


NORTH SAILS BLOG
Tout
News
Events
Guides
Sustainability
Tech & Innovation
People
Travel & Adventure

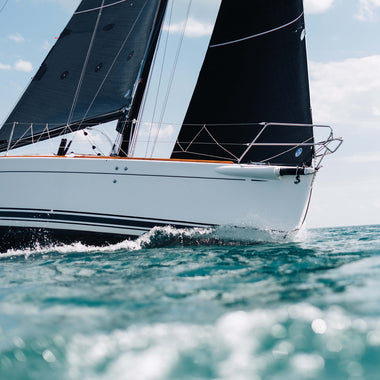
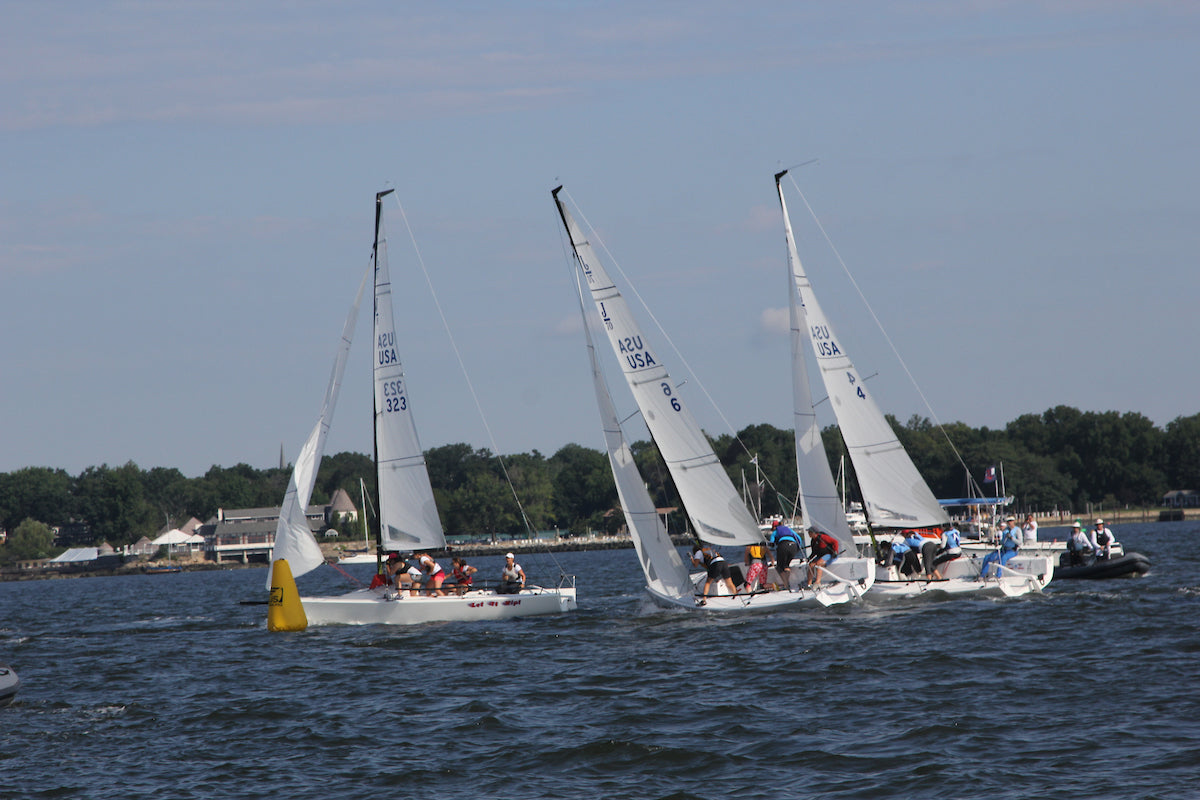
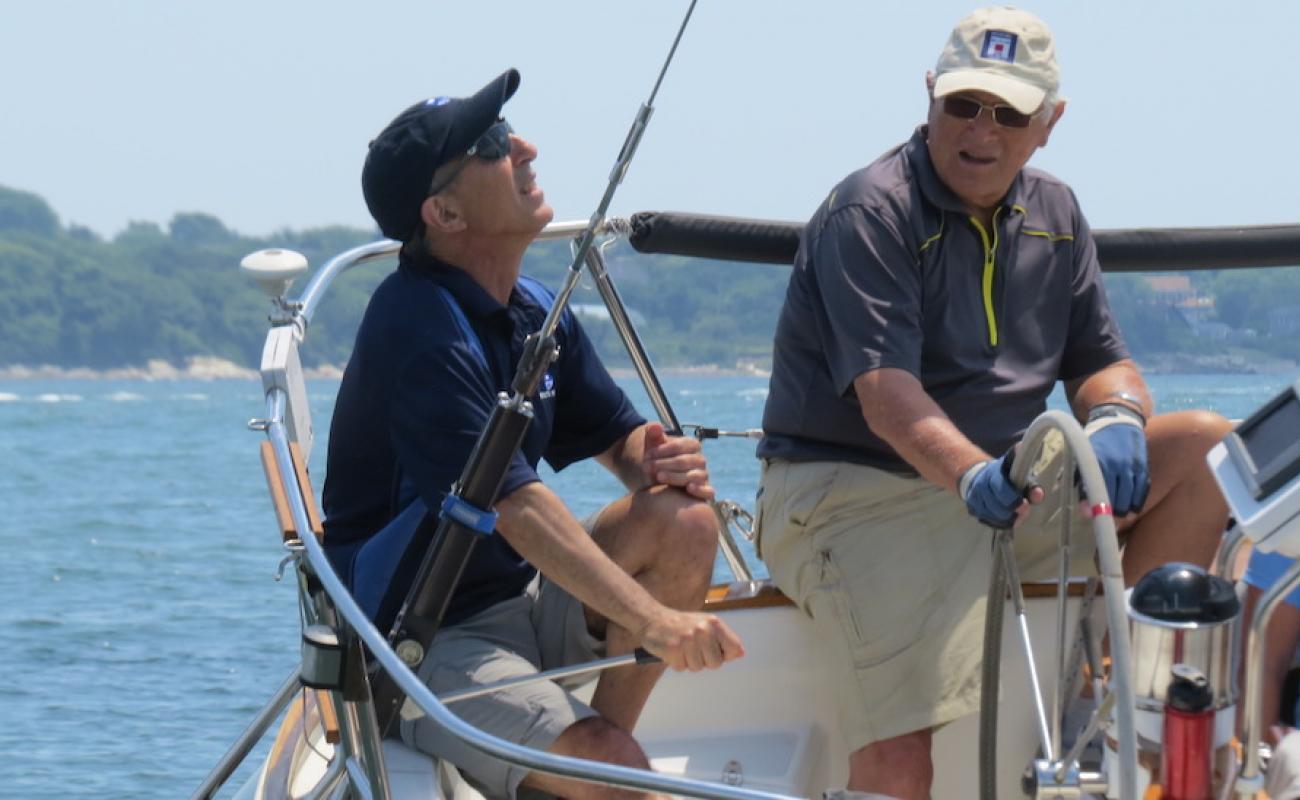
03 May
J70 TUNING GUIDE
For answers to your speed and boat handling questions, read our tips and tricks in the J/70 Speed Guide.
READ MORE
READ MORE
11 April
PRE-RACE PREPARATION: ARE YOU READY?
From sail selection to rig tune, a lot happens before you leave the dock. Follow these tips to help your team get race-ready before casting off.
1. Building a Crew
It is good to have the right number of crew onboard, but if no one can do bow, you aren’t in great shape! Ask yourself, do you have the key roles covered? Know who is responsible for what, and keep a roster of crew contacts on the back burner – these are the people you’ll call when someone can’t make it. Help your team by networking to fill open spots, spread the word and confirm new members as early as possible before an event. (Tip – try out a free service like Google Forms to get needed information, such as availability or gear requirements, organized and in a central place).
2. Weather & Sail Selection
Ask your navigator or tactician to inform the crew a few days out on what the forecast is expected to be. Helpful information about courses, start time, and how soon you want to get out on the water are important so everyone is on the same page. Include what time to meet at the boat (not the coffee shop) . Setting a specific dock call time will help the crew plan accordingly and get their gear and spare equipment onboard so dock-out time isn’t delayed.
The weather forecast and course information will also determine your sail choices for the day. Whether windward – leeward courses, round the cans or offshore distance racing is in your future, consult with the skipper, tactician and navigator to make a collective decision on the day’s inventory. Often, the biggest impact on sail power is the choice of genoa. Sail selection can be a tough call and North Sails is happy to help, so don’t hesitate to ask your local contact. Each sail has been designed for a specific range of wind strength and sailing angle, due to its size, weight or structural capacity (DPI). Batten up the jibs you will take for the day and stow the extra sails onshore in a safe, dry place. Extra sails are extra weight, so crucial decisions need to be made prior to leaving the dock.
Meanwhile, One Design sailors must remember class rules – Fast 40 rules allow sail changing each day, while J/109 rules require all sails to be carried. IRC events require you to have the same sails on board from the start of the event to the finish, and PHRF and ORR may also have separate restrictions.
3. Rig Setup
Tuning your rig is not a dark art but it is a whole job in itself. You will need to adjust your rig as the conditions change to get the best performance from it. Find out if your class, or boat, has a tuning guide, and follow it! As your team gets more experienced, practice fine tuning for your boat and see what feels fast. Work toward finding that little extra speed, it will make all the difference. Always carry a wet notes pad to make notes onboard. Record everything from the conditions, rig tune, and fast trim, and be sure to include TWA and TWS for reference. After racing, revert your rig back to base settings overnight so you can start with a clean slate the next day.
4. Leave time to Warm – Up
Maintaining communication with the crew on when to meet and being prepared can save you time so you can get out early and practice techniques, decide on which sails to use, and help the skipper get an idea of how long it takes to get the boat up to full speed off the line. Being able to sail around prior to the first race will help the tactician determine lifted tacks, where the holes are on the race course, and get the crew coordinated to get “in the groove” and up to full speed. Getting out there early will also allow for a quick snack and hydration before the warning signal. Something that can easily be forgotten, food and hydration helps focus and energy levels, which are key to doing well.
5. Notes on Sail Care
First rule of thumb, never walk/stand/or lay on sails. This crushes the materials and is devastating to your boatspeed! Just like an engine, your sails must be treated well and taken care of as you depend on them.
When putting sails onboard, make sure they are properly flaked so that the bowman can easily hook them up and hoist them. Although a leech flake gives the best possible flake with the battens in, the luff flake is best for your teammate to prevent the luff tape from tearing during the hoist.
When hoisting the mainsail, always slowly “back down” or reverse. This will take the apparent wind out of the sails, reduce flapping, and help prolong the life of the sail. This is a great method to practice, added bonus is it will clear any seaweed from your keel to limit drag. Extra precautions need to be taken in heavier air.
When hoisting the jib, you always want to do it when you are head to wind, or when you are dead-downwind. Never hoist your jib on a reach. Not only is it difficult for the guy on the halyard, it is not good for the sail if it gets dragged over the lifelines. Make sure there is slack in the sheets to avoid any friction on the hoist.
After sailing, it is a good habit to ease the batten tension. Sails tend to shrink a bit overtime, so tension will increase. Roll or flake your sails for storing , and lay them on a flat surface whenever possible.
Taking care of your upwind sails is just as important as tending to your kites. Make sure your spinnakers are dry and remove any luff cables before storing (tip: mark the cable where the luff should end to help when you go to use them next time). Flake the furling sails to make it easier on yourself, especially if it’s a top down furl. If laying a out to dry, make sure it is secured at the head and tack so they don’t escape!
6. Debrief
Often the best way to prepare for the next race (or the next regatta) is to review the race you just finished. This can happen on the way in, or upon return to the dock. What worked, didn’t work during the race? Review upwind and downwind tactics and boat handling. How can maneuvers be smoother, or boat speed be improved? For some crews, the discussion may happen organically. For others, you may want to develop a post-race checklist, or debrief outline, to encourage communication and keep the crew on the same page.
READ MORE
READ MORE
24 March
HOW TO TRIM LIKE A PRO
HOW TO TRIM LIKE A PRO
Everything You Need To Know
One of many key positions on a race team, the sail trimmer takes responsibility for optimizing sail performance. While the most important time to shine is during the race, a good trimmer knows that success starts before the boat leaves the dock. Read these tips from North Sails expert Sam Richmond, who moonlights as trimmer on Maxi 72 Jethou and Fast40+ Ino, and learn why attention to detail makes the difference between “good” and “great” in every situation.
Guidelines for Good Sail Trim
Power from your sails comes down to three sources: Angle, shape, and twist. A trimmer’s job is to achieve the most amount of power, while keeping in mind the balance of trim between sails.
Angles: Pull the sail in to add power and ease the sail out and to reduce power. Heading up will also reduce the power, whereas if you trim on or bear away you increase this. This is a common technique for the starting line.
Sail Shape: deeper sails generate more power. Flat sails generate less power and also create less drag. Depth is adjusted in a few different ways; sheet tension, forestay and backstay tension and lead/jib car position.
Twist: A closed leech will generate more power where as a twisted, open leech spills power. Twist is controlled with lead/car position and sheet tension.
Calibration
Always carry a wet notes pad to make notes onboard. Record everything from the conditions, rig tune, and sail trim, and be sure to include true wind speed and angle for reference. This will give you a foundation to base your decisions on, and provide a guide for making changes and improvements with your team.
Every line that can be adjusted needs a mark – use your marks to re-create settings that were fast. Aside from your sheets, think of your jib car position, in-hauler, outhaul, cunningham, halyards, traveller and backstay. These all affect the way your sails behave so try different settings until you find the sweet spot. Once you’ve found the groove, mark the line so you have a place to work from, and you know where to set it without hesitation.
When using an asymmetrical spinnaker, mark your sheet at the point where enough is pulled forward to prevent the windward sheet from going tight on the hoist. On a symmetrical chute, mark the guy so you know the foreguy/pole can still go up. Mark the inboard end of the pole on the mast so you can gybe as soon as possible if if you need to.
At the leeward mark, remind the pit person to hoist the jib and set the backstay to the mark you’ve made. This will allow for a smooth, clean mark rounding. Thinking about these things ahead of time allows the crew to focus on boat speed as soon as you round, while other competitors are struggling to get the set up correct for the next upwind.
Best Practices
The headsail trimmer should be constantly monitoring performance by using comparison tools onboard. Comparing your boat to other boats, target boat speeds and angles, how are “we” doing compared to just when we last made a change, and the feel of the boat. A good trimmer can feel a loss of power in the boat before it shows up as a loss of speed.
Take photos of your sails and send them to us so we can analyze the sail shape, compare them to new ones, and show you where improvements can be made. It is much easier to do this in the pre-start routine and shouldn’t be done during the race.
Communication is key. Making constant trim adjustments to improve or maintain performance, the trimmer must also communicate the current state of performance to the crew, suggesting how to improve, and reporting progress as adjustments take hold. Constant communication will keep your team attentive and working together. For example, if you encounter a lull in pressure, it would be common for a trimmer to call for the backstay to be eased. The mainsheet trimmer knows he needs to ease the sheet and the jib trimmer will ease too, while the helm “falls off” to help get the boat going again. Perhaps at the same time, the crew moves their weight to windward to help bear off.
Small efforts make a big difference in getting your boat back up to speed first. These constant changes or “transitions” in sail trim and crew weight placement can be the difference between the best and the rest.
Sail Changes
When conditions put you at a crossover between sails, a few extra factors come into play. Most notable are sea state, trending conditions, and past experience. In waves or chop you may opt to use the larger of two headsails for extra power when driving up and over waves. In flatter water a smaller sail can enable you to sheet harder and therefore point higher.
Consider the weather forecast and the conditions you have experienced up to the decision point. Are you anticipating the breeze to build up, drop off or shift? Also keep in mind that in a building breeze the sea state may remain flat, but in a dying breeze there will be leftover swell and power may still be needed.
As you gain experience with a specific boat and sail inventory, your notes on past performance will inform your decision on what sail to use. For example, in flatter water you may choose to use the J2 down to 8 knots, but as the chop builds, the J1 may be a bit faster with the slight increase in pressure. If time allows, you can try both options before the race and choose based on how the boat feels when testing your straight line speed.
Never Relent
A trimmers job is never done. Don’t cleat it and certainly don’t hang out to leeward! The jib trimmer will be the last of the crew to the rail, so only stay to leeward if conditions allow. Once the crew is fully hiked out, the trimmer should hike too, and take the tail of the sheet with you so you can ease quickly if you need to without leaving the rail. Keeping the boat flat in pressure allows the foils to do their job.
READ MORE
READ MORE
14 October
HOW TO TUNE YOUR RIG
Without a properly tuned rig, you won’t be able to control your mast’s behavior over the full range of conditions. Fortunately, rig tuning is a straightforward step by step process for both masthead and fractional rigs.
The goals in rig tuning are the following: (1) Eliminate side bend and lean, (2) Set mast rake for proper helm balance, (3) Set pre-bend to match the mainsail design, and (4) Control mast bend and headstay sag.
Here are a few definitions and explanations to get us started.
READ MORE
READ MORE

06 September
HOW TO HANDLE A SQUALL
HOW TO HANDLE A SQUALL
Anticipate The Worst To Be Prepared
A summer storm can hit with stunning suddenness, turning a languid late afternoon into a trial. While often short-lived, a squall’s sudden arrival requires a quick response.
Squall Preparation Tips
A little preparation goes a long way. Here are some things to do when you first realize a squall’s coming.
Don lifejackets and harnesses (if you don’t wear them habitually).
Have foul weather gear at hand.
Clear loose gear from the deck.
Close any open ports, prepare the hatch boards, and secure loose gear below.
Plot your position by every means available.
Determine where nearby hazards and safe water lie.
If time allows, head for port, but beware: The worst place to be when a squall hits is almost in, caught in a constrained space amidst a crowd of boats all dashing for home. Certainly the preferred place to be is secured in your berth or mooring. The next best place is in open water, away from other boats.
Prepare to shorten sail. One approach is to take a deep reef in the main at the first hint of strong wind, and then to roll the jib completely with the first gust. Make sure the jib reefing line is ready to go, with clean wraps on the furling drum.
When the squall hits, ideally you’ll already be dressed in full foul weather gear and harnessed to the boat, with the boat buttoned up. The boat will hopefully be under reduced sail, with plenty of sea room.
Two more squall tips:
Practice your squall drill in benign weather to see how quickly you can shorten sail.
Watch the weather and scan the horizon regularly, even on sultry summer days, so you won’t be caught off guard.
How to Handle a Broach
If you are caught with too much sail in a sudden squall, then the boat may broach (be laid over on its side by the wind) before you can shorten sail. It can take many eternal minutes to bring the boat back upright, and how you respond may affect your safety.
First, hold on, and take your time. Though there is much sound and fury, there is not as much danger as it might seem—as long as everyone stays aboard.
The greatest danger for the crew on deck is falling across dramatically heeling decks. For those below, the dangers are being thrown across the cabin and being pelted with unsecured equipment.
To reduce the heel, you will need to ease sheets. The jib sheet may be difficult to get to, as the winch may be awash to leeward. Likewise, the mainsheet will be heavily loaded and difficult to release. Even with the mainsheet eased the boat may not come back upright if the boom hits the water, preventing the sheet from running out. Easing the boom vang will help.
As the boat comes upright beware the flogging sheets, which can whip with remarkable force. Once you’ve shortened sail, survey the boat (on deck and below) for any gear that may have fallen or shaken loose.
READ MORE
READ MORE
06 September
JIBE SET: HOW TO DO IT RIGHT
If the angle of the downwind leg requires an immediate jibe, you’ll need to learn how to do a jibe set. Jibe sets are more difficult than bear away sets, because they require carefully coordinated crew work. Also, you must wait until after the jibe to set the pole. Since the pole helps the spinnaker fill by holding it away from the boat and other sails, there are several details critical to a successful jibe set
Many crew have two tasks in the process, so practice is vital. To keep it simple, we’ll assume we’re approaching the mark on starboard, bearing away, and jibing to sail the next leg on a port broad reach.
Set Up (during final approach)
Hook up the spinnaker on the starboard side, as far forward as possible. Set up the pole on the port side of the forestay—since it will be used once you jibe to port—with topping lift, downhaul, and guy in place. Make sure the guy is not fouled. The topping lift can be rigged under the jib sheets. (Alternatively, if it is long enough, it can be rigged outboard of the jib to port.)
As you round the mark and bear away, start the hoist. At the same time, pull the sheet (on the starboard side) just far enough to separate the spinnaker clews.
Next, jibe. Make sure you jibe the jib and ease out the old (port) jib sheet; then raise the spinnaker pole. Once the pole is up, trim the guy square with the wind. As soon the spinnaker is fully hoisted, trim the sheet and drop the jib.
Variations
No Pole
You can execute a jibe set without rigging a pole. Sometimes it is faster and easier this way, particularly if the decision to jibe set was a late one, and you don’t have time to make sure the pole is hooked up cleanly.
In this variation the foredeck crew acts as the pole, hand holding the guy outboard until the mast crew can hook up and set the pole. This is not recommended in heavy air.
Tack Set
Like jibe sets, tack sets do not allow complete preparation before the set. When tacking right at the mark, the spinnaker pole cannot be set until the tack is complete.
Prepare the spinnaker as usual, and hook up the pole but do not raise it. As you round the mark, raise the pole and hoist the spinnaker simultaneously. Have the foredeck crew lift the pole while the guy trimmer tails the topping lift. Tension on the guy will prevent the pole from going up, so do not pull the guy until the pole is set. Meanwhile, the mast crew can jump the halyard while the pit crew tails.
Building speed with the main and jib as you hoist the spinnaker is critical to a successful tack set. Proper trim can prevent you being passed by boats carrying a full head of steam into the mark.
READ MORE
READ MORE
06 September
NOT STEERING DOWNWIND
It happens almost without words. As the puff hits, Heidi and Jeff move off the cabin top to the rail. Tom trims back on the guy and David eases the spinnaker sheet. Jack eases the main. The boat bears off slightly and accelerates.
As the puff fades, Heidi and Jeff slide inboard, the pole goes forward, and the spinnaker sheet is trimmed. The main comes in. The boat heads up and carries speed.
Ron, at the helm, sits nearly motionless, the wheel moving in his hand as the crew steer the boat with weight and trim. Gradually we pull away from the other 37 footers, lower and faster down the run.
You can use crew weight and sail trim to steer any boat downwind. Steering with weight and sails is not just for dinghy sailors; it is fast in big boats too. The less you use the rudder to steer, the faster you will be. Here’s how it works:
To Bear Off
In moderate winds, we can sail lower in puffs and still keep target speeds. Bearing off will also help us stay in the puff longer. To bear off, move crew weight to windward and rotate the spinnaker to windward. Ease the spinnaker sheet in any puff, because the puff will shift the apparent wind angle aft. Trim back on the guy as the sheet is eased to keep proper spinnaker shape and to rotate the spinnaker to windward. Ease the main to eliminate weather helm.
You will need to move some crew weight to windward just to counter the heeling forces of the puff. It will take an additional increment of crew weight to actually help the boat bear off.
To Head Up
As the puff fades it is best to head up to keep apparent wind speed and to sail the new target angle. As the boat slows down, you will no longer be able to sail as low as you could in the puff. To head up, trim the spinnaker sheet and ease the guy. Trim the main and move crew weight forward and to leeward.
The next time you are steering downwind in moderate air, stop steering. Use your crew weight and trim to steer the boat. You’ll steer faster when you are not steering downwind.
READ MORE
READ MORE
06 September
PERFECT SPINNAKER JIBES
PERFECT SPINNAKER JIBES
Two-time World Champion Will Welles says that no matter how big your boat and crew, the key to perfect jibes is practice, practice, practice. There are two basic jibing techniques: End-for-end jibes for smaller boats and dip-pole jibes for larger boats.
Photo Chris Howell
Our divide and conquer approach provides a good framework for analyzing jibes. The job of the trim team—driving and trimming through the jibe—changes little from one technique to the other, while the foredeck squad’s job—the mechanics of jibing the pole—changes significantly. The foredeck team often gets the brunt of the blame when problems occur but, more often than not, it is the work of the trim team that makes or breaks a jibe.
Regardless of method, practice is a key ingredient to develop the coordinated effort that lies behind any smooth jibe.
We’ll look first at the driver’s and trimmers’ functions, and then address the two different techniques on the foredeck.
Driving and Trimming through Jibes
The driver must pace his turn to the crew work, while the crew must rotate the spinnaker and free fly it as the boat turns. This means trimming the (old) guy and easing the (old) sheet as the boat turns downwind. Here’s how to help make the coordination as smooth as possible.
Helm
Make a smooth turn from broad reach to broad reach. The turn must match the trim as the spinnaker is rotated around the boat.
Do not hold the boat dead downwind. Stay on a broad reach on one jibe, and then turn smoothly to a broad reach on the other jibe as you pull the main across. Avoid centering the main and avoid a dead downwind course. Keep the air flowing across the spinnaker.
Trimmer(s)
As the boat turns from broad reach on one tack to broad reach on the other, your goal is to rotate the spinnaker around the boat as the boat turns to keep the spinnaker on the downwind side. This means trimming the guy and easing the sheet as the boat turns downwind. It is best to trim too far and over-rotate the spinnaker, then correct your trim.
Why does the spinnaker collapse every time?
When the spinnaker collapses in the middle of a jibe, it usually means the rotation did not stay ahead of the turn. Either the trimmers trimmed too slow, or the driver turned too fast. It usually depends on who you ask. When the guys in back can’t decide which, they compromise, and both blame the bow crew.
Don’t Do This
Often you will hear that the helm should “Keep the spinnaker in front of the boat” and “Steer to keep the boat under the spinnaker.” These suggestions are misleading, because you don’t necessarily want the spinnaker in front of the boat; you really want to keep the spinnaker on the downwind side of the boat. The only time the spinnaker should be in front of the boat is when you are dead downwind.
Even more dangerous is the common advice to “Hold the boat dead downwind” while you jibe. In a dead downwind position, air circulates behind the main and can cause wraps in the spinnaker. Sailing dead downwind will also induce the boat to roll, making steering and crew work very difficult. In heavy air sailing, steering a course dead downwind can lead to a broach.
Jibing Practice
Start your practice without the pole, free flying the spinnaker. The goal is to complete the jibe without the sail collapsing. As the driver turns from broad reach to broad reach, the trimmer rotates the spinnaker to keep it flying. Trim both sheet and guy if the sail gets too far away from the boat; ease both if the spinnaker is strapped too tight to fill. Keep the spinnaker downwind of the boat, and keep it full.
The key to successful jibes is coordinating the trim and the turn. Once you do that, it matters little what happens on the bow.
Don’t forget to over-rotate
It bears repeating: To keep the spinnaker full as you jibe, over-rotate the spinnaker to the new leeward side. This lets airflow re-establish luff to leech as the driver turns smoothly to the new broad reach.
Jibes with the pole
End-for-End Jibes
The fastest and easiest jibe for boats without large numbers of crew is the end for end jibe. Once the helm starts to turn the boat downwind, remove the inboard end from the mast and the outboard end from the old sheet. As the mainsail crosses centerline, connect the old inboard end to the new spinnaker sheet and push it outboard until the new inboard end can be connected to the mast. A shout of “made” will alert the helm and trimmer that the pole is hooked up on the new jibe.
If you can’t get the inboard end on the mast, ask for the guy to be eased. The trimmer should not square back the guy until you’ve said “made.”
This technique depends as much on quickness as it does on strength. With good technique, and a little cooperation from the back of the boat, end for end jibes are pretty straightforward.
Twings (used to choke down the spinnaker sheet to a lead block on the midship rail) are often helpful during end for end jibes. The twing is a line with a block on one end. The spinnaker sheet is lead through the block. One twing is rigged to each sheet. The windward twing is choked down to the rail to improve the working angle of the guy. The leeward twing is left free or trimmed down part way to create a proper sheet lead. During jibes, both twings can be snugged down to control the spinnaker and keep the guy within easy reach.
Dip Pole Jibes
Larger boats with unmanageable spinnaker poles must resort to dip pole jibes. A proper dip pole jibe requires two sets of spinnaker sheets and guys. When sailing under spinnaker the leeward sheet and windward guy are working, while the leeward guy and windward sheet are lazy. The spinnaker pole is rigged with an internal control so the outboard end can be released from the guy by a crew member working at the mast. During a dip pole jibe, the end of the pole attached to the mast remains in place, while the outboard end is “dipped” to clear the forestay as it swings from one side to the other. On the way through, the foredeck crew removes the old guy, inserts the new lazy guy into the pole end, and yells “made,” indicating that the pole can be hoisted to the new side.
READ MORE
READ MORE
06 September
SETTING THE SPINNAKER
SETTING THE SPINNAKER
How to Accomplish the Perfect Spinnaker Set
Nothing takes as much teamwork and practice as spinnaker handling. Here we’ll cover the skills and techniques needed to handle and control conventional spinnakers, set from poles. Throughout the discussion the ‘Divide and Conquer’ approach to boat handling will be central: one team sails the boat as fast as possible with the sails you’ve got, while the other team handles the mechanics of the set, jibe, or douse.
Spinnaker Sheets
High tech line is so strong and light that the limiting factor is the ability to grip the stuff. For boats with double sheets and guys, attach both lines to a single shackle. The guy is so light you won’t have to concern yourself with dropping it off in light air, and you’ll save the weight of a second shackle. (The guy should have an eye splice in the end. Cow hitch it on to the shackle. And don’t fret about what to do with the money you save buying only one set of shackles rather than two. The high tech line will absorb all the extraneous funds.)
Spinnaker Sets
A trouble-free spinnaker set starts with careful packing and proper hook up. Most spinnakers can be packed by running the luff tapes to make sure the sail is not twisted as it is packed into the turtle. Large spinnakers and heavy air spinnakers can be set in stops that keep the spinnaker from filling before it is fully hoisted.
Regardless of how the spinnaker is packed, the head and two clews should be secured at the top of the turtle. Before each hoist check and recheck to make sure the halyard and sheets are not twisted or fouled. Make sure sure your tack line is on top of the spinnaker sheets, for inside jibes. Tack goes under the sheets for an outside jibe, or blow-through jibe. These are most common on grand prix style boats.
Bear Away Set
A bear away set is the simplest style of spinnaker set. You raise the pole as you approach the mark close-hauled, bear away to a reach, and hoist. For asymmetrical boats, pre-feed the tack line. You can tack at the mark for a bear away set, or simply bear away when you are at the mark. On most boats the sail can be hoisted from the forward hatch. Alternately the sail can be set from the leeward rail, forward of the shrouds, or from the companionway. Do not hoist from the bow; that moves too much crew and equipment weight forward.
Setting from the forward hatch has several advantages. First, the sheet and guy can be hooked up prior to the race, leaving only the halyard to set just before hoisting. Second, in rough weather a sail attached to the leeward rail might wash out of the bag. If you prefer to hoist from the bag even in rough weather, hook the bag in the middle of the foredeck rather than on the rail.
Pre-Rig (Before Racing)
Plan your first set prior to the start of the race. Position the spinnaker sheets and halyard to the appropriate side for the hoist, and attach the sheet and guy if you plan to hoist from the hatch. For a hatch hoist hook the guy to the tack, and attach the sheet shackle to both the clew and the head. Yep. (We’ll explain why in a moment.)
To pre-rig the pole, attach the guy, topping lift, and downhaul/foreguy to the outboard end. The inboard end can be attached to the mast track if the track runs all the way to the deck (so it doesn’t interfere with the jib in tacks). Otherwise, attach the pole to the shrouds.
Pre-rigging the guy simply means setting the guy through the pole jaw, making sure it is not twisted or macraméd through the lifelines.
Pre-rig the downhaul with a preset amount of slack so that when you set the pole, it will be at a good height for the hoist.
Attach the topping lift to the pole and then pull it back against the rig, to keep it clear of the jib during tacks. Secure the line through the jaw at the inboard end of the pole. If there is no inboard jaw (as on a dip pole rig), you’ll have to fashion another way to hold the topping lift aft. A shackle, velcro strap, or sail tie can work fine. Avoid hooks, which may grab things other than the topping lift.
Set Up (just before spinnaker set)
Hatch Hoist
The final spinnaker set up should be carried out with a minimum of disruption. If you pre-rigged for a hatch hoist, then all you’ll need to attach the spinnaker halyard. Here’s how to do it.
On your penultimate tack, ask the pit crew to bring the halyard tail to the rail so it can be eased as needed with a minimum of crew movement. The foredeck crew then attaches the halyard to the head of the sail.
But wait, how do you quickly reach the head of the sail if it’s down the forward hatch?
Remember how you pre-rigged the sheet by hooking the head and clew to the sheet shackle? Now you can retrieve the head by pulling up the sheet. Hook the halyard to the head, and then open and refasten the sheet shackle on just the clew. Be careful not to mix them up or twist them around each other.
When you tack, the genoa may foul the spinnaker halyard. To prevent this, pull lots of slack in the halyard and hold it tight prior to the tack, to keep it from fouling on the spreaders. As you tack, ease out the slack again so the halyard can sag out to leeward, clear of the genoa.
Leeward Rail Set
Bring the spinnaker on deck, hook the turtle to the rail, and hook up the sheet, guy, and halyard. Your spinnaker gear should be pre-rigged to minimize crew disruption. If you need to ask the driver or trimmers to ease the spinnaker gear, then change the way you pre-rig.
Hook up the spinnaker sheets and halyard while to windward. (Usually this means while on the final port tack for a starboard tack set.) When you tack, the genoa may foul the spinnaker halyard and pull it out of the bag. To prevent this, pull lots of slack in the halyard and hold it tight prior to the tack, to keep it from fouling on the spreaders. As you tack, ease out the slack again so the halyard can sag out to leeward, clear of the genoa.
If it’s windy and wavy enough that the sail may wash out of the bag on a long approach to the mark, try securing the spinnaker bag to the middle of the foredeck or at the mast base, and tie the bag securely shut after the hook up. Open the bag as you bear off to hoist.
Pole Up
When you tack on the layline, do not immediately set the pole. If time allows, hike out (or lie still) until the boat is up to full speed. Once you are up to speed (and sure you will fetch), the foredeck crew can go forward and lift the pole into place. The pit crew, working from the rail with the topping lift tail in hand, pulls the slack out of the topping lift. There is no need to get off the rail to tail the topping lift if you bring it with you on the last tack and tail from the rail. Once the pole is up and topping lift is cleated, open the hatch and pull the three corners of the spinnaker onto the foredeck.
If there’s time before the set, it is a good idea to review who will do what on the hoist, just to be sure. Also make sure the jib halyard is cleared, flaked, and ready to drop.
The Hoist
Be ready to hoist at the mark. Unless the tactician has called for a delay, hoist as the sails are eased and the boat stands up. Until then, hike as needed to maintain speed coming into the mark. Don’t stand “at the ready,” waiting to hoist.
Except in heavy air, pre-set the guy as you approach the mark. On the hoist, the guy must be pulled to the pole to prevent twists in the sail.
Take the slack out of the sheet, but do not trim enough to fill the spinnaker until the halyard is at full hoist. As you near full hoist, trim the guy off the headstay to a position perpendicular to the wind.
During the hoist the main and jib must be eased to maintain proper trim and speed.
Once the chute is up, drop the jib. In light to moderate air the genoa can be on its way down as the spinnaker hoist tops out.
In heavy air, ease the jib sheet and wait until the boat settles with the spinnaker. When the boat is under control, go forward to douse the jib, or leave it flying as a staysail if it adds speed!
Don’t forget to close the hatch.
If there is a delay with the spinnaker hoist, keep sailing as fast as possible with the main and jib to minimize the loss.
READ MORE
READ MORE
06 September
ORGANIZE YOUR CREW
If you want to drive the boat, trim the sails, watch the instruments, read the compass, track the fleet, and call tactics—then race singlehanded. If you want to race with a crew, a careful division of responsibilities is the only way to succeed against other well-balanced teams.
There are three basic building blocks of a successful race pyramid: boathandling, boat speed, and tactics. Your crew must be organized so each block gets the attention required. A crew boss is needed to orchestrate boat handling. Sail trimmers and a driver are needed to focus on boat speed, and a tactician is needed to manage the course.
As soon as you have more than one person on the boat it is time to divide up the chores. On championship two-person boats, the driver drives and the crew does tactics. On a three-person crew, the forward crew and driver focus on trim, while the middle crew handles tactics.
Crew assignments should be based on the number, skill, experience, and interest of your crew. Each crew position should have clearly defined responsibilities during each maneuver, and maneuvers should be executed the same way each time.
Principles of Crew Assignments
Divide and Conquer
During each boathandling maneuver, divide the crew into two teams: one to sail fast with the sails you’ve got, the other to get sails up and down. No one should serve on both teams.
Define Crew Positions
Each crew position has a specific responsibility during each evolution or maneuver. First, figure out the correct number of crew, define each position, and then sail with a full complement of crew every time you race. Once positions are defined, you can plug new people into a specific position that has clearly defined responsibilities. Writing out and diagramming your standard maneuvers will help during routine maneuvers, and also during the inevitable ad lib.
Create Crew Pairs
Ideally, you would have the same people in the same position for every race (yea, right—if pigs could fly). Since you can’t expect that, work toward a nucleus you can count on, and then pair new (or less experienced) crew with a regular crew member. For example, a new mast crew can be paired with an experienced foredeck, or an experienced trimmer can watch over a new grinder.
Do Your Job
If one person is having trouble completing a task, that can create a problem. When the next person tries to help out, and leaves part of her job undone, the problem grows. Pretty soon the entire crew is out of place—each trying to help another—and you have a huge mess. Unless it’s a flat-out emergency, stick to doing your assigned job.
Practice
The key to developing good crew work is practice. It is simply impossible to train crew during a race. There is not enough time to teach and learn, and there is too much to do. You must practice to win. There is no other way.
Practice Drills
As you plan your maneuvers, keep the Divide and Conquer principle in mind. Always keep part of the crew focused on going fast, even when the rest are attending to a boat handling maneuver. Try a simple walk through on the dock, or at least with no sails, to figure out the rough details and positioning.
Once on the water, go through maneuvers one at a time: tacks, jibes, sets, douses, reefs, sail changes, plus straight line trim and speed. Detail each person’s responsibility during each maneuver. Once you can run through each evolution smoothly in open water, try it around a closed course of buoys to add the element of timing.
Another excellent drill is to perform maneuvers in total silence. A single word from the helmsman (or crew boss) is all that is needed to initiate the maneuver. In silence you learn to watch and work with your crew mates. Learning to work quietly keeps the airwaves open for the unexpected.
Another effective practice tool is rotating crew positions. If the pit and foredeck, for example, switch places, each will understand better what is going on and can anticipate the other’s needs during a race. Similarly, trimmers and drivers who trade places will better understand how they impact each other.
Find a Tuning Partner
Once your crew work is smooth, find another boat to practice with. Sail parallel courses to work on boat speed. Use cat-and-mouse drills to improve boat handling. Try short match races to add competitive fervor. When you are confident of your boat handling and speed, then you are ready to race.
The difficulty of boat handling increases with the wind, so keep practicing until you are confident in all conditions. Try to refine your techniques to reduce crew movement. Pay attention to weight placement all the time. Figure out ways to keep weight properly placed as much as possible.
Your crew organization and crew assignments are dictated, in part, by your boat’s layout. If you find one crew member is overburdened during a particular maneuver, look into reorganizing the crew—and perhaps changing your layout, to redistribute the load.
READ MORE
READ MORE
06 September
TRIM AN ASYMMETRIC SPINNAKER ON A SPORT BOAT
Sport boat asymmetric spinnakers (also known as “kites”) trim differently from conventional spinnakers. And due to their extended, fixed position bow sprit, they differ from a cruising asymmetric flown from the stem.
Aside from the sheet and halyard, the only other control over spinnaker shape is the tack line, which runs from the end of the sprit to the spinnaker tack. Some boats also have twings to choke down the sheet.
Reach Up to Go Downwind
Asymmetrics don’t go downwind, at least not dead downwind. The fastest way to reach a downwind destination is to reach up and sail fast. The extra speed more than makes up for the extra distance. The optimum sailing angle is as much as 40 degrees above dead downwind – nearly as wide an angle as we sail upwind. Sailing at these high angles increases the apparent wind, which increases boat speed.
The trick is to build speed at an aggressive apparent wind angle, and then to push down to a lower course, with the boat speed holding the apparent wind forward.
The driver and trimmer must coordinate efforts. As load builds in the sheet, either from aggressive sailing angles or a puff, the trimmer should ask the driver to bear off, while easing the spinnaker sheet to unload the helm.
As the load in the sheet drops, trim the sheet and head up to rebuild power and speed. Get speed, then carry it down. Work up to rebuild, and drive down again.
You should always feel the breeze blowing across the boat – not over the stern. When you lose apparent wind flow across the boat, head up, rebuild speed and apparent wind, and slide down again.
For best broad reaching performance the sheet must be eased to allow the sail to roll out to windward. As the boat bears off, ease the sheet to take pressure off the helm. As you head up, trim the sail to add helm and bring the boat up.
Ease, Ease, Ease the Sheet
We asked one expert trimmer for advice on sailing deep with a sprit boat, and he said:
“Remember these three things: Ease, ease, and ease. Ease to a curl, pause and the curl disappears. Ease again. Carry a curl, and keep easing. Ease some more. Usually the sail stalls from being over trimmed. Ease.”
At times on a broad reach it may also pay to ease the tackline a foot or two as well. This will allow the entire sail to rotate further out to weather. There are a couple of things to guide you in how far you ease the tackline: Does the sail rotate out to weather? Can you sail lower or faster? If the sail sags to leeward instead of rolling out to weather, then pull the tack line back down to the sprit.
Likewise, if you lose control with the tackline eased, snug it down.
Note: With refinements in design and A-sails purpose-built for VMG sailing, there is less need to ease the tack line.
Marginal Planing Conditions
As the true wind builds to around fifteen knots, you may be able to plane. Even for a downwind course, it will pay to reach way up to get on a plane and then carry the plane down. Your planing speed will overwhelm the extra distance sailed to get on a plane, and crush the competition. On the other hand, if you can’t plane, you will waste plenty of energy going the wrong way… only practice and experience will teach you the best angles for your boat in a given condition.
Ease and trim
Regardless of the point of sail, the basic principles apply: Ease to a luff and trim. Given the rapid acceleration of sport boats, the apparent wind angle is changing all the time. Aggressive trimming is required to keep up as the boat builds speed, and an equally aggressive ease is needed to prevent a stall as the boat slows. Overtrimmed is slow.
On a close reach, trim to telltales, or keep a small curl. On a beam reach, the asymmetric is much faster than a symmetric spinnaker. On a broader reach force the sail out to a bigger curl. You will be surprised how far out it can go.
Tack Line
On a close reach snug the tack to the pole for a gennaker shape. On a broader reach, add power and allow rotation out from behind the main by easing the tack line a couple feet.
There are a couple of clues to indicate how far to ease the tack line:
The tack should pull to windward as the tackline is eased. If the tack sags to leeward, keep the tackline down.
Easing the tack line adds power, so in light air you may want to ease it a little even on a beam reach. Broad reaching in a big blow, you probably will want to keep it tighter than you would in lighter air.
Another valuable guide is the spinnaker telltales. Add telltales 1.5 to 2 feet aft from the luff at 1/3 and 2/3 height. When your tackline is set at the proper height, the telltales should behave similarly high and low.
Let’s Go Fast
Truth is, there is more to it than point and trim. Often you can use techniques similar to those described for upwind VMG sailing to improve speed on a reach. Here’s how:
Rather than simply point and trim, head up slightly to build speed and apparent wind. As speed builds the apparent wind will build and move forward. As the apparent wind angle goes forward you can drive off, carrying the extra apparent wind speed and boat speed at a lower angle.
When performance cycles down, heat it up (head up) again. Rebuild speed, and drive off.
The trimmers and driver must coordinate efforts to optimize performance. If the helm loads up, it will be difficult to drive off. As speed builds the trimmers will need to ease to allow the boat to drive down without loading up the helm. Similarly, trim the sails to help head the boat up, rather than steering too much with the rudder.
READ MORE
READ MORE
06 September
HOW TO REEF A MAINSAIL
Mainsail Reefing Setup
There are a number of effective reefing arrangements, but all have two common elements. The first is ease of use; the reef should be easy to set and shake. Second, the reefed sail must have a shape appropriate for the conditions, which means flat. The reefing system must pull the clew out along the boom, like an outhaul, as well as pulling down.
When reefed, all the load should be on the reef tack and reef clew. The reef points along the belly of the sail are used only to tie up the loose body of the sail; they should not carry any load. Single or double line systems can be set up to allow you to reef without leaving the cockpit. Otherwise you will have to go forward to set the reef tack and/or adjust the main halyard.
Regardless of the particulars, it is important that your system work well, so you are not reluctant to use it. When in doubt, reef. If you’re underpowered, shake the reef.
Here are the basic steps to reef your mainsail:
Assume a close-hauled or close reaching course.
Set the autopilot to maintain your course under jib alone, or heave-to.
Release the mainsheet and vang.
Lower the main halyard. Pull slack out of the reef line so it won’t tangle.
Secure the reef tack.
Re-tension the halyard.
Tension the reef line. It should be very tight, pulling down and out to flatten the reefed sail.
Snug the vang and trim the mainsheet.
Additional reefing tips:
Mark the main halyard line relative to the mast, so you will know how far you need to lower it the next time you reef.
If you expect to be reefed for a while, tie the reef clew down to the boom with a sail tie, to take the load should the reef line fail.
READ MORE
READ MORE
06 September
HOW TO JIBE SAFELY
When your destination is downwind on the opposite tack, then a jibe is called for. A jibe has three steps:
Starting from a broad reach, initiate the jibe with the command “Prepare to jibe.” Release the preventer and turn slowly downwind.
When the wind is dead astern, the jib will jibe itself. This is the signal to hold a steady course, pull the mainsail amidships, and then ease it all the way out on the new tack with the hail “Jibe Ho.”
After the sails are across, continue the turn to your new course.
Tips for Jibing Safely
The jib is the clue to a successful jibe.
Once the jib comes across on its own, trim the new jib sheet and hold a steady course while bringing the mainsail across by hand.
Use a slow turn
Keep control of the mainsail so the boom will not fly across. A slow turn allows time to trim and control the main.
Ease the main quickly
As the main jibes, ease the mainsheet all the way out—just let it run.
Watch your course
In stronger breeze, as the main jibes it will load the helm and try to turn the boat quickly up into the wind. Watch your course, and correct the helm to keep the boat from rounding up.
In light air as the jib jibes, grab all the parts of the mainsheet and fling the main across to the new jibe.
Don’t be shy about jibing
In all but the breeziest conditions, a well executed jibe is a safe and effective way to change tacks.
Prevent an Accidental Jibe
If the jib jibes itself unexpectedly, it is a signal that the main may soon follow. To prevent an uncontrolled jibe, head up immediately. Straighten out once the jib returns to its normal position. As a precaution, always keep your head down when you see the jib cross the boat, and use a preventer to secure the boom.
Gennaker Jibes
There are a couple of ways to jibe a Gennaker. One method is to snuff the spinnaker, re-lead the spinnaker sheet to the new leeward side, and redeploy after the boat and mainsail have been jibed. The Snuffer and Gennaker go around the outside of the forestay on a jibe. The disadvantage of this jibing technique is that you must go forward to pass the Snuffer around the headstay. (Only if the Gennaker is flown from a jib halyard beneath the forestay would you take the Gennaker inside the forestay on a jibe.)
The Gennaker can also be jibed while still flying. Square down to a very broad reach, tension the windward Gennaker sheet, and haul hard as you release the working sheet. Pull and pull and pull until the sail collapses, inverts, and starts to trim back on the new jibe; then finish the turn and jibe the main. The trick is to have the turn follow the trim – trim the Gennaker most of the way through the jibe before jibing the boat.
If the turn is too fast (or trim too slow), and the boat is jibed before the sail is trimmed, then the spinnaker can blow through behind the forestay, or it can wrap on itself, or around the forestay.
Spinnaker Jibes
Short handed jibes are a challenge. The easiest technique is to snuff the sail, drop the outboard end of the pole to the deck, and pull the snuffed spinnaker around the bow with the sheets. Then jibe the main, reset the pole, and redeploy the spinnaker. You can also use a “dip pole” technique, but this requires at least one designated foredeck person as well as someone on the helm. For more, read Perfect Spinnaker Jibes
READ MORE
READ MORE
06 September
PERFORMANCE AND TRIM SOLUTIONS
Poor speed
If boatspeed seems poor, you may need to add power. Try deeper sail shapes, and bear off a couple degrees.
You can also be slow from being overpowered, in which case you’ll also have too much heel and lots of weather helm. Reduce power and balance the helm to restore speed.
A fouled bottom can also have a big impact on speed.
Poor pointing
If your boatspeed is good, but the boat is pointing poorly, try sheeting harder. Trim the jib until you get a hint of backwinding in the main, and trim the main to the verge of stalling the top leech telltale.
Too much weather helm
Reduce heel to reduce weather helm. Try flatter sails, and more twist. Also, feather up to reduce angle of attack.
Weather helm may also be solved by better balance between main and jib: too much power in the main, and not enough in the jib. Add power to the jib, and/or ease the main.
If weather helm is a constant problem, try tuning your rig with less rake.
Jib telltales hard to read
If both inside and outside jib telltales are constantly dancing, create a wider entry angle and more forgiving steering groove by easing the sheet and/or tightening the halyard. With the draft properly positioned, the telltales will settle down.
Too little weather helm
If you have no feel in the helm, add power. Try deeper sails, and bear off a few degrees. Also try moving weight to leeward to increase heel. In light air, a lifeless helm may be a sign of being overtrimmed. Ease both sheets, and bear off to add power and speed.
If a lack of helm is a consistent problem, consider retuning your rig with more rake.
Pounding and pitching in waves
Sailing into waves requires power to punch through the waves. If the boat is pounding, then foot (fall off) slightly and add twist to keep from being overpowered. Also, moving weight (like anchors) off the bow and out of the forepeak can significantly reduce pitching.
Overworked Autopilot
If your autopilot is constantly searching, and can’t seem to settle on course, and your boat is upright and underpowered one moment, and overpowered the next… add twist. Twist creates a more gradual onset and release of power.
If your autopilot is working too hard, retrim for better balance. Add twist to smooth out the transition from overpowered to underpowered.
Also, if you have the option, set your autopilot to sail to the apparent wind angle when sailing upwind, rather than your compass course.
Overpowered
A small jib and reefed main provide a balanced rig for best performance in heavy air conditions. For more details, read Heavy Weather Sailing Techniques.
READ MORE
READ MORE
01 September
HEAVY WEATHER SAILING TECHNIQUES
HEAVY WEATHER SAILING TECHNIQUES
How to Sail Well in Strong Winds
We covered the Basics of Heavy Weather Sailing already; now it’s time to look at techniques to help you sail well in strong winds, which will increase your range and confidence. Harnessing the power of the wind and battling the waves while maintaining control can be exhilarating; some consider it the ultimate sailing experience.
How to Depower
The challenge in heavy weather is to depower enough to keep control, but not too much to fight the waves that come with heavy winds—and to maintain sufficient speed. The slower you go, the longer it will take you to get to your destination.
Depowering techniques include flattening sails, increasing twist, and reducing angle of attack; these are the first steps in dealing with increasing winds. When these methods are not sufficient, stronger measures are called for.
The waves that accompany strong winds can be as big a problem as the wind itself. Waves make depowering tricky, as sailing underpowered in waves can leave you at their mercy. The challenge is to keep enough power to handle the waves, while still maintaining control.
And pounding upwind against building seas can be more than unpleasant; it can be dangerous, as the motion batters the crew and equipment.
There are several ways to reduce pounding. First, add twist to your trim for a wider steering groove. This will allow you to steer around the biggest waves. Next, change speeds. Sometimes sailing faster will smooth out the ride, as you power through the waves. Ease sails a bit, and bear off a couple degrees.
Another option is to slow down. If the boat is leaping off the waves, then shorten sail and slow down to keep the boat in the water.
You can also improve the boat’s motion through the waves by moving weight out of the bow and concentrating it amidships—as low as possible. Before going out in big seas, consider moving the anchor and rode off the bow and stowing them below, perhaps in a couple of big canvas bags.
Another option to consider is picking a new destination. Do you really need to go upwind in these big waves? Let’s reach off and go somewhere else!
Adjust Your Speed
As mentioned above, sometimes slowing down a little can dramatically improve the motion and comfort of the boat. At other times, adding power and speed to help you steer around the biggest waves can improve the ride. Often adding twist by easing sheets just a couple of inches will help the boat find a wider steering groove which will, in turn, help you find a smoother path through waves. If the motion is bad, then experiment to improve it.
Shorten Sail: Smaller Jib First
If depowering the sailplan is not enough, it’s time to shorten sail. In heavy winds, a well-trimmed reefed boat can provide much better speed, control, and comfort than an over-canvased boat. And the first step in reducing sail area is to reduce your jib size. Generally, less sail area in the jib with a full-sized main means better speed, higher pointing, and more control in waves or gusts.
Depending on your set up, you can reduce jib size either by changing to a smaller sail or by roller reefing your genoa.
Roller Reefing
Roller reefing genoas make it possible to shorten sail without changing jibs, a nice convenience especially when short-handed. Foam or rope luffs and other refinements have vastly improved reefed sail performance, but the shape of a reefed genoa will still not be as good as an unreefed one. And to protect the life of your sail, be sure to leave a portion of the tack patch exposed to handle the loads along the foot.
As the genoa is rolled, adjust the jib lead to maintain proper sail shape. To remove the guess work from heavy air lead position, make marks on the foot of the genoa for your first and second increments of rolling—after perhaps 3 and 6 rolls on the headstay—and then mark the jib track at a position that makes the telltales break evenly top to bottom for each setting.
Two Jib Inventory
A sail inventory that includes a full sized genoa and a smaller working jib can provide a great boost in performance, control, and comfort in heavy air. Of course it means buying an extra sail, which will require the room to stow whichever sail is not rigged— and it means an occasional sail change. But the shape of a smaller jib will provide better performance and control than a rolled up genoa.
Change Early
Whatever your setup, make the change to a smaller jib early – as soon as the thought occurs to you – and while it is still relatively easy to do so. If you anticipate a breezy day, a smaller jib makes it possible to change while still at the dock or at anchor. And while it is only a small compromise in performance in moderate winds, it keeps sailing comfortable and fun in heavy air.
Reef the Main
Still overpowered with the smaller jib? The next step is to reef the main.
Tacking and Jibing in Heavy Air
The waves that come with big winds can make basic maneuvers challenging. When tacking, look for a relatively smooth spot, and start your turn as the bow climbs a wave. Push the helm over so that the next wave will push the bow down onto the new tack.
In extreme seas you may not be able to tack at all. In that case, you will need to wear ship or jibe.
Of course, jibing in heavy air is no picnic. Often the best way to handle the jib is to roll it up. A heavy air jibe is best accomplished at speed. As the boats surfs down a wave, loads on the sails are reduced. Use extra hands to jibe the main, and ease it quickly once it crosses centerline. Watch your course and steer to control the boat as it tries to round up coming out of the jibe.
Once under control, unroll the jib again. Use a winch to control the roller furling line while easing it out, as the load will be too great to handle barehanded.
Another Alternative: Motor Sailing
Perish the thought! This is a sailboat!
Well yes, but we’re not racing!
If you’re sailing under reefed main and rolled genoa and you are still overpowered, stow the jib and crank up the “iron genny.” Motor sailing into wind and waves under main alone provides a much better ride than motoring with no sails. (Save that for days with no wind.)
Motor sailing lets you point high, making better progress to windward, without the violent pitching of motoring into seas with no sails set.
Trim the main, head up high enough to control your angle of heel, set the autopilot, and keep a lookout.
What to Watch Out for When Motor Sailing
Make sure cooling water is pumping through the engine. On some boats, the water intake will lift out of the water when heeled. Violent pitching can also allow air into fuel line, which can stall the engine, and may require a bleed to get it going again. The pitching motion may also stir sediments off the bottom of the fuel tank, which may then clog the fuel lines or fuel filter.
Motoring with no sails set will probably not work in big seas. Sails are needed—at least a reefed main—to provide some stability and extra power.
Also to be avoided is motoring across a beam sea, as that can lead to violent rolling, or even a broach.
READ MORE
READ MORE
01 September
HEAVY WEATHER SAILING BASICS
Your course and speed are factors. In a moderate 12 knot true wind, a boat sailing close-hauled at a speed of 7 knots is really in a fresh wind of about 17 knots.
READ MORE
READ MORE
01 September
HOW TO TRIM A GENOA
HOW TO TRIM A GENOA
Three Sources Of Power
There are three sources of genoa power: angle of attack, sail depth, and twist. Our goal is first to get the correct total power and, second, to achieve the correct mix of power from each source to suit the conditions.
Angle of Attack
Trim the sail in, and you increase power by increasing the angle of attack. Ease the sail out and you reduce power. Once the sail is sheeted in, then the primary control of angle of attack is the helm. Bear off to add power, and head up to reduce power.
Depth
Deep sails generate more power, while flat sail shapes generate less power (and less drag). Genoa depth can be adjusted through a variety of controls, including headstay sag, lead position, and sheet trim.
Twist
A closed leech generates more power. A twisted or open leech spills power. Genoa twist is controlled through lead position and sheet trim.
Genoa controls
Your jib will have some or all or the following controls to help achieve the desired amount and mix of power:
Halyard
Set the halyard to hold the shape of the sail in its designed position. Tension the halyard to remove wrinkles from the luff. If the luff is stretched, ease the halyard. In light air, an over-tight halyard hurts performance. As the wind builds, increase halyard tension to keep the luff firm.
When rolling up the sail after sailing in strong winds, ease the halyard to relieve luff tension.
Genoa (or Jib) Sheet
Trimming the sheet adds power by increasing angle of attack and by reducing twist. Initially, the sheet’s primary impact is on angle of attack as it pulls in the sail. As the sail nears full trim, the sheet pulls the clew down (more than in), and the primary impact of trim is to reduce twist.
For proper close hauled trim, the middle leech should be parallel to the boat’s centerline. The foot should be a little rounder than the foot of the main, but otherwise the overall shape should match the main. (LINK TO mainsail trim)
As you trim in the jib, you will be able to point higher (sail closer to the wind) without luffing. When additional trim no longer improves pointing, the sheet is overtrimmed. Ease slightly to optimize jib sheet trim.
Headstay Sag
The amount of sag in the headstay can be controlled with an adjustable backstay. A tighter headstay flattens the sail, while extra sag adds power. In light air, set the headstay just firm enough to keep it from flopping in chop. Add tension as the wind builds. In strong breeze tighten the headstay as much as you can.
Genoa Leads
Moving the genoa lead fore and aft changes sheeting angle. As an initial setting, adjust the lead so the sail luffs along its entire height as you pinch up above close hauled. From this initial setting, the lead position can be fine-tuned to the conditions. You may want to move the lead forward to add shape to the foot of the sail, which will reduce twist and therefore increase power. This lead-forward shape is best for light air or choppy conditions.
Moving the lead aft reduces power for better performance in stronger winds. An aft lead position flattens the foot of the jib by letting the clew rise. (Think of it like tightening the outhaul on the main.) Moving the lead aft also increases twist, spilling power from the upper part of the sail. For heavy air sailing, we want the top of the sail to luff before the lower section.
Leech Cord
The leech cord does not control sail shape. It is intended to prevent leech flutter, which can damage the leech of a jib. Tension the leech cord just enough to stop flutter, and no more. If your sail has a foot cord, the same principle applies.
Do you need a genoa?
Large overlapping genoas are difficult to handle, hard to tack, easy to damage, and impossible to see around. A smaller jib is much easier to handle. On boats with large mainsails, a genoa is an unnecessary burden. In all but the lightest conditions, a working jib provides comparable performance (hey, we’re not racing!), and in moderate to heavy air the jib performs better.
READ MORE
READ MORE

01 September
SAILING DOWNWIND IN HEAVY AIR
The following tips are taken from the North U Cruising and Seminar Course book written by John Rousmaniere, author of the Annapolis Book of Seamanship. These tips are meant to be helpful reminders and reference for the cruising sailor. All subjects are covered in greater detail in the North U seminars and course materials.
Wing and Wing
A good breeze behind you makes covering long distances a pleasure. A common and safe cruising setup is to sail wing and wing under jib and main, with the jib poled out and the boom secured by a preventer.
Sailing in strong winds requires strong gear. You need a spinnaker pole (not a whisker pole) supported by a topping lift (or spare halyard) and secured by an after guy and foreguy. The genoa sheet should run through the end of the pole; don’t attach it directly to the clew of the sail.
The mainsail preventer is separate from the boom vang (which is there to control twist). The preventer runs forward, holding the boom out. In rough weather the preventer should run from the end of the boom through a block on the foredeck, and then aft to the cockpit for easier control. A preventer-vang combination attached to the toerail can cause problems, particularly as seas build and the boat rolls. If the boom dips into a big wave, the pressure of the water against the preventer can bend or break the boom, or it might cause the boat to spin out of control.
One danger of a preventer is the false sense of security it can provide. As you wander on deck, do not assume that the preventer will stop the boom from jibing. Always keep your head low.
Spinnaker Sailing
Under spinnaker in heavy air – are you crazy?
It’s true that if not properly trimmed in heavy winds, a spinnaker can overpower the boat. As you learn better trim, you can raise the wind speed at which you can carry the sail and still maintain control.
In heavy air, if the spinnaker rolls out to weather, then it will probably roll the boat to weather too. In more moderate conditions it can work well to square the pole aft, to get the spinnaker out from behind the main. In heavy air, this same trim creates problems.
Likewise, if the spinnaker flies too high or too far in front of the boat, then it will wander from side to side. As the spinnaker swings, the boat rolls, making steering difficult and control tenuous.
To keep control of the boat, you need to control the spinnaker. Choke it down directly in front of the boat by lowering the pole and over trimming the sheet. This “short leash” prevents the spinnaker from wandering and pulling the boat out of control.
Gennaker Sailing
Sailing under Gennaker in fresh breeze and following seas requires careful attention to trim and steering. Ease the tack line and Gennaker sheet to allow the Gennaker to roll out from behind the mainsail, and steer actively to keep the bow pointed “downhill.” To prevent a broach in gusts, ease the Gennaker sheet. If things get out of control, snuff and stow the Gennaker and switch to a jib.
Learn More
North Sails Cruising
Sail Types
North U
READ MORE
READ MORE
01 September
STEERING UPWIND
There are a number of guidelines to help you steer effectively upwind. There is also information you can learn from the feel of the helm that will help you find the correct trim and apparent wind angle for the conditions.
Steering Upwind
Depending on conditions, a good driver will consider some or all of the following when steering upwind:
Jib Telltales (Are the jib telltales flowing, luffing, or stalled?)
Balance of the Helm (Is the helm balanced, with just a slight weather helm, or are you wrestling to hold the boat on course?)
Angle of Heel (Is the boat sailing at a comfortable angle of heel? Is it overpowered and heeled too much, or underpowered and too upright?)
Boat Speed (Is the speed steady, rising, or falling?)
Apparent Wind Angle (Is the boat pointing well?)
“Feel” of the boat (Does the boat feel lively or sluggish? Is the boat pitching in the waves, or punching through the chop?)
Steering to Telltales
For starters, try to steer the boat with the telltales flowing. With the jib trimmed for a close hauled course, use the lower jib telltales as a steering guide. Steer so the telltales are streaming aft. Head up just short of the point when the inside telltales luff. The range of angle you can steer through with the telltales flowing—a few degrees—is the steering groove. By paying attention to the feel of the boat’s power, and the boat speed, you’ll be able to tell how far up in the steering groove you can point while maintaining power and speed.
If you head up too high, the inside telltales will luff, and soon thereafter the sail will start to luff as well. Aim to steer as high as you can while still maintaining full power.
If you bear off too far, the outside telltales will stall, and you will lose power and speed (and of course pointing ability).
When overpowered the boat will be heeling too much and hard to steer. Head up slightly, and let the inside telltales dance; the narrower angle of attack will reduce power and the boat should feel more balanced. Longer term, you can reduce power by lowering the traveler, tightening backstay, outhaul and halyards, and/or by moving the jib lead aft.
If the telltales are flowing, but the helm has no feel and the boat seems sluggish, try adding power by bearing off a couple of degrees. You can also raise the traveler, ease backstay, outhaul, and halyards, and/or move the jib lead forward.
In big chop, add power by bearing off a couple of degrees until the outside telltales dance. (Be careful not to bear off too far; the outside telltales will stall and performance will suffer.) If it is difficult to keep the boat in the steering groove, the jib may be over-trimmed – ease it a couple of inches. Once the telltales are flowing again, check your other guides.
Helm and Heel
Weather helm and angle of heel are key guides to upwind performance. If you are battling the helm, or the rail is in the water, reduce power. Flatten your sails, or head up to reduce angle of attack. In moderate to heavy winds, you can use the angle of heel as your primary guide; steer to maintain a consistent angle of heel. As you heel over in puffs, feather up (head up slightly); in the lulls, foot off a few degrees to maintain full power.
Battling Chop
If you are pitching excessively when steering through waves, bear off a few degrees to add more punch. If you are overpowered when you bear off, increase twist by easing sheets or moving the jib lead aft. The extra twist will spill some power, and it will also increase the size of your steering groove by giving you more consistent power as you pitch, roll, yaw, and steer through the waves. Chop can stop you dead in your tracks if you feather up in fresh breeze. Adding twist will spill power so you can keep the bow down.
Trimming for an Auto Pilot
Before you turn the steering over to an autopilot, you may need to adjust the sails to reduce load on the system. Self-steering works best with a well-balanced boat and a wide steering groove. Set the boat up with slight weather helm, and trim your sails with a little extra twist to provide more steering latitude.
Tacking
When coming about or tacking, think not about how quickly you can get the boat onto the new tack. Think instead about carrying as much momentum as possible with you through the change in course. Too fast a turn—which is common—will reduce momentum. Too slow a turn, and you’ll lose all your speed.
“Ready About”
Although we say “hard-a-lee,” “soft-alee” might be more apt. Prepare to tack by checking that the working jib sheet is flaked and ready to run. Remove any slack from the lazy jib sheet and load it on the winch with two full turns.
Steering Through the Tack
Start with a slow smooth turn into the wind. This initial turn will help maintain speed, and it will also carry you briefly at nearly full speed toward your upwind destination. As the sails begin to luff, turn more quickly to pass the bow through the wind. Once the bow crosses head to wind, slow the rate of turn again, and bring the helm back to centerline before you are down to the new close hauled course; the boat’s angular momentum will finish the turn for you. Position yourself well to windward (or to leeward in very light air) so you can see and steer to the jib as it is trimmed. Come out of the tack just a few degrees below your regular close hauled angle, and then head up to course as the boat accelerates to full speed.
For best performance, it also helps to ease the mainsail a few inches to accelerate out of the tack. Trim in again as you reach full speed.
Handling the Jib
While you may want to take excess wraps off the winch, be sure to keep the working sheet fully trimmed until the jib luffs half way across the foredeck. As the jib luffs, ease a full arm’s length of jib sheet to reduce load, then spin the rest of the sheet off the winch and make sure it runs.
On the trim side, keep the lazy sheet taut. As soon as the jib clew passes the mast, pull in full armloads as fast as you can. When the sheet load is too great to pull, add wraps and grind the sail in the rest of the way. Stand up over the winch to grind, and use two hands.
Tacking in Waves
If time allows, look for a relatively smooth spot in which to tack, rather than tacking in the middle of a big set of waves. Use a quicker turn than in smooth water, as the waves will quickly slow the boat’s momentum. Time your turn to start as you run up the face of a wave, and turn quickly enough to get the bow around so the next wave pushes you down onto the new tack.
Since big waves are generally accompanied by big wind, use the following heavy air tips to guide you in finishing your tack.
Heavy Air
When coming out of a heavy air tack, you can make it easier to trim the jib by slowing your turn. Turn just far enough to get the jib past the mast and shrouds, and then hold course with the jib luffing over the side deck. Don’t bear off to fill the sail until it is nearly sheeted home.
READ MORE
READ MORE

20 April
VIDEO: HOW TO TENSION FULL LENGTH BATTENS
TENSIONING FULL LENGTH BATTENS
How to properly tension full length battens using the “rocket” batten ends
The “rocket” comes standard on North Sails mainsails for the following classes: J/70, Etchells, Viper 640, Melges 24, International 14, International Canoe and F-18.
READ MORE
READ MORE

10 February
WHEN ARE WRINKLES FAST?
WHEN ARE WRINKLES FAST?
Optimist Sail Designer Mike Marshall’s Guide to Identify the “Fast” Wrinkles from the “Slow” ones
When you look at your sail on the water, your eyes are usually drawn to any imperfections. Sometimes these are in the sail’s shape, but other times there are wrinkles in the sail. As air tries to flow over wrinkles, it becomes disturbed and slows. And if the air can’t travel as fast as possible across a sail, the sail may not be as efficient as it could be, therefore reducing boat speed.
Optimist sails are just as susceptible to wrinkles as any other boat’s sails are. But the good news is that most of the wrinkles that harm a sail’s performance can be removed with fine adjustments to the sail. The key to dealing with wrinkles is learning some basic facts about them, especially what causes the different kinds of wrinkles that may occur.
In most cases, wrinkles that you want to get rid of tend to expand from a source and form a line, which means that they will often point to their cause. For example, in an Opti sail it’s common to get wrinkles near the sail’s luff. In the photo below, you can see such wrinkles spreading away from the luff and along the sail. Notice how these wrinkles seem to be pointing to a specific sail tie. If this sail tie is too tight, it will pull the cloth in that area forward, causing wrinkles to form. When the sail tie is eased, the cloth should relax and the wrinkles smooth out.
The arrow points to the sail tie that is causing a wrinkle to form. Loosening that sail tie by a few millimeters will relax the cloth and make the wrinkle disappear.
It’s also important to know that all wrinkles aren’t necessarily bad. Because an Opti sail must cover a very large range of wind speeds, sometimes the sail will become deformed to fit a certain wind condition, and as a result wrinkles will appear. These wrinkles generally can’t be removed without changing the sail’s shape into a less desirable one. So you can think of these wrinkles as indicators that the shape of the sail is correct for the existing wind condition. For instance, a wrinkle along the sail’s foot that occurs in heavy air is a good indicator that the outhaul is tight enough. Another example is shown in the photo below where the sail has wrinkles perpendicular to the sprit. Such wrinkles may occur in very light air when the sprit is eased to create twist in the sail. The increase in twist allows the sail to be trimmed tighter while keeping the upper leech open, which helps pointing ability. Wrinkles may also occur in heavy air when the sprit is loose. As the sprit is eased, the top of the sail flattens and opens, depowering the sail and making the boat easier to keep flat. In either case, these wrinkles arise because the sail is being manipulated to give it the correct shape for the current winds.
The arrow points to a “good” wrinkle, one that shows the sail is properly adjusted for the wind condition it’s being used in.
So how do you tell the difference between these two types of wrinkles – the “bad” ones that are slowing your boat and the “good” ones that indicate your sail shape is right? A useful rule of thumb is to ask yourself if removing the wrinkle will make the shape of the sail better or worse for the condition you’re sailing in. If the shape will improve, then follow the line of the wrinkle to its source and fix the problem to remove the wrinkle and make the sail perform better. On the other hand, if you think you’ll detract from the shape of the sail by removing the wrinkle, leave the wrinkle in. This wrinkle is there because of the sail shape you’re trying to achieve, so consider it an indicator that the shape is correct. Eliminating this wrinkle would hurt the sail’s performance by making its shape less desirable. Another tip to help identify these “good” kinds of wrinkles is to keep in mind that they generally occur when you’re sailing in extreme conditions, such as very light or very heavy air.
Careful preparation of your sail before you race can help reduce the chances of “bad” wrinkles occurring. This preparation will make your racing less stressful and more fun. And as we all know, having fun is the most important rule of sailing!
WHAT’S THE NORTH DIFFERENCE?
It’s not just a catch phrase.. It’s our way of working.
It’s helping sailors of all ages and skill levels get better.. get smarter… get faster..
It’s our designers and Opti experts attending major events and clinics to get input from sailors, coaches and parents on how we can do things better to make sailing more fun for you.
It’s somewhere you can ask questions and get answers and support..
It’s fast sails, unequaled customer service and a desire to help our clients to GO BEYOND.
Sail with a North sail and see how we can work together to make a difference for you and join with other North Opti sailors from around the world who are seeing the difference sailing with a North Opti sail has made for them.
READ MORE
READ MORE