


NORTH SAILS BLOG
Tutto
News
Events
Guides
Sustainability
Tech & Innovation
People
Travel & Adventure

30 March
GENNAKER LAUNCHING BAG INSTALLATION GUIDE
GENNAKER LAUNCHING BAG
Installation Guide
Most of the really memorable spinnaker mishaps can be avoided if the sail is equipped with a dousing sleeve. Inside the sleeve, the sail is protected from most snags. When the sleeve is hoisted there is no pressure on the sail, so the crew can take their time and make sure everything is sorted out before raising the sleeve. However, the sleeve and retrieval line add another layer of complexity and potential for tangles. That’s why, except on very large boats that are equipped with purpose-made spinnaker launching bins, we recommend storing your cruising spinnaker and sleeve in a racing “box turtle” bag or zipper “sausage” bag. For trouble-free launching and retrieval, follow the steps below.
Step 1
In a sail loft or on a clean dry lawn, tie the head of the sail to a tree or post. With a helper holding the tack, run the sleeve up and down to remove any twists.
Step 2
Pull the sleeve all the way down. If the sleeve fits the sail correctly, the cone will come within a foot of the clew, but will not go past the clew. Next, attach the clew and tack to opposite ends of the bag with the Velcro web straps. Stuff the loose foot fabric into the bag and place the cone in the center of the bag opening, on top of foot material, clew, and tack.
Step 3
Coil the retrieval line loosely and shove it up into the outer sleeve, so the line disappears above and outside the cone. This will keep the retrieval line from getting tangled and will prevent you from inadvertently rigging the tack line, halyard or sheets through the loop. (When you hoist the sleeve to the top of the mast, the retrieval line may fall to the deck on its own; if not, reach in and pull it out.)
Step 4
Flake the sleeve into the bag, forcing each flake deep into the corners. Pass the center Velcro webbing through the head ring and close the bag. Now the sail can be hooked up to the tack line, halyard, and sheets. You will hoist right out of the bag.
If the cone is allowed to run freely up the luff as the sail fills, it is possible for the cone to run fast enough that it creates a fair amount of friction. This could cause enough heat to melt the fabric over large areas of the sail. The friction of the retrieval line running through the palm of your hands can also cause enough friction to melt human skin. The skin repair is free (except in extreme cases), but the cost of replacing the melted spinnaker fabric can be pretty high. Before raising the cone, control deployment speed by wrapping the retrieval line around a deck fitting or winch.
READ MORE
READ MORE
28 March
SPEED READING: MANAGING YOUR RISKS
SPEED READING: MANAGING YOUR RISKS
Maximizing Your Chances To Make Gains
Zeke Horowitz, skipper of J/22 Uncle Fluffy, 2019 World Champions. © Chris Howell
J/22 World Champion and North Sails Expert Zeke Horowitz explains how you can maximize your chances to gain through smart boat positioning on the racecourse. Sailboat racing is all about controlling what we can—boat speed, boat handling, preparation, and decision-making. But we can’t control everything. So we need to think about ways to manage risk so we can rely on good speed and conservative tactics. In this article, we’ll review strategies you can apply to your position decisions to ensure your boat is in the right place to make gains while avoiding big losses.
Pre Start: “It’s all about the homework”
Get out early to sail most of the first beat and figure out if there are any trends in terms of where the velocity is, how often the wind is shifting, current differences, wave differences, etc. Take note of the range of compass numbers on both tacks so you’ll know right away if you’re lifted or headed. Then, check the starting line. Is there a line sight? Is there a favored end based on compass bearings compared to wind direction?
Now you can relate this info to what you learned sailing upwind and decide on an overall strategy. Is there a persistent shift? Is there a side to race to based on current? Is it oscillating? With all of this info, decide which area of the line to start so you can be ready to make gains right off the line.
If there is a favored end of the line or side of the racecourse, it’s important to start near that end. But if the wind is oscillating, start in an area so you can sail on the lifted tack off the start, regardless of the favored end. If you know the wind is oscillating and in a left phase during the start sequence, the pin will be favored. But since the next shift will be a right phase, it’s probably better to start near the middle or even boat end, because you will have an easier time tacking right away to get on the port lift, and you’ll be closer to the next shift than most competitors. Maybe a few boats that make a risky start at the pin look advantaged early, but you are on the lift, in less traffic and headed towards the next shift, which will be a righty. Now you’re in a position to gain right away.
Starting in Oscillating Breeze: Pre-race homework says wind is oscillating and the pin end is favored. Boat at the pin is upwind at the start, but can’t tack onto the lift right away because of traffic. Boat at unfavored weather end tacks onto the lift and then immediately after the start on the first shift, and gains the lead.
Beats to Windward: “Game of Thirds”
I like to divvy up the beat into thirds. At the bottom of the beat, it’s all about positioning yourself so you can execute the game plan. If you’re in bad air, you need to decide if tacking for a clear lane is the move or if it’s better to suffer for a while in bad air to get going the direction you want. If there aren’t many shifts, or there isn’t a particular favored side, then lane management is everything and you should not sail for a moment in bad air if you can help it. But if you know you need to get to one side, you may have to sail in bad air to get over to that side at the bottom of the beat.
If the wind is oscillating, you may have to come to terms with the fact that you won’t have much clear air on this beat, because sailing on the lift towards the mark is more important than sailing in clean air. If you know you’re on a lift, duck a boat coming across on the header instead of tacking on its lee bow, even if it’s a big duck. Keep going the right way, staying in position to gain at the next cross.
For the second third of the beat, start looking for opportunities to consolidate. You’ll have an idea of where you stand, and you need to weigh your options for staying ahead of the boats behind you while looking for the opportunity to jump the pack just in front. If you can take separate a bit from any pack of boats, you’ll be able to sail faster. So look for a good opportunity to separate into clear water and avoid being the boat going slow in the middle of the pack.
Most importantly, look up the course past the laylines and start developing a strategy for the top of the beat. If you want to get to a certain side for the last portion of the beat, be disciplined about lee-bowing packs or taking smart ducks to ensure you’ll be one of the first to get out there. Also, look for opportunities to consolidate any gains you’ve already made on packs so you can put them in the bank.
As you near the top of the beat (the final third), think about what the last shift or pressure advantage will be. Often, you can make gains getting to the edges at the top, avoiding the cluster in the middle. As the fleet gathers under the top mark, the wind velocity dies there under “the blob.” Be a little more on an edge, and you’ll have an opportunity to gain. If you’re not in the lead pack, think about the boats that will round ahead and try to avoid that traffic. If possible, also try to avoid getting to a layline too early; if the wind shifts, you won’t make any gains.
Finally, as you approach the weather mark, start developing a downwind strategy. Will there be a long jibe? Is there a pressure or current advantage? Are you rounding in a shift that will dictate the favored jibe right away? Being decisive here can help you jump that pack just in front of you!
Best Pressure/Shift at the Top Mark: Port approach is often clearer but more risky. Watch for traffic and boats rounding the windward mark ahead. Look for an edge with more wind or last favorable shift.
Runs to Leeward: “The Train and Making Gains”
The top third of the run is all about escaping from the top mark. If it’s the first weather mark, the traffic of boats still going upwind and the “blob” representing the mass of the fleet as a whole make the area directly under the mark a no-go zone. Unless you see a massive right shift or you know the run is going to be all port jibe, do a bear-away set. Jibing early at the first top mark can be tragic, and the smart money calls for a regular bear-away set on starboard.
Keeping that in mind, though, if you’re clued into the last shift or the position of the leeward mark and you know port jibe is going to be strong, then don’t hesitate; call the jibe set and jump the boats around you so you can be the first on the favored jibe heading down the course.
On the other hand, if you feel the left side of the course is favored and you want to stay on starboard, then commit early to the high lane around the weather mark so you don’t risk getting rolled and forced the wrong way.
Things usually settle in by the second third of the run and you can focus on speed and positioning. Manage your lane behind you to always have clear air, but when it is time to jibe, position yourself to make gains by sailing artificially low for a few moments, moving the trailing competition high of you. While it looks like they are creeping up to get on your breeze, you jibe into clearer air, setting yourself up for the last phase of the run.
The most important thing to decide in the last third of the run is where you want to be for the next beat. If you know you have to go to one side, then that dictates the gate mark you’ll round. If it’s not clear, then try to observe if there is a favored gate (one more upwind than the other), and if that isn’t clear either, decide if one gate will provide a cleaner escape—fewer boats coming down that side of the course giving you bad air as you turn upwind.
You also need to position yourself relative to the nearest boats so you can have a clean rounding. Try to get to the inside of any packs to get mark room. Or look for the chance to split from the pack or the boat rounding just in front of you so that you have less traffic and more clear air as you round. If you’re in a pack of four, and three boats are going to the same gate mark, it usually pays to go to the opposite gate with more speed and clearer air. Even if you want to go the other way, you can come around and tack fairly soon. Now you’ve avoided rounding in a pack and you’re still going the right way. Rather than being in a position where you’ll likely lose distance on that pack, you’re positioned to make another gain. Just make sure you’re not sailing straight into a blob of boats coming downwind with spinnakers!
The name of the game here is being able to decide when the opportunity is to “stay on the train” to avoid a loss and balancing that with positioning the boat on the train so that you’re more likely to gain than lose. Above all else, none of this will matter if you don’t take the time to develop good speed. Good luck this season!
Making Gains at the Gate: If you want to go to the right side, round that gate mark. If there is a pack of boats close ahead, round the other mark and then tack with clear air to gain on all but the leader.
READ MORE
READ MORE

27 March
RBS SLICE BATTEN INSTALLATION GUIDE
RBS SLICE BATTEN
Installation Guide
North Sails RBS Splice Battens provide a convenient way to ship and stow 19mm and 25mm battens with lengths up to 7.4 meters. With proper installation, the RBS Splice battens will afford the same level of performance as standard battens, with minimal distortion to the sail.
NOTE: The splice connector is permanently attached to the front section of batten. DO NOT try to remove the connector from the front end.
Step 1
Lay out the battens with the labels facing up and the arrows pointing towards each other.
Step 2
Identify the front and back sections, making sure that the tapered end of the back section is aligned with the splice connector.
Step 3
With the arrows pointing toward one another, insert the tapered end of the back section into the splice connecter. Apply enough pressure to the back section to seat the batten completely in the connector.
Step 4
If the two sections are connected properly, the batten will be perfectly straight. If the batten is improperly assembled, the back section will be angled.
Step 5
Tape the junction of back section and connector.
To take battens apart, remove the tape and hold the back section of the splice connector. Flex the front end up and down, while exerting pressure in the opposite direction as the arrow.
For a short video demonstration, click here.
READ MORE
READ MORE

22 March
SPEED READING: SETTING GOALS
SPEED READING: SETTING GOALS
One Design Expert Zeke Horowitz Shares His Winning Formula
© Chris Howell
J/22 World Champion Zeke Horowitz explains how to put his winning formula to work for you this season.
If you’re a competitive sailor, you’ve probably read about the value of setting goals for your racing. By setting and trying to achieve your goals, you measure your progress as a competitor, whether the goal is to finish every race at a windy regatta, finish in the top half, score a finish in the top five, or flat out win the regatta.
It’s important to always be striving, but for most sailors, there’s usually one regatta each year where we really want to perform our best. Sometimes it may even be two years ahead. It might be the Fastnet Race or the J/70 World Championship. But it could just as easily be the Labor Day Regatta or the district championship for your one-design class.
If you haven’t named that event yet, do it now! Then follow these seven steps to be best positioned to peak at the right time and have your best result when it counts.
Step 1: Set up your team.
Your team is the most important part of your success as well as your fun. There is no substitute for sailing with people you enjoy and with whom you work well. Approach your team with the idea that you’ve got a season of sailing ahead of you with a goal of delivering your top performance at the big event. Get everyone on the same page and committed to an energetic effort to achieve this goal.
© Chris Howell
Step 2: Set up your schedule.
Look at the regatta schedule leading up to your big event. Take note of any events that have a high priority: Are any of them at the same venue as your big event? Are any local to where your boat is? Are any more likely to attract a big fleet? Send this full schedule to your team and try to work out which events make the most sense.
There is HUGE value in doing events with the ENTIRE team. You can always look for subs if someone can’t make it, but try to prioritize your regatta participation based on the whole team’s participation. Always include at least one day of practice as a “shakedown” before the regatta if schedules permit. If it fits at any events, try also to include a day of tuning practice with another team, so you can have a tuning partner and learn faster. A shakedown session and a tuning session could also be fit into the same, single day. Sailing before a regatta pays many benefits and can really help the whole crew be on point for racing.
© Bernie Kaaks
Step 3: What’s the budget?
This is obviously a big piece of the puzzle in our sport. You need to consider travel, logistics, food, boat equipment, sails, etc. Make sure your budget fits comfortably with your schedule. It’s often better to sacrifice a regatta if it helps your team with more room in the budget for equipment or more comfort at your other events. If you sacrifice equipment, time or comfort instead, you likely have a much less productive experience. I find having a top-quality experience at one less regatta is a good tradeoff.
Step 4: The Boat
In sailing, there are many elements that are not in our control—wind shifts, tides, competing boats, decisions made by race committees, etc. But one element that we can and must control is our equipment. The boat is the most important piece of that. Be realistic about the condition of your boat and make the changes needed to have the best boat possible. If you’re chartering a boat, do lots of homework, get pictures, and make arrangements for any upgrades necessary. Broken or non-functioning equipment is a massive time waster. Add in specific days to your schedule for boatwork. And don’t leave anything until the last minute. When you get to the big event, you need to be 100-percent confident that your boat is perfect.
Step 5: Sails
Depending on your class rules, you will have more or less room to get creative with sail purchases. But regardless, you need to be sure you have the newest sails possible for your biggest event. In some boats, that means having sails that are “broken in”; but even then you must make that part of your plan. Look at your event schedule leading up to the big event and decide when and where you should have each sail in use based on your goals for each event (see step 6). This is another element that you can control, and it’s important to do it as well as you can given the budget.
© Andrew Palfrey
Step 6: Goals within goals.
Your team is clear that your big goal is to peak at the big event. In the meantime, it’s critical to set specific and trackable goals for each practice day and each regatta on your path. Maybe the first regatta you want to work out specific crew communication and boat handling. Then work on starts and boat speed at the next one. Decision-making at the top of the beats, etc. It’s imperative to not only set these goals before every day on the water, but to then debrief them with your team after each race, each day, and each regatta.
Your goals for the next events will change based on your debriefs and based on what you learned at your last one. But you need to spend time working on all of the small details so that you’ve had a chance to learn your lessons and reflect on your mistakes before the big event. That way, your team can have confidence in doing all the little things well, and you can focus on the conservative tactics and superior boat speed needed for the big event.
Step 7: We’re finally here – the big event.
If you’ve done the first six steps well, then you know your boat, sails, and equipment are at 100 percent. You’ve taken the time to gain confidence in your speed and your boat handling. You’ve learned about your team and how to communicate effectively. You’ve determined roles for each teammate both on and off the water (who makes sandwiches, who puts the bow numbers on, etc.). Essentially, you’ve controlled all of the elements you are physically able to control.
Now your task is to have fun, continue to control the things you can, and make conservative, high-percentage decisions on the racecourse that allow your team to rely on its strengths. Continue debriefing after each race and each day throughout the event. Keep learning!
There is always going to be luck involved with our sport, and there’s not much you can do about it. In fact, most top sailors will tell you that it takes a bit of luck to reach the top of the podium.
With this approach, you’ll be able to put yourself in a position to achieve your goals. Whether or not you achieve this goal at the big event, treat it just like all your warm-up events and debrief it with your team. At that point, it will become another step along your path to the next big event, where you can choose to peak next year. Good luck, and have fun!
©Mauro Melandri | Zerogradinord
READ MORE
READ MORE
10 March
STARTING, TACTICS, & SET UP
STARTING, TACTICS, AND SET UP
Strategies From the 2019 Midwinters In Tampa, FL
2019 Midwinters Champion, Rossi Milev neck and neck downwind with Robby Brown, 2018 National Champion © Chris Howell
On the first two days of Midwinters in Tampa, the breeze built from a 5-8 knot SE to the ‘normal’ SW seabreeze. On the final day, the breeze filled first from the south and shifted southwest much sooner, eventually strengthening to 12-15 knots. Every day, the strategy remained the same.
Daily debriefs after sailing provided some great insights from sailors at the top of the fleet, including: North Sails Expert and J/24 World Champion Tim Healy, Hydra Sailing Solutions coach and Old Dominion All-American Marty Kullman, and Brown University Coach and Collegiate All-American John Mollicone. Marty was tactician for Bangor Packet. Tim Healy was tactician for New England Ropes. John Mollicone was Tim’s helmsman. Take notes!
Using your prostart properly
Q: When you tack onto starboard, how do you judge how far away from the line?
A: Time and distance using your Velocitek, ask yourself: how many meters- how many seconds?
Example: Your Velocitek reads 50 meters at 60 sec., so you are travelling at roughly two knots, which is actually pretty slow. When you are that slow, it’s hard to control the boat once you get on the line.
tip: You want to be a touch further away from the line so you’d be approaching at about one second per meter.
Q: How much time do I have to burn so I’m not over early?
A: It depends on what shift you are in at the start.
Main Point:
Get out there early and practice your accelerations, then distance and time from the line. This will help you figure out the best place to start accelerating and you can trust what the velocitek is telling you.
© Chris Howell
Q:How do you properly ping the line?
A: When you get your pings, you want to cross the starting line close hauled. Come in on starboard at the same angle you would be close hauled. That’s where your bow is on the line. Do the same at the pin. The far side is easiest for the bow guy.
tip: The slower the better when you do your pings. This is so you can do it the same every time and you can trust what the tool is telling you. When you get comfortable with that, one guy is in charge of meters, one is in charge of time, and you can figure out fast if you need to be coming up to the line faster.
Main point: Always come in on starboard/port at the right angle, your true close hauled course, so your ping is accurate. Do it the same every time. At some point you’ll develop a routine and it will all become easier each time. You’ll learn to trust what the velocitek is telling you.
Strategy at the start
After you get comfortable with all the prestart tasks you develop a routine. For a port approach you are looking for a place to tack at 1:30 or closer to 1:00 . When you do decide, if you have someone behind you and they may tack below you. It’s good to go behind a couple boats and tack so you can guarantee yourself a hole.
Think about it this way:
In the light air, when the wind goes left you are racing earlier, maybe even trying to make the pin end. When the wind goes right you are burning speed at the start, going head to wind more, keeping in mind that you can’t set up too early.
You really need to know what shift you are in. Right shift, starting on starboard, you are going to get to the line faster. Left shift? It will take longer for you to get there.
Main Point: Know what shift you are on before the start
Example: If you are 20 meters away from the line and get a 10 degree right shift there is less distance to cover to get to the line because you are now able to sail more perpendicular to the start line and will take less time to get there. In a 10 degree left shift, there will be more distance to sail to the line because you will be sailing much more parallel to the starting line and will take more time to actually get to the line. .
Tip: Your tactician needs to articulate to the skipper: “We need to get going, go quicker, it’s a left phase, etc.”
© Chris Howell
Prestart Sail Setup & Technique
Tip: Make sure your traveller is preset, even if you are on port at the time (port approach)
Don’t have a lot of backstay on, but you can preset if you need it (in windier conditions). Mainsheet and final genoa trim is all you need to focus on as skipper at the start.
Average Genoa Trim:
You want to go 3” off the spreader tip on average. Sometimes a little tighter or looser but 3” average. You can trim tighter when it feels right.
Main Point: Trimmer on final approach needs to be in sync with skipper to get up to speed. Make sure your main comes in tight, trim in, and how tight you trim in all depends on my lane off the line.
tip: Another thing that’s important is to make sure your mainsail is up all the way. We mark it so we can see if it slipped. It will always stretch the first time, so you gotta tighten it before the first race and between races.
At The Start
Q: Is there a boat to leeward of me off the start?
A: If there is, you need to put them away.
Foot over them at the start to get them out of the way early. This only applies to a threat to leeward. If your tactician tells you that you have to pinch off someone to windward that’s when you revert to high mode.
Ask yourself: Am I in height mode? If yes, you trim the main in hard. Then you can pinch off the guy to windward before he has the chance to roll me.
Your trim all depends on how much space to leeward you have. Should you climb or foot? Sailing higher is slower, but sometimes to pinch off the guy to windward you can get away with sailing your high mode to get rid of them.
Main Point: At the start, think about what mode you are in and get over-top the leeward boat ASAP
© Chris Howell
Strategy beyond the start
Local knowledge is great but you have to sail with what you see. On day one, we hedged right but the pressure was left. Day two you had to connect the pressure, but don’t spend time sailing to it in a header. Sail on the tack that’s pointing at the pressure if you can to get there quicker.
Q: Why is it important to go upwind early when you get to the race course?
A: So you get to know what’s happening. To get a good idea of the shifts that are happening, you have to give yourself time to sail upwind so you can figure it out. You have to go with what you feel and where the pressure is strong. Make sure your boat is set up correctly for speed.
Main point: You have to go with what you feel and see.
Q: When you are in the middle, and you feel light. What’s the next best step?
A: Be patient and get to an edge. Sail towards the pressure if you can, but get to an edge. Once you are at the edge, you want to make sure you are into the pressure all the way before you tack. If you are too shy of the pressure, you won’t get the full effect.
© Chris Howell
Technique off the line and on the beat
Q:If you are deep in the fleet, and you’re thinking about shifts vs. clear air, which do you choose and why?
A: You can’t be in bad air, you need to find a shift so you get out of there. The amount of air that twists off a J/24 sail is major. Sail in bad air for three minutes? NO, it’s better to do two tacks. There are times where you’ll have to hold out for a short time, but you don’t want to be in bad air for long. You need to maintain your boat speed as often as possible.
Example: It cost us five boat lengths in one race, but we double tacked because we could keep our speed. It was worth it.
Tip: As tactician, you ask the skipper, are you starting to feel it? Are you having a hard time? Then you have to tactically decide how to get out of there. Sometimes it can be worth sticking it out, but your skipper will tell you if they can hang on a bit longer. This can bide you some time if you are looking for a clear lane, but you can’t wait that long.
Main point: Your skipper will tell you if they are struggling. Then you can decide what the next best thing is.
Tip: The lighter it is the more bad air affects you. If you feel like you are getting affected, foot or tack away. Ask yourself: “Is it really painful worth tacking away? Or not so bad where you can hang a bit longer?”
Main point: You need to have a high mode. Yes high mode is slower, but, if you can sail fast in high mode you can stick out the situations where it’s necessary to wait for a lane to clear.
© Chris Howell
© Chris Howell
READ MORE
READ MORE
07 March
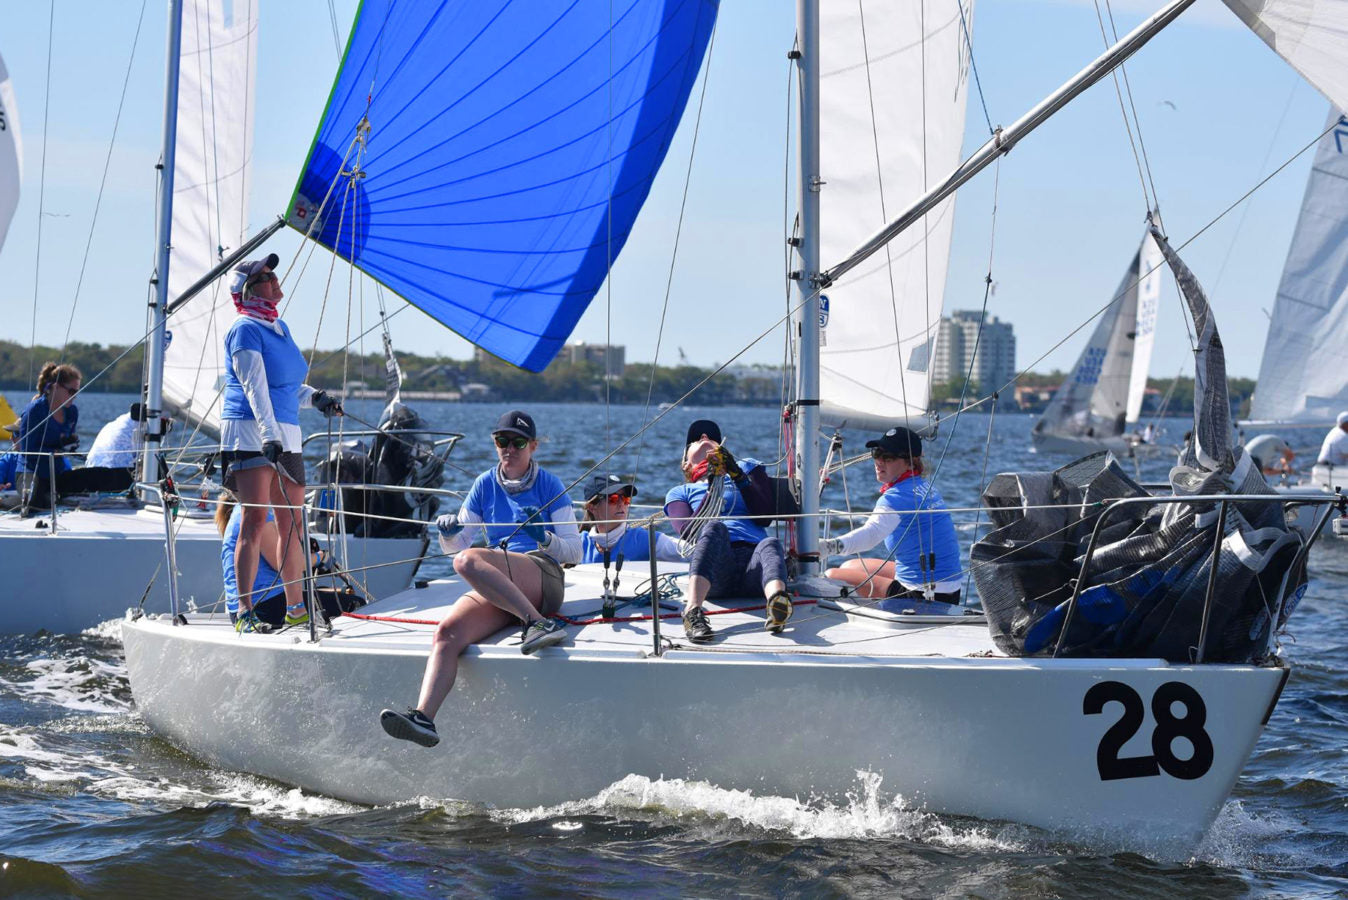
SPEED READING: TEAM BUILDING
SPEED READING: TIPS FOR TEAM BUILDING
Forming A Team Is Just Step One
For the past three years, Hillary Noble– North’s content marketing manager— has called tactics for the Women’s Seabags Sailing Team. Successfully sailing a J/24 with six women requires a strong team, both mentally and physically.
“We’ve come a long way since the 2017 Worlds,” Hillary says of the team’s first big regatta, where they won the Yaeger Women’s Trophy. “It’s been very rewarding in many ways.” Along the way, all six women have learned what it takes to be a great teammate, in order to make their next regatta more successful than the last.
“It’s so much fun to race with these amazing women!” she says. “They are powerful, and we keep getting better together—it’s a lot of fun.”
The team competes on the J/24 circuit year-round, and they are currently preparing for the 2019 World Championship in Miami, which they qualified for at the district one championships at Kittery Point Yacht Club, NH in 2018.
“It felt great to qualify on the water for this upcoming Worlds,” Hillary says. “This has opened two spots for other women’s teams to compete.”
“We are working hard this season,” she continues. “Making sure we have the right players for each event is really important. There will be plenty of opportunities to improve and we are always looking forward to the next regatta together.”
Hillary has collected five tips that form the basis for the team’s success. They apply equally well to her day job as part of the North marketing team—or to a mixed or men’s J/24 team. As Hillary points out, “We all want to win and get the most out of our experiences together.”
© Chris Howell
Hillary’s Tips for Team Building:
Focus on your individual job. Each team member can contribute to the team’s success. Many hands make things easier!
Know your team’s strengths, make a plan, communicate it early, and put your team in situations where they can shine.
Always work together towards a common goal. Any contribution by another set of eyes is valuable. If you see something, say something.
Help each other out. Any job on the boat can get difficult from time to time. Look out for your teammates and prevent them from failing.
Debrief after each race, but keep it short. Focus on the good things; admit mistakes, and learn something from your teammates. It’s all about growing together.
© Chris Howell
© Chris Howell
© Chris Howell
READ MORE
READ MORE
27 February
SPEED READING: ETCHELLS MAST LEVER
SPEED READING: ETCHELLS MAST LEVER
Tips From Expert Andrew “Dog” Palfrey
The Etchells is one of the most competitive and prestigious one-design classes in the World. Sailors have been challenged to find the boat’s extra speed for over fifty years. We had a chance to interview two-time Etchells World Champion Andrew “Dog” Palfrey, the developer of the popular Mast Lever System.
Dog, thank you for all your great contributions to the Etchells class. Compared to a few years ago, the boat sure seems easier and more fun to sail. Being able to make some very simple, but substantial adjustments easily makes the boat easier to sail fast across the wind range.
Many thanks for the nice comments and also for the opportunity to help spread the good word to our fellow Etchells sailors. It is gratifying for me to go to Etchells events and see almost universal take-up of the Lever system. As you mention, it does make life easier for the teams to extract best performance from the aero package.
Focusing specifically on the use of the mast lever, in simple terms: What is the correct move with the lever and the mast at the deck as you go from light to moderate breeze to stronger breeze during a race?
Along with the sheets, the traveller and backstay, the mast lever control is a primary control in helping to get the best from the mast and sails.
The most challenging thing about the Etchells mast and rigging geometry, is that we lack direct control of the headstay (via runners). Also, we can only declare one mainsail and two jibs for the big events, so the ability to power-up and de-power both sails is fundamental to extracting the best performance from an Etchells across the wind-ranges and sea-states we sail in.
I primarily consider the lever system to be a tool that either stiffens or softens the bottom two-thirds of the mast. In basic terms, we want to stiffen the mast in heavy airs and soften in lighter airs. So, to answer your question, on a day where the breeze is strengthening, we would progressively move the mast (via the lever) aft at the deck – thus stiffening the lower two-thirds of the rig.
We need to remember that the effectiveness of the lever is limited by the position of the mast, relative to the mast partner hole (in the fore-aft plane). Headstay length and mast-step position are the variables here.
“In an ideal world, we are always going upwind with the mast all the way back in the partners hole. Why? This gives us the ability for the mast tip be as far forward as possible on the downwind leg. We know this to be fast in all but very windy conditions.”
If we are sailing upwind before the start, and the perfect position sees a gap between the trailing edge of the mast and the back of the mast partners hole, I will consider going aft on the step or lengthening the headstay to close that gap. However, if the forecast is for the wind to increase, I will make sure there is a gap there. This way we have the ability to effectively stiffen the mast by pushing the mast back with the lever. So, having the step a little further forward and/or the headstay length a little shorter than perfect is good insurance in a building breeze.
© Onne Van der Wal
As you either move the lever back or let it forward, what changes are happening to the headstay sag and lower mast bend?
Really good question. In basic terms, moving the lever alters where the maximum bend is allowed to happen vertically in the mast, with the application of backstay and/or mainsheet load.
Simply put, if the lever is pushing the mast aft at the deck, the bend will occur higher up the mast (and vice versa).The effect of a stiffer lower section of the mast also sees the headstay become firmer with the application of backstay and/or mainsheet.
When looking for power, we are generally looking to induce headstay sag. So we allow the mast to bend below the hounds (this also helps the mainsail shape in light airs). The lever will either be pulling the rig forward at the deck (creating pre-bend), or in a neutral position. The mainsail is designed so that minimal backstay is required in lighter winds. Sometimes we are looking to sag the headstay more without changing the mainsail shape at all. This is possible with subtle changes of the lever, backstay and mainsail changes together.
When it is windy and we are looking to de-power, we are generally looking for a firm headstay. This generally means stiffening the mast below the hounds, so the effect of backstay and mainsheet more directly tightens the headstay.
“When I look around the fleet when I’m sailing or coaching, the biggest variances I see are in headstay sag. When I am sailing, I find the hardest thing to set up accurately is the headstay sag. This is because it is not easy to see and replicate and there is no way to accurately reference the sag directly with a mark. But it is one of the key drivers in extracting best performance out of an Etchells.”
I look closely at the entry angle of the jib. If it is very fine, we probably need more sag. Likewise, if it very blunt, I will either ease more jib cunningham or look to remove some headstay sag with the application of mast lever and a little backstay. I also carefully observe the dynamic behavior of the headstay. If it’s windy and wavy and the headstay is moving around a lot, I will prioritize firming it up with more aft lever, tighter backstay and mainsheet.
Is there ever a condition where you leave the lever uncleated? Just allowing the mast to float in the partners?
Never. Allowing the mast to move, or “pump” over every wave will be constantly changing the shape of both sails in a subtle, but counter-productive way. However, in light to medium winds, I do like to know where neutral is.
In our tune-up, I will ease both the forward and aft control lines and observe where the mast is happy sitting. That tells me where the step is positioned relative to the gate and helps me make decisions on whether I should think about moving the step or the headstay length. But then I will cleat the lever controls off again.
Regarding the boat hardware: In 2014, when I first set up the lever in an Etchells, there were lines on both the forward and aft controls. But for the past three years I have set up the forward puller with shock-cord, so that is automatic. The advantage of this is that you only have to deal with one control line (the aft puller). I set the shock cord system up with a cleat, so I can disengage it in heavy air (when it is not required). I also disengage it when checking where neutral is. The disadvantage is more weight, as you do need heavy shock-cord to offset any “pumping” and a 6:1 system. But I think the weight is worth it. Being able to adjust the important controls easily (and from the windward rail) is key.
Is there a good rule of thumb that can be used for how much “gap” behind the mast to start with? Say at the dock with light tension (10 the the Loos gauge) on the headstay and the mast floating?
Yes. As I mentioned above, one of the hardest things to accurately quantify is headstay sag. So any tools that help me replicate fast settings are valuable. The “gap” you mention is one of those tools.
On my personal tuning guide, I have the shroud calibration numbers to suit the North Sails tuning guide tensions. But I also have a column for the “gap”. It’s really important, as it is a key indicator of exactly how the mast will behave in the fore-aft plane when sailing upwind and down.
When on the dock, I will set the backstay up so it pulls the headstay firm. Making sure the lever controls are uncleated, I then apply more backstay and watch the mast at the partners. When it moves forward slightly (the mast starts to bend), I stop pulling the backstay and then ease a small amount so that the mast moves back to its neutral position. This is approximately 10 on the Loos Gauge, but I find this method is better than measuring the headstay with the Loos Gauge (as they are inherently unreliable at low loads).
I then look at (and measure) the gap. I also check shroud tension and headstay length at this time.
In light airs, I am looking for no gap at all – even to the point where the mast is hard against the aft edge of the mast gate and bending around it by a factor of 5 or so mm.
In heavy airs I like the gap to be around 20mm, or 3/4’s of an inch.
The gap is controlled by both the step position and headstay length. Personally, I adjust both step and headstay. But there are many ways to skin the same cat. John Bertrand rarely changes his headstay length and does more adjustment on the step.
I would say the most important thing is to develop your own boat’s tuning guide. When racing, make sure you know where you are relative to that. So, if conditions change, or you are lacking speed or height (or have too much – or not enough power), you are best armed to make high percentage decisions on what to change.
“Keep in mind that the sails are a living organism. As they age, they do grow a little. This generally means they become a little deeper and a little rounder in the aft sections. This may not be a negative thing in lighter winds and a bumpy sea. When you add a new sail to the boat, be prepared to exercise some flexibility to your setup to achieve the same effect.”
We are engaged in a wonderful game that is both complex and yet quite simple at the same time. Our sport rewards experience, so don’t be afraid of trying things. But try to keep a record of what works and what doesn’t. Above all, don’t stop asking questions!
Andrew sailing with John Bertrand
Andrew “Dog” Palfrey is a two-time Etchells World Champion, professional sailor and America’s Cup coach. Follow Dog’s blog at www.sailing.dog
READ MORE
READ MORE
14 February
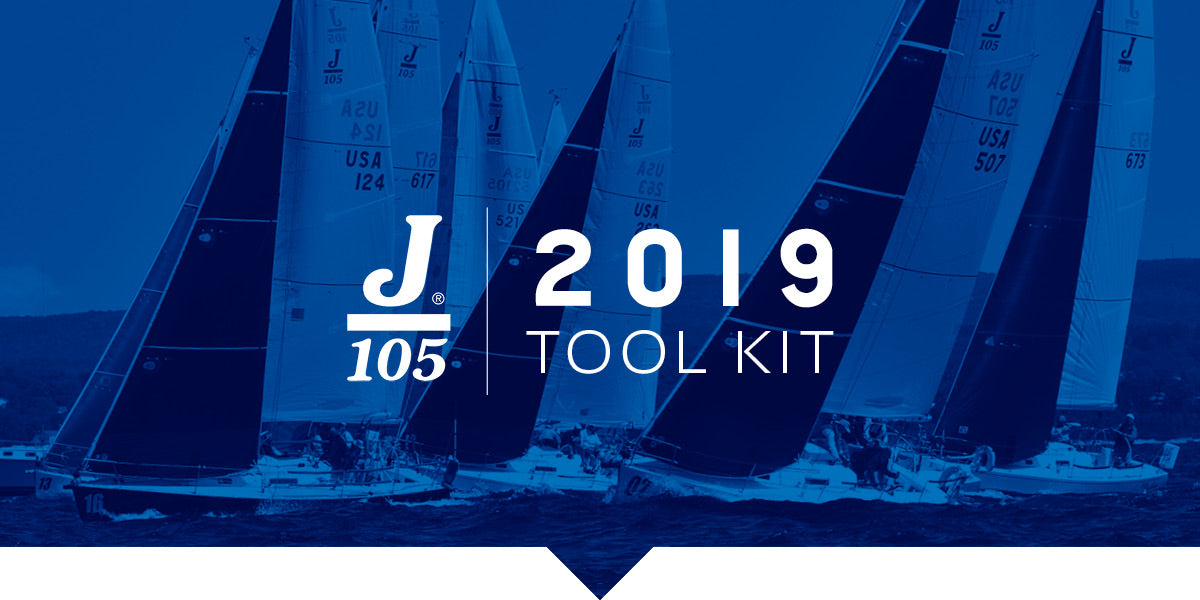
J/105 TOOL KIT
Get The Most From Your J/105
Your next regatta is just around the corner. Is your team ready? Our J/105 Tool Kit will help. Created just for J/105 sailors, by our expert team.
#NSVictoryList
There is no better performance test of a one design sail than the results it produces. In 2018 alone, North Sails J/105 inventories helped teams win regattas all over the US.
Tips From The Champ
Champion Terry McLaughlin shares some tips that helped team Mandate win the 2018 North Americans.
Downwind Tips & Tricks
How to sail as deep as possible while still keeping your speed up. Before your next regatta, read this downwind manual from expert Will Keyworth.
Define Your Speed
Pulling all the pieces together can be challenging. Our J/105 Speed Guide will help you leverage our expertise to make the most of your sailing.
Fine Tune With North
Find your groove. Get your numbers. Be confident in all wind conditions. After countless hours of sailing, sail testing, and competing in the J/105, our championship winning sails will get you up to speed quickly.
Working With The Best
Our J/105 sails deliver the best results for our clients. Contact your local expert and join us at the front of the pack.
READ MORE
READ MORE

13 February
WHY IS HEADSTAY SAG FAST UPWIND IN LIGHT AIR?
WHY IS HEADSTAY SAG FAST UPWIND IN LIGHT AIR?
How Headstay Sag Affects Everything From Speed To Point
Sailboats with headstay sag often point higher and maintain boatspeed better in light-air conditions. One Design expert Tim Healy describes the rewards and the risks.
Many sailboat classes limit the number of jibs that a boat may carry, and some classes allow only a single jib. These limitations challenge competitors to find ways to maximize power in light air. One of the key methods to power up a sail is to induce sag in the headstay, also known as the forestay.
Headstay sag on a sailboat is the distance between the midpoint of the headstay if it were perfectly straight and the actual midpoint while sailing. The best way to estimate this measurement is when sailing upwind, sight up the forward side of the headstay and note how far the midpoint of the headstay has sagged when compared to the mast.
When the headstay sags, it not only sags to leeward but also sags aft, which puts the luff closer to the leech, thereby adding depth to the jib.
How to Increase Headstay Sag
The key controls for manipulating headstay sag are shroud tension, mainsheet tension, and in some cases, headstay length.
You would think that headstay length would be the primary variable, but that’s only the case on boats with keel-stepped masts, such as the Farr 40, Etchells, and Shields, that limit range of mast movement at the mast step and deck partners. On those boats, lengthening the headstay by easing the forestay turnbuckle or adding extra toggles can be an effective way to increase sag. In some classes, such as the J/24, a maximum headstay length is prescribed, limiting this adjustment. And on almost all classes, there are good and practical reasons not to overdo the lengthening of the headstay, including a negative effect on mainsail shape.
In light air, the number one adjustment for headstay sag on boats with either deck-stepped and keel-stepped masts is varying the shroud tension. More tension effectively pulls the mast aft—assuming the chainplates are aft of the mast. If the lower shrouds are farther aft, they will have the most effect; on boats with aft-swept spreaders (J/24, J/70, Melges 24), the uppers will have more effect.
The other way to induce headstay sag is to minimize mainsheet tension. If the mast is stiff, trimming the mainsheet will quickly increase headstay tension and reduce sag.
Ideally, in light and puffy conditions, when you ease the mainsheet in a lull, you’ll see the headstay sag to leeward, powering up the sail. If you don’t get that response when you ease in a lull on a Thistle, Lightning or J/70, your shroud tension is too tight.
One other way to check that your shroud tension isn’t too tight is to sight up the aft side of the mast while sailing upwind. If you see a small amount of sag to leeward in the middle of the mast, that’s a good sign that your shroud tension is right.
Easing off the rig isn’t the only way to increase headstay sag. On a Lightning, you can add a block behind your mast at the deck. On a Thistle, you can put wedges under the mast butt. On a Snipe, you can pull the mast forward at the partners. On a J/24, you can move the mast butt aft. And on an Etchells, you can do any or all of the above.
When you sag the headstay, the maximum draft in your jib moves forward. To compensate and keep the draft aft, ease halyard tension, which also creates additional power. If you increase headstay sag but the halyard remains too tight, you’ll get a big “knuckle” in the front of the sail and an entry that’s too deep, so you won’t gain the overall power you’re seeking. You should see horizontal wrinkles in the front of the sail.
What Headstay Sag Does to Sail Shape
When headstay sag is increased, the headsail becomes deeper and more powerful. If your boat is under-powered, this can make a big difference when it comes to developing speed, especially in choppy wave conditions.
The other major effect of increased headstay sag is that it effectively rotates the middle sail, changing angle of attack. The mid-luff of the sail moves to leeward as well as aft. At the same time the mid-leech rotates slightly inboard, similar to the effect of weather-sheeting, which increases pointing ability.
Once the boat becomes overpowered sag can become a liability, which is why tuning guides usually call for more rig tension as the wind increases.
What Too Much Headstay Sag Does To Sail Shape
You can have too much of a good thing. With too much headstay sag the leech will rotate inboard too far, becoming extra sensitive to sheet tension and stalling too easily. Equally problematic, the entry angle becomes too extreme; when you bear off to rebuild speed, you have to sheet out too much to power up the sail.
Another problem is that the angle of attack varies too much at the front of the sail from top and bottom. You may also see a knuckle in the front of the jib, regardless of halyard tension, and the middle of the sail becomes too flat, without generating significant power.
Light Air and Flat Water
Let’s review how this should work in two light-air conditions, starting with flat water. Here, it’s important to create power in the sail plan, and sagging the headstay is the easiest and most direct method to create depth in the jib.
This creates a scenario where the middle of the jib luff has a better angle of attack to the wind and because of that angle of attack and the inboard rotation of the mid-leech, you will be able to point slightly higher without luffing or losing flow over the front of the jib.
When you have this set up correctly, it is as important as ever to make sure the jib leech tell tales are flowing 90 to 100 percent of the time so that the airflow stays attached to the jib. That said, it is OK (and we actually encourage you) to test maximum trim by sheeting in periodically until you see the jib-leech telltales stall slightly, then ease out until fully streaming. This is your jib sheet trim range, which on some boats may be as little as 1” of sheet.
It is important to stay on top of your rig tensions in these conditions and find the settings that work best for your driving style. In addition, make sure you have some mast side sag at the spreaders, which is a signal that the mast is free to bend forward as well as to leeward. Forward bend creates a flatter main that can be sheeted tighter without stalling the leech, which will also help pointing ability.
Light Air and Chop
When chop is introduced into the picture, a loose rig is still good, but you may find that the rig will pump too much as the waves get larger. This is normal, but in order to temporarily stabilize the rig for a set of bigger waves, pull on enough backstay to snug it up. This should minimize the pumping of the rig and headstay and keep a more consistent sail shape through the chop. As soon as the patch of chop is over, release the backstay to put more sag back in the headstay.
On boats that employ in-haulers or weather sheet the jib to increase pointing ability, be careful not to overdo it. The jib leech can become prone to stalling, which can be particularly slow in waves.
We encourage you to experiment, not only with your headstay sag but with your sheeting technique. Keep notes of what works and what doesn’t, and you’ll quickly master the art of headstay sag.
READ MORE
READ MORE

04 February
DEPOWERING & POWERING-UP
SAIL POWER: DEPOWERING & POWERING-UP
By Bill Gladstone
This article is derived from the North U Trim Seminar. North U offers seminars, clinics, books, media, online training, and coaching. Visit NorthU.com to Learn More
In the previous segment we explored sail shape and sail power in moderate air, and how proper shape varies with sea state. In this segment we explore Angle of Attack in moderate air trim and also techniques for de-powering in heavy air and powering-up in light air.
Moderate Air Trim
Angle of Attack
At full power in moderate air we adjust the mix of depth and twist to suit the conditions – adding depth and twist as chop increasing to improve acceleration and create a wider steering groove, or trimming with less depth and less twist for higher pointing and higher speed in smooth water.
Meanwhile we adjust and fine tune angle of attack through steering and traveler to maintain full power, speed, and balance. Much of the time this falls largely to the driver – footing off when underpowered or feathering up when overpowered to keep the boat at full power.
As we push to the high end of moderate air, and particularly in puffy conditions, a helm response alone is not enough. In these conditions playing the traveler is also critical to maintaining proper heel, balance, and speed. (On boats without a traveler there are alternate techniques, covered in Sail Controls, later.) When the main trimmer is doing a great job the angle of heel and helm load will not change – the trimmer will play the traveler as the wind changes, down in the puffs and up in the lulls. When perfectly executed the main trimmer is really driving the boat upwind, with the rudder following along as a trim tab.
Fig. 401 Angle of attack is controlled both by the driver and sail trimmers. Increase power by bearing off or trimming in; reduce power by feathering up or lowering the traveller down. Pulling the traveller up and sailing higher might provide the same speed at a higher angle. It would be worth a try…
Heavy Air
De-Powering
In overpowering conditions sail power can be reduced by reducing angle of attack, by flattening the sail depth, or by increasing twist. Each reduces power, but which is preferred? Often it is best to start to de-power by flattening sails while keeping closed leeches to maintain pointing ability. This is the case as the wind often builds more quickly than the waves, so we get relatively smooth water in a building breeze.
In chop or waves it may be preferred to use twist to control power while maintaining depth for acceleration. If steering is difficult, then de-powering with twist can create a wider, more forgiving steering groove. Most commonly, the de-powering progression would include changes in both depth and twist.
Angle of attack is played moment to moment by the driver and trimmers to maintain speed, pointing and balance at full power: neither overpowered nor under-powered. A core challenge of upwind sail trim is achieving not just the correct total power, but the correct blend of angle of attack, depth and twist; and then adjusting total power and the mix to keep up with ever-changing conditions.
Fig. 402. The boat shows great trim in fresh breeze, with sails flat and twisted, and the traveler down. Note the modest heel and balanced helm. Note also matching shape of the jib and main.
Steering in Waves
When the boat is difficult to steer in the waves that often means it is out of trim. If you’re underpowered as you squeeze up and knocked on your ear as you bear off it is not bad steering – it’s poor trim. Adding some twist and depth will create a wider steering groove and provide more punch to get through the waves. We are often told to steer up the faces and bear off down the backs of waves. We’re going to change that: If the boat is well trimmed it will find its own best path through the waves. You can help by playing the traveler (or sheet if vang sheeting) rather than steering with the rudder.
Fig. 403. For best performance in waves set up with some depth for punch and with twist to provide a more gradual onset and release of power.
Light Air Trim
Less than Full Power
And what about light air, when we don’t have power to trade? When sailing in underpowered conditions we sail with a wide angle of attack to increase power, a deep sail shape for added power, and as little twist as possible without stalling airflow. As we’ve seen in earlier segments, trimming to the wind gradient often requires substantial twist in light air. The wide angle of attack and deep sail shape that add power in light air are also prone to stalling, so substantial twist in needed in lighter winds to encourage airflow and prevent stalling.
Fig. 404. In light air we maximize power with a wide angle of attack, deep sail shape, and just enough twist to prevent a stall.
Re-Powering
In a fading wind the chop will often linger so power is added with depth as the breeze fades while twist is maintained to preserve a wide steering groove.
One final bit
We’ll see more on this theme of Mix of Power throughout the remaining Upwind Trim segments. We’ll also address the balance of power between the main and jib as part of our ongoing mix of power discussion.
Pro Tip (wink wink)
To protect your reputation as a sail trim expert NEVER make a change in trim as the breeze fades. Here’s why:
In a building breeze pretty much any change you make will improve speed, so when you see a puff coming, make a change. The puff hits and voila – performance and your reputation improve.
In a fading breeze, no matter what you do, performance will suffer. If you make a change as the breeze fades then your reputation will suffer along with performance – DON’T do it.
© Copyright Bill Gladstone
READ MORE
READ MORE
24 January
DRAGON CLASS SPEED READING
DRAGON CLASS SPEED READING
A Helmsman’s View
North clients lead the pack to the podium at the 2019 Worlds in Fremantle ©Tom Hodge Media
The Dragon World Championship in Fremantle kicked off the 2019 racing season on a high note for North Sails, with North customers making it a clean sweep on the podium claiming Gold, Silver and Bronze medals.
We talked to Grant Gordon, Silver medalist and first owner-driver about his campaign build up, crew and choice of equipment.
Team Louise Racing, second place finishers ©Tom Hodge Media
You have had a fantastic 12 months in the Dragon class. Tell us about your year and setting up the campaign?
The 2018 season saw our team change format to sail four up on our Dragon. The first step in this process was to scout for talented sailors, and we soon identified two excellent additions to the team. Jimmy Williamson joined us as jib & spinnaker trimmer and Sophie Weguelin in the role of bowman and extra pair of eyes on board. Ruairidh Scott, with whom I have sailed regularly, continued in his key role of tactician and mainsail trimmer. Spending time on the water would unmistakably be critical, and we teamed up with my friend and former Dragon World Champion Klaus Diederichs and the FEVER team. Together we ran a two boat training camp on Lake Garda; which was an ideal venue to prepare for sailing in Fremantle.
Your speed this year has been regularly commented on by fellow competitors. Can you explain a little about how you have achieved this so consistently?
Naturally, we have worked on tuning the rig using the North Sails Tuning Guide as a start point which gives you instant speed out the blocks. From there it’s just fine tweaks in changing winds and sea states as well as finding the optimal trim settings for the sails depending on the conditions. Making sure the boat is well balanced is critical so you can avoid using any unnecessary helm adjustments. As helmsman, I have focused on finding the right heel angle upwind and working with the trimmers to maintain this. Through our training time in Lake Garda, we were able to find trim settings which worked for us and allowed us to be fast consistently.
©Tom Hodge Media
What sails/equipment did you use and why?
We took delivery of a new Pettricrow V6 Dragon in February 2018. Once the mast was tuned correctly, we were confident that we had an accurate platform to build on. The North sail inventory is made of standard production sails, including an A-7+ Mainsail, R-5 Spinnaker, and V-6M and V-6H Genoas. The heavier wind conditions in Fremantle most often favored sailing with the Heavy Genoa. The combination of the A-7+ Mainsail and V-6H Genoa was very fast in the 14-22 kts wind range we often raced in Fremantle. We have also been equally fast with the V-6M medium Genoa in other venues throughout 2018.
What would be your top tip be for success in the Dragon class?
Assemble a team of talented sailors who respect each other and sail together as often as possible. During training, work hard to address your weaknesses. During the race, when the going gets tough, never give up; it isn’t over until you have crossed the finishing line!
©Tom Hodge Media
2019 Recommended Inventory
North Sails has been prominent in the class for many years. We are trusted and supported as our sail products are well developed. Our clients finished first through fourth overall at the 2019 Worlds, all using North Sails Mainsails, Genoas and Spinnakers which speaks for itself.
Louise Racing’s recommended products are: A-7+ Mainsail, LM-2 Mainsail, V-6L Genoa, V-6M Genoa ,V-6H Genoa, BR-9 Spinnaker, and the R-5 Spinnaker.
To upgrade your racing program to World Championship winning sails, contact your local Dragon expert for more information.
©Tom Hodge Media
READ MORE
READ MORE
14 January
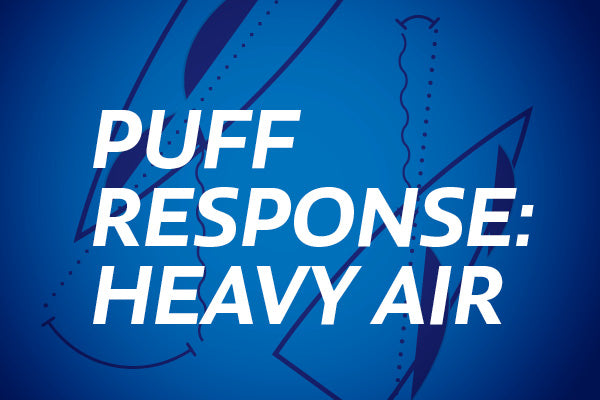
PUFF RESPONSE UPWIND IN HEAVY AIR
PUFF RESPONSE UPWIND IN HEAVY AIR
By Bill Gladstone
This article is derived from the North U Trim Seminar. North U offers seminars, clinics, books, media, online training, and coaching. Visit NorthU.com to Learn More
Proper response to a puff is critical to optimum performance in variable conditions. In our previous segment, Puff Response Upwind, we covered the best response to a puff in moderate air. In this segment we’ll look at Puff Response Upwind in Heavy Air.
Heavy Air vs Moderate Air
We’ll start by drawing a distinction between heavy air and moderate air: In light to moderate conditions as the wind speed increases our boat speed increases. We define Heavy Air, at least for the purposes of this article, as winds where an increase in wind speed does not result in an increase in upwind boat speed. Many boats cross this threshold around 15 to 20 knots True Wind Speed.
Fig. 1: As the wind increases in heavy air our boat speed does not.
The Puff Hits
As a puff hits the True Wind increases (“GUST!”). The stronger True Wind creates a stronger Apparent Wind and a wider Apparent Wind Angle. The best response is to trim sails to match this wider Apparent Wind Angle – usually by lowering the traveler. The trim response maintains a balanced helm and consistent angle of heel.
It can be helpful if crew looking upwind can call or count down the arrival of puffs so the main trimmer and driver can be ready (“Puff in 3-2-1!”).
Ideally the jib would be eased in concert with the main but in reality that can be hard to do – and even harder to retrim. On boats where you can play the jib it can be very fast. J22s come to mind as one boat where the jib and main are both played through the puffs. See Figure 2.
Fig. 2: A puff results in stronger Apparent Wind and a wider Apparent Wind Angle. The proper initial response is a change in trim – lowering the traveler (or making other adjustments) to match the new wind angle.
Acceleration – NOT
The trim response maintains a balanced helm and consistent angle of heel. In heavy air we then feather up to point a little higher. Feathering up will push the apparent wind forward… See Figure 3.
Fig. 3: As we feather up in the new wind the apparent wind moves forward and we can re-trim.
Limits
You can feather up in puffs to a point… but your rig can never outpoint your keel. At some point you’ll be lowering the traveler (or adding twist or… see below) and leaving it down.
Wasted
If we don’t respond to the puff with a change in trim then we waste the energy of the puff in heeling force, weather helm and leeway rather than take advantage of it with a smooth feather up to a higher angle.
More…
Why a Trim Response? Why not just feather the helm?
Why not just feather through the puff? Because a Trim Response is faster. A trim response maintains a balanced helm and reduces leeway. A feathering response gives you a brief bit of height (usually accompanied by more heel and leeway). In actual practice your response will likely be a combination of both trim and feathering. Feathering alone will not be fast or sufficient in most conditions.
Why use the Traveler?
In this depiction we use the traveler to respond to a puff. Lowering the traveler reduces angle of attack. This is often the preferred method on a moderate displacement keel boat.
Alternatives to the Traveler
On some other boats – for example high performance boats with square top mains and high aspect keels, and on multi-hulls – it is more effective to play the mainsheet and change twist. On still others – for example, Etchells – a big pull on the backstay is very effective.
Some boats use “Vang Sheeting” (where the mainsheet controls angle of attack) and respond to puffs by playing the main.
Which is Best?
Snappy Answer: Whichever is fastest.
Longer Answer: You’ll have to test to see what works best on your boat; but the bottom line is that a Trim Response is preferred to just feathering/ steering through the puff.
Puff Response in Heavy Air
In actual practice your response will likely be a combination of trim and feathering. Feathering alone will not be fast or sufficient in most conditions.
© copyright Bill Gladstone
READ MORE
READ MORE
10 January
FULL POWER & MIX OF POWER
SAIL POWER: FULL POWER & MIX OF POWER
By Bill Gladstone
This article is derived from the North U Trim Seminar. North U offers seminars, clinics, books, media, online training, and coaching. Visit NorthU.com to Learn More
In our first segment we defined the three sources of sail power: Angle of Attack, Depth, and Twist. Segment two focused on twist and the impact of twist on performance.
In this segment we address how our three sources of power combine to create our total power, how we add and reduce power to match the conditions, and how we can change not just the total power, but the mix of power. Later segments will explore the relationship between the main and jib and also describe how each of our sail controls impacts shape and power.
Optimum Performance
Each sail gets its power from a combination of angle of attack, depth and twist. It is time to explore how these combine and how we can adjust both the total and the mix of power to optimize performance in different wind speeds and sea states.
Total Power, Full Power, Mix of Power
Our first goal is to get to full power – neither overpowered nor underpowered. Full power means the crew are fully hiked, the boat has its designed angle of heel, and the helm is well balanced and easy to steer.
Fig. 301 Our total power is the sum of power from each source: Angle of Attack, Depth, and Twist.Once we are at full power we can fine tune to suit the conditions. Here are a few generalizations to help in finding the best mix of power.
First, understand that we can trade one kind of power for another. We can add power from one source, reduce from another and have the same total but a different mix. For example: Adding depth adds power while adding twist spills power. By adding depth and increasing twist we can get the same total power, but a different mix.
Fig. 302 On the left, trimmed flat with little twist. On the right, a deeper (more power), more twisted (less power) shape. Same total, different mix.
Moderate Air Trim
By moderate air we mean enough wind to get the boat to full power – as described above, this means, the crew fully hiked and the boat sailing at its designed angle of heel, and the helm balanced. On most boats we transition from light air to moderate in 6 to 7 knots of true wind speed. Some boats need more, some less. Once we are at full power we can fine-tune performance by changing the mix of power. Here’s what we mean:
Waves or Chop
In wavy conditions a deeper more twisted shape is preferred. The extra depth provides power to punch through the waves and better acceleration to build speed as each wave slows the boat, while the extra twist provides a wider steering groove and is less prone to stalling. The waves make a narrow course hard to hold, and each wave slows the boat, so we are constantly accelerating.
The downside is a slight compromise in pointing ability compared to smooth water sailing. But remember: you’ll never point if you are slow. Speed First.
Similarly, coming out of a tack our sails are initially trimmed with extra twist to ease flow at a wider angle of attack, and with extra depth for acceleration, with final trim coming only as the boat accelerates to full speed and is brought up to a narrower, high pointing angle of attack.
Smooth Water
In smooth water and that same full power wind speed we trim with less twist – adding power and pointing ability – while sailing with a flatter sail – reducing power and drag. We have the same total power, but a different mix.
The downside to flat sails with little twist is a narrower steering groove and poor acceleration. In smooth water we can sail in a narrower groove, and once we are up to speed we won’t be slowed by waves. It only works if you can sail to it; you won’t point well if you use high pointing trim in unsuitable conditions. You’ll just stall and go slow.
Fig. 303 As conditions vary across the spectrum of smooth to choppy we can fine tune our mix of depth and twist.
Across the Spectrum
We’re rarely in perfectly smooth or ferociously chopping conditions. Mostly we sail in something in between. For best performance we’ll adjust the mix of depth and twist to suit the prevailing conditions while maintaining full power. The differences are nuanced and often the performance advantage is small… but critical. The difference between good and great, between mid-fleet and winning is just a couple percent and is often comprised of several things each contributing fractions of a percent. Never relent. Every little increment matters. It adds up.
Fig. 304. Across the spectrum, from flat with little twist to deep and twisted. We do most of our sailing in the middle, making incremental changes as wind and sea state fluctuate.
Next Time…
In our next segment we’ll look at the role of Angle of Attack in upwind performance and look at de-powering in heavy air and powering-up in light air.
© copyright Bill Gladstone
READ MORE
READ MORE
19 December
NAVIGATING THE SYDNEY-HOBART
NAVIGATING SYDNEY-HOBART
Australian Summers Make For The Ultimate Offshore Experience
© Kurt Arrigo / Rolex Sydney Hobart
The Rolex Sydney-Hobart Race is one of the classic yachting events on the annual race calendar, arguably the most famous and difficult race taking place in the Southern Hemisphere. Its reputation is well deserved, giving all who enter it numerous challenges – not only in the level of competition the race draws, but also with many hurdles brought by Mother Nature. These environmental challenges take the form of fast changing and often strong winds, squalls, complex ocean currents, and potential for extremely rough, boat-breaking sea conditions. All that on top of what is often a more than 20 degree Celsius drop in air temperature from balmy Sydney to cool Hobart.
Navigators of the race watch typical wind patterns of the Australian summer: a semi-permanent high pressure to the east over the Tasman Sea, and another over the Great Australian Bight west of Tasmania. Air flows anti-clockwise around these high pressure systems, which means there is a tendency for northerly winds off the Sydney coast and southerly winds west of Tasmania.
Between these two high pressure areas there is normally an extension of the thermal low pressure from the hot interior of Australia, extending into NSW and pointing toward the Bass Strait.
The patterns described above represents the average – that is, what you get if you average the weather maps over a long period of time in the Australian warm season. However, the actual weather on any given day is the result of modulations on the average pattern and disturbances (weather systems) embedded within the larger scale.
SOUTHERN OCEAN CHILL
One such important and common disturbance involves the northward intrusion of cold air out of the Southern Ocean. When cold air pushes north toward Tasmania, the Bass Strait, and southeastern Australia, some very abrupt and severe changes can result. Ahead of the cold fronts which mark the leading edge of a cold push, winds typically build from the north along the coast. Sometimes thunderstorms can develop over the hot interior of NSW and move east into the course from Sydney and south to Green Cape. Such storms have generated spectacular waterspouts on the course – an encounter with which is not only memorable, but potentially very dangerous.
“Being ready to weather strong upwind sailing and very rough seas in the wake of a S’ly change are a must for any crew and boat taking on this race.”
As a cold front moves north and east across the race route, fast running conditions down the coast abruptly change to hard, very rough, upwind conditions. Not to mention the fact that squalls and much cooler air make sailing more difficult. These post-change encounters are a make or break point for some teams. Being ready to weather strong upwind sailing and very rough seas in the wake of a S’ly change are a must for any crew and boat taking on this race.
TRICKS OFF TASMANIA
Further down the track from crossing the Bass Strait to east of Tasmania, winds are no less challenging. Large ocean swells are common crossing the strait, and Gale or Storm force winds can occur – especially in the day or two following a front. Off Tasmania, winds can run the gambit from strong to exceedingly light. One certainty of sailing off Tasmania is that the wind will change. The weather patterns there are fast moving and can behave erratically. An area of no wind can exist within hundreds of meters of gale force gusts. Understanding how conditions will change and making a correct call at the last moment can make the difference in almost any team’s race.
SURF OR SWIM
Another important factor in the strategies for this race is often the East Australian Current (EAC). The EAC is a western boundary current similar to those found on the east coasts of most continental land masses around the world (Gulf Stream off North America; Brazilian Current off South America; Agulhas Current off South Africa, and; the Kuroshio off Asia). The EAC is a generally south-flowing current off the coast, typically extending from north of Sydney to the Bass Strait and off the east coast of Tasmania. While the current is always present in one form or another, its speed and position relative to the course can vary significantly. In addition, tight swirls or eddy’s are typically present in proximity to the main current flow, and can result in areas of rotating water over ten miles wide, often delivering the opposite of what a skipper may expect.
While the current doesn’t change much on a day-to-day basis – unlike the weather – it does vary over a period of weeks. Sometimes it is close to the coast and within reach of the fleet to take advantage of its southward flow. Other times, it is further offshore, and sailing out to it can be a gamble whether or not the favorable flow will be enough to offset the extra distance necessary to get to it.
There is also a potential significant downside to being in the current – even if it is within reach. When winds are blowing from the south, very large and steep waves can develop within the EAC which can, at a minimum, slow progress or, in the worst case, be boat-breaking. Anytime there is a southerly change and strong upwind conditions in this race, sea state within the EAC is a significant factor.
The crews will be closely monitoring the weather forecasts and EAC condition in the days leading up to the race. While the forecasts can be reliable, it is often the small differences that are more difficult to predict. That will combine with the level of seamanship on-board to determine how well a team does.
“Having a fast boat and sails are of course a bonus, but being ready and able to handle whatever the weather and sea brings will make the difference.”
Chris Bedford is a well known sailing meteorologist and has advised many professional teams on inshore and offshore race routing, including the Abu Dhabi Ocean Racing 2014-2015 Volvo Ocean Race team. Read more from Chris at sailwx.com
Contact your local North Sails experts to get your sails inspected and ready to take on the big race!
READ MORE
READ MORE

07 December
A-CLASS SPEED READING
A-CLASS SPEED READING
Training, Sail Design & “An Attitude Of Continued Learnings”
© Gordon Upton / guppypix.com
Glenn Ashby still remembers his first A Class catamaran sail like it was yesterday. “It was 1995 and it was only a 10-minute sail on a lake,” he says.
“I couldn’t get over how smooth, efficient and fast the boat was. I’ve really enjoyed the boats ever since.”
Not only has he enjoyed them, the 41-year-old sailor has been the most successful sailor in the class, bar none, upgrading his skillset as the singlehanded cats evolved into full-on foilers. In November 2018, at Hervey Bay, Australia, Glenn won his 10th A Class world championship title, adding to his collection of eight world titles in other classes plus an Olympic silver medal.
There might’ve been more world titles by now, but the talented Australian got side-tracked a few years ago, joining the Team New Zealand America’s Cup effort and winning that little-known trophy in 2017 as skipper of the team’s foiling AC50 in Bermuda.
Glenn has again signed on with TNZ as America’s Cup defender, but recently engaged in nearly a month of cross-training in the A Class, which he says is “the highest performance single-handed catamaran class in the world.” He brought along two of his TNZ teammates, Blair Tuke and Peter Burling, and they spent two weeks training on Port Phillip Bay at McCrae Yacht Club.
“It was intense,” Glenn says. “Full-on. Long days on the water and a lot of boat work. We were also learning how to foil-jibe the boats—the kind of homework best done before the regatta.
“Two days into the training, Pete and Blair were already going really well, and as they are very talented they were pushing hard immediately and we learned a lot of things very quickly working intensively as a group on and off the water.”
© Gordon Upton / guppypix.com
Despite winning six of the nine races sailed at the championship in November, the win didn’t seem easy. After three wins on the first day, Glenn was annoyed with his 5-1-3 the second day:
“Normally I’m happy pushing the boat hard and not backing off,” he says, “and I probably was sailing a little too conservatively. When you start thinking, ‘I don’t want to capsize here or damage the boat,’ you don’t get the ultimate results. That was a great lesson for me. I gave myself an uppercut to the jaw and carried on.”
Glenn finished out the regatta with a 3-1-1 and won with half as many points as second-place finisher, Mischa Heemskerk. Tuke and Burling finished third and fourth, respectively. (Results)
“There’s a fine edge with A Class boats. Sometimes you find the other side of the line and have a wobble and have to use 110-percent of your skills and knowledge to keep the boat upright or stay on the boat! I feel at times it is somewhat like racing bikes or cars where you don’t want to really exceed your skill level and rely on luck to keep in control. You don’t want to be pushing yourself outside of your comfort zone for your skill level when on the ragged edge, but you have to be all-in when racing and know where that line is and be close to it. You have to get to that level to get best performance out of your machine or vessel. Good results generally come from doing your homework very well and pushing hard during training. Couple this with learning your settings and understanding your equipment means you are in good shape to complete the exam!”
“Our training for sure gave us a step up,” Glenn continues. “The work with Pete and Blair and Ray Davies as coach and over seeing performance, set us up for one of us to have a chance of winning I feel. I was very happy and proud to have had this opportunity to work with the boys with the blessing of everyone at ETNZ. It was a great team effort again. ”
Glenn has designed and produced sails under his own label for many years and says with “limited time” these days for sailmaking, the opportunity to develop a relationship with North Sails was timely. He says,
“I do all the design work for the sails that are produced and North have been fantastic at producing them under their banner, and together we’ve had a strong relationship since day one. The partnership works well for us as I can’t put time into physically manufacturing sails these days. North has been able to continue to provide top level, high performance race sails and also added marketing, sales and customer service to my signature line range.”
© Gordon Upton / guppypix.com
Starting with his standard sail from a couple years ago, Glenn says, “I worked on a new direction and designed the DS2, which I felt was well-suited to a wide range of body weights, but specifically the 73- to 83-kilogram range. With adjustment to the spreaders, prebend in the rig and batten tensions, I could be as fast in the low end of that weight range as others near the top.
“For this year, I developed the DS2-F design with reduced luff curve and slightly different mold shaping for lighter-weight sailors, which was very solid for upwind foiling. Everyone with North Sails who used those in this regatta had a good experience with their performance —if they got off the starting line well, they were right up at the front.
“Our philosophy this year has been to target intensely the upwind foiling aspects of where the class is now. The challenge is to make a sail that also works really well in displacement mode (upwind under 10 knots). The goal is to accelerate quickly up to speed and then when foiling have a shape that’s quite clean at high apparent wind speeds as well as being able to morph into a nice aero package for downwind sailing.
© Gordon Upton / guppypix.com
“We made a lot of changes in the bottom half of the sail. I needed to make sure that part of the sail was driving hard and also really working well when doing high boatspeed numbers. Keep in mind that at 16 to 20 knots boat speed upwind in 14 to 18 knots of true wind, your apparent windspeed can be up to 30 to 35 knots across the deck.
How important is Glenn’s use of the A-Class in cross-training, first with his Olympic Tornado campaigns and more recently with the America’s Cup?
“It’s been really important,” he says. “The knowledge and practical learnings and lessons you get from sailing high-performance boats are key, especially because the class has had such rapid growth and is continually evolving. It’s great for the brain and forces you to think outside the squares. It’s taught me to be open-minded and willing to take on new ideas.”
A good example of this occurred before these recent world championships.” We have an attitude of ‘continued learnings,’” Glenn says. “Not too many people were aware that we completely changed our rudders, daggerboards, and elevators between the Australian Nationals and the Worlds, which started two days later. Our experience gave us the ability to test the new equipment, decide it was better, measure it in, and not be scared to make the change.
“The new foils gave us a step up in global performance. The new daggerboards I felt weren’t much different upwind but downwind they were a little better at times. The elevators were fractionally longer than standard, but we felt they were a gain, too—it’s all the half-percent gains added together that can give you the edge.”
© Gordon Upton / guppypix.com
READ MORE
READ MORE
21 November
VIDEO: FLYING SCOT SAIL TRIM
FLYING SCOT MAINSAIL TRIM WITH ZEKE HOROWITZ
Video With Tips and Advice on How to Trim the Mainsail on a Flying Scot
We’ve all heard it one hundred times…. “Boat speed is King.” That’s all well and good but how are we supposed to know how to achieve it?? In this video with North Sails expert Zeke Horowitz, you’ll be able to see and learn how, when, and why to play the controls on your mainsail while sailing upwind.
The key is to remember that sail trim needs to be dynamic – you need constant tweaks and adjustments to keep the boat moving as fast as possible for as long as possible.
You’ll learn to develop a short checklist based on feel and visuals so that you’ll know what needs to be adjusted and when. The important elements to check on for proper mainsail trim are:
Feel on the helm
Heel of the boat
Leech tension/twist
“Speed wrinkles” in the lower 1/3rd of the sail.
You want to generate the right mix of all of these elements with a dynamic trim approach so that you can sail with the boat as flat as possible, as steady as possible (constant heel angle), and at as high a pointing angle as possible without losing center board flow.
Boat speed is King and it’s just that simple. 😉
We would like to thank Eric Bussell and the Flying Scot Class for the opportunity to be involved in making this video.
READ MORE
READ MORE
19 November
VIDEO: TACKING ON A FLYING SCOT
TACKING ON A FLYING SCOT WITH ZEKE HOROWITZ
Video With Tips and Advice on How to Tack on a Flying Scot
Nailing a perfect tack is often the difference between getting that first cross off the starting line, sneaking it in at a weather mark layline, or being able to pinch off a boat just before the finish. Tacking your Flying Scot can have a lot of variables based on the specific conditions you’re sailing in or the exact scenario you’re in. Practice makes perfect, and as you continue to improve you’ll be able to dial in the subtle nuances of all of these variables.
There are a couple of keys to focus on and practice so that when the time comes to execute the perfect tack, you are prepared and ready to nail it!
Try to bring the main sheet in a bit as you start to turn up at the beginning of the tack. This helps the boat turn up without using as much rudder.
Then, ease the main sheet as you go through the tack so that the main sail is slightly eased and in acceleration mode once you get onto the new tack.
Keep your eyes forward on the jib tell tales so that you can hit the proper exit angle.
Get comfortable with your hand switch so you don’t feel rushed.
Finally, understand the feel of the boat in terms of heel/roll so that you can decide when and how quickly to cross sides to keep the boat as steady as possible.
In this video, listen to North Sails expert Zeke Horowitz as he provides tips and advice on how to tack on a Flying Scot.
We would like to thank Eric Bussell and the Flying Scot Class for the opportunity to be involved in making this video.
READ MORE
READ MORE
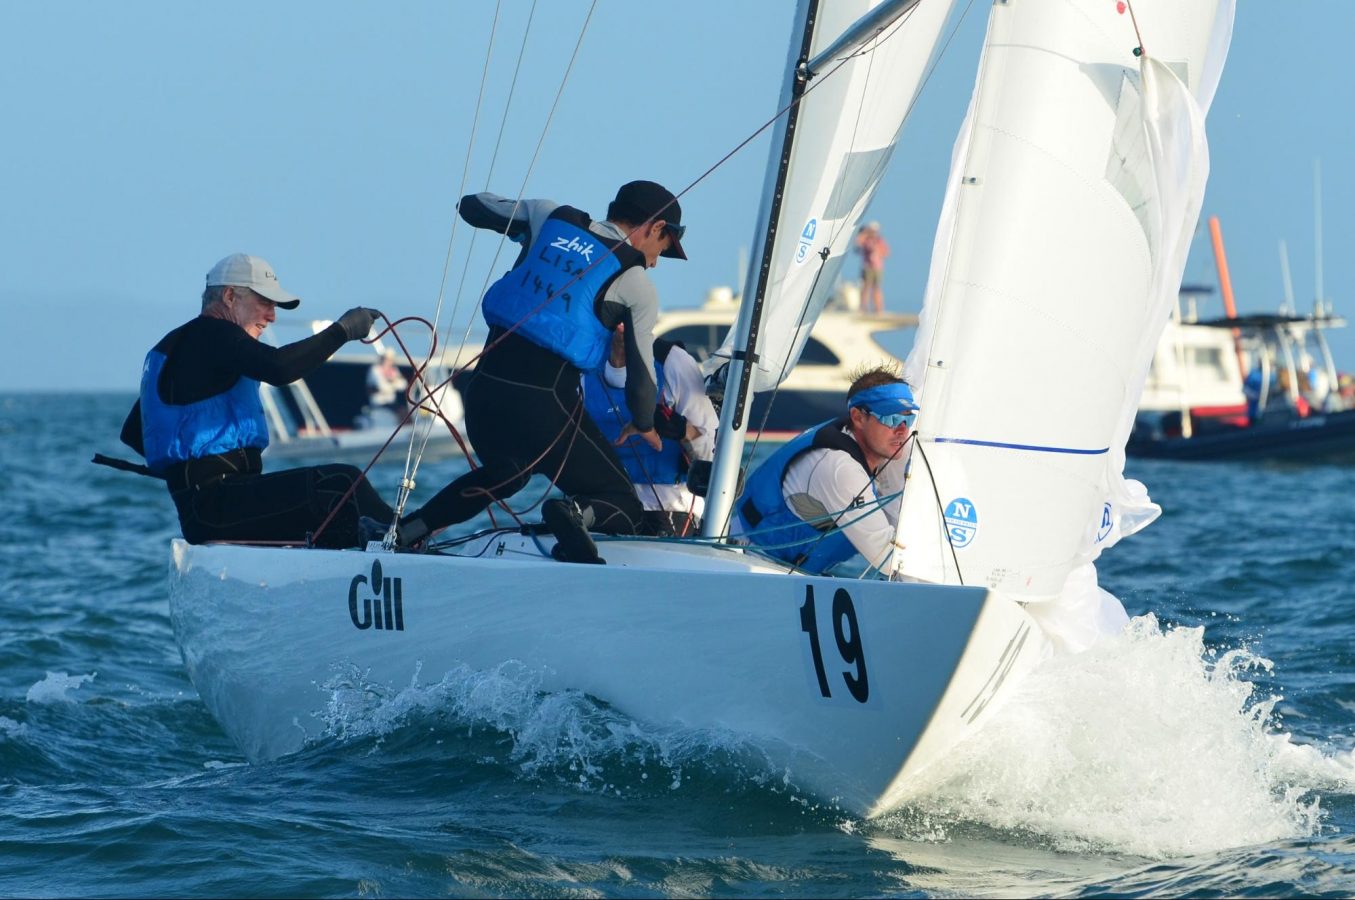
16 November
ETCHELLS WORLDS SPEED READING
ETCHELLS WORLDS SPEED READING
New World Champion Martin Hill Shares Victory Insights
© KJW / Etchells Worlds Brisbane 2018
Sailing in a 94-boat fleet that’s stacked with past world champions, Martin Hill didn’t have high expectations on his chances of winning the 2018 Etchells Worlds in Brisbane, Australia. But after a 6th-place finish at the 2017 Worlds and some strong results earlier in 2018, Martin and mainsheet trimmer Julian Plante were joined by Sean O’Rourke as a new bowman and Olympic 470 medalist Mat Belcher as new tactician and the combination began to click.
The team’s speed, decision-making, and fleet management was excellent in the first two races; both times, their boat, Lisa Rose, rounded the first mark in the lead and earned second-place finishes. “In the opening race, when we rounded the weather mark,” Martin says, “I thought, ‘Game on!’”
Yet a world championship spans six days and nine races, and the Lisa Rose team had to evolve to emerge at the top of the field on the last day. What were some of the keys?
© KJW / Etchells Worlds Brisbane 2018
Making the most of individual abilities
“We developed a nice chemistry, with each person respecting each others’ ability, ” Martin says, describing how each team member worked with him to shape their boat speed and tactics. “Julian, on the mainsail upwind, would manage our mode—high and slow or fast and low. Sean was on the kite sheet downwind, calling when to sail lower and higher. And in a tactical situation, Mat would say, ‘My boat’ for the short term, such as when calling for a lee-bow tack.”
“I knew instinctively that Mat would be really good,” Martin adds. “I always admire people in the 470 class and how good they are in the chess game they play. I had previously sailed with Malcolm Page, so I’ve had a long history knowing them.”
Sailing in sync with the waves
“After the first two races, we were leading the event,” Martin says. “It was pretty exciting. But we were a little bit concerned about our running. In the first race, Ian Murray jibed and got by us downwind, and in the second, Lawrie Smith. In another race, on the third day, we were third to the top mark and dropped down to sixth.
“We began looking at drone footage of the racing in our morning debriefs and watched how other people were sailing downwind. We saw a combination of things. We had been sailing pretty aggressively in the waves and realized others weren’t as aggressive—they were sailing more in sync with the waves. There was a time to push hard down the waves and a time to be more coordinated between me and Sean, the kite trimmer, plus use a bit of crew kinetics.
“We also thought our VMG kite was underrated,” Martin says. “We found we could use that and sail deeper with the pole forward. Using the runner, you’d think you could sail deep, but we feel the VMG was the sail to work with in those conditions.”
© Emily Scott Images
Starting strategy modified
The starting line was 1.2 kilometers long, so choosing the correct end could pay off big, as it did in the first race when Lisa Rose started towards the right-hand end and benefitted from a persistent right shift. But a 49th in the fifth race convinced the team to be more conservative.
“Early in the regatta, we looked for leverage on the line,” Martin says, “but later we came back to what Olympians do to reduce risk by starting near the middle where fleet density wasn’t too great. That way we could play both sides, even in a big field.”
For the final race, the strategy changed again. “We made sure we stayed with Mark Thornburrow’s Racer C,” Martin says. “With 94 boats, a lead could disappear in a heartbeat. They picked the favored starboard end and after a general recall, we both stayed there and got a great start to leeward of them. Mat is in a class of his own—we knew there was a persistent shift to the left and our plan was to sail slow and high. It wasn’t aggressive, it wasn’t match racing. We just knew we had to get across to the left and we did.”
Lisa Rose finished sixth in the last race with Racer C in 10th. The final margin between first and second place was 17 points.
More information on starting strategies can be found here.
© Emily Scott Images
Sail choice on the edge of development
The Lisa Rose team had been involved with a Tom King-led North development program involving a radial main and radial jib designs. The team chose to sail the Worlds with two radial jibs, although the heavier sail stayed mostly in the bag. “We were very impressed with the lighter sail,” Martin says. “It’s more suitable in light-medium than lighter air, and it needs more development. But it was good for this regatta. It gave us awesome speed in medium-bumpy conditions.”
“Julian Plante had been a long-time North sailmaker,” Martin says. “His job was speed and he knew we needed to be conservative with our sail choices. We went with standard spinnakers, but Julian agonized over which mainsail design to use. We ended up going with North’s PC+ mainsail because we expected a lighter regatta—and it was best when the breeze dropped a bit.”
“We used what North had and it delivered,” concludes Martin. “Julian was conscious of working with what he was familiar with. You can’t get too far from North’s test bed over so many regattas. Their sails have been successful for a reason.”
Final words
“We had a great chemistry of openness and working together with a goal,” Martin says. “I have an incredible sense of relief and satisfaction. The other day Julian called me and said he had a dream we were world champions. And it’s true!”
READ MORE
READ MORE
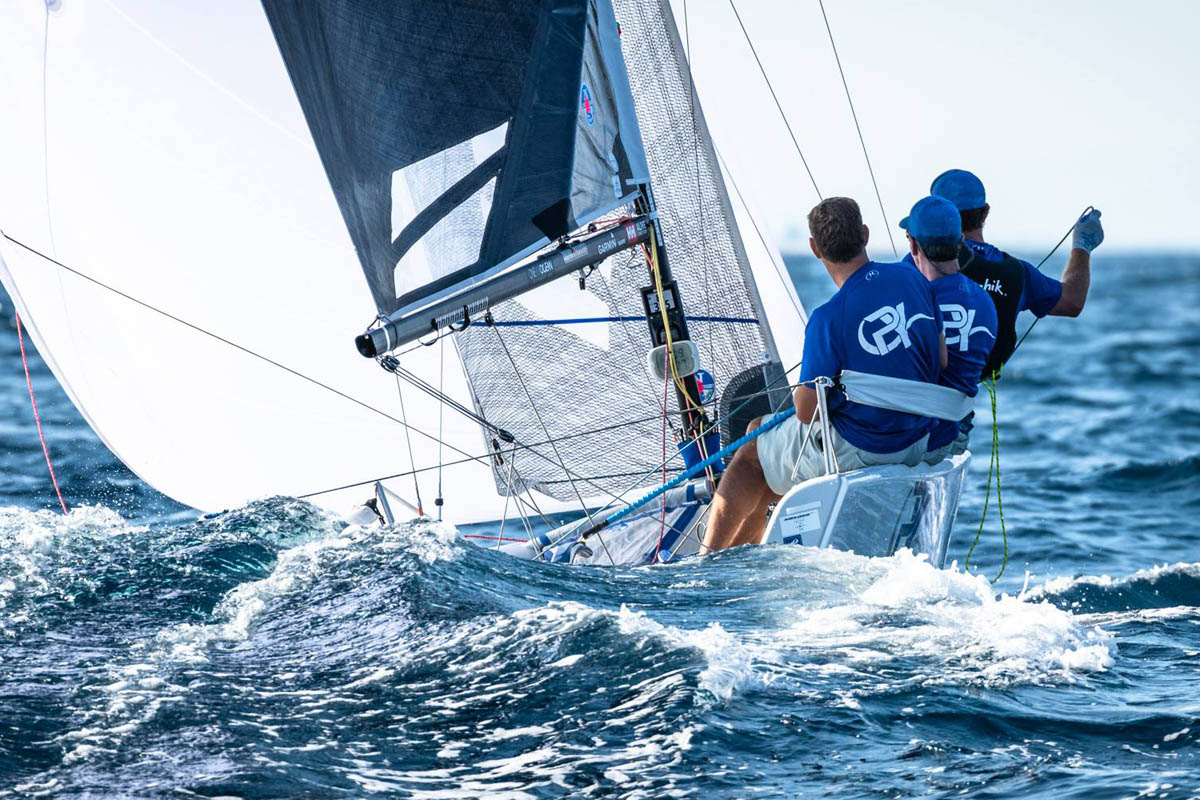
02 November
MELGES 20 SPEED READING
MELGES 20 WORLDS: SPEED READING
Two-time World Champion Drew Freides Shares His Views on Winning Speed
The waves were bumpy and the wind was hard to read at the 2018 Melges 20 Worlds in Cagliari, Italy. That put a premium on speed at all times for the crew of Pacific Yankee, which earned its second championship title in a row.
Racing in a tough 38-boat fleet, Drew Freides, Morgan Reeser, and Charlie Smythe won the last two races to earn the title by a point. What made the difference?
Skipper Drew Freides credits his teammates, coaching, planning, and preparation, and says one key, after winning the 2017 Worlds, was adopting the attitude, “We’ve got to improve because everyone else is going to improve.”
“One thing I’m good at is that I’m scared of failure.” Drew says, “so I’m never content. I always feel like someone’s going to pass me and be better.”
Build a Speed Matrix
“Over the year, we focused on a matrix for boat setup,” Drew says. “Vince Brun, our coach, was maniacal about it. When we’re racing we don’t want to think about boat setup—we want to focus on sailing well and sailing smart. The matrix is marked as number of turns on and off the uppers and the diamonds and is easily repeatable. We developed ours by starting with the North Sails Tuning Guide, and it evolved from there based on our work with sail designs and our observations.”
“We always put the rig back to base setting at the end of the day,” he adds. “Sometimes we check measurements with calipers and once in a while with a tension gauge.”
Think “Dead Stick” and “Unload the Boat”
Drew says to go fast the boat can’t be loaded. It should have more of an “easy” feel. “On our boat,” he says, “Morgan is focused on tactics, and Charlie on speed, but Morgan is holding the mainsheet. When we wanted speed, Charlie would say to him ‘free it up,’ meaning to unload the boat. We’d go for a flatter mode for the sails, put the bow down, and get it ripping. When we wanted height, I’d ask for more load on the helm, which meant more leech tension, rounder sails.”
“The boats are tippy, and heel is your enemy. You’d be surprised how much the boats heel. You really want the tiller to feel like a “dead stick”…the less feel we had, the faster we went. It takes time getting used to it.”
“The upper shrouds on a Melges 20 are on cars,” says Drew. “Charlie spent a ton of time adjusting uppers, forward and back. We would set ourselves up going off the starting line with the car forward. We’d go a tenth or two slow, climb and build our hole, then once we were in clear air, we would move the cars back and put the bow down. Once you get the boat going fast, it points high on its own.”
Upwind in Lumpy Conditions
At Cagliari, Drew says, “it got very lumpy, which put a premium on accelerating and rebuilding speed quickly. We needed a good balance of sail depth for power, but not so much that we couldn’t put the bow down and go.
“On the second to last day, port tack was brutal. We had a great setup and could put the bow down and rip up to 5.9 knots. When you hit waves, it was important we were already going fast and not trying to climb. If Charlie said, ‘Bad set coming,’ Morgan would ease the main and I’d bear off. If Charlie said, ‘Flat spot,’ Morgan would sheet in and we’d start climbing. The biggest gains to be made were in terms of height, but that’s only because we were already going fast.”
Same Speed and Lower, Downwind
“The goal downwind was to sail the same speed but lower,” says Drew. “ When it got lighter, it was an uncomfortable low mode. With spinnaker sheet in his hand, Charlie coached me how low we could go. We were constantly looking to soak and never have the boat loaded. We never had enough wind at the Worlds to sail higher and get beyond lazy planing.”
“Some thought we had special sails, but for the record, we used North’s R-2 and V4-2R, off the shelf. We used the V4 more than you would think, down the wind ranges, because it let us heat it up and get onto some of the waves. The R-2 is not as comfortable reaching so we sometimes used the planing chute even though we were trying to soak low.”
Read more about Pacific Yankee’s victory at the 2018 Worlds
“In the 8- to 12-knot range when not overpowered, use rounder sails and hike really hard. We were sometimes too quick to depower.”
READ MORE
READ MORE
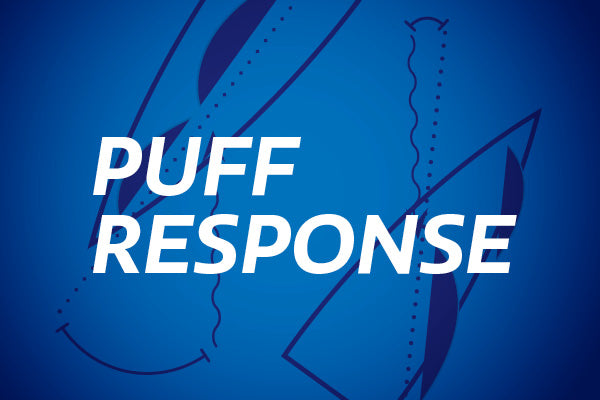
02 November
PUFF RESPONSE UPWIND
PUFF RESPONSE UPWIND
By Bill Gladstone
Proper response to a puff is critical to optimum performance. The best response is a change in trim to match the changing apparent wind angle. Here’s why:
Apparent Wind
We’ll start with our wind triangle before the puff hits. Figure 1 shows how apparent wind is the vector sum of Boat Wind and True Wind.
Fig. 1: Apparent Wind is the sum of True Wind and Boat Wind.
The Puff Hits
When the True Wind increases (“Puff!”), it creates a stronger Apparent Wind and a wider Apparent Wind Angle. Trimming sails to match this change usually means lowering the traveler, which is the fastest way to maintain a balanced helm and consistent angle of heel.
Fig. 2: A puff results in stronger Apparent Wind and a wider Apparent Wind Angle. Drop the traveler to match the new wind angle.
Acceleration
Once the boat’s helm is balanced again, the boat then accelerates to match the new wind speed. That moves the apparent wind forward, so then we need to re-trim the sails again.
Fig. 3: As the boat accelerates with the new wind, the apparent wind moves forward and we need to trim in again.
Wasted energy
If we don’t change sail trim in response to the puff, its energy is wasted in heeling force and weather helm rather than being turned into acceleration. The boat may eventually accelerate – after making leeway – but by then all of the more responsive crews will have jumped ahead.
Why change trim? Why not just feather the helm?
Trim Response lets you accelerate more quickly. Feathering (heading up, to reduce heel angle) will give you a brief bit of height, but that is usually offset by more leeway. Changing sail trim gives you speed, and speed then gives you height.
Why use the Traveler?
Lowering the traveler reduces angle of attack, which is the preferred trim response on a moderate displacement keelboat. On higher performance boats or multihulls, especially those with square top mains and high aspect keels, it is more effective to ease the mainsheet to adjust twist. On some boats – for example, an Etchells – a big pull on the backstay is very effective.
Some boats use “Vang Sheeting” (where the mainsheet controls angle of attack) and respond to puffs by playing the main.
Which is Best?
Snappy Answer: Whichever is fastest.
Longer Answer: You’ll have to test to see what works best on your boat. As a general rule, Trim Response is preferred to just feathering/ steering through the puff.
This article is from the North U Boat Speed Seminar curriculum. To find a North U Seminar near you visit https://northu.com/types/seminars/
READ MORE
READ MORE

12 October
UNDERSTANDING TWIST
TWIST EXPLAINED
By Bill Gladstone
In Upwind Sail Power, we defined the three sources of sail power: Angle of Attack, Depth, and Twist. Now we’ll focus on twist and how it impacts power and performance.
Twist
Twist describes the relative trim of the sail from high to low. A sail has lots of twist when the upper part of the leech is open, while a closed leech has little twist. Increasing twist reduces power because it opens the upper part of the sail.
More Twist = Less Power.
As with increasing angle of attack and depth, reducing twist adds power up to the point where the sail stalls and power drops.
More on Twist
Twist is necessary because due to less surface friction, the wind is stronger aloft than at the surface; this phenomenon is called wind gradient. True wind and boat speed combine to create apparent wind. The stronger true wind up high creates both a stronger apparent wind and a wider apparent wind angle aloft. The upper part of the sail must be twisted out relative to the lower part of the sail to match the more open apparent wind angle.
The sailmaker designs twist into the sail to match the average wind gradient and then we trim to fine-tune it, in order to match wind and sea conditions as well as our performance goals. Fine tuning twist is one the most powerful trim adjustments we can make.
The right twist for…
Light Air
Wind gradient is most pronounced in light air, so extra twist is needed. In addition, sails are prone to stalling in light air, and twist helps prevent that by easing flow. Likewise, a deep sail shape – used for extra power in light air – is prone to stalling, so trimming with plenty of twist is appropriate in light air. So, though it may be counter-intuitive – since adding twist reduces power – we trim with quite a bit of twist in light air to prevent stalling.
Moderate Air
In moderate winds, we can trim harder without stalling flow. This harder trim with less twist adds power and improves pointing.
Heavy Air
As the boat gets overpowered, we flatten sails and add twist to spill power. Thus, we sail with more twist in light air and heavy air and the least twist in moderate air.
Twist and Performance
Generally, less twist will help pointing while more twist is faster, with a wider steering groove. For example, coming out of a tack sails are initially trimmed with extra twist (to prevent stalling when slow), with final trim coming only as the boat accelerates to full speed. Likewise, in wavy conditions we trim for extra twist, to a more forgiving steering groove as the boat gyrates in waves. Reducing twist, on the other hand, maintains full power at a high pointing angle when sailing in smooth water.
Depowering your sail plan
Power can be reduced either by increasing twist or flattening the sail (or both). Which is best? In wavy conditions, it’s better to depower by adding twist, while in smooth water conditions flattening the sail is recommended.
Often some combination of twist and flattening is best. One of the challenges of trimming is achieving the correct total power, and the correct mix of power by adjusting depth and twist to match the conditions. Boom vang and cunningham can help to achieve the balance.
© Copyright Bill Gladstone
READ MORE
READ MORE
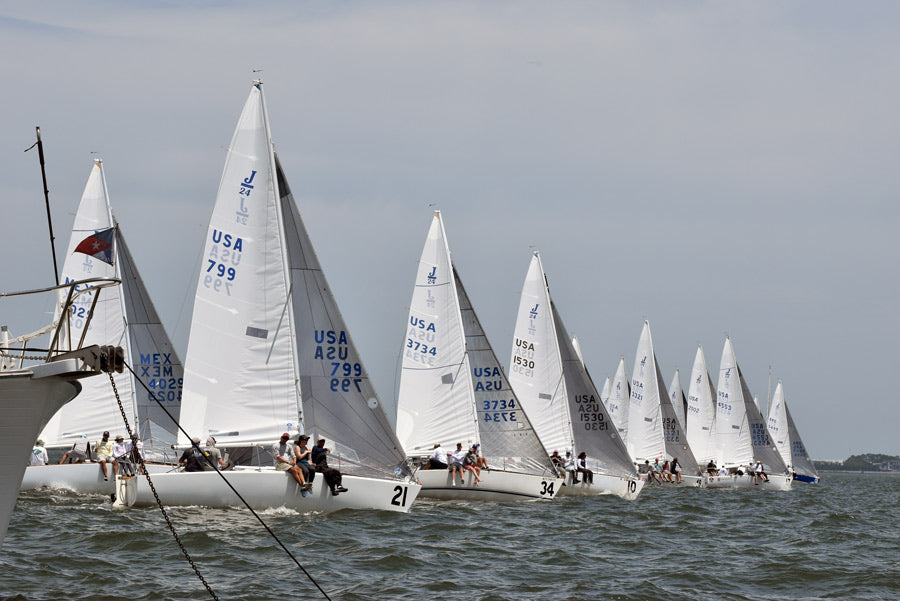
05 September
J24 SPEED GUIDE
Winning the world championship still means a lot in this class, and it’s remarkable how people come out of the woodwork to try to do that.
READ MORE
READ MORE
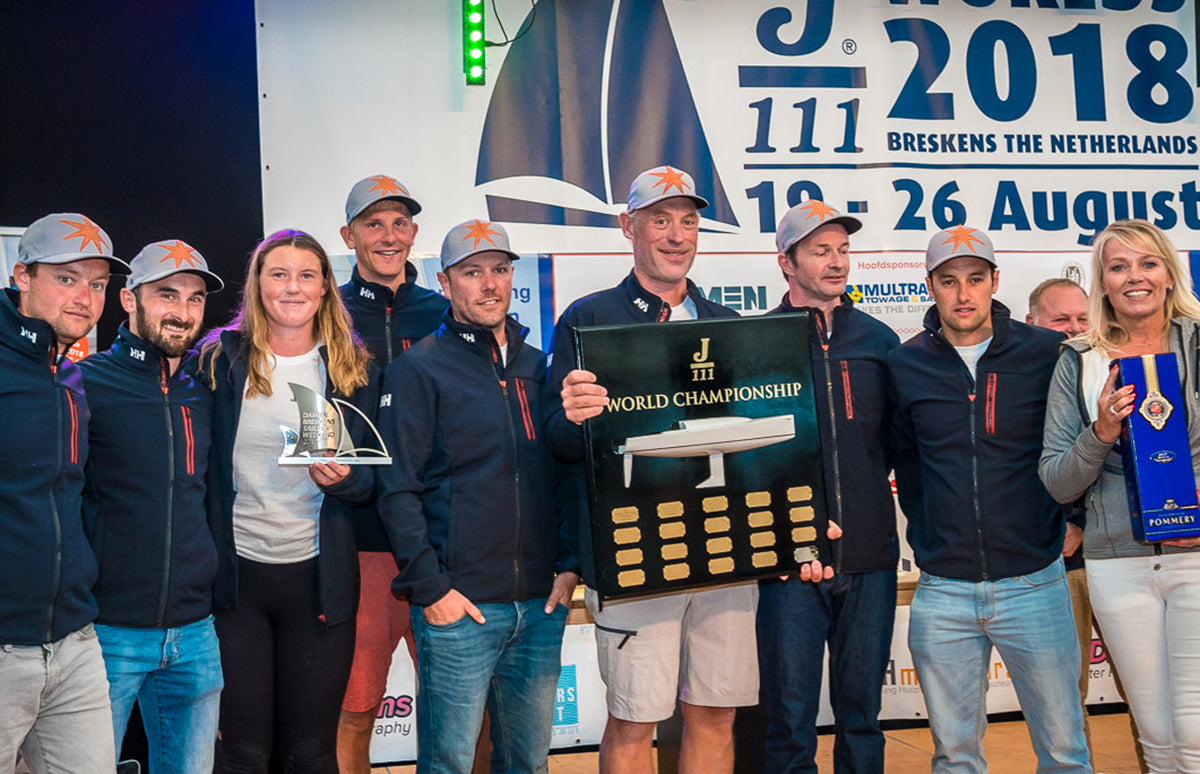
30 August
J/111 WORLDS: SPEED READING
J/111 WORLDS: SPEED READING
North Experts Share Their Winning Speed Tips
Martin Dent and team JElvis, 2018 J/111 World Champions! © WACON-images.com
Twelve teams battled throughout the weeklong J/111 Worlds in Breskens, Netherlands, where big-breeze speed was the key to success. Martin Dent and his team on JElvis scored nine straight bullets and a second out of 12 races, an impressive scoreline!
North Sails expert Ruairidh “Rory” Scott , main trimmer and crew captain onboard JElvis, says the team did a great job with boat handling.
“Our crew made sure our hoists, spinnaker jibes and douses were on time and very tidy. This resulted in huge gains and the ability to overtake boats when the pressure was on.”
They also matched headsail choice and mode to the conditions, Rory continues. “Most of the races were on the crossover between the J2 and J3. As the waves got bigger, we felt more comfortable on the J3 as a wider range of steering angles was possible. On Friday the waves were a little smaller and so we went back to the J2, which allowed us to sail a little higher at the same speed.”
© Ineke Peltzer-Ista
Downwind, it was important to sail the correct mode. “We were usually the first boat to sail a higher angle, which was faster downwind. The crossover was around 17 knots, and we also kept the jib up to maximize efficiency. As soon as the wind dropped below 16 for any length of time we would drop the jib and put the bow down.”
North Sails expert Jeremy Smart helped Tony Mack’s McFly finish second overall and kept an eye on JElvis, noticing all the things they were doing right. “Their speed was unmatched as the breeze came up, when boat handling became crucial.”
Second place went to Tony Mack’s McFly © Paul Wyeth
“The biggest gains were made downwind,” Jeremy continued. “They were able to sail hotter angles to extend, leaving their jib up and maintaining control while planing. Surfing waves was really helpful, which they were very good at, making them unbelievably fast.”
“3Di has a great edge in breeze because it holds its shape very well,” Jeremy added. “Since it doesn’t stretch, the power that is put into the sail is transferred straight into the performance of the boat. The speed is unparalleled.”
JElvis used North Sails standard sail designs for the 2018 Worlds. For more information on our World Championship-winning sails, please contact a North J/111 class expert.
J/111 World Championship
1
JElvis / Martin Dent
2
McFly / Tony Mack
3
Sweeny / Paul van Driel
4
Lällekönig / Jörg Sigg
5
Journeymaker II / Chris Jones
6
Djinn / Sebastien de Liedekerke/td>
8
Jagerbomb / Paul Griffiths
9
Top Job / Norbert Burkert
Full Results
Ruairidh Scott and Martin Dent , proud World Champs! © WACON-images.com
READ MORE
READ MORE
24 August
UPWIND SAIL POWER
UPWIND SAIL POWER
by Bill Gladstone
Understanding and controlling sail power is essential to optimizing upwind performance.
The Three Sources of Sail Power
1. Angle of Attack
2. Sail Depth (Draft)
3. Sail Twist
Total sail power is the sum of power from the three sources. Sail trimmers first try to get the boat to full power (neither underpowered or overpowered), and then adjust the mix of power from angle of attack, depth and twist to match the sailing conditions and optimize performance. When overpowered or underpowered, we work to decrease or increase power.
Sailmakers design and build sails that are both fast and can be adjusted to perform well in a range of conditions. As sail trimmers, our goals parallel those of the sailmaker: First, achieve the designed shape and second, fine tune the shape to the conditions. We’ll look more at fine tuning sail shape after we define each of the three sources of sail power, as well as some other characteristics of sail shape.
1. Angle of Attack
The first source of power is angle of attack. At zero angle of attack, the sail is luffing. Trim in to increase angle of attack and thus, to increase power. Ease the sails out, and power is reduced. Angle of attack is also controlled by the driver. Bear off to increase power, and head up to reduce power.
Power increases as angle of attack increases, up to the point of a stall. When angle of attack is too great, flow stalls and power drops quickly.
Trimming in, as shown (A-B), increases angle of attack and power. The driver can also increase angle of attack and power by bearing off (C-D). Ease sails or head up to reduce power.
2. Sail Depth (Draft)
Sail depth, also called draft or camber, is the second source of sail power. Sail depth controls the power, acceleration, and drag of the sail. More depth creates more power and better acceleration; while a flatter sail has less power and less drag. As with angle of attack, power increases with depth up to the point where flow stalls. Maximum power is achieved just short of a stall.
A deep or “full” shape is more powerful than a flat shape. Deep sails are best for power and acceleration. A flat sail is best when overpowered in heavy air. A flat shape is also fast in smooth water, as it creates less drag.
A deep sail is best to punch through waves and chop, or to accelerate after tacking.
A flatter sail reduces power and also drag. In overpowering conditions a flat sail is best. A flat sail also will be fast in smooth water. When overpowered reducing drag can improve performance. In underpowered conditions adding power is more important than reducing drag (see fig. 2).
3. Sail Twist
Twist is the third source of sail power. Twist describes the relative trim of the sail high and low. A sail has lots of twist when the upper part of the sail is open. The opposite is a closed leech with little twist.
Increasing twist reduces power; decreasing twist adds power. Increasing twist spills power from the upper part of the sail. Again: More Twist = Less Power. (fig. 3). As with angle of attack and depth, reducing twist adds power up to the point where the sail stalls and power drops. So, why twist, and how much?
Wings and keels are not designed with twist, but sails (and propellers and windmill blades) are. Due to less surface friction, the wind is stronger aloft than at the surface; this is known as wind gradient. The true wind and boat speed together create the apparent wind. The stronger true wind up high creates a wider apparent wind angle (and stronger apparent wind) aloft. The upper part of the sail is twisted out relative to the lower part of the sail to match the more open apparent wind angle. The sailmaker designs twist into the sail to match the average wind gradient.
Sail twist is then fine-tuned to match the sail shape to the prevailing wind gradient. We further fine tune twist to wind and sea conditions, and to match our performance goals.
Fine tuning twist is one the most powerful trim adjustments we can make.
Twist is the difference in trim of the sail high and low. Increasing twist reduces power by spilling open the top of the sail.
Sails are designed with twist to match differences in apparent wind caused by wind gradient.
READ MORE
READ MORE
14 August
J/70 TOOL KIT : ALL YOU NEED FOR YOUR NEXT REGATTA
Get The Most From Your J/70 Racing Experience
The sailing season has already started. Is your team ready? Our tool kit will help you finish in front of the pack. Read our tips on boat speed, boat handling, crew techniques, and more. Created just for your by our team of experts.
Winners Choose North
There is no better performance test of a sail than the results it produces. In 2018 alone, North Sails J/70 inventories powered the winning teams at regattas all over the globe. Clients trust in our products to get the most out of their sailing experience.
Tim Healy’s Winning Inventory
No matter what the weather will bring, we’ve got options for any condition. Here is Tim Healy’s suggested inventory to help you get you started.
Light Air Tips
A week of intense training with the Japanese teams in Newport, RI taught Tim and his team a lot about light air tuning and trimming. Here are his tips, which include some important points to optimize your light air speed.
Fine Tune With North
Find your groove. Get your numbers. Be confident in all wind conditions. After countless hours sailing, testing, and competing in the J/70, our World Championship sails will get you up to race winning speed quickly. Reach your competitive goals with North.
Downwind Tips
Whether you are in displacement mode, wing-on-wing, or full plane, there are many ways to achieve better boat speed. Read more from Tim on how to enhance your performance downwind in all conditions.
Get Up To Speed
Pulling all the pieces together can be challenging. North Speed Guides will help you leverage our expertise to make the most of your one design sailing.
Our Road To 2018 Worlds
One design experts collaborated in a three-day clinic that combined the talent and intellect of the North team. Our commitment to excellence keeps us evolving designs within the J/70 product line.
Client Performance
An entertaining and educational interview with the 2018 Corinthian J/70 Midwinters Champions and 1st place Corinthian Marblehead NOOD team, Joint Custody.
Our Experts Make It Happen
Have questions? Contact your local J/70 expert today for more information on how choosing North can up your program.
READ MORE
READ MORE
23 July
MY FIRST TIME ON A VX ONE
MY FIRST TIME ON A VX ONE
How Mike Marshall sailed a VX for the first time and won 7 out 8 races
After hopping in a VX One for the first time at the 2018 Newport Regatta, I wasn’t sure what to expect. Lucky for me, I had a great crew in Jeff Eiber, whose boat USA 175 we were sailing. He was able to get the initial tuning in place so that I could spend the regatta getting to know the boat and what makes it go fast. Because we had winds from 4 to 15 knots, I got to experience the VX One in a wide range of conditions. What transpired was a lot of falling down in the back of the boat, a lot of getting tangled up in lines, and a whole lot of learning coupled with a whole lot of fun.
“The VX One rewards the fundamentals of sailing” -That’s my catchphrase for this boat. What does it mean? It means that the VX One rewards clear air, good boat handling, clean starts, great boat balance, hard work, and letting the boat talk to you about what it needs – in short, the basics of sailboat racing.
VANG ON
As expected, sailing this boat flat is the key upwind, but you also need to be able to put the bow down. There are two solutions to this problem: Add weight to the rail or pull the vang on and hike. Since the boat is very weight-sensitive and more weight hurts you downwind, the best solution is to use the vang, and a lot of it. On the windiest day, with 15 knots, I pulled the vang as hard as I could get it. This allowed me to ease the sheet to stop the boat from heeling while still maintaining the leech tension for point. Consequently, I was able to put the bow down and get the boat sailing flat while keeping the leech engaged and forcing the boat upwind.
For a short-cord keelboat, the faster you go, the better the foil works, and therefore the boat slides to leeward less, but at the same time the boat also “releases.” By this I mean that it frees up and becomes easier to sail. Small rudder movements do more to change the boat’s direction instead of just creating drag. The mainsheet becomes easier to play because instead of having to dump and trim 6 feet of sheet, you have to play only 1 to 2 feet. The increase in speed powers the boat through waves instead of having the feeling that you’re hitting them and bouncing off. All this means that you can spend more time going fast and less time worrying about your speed relative to other boats. The key to the whole mix is the vang. Whenever I felt the boat bound up, I’d try pulling on a little more vang, and off we’d go again. This was true even in the lighter air.
RIG TUNE
Another piece of the puzzle was the rig tune. Thankfully, Jeff did most of the work here, but by the end of the event, I had asked enough questions that I was starting to understand what he was looking for. In any condition going upwind, he’d start from a base setting and observe the leeward upper. He was looking for it to be just going slack. Then I’d trim the main in harder than I normally would, and we’d look for over-bend wrinkles. Jeff wanted the large wrinkles from the spreader to be traveling about half way down to the clew of the sail. If they extended more than that, he’d tighten both lowers the same amount. If the wrinkles extended less than that, he’d ease off the lowers. This procedure kept the main looking flat enough in the breeze and full enough in light air. As for the base setting, Jeff would always set the boat up for the lightest wind that we were expecting during that particular race.
STAY OUT OF THE BACK OF THE BOAT
Next on my list of things learned was to stay out of the back of the boat. This lesson applied to doing anything, not just normal sailing. It was so easy to get too far back in the boat in a gybe, but that would simply stop us. The same was true for tacks, although they were a bit less critical. Staying out of the back rewarded us with good roll tacks and good roll gybes. And the reward didn’t just come from rolling hard or staying forward. It came from exiting the tack or the gybe at the correct angle so that the boat would power up right away. Upwind, if you’re too low, you’ll give up boat lengths, whereas if you’re too high, the boat will stop. The same concept holds when sailing downwind, but in the opposite direction whereby giving up boat lengths comes from being too high.
FIND A CLEAR LANE
In virtually all sailboat racing, you need to sail in a clear lane, but doing so was particularly important for our VX One. Because we were light on crew weight (350 lbs.), we needed to be very careful about having a heavy boat above us that could roll us or a light boat to leeward with insufficient vang on that was pinching. With a clear lane, we could fall into our bow-down mode, and within three boat lengths, we were the same point as the boats around us, by going faster than they were and in turn sliding sideways less.
In closing, I want to give a plug to the VX One. It’s really fun to sail. Hike hard and try to be as fast as possible all the time, and the boat will reward you in spades. With luck, I’ll get back out on a VX One soon. I’m just hoping that the next time will be in 15+ knots with the spinnaker flying!
Learn more about the North Sails fast VX sails.
READ MORE
READ MORE
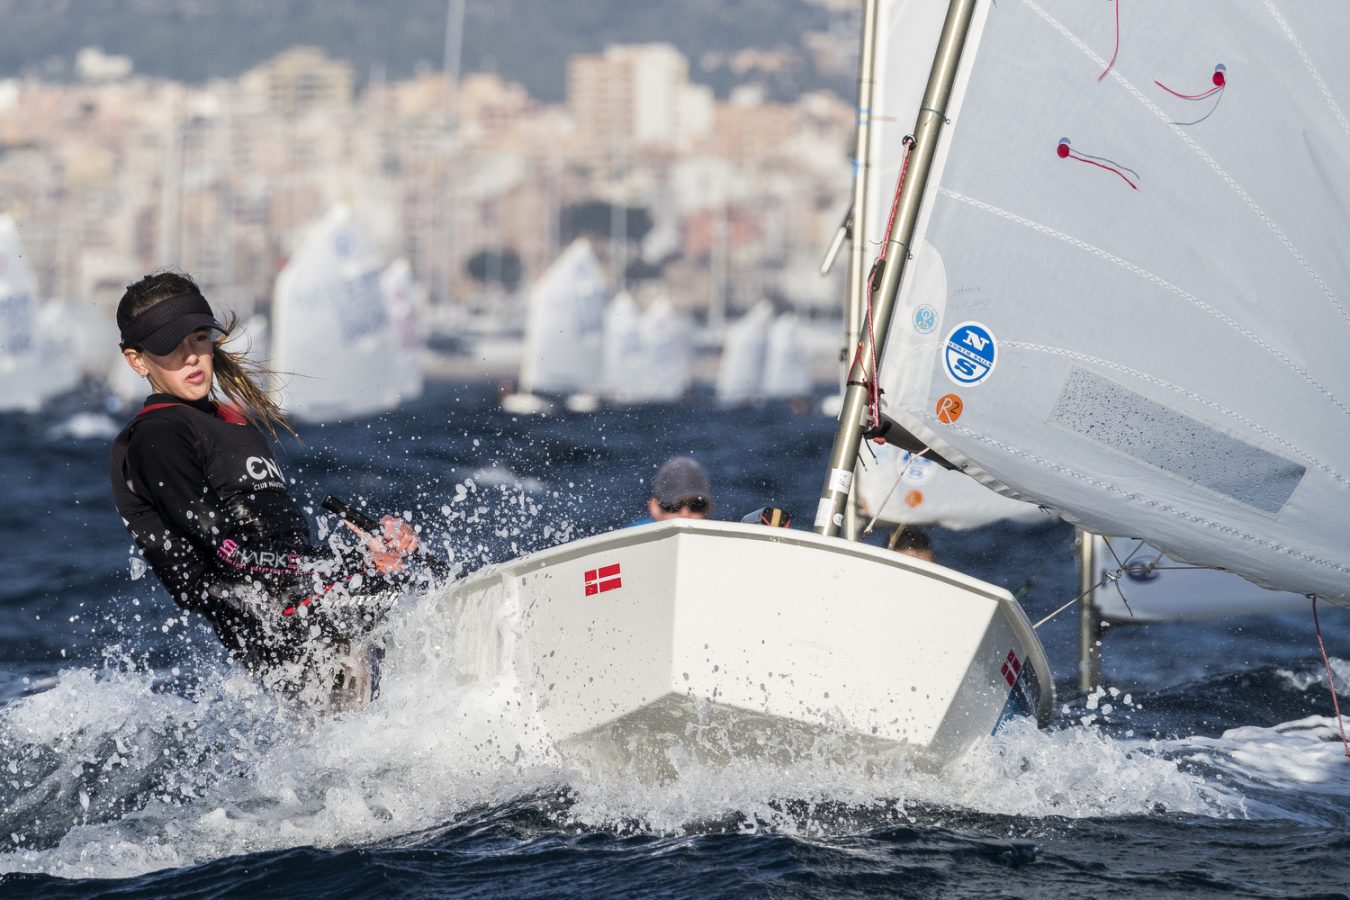
15 June
ONE DESIGN SPEED GUIDES
NORTH SAILS SPEED GUIDES
In Depth One Design Guides Written by Our Experts
Ever wonder what it takes to be competitive in a one design class? North Sails Speed Guides provide you with essential information on tuning, finding the right crew, buying sails, and boat-specific proper technique. Pulling all the pieces together can be challenging, and the North Speed Guides help you leverage our expertise to make the best decisions for your racing program and make the most of your one design sailing. North Speed Guides provide you the knowledge and confidence to focus on the best part of sailing: having fun.
READ MORE
READ MORE
06 June
SPEED READING: GET FAST AND STAY FAST
GET FAST AND STAY FAST
Important factors that affect your Flying Scot boat speed
© Art Petrosemolo
We’ve all read it a million times from all of the sport’s top performers – “boat speed is king,” “the key to winning consistently is boat speed,” “you have to have top boat speed to win”…. There’s a lot of ways to say it… But how do we achieve it? THAT is the question.
In the Flying Scot, one of the most important factors for boat speed both upwind and downwind is the center board engagement. When sailing upwind we need to accurately trim the sails, put the boat on the right heading, and get the body weight in the right spot so that the boat can get going fast enough to allow the centerboard to start working and achieving maximum lift. If any one of those three trims are off, the boat will experience some sort of stall which will decrease lift of the board and increase the distance between us and the fast guys!
The generic tip is “speed before height”. This is a simple concept that most of us understand – but it’s the execution of this technique that can be difficult. It all starts with positioning. The boat has to be in a place where you are able to ease the sails a bit, put the bow down, and let it rumble. If you are sailing with someone to leeward, you aren’t able to make this move and instead you are stuck trying to live in high mode which can be very unforgiving. It’s crucial to make every effort to make tactical decisions that keep people away from your leeward hole. Make sure that you have a big hole to leeward of you right after the start.
A couple keys to achieve that are:
1. Use a “high kill” in the last minute where you get the boat to coast at head to wind (without losing flow/steerage). If the boat to leeward of you isn’t matching, then that hole is getting bigger.
2. Accelerate the boat in the last 10-15 so that you can ultimately “pull the trigger” at 2 or 3 seconds which allows the boat to be already close-hauled at full speed at the gun. Of course this requires accurate knowledge of where the line is, but if you can already be full upwind with the center board working when the gun goes off, you are going to have plenty of room to leeward of you to let the boat rumble.
Another opportunity to give yourself a bigger hole to leeward of you on the racecourse is in a situation where you know you are likely to get lee-bowed by a competitor. This can happen if you are out on the edge of the course near a layline most likely.
If you know you are likely to get lee-bowed by a competitor coming across on the other tack, put your bow down at them. Make it clear from 5-10 boat lengths away that it is your intention to duck them by aiming your bow at their transom.
This will force them to either take the cross – which you are fine with in this tactical situation – or tack early. As soon as you see them start their tack, you trim the sails back in and put the bow back up to your close hauled course which leaves them an extra boat length or two to leeward of you which should be enough for you to comfortably hold your lane. Plus, you will be coming at them with a click more boat speed since you are bow down, which should have you with an even better lane after their tack
Developing the feel on the helm and in the hull so that you can sense when the center board is fully engaged is the hard part.
It can only come from time on the tiller, and sailing in a straight line while experimenting with the edges of performance. But that’s where the fast guys really get away – they are constantly making very slight adjustments to heel angle, sail trim, and their course so that they can get the board to maximum lift and then try to take that lift as high as they can before the boat stalls.
When they feel the boat is on the brink of a stall, they adjust again to re-engage the board and repeat the process. You can think of it like executing very gradual “S-Turns” all the way up the beat – bow down and sails eased with body weight pressing on the rail to get the boat rumbling, and then bow slightly up with sails trimmed hard to turn that speed into height. That’s the magic!
Remember, a fully engaged center board will give you height without forcing you to actually point the boat higher. In fact, the boats gaining height might have their bows further from the true wind angle – but since the board is providing lift, they are still climbing to windward!
Practice makes perfect, so get out on the water and sail upwind (maybe even with your eyes closed) and really try to hone in on this feel. Boat speed turns into good tactics, and the combination is what will put you at the top of the podium!
Contact Zeke Horowitz for additional questions on making your Flying Scot sail faster.
Learn more about North’s fast Flying Scot sails.
READ MORE
READ MORE
05 June
SPEED READING: FIVE DOWNWIND MODES
FIVE DOWNWIND MODES
Simplified To Optimize Your Downwind Performance
© Mauro Melandri / Zerogradinord
The J/70 is a relatively new class and the learning curve is still very steep for all involved. Here are a few basic tips that can help when trying to optimize performance downwind.
PLANING
Crew Weight Aft. Keeping the bow out of the water and rudder in the water.
Backstay remains at 75% to 100% on. This will make keep the mast back, the luff of the spin tight and the draft of the spin forward.
Traveler down all the way. This will make each pump more effective as the traveler will pull the boom both in and down each time you pump.
Play Vang. When the boat is ripping and under control, try a bit more vang to power up the main; you will go the same speed at a lower angle. Remember to ease some off before next jibe!
Consistent Heel. Keep the angle consistent – this will keep the helm loading consistent to help the helmsman find the fastest apparent wind angles.
MARGINAL/LAZY PLANING
Crew extremely active with fore and aft weight. Keep weight forward until boat starts to surf down waves and bow wants to crash into next wave, then move weight back quickly, turn bow up and move weight forward again to catch the next wave.
Drive boat with side-to-side weight. Move weight in slightly to help the boat turn up and power up in order to maintain the plane. Full hike in puffs to turn down and flatten the boat and accelerate.
Backstay 50%-75% on. This will keep the luff of spin tight enough for planing with apparent wind forward, but still keep a powerful shape for both main and spin.
Vang on. For max power when pumping, keep the main leech firm and under control by tightening the vang.
Consistent heel. Same as above.
See also: Tim Healy’s tips for marginal planing conditions in flat water
DISPLACEMENT SOAK-MODE
Weight forward. Keep knuckle of bow in water and transom just in water. You want maximum water line with minimum drag.
Drive boat with side to side weight. Use weight to steer the boat and use as little rudder (which creates drag) as possible.
Backstay off. This allows the mast to move forward as much as possible, making the luff of the spinnaker rounder and deeper, which is better as the apparent wind moves aft.
Play Vang. Ease vang to get good twist without inverting the compression battens. Tighten for jibes or if surfing conditions are present and pumping becomes legal.
Tack-up soak mode. This only works in over 9 knots or when the apparent is max aft. Letting a few inches off the tack line allows the spin to get deeper and rotate to weather more to maintain a lower course heading. If spin gets unstable, pull tack down and head up slightly.
DISPLACEMENT WING-ON-WING
Weight forward. Same as above
Maintain consistent weather heel need more as breeze gets lighter. Weather heel helps the spin stay full and stable.
Play Vang. Vang on in jibes to pop battens. Vang on also helps to keep rocking to a minimum.
Backstay off. Same as above
Watch your masthead fly. The wind should be coming from dead astern or slightly from the weather stern quarter. Sailing by the lee only creates disturbed air for the spin interfering with the air coming off the main. Trimer and tactician should direct driver by saying “turn right” or “turn left” not “up” or “down”
Vang on for maneuvers. To help pop the compression battens when it comes time to jibe.
DISPLACEMENT VMG-MODE
Weight forward. Same as above.
Maintain slight leeward heel. This will help keep the spinnaker full and air flow attached. In puffs slightly flatten the boat and turn down. In lulls slightly more heel to turn up to keep spin full and speed up.
Vang off. Let main leech twist- vang on slightly in chop to control flapping. Pull the vang on for jibes to help battens pop over.
Backstay off. Only pull on to control rig from becoming unstable in chop.
READ MORE
READ MORE

16 May
OPTIMIZED FOR MULTIHULL
OPTIMIZED FOR MULTIHULL
Sailing multihulls have unique attributes: higher speeds, higher stability, higher loads. It’s very important that multihull sails have the correct fit, form and function. While finished sails for multihulls may not look that different on the water, our understanding of multihull attributes and performance makes the difference in producing high quality sails.
OPTIMIZED SAIL SHAPE
Through decades of multihull experience, North sails has developed and maintains an extensive library of validated multihull “mold” shapes. Shapes are classified by performance requirements, wind range, aspect ratio, and other factors. Designers use this library as the basis for camber, draft, twist, and geometry before customizing to each individual sail’s specific requirements.
Straight Masts
Most multihulls do not have backstays. The mast is supported by the main shrouds, as well as diamonds or lower shrouds or both. Many multihulls have aerodynamically efficient, longer chord-length masts. As a result, multihull masts are generally very straight in the fore and aft direction – with only mainsheet and cunningham to control mast bend. Straight masts are more challenging for the sail designer, who must rely on sail material, structural engineering, and shape distribution for the perfect fit. Thanks to the power of the North Design Suite, North designers are able to optimize multihull sails for straight masts.
Rotating Masts
Some multihulls use rotating masts to improve aerodynamic efficiency and control sail shape. Mast rotation impacts luff curve and flattens the overall sail shape – but not too much. North designers account for the amount of rotation along with the size of mast (chord-length) to optimize the mainsail performance.
Headstay Sag
Headstay sag is an important design consideration for upwind headsails, and multihulls can often sail with more headstay sag than monohulls. Too much headstay sag usually reduces upwind performance. North Sails designers optimize for this extra headstay sag through specialized shape distribution, ensuring fast, easy to use sail shapes.
Tight Wind Angles
Multihulls have higher righting moments and less drag for faster sailing. Faster sailing means closer wind angles, which requires flatter, more specialized sail shapes. This is true for both upwind and downwind multihull sails. North Sails optimizes for the tight apparent wind angles of multihulls.
OPTIMIZED SAIL SIZE
Mainsail Roach profile is one area where multihulls stand out – the absence of a permanent backstay allows a variety of large roach designs. The shape of these roach profiles has evolved over time and the optimum profile depends upon a variety of factors: optimal sail area and distribution, aerodynamics, camber depth, twist profile, and ease of handling/stowage. Today, North Sails offers two distinct types of mainsail roach profiles.
Square Top Mainsail
This modern feature adds area on top, allows twist higher up the leech, and permits more tension on the mainsheet which translates to better performance upwind. The extra power on top also increases downwind speeds. When performance is a top priority, square top mainsail are the best choice. A key feature sail designers optimize is the head width as a percentage of the foot length. Some square tops include a head cut out and vertical batten to maximize sail area while minimizing drag at the top of the mast.
High Roach Mainsail
A more traditional approach to multihull mainsail design is a high roach mainsail which usually has a batten arrangement that allows easy stowage of the sail on the boom without disconnecting the head from the mast. High roach sails are well suited for woven polyester material, which cannot always support a square top design. High roach mainsails are optimized for cruising.
Rig Geometry
Cruising catamarans often feature mainsails and headsails with high clews. Sail designers might need to accommodate deck features such as hard tops, biminis, and the relative heights of a headsails clew and tack. Each of these can affect sail shape and engineering. Here is a photo of a mainsail and headsail that accommodate the unique deck geometry of a cruising catamaran.
Offwind Sails
The wide multihull shroud base allows a range of reaching and downwind sail types. A key factor when designing these sails is the desired apparent wind angle, which will determine if the sail sheets inside or outside the shrouds. Close reaching sails that sheet inside must respect the shroud geometry. Downwind spinnakers that sheet outside can be larger in size and deeper in shape. Please read the North Sails Multihull Downwind Sail Guide for a full explanation of the different North multihull offwind sail types.
OPTIMIZED SAIL STRUCTURE
A multihull’s higher righting moment means higher sail loads, which in turn require stronger, lower stretch materials. North Sails uses a sophisticated tool to determine the modulus requirement (stretch resistance) for a given sail. Boat performance, wind strength, sail size, aspect ratio and trimming characteristics will all factor into the optimum sail multihull structure.
Once structural requirements are understood, North Sails has a variety of racing and cruising materials that will meet your performance, durability and budgets.
North Sails offers a variety of sail material choices for multihulls, but 3Di composite molded sail technology is uniquely suited to producing the best multihull sails where high strength, low stretch and extreme durability are essential.
Some key aspects of 3Di sails that are important for multihull sailors include:
• 3D molded for optimized sail shape
• Spread filament composite construction for high strength and low stretch
• Ultra PE reinforced for ultimate durability
• Variable fiber mass
• Secondary and compressive load resistance
• Specialized multihull structural tape layouts
Sail Finishing
Beyond optimized sail size, shape, and structure, North Sails optimizes the finishing details for multihulls.
Some of the sail details optimized for multihulls include:
• Mainsail reefing systems, tack and clew attachments
• Mainsail luff hardware, battens and slide attachments
• Mainsail head attachments and jacklines for square-top and high-roach sails
• Vertical battens for specialized mainsail head cut outs
• Mainsail Reefing pull down lines
• Headsail furling systems for fixed, free flying and structural furlers
READ MORE
READ MORE
29 April
SPEED READING: ONBOARD COMMUNICATION
ONBOARD COMMUNICATION
The Chain of Command
© Jeff Brown
By Reed Baldrige
On board communication for racing yachts is a key factor for performance, no matter what type of sailing. However, when the number of crew increases, it becomes more and more important. Offshore one-design boats typically have 6-12 people which requires a lot of communication and coordination. Below are some suggestions to keep your boat moving through the water and around the corners more efficiently and effectively with better communication.
Here are the positions onboard following proper chain of command:
The Tactician
Starting from the top, there is the tactician, or head of the afterguard, is the one who gives the overall plan, talking to the whole crew and communicates directly with the helmsman in close quarter situations, such as the start and mark roundings. Ultimately the tactician is responsible for where the boat sails through the water, and how it sails, telling trimmer what type of mode is best for the boat.
© Onne Van der Wal
The Trimmers
Next, the primary trimmers, who are the voices in control when sailing in a straight line. When sailing upwind, the main trimmer, who is usually the only other crewmember besides the skipper facing towards the middle of boat and sitting next to the helmsman, is constantly talking with helmsman about how the boat feels to each other. When sailing off the breeze it is the spinnaker trimmer who takes over keeping the boat in the grove.
© Chris Howell
The Boss
Now you may be asking yourself, what about the boss? The skipper? This is the most important part. It is crucial that the skipper communicates to his or her trimmers about how the boat feels, how much the tiller or wheel is pulling or pushing. Knowing these characteristics of how the boat feels can help the trimmers do their job more effectively, as they can adjust accordingly to get the boat to feel good and in the groove.
Many times it is hard for helmsman to speak up because there is a lot of conversing going on between trimmer, tactician and the bow, while also trying to focus hard on driving straight, knowing that if they were to veer off course a quick course change command is coming from their trimmers. But nevertheless it is crucial to tell your trimmers how the boat feels. Good trimmers should be asking frequently about how it feels to make sure the boat is maintaining a good course through the water.
©Jeremie Lecaudey/Volvo Ocean Race
The Middle
Moving forward in the boat, is what I like to call the middle. This includes headsail trimmers, grinders when you have them and the pit, which can be multiple people. Communication from this part of the boat is non stop and travels both ways.
Communication can be difficult on larger boats and/or in windy conditions. The crewmembers on the bow need to know what the next maneuver is going to be so that they can prepare or get the proper hardware ready.
The Bow
The bow, typically made up of the crew who operate at or in front of the mast who deals with the hoisting and lowering of all headsails.
Communication coming front to back is also crucial, such as an obstruction that is behind the jib or an issue onboard your own boat needing attention before the next maneuver can be executed. Many times, in challenging conditions, hand signals can be used to express the readiness or state of the bow prior to a maneuver.
© Carlo Borlenghi
Overall, the golden rule is that too much communication is always better than not enough, and yelling or scolding your crew only slows down the process of any maneuver.
Most importantly: keep the boat fun, keep the boat fast!
READ MORE
READ MORE
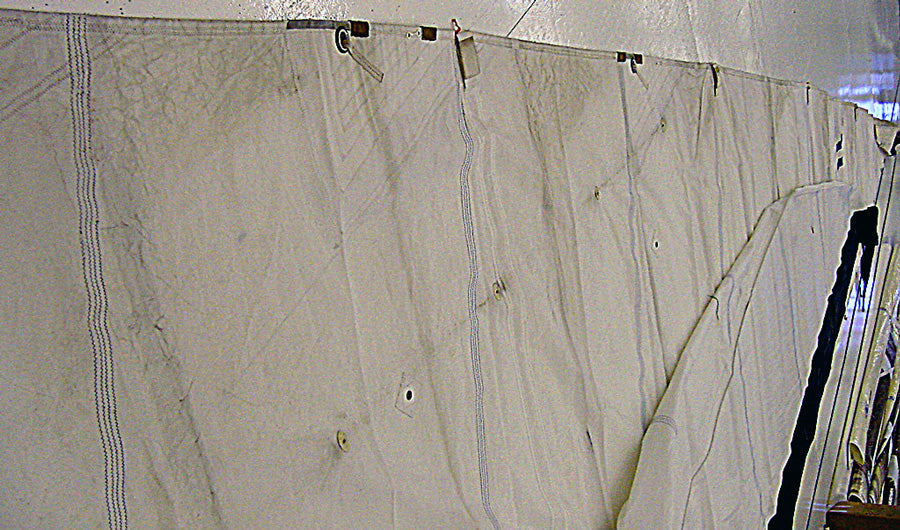
27 April
MILDEW ON SAILS: WHAT TO DO
MILDEW ON SAILS: WHAT TO DO
Our DIY Sail Care information only applies to traditional fabrics and laminates. 3Di is composite technology, not a sail laminate. For info on 3Di sail care, read Sail Maintenance. Here is what you need to know about mildew on traditional fabrics.
Sails mildew. There are lots of guesses about why some mildew more than others, but not much in the way of facts. Three things we do know:
Mildew is not a structural problem.
Mildew is ugly.
Sail owners get a little uptight when their sails turn black and splotchy.
We can state a few truths about observed patterns regarding sails that have and have not mildewed:
Sails in hot humid areas are definite candidates.
It appears to help if the boat owner makes an attempt to keep the sail dry. Take a short sail to air out a damp roller furled genoa, especially if you are leaving the boat for an extended period and your last sailing day involved a lot of rain and salt water spray.
Salt water residue dries more slowly than fresh water, so salt water dampness is worse than fresh water dampness.
Areas with higher levels of air pollution, or pollen, tend to have more mildew issues.
Laminated sails are much more susceptible to mildew than woven Dacron sails.
Mildew propagates quickly in the adhesive layers of any glued-on parts. Insignia fabric reinforcing and adhesives used to glue together seams are particularly susceptible to mildew growth, because they feature thick layers of glue.
Cleaning Mildew
Sailcloth manufacturers have developed chemical treatments to retard mildew growth when the fabric is produced. However, there is a delicate balance between killing the fungus and killing the humans. So the problem has not gone away.
Surface mildew can be cleaned off the sail with a diluted bleach solution. But once the mildew creeps in between layers of fabric, the sails need to be sent out for industrial cleaning. Wash companies other than sailmakers should be considered suspect. You might get a nice white sail back, but it may also be crumpled up like a bed sheet. For more information, read Should You Wash Your Sails?
In our experience, once a sail has had a mildew problem, it will probably always have a mildew problem. A good cleaner can reduce the black spots to dirty white spots, but if the boat stays in the same area where the mildew started, the spots will soon be gray, and then it’s only a matter of time before they are black again.
How to avoid mildew
Air out your sails regularly, especially after rain. Try to do this on a calm, dry day.
Exposure to sunlight is helpful, but too much causes UV Damage.
Do not put sails away damp or salty. The salt attracts and retains moisture. Store in a dry location.
If your boat is inactive for more than a week or two, take the sail off the rig and store it dry, or arrange for somebody to air it out periodically.
Do not install a foam luff on sails prone to mildewing.
If mildew occurs
Treat mildew at the earliest possible moment. Mildew stains are easier to treat when new, relatively small, and close to the surface.
Isolate mildew-infected sails from clean sails. A sure way to spread mildew is to rub an existing growth against a receptive surface.
The most popular mildew remover is household chlorine bleach (sodium hypo chlorite) sold in the U.S. in 5.25% solution. Manufacturers recommend diluting it further. Tilex® and other “mildew removers” are sodium hypo chlorite solutions of about 3%.
DO NOT use BLEACH on KEVLAR or NYLON, EVER, UNDER ANY CIRCUMSTANCES! We have seen people poke their fingers easily through spinnakers rinsed in chlorine-treated swimming pools.
DO NOT EVER MIX BLEACH AND AMMONIA! The mixture forms phosgene gas which killed and disabled thousands in the First World War.
For deep set stains, immerse the stain in a fungicide for 12 hours or more. A high concentration is not necessary. No amount of surface scrubbing will do what a good soak can.
After using bleach, rinse thoroughly with plenty of fresh water! Bleach residue can cause long-term structural damage.
If the mildew stain is not removed by above treatments, give up. Further treatments can cause other damage.
Scotchguard® and related water repellents have not proven to kill or prevent mildew.
Lysol® household disinfectant is an effective fungicide and inhibitor. Some health and environmental agencies prohibit the use of stronger fungicides.
Anything you use to kill or remove mildew will wash or wear away in a relatively short time. North NorLam™ fabrics are treated with the most powerful commercial fungicide allowable. It is 100% effective in laboratory conditions, yet demonstrably less effective in the real world.
Lastly, this is what Bill Bergantz, Vice President of North Cloth, has to say about mildew:
It is a poorly kept secret that mildew will grow on sails. While we do not completely understand it and don’t have a lot of good answers for prevention and cure, here is what we do know and what you should know in dealing with the problem of mildew.
Mildew is a fungus. Like mushrooms (another fungus), it grows best in damp conditions, and probably doesn’t like daylight. It can flourish in climates as diverse as Florida and the midwinter Pacific Northwest.
Mildew lives on microscopic organisms that it takes from the air, water, or the surface of the sail.
Mildew will form on modern synthetic sailcloth, including adhesives, finishes, films, etc., but does not cause structural damage.
Mildew does not affect the performance of sailcloth, so our concern is with the cosmetic disfiguration it can cause.
Mildew can grow on anchor rodes and mooring lines , sheets and sail covers, dodgers, cockpit cushions, mattresses, bulkheads, and so forth. Mildew spores are carried in the air, especially in rain water, and are easily transferred by contact.
READ MORE
READ MORE
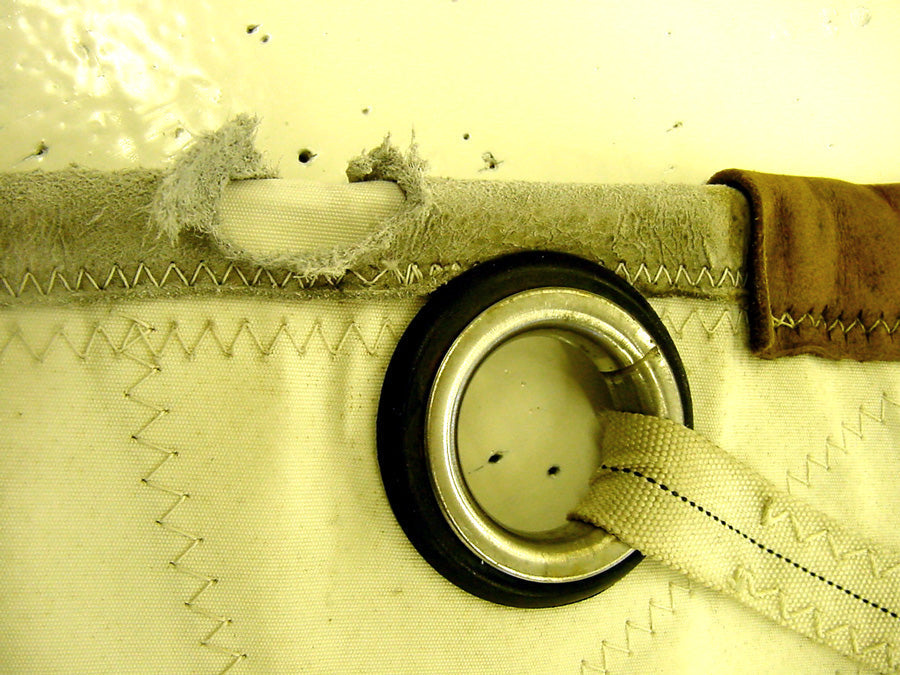
26 April
CHAFE NEVER SLEEPS
CHAFE NEVER SLEEPS
Our DIY Sail Care information only applies to traditional fabrics and laminates. 3Di is composite technology, not a sail laminate. For info on 3Di sail care, read Sail Maintenance. Here is what you need to know about chafe on traditional fabrics.
North Sails CEO Dan Neri shows us how to keep chafe from destroying your sails.
Wherever soft, fabric parts of a sail rub against hard metal parts, the sail is going to eventually suffer chafe damage. It is difficult for a sailmaker to identify all potential chafe areas, so you must watch for chafe and add (or replace) chafe protection before a hole appears.
Heavy dacron and webbing work best for chafing surfaces around rings. Webbing is easy to fold around corners and is made of thicker fibers, so it will wear better than Dacron. Dacron, on the other hand, is easier to sew due to its lower bulk. We are not particularly fond of leather for chafe protection, even though it looks nice when it is new. Leather stretches when it is wet, so it is more easily ripped than webbing chafe guards.
This leather chafe guard is not helping the sail at all. When the leather gets wet, it tends to sluff apart where the reef line rubs against it. Someone has gone to the effort of sewing another layer of leather over the first chafe gear above the reef ring. This new leather will last forever because there is is no way the reefing line will be able to rub there.
Anytime you see your sail rubbing on the rig, or see a lazy jack or running stay rubbing on the sail, circle the area of contact with a marking pen. Then, at your first opportunity, cover the area that you have marked with an appropriate material.
How to make chafe patches
The most common chafe material is “Stickyback.” Due to its lightweight it will conform to the surface of the sail, even if it is applied over areas that include staggered layers of reinforcing, or batten pockets. The surface is slippery, which allows the fabric to slide against other materials without grabbing or heating up from friction. However, because it is thin and made from lightweight fibers, this is really only a temporary solution.
Heavier weight chafe patches can be made from woven polyester sailcloth and several strips of seamstick adhesive, or a thin layer of liquid adhesive. Whenever possible, chafe material should be applied with adhesive rather than sewing because it will need to be renewed at some point. Stitching will leave holes in the sail when the old chafe material is removed, and more holes when the replacement material is installed. Multiple layers of lighter weight material installed with adhesives are the best way to go.
For multiple layer patches, the large layer should be 20-40% bigger than the small layer to taper the patch.
Common chafe areas include:
Spreaders
Where spreader ends push hard into the surface of a sail, you need a sewed-on dacron patch on each side of the sail. If the sail leech scrapes across the spreader base during tacks, but does not come into contact with the spreader end, use a lighter, completely sacrificial patch.
Mainsails on boats with swept back spreaders are prone to punctures from the spreader ends both when sailing downwind and while reefing. As mainsail loads change, the fabric is pressed hard against the spreader end. Eventually, the spreader end chafes a hole in the sail. Because the hole is on the leeward side, you may not see it.This can result in significant damage if not addressed right away.
This hole was rubbed into and through the batten pocket from nearly continual rubbing against the boat’s standing rigging.
Tips to minimize sail damage when reefing
Slightly over trim the sail or keep tension on the boom vang.
Monitor the chafe protection layers on the sail.
Wrap the spreader end with black tape so the spreader will make a mark on the sail as an early warning sign.
Stanchions
If the foot of the headsail sometimes catches on a stanchion top, sew a dacron patch on each side of the sail. If the foot of the sail sometimes rubs on the shackle that attaches the upper lifeline to the bow pulpit, add a lighter, completely sacrificial patch.
Full-length batten pockets
A sacrificial layer of Spectra webbing sewn onto Dacron tape can easily be replaced with another if necessary.
Full-length battens rub on standing rigging, running backstays, and lazy jacks. Standing rigging is the biggest concern because it is rigid. The batten is also rigid, so the pocket material is in between the proverbial rock and the hard place. Pockets should be covered with a rugged layer of fabric or webbing, preferably spectra because it does not heat up from friction like polyester. Nylon webbing has good chafe resistance, but it shrinks and will cause the batten pocket to pucker.
How to make a batten pocket chafe guard
Cut a piece of light sailcloth tape so it is the same length and width as the batten pocket.
Stitch spectra webbing along its center.
Glue the tape to the pocket with the spectra facing out.
Stitch along the edges of the batten pocket, matching the existing machine stitching as much as possible.
Excerpted from The Complete Guide to Sail Care and Repair, by Dan Neri
READ MORE
READ MORE
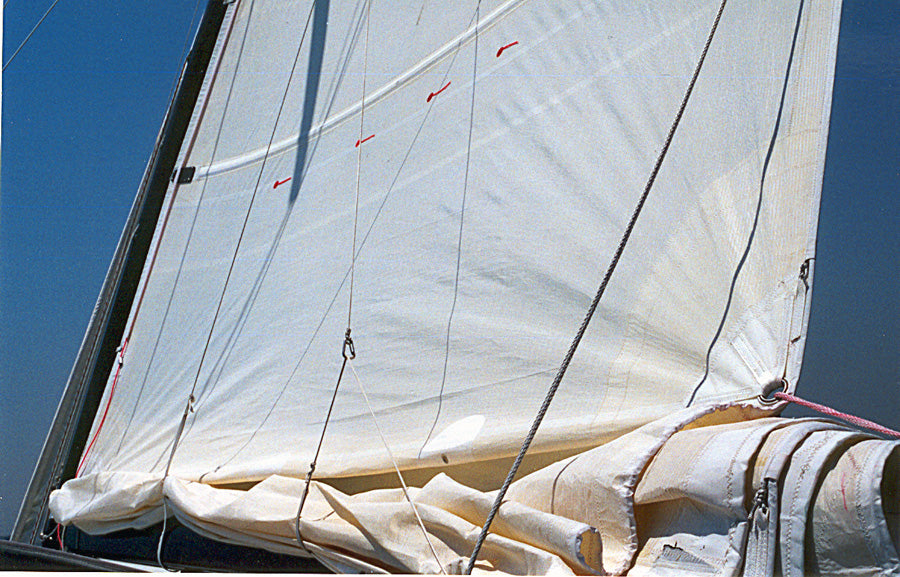
19 April
THE FOUR F'S OF SAIL FATIGUE: FLEX, FIBER COMPRESSION, FLOGGING, AND FLUTTER
THE FOUR F’S OF SAIL FATIGUE: FLEX, FIBER COMPRESSION, FLOGGING, AND FLUTTER
Our DIY Sail Care information only applies to traditional fabrics and laminates. 3Di is composite technology, not a sail laminate. For info on 3Di sail care, read Sail Maintenance. Here is what you need to know about the Four F’s of Fatigue for traditional fabrics.
No matter what it’s made of, sail laminates and traditional fabrics will eventually wear out. Fortunately, proper care and use can drastically increase the longevity of your inventory. North Sails CEO Dan Neri takes us through the various factors that typically lead to structural failures and shows us how to minimize damage.
Flex Fatigue
Just as UV exposure is an unavoidable bummer if you choose to sail in nice weather, flex fatiguing of your sails is a fact of life if you choose to sail in wind or waves. Any action of the sail membrane that causes it to cycle back and forth will eventually fatigue the materials. On very windy days this includes flogging during hoisting and lowering, rolling furling sails, and flogging while tacking or reefing. The edges of the sails flutter rapidly if leechlines are not tensioned correctly in moderate and strong winds. And in light winds on broad sailing angles, sailboats can roll violently enough to cause the sails to “slat,” which flexes the fabric and shock-loads the attachment hardware.
To avoid flex fatigue:
Eliminate or reduce flogging.
Make sure leech and foot lines are adjusted to eliminate edge flutter.
Change course in light-sloppy conditions to reduce slatting.
You can save your sail from much of the punishment from reefing by flaking the fabric below the reef and pushing it to the side of the boom opposite the vertical leg of the reefing line.
Fiber Compression
When sailcloth is bent, one side of the fabric is being stretched and the other side, the inside of the bend, is being compressed. The compressed fibers are the ones damaged. Fiber types that show the most remarkable strength under strain, like Carbon or Kevlar, break down easily when they are compressed. Some fibers crumble and fall apart, turning into powder. Other fibers shatter and displace longitudinally in the same way that a live tree branch fractures when bent in half. Once a fiber shatters, there is more exposed surface area for UV penetration—and the more the fiber is degraded by the sun, the more easily it will crumble the next time it is flexed.
Causes
The most likely causes of fiber compression fatigue are folding the sail for storage and smashing the mainsail fabric under slab reefing lines. When you fold your sails loosely with the folds parallel to the foot, there is no damage to the sail. So a mainsail that is flaked over a boom in exactly the same way every time is fine, and a racing jib that is flaked into a full-length zipper bag is a happy sail. However, when you fold a sail parallel to the foot and then fold it again along the foot in order to get it into a conventional sail bag, the loose flakes are forced into compact 180 degree folds and the fibers on the inside of those folds will be crushed.
Polyester and spectra fibers that are used in cruising sails will stand up to dozens of cycles, shattering just a little each time. When you bag your sails, it is better to fold in a different spot each time (and have hundreds of imperceptibly minor areas of fiber compression) than to fold in the same spot over and over and eventually end up with a hard horizontal line of shattered fibers.
To avoid fiber compression problems:
Fold sails in loose flakes whenever possible.
Avoid creasing a sail in exactly the same place each time it is bagged.
When reefing, push sail fabric to the opposite side of the boom from the vertical leg of the clew reef line.
Flogging
When a sail is allowed to flog, the leech of the sail will sustain more damage than the middle or luff. Think of a lion tamer snapping a big whip. Nothing is happening at the whip handle, but the farther away from the handle, the farther the whip travels and the more violently the whip snaps when it changes direction of travel.
Sailmakers taper the transitions from the base layer of the sail into the heavier areas of the leech. The tapered reinforcements help to soften the effects of flogging and to distribute the fiber flex over a greater surface area. You can reduce flex fatigue by paying attention to the length of time the sail is allowed to flog and the force with which it flogs.
Mainsails
Mainsails are supported on two of three edges, and full-length battens soften the flogging action of the unsupported leech. In breeze under 25 knots, a well engineered cruising mainsail with full-length battens won’t flog at all. Rather, it will wave back and forth while it is being raised and lowered. A mainsail with short battens (usually referred to as “leech battens”) is more adjustable and lighter, but will quickly deteriorate if it is allowed to flog.
Headsails
Headsails are only supported on one of three edges, so an untended headsail can potentially flog itself apart. Accordingly, the sail handling members of a cruising crew need to be ready execute any maneuvers involving the headsail as efficiently as possible. At a minimum that means always having the headsail sheets flaked and clear before a tack, jibe, or furl. Beyond that basic procedure, it is worthwhile to emulate a racing crew even during casual daysailing to minimize the headsail flogging. (For more info, read Club Racing: How to Improve Your Tacks)
Reduce flogging by:
Keep sails trimmed whenever possible.
Position headsail leads far enough forward to keep pressure on the upper leech.
Use an outboard lead for the headsail sheet when reaching.
Prepare for tacks before casting off old headsail sheet.
Raise the main in the lee of the land on windy days.
Run downwind when roller furling on windy days.
Select a full batten option when purchasing a new main.
Keep at least moderate tension on sheets when the boat must be stalled temporarily.
Furling
When it is time to roll up the headsail, both sheets need to be ready to run free and the person who will be hauling in the furling line must be in place and braced for the activity. If the furling is done with a winch, some drag should remain on the sheet to reduce the range of travel when the sail flogs. If the furling is done without a winch, the sheets need to be eased more aggressively so the whole operation takes less time. Whenever it is practical, turn the boat downwind before roller furling the sail. The strength of the apparent wind will be reduced by about 1.5 times the boat speed and the headsail can be partially blanketed behind the mainsail.
Flutter
Leech or foot flutter is flogging’s little sister. When just the edge of a sail flutters, there is significantly less sail area moving, but the number of cycles is significantly greater. Also, because a fluttering leech or foot edge does not shake the boat, it is easier to ignore. But when you ignore it, it doesn’t go away. Rather, the fluttering action steadily breaks down the fibers. Throw a little UV degradation into the mix and eventually the leech or foot tape will rip off the sail.
This is what happens after many hours of leech fluttering. The fabric right at the edge of the leech tape has been subjected to thousands of cycles of bending back and forth, compressing the fibers at exactly the same spot each time. Throw a little UV degradation into the mix and the tape will zip right off the sail.
Leech flutter is caused by unstable airflow over the trailing edge of the sail. If the air is flowing off the trailing edge fast enough, the force of the airflow will deflect the loose edge. That deflection will cause a vacuum that the fabric will snap back into and then the cycle repeats itself. The fluttering edge makes a noise like a playing card against the spokes of a bicycle. Treat this noise as a signal to get up and tighten the leech line.
Racing sailors are taught to ease the leech cord as much as possible to minimize the amount that the leech hooks to windward. The same idea is valid for cruising sailors, but we might as well err on the too-tight side in anything except the lightest wind. Better to have a slight hook in the leech of the sail than a ripped leech.
Tips to control leech flutter:
Position jib leads or the main traveler car so the sheet angle lines up with the leech.
Tension leech lines properly.
Excerpted from The Complete Guide to Sail Care and Repair, by Dan Neri
READ MORE
READ MORE
19 April
VIDEO: FLYING SCOT JIBING TECHINQUE
FLYING SCOT JIBING: STEP BY STEP
How to do a proper jibe in the Flying Scot
Whether you are racing a super yacht, a foiling catamaran, or a traditional small keel boat having top notch boat handling skills is one of the most important factors in having a successful performance while racing. Being able to whip off a perfect jibe in every condition will allow you to have confidence to execute your game plan without hesitation which can turn into many boat lengths in gains throughout a run. In this video, Zeke and Jay Horowitz focus on proper jibing technique in the Flying Scot.
“Make sure you understand the subtle differences in technique for each condition and always communicate with your team. It is really good to come up with a repeatable dialogue between skipper and crew so that you do everything the same way every time. On our boat, we do a hand off of the sheet and guy at the beginning and the end of the maneuver and we are sure to say “my sheet, my guy” every time so that there is no mistake in the hand off. We also try to focus on doing each step smoothly without rushing. It is more important to keep the spinnaker full, and the boat steady through the maneuver than it is to rush through it all and risk a mistake. As you get better at executing each step, you’ll be able to do them faster but it’s important not to rush”. – Zeke Horowitz, 2018 Flying Scot Midwinter Champion
Good luck and have fun!
Learn more about North Sails Flying Scot products.
READ MORE
READ MORE

18 April
VIDEO: HOW TO RIG THE E SCOW SPINNAKER
HOW TO RIG THE MELGES E SCOW SPINNAKER
How to Run the E Scow Douser System Properly
The Melges E Scow’s asymmetrical douser system makes it easy to launch and retrieve your spinnaker at the high speeds and crowded race tracks that you see in the E Scow class. Making sure that your system is run properly will help you nail every rounding and lead to better results.
Contact Eddie Cox for additional information.
READ MORE
READ MORE
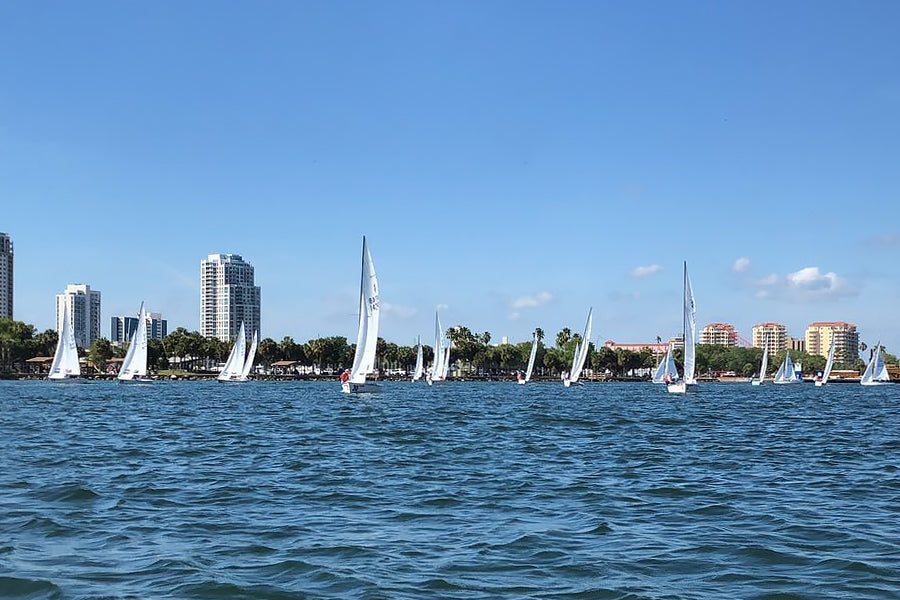
05 April
LIGHTNING SOUTHERN CIRCUIT TAKEWAYS
2018 LIGHTNING SOUTHERN CIRCUIT
North-powered Teams Dominate Grassroots Circuit Events In Miami and St. Petersburg
For many the annual pilgrimage south to the Lightning Southern Circuit is a tradition (to steal from a famous golf tournament) like no other! So, our team of Steve Kirkpatrick, Lightning legend Neal Fowler and myself decided that we needed to head to Florida and see what all the fuss was about. Since two of us were newbies to the boat, class and events we quickly found out what it was all about. It seems the Lightning Winter Championships and Midwinters, the two events that comprise the Southern Circuit, are all about great competition, tremendous comradery, and serious grassroots fun!
Unique to this event, the ILCA sponsors a program called the “Mentor Program” which is run, on a volunteer basis, by Nick Turney of Nick Turney Sailing Services. Nick provided on-the-water assistance, coaching, clinics, and racing briefings each day and everyone who signed up for the program learned a lot from the group briefings and individual attention. Helping sailors get up to speed to contend with the experienced sailors seems to be the prevalent theme in the class and the support and openness of the top sailors, who were often guest panelists for the program, really seemed a positive way to create a fun, learning experience for everyone on the scoreboard.
For us, the circuit allowed us to experience what a special class the ILCA is. Lightning sailors, to me, seem a special breed and the entire atmosphere of the events seems to be about some good old fashioned racing buddies working with each other to help the fleet grow. As I walked around the boat park it was easy enough to find sailors helping sailors, asking questions, sharing tricks, etc. This is what helps to grow the class! Our team benefitted from this spirit when, in Miami on the way out to the race course, our main halyard broke. We sailed in to find only 2 or 3 teams still on the dock but all of them quickly jumped in to help as we flipped the boat at the dock and several folks held our, now sideways, Lightning steady while Steve and Tom Allen (boat builder extraordinaire) tied the main to the top of the mast and pushed us off so we would not miss any races!
Winter Championship – St. Petersburg Yacht Club- March 24-26
The Winter Championship, hosted by St. Petersburg Yacht Club, was a nice way to kick off the series as 52 teams descended upon Tampa Bay traveling from far and wide to race with friends and family.
Light air greeted the fleet on Saturday, yet still provided racing conditions in the later afternoon to allow us to get in one race and get the series started. Day two was very much the same, with winds on the lighter side and shifty from the ESE, still allowing for great racing conditions as the day progressed. Monday arrived with fog which burned off as the day went on, bringing a little more wind than what was originally predicted. Once the sun came out and heated things up, the wind died off, but still gave the fleet two more solid races to conclude the event.
Congratulations to clients from team Argentina, Javier Conte, Julio Alsogaray, and Paula Salerno for taking first overall. In second was Team PatStrong with David Starck, PJ Shaffer, and Kelly Barnash. In third, fleet newcomers, Church of the Great Outdoors, with Steve Kirkpatrick, Neal Fowler, and Hillary Noble.
Congratulations also to Masters Division winner and “Lightning King of the South”, Ched Proctor with team Abigail Preston and Jeff Eiber on the swift Veggie Sub.
Special thank you to Todd Fedeszyn and the St. Petersburg Yacht Club and Sailing Center volunteers for your outstanding job running races and setting the courses. In what certainly were trying race conditions, their race management experience and overall understanding of the area and weather patterns made it so everyone was dealt a good hand.
North-powered teams finished 1,2,3,4,5,6,7,8,9,10 this year at the St. Petersburg Winter Championship. Well done!
Full Results
Midwinter Championship – Coral Reef Yacht Club- Miami, FL- March 28-30
The Midwinters hosted by Coral Reef Yacht Club in Miami was also a not-to-miss event, with 29 boats competing in hopes finding idyllic Biscayne Bay conditions and looking to either improve their series standings or hold of the charge of their nearest competitors. Several new teams joined in with those who travelled across the state from the Winter Champs making for a fun and fresh new start to the 2018 Midwinter Championship.
Breeze was quite “fresh” on Wednesday as teams enjoyed hiking hard through the puffy and wavy conditions. An easterly wind direction was the end result, as over the three days of racing the wind slowly clocked right, making for a beautiful southeasterly pressure that allowed for great racing conditions each day for sailors. With Nick Turney Sailing Services there at the scene, sailors could gain helpful insights and racing video replays to review each day. With added drone footage being shared each evening, the excitement of the mark roundings and crossing tacks was renewed over evening refreshments and comments such as “Boy that was close!” were shared amongst the gang. Having on the water support from Nick, top-notch fleet management, and spot-on race committee volunteers makes events like these a true success for all involved.
Congratulations to David Starck’s Team PatStrong for winning the tie-breaker with previous World Champion Javier Conte and his team Argentina. Tito Gonzalez’s team came out hot with a win in the final race, giving them third overall. Tito sailed with his family on Ojo de Lince, with his daughter Trini and son Alberto Gonzalez Jr, making it a true family affair. Congratulations to our clients once again for your spectacular performances across the board.
Clients finished 1,2,3,4,5,6,7,8,9,10 at the Miami Midwinters. Congratulations to our clients for finishing at the top of the fleet, proving teamwork and speed are the keys to success.
Full Results
Congratulations to series winners on Argentina, with Javier Conte, Julio Alsogaray, and Paula Salerno for winning the series total out of 14 races and to Javier for winning the Humphrey New Comer Award. Jack Mueller Grand Master Award winner this time around was Grand Master Ched Proctor, and the Dr. Georges Peter Great Grand Master Award winner, Bill Mauk. Congrats to Mark Allen from Michigan for winning a new North Sails Jib!
Three Takeaways
1. Starts are crucial. Not setting up too early, having a hole below you to accelerate, and starting as close to the favored end as possible are very important. Don’t be afraid of a port-tack approach- this can be helpful in finding the right hole on the line that will give you a nice gap to leeward to accelerate.
2. Boat speed. Boat speed. Boat speed. Get out there early and speed test with another boat. Make sure your rig is set up for the lulls. Adjust your leads for waves/chop/flatwater. Straight line speed, especially off the starting line is very important in larger fleets. Being able to hold your own lane with speed after the start is a winning move.
3. Be comfortable. Be ready. Practice maneuvers before you start the race. Give yourself time to adjust to given wind conditions. Be comfortable with your abilities, and be confident in your position. Executing quick-yet smooth maneuvers, (especially in light air or chop) is beneficial. Being able to throw in a last minute roll- jibe, or double tack on the starting line to gain height are valuable techniques you can’t plan ahead, but you have to be ready to execute in a snap. Being ready and being one step ahead of your competitors makes a huge difference, and will help you stay in front of the fleet.
(l to r) Karen Park presenting the Colin and Karen Park Trophy to Kristine and Todd Wake-Top performing wife/husband at the Winter Championships
Ched Proctor – Grand Master Circuit winner
Circuit VP David Starck shows everyone how to be a class volunteer and still win regattas! 1st in Miami, 2nd in St. Pete and 2nd overall in the circuit!
My team Church of the Great Outdoors, with Steve Kirkpatrick, Neal Fowler, and Hillary Noble
Neal Fowler showing Steve and I how to “properly” tune the rig! Always learning!
(l to r) Brian Hayes and Nick Turney give a tuning clinic during a postponement at the Winter Championship
Mark Allen with Skip Dieball and Emily Simon on their way to 5th place at the Winter Championships
Josh Goldman, with Jackson Benvenutti and Monica Morgan sailing Hard Asset to 8th place overall in the circuit (note: the “Gold Man” Sailing Team shirts!)
The “King of the South” Ched Proctor, with Jeff Eiber and Abigail Preston chasing down the pack in St. Pete on their way to the Masters win.
READ MORE
READ MORE
27 March
CHARTERING A BOAT - TIPS TO MAKE IT A POSITIVE EXPERIENCE
DON’T BE AFRAID TO CHARTER A BOAT
Tips to make it a positive experience
Will Welles won the 2018 Midwinters in a chartered J/24. With his organization skills and attention to details, we think Will has come up with a system that helps minimize surprises when chartering a boat for an event. Here are his top tips:
We have all had good and bad experiences with chartering. Most people say it is luck of the draw, but I believe there are some things you can do to improve the odds.
First thing is to do your homework!
Make sure you find the best boat you can. Whether it is a particular builder, hull number, etc, make sure you dig until you find what you are looking for. I am pretty particular about the vintage of the boat, what mast it has, keel shape, rudder, etc… and if you can find a boat that already has good pedigree then that is a plus! What you are looking for is as close to turn-key; a boat that will need the minimum time to make it ready to sail.
Where to start?
First, start with the local regatta organizers and people you know and trust in the area who may know the local boats. It’s not what you know, it’s who you know at this stage.
Once you find a couple of boats that fit the bill, ask the owner for the class measurement certificate, history of the boat, recent upgrades, and what extra parts and pieces would be included.
Ask for detailed photos
Photos are always worth a thousand words! Ask for photos of the keel, rudder, rudder hardware, tiller, bottom, deck, mast, boom, running rigging, standing rigging, etc. I like to see how the deck hardware is laid out. While most boats run the same set up, it is not worth risking any surprises. The deck pictures should allow you to zoom in on hardware to see its age and condition.
After I have reviewed the photos, I ask the owner a few simple questions that can usually be answered with either yes or no, to speed up the reply. For the J/24, this is the list I use:
Bottom, foils, rudder? Silky smooth?
Headstay max class length?
Protest flag?
Yellow flag?
Carbon spin pole?
Good lifting strap?
Tension gauge? Loos Gauge B?
Optional equipment – weight, right at minimum all up?
Five good life jackets?
Compass – (I’d like to use yours if ok, just because I don’t think mine will fit on that older cradle)
Velocitek – (I can bring mine)
VHF – (I’ll bring my own)
Boat tools?
Windex masthead fly?
Blocks, boomvang, etc., all good?
Mast still straight?
Mast butt adjuster?
Dedicated rig tools?
Once I have these answers for each boat on my list, it’s time to choose the best boat for the event. However, the work doesn’t stop here; this is where the journey with your new charter boat begins!
Time is Precious!
I think we all can agree that time is precious at the regatta, so anything we can do to save time will help maximize our on the water time, which is how we’ll get used to our new best friend.
A big time-eater is trips to the marine store. Who even knows if there is a marine store near the regatta site, or how bad traffic will be? Even if the store is right around the block it still takes time away from going sailing. Put together a spares kit and either ship it to the regatta site or bring it with you. You don’t need to pack every spare part, just what you know you will need based on the information you have about the boat. I also take a few things that makes me feel comfortable right away: tiller extension, favorite mainsheet or windex, etc. Part of getting up to speed in a charter boat is having some familiar things around you. Here’s a list of stuff I bring with me:
Running rigging (spin sheets, jib sheets, mainsheet)
Karl’s Boat Shop tiller w/tiller extension
Loos tension gauge
Wetnotes with tuning matrix
Calipers (depending on turnbuckles)
Metric tape measure
KG Fish scale (to weigh all up boat items)
Spare blocks, clevis pins, ring dings, etc.
Sail repair tape, sailmaker’s palm, needles, telltales
Spare compass and bracket
Velocitek and bracket
Spinnaker launch bag
Spectra lashing line
Electrical tape
Teflon tape
Tools? Drill?
Add to this any parts you know you will need for the boat, based on the pictures and information you got from the owner.
Make sure you allow yourself plenty of time to get the boat sorted before going sailing. Hopefully you and/or someone else on your team likes and is good at boat work; ask other team members to figure out the lay of the land, so if you do need a part or a tool you can get it without too much fuss. In my experience, there are always nice locals who will loan you a missing item or help find one for you if you treat them well in return. I always try to help traveling sailors when they come to Newport, because it works both ways!
Check the Mast
Once the boat work is done and the mast is stepped I always measure to make sure the mast is in the center of the boat. There are a few ways to do this. I like to measure aft from the stem down each rail towards the mast and make a mark on either rail (starboard and port). Then I measure from the keel tip up to said mark on each side. Next, I get the mast straight at the base rig setting (20/15) and hang a bucket full of water over the rail. The goal is that the mark lines up on each side. If it doesn’t line up, I adjust the upper shrouds and use the lowers to make the mast straight at base dock tune.
If the mast is already stepped, I suggest sending someone up in a bosun’s chair to tape and check over fittings, etc., once the boat is in the water.
Time to Sail
Time to splash the boat, hook on the sails and head out for a shakedown cruise to see how everything looks and trims. You may add a few more things to the work list; if so, allow time in the early morning so you can sail most of the next day. Ideally, we will line up with another fast boat to see how we are going. Fingers crossed, everything aligns! At the end, we always try and leave the boat better than we found it.
2018 J/24 Midwinter winners used a chartered boat
Keel looks good on the photo
Preparing the bottom
Time to sail! Photo Chris Howell
READ MORE
READ MORE
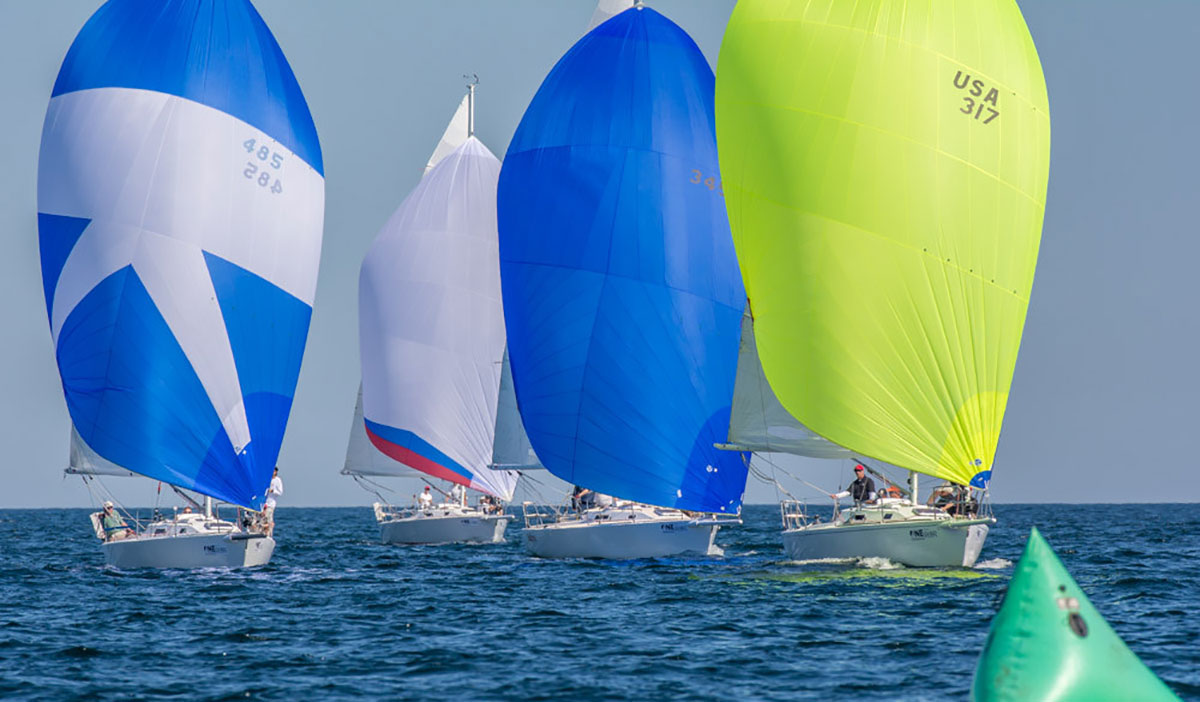
05 March
J/105 DOWNWIND TIPS AND TRICKS
J/105 DOWNWIND TIPS AND TRICKS
How to sail as deep as possible while still keeping your speed up
We often see teams get a little too relaxed when sailing downwind, even though this is where you will make the largest gains (and losses) when racing your J/105. You are trying to get to the bottom mark as fast as possible, so you need to sail as deep as possible while still keeping your speed up. Since the J/105 is primarily a displacement boat and doesn’t plane easily, the key is to coordinate several critical elements as you sail through velocity changes.
Puffs and lulls
Sailing with the wind, you will only see about half as many puffs as you did sailing upwind, so it is critical to designate one crew to call the breeze. A constant stream of verbal puff and lull communication will help keep your team in sync and anticipate the next change in velocity.
Helming
The goal for the helm is to minimize rudder movements while steering the boat downwind, using crew movement and sail trim to steer the boat. Make sure you are in a comfortable position with good visibility. We often see the helm trying to sit too far forward, which makes it difficult to steer accurately. As a driver, you are going to be working hard all race, so get comfortable!
Kite Trimming
The spinnaker trimmer and helm should maintain a continuous dialogue, discussing the pressure on the spinnaker and the correct angle to sail. “Up in the lulls and down in the puffs”…right? Yes, but make sure the angle changes are slow and smooth. As the breeze starts to drop, begin to “heat” up slowly—before the boat speed crashes—until you reach the angle that will keep your speed up in less breeze. When the puff returns, bear away and gradually build speed until you reach the new lower target angle.
In non-planing boats like the J/105, the goal is to get the spinnaker to rotate to weather, which increases its projected area and gets the sail out of the disturbed air behind the mainsail. To accomplish this we use both heel angle and tack line ease. In all but very light wind, keep the boat flat (or even slightly heeled to weather). This will also help the boat sail deeper in the puffs with less helm movement. Generally speaking, you can ease the tack line of the spinnaker as long as it goes straight up or to weather; if it goes to leeward when eased, keep it tight.
Weight placement
The J/105 is very responsive to weight placement, and moving crew weight to help turn the boat will minimize the amount of rudder needed.To head up, the crew leans to leeward; to head down, the crew hikes/leans to windward. In light air, we like to keep only the helm and main trimmer behind the cabin top winches; put the rest of the crew at the shrouds. As the breeze picks up, we move weight back just enough to keep the bow from digging in.
At least once a season, we like to completely empty the boat of EVERYTHING. This is a great way to see how much excess weight is on board, as well as an opportunity to pare back to the bare necessities.
Stabilize the rig
Keeping the rig from bouncing around in puffs and waves will mean the sails are pulling the boat forward and not just moving the mast. Apply enough backstay tension to make it “just snug”, and tension the jib sheets after furling to take the “slop” out of the headstay.
Four Modes of Downwind Sailing
Light air VMG
In VMG mode, the apparent wind will be around 90 degrees. Make sure the trimmers are easing sails in the puffs so the driver can work lower. The crew will be sitting forward and to leeward in the light spots, moving to the centerline and even up to weather in the puffs to help steer the boat down. Constant communication between the trimmers and helm is critical!
Moderate air running
The crew sits just behind the shrouds, heeling the boat to weather to help rotate the spinnaker out from behind the main. Ease the tack line as much as possible while keeping the spinnaker stable; don’t let the tack fall to leeward.
Heavy air running
The crew slides aft to help grind in the spinnaker and to keep the bow from digging in. If you are having a hard time steering straight, there is too much weight forward.
Wing on Wing
Sailing wing and wing can be very beneficial, especially for tactical reasons. Our recommendation is to sail conventionally, unless the water is very flat or you need to dig low for tactical reasons. A winged-out spinnaker is not as stable, and recovering from a collapse is very slow.
When all of these variables work in harmony, huge gains can be made by continuously sailing lower and faster and smoother than the boats around you. By working on these elements in practice and then applying what you learn on the race course, you can definitely “up your game.”
10 knots of wind. Crew forward and to weather to help the spinnaker rotate to weather. The tack line is eased to increase luff windward projection. Two people looking aft to ensure that we get into and stay in the puffs.
Crew forward and to weather with good spinnaker rotation.
Wing on wing in FLAT water. Crew forward and to weather with spinnaker trimmer holding sheet out to ensure that it is not affecting trim. Crew looking aft to help find puffs.
READ MORE
READ MORE
26 February
GYBING LIKE A HERO
JIBING YOUR VIPER 640: HERO OR ZERO
Boat Handling Goes A Long Way
Whether you are gybing your Viper in 5 knots, 15 knots or 25 knots, A LOT can be gained or lost. Having the confidence that your crew can nail a stellar jibe at just the right moment in any condition is a truly liberating feeling that can see your team leaving other boats in the dust. No matter how much wind there is, the keys to a successful jibe are:
Steering with your body weight
Rate of tiller movement
Getting the spinnaker filled on the new jibe
Hitting the exit angle
CONVENTIONAL JIBE
If the wind is very light (under about 6 knots or so) you should try doing a “conventional jibe”. This method guarantees that the spinnaker is going to make it around the headstay (as long as everyone keeps their feet off the sheets!) which takes away the risk of messing up the “blow thru” part of the blow thru-jibe. There is nothing worse than having to pull the spinnaker off the windward side of the jib after failing to execute a blow-thru in light air. You’re dead in the water!
To execute the conventional jibe, the first thing to do is move body weight to weather to induce a down turn. The turn down can be slow so don’t move the tiller too much at first. The trimmer should slowly ease the sheet out as the boat turns down until they feel the pressure leave the sheet. This is usually right at about dead down wind with the clew of the kite eased to being nearly even with the head stay.
At this point, the trimmer drops the existing sheet and starts whaling on the new sheet, pulling it around as the helmsman speeds up the rate of turn, ultimately hitting the right exit angle, which needs to be high enough on the new jibe that the spinnaker is able to fill. This depends a lot on how light it really is. Whatever the crew can do to generate a bit of roll throughout this process is really helpful to keeping the speed up in the jibe.
Both the helmsman and the forward crew should stay on the old windward (or new leeward) side as long as it takes for the trimmer to fill the kite and get situated on the new board. There is always time to cross the boat!
BLOW-THRU JIBE
As soon as the wind is above 6 knots, we use the blow-thru method all the way up the wind range. To execute a good blow-thru, first be sure that both sheets are ready to run clean. Just like in light air, it is important to try to steer the boat with body weight, so have all the crew lean to weather to start the jibe.
As the boat begins to turn down, the trimmer should give 1-3 good pumps of the existing sheet (depending on how long their arms are!) which flattens out the spinnaker and makes it easier for the breeze to now fill it on the new side. The jib trimmer can also trim the existing sheet in at this time.
It’s very important that, after the initial down turn using body weight, the helmsman really tugs the tiller and turns sharply. The forward crew should have to hang on tight so they don’t get ejected! A good blow-thru means that the kite goes from full one side to full on the other side as quickly as possible. Doing a fast turn enables a quick transition for the kite so practice over-exaggerated turns and then start to slow yourself down if you are too quick (I bet you won’t be!).
As we are passing dead down wind and the spinnaker has lost all its pressure (and while the helm is still hard over) we recommend having the forward crew reach up to the spinnaker clew and give it a nice yank down and back. This puts tension on the leech and flattens the sail, making it much easier to fill onto the backwinded jib. A critical part of the sail actually blowing around the headstay is that it actually fills from the leech first. This little yank makes this much for likely to happen.
At about the same time the forward crew does the yank, the trimmer should now be over to the new sheet which should only require a few big pulls since the wind is now doing most of the work for you. This is the time when it is really important that the helmsman finds the right exit angle. As soon as they see that they’ve turned fast enough to execute the blow-thru, they can slow the turn down a bit and start to try to feel the boat based on its heel angle. If the boat is dead flat, you need to keep turning up to the appropriate exit angle. If you feel you’re starting to wipe out….. Time to ease the sheets, get to the high side and try to turn back down a bit! (scooting aft in the boat can help avoid a wipe out too)
After the kite is all the way around the head stay and filling on the new side, the jib trimmer can go ahead and switch the jib as well. The method of this jibe really doesn’t change much in the different wind speeds – you just need to practice a lot in all conditions to hone in on the variables like rate of turn, exit angle, and how much sheet you need to go through.
HEAVY AIR
If you are starting to get towards “survival conditions” for your team, you can reintroduce the “conventional jibe” again. It may be a little less risky in terms of wiping out. The key here is to try to find a good wave to surf down as you begin the jibe so that the load on the sails decreases. As you are surfing down the wave, you can ease the kite out a few feet, get to dead down wind and then flick the main over and cross the boat. Once the main and the crew have switched sides, the boat becomes a lot more stable. Then the trimmer can pull (hard!) on the new sheet to start to pull it around as the helmsman conservatively turns up to find the angle where the kite will fill again. This method won’t be quite as fast as a perfectly nailed blow-thru jibe in 25 knots, but it is a heck of a lot faster than turning over from messing one up!
READ MORE
READ MORE
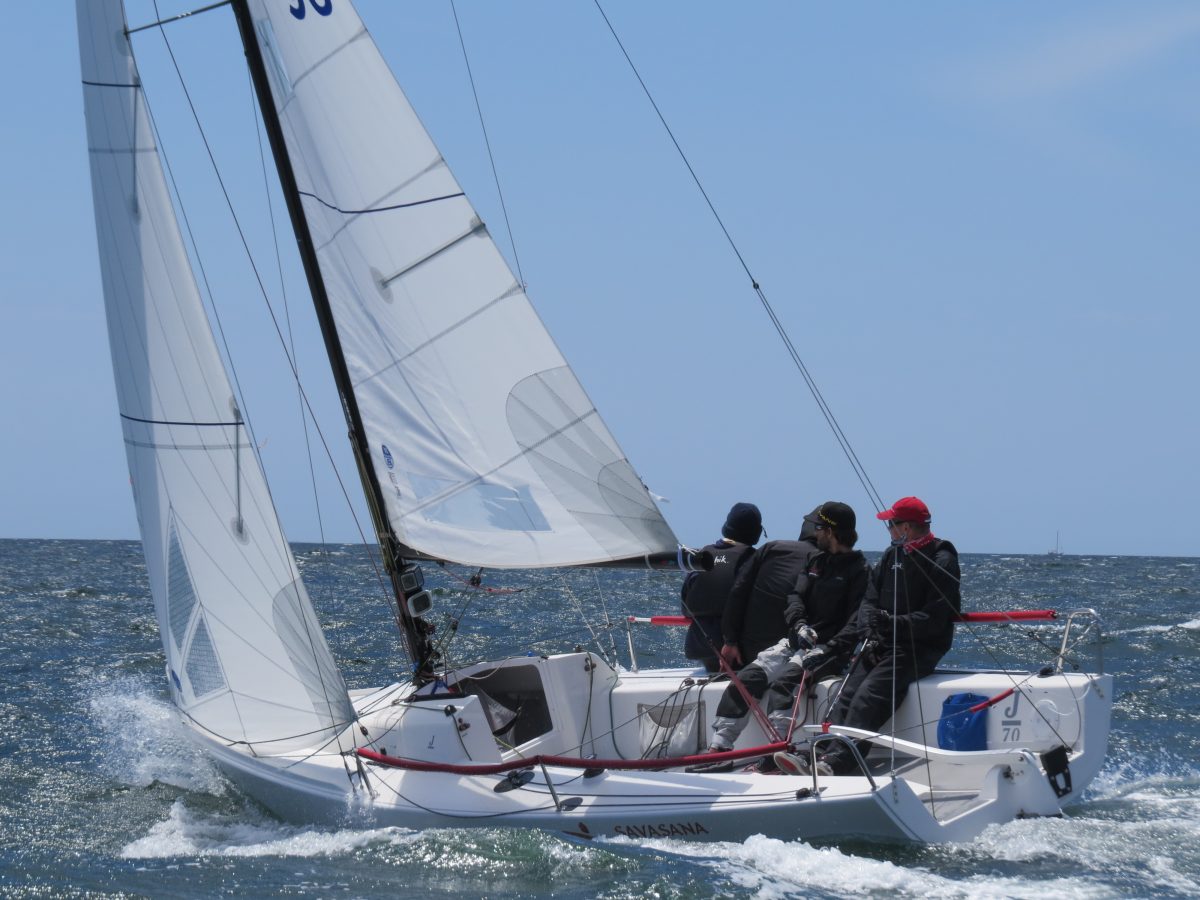
22 February
HOW TO TRIM THE J/70 JIB FOR MAX SPEED
J/70 JIB TRIMMING FOR SPEED
Jib Lead and In-hauling Settings for the J-6 Jib
Trimming the jib on the J/70 involves both technique and accuracy. Proper jib trim will help balance the boat and help in boat speed and pointing ability. While achieving the proper trim is the goal, being able to repeat the trim consistently will also make a big impact on your boat’s performance. The important factors in proper jib trim are the lead car position, jib sheet tension, in-hauler tension, jib halyard tension and reference marks to repeat all the settings. The final trim position for the J/70 jib is a balance between the sheet tension and in-hauler tension.
When the jib is trimmed in, the leech of the jib should be lined up with the spreader stripes (between 18”-22” from the side of the mast). Within this range, your upper jib leech telltale should be flowing 90-100% of the time. Trim in until it just stalls then ease a hair until it starts flowing again. This is your max trim.
Jib Car Position
The first step in jib trim on the J/70 is jib lead car position. Setting this position is important as it affects all of the other settings. Combining the jib lead car position with the amount of sheet tension, in-hauler and halyard tension allows the trimmer to manipulate the sail to fit the conditions and style of the skipper. When discussing the position of the jib lead car, we reference the number of holes visible behind the first deck mounting screw in front of the car once in a position.
Windward Sheet
On the J/70, we use the windward, or lazy jib sheet as an ‘in-hauler’ to pull the clew of the jib to windward and more inboard. When setting the in-hauler tension, our reference point is the distance the clew of the jib is away from the side of the cabin house.
J-6 Jib: For the J-6 some in-hauler is always required. In very choppy conditions, use less in-hauler with the clew at 2”-3” from the cabin house and the lead at 5-6 holes showing. In light to moderate chop the clew can be at or just inside the cabin house with the lead at 6 -7 holes showing. In very flat water the lead can go back more to 7-8 holes showing.
J-2 Jib: Our go to setting for the J-2 is 2” from the cabin house. In Flat water we may go to 1” away and in moderate chop conditions 2.5-3.5”. In big waves and chop we may go with no in-hauler. Remember that the less in-haul is used, the farther forward the jib car needs to be.
For the J-2 jib with no in hauler, the car should be around 3-4 holes showing and with a lot of in-hauler on and the jib clew is at 1” from the cabin house, there should be 5-6 holes showing in front.
Jib Halyard
The jib halyard on the J/70 is rigged with a fine tune purchase that can be adjusted while sailing. In lighter winds, the jib halyard should be set so that there are slight wrinkles appearing in the first panel along the luff of the sail (approx. 4-8” back from luff of sail). If wrinkles extend further back in the sail, or no wrinkles appear at all, the halyard should be adjusted to compensate. As the wind gets stronger, and the sails need to be de-powered, the jib halyard should be tightened just to the point where the wrinkles along the luff disappear. As the halyard is tightened and loosened, it is important to keep in mind that the halyard tension also affects the leech tension of the jib and the sheet and/ or in-hauler may need to be adjusted to compensate.
Make Marks
Make reference marks on jib sheets for both the sheet tension and in-hauler tension. Having reference marks will make it much easier to duplicate your trim settings quickly. Jib sheet and deck reference marks help accurately repeat trim settings It is a good idea to experiment with different settings for each control to get used to how each control affects the sail and how they interact with each other
The basic effect of the three jib controls, lead car position, in-hauler and jib halyard is:
Jib Lead Car Position
Forward = Tighter leech, round foot
Aft = Open leech, flat foot
In-hauler
More = Tighter leech, round foot
Less = Open leech, flat foot
Jib Halyard
More = Flatter sail
Less = Deeper sail
** Counting the number of open holes in front of the jib lead car and after the first bolt identifies jib lead position.
*** The distance (in inches) from the clew of the jib to the side of the cabin identifies in-haul measurement. Use less In-Haul when lead is forward and more in-haul when lead is aft.
After setting the sheeting position of the jib, the trimmer needs to constantly check to ensure the trim remains correct as the conditions change. Since the jib on the J/70 is high aspect (tall and thin) changes in the conditions have a significant impact on the trim of the sail. For this reason, there are telltales attached to the upper leech of the jib to help the trimmer know when the sail is going to stall. When the sail is trimmed properly for upwind, the leech telltales will be flowing and if the telltales begin to stall, the sail will need to be adjusted to regain the flow. Most often, only a small adjustment is needed to help return the proper trim and flow to the sail. The reference marks on your spreaders will also help with jib trim. You will find that in 10+knots in flat water you may be able to sheet so the jib leech is at the inside, 18” spreader mark and the leech telltale is still flowing. When it is light and lumpy you will find that the leech will need to be closer to the outside 22” spreader mark. Easing the jib sheet slightly is the first step in returning flow to the jib. Normally, this will only require an inch (or less) of sheet to be eased out. If the leech telltales continue to stall when the leech is sheeted in to the spreader stripes, other adjustments need to be made to properly trim the sail. Since the telltales indicate the stalling of the upper leech of the sail, adding twist is likely the solution. The two ways to best achieve more twist in the jib, is to move the lead car aft and use less sheet tension. As described earlier, both adjustment will add twist to the sail and help regain the twist and flow at the top of the sail.
Other J/70 Speed Resources:
J/70 Speed Guide
J/70 Full Tuning Guide
J/70 XCS-1/J-6 Quick Tuning Chart
READ MORE
READ MORE
21 February
VOLVO OCEAN RACE: JUST ANOTHER YACHT RACE, ONLY LONGER
VOLVO OCEAN RACE: JUST ANOTHER YACHT RACE, ONLY LONGER
Around the World racing veterans from North Sails share their biggest lessons learned
What does an extreme event like the Volvo Ocean Race have in common with the distance racing most of us do? We asked race veterans (and North Sails employees) for lessons learned; read on for a few tips that just might help you on your next race.
The biggest screwups teach valuable lessons.
North Sails Vice President Kimo Worthington won the 1997-98 Volvo Ocean Race on EF Language
“On our first Southern Ocean leg from Cape Town to Australia, we didn’t have any idea what we were doing and we wiped out in a big squall, blew out our kite. We ended up in irons, and when I looked over the side the spinnaker pole had somehow wrapped itself around the front of the keel. Huge mess. Four hours of cleanup, and then we crashed another four times before the leg was over.
“As soon as we got into Fremantle, we had a very frank team meeting—not rah rah, but how did we screw up, how could we do it better? Instead of imploding, we decided to stack harder and farther back than anyone else. We also decided reefing was the key. Once we reefed, we could carry the kite in 40 knots of wind. By the time we passed Cape Horn, we were 500 miles ahead. That debrief was key to winning the race.”
Tune up with the fastest team before the start.
North Sails President Ken Read skippered PUMA Ocean Racing around the world in 2008-09 and 2011-12.
“MAPFRE and Dongfeng did something very interesting before this race. They both must’ve decided they were good enough to win a two boat race, so they trained with each other to create an even bigger speed advantage over the other teams. So now what you have is two arch rivals going out to play with each other. Tuning up beforehand is about three things: Time, money, and smarts. Time to do some serious training. Money to buy the best drivers. And then enough smarts to team up for pre-race training with the other top guys… that’s a pretty powerful combination.”
© Ian Roman / Volvo Ocean Race
Keep working with your sail designer to get faster.
North Sails Designer Mickey Ickert has worked with several Whitbread and Volvo Ocean Race teams, including 2005-06 winners ABN AMRO.
“Back when the Whitbread and Volvo were on the cusp of satellite communication, periodically I would get a call from the boat discussing the next sail or sail recuts to be made in port. In those days, the sails were consistently developed and updated by each team, with the aim to catch up or outperform the opposition. It’s a long race, with plenty of opportunity to learn and improve, so it was possible to outperform the early leader if everyone kept talking as a team with the designers.”
© Oskar Kihlborg Volvo Ocean Race
READ MORE
READ MORE

07 February
J70 SPEED GUIDE
The boat appeals to these different groups because it’s fun to sail—it’s a mixture of dinghy and keelboat—and it’s not technically too difficult.
READ MORE
READ MORE

02 February
SPEED READING: HOW TO MAINTAIN FOCUS WHILE OFFSHORE
SPEED READING: HOW TO MAINTAIN FOCUS WHILE OFFSHORE
Surviving Times of Isolation
📸Konrad Frost
Day after day, mile after mile, distance racing reminds us of that never-ending feeling of being stuck in one place for extended periods of time. Hear more from Casey Smith(CS) how to cope with those long periods of isolation where you can only do so much. Casey is a two-time Volvo Ocean Race veteran and was a key member onboard during all of Comanche’s record runs and race wins. Casey knows a lot about being stuck out at sea, but still finds humor in the little things and gets his job done, which is most important.
Here are Casey’s tips for maintaining focus while isolated at sea for days on end:
What’s the longest race you’ve done?
CS: For sure it’s the Volvo Ocean Race. Four hours-on, four hours-off, the whole way around the world. Waking up and coming on deck “Oh, hi. Fancy seeing all you guys here! And look, that other boat we are racing against is still right there, and it has been for the last week!”
Do you have a sequence of things you think about that help you stay focused?
CS: Sleep. Eat. Four hours on watch. Repeat (10, 20, 30+ days…).
Do the days blend together or do you lose track of time?
CS: For sure you lose track of the days of the week you never lose track of time because the whole boat revolves around time. The four hour watch rotation or the weather schedules and boat position schedules are all very closely followed and everyone wants as much time to rest as possible and also know how you are doing on the fleet.
📸Yann Riou
What are some things you think about while you are sailing for extended periods of time?
CS: You just need to concentrate on the competition aspect of the race; that’s why you are out there in the first place. Compete and try to win. It’s really important to put everything into sailing the boat 100%.
How do you maintain your focus if the weather gets rough and you are on the same tack/jibe for hours on end?
CS: Focus comes from wanting to win. Chances are if it’s windy and downwind are probably going fast. You want to make sure you are the fastest boat and keep the pedal down. If you’re sailing upwind, and conditions are windy and rough, that’s a bit tougher because it’s hard to sleep during the off-watch and your energy is a bit lower. Being on the same tack or jibe for long periods is great as it means you get a break from moving sails and equipment so everything has a silver lining!
What advice can you give to someone who is sailing offshore for their first time in relation to staying focused and not feeling overwhelmed?
CS: It’s all about making the boat go fast. Basically nothing else matters. You have a job to do, it might be helming, trimming, grinding, sail changing and everyone contributes to miles gained or lost. Do your job at 100% and keep the boat moving fast. Also, stay calm and level. There will be times when another boat (or boats) is doing better than you but stay calm and keep sailing your boat 100% as that’s all you can control.
📸James Blake
When you are down below, if you are not sleeping, what do you do to still stay alert and ready for when it’s time for your shift to start?
CS: Eat. Make coffee for the team. Tidy up the living space up. Dry water out of the bilge. Check the steering and other systems. Watch movies.
What are your favorite foods to help stay awake and focused if you are the crew on shift?
CS: We are usually limited on what foods we can have on board, so your mind does wander to what food you love and would love to be eating. The reality is you have never seen faces light up as much as when a fresh bag of jerky comes on deck. Coffee and warm drinks are huge as well, but chewing gum is needed after the jerky and coffee. Brushing your teeth is something that slips a little offshore.
Is there anything you have vowed to do when you’ve been on a long leg? (Did you do it?)
CS: Remember to load some more movies, music or books on the iPod. You can only watch the music video of Umbrella by Rihanna so many times.
Staring at the horizon for so many hours on end, have you hallucinated offshore?
CS: No hallucinations on deck but I’ve had some crazy dreams during the off watch. Also waking up and forgetting where you are and then slowly coming too. Then the realization of “crap, I’m on the boat and only one week into a six week leg from China to Rio.”
READ MORE
READ MORE
30 January
STARTING STRATEGIES: LOW RISK, HIGH REWARD
STARTING STRATEGIES: LOW RISK, HIGH REWARD
Tricks for a Better Race Start
The first two minutes of a race is arguably the most important. Those first two minutes will define where you start on the line, and how much space is around you to accelerate. This makes starting one of the hardest skills to master in sailboat racing. Good news is there are a few tricks that can make starting much easier. These tricks focus on executing a start that is low-risk and has a high-reward. A low-risk start isn’t going to mean that you are leading at every windward mark, but it will keep your options open on the first beat so you can go where you want without being forced which will give you a better chance of rounding the top mark in the front of the pack. Once you are in the front, it is easier to hang in there.
In the video below, our expert Mike Marshall talks us through a ten-boat start where one boat, in particular, had the opportunity to contain the fleet and have a low-risk start with just one small decision change. Instead, because they were too early, they had to sail down the line which then forced them into a high-risk starting situation that gave them no control of the race, or their competition.
READ MORE
READ MORE
25 January
SPEED READING : OFFSHORE RACING
SPEED READING : OFFSHORE RACING
North Sails Billy Sykes shares tips for racing offshore long distance
© Rolex / Daniel Forster
Billy Sykes joined Matt Allen for the 2017 Sydney-Hobart. Matt won this race 34 years ago, and just last year pulled off the overall corrected time win, where he was awarded the prestigious Tattersall Trophy. Over the course of the race, there were lessons learned but the overall experience was something the skipper and crew had well-prepared for. Billy shares his top five tips for doing a long distance offshore race based off his latest experience on the new TP52 Ichi Ban.
Build your team with intent.
Each crew member wears multiple hats. Going into a distance race, there will be times where the crew has to get some rest. Usually the crew will divide into shifts or groups to make this possible. While some of the crew is resting down below, the others are racing the boat to its full potential. During this time, you wouldn’t wake up your crew to come out on deck for a sail change, you’d simply execute it with the crew that was ondeck for that shift. Building your team with intent to let everyone take turns for each job is the reality of a long distance offshore race. There isn’t just one bowman. There isn’t just one kite trimmer. Having each crew member understand all positions, it makes the team stronger and contributes to the team’s overall success.
© Rolex / Daniel Forster
Make sure your crew is comfortable and confident at the helm.
For an offshore race, it is crucial that all crew members can steer the boat with confidence. In our case during the Sydney-Hobart, Matt made sure all the trimmers were happy steering the boat so by the time we started the race, we all felt we knew the boat well. Over half the crew ended up helming over the course of the race so this preparation was critical. In big breeze downwind with the our biggest masthead spinnaker up, being able to change who was at the helm every hour was a fundamental piece of the success – everyone on our crew knew what to do so they were quick to make decisions and comfortable executing maneuvers.
“Matt did a great job making sure all crew members could steer with confidence during the Sydney-Hobart. It was very challenging to steer the boat downwind in these conditions. The best for us was that we just kept pushing her hard, we never took the pedal off. Running at 24-30 knots with essentially our biggest masthead spinnaker up was so challenging, it was two stand-out helmsman in those conditions who took the tiller and did an exceptional job.”
Choose your inventory wisely.
During the Rolex Sydney-Hobart Race the sea-state was tremendous. Going into the race you have an idea of what to expect, and after do-diligence, you can be more assured you know what you need to get you to the finish line. Accounting for the wind directions, weather systems, and points of sail that you will likely be on helps determine what you want to have on hand. For most offshore racing, the navigators will try to get the boat into the best current that would lead you in the right direction of the mark. Sometimes however, that doesn’t help the sea-state factor you will experience, which can be bad and unavoidable in some cases making the sail choices, and range of each sail even more important.
“Ichi Ban’s main took an absolute beating during the Sydney-Hobart last year. The sail was still perfectly fine, holding up to that type of wind pressure with no problems definitely shows what an exceptional product 3Di is.”
© Rolex / Carlo Borlenghi
Know your inventory and know how each sail works.
Knowing what sails you have onboard, and when to use them is of most importance. Always keep in mind you may need one in a pinch. Choosing sails is like deciding tactics. Depending on what you have onboard that you can put up also dictates what sort of tactical maneuvers are possible with your given sail choice. Another part to this is that good sail management and some well-timed eases on the kite sheet prevented damage to our sails.
“We all talked about the sail options we were going to bring a few nights before the start. We talked about combinations and racing style and what was going to work best. Essentially, I wouldn’t change anything that we took when we left Sydney Harbour.”
Having an owner who sets expectations and is hands-on during the planning process.
Having a confident owner is very important. Matt was very involved in choosing his sail inventory before the race. He knew what he wanted and that helped our team aid him in getting the right sails for the boat. Matt was there every step of the way to make sure we constructed the headsails and spinnakers out of the strongest materials possible so his inventory could handle a wider wind range. Our entire team here in Sydney worked hand-in-hand with Matt on this; the mainsail, headsail, and the spinnakers. We especially took some time to consider what DPI we were going to use for each upwind sail. Matt knew what he wanted, knew what he needed, and we were there to help him get exactly that.
“The planning, thought, and research that Matt and the team did before the build even started made Ichi Ban the race winning boat it is today.”
For the Sydney-Hobart race, Ichi Ban was equipped upwind with 3Di RAW 870 offshore mainsail, J2.5 3Di RAW 870, J4 3Di 870 ENDURANCE, 3Di RAW 760 FRO. Downwind she had the options of A2+. A3. A4, and A6. She also had a genoa staysail, made of 3Di RAW 870, and a spinnaker staysail.
Ichi Ban‘s most frequently used sail was the A4 and genoa staysail. Her fastest speed recorded was 26 knots with an average speed of 16 knots.
© Rolex / Carlo Borlenghi
READ MORE
READ MORE
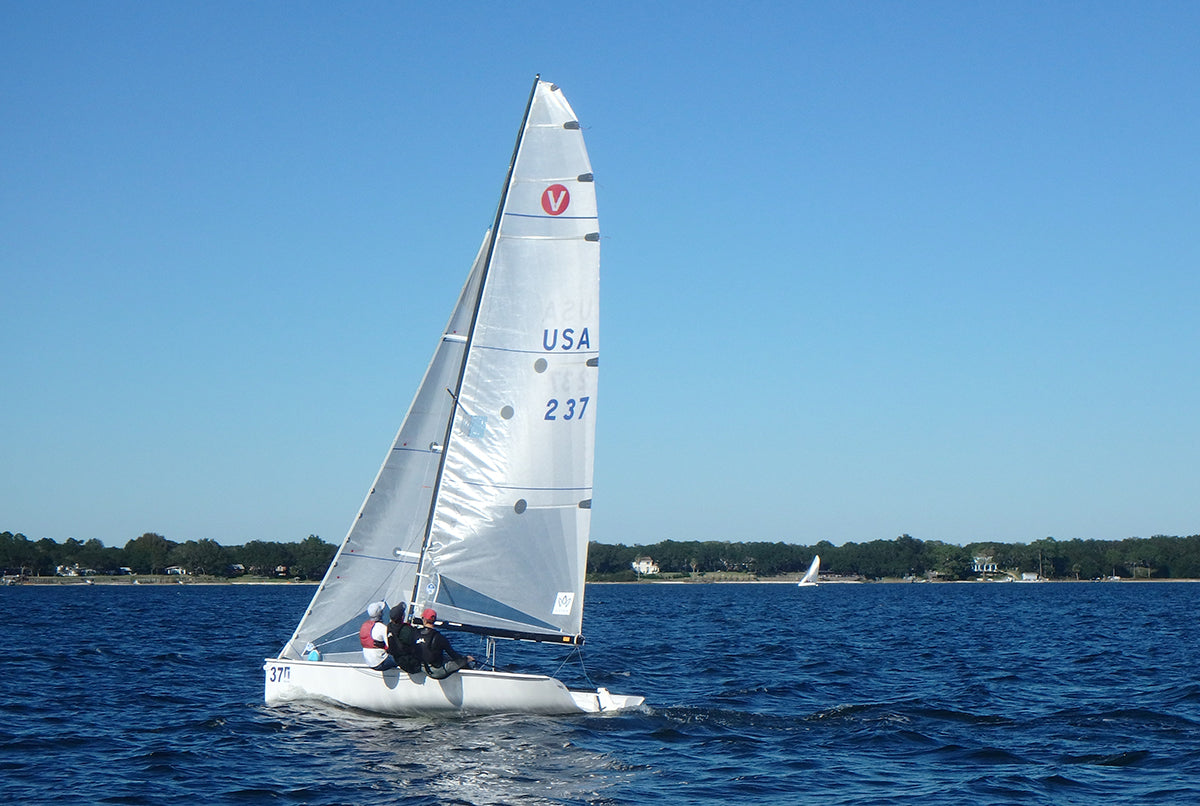
18 January
THE POWER OF A PERFECT LIGHT AIR ROLL TACK
THE POWER OF A PERFECT ROLL TACK
Boat Handling Goes a Long Way
The Viper 640 class has seen a lot of growth in the last couple of years largely in part to its grassroots feel, its fun-loving fleet members, and its dedicated class management. A nice list of destination venues like Bermuda and Florida doesn’t hurt either! But the true draw to this class is the boat itself. It is a proper sport boat with the feel of a planing dinghy with the stability of a small keelboat. There is no “low and slow” mode in the Viper 640. Even in under 10 knots of breeze, you always feel like you are flying downwind and, as it soon as it is over 10 knots, hang on to your hats!
Like any other racing class, the teams that consistently find the top of the podium on a Viper 640 are the ones that demonstrate superior boat speed but also, like a high-performance dinghy, the boat handling skills are nearly just as important as the boat speed factor. A lot can be gained on the Viper race track from executing your boat handling at a high level.
Don’t Underestimate the Power of a Perfect Light Air Roll Tack
We’ve all been a victim to that the hotshot team coming at us on port tack on the first beat in lighter air conditions. We’re thinking, “no problem, we are on starboard, they are either going to have to duck us or do a slow tack to leeward and we’ll roll right over the top.” Only to end up seeing that smirk on the helmsman’s face as they look back at us after ultimately pinching us off and sending us back to the middle of the course. How did they do that?! The perfect roll tack… That’s how!
Learning the skills of executing a perfect roll tack often times begins in our junior sailing days – be it Opti’s, Lasers, or some other dingy. Then it has to be translated into different boats and with different teams. But the fundamentals remain very similar:
A perfect rate of turn
A well-timed “bump” from the crew weight
The perfect amount of back wind on the jib
Hitting the exit angle
Easing the sails
Flattening the boat together and effectively without over flattening
It’s that simple! Here is the breakdown of executing a perfect roll tack in light air in the Viper 640:
Once we’ve communicated that the tack is coming, we try to be patient and find a nice flat spot to start the turn. We give the mainsheet a bit of trim to close the leech and help the boat start to turn up. We might lean our body weight to leeward just a tad, but we don’t aggressively heel the boat to leeward. The initial tiller movement is quite slow as we try to let the boat carry its momentum into the wind as long as possible. No one moves until we have turned all the way through head to wind and the jib starts to backwind.
When the jib backwinds, the helmsman accelerates the turn (pushing it all the way into the bridle if using the aft mainsheet set-up) and the crew now, smoothly but deliberately, moves their weight hard to the rail (on the new leeward side). It’s critical to wait to do this “bump” until the jib has backwinded because now we are using the pressure from the wind to help us generate the roll. If we roll too early, it slows the turn down and we don’t get the leverage from the wind to help generate a powerful roll.
When we think the boat has now reached its maximum heel, the jib trimmer will now switch the jib, the main trimmer will release the main, and the team will hop to the new weather side and use their shoulders as much as possible to pump the boat back to flat. It is crucial not to let the boat over-flatten. Depending on how much wind there is, you’ll have to decide how many crew members are needed to flatten. It is also crucial that both sheets stay eased as you bring the boat back to flat because the boat will experience an apparent wind shift aft as the mast comes back to vertical. You need to keep the leeches open to allow for maximum acceleration.
Once the boat is flat and you’ve hit your exit angle, you can trim the sails back into the normal upwind look. Remember that the Viper really likes to sail low angles upwind when it is light, leaning on the jib for power. So we try to avoid coming out of the tack at a lower angle. If you come out of the tack to close to the wind, you will be underpowered and down speed.
READ MORE
READ MORE
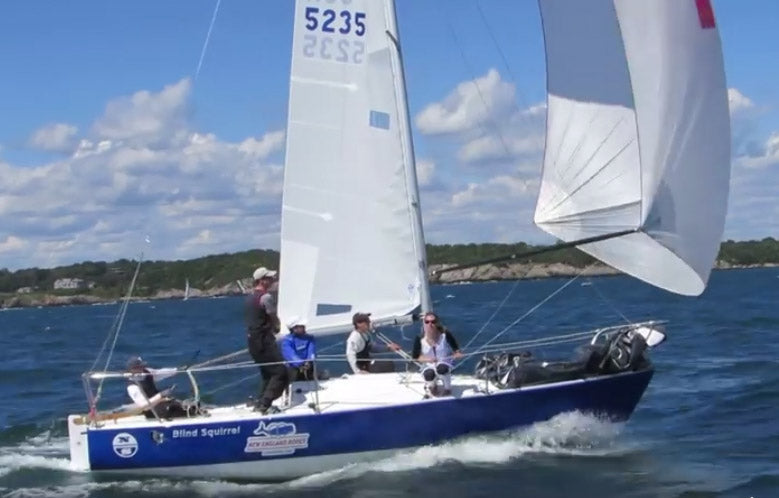
14 September
ROAD TO THE J/24 WORLDS
J/24 TIPS FROM THE EXPERTS
Upwind & Downwind Techniques to Get Your Team Up to Speed
Take some notes with Tim Healy, Will Welles, and John Mollicone on the fastest techniques for upwind and downwind sailing in the J/24. Crew weight placement, trimming techniques, and catching the perfect wave are the keys to success.
READ MORE
READ MORE

28 August
THE KEY TO SUCCESS AT J/111 WORLDS
THE KEY TO SUCCESS AT J/111 WORLDS
North 3Di powers Skeleton Key to winning victory in San Francisco
After Peter Wagner’s Skeleton Key won the 2017 J/111 Worlds on San Francisco Bay, hosted by St. Francis Yacht Club. North Sails caught up with tactician Seadon Wijsen, North Sails J/111 class expert and salesmen based in San Francisco, CA. Seadon identified four key points that contributed to their first place finish at one of the most competitive regattas of the J/111 season.
North Sails clients have won every major J/111 Class event since Worlds in Newport, RI in 2015. This year, Skeleton Key was equipped with North Sails MNi-4 Mainsail, MHi-4 Jib, Hi-2 Jib, HWJi-2 Jib, A2-4 Spinnaker, and the A4-2 Spinnaker. Thanks to our clients and expert feedback, our designers are constantly improving sail designs, pushing to create the best products for high performance competition.
1. Experience – We have sailed a number of J/111 regattas over the years and know how to sail the boat well.
2. Consistency – Having seven of the eight crew we had at the Worlds last year, and the same team we had in Key West this past January, really helped.
3. Confidence – Knowing our rig tune and sail set up gave us a lot of consistent speed. While this time we were not always the fastest around the marks, we were consistently fast upwind and downwind throughout the wind ranges.
4. Patience – If I were to add one more thing, it is that we had a lot of patience. We were a little frustrated to not be winning after each day and sometimes we beat ourselves up, but overall we were patient, did not try anything too radical, kept covering and chipping away at the competition.
Contact your local North Sails expert to get the latest information on the fastest sails for the J/111
READ MORE
READ MORE
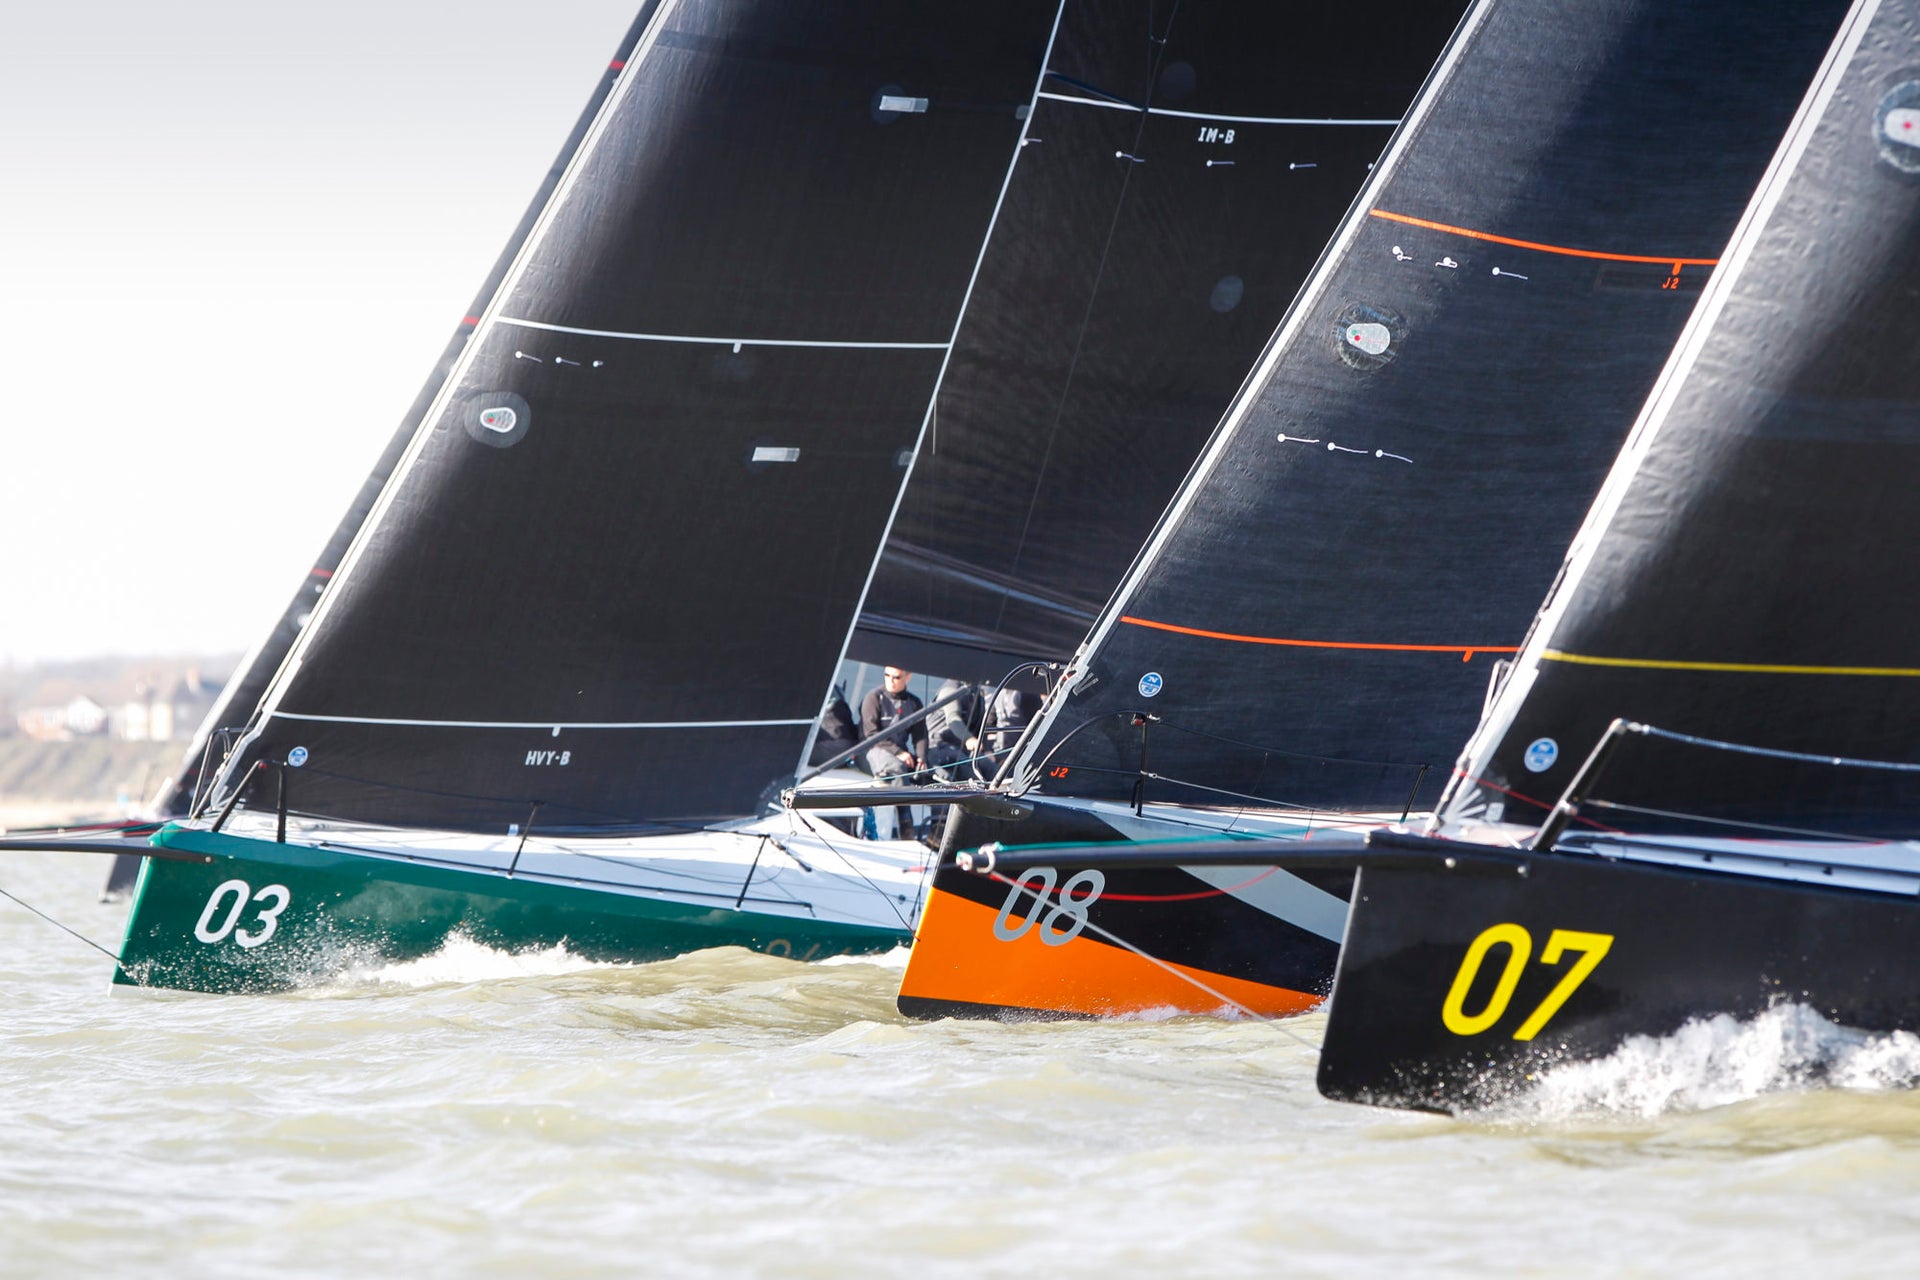
06 June
UPWIND SAILS GUIDE
UPWIND SAILS GUIDE
Options Fit For Any Sailor
All sails can be described using four basic criteria – Size, Shape, Style and Specifications
Size quantifies the two dimensional aspects of the sail: luff, leech and foot lengths, and the sail’s roach profile.
Shape describes the three dimensional aerodynamic form built into these perimeter dimensions, which is commonly referred to as the Mold Shape.
Style refers to the material used to build a sail.
Specifications indicate the specific construction features such as hardware, reefs, luff attachments, fittings, and other sail handling systems.
North designers use complex numerical tools in concert with extensive empirical data to create unrivaled sails. The starting point is a well-suited mold shape selected from a design library with a fifty year lineage. The mold shape is then adapted to a particular target use, based on multiple inputs determined by our sail experts in consultation with our customers. Factors such as boat type, righting moment, rig geometry, sail size, material type, aspect ratio, wind speed, wind angle, sea state, mast bend and headstay sag are just some of the critical elements to successful sail design.
Navigating all of these variables can be challenging for even the best and most experienced sailors. Compounding the issue are the different languages of sailing used around the world. This guide is intended to help us speak a common language when describing sails.
Mainsail and Mizzen Mainsail Types
Standard Mainsail
This is our default mainsail type for both racing and cruising. Standard Mainsails may include up to 2 full-length battens and use conventional roach profiles that are customized to the boat’s geometry and customer requirement. Available in all material types, popular configurations are 1 full-length top batten for racing, and a “2 Plus 3” (2 full, 3 leech) batten configuration for cruising.
Full Batten Mainsail
Cruising Mainsail with more than 2 full-length battens. Available in all material types, usually paired with a luff car system and mechanical fasteners to batten receptacle.
High Roach Mainsail
Traditional cruising catamaran roach profile with full-length battens. Sometimes called a “Butter Knife” or algorithmic curve. The key feature of our High Roach Mainsail is that the batten can be designed parallel to the boom for easy flaking or boom furling. Available in all material types, but best suited for NPC Radian, NPL Tour, 3DL Marathon and 3Di Endurance styles to support the wide head angle.
Square Top Mainsail
Our most modern mainsail profile, with a head width supported by a gaff batten. Available in all material types, but best suited for NPL Sport, 3DL and 3Di.
Boom Furling Mainsail
Mainsails specifically designed for use on furling boom systems. Typically designed around a boom manufacturer’s specifications, these include special features like hard braid luff rope, leech plies and extra battens. Available in all material types, but best suited for NPC Coastal, NPC Radian, NPL Tour and 3Di Endurance.
Mast Furling Mainsail
Mainsails to be used with in-mast or external mast furling systems. Can be configured in a wide array of batten and roach profiles depending upon furling system and performance requirements. Available in all material types; best suited for NPC Coastal, NPC Radian, NPL Tour and 3Di Endurance.
Racing Headsail Types
Sails listed as headsails can be made either as Genoas or Jibs. Sails listed as Genoas are only made as overlapping headsails, while Jibs are only made as non-overlapping headsails.
Light Headsail
Maximum size specialty headsail for very low boat speed and boats that have other, full-sized headsails. Typically used when the boat is tacking through wide angles, with an emphasis on getting the boat moving. This mold has a full shape, with enough curvature in the leech to remain smooth when not sheeted in hard. Light Headsails will not perform well when trimmed in tight. The luff curve is designed for very straight headstay.
Super Light Headsail
Similar to Light Headsail but often made in the lightest cloth possible, with a very low maximum apparent wind speed rating.
Light/Medium Headsail
Maximum size headsail shaped for power more than pointing. Used when maximum upwind hull speed cannot be achieved or it is a struggle to maintain it.
Medium Headsail
Maximum size headsail used when the boat is powered up, but has still has not achieved maximum upwind hull speed. The Medium Headsail has a flatter shape that can be trimmed harder than a Light Headsail. The luff curve is designed for low headstay sag
Medium/Heavy Headsail
Maximum-sized headsail with an all-purpose mold shape. Geared slightly toward pointing more than power.
Heavy Headsail
Maximum, or near maximum size headsail used when the boat has reached maximum upwind hull speed. This shape is best when the boat will not go much faster, but can go higher by sheeting hard. This mold has a very straight leech and needs to be sheeted hard to remain smooth. The luff curve is designed for moderate headstay sag.
#2 Genoa
Reduced size genoa designed to fill the gap between the Heavy Genoa and #3 Jib. This mold has a very flat shape and a very straight leech to allow for a wide sheeting angle. The LP, mid-girth and luff length are designed around the rig geometry. This sail may not sheet well around some spreader arrangements and is not suitable for all boats. The luff curve is designed to match moderate headstay sag.
#3 Jib
A non-overlapping headsail for heavy air use on boats that also carry genoas. This sail sheets inboard of the shrouds and in front of the mast, which allows the mainsail to be eased or traveled down without backwinding. This sail is typically sized with a maximum foot length and mid-girth to fit in front of the rig. It has a round entry and very straight back to power through waves while maintaining pointing.
# 4 Jib
Reduced size Jib for use when the mainsail is reefed or nearly reefed. This sail is short of maximum luff length and has a reduced foot length to allow effective steering in large waves and reduce mainsail backwind.
Heavy Weather Jib
Similar to #4 Jib but sized to Offshore Special Regulations (OSR) guideline.
Furling Genoa
All Purpose Roller Furling headsail with an LP greater than 110%. Designed for a wide range of wind speeds and angles. The material must be low stretch to hold shape in heavy air, and strong enough to handle furling and rig impact. Designed with a shape similar to Light/Medium Racing Genoa, it is optimized for eased out, upwind trim in the middle of the target wind range.
Furling Jib
All Purpose Roller Furling headsail with LP less than 110%.Typically designed for modern cruising boats that utilize non-overlapping headsails. Can also be designed as a heavy weather specific sail for cruising boats that also carry overlapping genoas.
Self-Tacking Jib
All Purpose Roller Furling headsail with LP less than 110%. Designed for modern cruising boats that utilize non-overlapping headsails with a lateral, self-tacking sheeting track. Commonly fitted with a clewboard for sheeting adjustment, and optional vertical battens.
Yankee
All Purpose, high clewed headsail for cruising. May be set on roller furler or fixed stay. The high clew enhances reaching performance and improves visibility. Commonly used on cutter rigs or boats with an inner Jib.
Inner Jib / Inner Fore Staysail / Staysail
Small Jib set on an inner forestay. May be set on roller furler or fixed stay. Typically designed as a heavy weather jib, but also used a Genoa Staysail for cutter and double head rigs.
Storm Sails
Storm Trysail
Designed to attach to mast and sheet independently from the boom. Typically set on a dedicated luff track, its size is based on Offshore Special Regulations (OSR) guidelines.
Storm Jib
Designed to attach to headstay or inner stay with luff tape or hanks. Size is based on Offshore Special Regulations (OSR) guidelines.
READ MORE
READ MORE