


NORTH SAILS BLOG
Alle
News
Events
Guides
Sustainability
Tech & Innovation
People
Travel & Adventure

10 May
J/111 TUNING GUIDE
See also: J/111 European Tuning Guide
NORTH SAILS J/111 QUICK TUNING CHART
Wind Strength
Jib
Asym
Mast Butt
Headstay
Verticals/Uppers
D1s/Lowers
D2s/Intermediates
Sheet Angle/In-haul
Traveller Car
Vang
0-6 Knots
LM
1.5A
-6
-2
Handrail
All Up
Off
6-8 Knots
LM
1.5A
-4
-1
1.5" - 2" inside handrail
18" Up
Off
BASE 9-11 Knots
LM
1.5A
44.3 cm
2.22M Arc 15.3M "pin-pin"
62 Units RT-10 Loos gauge
28 Units RT-10 Loos gauge
27 Units PT-2 Loos gauge
Handrail
4" Up
Off
12-15 Knots
MH
2A
5
1.5
Handrail
Centerline
Off
16-20 Knots
MH
2A
9
3
1/2 way handrail track
Centerline
On Hard
20+ Knots
HWJ
2A
14
5
1/2 way handrail track. "Twisty" sheet load
Centerline
On Hard
24+ Knots
Track, no in-hauler
READ MORE
READ MORE

10 May
J/105 TUNING GUIDE
Download the North Sails J/105 Tuning Chart
Part 1: Rigging Preparation
The following recommendations are small changes that should be made to the stock J/105 to allow you to get the most from your North Sails and make the boat easier to sail and set up.
Head swivel shackle
The North Sails jibs come with a webbing loop at the head. It is critical to have a 90-degree “twist” shackle to attach the sail to the swivel. A standard shackle will cause a hard spot at the top of the jib as the sail is torqued.
Remove backstay toggle
Many J/105s come with a toggle that rotates the hydraulic cylinder 90-degrees so that the handle faces forward. While it is nice to have the handle forward, this toggle reduces the throw of the backstay adjuster too much so that you are not able to get enough tension in heavy air. Some of the older boats actually need to have the backstay rod shortened to get enough backstay throw.
Change to 4:1 or 6:1 Cunningham
The standard Cunningham is 2:1 and led aft to a cabin house halyard stopper.This system should be replaced with the lower purchase with integral cleating shackled to the ring on the top of the Quik Vang. This allows for easier and more precise Cunningham control by a forward crewmember. Many boats then rig the asymmetrical tack line through the free stopper.
Mark the tack line at the cleat
Put marks on the tack line at the proper range of settings. As you approach the windward mark you can then pre-set the tack line so that when you extend the pole and set the spinnaker the tack will be set properly. The tack line is much easier to work with in this placement than on the side of the cabin house.
Move mainsheet swivel base forward of the traveler
This allows for easier trim of the gross tune by the main trimmer, especially when tacking.
Tapered Spectra spinnaker sheets
These sheets have a light uncovered portion that attaches to the sail, with a covered portion that goes on the winch. The sheets should be 3/8” Spectra cored line with the cover removed at the sail end of the sheet. These lightweight sheets are used in all conditions and help downwind performance in light air. Heavy sheets pull down on the leech of the spinnaker in light air, closing the leech too much.
Bypass the jib sheet turning block
The standard set-up for the jib sheet is to run the sheet from the clew of the jib, through the lead block, through the turning block near the rail, and then to the winch. This set-up makes the lead block lean over to leeward, increasing sheeting angle. In light and moderate air, the jib will sheet tighter to the centerline if you lead the sheet straight to the winch from the jib lead block. In heavy air, it can be faster to use the turning block to sheet the jib outboard slightly.
Part 2: Rig Set-Up and Preparation
Tools and items required: Loos RT 10M Rod Tension Gauge, 2 crescent wrenches, spray lubricant, bosun’s chair and 50’ metric tape measure.
Part of the success of growth of the J/105 Class is the tight class rules and limited sail inventory. With the J/105s limited sail inventory of only one headsail, aggressive rig tuning is essential for performance throughout the full range of wind conditions. By definition, the North Sails “AP” inventory is optimized for 9 to 12 knots. This is actually the easiest condition to sail in, so the racing tends to be at its tightest. Having really fast sails in this condition is key to gain a slight speed edge and the AP inventory is designed to give you just that. The heavy air “HA” inventory is optimized for 13-20 knots. In the extreme conditions of light and heavy air the rig must be manipulated to enhance the sail shapes for those conditions. The result of proper rig tuning is the correct relationship between mast bend and headstay tension to get fast shapes. The North inventory has been designed to make these transitions easily with the correct tuning to be fast in all conditions.
Step One: Check Mast Butt Position
The measurement from the front of the forward bulkhead to the aft face of the mast should be 24.46cm (9 5/8”). This is very close to the center of the step. For the HA sails, the mast butt should be 26.00cm (10 1/4”) from the bulkhead.
Step Two: Check J Measurement
The J measurement is the distance from the headstay intersection to the deck to the forward face of the mast. This should be a minimum of 4.11m (13’6”). Use mast chocks or SparTite to achieve this position.lean over to leeward, increasing sheeting angle. In light and moderate air, the jib will sheet tighter to the centerline if you lead the sheet straight to the winch from the jib lead block. In heavy air, it can be faster to use the turning block to sheet the jib outboard slightly.
Step Three: Set Mast Rake
Rake is controlled by headstay length. The headstay should be set at the class legal maximum rake, 13.035m (42’ 9.125”). Hoist a crewmember up the mast and have them hold the butt of the tape measure at the center of the pin that secures the forestay to the mast. Measure to the to of the furler drum (measurement A), then measure from the top of the furler drum to the bottom of the furler drum (measurement B), then from the underside of the furler drum to the intersection of the stem and sheer line of the boat (measurement C). The overall headstay measurement is then the sum of A+B+C.
Step Four: Centering the Spar
Put a mark on the rail of the boat on one side even with the chainplates. Measure this distance from the headstay attachment on the bow. Put a corresponding mark on the other side, the same distance from the headstay. At this point the Upper Shrouds (Caps) should be hand tight and the Intermediates (D2s) and the Lowers (D1s) should be loose. Hoist the tape measure to the top on the centerline jib halyard. Measure to the marks on either side and adjust the Caps until they are equal.
Step Five: Tensioning the Shrouds
Tighten the D2s and D1s to hand tight. Add 8 full turns to the Caps. Then tighten the D2s 6 turns. This should be done incrementally (2-3 turns at a time per side) sighting the mast to be sure that the mast is in column. Add turns to one side and remove turns from the other to bring the mast in column. This added tension that you have applied has probably made the D1s slack, so double check to make sure that they are hand tight.
Step Six: Check Shroud Tensions with Loos Gauge
Put marks on the shrouds 2m (6’ 6 3/4”) up from the deck. Put the top post of the gauge on this mark when measuring tension. Be sure to have the backstay released when measuring tension with the Loos Gauge. For the base setting for 10-14 knots TWS the shrouds should read the following:
All Purpose Sails Caps: 35D2s: 10D1s: 0 (10 cm play)
Heavy Air SailsCaps: 55D2s: 25D1s:10 (hand tight)
You should double check to be sure that the mast is still in column at the dock when the rig is at full tension. At the base setting, the mast should sit with virtually no pre-bend up to the hounds.
You are now at the “base” setting and ready to go racing. From here follow the Quick Tuning Guide to optimize your J/105’s performance for various wind conditions.
Advanced Tuning – Beyond the Numbers
The North Sails J/105 Tuning Guide is very refined, and has been used to the letter to win many events. However, understanding the fundamental concepts of how tuning affects the rig and sails is important to be able to check that the settings are right for your boat, as well as customizing your own tuning numbers for your sailing style. Keeping good records is the key. Keep a Wet Notes pad on your boat and record your rig settings, wind speed, sea state, and your speed and pointing relative to other boats. This will help you to see what is working best for you and fine tune your own numbers.
Changes to shroud tension affect the rig in two ways: 1) headstay tension & 2) mast bend. Tighter Cap shrouds generate more headstay tension by pulling back against the headstay. A good guide for Cap (upper) shroud tension is that the leeward Cap shroud should just go slack in all but the heaviest of wind conditions. Tighter D1 (lower) and D2 (intermediate) shrouds generate more headstay tension by reducing mast bend and compression. The important factor of the D1 anD2 adjustment is the relationship to the amount of backstay used in each wind condition, which affects mainsail shape. Tight D1s and D2s will make the mast too straight (main too full and draft forward) when no backstay is used, and conversely loose D1s and D2s will allow the mast to bend too much (main too flat or even inverted) when a lot of backstay is used. The final D1 and D2 rig tension will be dictated by mainsail shape.
The light air performance of the J/105 can be dramatically improved with leeward mast sag in under 12 knots. This is side-to-side sag from the partners to the hounds. This can only be seen under sail and will not happen at the dock. The settings from the Quick Tuning Guide should generate this sag, but all masts are a little different, so you may need to adjust your intermediates and lowers to achieve it. Loosen the intermediates and lowers so that there is 2.5cm (1”) of leeward sag halfway to the hounds in under 9 knots and Zero in 9-12 knots. In general the intermediates will need to be eased twice as many turns as the lowers to achieve even sag.
Part 3: Mainsail Trim
The J/105 relies on much of it’s power from the mainsail with the class inventory. The mainsail is very easily adjusted because there are many shape controls including mainsheet, traveler, backstay, cunningham, vang and outhaul. Proper mainsail trim is achieved by balancing the speed and pointing with its twist, angle of attack and overall power. Proper communication with the helmsman for the feel of the boat and performance vs. the boats around you are the key to establishing the correct balance of those three elements.
Mainsail Angle of Attack — The Traveler
The traveler controls the boom angle to the centerline of the boat, which is described as angle of attack to the wind. Much like the sheet, a narrow angle of attack (traveler high) is used for pointing and powering up the boat and a wide angle of attack (low traveler) is used for acceleration and depowering the boat. Carry the traveler as high as possible without making the boat heel too much.
In light to moderate conditions the boom should be on centerline or slightly above. In very light air, when the main is twisted, setting the boom actually above centerline will put the lower third of the main parallel to the centerline of the boat. A good gauge for this is to look where the bottom batten is pointing. The bottom batten should point at the backstay in very light air. If it is pointing to windward of the backstay, the traveler is too high.
As the breeze builds, the traveler should be played aggressively to control heel and keep the boat on its feet. If the boat heels too much, the boat will get too much helm and the helmsman will have to use much rudder angle to keep the boat going straight. The optimum rudder angle to create the most lift is around 4 degrees. There are times when more angle than that is unavoidable, but 5 degrees of rudder angle should be the most that you try to use. Rudder angle can be monitored by putting a tape mark on the top of the wheel when it is perfectly straight. The main trimmer can notice when the helmsman is using too much helm (or not enough) and adjust the traveler appropriately.
Mainsheet vs. Traveler for Various Sea States
One of the more difficult things to determine is how to depower the main in moderate to heavy conditions. As we have learned, you can depower the main by either twisting the main by easing the sheet or letting the traveler down. The technique used should be determined by sea state, which will affect how the helmsman has to steer the boat. In flat water, the helmsman should be able to use very subtle steering changes. Hours of on-the-water testing has shown us that depowering by lowering the traveler and keeping a tight, untwisted leech produces the best VMG. You can point reasonably high in flat water without slowing down and the tight leech will help with pointing. We have found that twisting the main in flat water in moderate air only makes you lose height. With this style the traveler is played to maintain the proper angle of heel.However in waves and chop, the opposite has proven to be faster. In waves and chop the helmsman has to be more aggressive with the helm. With the wider range of steering keeping the traveler higher (with the car near centerline) with a more twisted main allows the helmsman to steer through wider angles and accelerate as needed in the waves. With this style the mainsheet fine tune is played to maintain the correct trim and angle of heel as the helmsman steers through the waves.
Overall Power – The Backstay
The backstay is the most important sail control for setting the overall power of the sail plan. The backstay is the universal control to modify the shape of the main primarily, but also the jib. The North Class Inventory has been carefully designed so that backstay adjustment changes the shape of the main and jib in unison. As backstay is applied the mast bends, flattening the main. It also pulls aft against the headstay, reducing headstay sag, which flattens the jib. By flattening the sails the boat’s power is reduced as the boat becomes overpowered and heels too much. Flatter sails can be trimmed harder than full sails so when it is windy it is better to set the sails up flatter and sail with less twist. This will allow you to point higher.
As stated in the tuning section of this guide, having the rig set up properly for the wind conditions will allow you to get the most benefit of adjusting the main and jib together with the backstay, but itis also the control that allows you to set up the sails as best you can when the wind changes and you are no longer tuned correctly.
With a loose rig the main will flatten out faster than the jib. This is because the loose D1s and D2s will allow the mast to bend, which will flatten the main. However, since the mast is bending, the main will get to a point where it over bends before you can bottom out the backstay. By not being able to bottom out the backstay, the jib will still be a bit fuller than is ideal at this point since 1) you can’t pull on the full range of backstay and 2) the mast will compress more so the backstay tension will not transfer as well to the headstay.
Conversely, with a tight rig, the main will stay fuller when the backstay is eased, while the overall rig tension will keep the headstay tighter and thus keep the jib a bit flatter. It is important to understand this relationship between how the backstay and rig tuning affects sail shape when you may not be tuned correctly. If your rig is too loose, use more backstay to set the main up flatter, knowing that your jib will be fuller than ideal. If your rig is too tight, use less backstay to set the main up fuller, knowing that your jib will be flatter than ideal. In general, it is better to be set up with a flat main and a full jib so it is better to err on the loose side of the rig tuning matrix if you expect the wind to change. It’s much easier to depower the J/105 than it is to power it up so always tune for the lulls!
As the mast bends it has an immediate effect on the luff and leech tension, so other controls must be adjusted in conjunction with the backstay. When you pull the backstay on, the mainsail will twist more so more sheet will have to pulled on to reset the twist. More backstay will also loosen the luff, so more cunningham will be needed. Don’t forget to ease the sheet and the cunningham after you ease the backstay.
Other Mainsail Controls
Cunninghamhe cunningham controls the luff tension of the mainsail. Luff tension controls the draft position of the mainsail. As backstay tension is applied, the mast compresses and the main appears to fall down a little and the draft will move aft. Pull on the cunningham to move the draft forward to the desired position. As well as moving the draft, luff tension will also make the main somewhat flatter. In light air, you should see slight wrinkles coming from the sail slides. In moderate air the luff should be smooth. In heavy air, the luff should be tensioned past being smooth to set the draft position and flatten the sail.
VangWith the non-overlapping jib, in order for the mainsail to generate enough power in light air, a certain amount of depth has been designed into the lower portion. In over 12 knots begin to pull on the vang to induce low mast bend to flatten the lower third of the main. When it is really windy pull on the vang quite hard to help bend the mast. be sure to ease the vang at the weather mark! Before you ease the main, ease the vang to allow the main to twist as you bear off. If the vang stays on too hard, you may not be able to bear away, or worse you could break the boom.
OuthaulThe outhaul also controls the sail shape in the lower third of the mainsail. Easing the outhall makes the lower third of the mainsail fuller and tightening flattens the lower third. In light air the outhaul should be slightly eased and pull it progressively harder as the wind increases, to the point where you should pull it as hard as you can in over 15 knots.
Part 4: Jib Trim
The J/105 Class Jib has a very tough job. It has to be fast in all wind conditions, where other 35’ offshore one-designs allow three headsails! The single jib inventory presents a tough challenge for sail designers to create a sail that is versatile enough to cover the entire wind range, while being constructed so that it can be light enough to perform well in light air, yet being strong enough to handle heavy air. The 3DL jib is the ultimate solution to handle this daunting task. The latest design has been refined to be responsive to the few controls that can change the shape. The 3DL process is the only way to create a sail that is minimum weight, yet is strong enough for heavy air.
While the North 3DL jib is refined to a level that makes it very easy to enhance the light shape in light air and a heavy shape in heavy air, it is important for the trimmer to be able to manipulate the sail appropriately. The primary controls that we have to affect the sail shape are the halyard, sheet, jib lead placement and headstay tension.
Jib Halyard
The halyard is the most important sail control for shaping the jib and it has a much greater affect on sail shape than the cunningham on the main. However, just like the cunningham on the mainsail, the halyard controls the entry angle, draft position, and overall depth in the sail. A tighter halyard will produce a more draft forward, rounded entry shape, with less overall depth. A loose halyard will produce a more draft aft, finer entry shape with more overall depth. As a general rule, the halyard should be tensioned to just barely remove the wrinkles in the luff. In lighter air wrinkles can just be visible, in moderate air the luff should be smooth, and in heavy air the halyard should be pulled 2.54-7.62cm (1-3”) past removing the wrinkles.
In flat water, a looser halyard can improve pointing with a finer entry angle. In waves and chop, a tighter halyard will produce a more rounded entry and more open leech, which will have a wider steering groove and be better for acceleration. If you try the loose halyard and your helmsman seems to be struggling to find the groove, try a slightly tighter halyard.
As sails age, the entry tends to get finer and the draft starts to move aft. An older sail will require more halyard tension to achieve the same shape as a brand new sail with a looser halyard.
Jib Sheet
The sheet is the most important control for adjusting the jib once the draft is set. The general rule is to trim the jib as hard as possible without slowing the boat down too much. The jib needs to be played in conjunction with the main and the helmsman’s steering. The sheet tension will change with each change in the wind speed. When a puff hits, the leech will become more open. Be careful not to trim the jib too soon. Allow the leech to stay open to take advantage of the puff to accelerate the boat and them trim in once you have accelerated to increase pointing.
The Class mainsails are fitted with a spreader window so that you can see the jib leech on the lower spreader. Put tape marks on the spreader at 7.62cm (3”), 15.24cm (6”) and 22.860cm (9”) in from the spreader tip. In general you should trim the jib so that it is at the spreader tip in very light air, 7.62cm (3”) inside the tip in light air, 15.24cm (6”) to 22.860cm (9”) inside the tip in moderate air, then back out to 7.62cm (3”) in heavy air. These guidelines are subject to change based on sea state. The jib can be sheeted harder in flat water than in waves and chop. Be careful to only make small sheet adjustments. Due to the high aspect nature of the jib, small changes make abig difference.
Jib Lead
The jib lead should be used to control the top and bottom shape of the jib. The middle of the jib is not as affected by lead position as much as it is with sheet. Once the sail is trimmed to the appropriate spot on the lower spreader, adjust the lead to make the top and bottom look right. Moving the lead forward will make the upper leech more closed and the foot rounder. Moving the lead aft will make the upper leech more open and the foot flatter.
The median jib lead position is slightly aft of the middle of the jib track, which is about 9” aft of the chainplate. This position is also just forward of the window on the side of the cabin house.
Headstay Tension
Headstay tension has the most dramatic affect on the overall camber of the jib. Headstay tension affects headstay sag. This is a difficult thing to visualize, but it works much the same as mast bend affects mainsail shape. As the headstay sags, it pushes the luff towards the leech, which increases camber. Conversely as the headstay gets tight, it pulls the luff away from the leech, decreasing camber.
Clearly this is very important, but has been listed last here because it is very dependent upon rig tuning. Headstay tension is achieved by a combination of a tighter rig and a tight backstay. As we have learned in the rig tuning and main trim sections, rig tuning and backstay tension has a great affect on mainsail camber as well. The Class main and jib designs and the tuning guide shroud tensions have been carefully developed to have the backstay control main and jib camber in unison. If you are tuned properly, when the main sets up correctly, the headstay tension will be correct as well. Your headstay tension should be almost self-tending.
During a race, the only way to adjust your headstay tension is with the backstay. Because of this it is important to know how you are tuned and whether you are actually sailing in the right wind speed for your tuning. The backstay will be the key to get the most of the set up that you have when you are not tuned perfectly. Simply, if there is less wind than you are tuned for, use less backstay tension to power up the sails as best you can. If there is more wind than you are tuned for, use more backstay tension.
A good technique is to tape a batten with marks every 2.54cm (1”) on it to the backstay cylinder. This will help you to be able to record your settings and duplicate them later.
Part 5: Crew Weight Placement
With the new “float line” rule, this discussion has become much easier now that we know that all boats should float the same. The goals of weight placement are to 1) control helm and 2) reduce wetted surface in light air.
Light Air
In light air the crew should be well forward and to leeward both upwind and down. Two crewmembers should be forward of the shrouds to leeward. Remaining crew should be up near the shrouds. There should only be one person in the cockpit other than the helmsman. In really light air the main is not trimmed that often and the helmsman can make small adjustments. Being to leeward helps heel the boat increasing helm giving a better feel and allows for the best pointing and rudder lift. Being forward allows the bow to dig in which also helps pointing as well as reduces wetted surface by getting the transom out of the water.
Moderate Air
In moderate air the crew can begin to slide back as they begin to move to weather. Once anyone goes to weather they should be stacked just behind the shrouds. At this point if you have a dedicated main trimmer, he can slide back to his station upwind. Downwind as soon as there is constant adequate pressure on the sheet and you begin to try to sail low the crew should move to weather to help rotate the spinnaker to windward out from behind the main. This happens at about 10 knots. There is plenty more coming on downwind sailing in Part 6, starting on page 21.
Heavy Air
In heavy air the crew should continue to move aft, especially in waves. If you notice that your helmsman has to steer a lot to keep the boat going straight (dialing for dollars), move aft and as the bow lifts the boat will track straighter. Since crew weight is limited the guys who are on the rail need to hike hard. Remember, sailing is a sport and it’s a boat not a couch!
Part 6: Downwind Sailing
Sailing the J/105 downwind can be one of the more difficult things to do well. Paying small attention to the minor details can make a huge difference. The key to fast sailing downwind is good communication between the trimmer and the helmsman. The trimmer should constantly be telling the helmsman how much pressure he has in the sheet. This will allow the helmsman to know if he can bear off a little more, but more importantly when he needs to head up a little bit to build pressure.
The J/105 has an asymmetric spinnaker set on a centerline sprit. The goal in downwind sailing is to maximize downwind VMG. This is achieved by sailing a wind angle tight enough to keep speed, but sailing lower towards the mark whenever possible. The North Sails asymmetric has been designed as a running spinnaker for optimum downwind performance at the apparent wind angles that produce the best VMG for the J/105. The sail has been designed to rotate out to windward to project the maximum sail area out from behind the mainsail. Always hoist the sail all the way to the top. Due to the luff length restriction in the rules, the tack of the sail is never set all the way down to the pole. Raising the tack helps the sail to rotate to windward.
Light Air Sailing (0-9 knots TWS)
In light air, you must sail tighter angles for best VMG. The tack is set 0.3m-0.6m (1-2’) off the sprit. The crew should be forward and to leeward. Keep the crew weight as low as possible. Steer down in the puffs until the pressure sheet starts to get light and then head up slightly. Communication between the trimmer and the helmsman is key. Try to find the lowest angle you can sail before the speed drops. Don’t forget about the main! Proper mainsail trim is essential to good speed. The vang should be set so that the top batten is open by 5 degrees. A good trick to help acceleration out of the jibes is for the main trimmer to hold the sail in a bit after coming out of the jibe. When the asymmetric is jibed, it needs to
be overtrimmed to make it “pop” through. When the spinnaker is overtrimmed, it blows air back into the mainsail relieving pressure from it. By keeping the main in, it will keep the main pressurized as well as opening the slot between it and the spinnaker to get the air flowing over it faster. The main trimmer can easily feel if the main is pressurized by the pull on the sheet. Ease the main out slowly as the pressure on the sheet builds as the spinnaker is eased.
Moderate Air Sailing (9-12 knots TWS)
In moderate air, there is a wide range where you can sail. Lower is best as long as you can maintain your speed. The tack line is eased 0.6-0.9 (2-3’) off the sprit. The same principles apply to steering as in light air. Once the boat feels well pressured, the crew should move to the windward side to help rotate the spinnaker. In this range the crew should be very active moving to weather when you head down in the puffs and back to leeward when you head up in the lulls.
Heavy Air Sailing (12+ knots TWS)
In over 12 knots, the boat is well pressured up going downwind. At this point you want to sail as low as possible most of the time. There will almost always be good pressure on the sheet but when you sail too low, the sail will become blanketed behind the main and collapse. The sheet is well eased to get as much of the sail out from behind the main as possible. The crew should be to windward at all times. Heel the boat to windward by as much as 10 degrees. The vang should be set so the top batten is parallel to the boom.
DOWNWIND NOTESGood coordination between the trimmer and helmsman will result in very subtle changes in the sheet. A properly coordinated team will only adjust the sheet by a couple of feet. If you find yourself constantly trimming and easing more than 3 feet of sheet than your coordination should be improved. Be careful not to try to sail too low and collapse the spinnaker. A collapse will result in around a three-boat length loss!
Rev 0218
READ MORE
READ MORE

10 May
J/88 TUNING GUIDE
Below are Vince Brun’s suggestions for boat set-up and pre-race routine, based on his experience sailing the J/88 North American Championship. You can also download PDFs of the following:
US Tuning Guide
US Quick Tuning Guide
EU Tuning Guide
EU Quick Tuning Guide
BOAT PREPARATION
Bottom
Needless to say the bottom of the boat being clean and properly maintained is a key part of any fast boat or program. Going fast starts there and I can assure you that not one boat ever won a big event with a poorly maintained bottom. Don’t matter how well the crew perform, the rig is set, the sails trimmed, or the helmsman skills, a clean and smooth bottom, will have a huge impact on the overall boat performance. For this reason, I always make sure that my boat bottom is as good as I can possibly get it, this will give me confidence which helps me focus exclusively on the mast and sail setup.
SAILS, RIG SETUP & PERFORMANCE
Rig Setup
I found that the current North Sails J/88 tuning guide was extremely accurate on the gauge numbers.
Light Medium versus Heavy Jib
At the regatta Velocity performed better with the Light/Medium jib up to 18 knots TWS, and this was made clear when we had the heavy jib in winds between 14 to 18 knots. The J/88 likes to be slightly overpowered and the small jib didn’t help in that range. This was noticed not only in the lack of acceleration after a wave, but also in the poor pointing ability. I would tend to use the Light Medium, even if the breeze is hitting 19 knots in the puffs, when the wind drops, the J-88 gets underpowered quickly when using the heavier jib.
Backstay
The backstay is a key control on the J/88 in all conditions, not only helping with the flattening of the mainsail but also critical on controlling the forestay tension, and therefore forestay sag. Find a good way to calibrate your “fast settings” with good backstay marks, so that they can be duplicated again, and again.
Inhaulers and Jib Lead Position
For anyone trimming the jib, the inhauler and jib lead position are key controls in achieving a well set jib. If these controls are set in the wrong position, the trimmer won’t be able to have the jib properly trimmed. During a race you don’t normally have the luxury to stay on the leeward side to get the sail set up just right, so having these settings established well before the race is extremely important.
In my opinion, the key to success on any boat, is the confidence to be able to repeat “fast settings” that were learned in previous races or training and only work on fine tune changes from there. These numbers should be constantly added into your boat’s tuning matrix, so that these adjustments can be made automatically, which will help free everyone’s minds to better focus on what is happening on the race course and strategy.
Running rigging with proper length and good marks
As emphasized above, I’m a firm believer that good marks on the control lines, are a tremendous help to crews allowing them to perform their tasks faster and with more precision.
Example: If the spinnaker halyard is marked when the sail is fully up, the mast person will know precisely when that job is done and be able to move to his next task quicker, and without hesitation.
Mainsheet
I would suggest having the mainsheet fine tune separated from the mainsheet gross, to avoid the lines tangling at the leeward rounding or during pre-start maneuvers.
Spinnaker sheet turning block position
It might be a good idea to have the turning block for the spinnaker sheet moved forward, so that the spinnaker and jib sheets don’t cross. This allows the spinnaker sheet to stay ahead of the jib winch and in line with the spinnaker top deck winch.
Folding Propeller
As we learned on the first race on Sunday, it’s extremely important to have the propeller properly closed before the start to avoid the extra drag. The boat should be traveling at full speed before turning the engine off and putting it in reverse, this will ensure that the prop is properly set.
PRE-RACE ROUTINE
Pre-Race Warmup
I have seen many different approaches to this, but ultimately everyone has the same items crossed, before the start. Below is the pre-race routine I try to execute before every race day. It’s very simple:
Get to the starting area and start sailing on starboard (hopefully against another boat) for a good period of time to record the wind oscillation range, and have the lifts and headers numbers well defined.
During this time, I also fine tune my controls so that I’m comfortable with the boat speed (this being the reason for another boat being around). If there are speed issues, I make changes and continue testing.
After this is done, I hoist the spinnaker to make sure all the lines are led correctly and practice a few jibes to get the crew polished and ready for the day.
At the starting area, I normally check in and inspect the starting line, by going head to wind near the committee boat. Checking the wind direction and comparing it with the line setup.
Now with all the data needed, the crew can discuss and prepare the starting and first leg strategy.
Starting around other boats
Obviously it’s hard to predict what others will do when approaching the starting line with a minute (or less) to the start. Possibly more important than how close you are to the line, is what “upwind lane” you will have 30 to 60 seconds after the start. A boat close to leeward with their bow slightly forward, will be a serious issue immediately after the gun. There are a couple of ways to escape this situation but the key is to identify the problem earlier rather than later, particularly when there are boats closer to windward.
If someone is close to leeward with a minute or more to go, you have two possible options:
Two tacks – which involve doing two quick tacks and opening the gap to the leeward boat and closing on the windward boat. This normally requires a nice gap to windward and great crew work to make this maneuver possible. This technique will require a well trained crew that understands the boat and can execute the tacks with relatively minimum loss of speed.
The other more common option is to “push” the leeward boat by bearing off and taking their stern, establishing a hook to leeward. In most cases this attempt will force the leeward boat to do the same, but if they are late responding, which is not uncommon, you will be in a controlling position since you will have more speed and be able to hook. If you are unable to execute the hook, because the leeward boat has mimicked your move, you will be forced to go with plan A and do a double tack to protect your hole and future lane.
Again, identifying the situation early will give you more options to avoid a bad starting position.
READ MORE
READ MORE

10 May
J/109 TUNING GUIDE
Base Settings
Rake – Swing Arc – Use jib halyard pulled down to top of black band on mast – swing fwd to mark headstay.
Rake – Distance from mark on headstay to deck at stem: 2230 mm
Cap Shroud Tension: #60 on RT-10 Loos Gauge
D1 Tension: #40 on RT-10 Loos Gauge
D2 Tension: #25 on RT-10 Loos Gauge
J Dimension: Measured from stem to Fwd face of mast: 4050mm
Mast Base: Measured from Fwd face of mast to bulkhead: 460 mm
Pre-Bend: without mainsail hoisted: 20mm
Sail Models
Jibs
0-14 TWS: LM-2 Light-Medium Jib
12-25 TWS: MH-2 Medium-Heavy Jib
Spinnakers
0-20 TWS: A2-4 AP Spinnaker
18-25 TWS: 4A Heavy Spinnaker
Quick Adjustments
Turns from Base Settings
TRUE WIND SPEED
SAIL SELECTION
CAP SHROUDS
D1s
D2s
Very Light (0-8 TWS)
LM-2
-5 turns
-2 turns
-2 turns
Light (9-12 TWS)
LM-2
-2 turns
-1 turn
-1 turn
BASE – Medium (12-16 TWS)
LM-2 or MH-2
Loos 60
Loos 40
Loos 25
Heavy (17+ TWS)
MH-2
+5 turns
+2 turns
+1.5 turns
READ MORE
READ MORE
10 May
FARR 280 TUNING GUIDE
The Farr 280 is a relatively light boat which makes it very receptive to positive trimming. It is imperative to have thesail trim spot on but also the fore and aft weight trim correct and whichever team does this the best will be rewarded with the best boat speed. Up to 7 kts the Farr 280 is always looking for more power so keep the sails powered up, focus on building speed efficiently out of transitions (tacks, jibes, ducks and mark roundings) and don’t over trim or you can easily kill the speed.
Tools Needed
Take your rig tune seriously. Keep whoever adjusts the rig the same from the beginning to the end and you will be far more accurate all season long. It is one item on our list we can get right before we leave the dock.
Equipment Requirements
• Loos Gauge PT-2 (headstay, V1 and D1 shrouds)• Loos Gauge PT-1 (D2 shrouds)• 30 m (100’) tape measure (forestay pin-to-pin)• 5 m (16’) steel tape measure (mast heel)• Rig spanners (adjustments)• Setting Up the Mast
Step 1
Set the mast plate in the correct location.Before the mast is stepped, place the aftface of the mast step 455 mm (17.91”)forward of the forward keel bolt centerline. Measure from the white line to theforward keel bolt (Fig. 1).
Step 2
Step the mast and attach the headstaystrop to the lower headstay fitting
Step 3
Attach the cap shrouds only just past hand tight.
Step 4
Measure down from the uppermeasurement point (Fig. 3) and make amark on the headstay 11.92 m (39.11’) fromthe top point.
Step 5
Pump up the mast on the hydraulic jackso that it just lifts off the collar. Then pump the headstay down (shorter) so that your headstay mark of 11.92m (39.11’) becomes just even with the plate in the headstay well.
Step 6
Measure back from the headstay to the same location on both sides of the boat even with the partners. Make a mark on the partners halfway between these 2 points. This locates the centerline of the mast on the boat’s centerline.Using the supplied chocks center the mast on the centerline of the shrouds. This may entail sanding the supplied plates to fit the partner hole. Once centered, screw the plates to the chocks through the sidewall of the partners so that none of these fall out while sailing. Eventually the mast should be held in place with “Spartite.”
Step 7
Using the centerline halyard measure down to the mark from Step 6 on both sides of the boat aft of the headstay.Adjust the cap shrouds so that this number is the same on both sides. Now your “hounds” are centered.NOTE: It is extremely important that there is no “load” on the shrouds when you adjust the nuts (Fig. 6). If there is toomuch load you may either strip or cross thread the rod. To adjust the nuts you must “drop” the mast, adjust, then pump back up.
Step 8
Use an ARC measurement to get the correct 1.5° rake at the correctmast butt height. Take the centerline halyard, measure 1.00 m (39.37”) down from the boom band, swing the halyard to the headstay and mark headstay. Pump up the mast until this headstay mark is 684 mm (26.93”) above deck. Place a straight edge over the headstay well to get this measurement.Note: how high the bottom of the mast is relative to the mast plate. See Step 9.
Step 9
Obtaining the correct cap (vertical) shroud tension. With the mast pumped up so that the headstay ARC measures 684mm (26.93”), note the mast butt height. In the case here it is 78 mm (3.07”). With the headstay at 1.5° rake and the mastraised 78 mm (3.07”) (Fig. 8). You want the jack pressure to read 1925 psi or 133 bar on the cockpit dial with just the headstay and cap shrouds attached. You will need to raise and lower the rig a few times to make the necessary adjustments to the cap shrouds.
Step 10
Repeat Step 9 when attaching the D1s with the caps (verticals) and headstay. Use the PT-2 Loos Gauge to get 28 units on the gauge for the D1s.
Step 11
Repeat the Step 10 while attaching the D2s, D1s, caps and headstay. Use the PT-1 Loos Gauge to get 26 units for the D2s.
Step 12
With all standing rigging attached, check the finished tune with the Loos Gauges.You should have the Loos Gauge units listed below for the BASE settings. The mast butt height will be relative to your boat. Hull #1 was 78 mm (3.07”).
We set BASE settings for this boat at maximum load. From this point the tuning relates to lowering the mast buttheight combined with lengthening the headstay to soften the rig loads as the wind speeds diminish.
BASE Settings for 18+ kts TWSRake 1.5 °Mast Butt 78 mmHeadstay 39 PT-2 Loos GaugeCaps 43 PT-2 Loos GaugeD1s 28 PT-2 Loos Gauge
No diagonal or vertical shroud adjustments should be required with this rig. Primary adjustment is with the headstay and mast butt ram. Headstay and mast jack pressures can be referenced using the hydraulic pressure gauges on the control panel.
1° of rake change = 53 mm (2.09”) change to the headstay length. With the mastset at 1.5°, use a batten set down into the bottom of the headstay well to mark the batten at the centerline of the headstay pin shown in the photo below. Tighten and ease the headstay in 26 mm (1.02”) increments and mark the batten from 1.25° to 3°of rake. Use this batten for a quick reference when tuning.
Use the centerline of the headstay pin to measure rake while sailing the boat. The red line shows the centerline of the pin. D2s 26 PT-2 Loos Gauge For lighter winds we recommend a combination of dropping the mast down and lengthening the headstay. This promotes sailing with a softer rig laterally while sailing with more rake.
Three marks that help when sailing
1. On the under side of the spreaders make a mark to reference the headsail leech when sailing:
Lower Spreader: 635 mm (25.00”) from mast centerline
Upper Spreader: 476 mm (18.74”) from mast centerline
2. Mark the headstay to be visible from the cockpit/rail. The red marks below note 1.5° (upper) and 3° (lower) of rake when parallel to the deck height.
3. Mark the maximum down position on the aft face of the mast (shown below with white electrical tape. But this should be marked in a more permanent manner.
READ MORE
READ MORE

10 May
STARLING TUNING GUIDE
The object of the Starling class is for all sails and masts to be identical.
We pride ourselves on our ability to reproduce sails identically, so please feel free to contact us if you feel your sail isn’t the same as other sails. This is important as it allows us to improve our methods, and ensures all sails out on the water are the same. If for any reason your sail is outside the tolerances, then we will replace it.
The luff of the sail is 4040mm long.If you are fitting a fixed height gooseneck, then allow 4025mm from the top of the boom to the top of the sail.
The foot is 2115mm long.Allow for the outhaul to pull the sail out to a maximum 2125mm from the aft face of the mast.
The leech is 4370mm.
Sail Care
Always roll your sail and keep it in its bag when not in use. Ideally remove thebattens after use. If you don’t want to do this, then release the battens from the pocket elastic and roll the sail parallel to the pockets. If you are rolling onto a tube, tie the clew first and roll the sail a couple of turns before attaching the tack. This will allow you to roll the sail parallel to the batten pockets on the tube. Wash the salt from the sail every 3-6 weeks depending on how often it gets wet. Do this on a light day by hosing the sail while rigged, and leaving to dry.Setting up:The tack should be set on one of the holes on a standard gooseneck fitting (about 25mm from the mast) for. Choose the hole which makes the tack area of the sail setup smooth.There are no rules requiring black bands. To take maximum advantage of this, make sure your sail is as high as possible up the mast. Check that your mast is the maximum length allowed under the rules (4480 from base to tip.) If you have a fixed gooseneck, then you will want the sail to be at the top in heavy airs. You will need 2-3 talurits on the halyard strop so you can adjust the luff tension to make it looser for lighter winds.
Make sure that the boom is long enough so you can get maximum tension on the outhaul when the wind increases. Check that the sail doesn’t extend beyond the end of the track on the boom or it will damage the sail.
Battens
Your sail comes with a standard set of battens specially designed for the Starling.Smaller skippers will find a benefit from changing to a heavier #2 batten as the wind increases.
The basic shape of the sail features a very straight (or flat ) exit, so there shouldn’t be any need to change the lower battens from one condition to the next.
Remember – the stiff end of the batten is the back. Bendy end forward!!!
Outhaul
We suggest 4:1 purchase inside the boom, so you can make small repeatable adjustments. Make sure you have a system of marks so you can repeat your fast settings from upwind to downwind- or when the breeze changes. Use a shock cord system inside or outside the boom to help the system release.
Don’t ease the foot too much. If you are getting vertical wrinkles off the boom, then you have gone too far.
The Starling sail has the ability to be set up full, but then to flatten really well as the wind increases. Experiment with various settings so you know what is fast for your weight in each condition.
Rake
Following is a formula for working out the correct mast rake for your hull.Because there is a variation in the hulls, there is no correct rake to suit all boats. There is a correct rake for your individual boat and you should have a record of this and of the rakes you try. Another way to find a starting rake is to level your hull alongside a top boat. Then sightthe masts and set your mast up to the same angle. Measure this from a mark permanently etched on your mast to a mark on the stern. This is your rake.
The following system will give you a good all round rake. You should feel free to use this as a starting point and experiment slightly forward and aft of this point.
Measure up 3050mm from the deck and mark the back of the mast – this is the new rake measuring point.Measure from the 3050mm position to the intersection of the deck and transomA good starting mast rake is 3640mm.From this position, individual skippers will need to adjust the mast rake to suit their body weight and sailing style. If more speed is needed downwind, rake the mast forward, and if more pointing ability is required, rake the mast further aft
Sail Shape
It is a good idea to glance up at your sail occasionally especially when you are going fast- (or really slow) to see what your rig looks like and therefore be able to eventually memorise these shapes and settings.Look carefully at the top batten. Try and guage how open the top batten is and use this as a reference to compare withprevious settings. This tells you how much mainsheet and vang you should be using.
Rig Tension:Tight v’s loose. I prefer a firm rig. The tension should be so that by pulling forward on the mast you can just do up a shackle on the forestay. Any tighterthan this is unnecessary. My reasoning is purely practical.
There are pro’s and con’s for the 2 extremes. If you have a loose rig, it will give you more optimal fore and aft rake upwind and downwind, whereas a tight rig can’t move. However a loose rig also means it falls away sideways which isn’t desirable. I think that this is why the 2 styles ultimately perform equally. Of course what the top skipper is using will always appear fastest!!- but look carefully at what else he/she is doing.
My practical reasoning is simple. A loose rig is more susceptible to wear and therefore failure. The movement also makes it more prone to shackles etc working their way loose.
If you are a methodical type of person and check your gear often, then by all means go for a loose rig if you believe it to be the way to go.
If you have a rotating rig, you may need to have it a little looser to help it rotate more easily. Try a 1-2mm thick teflon washer under the mast.
Masts
All masts must be from the same F4 section from Fosters. There is a 150mm range between the maximum and minimum heights for the stays. We suggest having the forestay close to min (2800) and the sidestays close to max (2950).If you have a rotating mast, then we recommend an inner forestay at 900mm. This should be set very loose so that when the boom is right out there is still about 20mm slack in the stay.
Due to the nature of the mast construction, there will be variations in the stiffness of the masts. Beware of this as it can be the reason for consistently poor performance in certain conditions. Avoid masts which are too stiff.If you are over 60kg you will start needing a stiffener in you mast. If you are careful you can wait until you are over 65kg- however you run the risk of breaking rigs downwind.
Vang
Your vang is there to control leech tension once you run out of width on your traveller. If the breeze is light and you aren’t having to ease the main in gusts, then you don’t need any vang. In these conditions you should have it just eased, so that it isn’t taking any load.However, you don’t really want it too loose or else it will take too long to pull on should the breeze increase.
In the lighter breezes you are quite often sheeting quite loosely, so make sure there is no tension on the vang.
As soon as you find yourself easing the main in the gusts, you should have vang on. This should mean that as you ease the main in the gust, the boom moves outwards only- not upwards.
Remember vang bends the mast and flattens the sail a lot, so if you are hunting for power, make sure you don’t have too much vang on.
Be sure your rig and fittings are strong enough, so that you aren’t afraid to use a lot of vang when the wind increases.
Reaching is similar in trim to upwind. In the light you will have to be careful not to close the leech too much, however as the breeze increases, you will need to slowly increase the amount of vang to keep the leech under control and keep powered up. Again too much vang will bend the mast too much and lose power.
Downwind you will need less tension than you have had upwind or on the reach.Ease vang as you go around the mark.
If you can imagine looking up from the boom, the ‘twist’ or amount the leech opens, should be nearly the same on all points of sail, in all conditions.For this reason it is a good idea to get used to looking up at how open the top batten is and try to adjust the vang to keep it looking the same as the wind changes.
Cunningham
Cunningham does two things. It moves the shape forward in the sail, and then as you use more, it bends the the mast and opens the leech in the head.
Cunningham is the last control you should be using to depower. You will already have a good amount of vang and full outhaul before you use the cunningham. The more you get overpowered, the harder you pull on the cunningham.
Centreboard
Your centreboard is another very important control to how the boat sails. The rake and positioning of the centreboard changes the balance of theboat and makes it easier or harder to sail. Basically the further forward and further down the board is, the more poweryou will have. You may even try raking it forward a little in the light. As the breeze increases you will begin getting overpowered and the helm will start getting a little heavier. A heavy helmis slow, as you are holding the rudder against the water flow and creating drag just like a big brake. Therefore as it starts getting heavier, it is time to start moving the board. Firstly do this by raking the board. Leave the top at the front of the case, and let the bottom move as far aft as possible. You will probably find it faster if you begin doing this a little earlier in choppy conditions.
If you are still overpowered, you can now start lifting the board. Don’t be afraid to sail around with up to 150mm of board up if it is windy.
This will allow the boat to sail flatter, especially through the gusts, and to move faster through the water. Be aware to begin putting it down again if it lightens, or else you will find yourself not pointing.
Rudder
The rudder is very important. You sail the boat by feel. The position and rake of the rudder will effect this feel. As arough rule the rudder should be set up so the leading edge is square to the water.However it is even better to fine tune it from here by trying it a little back orforward from this position. Changing the tip postion by 10mm increments is about right. Once you are happy, then fix it in place with some sort of system which won’t allow it to move around.
The rudder ‘feel’ should be light in all conditions.
Make sure there is no slop in the rudder system. There is potential for wear especially in the gudgeons. If this is the case then replace them with a good positive system.
Calibration
Even the best skippers need calibration marks. These enable you to keep the best speed from week to week, and to keep learning how small changes effect your performances.
Highest priority is the Outhaul, the cunningham and the vang. I would also recommend some marks on themainsheet. Marks on ropes can be done with markers, or better still, by sewing contrasting thread into the lines.
Good luck, and please feel free to make comments and contributions to this guide.
READ MORE
READ MORE

10 May
DRAGON TUNING GUIDE
The purpose of this tuning guide is to give our clients in the Dragon class some guidelines on how to get the most out of their North sails. The tuning-guide was compiled by Jørgen Schönherr, Poul Richard Høj Jensen and Theis Palm.
Always experiment and try finding your own trim using these guidelines. The weight of the crew, the balance of the boat and the stiffness of the mast, together with specific local wind and sea conditions all have influence on the fastest and final trim.
MAST TRIM
Before stepping the mast in the boat, some very important measurements have to be checked to follow this tuning guide correctly:
1. Lead the upper shrouds and forestay along the mast, the uppers have to be outside of the spreader tips. Pull them as hard as you can and put a mark on all three wires at the top at the black band on the mast (it is 80 cm above deck level). These three marks are now used to check if the mast is straight from side to side in the boat, and to check the mast rake.
2. All measurements for the mast position is made from station 4, (you find station 4 between the forestay and the mast) which is marked on both port and starboard side of the hull with a dot. Draw a line in between the points. From the middle of this line to the front end of the mast (without spinnaker pole track) See the distance in the ‘on the water’ tuning guide below.
3. The mast rake is set by first fixing the forestay on the deck 1,86 cm from the front side of the mast. (This is the max. distance allowed in the class – rules). Then measure the distance from the black mark on the forestay to the deck (along the forestay). See the distance in the on teh water tuning guide below.
4. The upper shrouds proper position is located by measuring perpendicularly from the line on station 4 to where the shroud enters the deck. See the distance in the on the water tuning guide below. For light crews (220-240 kg) we recommend to leave the shrouds one hole forward.
5. The lower shrouds are placed in the hole just behind the top shrouds (approx. 3 cm), so that they don’t hold the mast back when going downwind.
6. The marks on the top shrouds (from step 1) are now used to control if the mast is placed in the middle of the boat. This is done best by measuring the distance from the mark to the deck. This should be the same on both sides. It is very important, that the mast is straight from side to side and not being distorted at deck level.
7. Setting up forestay tension, put the mast in strong wind position (tension 20 on the uppers and 8 on lowers). Next, put the tension gauge on the forestay around the black mark. Pull runners until the gauge reads 30. Make tape on runner exit above deck. Do the same on the other side. Now both runners have the same tension on the mark set-up. When you ease the runners until the forestay is just tight, the tape mark will be 15 cm above the deck as the uppers are both the same length.
8. The jumpers are adjusted by pulling the permanent backstay. Look up along the sail track and check that the jumpers are equally tight on both sides. If this is not the case, they should be adjusted till the mast is completely straight.
9. For all rig tension measurements we have used a Loose Gauge PT-2M. To get a more precise reading, cut the plastic of the upper shroud about 1.2 m above deck. You find all setting in the chart below.
10. The lower shrouds are tensioned, so that the mast is completely straight in the boat up to 20-22 knots. From here on, tighten them till the mast drops 5-10 cm off to leeward where the forestay meets the mast – the exact measurement is dependent on crew weight.
ON THE WATER TUNING GUIDE
Wind
Light – 0-5 knots
Medium – 6-16 knots
Heavy – 17+ knots
Comments
SailInventory
Mainsail A-7+ for Std. Petti & BBMainsail LM-2 for stiff Petti mastGenoa MG-15 / MJ-8Spinnaker CD-5 or R-5
Mainsail A-7+ for Std. Petti & BBMainsail LM-2 for stiff Petti mastGenoa MG-15 / MJ-8Spinnaker CD-5 or R-5
Mainsail A-7+ for Std. Petti & BBMainsail A-10 for stiff Petti mastGenoa HG-15 / MJ-8HSpinnaker CD-5 or R-5
The sea conditions and waves can change the wind range in the sail inventory
Mast Rake
123,5 cm (Petticrow)120,0 cm (BB)
122,5 cm (Petticrow)120,0 cm (BB)
122,5 cm (Petticrow)120,0 cm (BB)
Measure 80cm up from deck, transfer mark at mast to the forestay. Measure along the forestay to deck level
Mast Ram
Mast 1,5 cm forward at deck level
Mast neutral
Mast 2,5 cm forward at deck level
If you struggle with pointing, pull the mast back
Mast Position
83,0 cm (Petticrow)81,5 cm (BB)
83,0 cm (Petticrow)81,5 cm (BB)
83,0 cm (Petticrow)81,5 cm (BB)
Mast position at deck level is taken from station 4
Jumpers (adjustable)Jumpers (fixed)
Loose
Loos gauge tension 6
Mast straight
Loos gauge tension 6
Mast straight
Loos gauge tension 6
Make sure the mast is straight from side to side
Upper Shrouds
Loose gauge tension 14 for Std.Petti & BB and 12 for stiff Petti mastminus 1 turn
Loose gauge tension 14 for Std.Petti & BB and 12 for stiff Petti mastplus 1-2 turns
Loose gauge tension 14 for Std.Petti & BB and 12 for stiff Petti mastplus 3 turns
Tension is taken without plastic. Shroud position from station 4. is 83 cm all time, for light crew 80 cm
LowerShrouds
Let the mast bend 1 cm toleeward at spreader level
Mast straight
Mast straight plus 1-1½ turn so themast bends to windward
When you set the mast straight, look up at the sailgroove
Backstay
Little tension in the very light
Just tight to prevent the mast top from moving in waves
Just tight to prevent the mast top from moving in waves
Little tension in the very light to pre-bend the mast
Runners
Slack to 15 -16 cm above deckMark # 4
From 15 – 5 cm above deckMark # 3 – # 2
From 5 – 0 cm this is maximumMark # 1
Mark # 1 (tape) runners at through deck level such thatthe forestay reads 30 on the Loos gauge.This is the maximum runner setting
Mainsail
Light sheeting; upper teltalesflying straight back
Sheet until the top batten isparallel with the boom; uppertelltales 20% on leeward side
Sheet until the main is flying nicely, the top batten is 2 degrees twisted to leeward, telltales are flying straight back
If you struggle with pointing, you must pull the sheetharder, but check the mast ram first
MainTraveller
To windward; boom on middle
To windward; boom on middle
On the middle and up to 10 cm to leeward
The boat has to be light on the helm
Outhaul
2,0cm from black band
1cm from black band
All the way out to black band
The sail has to be flat along the boom in heavy wind
Cunningham
Loose
Loose – just remove wrinklesalong luff
Just remove wrinkles along the luff
In very heavy winds, you can pull hard to move draft forward
Boomvang
LooseMake sure it is cleated for the run
LooseMake sure it is cleated for the run
LooseMake sure it is cleated for the run
On the reach and run pull so the top batten is parallel to the boom
Genoa Sheet
Pull so the foot just touchesthe shroud at deck level
Pull until the foot is touching10 cm up at shrouds
Pull until the foot is touching25 cm up at shrouds
Genoa Barberhaul
Mark #4 / 15 cm out of cuddy15-18 cm from the spreader
Mark #2 / 9 – 10 cm out of cuddy5 cm from the spreader
Mark #3 / 10 – 12 cm out of cuddy8 cm from the spreader
GenoaHalyard
Small wrinkles along the luff
Just remove wrinkles alongthe luff
Just remove wrinkles alongthe luff
Make sure that the luff is NOT overstretched
READ MORE
READ MORE
09 May
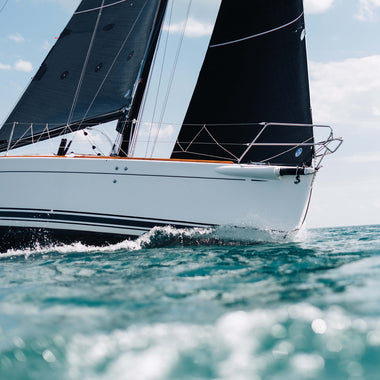
JDAZE-D IN CANANDAIGUA, NY
Finger-lake sailing at its best!
Spending the weekend in a J/24 on one of the most beautiful finger lakes in upstate New York; Who could ask for anything more? Well, maybe the sleet and rain were a little more than one would ask for, but the racing was competitive, fun, and very tricky, making for a great experience for all 27 boats.
Teams arrived Saturday morning at beautiful Canandaigua Yacht Club for some good old fashioned lake sailing. Fully suited in fowlies, everyone was prepared for the unpredictable finger lakes for a test of skills, crew work, and most importantly, patience. There is something to be said about the one liner: “Wait for it…”, as conditions were more shifty, puffy, and challenging than most could imagine.
A post-race debrief with Mike Ingham from North Sails offered great insight on maintaining control of your own destiny in short course racing. Most importantly, teams were advised to keep the comms up when Mike said,
“We did better when we were all talking about it. I noticed when things got quiet onboard we didn’t do as well.”
This was true for all sailors in the fleet as staying focused and keeping track of what was going on could make or break your next race. As pressure moved in from the West, large puffs were coming in on both sides of the windward leg, making decisions at the start very important. One start in particular that Mike reflected on was where there was a huge lefty right which caused the entire fleet to tack right at the start, making the next decisions very crucial. Keeping your head out of the boat, looking for what pressure is coming down, but also making sure there was a future after the first move was very important. Shifts were big enough to lift you 15 degrees, and force an auto tack seconds later. In other cases it was better to follow the header down and determine if it was significant enough to tack in. There were also some major fluctuations in velocity, making it difficult to sort through whether a decrease in pressure was in fact a header as well.
Boat set up was important as you never wanted to be too tight or too loose, the default for most was to set up for the lulls. You could easily make the fine-tune adjustments and crew weight to get you through the puffs, as they were not steady throughout the race course.
Another thing that teams practiced diligently throughout the weekend was never giving up. One minute you could be looking great, the next not so much, but keeping your head out of the boat, looking for the next pressure line to come down, being patient, and having faith and trusting in what you know gave sailors the best shot of staying between their competitors and the mark.
Congrats to Andrew Carey and team ‘Mr. Hankey’ for winning the J-Daze Regatta, and thank you to the Canandaigua YC Race Committee and staff for your hospitality and support. This was a great regatta for the J/24 class!
Full Results
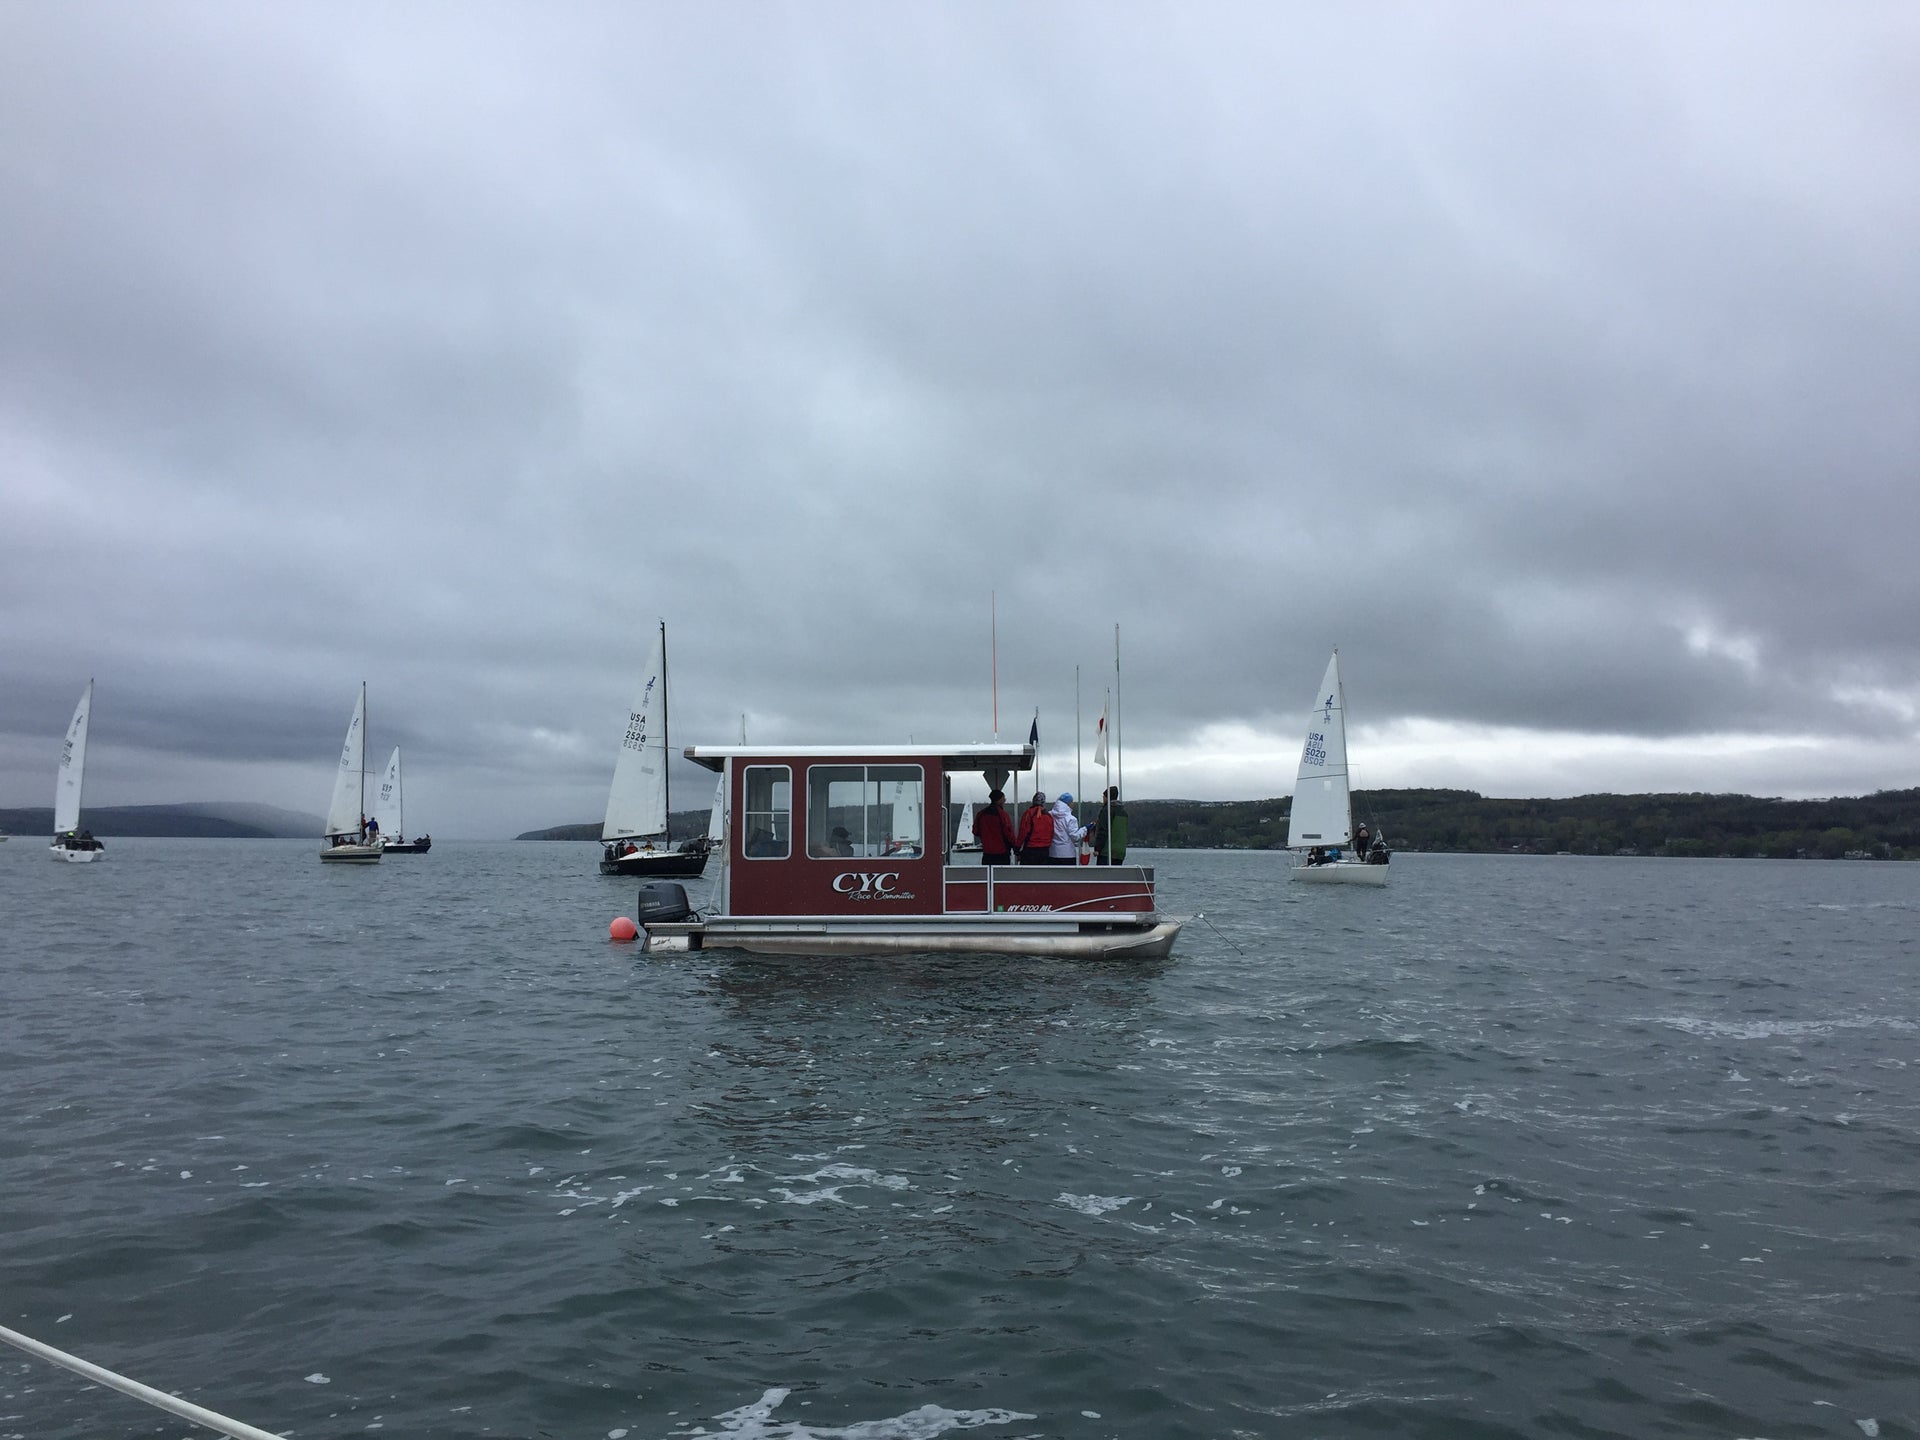
CYC RC ready to run some races
READ MORE
READ MORE
09 May
ANNAPOLIS NOOD
A wet and wild NOOD Regatta makes waves with record numbers and stormy weather
In one of the biggest NOOD events we’ve seen in years, Annapolis provided all the necessities for fun this weekend, leaving sailors on over 200 boats exhausted yet happy with their final results.
Friday was an absolute blowout, forcing the race committee to cancel racing for the day. Saturday served a full day on the water, followed by a debrief with North Sails experts Zeke Horowitz, Jackson Benvenutti, and Skip Dieball for the Viper 640 class. Viper sailors collected pointers from the North class experts on how to improve trimming techniques and find the best ways to tune their rigs in big breeze and waves. Discussion surrounding how to survive when your rig is too tight, different sailing angles, and adjusting head stay tension, created a great environment for sailors to unwind and think about improving their boat speed for the next day.
North Sails Saturday also opened the signature Rally Race – a one-day pursuit distance race. The Rally Race had a great turnout for both spinnaker and non-spinnaker divisions, with North clients taking 1st in both divisions. Conditions were superb with a WNW Breeze at 15-22 knots. Bill Adam and the Race Committee team selected an 18-mile race with the start and finish just East of the US Naval Academy. All competitors in the Rally Race enjoyed the North Sails party back onshore and had fun stories from the day to share over libations with fellow competitors.
Sunday was a full on thrill for sailors with big puffs and sustained winds over 20+ knots. Solid conditions to top off another great NOOD regatta on the Chesapeake. Congratulations to our clients for their outstanding performance this weekend!
Full Results
J/22 Start
J/22’s headed downwind
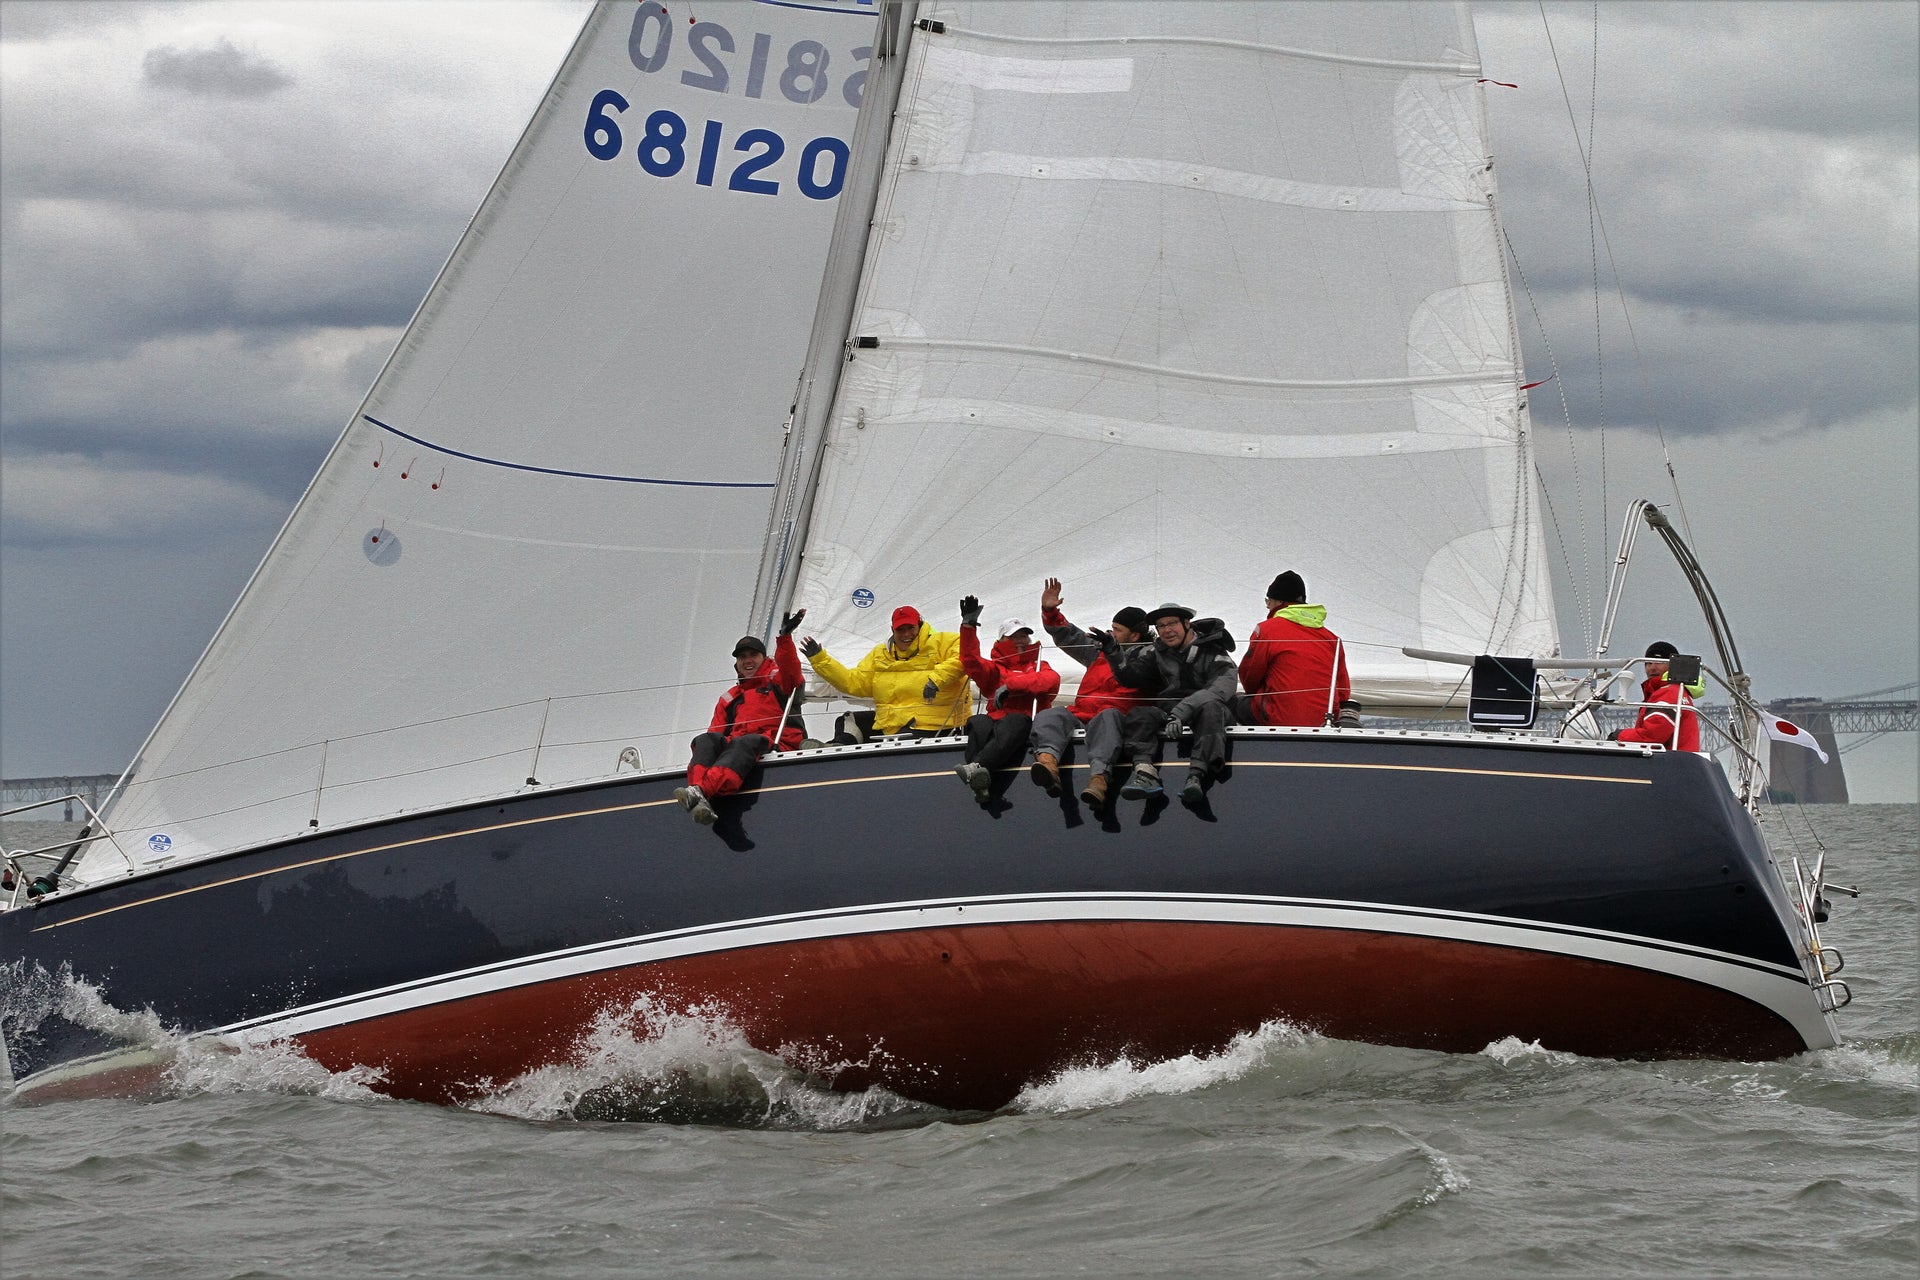
J/111 team ‘Skeleton Key’
‘Savasana’ wing-on-wing
Ensign team ‘Chowder’ took first in their division
J/70 fun in big breeze
‘Muse’ 2nd Place Corinthian J/70 team
‘Savasana’ catching one downwind
‘Skeleton Key’ edging upwind in big breeze
Rally Race RC lead by Bill Adams on point and enjoying their day on the water
Rally Racer’s loving the big breeze
READ MORE
READ MORE

09 May
YNGLING TUNING GUIDE
Congratulations on your purchase of North Yngling sails. Thank you for choosing us as your personal sailmaker. We have been working hard to design and build the fastest, easiest and most durable Yngling sails available.
Please use this guide as a reference and starting point. While we have found these numbers to be accurate and beneficial for most sailors, others may find different settings to be even more comfortable. We urge you to experiment.
While we cannot guarantee immediate victory by following this guide, we can assure you will be taking a major step in the right direction!
Please call on any of your North One Design Yngling experts if you have any questions. Good luck and good sailing!
Prior to stepping your mast
Check the length and cant of your spreaders, as they are important in shaping the mainsail. When set properly the spreaders help maintain control of the mast bend and indirectly, the tension/sag of the forestay.
The length of the spreader is measured from the side of the mast to where the shroud passes through the spreader tip. The length of the spreader should be very close to 60Cm (23 9/16”). The cant of the spreaders is measured by checking the distance of a taut line (bungee cord hooked at the tips works well) from the back of the mast. We have found this distance should range between 21.5-22.0 Cm ( 8 ½- 8 ¾”). The greater this distance, the bendier the mast. For the Abbot Boats/ Proctor Spar combination set up closer to 21.6-21.8. For the DeWolf Boats/Hall Spars combination set up the spreaders closer to 21.5 cm.
The butt of the mast is set so that the distance between the center of the forestay pin to the front edge of the mast is 1.925 m (6’ 3 ¾”).
Note: it is important to check that your mast does not sit squarely on the step (or casting). Ideally there should be a gap of nearly ¼ “ between the front of the mast extrusionand the casting or step. This gap will allow the mast to “rock” fore and aft easier and therefore bend easier, making for smoother gear shifting from light to heavy winds.
Hoist a tape measure on your main halyard and lock in your standard full hoist position. The mast rake is set so that the distance from the top of the mast ( main halyard in its locked position)to the top of the deck at the transom is 26’ 3”- 26’ 5”.
Using the tape on your main halyard, check that the mast is centered in the boat side to side.
Start with a tension gauge to measure your rig-tension. We suggest the Loos Model PT-1 gauge as it appears to be most consistent. These are good rough tune starting points for the upper shrouds at the dock: Light winds (below 6 mph) your gauge should read close to 6. In medium winds, and for your “base” setting your guge should be close to 9 and in heavy breeze the guage should be at 18. HOWEVER……
Note: As a final check in all conditions for your upper shroud tension, ideally the leeward upper shroud will just barely start to go slack…not sloppy.
The lower shrouds are best adjusted and fine tuned while under sail. They are tensioned so that the mast has a slight (3/8”) sag to leeward at the spreaders in light to medium winds. Only in heavier winds or when overpowered, will the lowers be tightened to straighten the mast laterally in the boat.
MAINSAIL TRIM
Trim the mainsheet hard enough to make the top batten parallel to the boom. You can check this by sighting from underneath the boom on a vertical plane. Once you have accelerated and you want to point higher, trim harder to cock the top batten slightly to windward. Generally, we recommend sailing with the top leech telltale stalling 70% of the time. In flat water, you can trim harder, but in light air and choppy water, you will need to ease to twist off the top of the main.
In light to moderate air, trim the traveller car to windward no more than 4-5” above centerline so the boom is on centerline. When you have the traveler to weather be sure to ease the mainsheet to maintain the upper batten parallel to the boom position. In light, sloppy conditions , or when trying to accelerate, ease the sheet so the upper batten is angled outbord from parallel 15-20 degrees.
As the breeze increases, gradually drop the traveler back to centerline to reduce helm, while at the same time trim the mainsheet. In very windy conditions, the traveler car may be dropped up to 2-3” below centerline. In these conditions the vang is tensioned hard to control leech tension and help bend the lower sections of the mast.
OUTHAUL
The outhaul controls the draft in the bottom of the mainsail. In nearly all conditions the outhaul is pulled tight enough to close the shelf foot so that the shelf seam is along the side of the boom. In heavier winds, the outhaul is pulled very tight, and to the band, so that the bottom of the main is very flat. Actually, the difference between standard “all around” trim and heavy wind trim on the outhaul is very slight. The outhaul, again, is pulled quite hard in most conitions.
CUNNINGHAM
The cunningham is used to position the draft of the sail. Your goal should be to keep the maximum draft point 50% back in the sail (sighting from luff to leech). We use no cunningham up to 10 knots, just enough to remove many of the wrinkles in 11-12 knots, and progressively tighter in higher winds to remove most of the wrinkles and position the draft forward in the top of the sail.
BACKSTAY
The backstay affects several different areas of sail trim and should never be overlooked as a power control. Pulling on the backstay does two things to the sail plan. First, it bends the mast by pulling on the tip, which opens the main leech and flattens the upper two-thirds of the sail. Secondly, it makes the headstay tighter, which flattens the upper entry of the jib and eases its leech; thus increasing pointing ability and reducing heel. Since pulling on the backstay has a large effect on main leech tension, whenever you adjust the backstay, you should check your mainsheet trim and vang tension.
JIB
JIB LEAD
As a basic starting point, set the jib lead at a distance of 2 m from the forestay pin to the center of the block. The jib should luff nearly even along the luff of the sail. In heavy winds move the lead aft a hole (no more than one inch). Note: Many sailors are raising the tack of their jib off the deck nearly 2-3” ( the skirt is still lying on the deck) to help make the bottom of the jib more powerful.
HALYARD TENSION
Be careful to avoid over tightening the halyard, as this will move the draft too far forward. Pull just barely enough to barely leave a hint of wrinkle off of each snap, but not more in all conditions. In heavy winds pull the halyard a slight bit tighter so as to make the luff smooth and position the draft properly.
SPINNAKER
The general rule of trim is to allow 8-10” of curl in the luff of the sail.
The outboard end of the pole should be even with the free floating clew and the pole should remain perpendicular to the apparent wind.
Pole height is important and has a big effect on the spinnaker. The luff break should appear approximately one-third of the way down from the head. If the break is lower, the pole is too high and it should be lowered, higher than this, the pole is too low and should be raised. Another effective guide is to position your pole so that the centerseam of the spinnaker (the vertical seam running from the head to the middle of the foot) is parallel to the mast.
Light Air
The most important area in light air is to concentrate on good communication between helmsman and spinnaker trimmer. The goal is to sail as low as possible while still maintaining good pressure on the spinnaker. An easy way to measure this is knowing the tension on the sheet. The important thing is not to sail too high with translates into longer distances, consequently do not sail too low thus sacrificing boat speed.If the spinnaker sheet starts to drag in the water, head up slightly!
Be careful not to pull the pole too far aft, which over flattens the spinnaker.
Heavy Air Reaching
Never allow the pole to rest on the headstay. Always maintain at least 2-3” of distance between the pole and headstay. When big puffs hit and the spinnaker is full, ease the sheet 2-3’ to help the boat accelerate. Trim as the puff subsides. Have the foredeck person keep a hand on the vang at all times and be ready to release if the boat begins to spin out. As soon as the rudder starts to have weather helm, the vang should be out of the cleat and eased until the boat is under control again. Hike hard on the reaches.
Mainsail
Ease the sheet until a luff appears then trim slightly to create more apparent wind. Dead downwind the boom will be out to the shrouds. Set the vang in light to moderate air so the top batten is eased out past parallel to the boom ( since the shrouds are set aft on the Yngling more twist in the main dead downwind is necessary to help the boat sail low enough.) The Cunningham, backstay and outhaul should all be eased for maximum downwind power.
Twings
It is critical to utilize the twings properly sailing both on the reaches and dead downwind. The windward twing should always be all the way down. It is critical to make sure the leeward twing is off during the set. If it is not, the spinnaker will fill prematurely, causing the boat to create weather helm and round up.
When sailing downwind in light air, the leeward twing is completely released. In very heavy air, pull the leeward twing as well, on about halfway or 2’ away from the deck to help keep the spinnaker under control.
READ MORE
READ MORE

09 May
Y-FLYER TUNING GUIDE
Congratulations on your purchase of North Y-Flyer sails. We are confident you will find superior speed over all conditions. Your sails are designed to be fast, as well as easy to trim and handle.
The following measurements are those we have found the fastest for your new North sails. After experimenting, you may find a slightly different setting may mean even better boats speed for you. We are anxious to help you go faster and win races!
Onshore Adjustments
Mast Placement – The mast step should be positioned so that the mast is near maximum aft position. In this position the back edge of the mast should be 16” to 16½” forward of the centerboard pin.
Mast Rake – the best method for measuring the mast rake on the Y-Flyer is by hoisting a 50’ tape to the top of the mast and measuring the distance from the top of the mast to the intersection of the transom and the back deck. Just hook the tape on your main halyard shackle and don’t worry about adding or subtracting any difference for the shackle. With the rig tensioned properly (discussed later) this measurement should be 24’1” to 23’10½”.
If you are trying to correspond this measurement to the older method of the bubble level on the top of the centerboard trunk, the measurement should be approximately 30”-31”.
While the tape measure is hoisted to the top of your mast it is important to check that your mast is set up straight in your boat laterally. To check this, take the tape and measure the distance from side to side at the bottom of the chainplates. Try to adjust your shrouds so there is no more than ¼” to ½” difference from side to side.
Rig Tension – We have found that the Y-Flyer performs best in medium winds with the rig set up fairly tight. It is best to use a powerful jib halyard adjustment system (a lever, magic box, block and tackle, drum, etc…) so that the leeward shroud just begins to go slack when it is blowing 10-12 mph.
To verify the proper rig tension we strongly suggest using the Loos Tension gauge. When using the Loos gauge, and checking the tension on your 1/8” upper shrouds, the number should read approximately 34-36 (not lbs.).
In light winds without changing the shroud position, it is advantageous to ease off the jib halyard slightly so the tension is reduced in the rig. This will allow the jib luff to sag slightly, making the jib slightly fuller. Using the Loos gauge to check the tension on the shrouds, you should find a number of approximately 28-30. If you still have your tape hoisted on your main halyard, you can check the rake number and see that it will become less (indicating more rake) by 1-2”. In heavy winds, when the boat is overpowered, it is fastest to rake the rig farther aft. If you set your mast up at 24’1” for medium winds, we suggest that you allow it to drop back nearly as far as 23’9” to 23’10”. Ideally, it is best to also drop the shrouds in their channel adjusters so that the rig, when raked farther aft, would still be close to the proper 34-36 Loos gauge number on the shrouds. However, if the breeze comes up during a race and since it is impossible (and Illegal!) to change the shroud tension it is still best to compromise and sail with a looser rig with the mast raked farther aft.
Loos Tension Gauge – This gauge is a very helpful guide in tuning your Y-Flyer.
Mast Bend – when the rig is properly tensioned with the proper rake and spreader settings, your mast should develop positive prebend, where the middle of the mast will move forward at the spreader and the top of the mast will come aft. In medium winds with the rig tensioned at 34-36 on the shrouds the mast should develop nearly 1” to 1½ of prebend. You can check this by pulling the main halyard down tight and holding it at the gooseneck so it will develop a straight line as a reference from the top of the mast to the gooseneck.
In light winds with less tension in the rig, there will be less prebend of approximately ¾”.
Listed below are suggested spreader positions for the various popular masts used the Y-Flyer Class. It should be noted that masts of a particular section may have slightly different bend characteristics depending on spreader height and rigging placement and differences in the extrusions themselves. Because of this, the following measurements should be used as starting points only with appropriate adjustments being make on the actual bend and tested while sailing.
Spreaders for the stiffer mast (W2, H2) – We have found that the spreaders that are 19¼” long and are free swinging forward but lock up when pushed aft at a point where they are 35” to 36” tip to tip will give the proper desired bend. this tip to tip measurement can be found by pulling the spreader together with a tape from one spreader to the other at the tips. Also, check and make sure that the spreaders are angled evenly on each side. These measurements are for masts with spreaders that are 9’1” to 9’2” from the deck. Spreader that are higher on the mast will need to be somewhat shorter.
Spreader for the bendy mast (DP1, C1) – These masts require spreader which are 18 ½” long and 38” measured tip to tip. These measurements are taken of masts when the spreader are approximately 10’ above the deck. To make adjustments to the bend, the “cant” in the spreader should be adjusted (forward for less bend-aft for more bend: or closer tip to tip measurement for more bend, greater tip to tip measurement for less bend).
The Mainsail Look When the Mast is Properly Bent: Basically on all masts we are looking for very slight overbend wrinkles (diagonal wrinkles that will appear from the spreaders to the clew) showing that the mast is beginning to reach maximum mast bend. In light to medium wind these wrinkles should barely appear while in winds above 15-18 mph, these wrinkles will be quite noticeable and in above 20-25 mph winds, will be quite severe. If these wrinkles are not developing, your mast is not bending enough.
Lower Shroud Tension – Your lower shrouds should be adjusted so that the mast is straight sideways when sailing upwind. Check this by sighting up the back of the mast, up the tunnel, and determine if the mast is sagging to leeward or bowing to windward at the spreaders. If sagging to leeward, tighten the windward lower shroud; if bowing to windward, loosen the windward lower shroud. Check both sides independently and when adjusted correctly the lower shrouds will be much looser that the upper shrouds with the jib up and the rig tension as described before.
If you find that it is necessary to sail with your lower shrouds quite tight to keep the mast straight sideways, it could be a good indication that your spreaders are too long. Lower shrouds that are tight can severely impair the mast’s ability to bend properly and therefore harm the boat’s performance. Shorten your spreaders in increments of 1/4” to 3/8” and readjust the lower shrouds to match. Again, your goal is that the leeward lower shroud will be much looser than the leeward upper when sailing upwind in medium winds. The lower shroud should be considered just as a “tweeker” to help control lateral mast bend, but definitely not to be the primary control. The spreaders are most important.
Jib Lead Placement – On your new North Y-Flyer jib you will notice a pencil line drawn from the clew grommet out towards the center of the sail. Use this “trimline” to position your jib lead by making your sheet a direct extension of this line.
In heavy winds, move your jib leads 1” to 2” aft of your medium/light air extension of the trimline position to help depower the jib and open up the slot.
Your leads should be positioned 13½” to 14” off centerline (27” to 28” lead to lead).
Centerboard Angle – It is important that your board is lowered to the maximum, with as little of the board as possible showing above the trunk when sailing upwind.
Sailing Adjustments
Main and Jib Cunningham – For both the main and the jib, never pull tighter than to just leave a hint of wrinkle along the luff of both sails. On your main, these wrinkles will appear in the lower 1/3 to 1/4 of the luff, and on your jib, will appear as small wrinkles approximately 2” long, perpendicular to the luff.
Note: do not attempt to pull out your overbend wrinkles by tensioning your main cunningham. Again, remember that the overbend wrinkles are a necessary guide in showing that the mast is vending properly and pulling the cunningham tight enough to pull these wrinkles out will pull the draft too far forward in your main, robbing your boat of necessary power.
Outhaul – The outhaul adjusts the depth in the lower part of your mainsail. as the outhaul is eased, the shelf on the bottom of the sail opens and the seam that attaches it to the sail moves away from the boom. To gauge outhaul tension, judge the distance from the seam to the side of the boom at roughly the center of the mainsail foot.
The outhaul will be pulled tight enough so that there is just a ½” to 1” gap between the side of the boom and the shelf foot seam in the middle of the foot. In breezes above 10-12 mph when the boat becomes overpowered the outhaul will be pulled tighter until the seam is snug against the side of the boom (max outhaul).
When reaching, ease the outhaul until vertical wrinkles appear across the seam perpendicular to the foot into the body of the sail. Tighten your outhaul until the wrinkles are just removed. When overpowered on a reach, with the spinnaker, leave the outhaul set as you had it upwind. For downwind sailing, leave your outhaul in the tensioned position for maximum projected area.
Jib Sheet Trim – Unfortunately, there is not an easy guide for jib trim. We are looking for a parallel slot between the exit of the jib and the entry of the main. A guide that has been used with some success is imagining a middle batten on the jib at mid leech. Set this “batten” parallel to the centerline of the boat, making the upper batten of the jib twist outboard slightly and the lower batten twist inboard slightly. In extremely flat water and winds of 8 to 12 mph, it is possible to trim the jib in slightly tighter so that the top batten is nearly straight back parallel with the centerline. This trim can be used for short periods of time when the boat is traveling at near maximum speed.
In light winds, or when acceleration is needed, ease the sheet out slightly so that the top batten is angled outboard approximately 15 degrees from parallel with the centerline of the boat. The imaginary middle batten will be angled outboard just slightly from parallel to centerline, and the jib will be fuller and less apt to stall.
Mainsheet Trim – The mainsheet on your Y should be pulled so that the upper batten is parallel to the boom. This is sighted underneath the boom looking up the sail, lining the batten and the boom parallel on a horizontal plane. In very light winds, it is usually impossible to keep the upper batten from hooking slightly to weather because of the weight of the boom hanging on the leech. In these conditions, ease the sheet out so that the top batten is parallel with the centerline of the boat.
In choppy conditions in winds above 2 to 3 mph, ease your mainsheet approximately 6 to 8 inches to slightly open the upper batten out from parallel to the boom. This will make your mainsail fuller, more powerful, and like the jib, less apt to stall.
In medium winds and flat water (ideal boat speed conditions) sometimes it is possible to slightly overtrim your main so that the top batten is looked to windward of parallel to the boom approximately 2 to 5 degrees for short periods of time.
Picture the mainsheet as your accelerator. As your boat picks up speed, pull the main tighter and tighter until the upper batten is parallel or slightly looked to the boom, and in lights winds or when the boat is hit with a wave and needs to accelerate, ease the mainsheet so that the upper batten will angle outboard slightly, inducing “twist” into the sail.
Boomvang – Upwind in medium to heavy winds the boomvang should be kept hard enough to keep the upper batten parallel to the boom. This may require a good deal of boomvang tension, but this will also help to bend the mast and flatten the sail. In light winds, never use any boomvang tension upwind. Downwind the vang should be tensioned only tight enough to maintain the upper batten parallel to the boom position. There may be a tendency to overvang downwind in light winds and undervang downwind in heavy winds. Basically, look for the main to set downwind as it does upwind. The traveler is used to help balance the helm of your Y and keep the boat upright. Upwind when the boat becomes overpowered, the traveler should be eased to leeward, with the boat slowly feathering up into the wind to help keep the boat level and the helm neutral. In the lulls, be sure to quickly pull the traveler back up to centerline, but be ready to ease back down to leeward in the puffs.
Downwind – When sailing your Y downwind with the whisker pole up, it is best to ease off your jib halyard as much as 10” to allow the luff of the jib to sag greatly. A loose luff, when sailing with a pole, will allow the jib to basically “turn around” with the leech becoming the luff and the luff becoming the leech. We need to remember that we are trying to create airflow across the jib with the wind entering the jib from the actual leech of the sail. Not attaching your jib to the forestay with the snaps or Velcro’s will make this procedure much easier. Instead, you can set the forestay so that it is loose enough to just allow the rig to lean back to your heavy air setting of approximately 23’9”. There will be slop in the rig, but that is necessary for top performance downwind. A shockcord retainer can help minimize the slop in the headstay when sailing upwind.
In addition, it is also suggested to sail with a longer whisker pole, which will help with better performance on beam and broad reaches. You will find that the pole will just barely fit in the cockpit of your boat!
Once again, a powerful jib halyard adjuster is helpful to make it easy to adjust the halyard tension properly and easily before rounding the leeward mark when the pole is dropped.
When sailing on a close reach, without the pole, be sure to use your barberhaulers and move your jib lead outboard. The proper position of your barberhauler lead, forward and aft, is determined by the trimline on the clew of the jib. This time, position the barberhauler lead so that the sheet is angled slightly forward of parallel to the trimline. This will make the jib slightly more powerful and help to support the upper leech.
We wish you good luck and fast sailing! Do not hesitate to give us a call if you have any questions or problems. Please consider us your personal sailmaker.
READ MORE
READ MORE

09 May
WINDMILL TUNING GUIDE
The following tuning guide is meant to be a good starting point in setting up your boat. Depending on your crew weight, strength, sailing style and local conditions, you may have to alter your rig slightly. As you read this, write down any questions you may have, and we will be happy to discuss them with you in more detail. We are trying to achieve a rig set-up that is fast in all conditions; upwind, reaching and running, and is very easy to adjust or change gears. Your new North Sails are designed around this all-purpose philosophy.
INITIAL SETTINGS
- The first item that should be checked is the mast step. It should be place at about 59-60” from station 0. Make sure that your mast is tight in the step and will not twist in the step.
MAST RIGGING
- The standard height for spreaders is between 104 to 106” above the theoretical top of keel. In checking the fleet, I have found some as high as 117”. While this is quite high, it seems to balance the mast bend nicely, and allow the jib to be sheeted inside the shrouds if you’d like and not foul on the spreaders. The length and angle the spreaders are set to determine the deflection that the shroud is moved away from a straight line between the mast and the chainplates. These factors control the stiffness of the mast. The spreader length should be set to deflect the shrouds about 2.5” to 3” outboard to restrict side bend and pinned to deflect the shroud about 1.5" to 2" forward which restricts fore and aft bend. These are checked at the light air rake settings. When measured from a straight line between the shrouds, the distance to the aft edge of the mast should be about 5" for a Kenyon “A” section, and 6.5” for a Proctor Lambda or Alpha Minus. Spreader length of about 15.5" from the surface of the mast works well with the spreaders at 106” and the chainplates inboard. With the spreader bracket at 117” above the keel, a length of 15.5” works well with the chainplates close to the gunwhale. These numbers will vary depending upon the location of the chainplates and height of the spreader brackets, but the overall deflection is the key. When sailing upwind in 8 to 10 knots, with the boom close to centerline the mast should be straight up to the forestay. If the spreader area goes to leeward, you need to either loosen the rig if it’s tight, or shorten the spreaders. It is also a good idea to have nicropress stops under the spreaders so the spreaders don't drop in angle.
CENTERING THE MAST
- Before calibrating your mast rake, check that the mast is even in the boat athwartships. You can do this by hoisting a jib and tensioning the rig until the shrouds are tensioned. Attach a tape measure to the end of the main halyard and raise it to full hoist. Check the distance to each chine directly below the chainplates, and adjust the shrouds until the mast is in the center of the boat. Next sight up the back edge of the mast to ensure that it's straight athwartships. If the measurement to the gunwales is even, and the mast isn't straight side to side, then either the spreaders are uneven in length or the mast partners at deck level are uneven and pushing the mast to one side. It is important that the mast is straight in the boat and nominally tight in the partners. Any side to side play in the partners depowers the rig too early.
MAST RAKE
- Mast rake and rig tension are the two very important tuning variables. We use a “boom band radius system” to measure and calibrate your rake, which uses your forestay. Hoist your jib without attaching the hanks to the forestay. Detach the forestay from the headstay fitting at the bow. Swing the headstay back to the mast, and mark the stay with tape where the wire is even with the top edge of the sail black band at the boom. This is your “zero point.” If your spar has two bands, use the upper band. If you are not confident that the band is in the right place, check the class rules and re- measure it. Now swing the wire back forward, attach a tape to the “zero point”, and measure down to the upper forward intersection of the deck and the bow. In light air and full power, this number should be about 34.5” An average light air setting would be 36”. For lighter crews or increasing breeze, rake back to about 37”. In heavy air rake back to about 38” To set the shroud tension, at your light air rake setting the shrouds should have about 150 lbs of tension, as measured on a Loos Gauge. If you don’t have a Loos Gauge, this is moderately tight where the shroud can be wiggled in a small circle without too much trouble. Heavier crews can use more tension to restrict mast bend, and lighter crews can sail with looser shrouds to allow more mast bend. As the breeze builds and you get more overpowered, just ease the jib halyard off to increase aft rake. This depowers the main through more athwartship and fore and aft bend. As a guideline, if you are pointing too much and going too slow, increase rake and loosen the helm up. If you are fast but not pointing, decrease your aft rake. With the mast in the 3’0” rake setting and the jib up, block the mast to have about 1/2” to 1” of pre-bend, that is where the middle of the mast bends forward.
DAGGERBOARD
- In my limited experience, it appears that the board should be as stiff as possible. It is also important that the board fit tightly in the trunk. The trunk can be shimmed within the WCA class rules with carpet, which will protect the daggerboard and keep it snug in the trunk. In conditions up to a full hiking breeze, keep the board all the way down and even forward in light air. As weather helm increases with the windspeed, you can balance the helm by either raising the board and/or angling the board aft.
MAINSHEET TENSION AND BOOM VANG
- Generally, the vang should just go slack when the mainsheet is at maximum tension. In light to medium conditions, trim your mainsheet so the top batten is about parallel to the boom. If you are sailing in very smooth water, trim hard enough to hook the top batten 5 degrees to windward. The boom vang is a powerful tool in that it will increase the mast bend and flatten the main. When sailing upwind, if you have speed with no pointing, try reducing aft rake, getting the traveller closer to the centerline, or vanging harder to tighten the leech and flatten the main. If you have pointing with not enough speed through the water, try increasing your aft rake, easing the traveller, bending more, or checking to see that you are not vanged too hard. Or just hike harder and sail the boat flatter!
MAIN CUNNINGHAM
- The main cunningham should be slack up to 10 knots. Above 10 knots, tighten enough to remove wrinkles along the luff. Always be aware that the cunningham pulls the draft forward and depowers the leech, which is not always good.
OUTHAUL
- Our sails are designed with a shelf foot, which makes the sail sensitive to outhaul control. Ease the outhaul 2-3” for power in a chop, and for offwind legs. Tighten in heavy air or overpowered conditions.
JIB LEAD POSITION
- As a starting point, your jib leads should be positioned so that the bearing point on the blocks is about 83” aft of the jib tack pin. Another guide is to set your leads so that the jib sheet lines up with the trim line on the clew of the jib. In choppy conditions it may be faster to move the lead forward from this point, and sheet just a little looser. If your sail does not have a trim line, you can install a line on the clew, defined by the center of the clew and intersecting the luff midway between the tack and the head. This is a good starting point. Move the jib lead aft as the wind increases, and/or more rake, to accomplish the same end result of twisting off the top of the sail. If you have speed with no pointing, try moving the leads forward. If you have pointing with not enough speed through the water, try moving the leads aft. Experiment with different lead positions, especially in stronger breezes, as changes are readily felt. The leads should be about 16” to 17” from the centerline. This can be adjusted by changing the length of the shackles which hold the ratchet blocks to the track slider. Generally, 16” is best for light air, and 18” or so best for heavy air.
READ MORE
READ MORE

09 May
SOLING TUNING GUIDE
The following tuning guide is meant to be a good starting point in setting up your boat. Depending on your crew weight, strength, sailing style and local conditions, you may have to alter your rig slightly. We are trying to achieve a rig set up that is fast in all conditions: upwind, reaching and running. Your new North sails are design around this “all-purpose” philosophy.
As you read this, write down any questions you might have, and we will be happy to discuss them with you in more detail.
MAST RAKE AND SHROUD TENSION
Most boats have an adjustable forestay which allows the crew to change the mast rake for different wind velocities. Our rake is checked by measuring the amount of forestay that exceeds the mast length.Hold your forestay along the front of the mast and simply mark the forestay at the point where the bottom of the mast would be. We check our rake by measuring the distance from this mark to where the forestay intersects with the deck. We suggest you set the rake at 29” inches. After the rake is set, It is possible to make marks on the mainsheet, backstay, and jib clew heights for different wind and wave conditions. In light wind conditions (under 7 knots) we suggest a 30” inches rake.
This will increase “feel” and make the boat easier to steer. Remember that every time you change the rake, all these control marks have to be changed.
SHROUD TENSION
Our shroud tension is measured with the shroud in the forward position, and the backstay on, so the headstay is snug at 29” inches of mast rake. Uppers should be at 700 lbs. at all conditions.Lowers should be set so the mast (when sailing), have 1 1/2” inches (one and half inches) of sag at the spreaders, for light air; increasing tension to 500 lbs. at 18 knots of wind.
NOTES:
The more upper shroud tension you have, the more pre-bend you will have.
If you have a soft mast, and or the mainsail looks a bit flat, you may need less upper tension.
SHROUD POSITION
We have five settings for the fore and aft movement of the shroud position at the deck. The total travel is 12” inches.
TRACK POSITION
WIND
WIND RANGE
#1 - Full forward
Light air
0-7 Knots
#2
Light to Medium
7-10 Knots
#3 - Middle track
Medium
10-16 Knots
#4
Fresh
16-20 Knots
#5 - Full aft
Strong
20+ Knots
Be careful not to depower the boat too quickly, especially in waves.
SAIL COMBINATIONS
We recommend the following sail combinations:
0-14 knots: AP-2 Main and V-1 plus Jib
8- 20 knots: AP-2 Main and V-1 Turbo Jib
18+ knots: AP-2 Main and A-1 Jib
BACKSTAY
There are two things that the backstay does. Controls the fullness in the mainsail and also the forestay sag. This is probably the most important adjustment in the Soling. The more backstay tension, the flatter the main, and the less forestay sag results in a flatter jib. I have my backstay marked on every inch, so is easy to repeat fast settings and have the boat ready, quickly after mark rounding. Our mainsail is designed so that the mast bend and forestay sag are matched for the conditions.
MAINSHEET TENSION
The mainsheet controls the top part of the mainsail. The quickest and most accurate way to trim the mainsail is to watch the angle of the top batten. Sighting from under the boom, the top batten should be parallel to the boom most of the time, if not in overpowered conditions. In flat water, the top batten can point five degrees to weather of the centerline, and when overpowered, it should open from centerline until helm balances.
BOOM VANG
The rule of thumb, is to have the vang adjusted for the downwind legs, so the top batten is parallel to the boom.This control is also important when close hauled, by helping control the forestay sag and making the jib either more or less powerful. In smooth water, the vang should not be used, so the forestay is as straight as possible. In choppy waters, boom vang should be used, and by experimenting you will be able to find the perfect tension, which is normally when helm is almost neutral.
MAINSAIL TRAVELER
The boom should be about 4 to 5 inches above centerline until both crews are over the side and boat is overpowered. At this point traveler should be placed on the centerline (not very often the traveler should be placed below centerline).
JIB TRAVELER
A good starting position is 10 to 11 inches athwart ship centerline. In heavy air, it should go outboard 2 to 4 inches (20 knots and above), this will help stop the back wind on the mainsail under heavy breezes.
CLEWBOARD POSITION
This will vary from boat to boat, but the third hole for the V-1 jib and the A-1 jib will be a good starting point. When it is light and crew is inside or not fully hiked, make the jib fuller down low, by going to a higher hole (or just by moving the whole jib up). When crew is fully hiked and the wind is stronger, make the foot flatter, by moving to a lower clew hole (or by moving the whole jib down). For full power conditions, the jib should luff evenly from top to bottom.
LUFF TENSION
All jibs should be set with minimum luff tension, just enough to take most of scallops out; DON’T OVER STRETCH. Too much tension moves the draft forward, which is very slow.
OUTHAUL
In light air the outhaul should be stretched to about 1 to 1 1/2” inches from maximum out. As the wind increases, pull the outhaul all the way out so the sail is perfectly flat right of the boom. In reaching, the outhaul should at maximum ease (about 3” inches).
RUNNING AND REACHING WITH SPINNAKER
A lot can be done in terms of speed when running and reaching, and if you are faster than the competition, that could be the necessary edge you need to win.When sailing downwind, the fastest setting is by moving the mast as far forward as your backstay would allow.The other important controls are the pole fore & aft and up & down. For fore & aft adjustments try to have the luff of the spinnaker perpendicular right out of the pole.For up and down control, the pole should be adjusted so the clews are even height from the water.
SAIL CARE
Always store your sails away from the sun and make sure they are clean and dry.Be sure that you always “roll “ your upwind sails, this will help them last longer and stay wrinkle free.If you have any questions or comments about our Soling Tuning Guide, don’t hesitate to contact us.
READ MORE
READ MORE

09 May
SANTANA 20 TUNING GUIDE
The following tuning guide is meant to be a good starting point in setting up your boat. Depending on your crew weight, strength, sailing style and local conditions, you may have to alter your rig tune slightly. As you read this, write down any questions you may have, and we will be happy to discuss them with you in more detail.
Our main goal is to help you achieve a rig setup that is fast in all conditions; upwind, reaching and running, and is very easy to adjust or change gears while sailing. Your new North sails are designed around this all-purpose philosophy.
It is important to mark all your shrouds, sheets, halyards, tracks, outhaul, backstay, etc. Keep records of your tuning setups, the conditions you sail in, and how your speed is. It is essential to be able to duplicate settings from race to race, and also to know exactly how the boat was set up when you were going fast. Experiment during practice races and clinics.
TUNING AT THE DOCK
Rake Setting: 51”
Once the mast is up, attach your jib or spinnaker halyard to the tack and tighten. Disconnect the forestay and bring back to the mast. Pull the forestay tight along the front of the mast and with a black marker, make a mark on the forestay at the location of the bottom of the black band. This should be 22” above the bottom of the mast. Mark the 22” spot on the mast if your band isn’t in the right place. Re-connect the forestay, apply enough backstay tension to straighten the forestay and measure from the black mark to the center of the forestay pin.
If you are sailing really light on crew weight, and the breeze is up you might want to go around 50”
Why do it this way? Because it’s the most accurate way and the measurement is the same for new and old style decks.
Next, make sure the top of the mast is centered in the boat. To do this place a pencil mark on the port and starboard rails at equidistant aft of the tack fitting at about 10” forward of the shrouds. Make sure your lower shrouds and aft lower shrouds are loose. With the upper shrouds hand tight hoist a tape measure on the Genoa halyard and measure from the Genoa halyard block to the pencil marks. Keep measuring side to side and tightening or loosening the upper shrouds until the tip is centered.
Hand tension each forward lower until they are evenly tensioned. Sight up the mast track on the aft side of the mast to see if it’s straight from side to side. You’ll find it helpful to take the main halyard and hold it stretched tight centered just above the gooseneck in the mainsail track. Use the wire as a straight-line reference with the track. Tighten or loosen the forward lower shrouds until the middle of the mast is in column with the mast tip.
We recommend investing in a Loos Tension Gauge Model PT-1. This gauge can hang on the shroud as it is adjusted and won’t stretch out like the Model A gauge.
Using the tension gauge adjust the upper shrouds to the base setting of 25 and the lower shroud to 20. Once the mast is centered it is important to take the same amount of turns on the port and starboard shrouds while adjusting tension in order to keep the mast centered. If the port and starboard spreader tips are at different heights above the deck, the mast will not be straight side to side or the shrouds will have different tension from the port side compared to the starboard side.
The aft lowers should be attached to an adjustable track, because adjustment of these throughout the race is essential. First make sure the backstay is released. If they are attached to a track make sure they are evenly set and when trimmed to maximum tension they invert the mast by at least 3 1/4 to 3 1/2 “.
Rig Settings
Apparent Wind
Uppers
Lowers
0-5
-1*
-1*
5-10
– ½*
– ½*
10-12
Base Setting
25
20
12-15
+1 ½*
+2*
15-20
Genoa
+2*
+ 2 ½*
15-20
Jib
Base
+2*
20-25
Jib
+2*
+2 ½*
* Denotes one full turn of the turnbuckle barrel using standard open body turnbuckles.
Set up the rig at the base setting before you leave the dock, adjust the rig as conditions change but remember to keep track of any changes. Just to make sure there is no confusion, all the changes reflect turns on or off from the base setting – not from the previous setting. Also, mark your deck with an arrow and a ‘T’ for the tightening direction and replace any cotter rings/pins with turnbuckle nuts – they’re much easier to adjust!
UPWIND TRIM
Light Air (0-5 Knots)
In these conditions keeping the boat moving fast and not worrying about pointing makes bigger gains around the racetrack. Therefore set the boat up to maximize boat speed instead of pointing ability.
The golden rule in all conditions is “If you want to point you have to be going fast first!”. In light air set your sails up for maximum power.
Main
First set the aft lowers at a position so the mast is perfectly straight yet there is enough tension that when the backstay is pulled the mast will not bend down low. Get in a habit of sighting up the backside of the mast to see how the mast is bending. Next, sheet in the main sheet so that the top batten cups slightly to windward. Now pull the backstay until the top of the mast bends enough to allow the top batten to twist to leeward so that it is parallel with the boom. Make sure the telltale on the top batten is not stalled. The small amount of backstay tension will provide the correct amount of headstay sag. The boom vang should be eased all the way and the traveler pulled to weather enough so the lower battens are just to leeward of the backstay. The outhaul should be 1-2” from maximum. The more chop there is, the looser the outhaul should be set. The cunningham should be pulled on just enough to remove major wrinkles from the luff.
Genoa
Tension the genoa halyard enough to remove the luff wrinkles. This will pull the draft forward and open the leech of the sail. With the draft forward the boat will be easier to steer. The open leech will help air flow across the sail without stalling. The foot of the genoa should be 3-4” from the shroud turnbuckle, and the leech should be 2-3” from the spreader tip. Make sure the leech lines are eased.
Remember in these conditions keep your head out of the boat and sail towards better wind velocity on the course.
Light to Medium Air (6-12 Knots)
These conditions call for a good amount of power as well as the ability to point.
Main
The aft lowers should be set at their medium position which puts 1” – 1 ¾” inverse bend into the lower section of the mast. Determine the medium air backstay setting by using the same technique as described for light air. The traveler should be pulled to weather with the boom on centerline to help the boat point, but eased to leeward if too much weather helm is felt or if the boat starts to heel too much.
The outhaul should be eased ½” from the maximum position. The cunningham should be pulled tight enough to remove all wrinkles from the luff. The boom vang should be pulled in just enough to snug up the line (preset for downwind). Start with the main sheet set with the top batten parallel to the boom. If your boat speed is good and you want to point higher, try pulling harder on the mainsheet and stall the top batten telltale 50-80% of the time. Beware, if your speed starts dropping off ease the mainsheet.
Genoa
Set the halyard so some wrinkles show in the luff of the genoa. This will flatten the genoa entry and move the draft aft in the sail, allowing for more power and higher pointing. Set the leads so the foot is 1” – 2” from the shroud turnbuckle and the leech is 2-3” from the spreader tip.
Medium to Heavy Air (13-18 Knots)
Once the wind has reached this level, it is time to start thinking about de-powering the sails to keep the boat from healing too much.
Main
The aft lowers should be set tighter with 3 ¼” – 3 ½” of inverse bend. This allows more backstay to be pulled on letting the top of the main twist to leeward, while at the same time placing more tension on the forestay which improves pointing and flattens the genoa. In order to determine backstay tension, pull the main sheet in enough so that the top batten twists to windward even while the backstay is at it’s medium setting. Then pull just enough backstay to let the top batten twist to leeward about 15 degrees. The cunningham should be pulled tight enough to remove all wrinkles from the luff. The boom vang should be tightened enough to hold the boom down at its sheeted height even without mainsheet tension. The outhaul should be at its maximum position.
Genoa
These conditions are at the upper wind range for the genoa. The decision to switch to the small jib will depend on crew weight, consistency of the wind and waves. Choose the size of your headsail based on the strength of the wind during the lulls. The larger the waves the larger a headsail needed to power through them. If the Genoa is used tighten the halyard to move the draft forward and open the leech. Set the leads so the foot is against the shroud turnbuckle and the leech is 4” – 5” from the spreader tip. To de-power twist the Genoa by easing the sheet 1” – 2”.
Remember the tighter the aft-lowers and backstay are, the tighter the forestay is and therefore the flatter the Genoa.
Jib
The crossover to using the class jib can be found in this wind range. Lighter crews, or sailing in flatter water can allow you to go to the small jib and still be fast.
Keep the leads forward and don’t strap the jib in! The S-20 likes to be rolled up to speed and a strapped headsail won’t get you there!
We also recommend a 2:1 jib sheet system. The sheet should be dead-ended at the jib car, go through the jib clew, through the jib block then back to the Genoa ratchet and up to the weather side. This makes adjustments to the jib easy while trimming from the high side.
Note: The 13-18 knot range of apparent wind can really separate the fleet. Make sure the boat is tuned for the conditions and the headsail. The key is to keep the boat moving fast and pointing high, you should roll the boat up to speed and keep the weather tell tales at about 45 degrees for maximum VMG to weather.
Heavy Air (19+ Knots)
In these conditions the sails need to be flattened as much as possible and set up so the boat is as easy as possible to steer.
Main
Pull the aft lowers on to their maximum setting of 4” of inverse bend. Tension the backstay in the same manner as in the 13-18 knot conditions, except that 20 degrees of twist is desired. Begin vang sheeting by pulling the boom vang on hard, which bends the lower section of the mast thereby flattening the lower part of the main. The cunningham should be pulled in enough to remove all wrinkles and move the draft forward. Set the outhaul at its maximum setting. Let the traveler all the way down to the edge of the cockpit.
If the boat is still overpowered with the top batten inverted and the main flogging it’s time to go into super twist mode. Pull the traveler all the way up past centerline and ease the mainsheet so the boom is on centerline. Keep the aft lowers, backstay and vang snug. The outhaul can be eased ½” for power in the lower section of the main.
Jib
The jib should be sheeted to tracks mounted on the round cabin top inside of the shrouds. The track should have a sheeting angle of 11° off centerline. To find this angle measure horizontally 19 ½” outboard from centerline behind the mast. This is where the jib track should be installed.
Pull the jib halyard tight enough to remove the wrinkles in the luff. Set the jib so the top tell-tales break slightly before the lower tell-tales. If the boat need a little bit more power, move the jib lead forward to give the bottom of the sail some depth and sheet the sail so the leech is pointing straight aft. To de-power move the lead aft to flatten the bottom of the sail and twist the top off.
The main and headsail need to work together. If the genoa or jib is twisting off at the top, so should the main. If the genoa or jib is sheeted hard, so should the main. When the wind is blowing hard, adding twist to the main and jib will help give the boat a larger groove to steer in.
Aft Lowers
Wind Speed (knots) 0-5 6-12 13-18 19+
Inches of inverse Tensioned yet 1-1 3/4” 3-3 1/2” 4”
bend straight mast
Outhaul
Wind Speed (knots) 0-5 6-12 13-18 19+
From black band 1-2” 1/2” Max. Max.
GENOA TRIMMING GUIDE
Wind Speed (Knots) 0-5 6-12 13-18 19+
Sail from spreader tip 2-3” 2-3” 4-5” 6”
Foot from turnbuckle 3-4” 1-2” against against
Luff Tension smooth——-><—-slight wrinkle—–><——-smooth
Leech Line <———-just tight enough to prevent flutter———->
Main Trim
Run
Downwind the main should be set at its fullest settings. The backstay should be eased. The jib halyard should be attached to the jib tack hook and tightened. This allows the mast to remain forward and stable at all times. In breeze over 15 knots it is a good idea to keep the backstay tensioned a little to prevent total mast inversion. The aft lowers should be released all the way immediately after the weather rounding. The outhaul should be 2” from maximum tension. The cunningham is always eased all the way on a run. Boom vang should be set so the top batten is parallel with the boom.
Reach
While reaching the main should be powered up most of the time. The backstay should be eased, aft lowers off, cunningham loose and outhaul eased. A little bit of twist in the top of the main is okay. Make sure the top telltale is not stalled. Once the boat starts to be overpowered on the reach it is time to depower the main. Pull the backstay on a little to keep the mast in column. Ease the vang to allow the top of the sail to twist off. Pull the cunningham on to open the leech of the main. Tighten the outhaul.
Spinnaker Trim
North’s full radial spinnaker likes to be flown with the spinnaker pole lower to project more area. A good starting point is for the pole to be connected at the mast 44 ½” up from the deck. The pole should be flown parallel with the horizon. The halyard should be raised as high as it will go to increase projected area and stabilize the sail. When running, square the pole so it is perpendicular to the apparent wind and make sure the sheet does not go past the headstay.
The trimmer should keep a slight curl in the luff of the sail. Remember that an under trimmed spinnaker is much faster than an over trimmed and stalled spinnaker. Spinnaker trim needs to be constantly adjusted due to the changes in apparent wind caused by velocity changes, steering, waves and changes in boat speed. To help the boat accelerate faster be ready to ease the sheet 5” – 12” when a puff hits. The ease of the sheet will move the driving force of the sail forward instead of healing the boat to leeward. Never let the pole rest on the headstay; it should always be at least 2-3’ aft of the headstay.
When running, concentrate on steering your optimum down wind angle. Good drivers are sensitive to small changes in boat speed. When the boat is going slow, head up a little to increase boat speed. If the boat is moving fast or in a puff, bear off to ride the puff longer and use your extra boat speed to sail lower. Good communication between helmsman and trimmer is important.
Make sure one of the team (not the spinnaker trimmer) is constantly watching for puffs and velocity downwind.
If you have any questions, comments or suggestions about your new Santana 20 sails, we will be glad to discuss them with you.
READ MORE
READ MORE

09 May
REBEL TUNING GUIDE
Congratulations on purchasing a new Rebel sails. We are confident you will find superior speed over all conditions. Time has been spent to insure that not only are your sails fast, but that they are also easy to handle and trim.
The following measurements are those we have found to be the fastest for your new North sails. After experimenting you may find slightly different settings may mean even better boat speed for you and your style of sailing. If you have any questions or problems, please don’t hesitate to call. We are anxious to help you go faster and win races!
Adjustments on shore
MAST BUTT PLACEMENT
Place the butt of your mast between 54” and 55” when measured from the stern (excluding the molding) to the center of the mast step.
MAST RAKE
To measure the mast rake, hoist a 50’ tape on the main halyard and measure the distance to the intersection of the transom and the back deck. Without the jib up and the rig leaning back on the forestay the measurement should be 26’. Now grab the forestay and pull the rig forward until the shrouds are just taut. The rake measurement should become 26’ 3”. Sailing with the jib up and the rig set properly, your boom should be just about parallel to the deck in an 8 to 10 mph breeze. (Please see “Rig Tension” for the rake measurement after the jib is up.)
RIG TENSION
We have found that the Rebel performs best in moderate to heavy winds with the rig set up fairly tight. After hoisting the jib, tension the jib halyard so that the rake is pulled up to 26’ 1” – 2”. In very heavy winds (15 to 18 mph), it is advantageous to pull the rig up as far as 26’ 3” – 4” to help minimize luff sag that can develop and make the jib too full. In lighter winds, set your jib halyard so that the rake measurement 26’ 1”- 2”.
As you tune your Rebel you will note that with the jib up, the forestay is always quite slack. This will put all the load on the luff wire of your jib. Your North jib is built with 3/32” 1X9 stainless steel wire, and is designed to withstand the loads of the entire Rebel rig. We feel your boat will perform better if you allow the rig to take this load. If you feel your jib halyard tensioning devices are not able to tension your jib halyard as suggested in the tuning guide, set your aft rake (the rake measurement taken when the mast is leaning back on the forestay) at 26’ 1”-2”. This way your rig will be set properly for all conditions.
DIAMOND TENSION
There has been a tendency over the past few years to set the diamond tension on the Rebel mast extremely tight. While this is perhaps beneficial in helping to control sidebend in the mast, it also greatly reduces fore and aft bend. In fact, in some masts it has been shown that excessive diamond tension can induce negative prebend. Obviously, negative prebend (where the mast bend is reversed with the middle of the mast going aft and the tip of the mast going forward) can be very slow as it will make the main much fuller than it is designed.
We suggest loosening the diamonds on your mast slightly so that when sailing upwind in an 8-10 mph breeze and sighting up the back of the mast, the slot appears very straight.When the diamond are too loose the mast will sag to leeward in the middle. The diamonds should be just loose enough that the windward diamond wire should almost (but not quite) go slack when sailing upwind in an 8-10 mph breeze. Again, if the diamonds are too loose the windward diamond wire will actually go slack and the mast will sag to leeward in the middle. If, when sailing upwind in these conditions on both diamond wires seems nearly equal we suggest experimenting with loosing the diamond wire slightly.
JIB LEADS
Your new North jib has a “trim line” in pencil which runs from the clew grommet of the jib out into the body of the sail approximately 18”. This line is inscribed on your jib to aid you in setting your jib leads correctly in the fore and aft position. In moderate winds, you should set your leads so that the jib sheet is an extension of that line to the deck of your boat. In lighter winds, or in medium winds with heavy chop, set your lead position so that the jib sheet is angled slightly forward of the trim line. This should place your jib leads forward of the moderate wind spot about 1”. In medium to heavy winds in flat water, or very heavy winds, place your jib lead so that jib sheet angles aft the trim line. This will place your jib lead 1” to 2” aft of the moderate wind/perfect extension setting.
As for the jib leads side to side, on new boats we suggest setting your lead positions so they are 3’ 6” apart when measured from bearing surface to bearing surface. This will place your leads on the inside edge of the seat. On older boats, place your leads as far inboard on the deck as possible. Even better, place them on a wood block so they are even closer together.
CENTERBOARD LEADING AND TRAILING EDGE TAPERS
We suggest that your board be tapered the full class maximum on both the leading and trailing edges. The trailing edge should come to a 1/16” squared-off edge. The leading edge should be a parabolic shape, coming to a near point, but carrying its roundness much farther forward than on trailing edge. A well-shaped centerboad can mean a great deal to the upwind speed of your Rebel in all conditions.
RUDDER SHAPING AND ANGLE
Like the centerboard, the rudder should be shaped to a 1 1/6” squared-off edge at the trailing edge, and to a parabolic, perhaps somewhat blunter than the centerboard, leading edge. There is no maximum on tapers, so a good faired- out rudder would help a great deal. The new rules allow the Rebel rudder to be angled straight up and down parallel to the transom. We suggest positioning your rudder so it is very close to this measurement, or at the most cocked up 15 degrees.
TRAVELLER/BRIDLE MAINSHEET HEIGHT
The traveller on the Rebel, like on most boats, is an important adjustment. Perhaps one of the most important adjustments to the traveller is that the height of the traveler be as high as possible. It should be set so that the V (the very top of the bridle running from the mainsheet sheeting to the back of the boom) should be nearly “two-blocked” in medium heavy winds. The closer you have the bridle to the mainsheet block, the better the boat will perform in light to moderate winds. It is as though we are pulling the traveller completely to windward for those conditions and pulling all from the windward side, it will then be much easier to trim the mainsail correctly and keep the boom closer to centerline.
On new boats the measurement from the seat to the top of the block if we have a double purchase at the end of the boom, should be 2’ 1”. This should bring the mainsheet bridle within 2” of being two-blocked in medium to heavy winds.
We suggest using the single purchase at the back as it allows you to make the traveller/bridle even higher, and the double purchase in the center of the boat near the mainsheet cleat.
Introduced in 1993 a mainsheet bridle where the legs of the traveller are actually sewn into the mainsheet. Several sailors have experimented with this and this actually makes the bridle height much less critical. It allows you to carry the traveler/ bridle height a little bit higher because the two legs of the bridle will actually be sucked up into the mainsheet block when the main is trimmed hard in a breeze. This is an excellent traveler/mainsheet system for the Rebel and we strongly suggest giving it some consideration.
Sailing Adjustments
MAIN AND JIB CUNNINGHAM
For both the main and the jib, never pull tighter than just to barely remove the wrinkles. It is best to leave just a hint of horizontal wrinkles from the luff of your main and jib to be sure you don’t have them pulled too tight.
OUTHAUL
Pull the outhaul to within ½” to 1” of the band except in very light or choppy conditions, or downwind when extra power is desirable. In these conditions it’s advantageous to ease the outhaul 2” to 3”. When the outhaul is pulled out tight, you will notice a crease just above the boom, which is normal. This crease represents the extra fullness designed into the sail for power when the outhaul is eased.
JIB SHEET TRIM
Unfortunately there is no easy guide for jib trim. We are looking for a parallel slot between the exit of the jib and the entry of the main. The guide that has been used with some success is that of imagining a batten on the jib at mid-leech. This batten should be set parallel to the centerline of the boat, which makes the upper leech of the jib twist outboard slightly and the lower leech twist inboard. It seems that 90% of boatspeed problems are due to faulty jib sheet trim.
MAINSHEET AND TRAVELER
The mainsheet should be pulled tight enough so that the upper batten is parallel to the boom when looking up the sail from underneath the boom.. In light winds, it is impossible to keep the upper batten from hooking slightly to weather because of the boom weight hanging down the leech of the sail. In these conditions, we suggest easing the sheet out so that the boom is approximately over the corner of the transom, and the upper batten will then become more or less aligned with the centerline of the boom.
Please do not get this guide confused with the guide for most other conditions where the upper batten is set parallel to the boom. In choppy conditions, ease your mainsheet approximately 6” to open the upper batten slightly out past parallel to the boom.
It has been found that the traveler is not as effective in depowering the boat in heavy air as is easing the mainsheet out. However, before easing the mainsheet it is important that the boomvang be applied quite heavily to keep the boom down.
This allows the mainsheet to act more like a traveler, allowing the boom to travel in and out sideways rather than up and down. The boomvang is helpful because it helps bend the mast and flatten the sail out in heavy air due to increased pressure forward on the boom into the mast.
BOOMVANG
When sailing downwind the vang should be set so that the upper batten is parallel to the boom.
Upwind in a breeze, we set the vang to keep the upper batten parallel to the boom when we ease the sheet in puffs. This will mean a heavy amount of vang tension and will allow the mainsheet to act like a traveler, the boom will just move sideways rather than up and down.
JIB HALYARD TENSION DOWNWIND WITH WHISKER POLE
If your boat is setup with an adjustable jib halyard, it is best to ease e halyard of when sailing downwind with the pole up so that the luff of the jib will sag and allow the jib to perform even better.
Imagine the leech of the jib becoming the luff and vice versa as we put the pole up. We suggest pulling the pole back as far as you can when the halyard is eased off slightly, so that the jib will almost break like a spinnaker, that is, the leech (new luff) will almost become unstable. Always be sure to ease off your jib cloth tension (jib Cunningham) downwind, to allow the draft to move back in the sail, and not to hook the luff when the pole is up.
Sail care
Your North Sails are constructed out of the best materials on the market today. We make sure of this by testing every roll of cloth we use. Through proper care and maintenance your sails will give you the performance you have come to expect from a North Sail.
The most important factor for a long life for your sails is to watch them for signs of wear and tear in high load and chafe areas. Be sure to wash the sails off with fresh water and dry the sails thoroughly before storing. A dry, mild climate is best.
Excessive heat can cause sails to shrink. It is best to roll the mainsail and jib.
READ MORE
READ MORE

09 May
PENGUIN TUNING GUIDE
Congratulations on purchasing your new Penguin sail. The following tuning guide is meant to be a good starting point in setting up your boat. Depending on your total crew weight, wind strength, sailing style and sea conditions, you may have to alter your rig slightly.
Onshore Adjustments
Set the mast butt position 21-23” from the Centerboard pin for older wood boats (Horners, Wrights, Beatons, Salentines) and 27-29” for newer Fiberglass or wood boats (Burtis, Freedom, Austin).
Step the mast and hoist a tape on the main halyard to its normal locked position.
Measure the rake of the mast to the top of the transom. This number should be close to 19’8” for the newer boats and as far forward as 19’ 10” on the older wood boats. Remember the goal to set the mast up in the boat so that when sailing with the main trimmed properly and the boat at the proper heel the helm should be nearly neutral. Too much weather helm would warrant moving the mast farther forward in the boat… too little, or lee helm would indicate a bit more rake.
Set the shrouds and forestay “snug” so that just gentle pressure forward is necessary to hook the headstay. As a visual guide for proper rig tension, the leeward shroud should become slack at 4-5 mph. Once set this rig tension is proper for all wind strengths.
Now put on the sail and go sailing.
OUTHAUL
There are a couple techniques used to gauge the outhaul adjustment. Perhaps the most precise is to measure from the back of the mast to where the aftermost edge of the sail would line up on the boom. For lighter winds or when more power is needed set your outhaul tension so this number is close to 99”. In more breeze, or flatter water set closer to 101” Another method is to measure the horizontal distance between the sail and the center of the boom. In all conditions set the outhaul tension so that this distance is about 6-8”. A “high-tech” double check is to use the width of the hand from the end of the pinky to the thumb as a guide. Note: If your mast is fairly bendy, easing the outhaul will allow the sail to maintain the necessary fullness as the mast bends and pulls the depth out. Inversion wrinkles (diagonal wrinkles in the lower ¼ of the main indicating the mast is bending and maximum bend has been achieved) should develop in all mains/masts in 10mph of breeze. If these wrinkles appear earlier, ease the outhaul slightly. If they seem to develop in wind above 10mph, pull more outhaul.
CUNNINGHAM
In lighter winds, be sure to leave slight wrinkles all along the luff from head to tack. Adjust as the breeze increases until in heavier breeze the luff is almost smooth. Be sure that your boom’s ability to be pulled below the band is restricted so that the luff wrinkles are easy to maintain in lighter winds.
VANG
In heavy winds pull the vang hard to help flatten the main and depower the boat. Tension the vang to the point where the inversion/ overbend wrinkles are evident and fall halfway back on the boom. Try to maintain the top batten parallel to the boom and the top telltale flowing. Downwind, and upwind when not overpowered, be sure to ease the vang so that proper mainsheet tension (and added “twist”) is developed.
MAINSHEET
Play the sheet to keep the leeward telltales flying in light air. Tighten the vang only in hiking conditions enough so that the boom doesn’t lift when the sheet is eased. When overpowered, play the sheet to keep the helm balanced and the boat flat. In choppy conditions play the sheet to keep the boat powered up. In conditions where acceleration is important, ease the sheet so that the upper batten is angled outboard from parallel to the boom (“twist”) and be conscious of driving the boat slightly lower.
TRAVELER
Set your traveler height so that the boom falls directly over the corner of the transom when the mainsheet is trimmed properly. The block should be close to 10-12” above the transom. The block will be positioned laterally about 12” below centerline except when overpowered at which time the traveler should be allowed to drop as far to leeward as possible.
HEEL
In very light air heel about 15 degrees. In winds above 3-4mph, try to sail the Penguin with the windward chine just clearing the water; about 5-8 degrees. Downwind, sail the boat heeled to balance the helm. With the board up dead downwind, heel the boat to windward until the helm is completely balanced.
WEIGHT PLACEMENT UPWIND
Ideally the fore and aft placement of the crew in all conditions will place the “knuckle” of the bow just kissing the water. Position the skipper and crew on opposite sides of the thwart and as close together when on the rail. When sailing in choppy, breezy conditions both should slide aft about 10”. In light winds with the crew to leeward, the skipper should slide forward a few inches to nearly on top of the thwart, still maintaining the bow just touching the water position.
WEIGHT PLACEMENT DOWNWIND
Maintain a fore and aft position to keep the boat on its lines. In breezy conditions, and especially when it is puffy, slide aft about a foot. In light winds, slide forward and again, be sure to heel the boat for proper neutral helm balance. When you have any questions please give us a call.
Sail Care
Your North Sails are constructed out of the best materials on the market today. We make sure of this by testing every roll of cloth we use. Through proper care and maintenance your sails will give you the performance you have come to expect from a North Sail. The most important factor for a long life for your sails is to watch them for signs of wear and tear in high load and chafe areas. Be sure to wash the sails off with fresh water and dry the sails thoroughly before storing. A dry, mild climate is best. Excessive heat can cause shrinkage. It is best to roll the mainsail and jib.
READ MORE
READ MORE

09 May
MELGES 17 TUNING GUIDE
IMPORTANT NOTES
We recommend not exceeding 350 lbs total crew weight as this puts excess stress on the mast and the boat.
When sailing, the boat performs best with the board all the way down in all conditions upwind. Downwind it is best to pull the board up 8” to 10” on the control line except in light air it will be best to leave the board all the way down.
It is important to always keep the ends of the spinnaker halyard tied off. It is difficult to re-lead through the backbone to the transom, so it is important to maintain control of both ends of the spinnaker halyard at all times.
The Roller Furler should furl counter clock wise when furling up the jib. So, it is important to roll it up clockwise before putting up the jib.
The Spectra outhaul line coming out of the thru-deck pulley on the end of the boom is meant to go through the clew of the sail and through the hole in the side of the boom and then tie a slip knot to make a 2:1 purchase.
The bow eye is suitable for tying the boat to the dock or towing the boat itself, but not suitable for towing multiple boats. When towing multiple boats tie off the tow line to the base of the mast, and tie off boats behind off the base of the mast as well.
McLube the mast track and the mainsail bolt rope to allow the mainsail to go up and down more easily.
You can also Mclube the spinnaker to make it easier to pull in and out of the chute launcher. Keep in mind that the standard spinnaker is made from silicone impregnated material so it is already very slippery.
When stepping the mast, tie off the bow sprit so that when tension is pulled on the spinnaker halyard, the bow sprit does not extend.
The red boomvang line comes up through the deck in the aft fairlead hole, the Cunningham comes up in the next forward hole in the center of the mast step, and the spinnaker halyard comes up the starboard hole on the side of the mast step.
After leading the chute retraction end of the spinnaker halyard through the lower grommet in the spinnaker tie a doubled up knot in the halyard about 12”-18” from the end before putting the end thru the top grommet belly patch and knotting off. This allows the spinnaker to go into the chute tube without a large bunch up of spinnaker cloth at the end of the line. Make sure you tie big enough knots so they don’t pull thru the grommets. If the kite will not pull all the way into the chute launcher the knots are too far apart.
When tying the tack line to the tack of the kite, tie a very short loop and keep the knot tight to the sail to prevent the knot from jamming in the block at the end of the pole.
Open tank drain plugs after sailing to check for water. Also, open forward inspection ports to check for water and air out when not sailing. Even condensation can add up to a considerable amount of water over time.
The diamond shrouds are pre set with 4” of pre bend in the spar. Be sure to keep the turnbuckles tied off.
Do not sail the boat with less than 3” of prebend in the mast and sufficient tension on the diamond shrouds. These shrouds support the mast head spinnaker and prebend the mast to fit the mainsail in light air.
Make sure that the ties remain on the sidestay turnbuckles as well to prevent the turnbuckles from changing settings or losing turnbuckle parts.
Check the spreader angle on the lower spreaders by running a straight edge across the tips resting on the shroud and measuring to the aft side of the mast tunnel. The measurement should be 10”. Also, make sure the tips are extended so there are 3 holes showing in the spreader tips.
When launching on a hoist, pay special attention to the mast and spreaders to prevent damage on the hoist. Also, make sure that the lifting bridle is secure and not caught under any deck fittings.
Do not walk on the foredeck while on the trailer unless the transom is secured to the trailer. The MELGES 17 is very light and it takes very little weight to have the bow go down and hit the trailer. The trailer bunks are set up to support the boat under the mast bulk.
RIG SET UP
Untie the mast, untie the upper shrouds off the base of the mast and attach to the aft most hole in the chainplates. Be sure to tighten the shackle with a wrench and it is a good idea to use a plastic wire tie through the shackle hole and around the shackle to prevent the shackle pin from coming loose. The lifting bridle then attaches to the shackle on the upper shroud turnbuckle. Attach the lower shrouds to the forward most hole in the chainplate.
Keep the rear hold down secured to prevent it from tipping over when rigging the mast, and keep the trailer latched to the vehicle.
Slide the mast aft so that you can latch in the mast base to the deck plate, be sure to push the mast forward to hold the base in place and take care not to knock the base out by moving the mast aft or bumping the mast as this could damage the mast and boat if the mast drops to the ground. Be sure the boat is positioned to avoid any electrical wires or trees or other boats when stepping the mast. Also, be sure the boomvang lines (RED) and the Cunningham line (YELLOW) are pulled straight aft to prevent pinching under the mast base. And, the spinnaker halyard goes on the starboard side and you should place the line in the cutout on the starboard side of the mast base before stepping the mast.
Run the spinnaker halyard (yellow/ white fleck, or gray) starting at the deck, go inside the boomvang bail at the base of the mast, up the aft starboard side of the diamond shroud turnbuckles, lead it on the starboard aft side of the starboard spreader, but in front of the spreader turnbuckle adjuster, lead it aft of starboard upper spreader, lead it thru the pivoting eye along side the main halyard cleat, thru the swivel block at the mast head and back down to the base.
Run the Jib halyard, start by attaching the 1/8” spectra line to the becket block at the hounds. Slide the spectra loop thru the block and then the other end of the spectra thru the loop and pull tight. Attach the small 3mm blue jib halyard puller line to the lower end of the spectra line, run the small spectra line thru the becket block from front to back. This forms a 2:1 purchase with the jib halyard, secure both the tail and the loop of the spectra where the blue line is tied to the shock cord or gooseneck area.
Run the main halyard from front to back on the mast head, keeping the snap hook on the front side, pull the halyard thru so the snap hook is at the top, the other end is tied off at the shock cord and the main halyard puller is attached to the snap hook and pulled down and tied off at the base.
Attach any mast head Windex fittings.
Make sure that all halyards and shrouds are run clean and free of tangles and twists. Make sure the turnbuckles are lined up and not kinked.
Making sure the trailer is properly latched to the vehicle, stand in the cockpit just forward of the rear mast hold down and start walking up the mast, be sure to always push forward on the mast and keep the mast centered to make sure the base does not pop out of the mast step deck plate. The mast only weighs 22lbs so it is very easy to step. Once up, take the spinnaker halyard and tie off on the top of the trailer mast stand, make sure the bow sprit is tied in, make sure the other end of the spinnaker halyard is tied off, then cleat the spinnaker halyard and put a safety knot in it to hold up the mast.
Putting up the jib; take the jib out of the bag, pull thru the jib forestay wire if it is not already installed, attach the top furling swivel to the top of the wire, shackle the head of the jib to the shackle on the top furling swivel, install the two jib battens, make sure the roller furling drum on the boat is furled up clockwise enough turns to completely furl the jib when up. Attach the tack of the jib to the roller furling drum, lead the tack line through the pulley on the shackle and up to the cleat on the jib, lead at least one side of the jib sheet system, attach the top swivel to the spectra line above the loop in the bottom end. Note: The Spectra goes right over the pin in the furler, there is no other fitting. Now, raise the jib with the small blue jib halyard puller line, ease the jib halyard adjuster purchase all the way out, snap the end of the jib halyard to the becket block and snug up the jib halyard purchase system. Pull on the jib luff so that it is snug and the jib will furl properly. Furl the jib. Finish leading the continuous jib sheet. Jib sheet starts in the cockpit, lead thru each ratchet, lead down through each pulley on jib clew, lead back to eye strap on jib car and tie a figure 8 knot.
Mast rake and shroud tension; Set up the mast rake at 26’10”.When the shroud tension is set at #25 on the Model A Loos tension gauge. This equates to 210lbs and this is the base setting. Put a mark on the mast rake adjuster line at this setting. This is your reference point.
Once you have the rig tuned at base, you can put the boom on the mast. Slide the boom onto the gooseneck pin, shackle the vang becket to the vang bracket at the base of the mast and shackle the other end to the boomvang bail on the boom. Careful, the boom can slide off the gooseneck pin. If you put the mainsail on, hook up the tack and the outhaul this will help keep the boom on, or, snug the boomvang slightly.
Shackle the 40mm double pulley to the forward mainsheet eye strap; use the locking plate on the top of the pulley to keep the block from spinning, position the block fore and aft.
Shackle the 40mm single on the aft eye strap and let it swivel.
Lead the mainsheet, tie off on the 40mm double becket on the mainsheet bridle and lead thru the blocks appropriately.
Now it is time to set up the asymmetrical spinnaker. Start by gathering the spinnaker on the port side of the port along side the chute launcher opening.
Tie off the spinnaker halyard, look up and ensure there are no bad leads.
Then tie off the tack line to the tack of the kite, make sure the tack is tied to the bow eye, goes up through the bow sprit pulley around the outside of the jib headstay and aft to the tack of the kite.
Next you should lead the end of the spinnaker halyard that comes out of the chute launcher under the foot of the kite up through the lower belly patch grommet, then tie a large knot about 12”-18” from the end of the line. Then lead the line from the inside out on the top grommet and knot off with a large knot.
Then lead the continuous spinnaker sheets starting in the cockpit, going through the 57mm Harken auto-ratchets shackled onto the eye straps just behind the chainplates, make sure that you look at the arrows so the ratchets will ratchet when the sheet is pulled in. Take the port sheet out around the port sidestay and tie off on the clew of the spinnaker. Take the starboard sheet out around the starboard shroud, around the outside of the headstay, stay inside the tack line, and go over the top of the spinnaker retraction line, then tie off on the clew of the spinnaker. Using the spinnaker retraction line, pull the kite into the sock helping it in at the same time, make sure the lines stay free and untangled.
Launch the boat
Pull up the mainsail; it is best to tie a bowline to the head of the mainsail to pull evenly off the top of the sail, keep the loop short and leave a bit of tail on the knot to make sure it does not come untied. Pull the main all the way up until the sail stops at the top of the tunnel, cleat the main in the mast head cleat and pull down on the luff to seat the line in the cleat.
Lead the Cunningham up to and thru the mainsail grommet and back down to the eyestrap at the tack and tie off making a 2:1
Make sure the outhaul is lead with a 2:1 purchase at the end of the boom.
RIG CHART
WIND SPEED
0-10 knots
6-12 knts
10-18 knts
15-25 knts
SHROUD TENSION
Loosen 2 full turns from Base
Base
Base
Tighten 6 full turns from base
MAST RAKE
Base
Base
Base mark
Base mark
LOWER SHROUDS
Loosen 3 full turns 1/2” of sag at spreader
No sag, lowers will be snug
No Sag
Tighten lowers 4 turns
JIB LEAD
4 holes showing behind car
4 holes showing
3-4 holes showing
3-4 holes showing
SAILING TIPS
Angle of heel; heel the boat to reduce wetted surface in light air, keep the leeward board vertical in medium breeze and heavy air, work to keep the boat flat.
Only snug the boomvang unless you need to depower the rig, the vang will blade out the mainsail.
Only pull on the Cunningham when you are overpowered.
Trim the mainsail with more twist than a lower roached mainsail, the larger roach mainsail likes a bit more twist, watch the leech telltales, keep them flowing.
Going fast upwind requires only trimming the mainsail properly and trimming the jib properly with the correct lead. Do not over-tension the boomvang or the Cunningham.
If possible the helmperson should help either drop the board or raise the board.
If the waves are big, keep the boat flat, keep the jib leads forward and try a soft jib sheet tension.
Always pull the wrinkles out of the jib luff.
Downwind, sail with pressure, but don’t sail too high in the medium stuff. In light air, sail with weight to leeward, and the apparent wind forward. In medium breeze sail with pressure and weight in and try to get low on the course. In the bigger breeze hike hard and sail with pressure and the mainsail in.
Raise the leeward board 8”-10” on the control line downwind in a breeze over 8 knots. Keep it all the way down in light air.
Furl the jib after the kite is up.
Unfurl the jib before you take the kite down, the headstay will have more sag in it when you are unfurling the jib, uncleat the furler line and pull on the jib sheet a bit to get the jib to unfurl, do not force it, let the wind blow the jib out if possible so as not to damage the jib while unfurling.
Take out all of the slack of the kite retraction line before you uncleat the halyard.
On a windward take down, trim the windward sheet and clew around to the port side of the boat and strap the foot, hand the sheet to the skipper and retract the kite.
On a leeward drop, which is the hardest drop to do safely, you need to head straight down wind, strap the foot of the kite on the port side of the boat, heel the boat to windward(skipper and crew) and retract the kite while keeping the boat heeled to windward.
The Mexican takedown is the same as the other take downs, you simply trim the kite tight on the port side and gybe into it and retract it.
Skipper may have to tail the halyard down to help prevent the kite from dropping in the water. Speed on the retraction line is key.
When gybing, get the board down and go right into it, trimming the kite thru on the gybe as quickly as possible.
Practice all take downs, leeward and windward. Both take downs will require bearing away to unload the kite to more easily pull it in.
In very heavy air, keep the main trimmed in to help support the rig and to go really fast.
If you ever have rudder stalling problems in heavy air, at very high speeds, raise the board slightly.
Keeping the front of the boat organized: Try leading the spinnaker halyard over the top of the boom or through a caribbeaner attached to the boom vang bail on the boom. Also, leading the board up line through a caribbeaner on the forward mainsheet bail works well to keep the board line clean and easy to grab.
The MELGES 17 is a brand new, fast, exciting boat to sail. The above information is what we have learned so far about the boat. These are generalizations and will be a good starting point. It is good to experiment outside the range of these numbers slightly to see what works best for your team. Be sure to take good notes so you can refer back to fast settings. Sail fast and have a blast!
READ MORE
READ MORE
09 May
M-20 SCOW TUNING GUIDE
Knowledge is power. We see this in every sport throughout the world. Racing sailboats is much different from the other sporting events. Sailing requires tuning for different wind and water conditions. Many of these tuning adjustments are very small, yet critical.
We have outlined for your information tuning information for many different boats that we race on a regular basis. The measurements achieved have been tested through countless hours on the water in a variety of conditions. What is truly unique with this booklet is the fact that we have simplified the tuning process for all of these classes in order to make the process easy for our customers. You will be able to achieve newfound speed in your class. These measurements coupled with the fastest one-design sails in the world will give you the knowledge for speed. In sailboat racing this is a combination for power and speed!
North Sails will continue to bring you the very best in sailing service and technology. Additional knowledge can be learned from the North Smart Book. Our objective is to allow you to set the pace in your racing class.
Mast Rake
In order to set proper shroud tension, the order in which to proceed is as follows:
Attach a measuring tape to the main halyard and hoist to the peak (the upper black band) and lock the halyard ball into the latch at this point. Measure to the intersection of the deck at the transom 28′-4″. Make the shrouds snug when the mast is raked in this manner.
In light and medium winds set the rake using the jib halyard so that the rake measured in the same manner as in number one is 28′ 4″. This is your sailing mast position.
In heavy air the rake should be 28′ 2″, when sailing to windward you will find the boom to be quite close to the deck, the main sheet blocks on the boom and traveler will be near to touching.
If you are using a magic box put marks on the spar at the junction of the magic box wire and the jib halyard as a reference point.
If you are using the ball and latch or the sharks teeth, make notes on the spar to correspond with the rake measurements given above.
Make certain that when you measure rake that the mast is not bending.
Mast Bend
Most new mains require a considerable amount of mast bend to set right. After setting the rake as described above, tighten the backstay until the measuring tape shows 27′ 10″. This is a good starting point for bend. Generally in medium airs when you sheet the boom to the center of the boat, tighten the backstay until the upper batten is 12″ to 18″ off the backstay. Trimming harder tightens the leech as does easing the backstay. In no event sail with the leech closer than 12″ to the backstay at the top batten.
Other Mast Adjustments
Your spreaders should be 17″ long when measured from the mast to the shroud and should be angled so as to deflect the shroud forward of a straight line from tang to chain plate by 1 1/2″. This can be accomplished by laying a board across the spreaders from tip to tip and adjusting the spreader angles so that the distance from this board to the mast is 2 1/2″ to 3″.
Cut wood chocks to fit into the mast well alongside the mast so that absolutely no side bend is permitted at deck level.
Sail Adjustments
Jib: 0 – 7 Knots
Attach sheets to 2nd hole or corner in clewboard.
Tension luff only barely enough to eliminate horizontal wrinkles.
Jib car from centerline 14″
Sheet tension: sheet until the third batten from the top is parallel to the centerline of the boat.
Jib: 8 – 15 Knots
Attach sheets to the second hole (corner).
Tension luff to eliminate horizontal wrinkles.
Jib car 15″ off centerline.
Sheet tension: sheet until the second batten from the top is parallel to the centerline of the boat.
Jib: 16 – 30 Knots
Attach sheets to third hole.
Tension luff to eliminate horizontal wrinkles.
Jib car 15″ from centerline in rough water, but eased out as necessary to avoid backwinding the main if you are in smooth water and have eased the main traveler.
Sheet tension: sheet until the third batten from the top is parallel to the centerline of the boat.
Main: 0 – 7 Knots
Sheet tension: Sight top batten parallel to centerline of boat, or about 12″ to 18″ off backstay.
Traveler carried 12″ to windward at 0 mph, to 3″ to windward in 7 mph.
Vang only snug.
Very soft Cunningham tension.
Outhaul in 1 1/2″ from black band.
Main: 8 – 15 Knots
Sheet Tension: More firm. Sighting top batten, maintain it 12″ off backstay.
Traveler on centerline.
Firm boom vang tension.
Cunningham eliminate horizontal wrinkles.
Outhaul 3/4″ in from black band.
Main: 16 – 30 Knots
Sheet Tension: Very firm. Top batten 18″ off backstay.
Traveler on center to all the way out in big puffs.
Very firm vang.
Very firm Cunningham.
Outhaul to black band.
All these generalizations are norms and averages that have proven fast over many years. Some experimentation by your part may be necessary to fine tune your particular rig and sailing style.
Good luck with your new sails and please feel free to call us with any questions you may have.
Sail Care
Your North Sails are constructed out of the best materials on the market today. We make sure of this by testing every roll of cloth we use. Through proper care and maintenance your sails will give you the performance you have come to expect from a North Sail.
The most important factor for a long life for your sails is to watch them for signs of wear and tear in high load and chafe areas. Be sure to wash the sails off with fresh water and dry the sails thoroughly before storing. A dry, mild climate is best. Excessive heart can cause problems with the sails due to the possibility of shrinkage. It is best to roll the mainsail and jib.
Mainsail
When hoisting and lowering the sail try to minimize the amount of creasing or wrinkling of the sail. Every time the sail gains a crease the cloth breaks down that much faster. Always have someone contain the leech and luff during these procedures.
The battens can be left in the sail without any problems. Be sure to roll the sail down the leech so that the battens will not twist. This could cause damage to the battens.
Jib
When rolling the jib keep the battens perpendicular to the leech. Pay special attention to the battens and batten pockets for wear and tear.
Spinnaker
The spinnaker is fairly straight forward. Be sure to repair all tears and pulled stitches. Folding the sail when storing is best.
READ MORE
READ MORE
09 May
M-16 SCOW TUNING GUIDE
Knowledge is power. We see this in every sport throughout the world. Racing sailboats is much different from the other sporting events. Sailing requires tuning for different wind and water conditions. Many of these tuning adjustments are very small, yet critical.
We have outlined for your information tuning information for many different boats that we race on a regular basis. The measurements achieved have been tested through countless hours on the water in a variety of conditions. What is truly unique with this booklet is the fact that we have simplified the tuning process for all of these classes in order to make the process easy for our customers. You will be able to achieve newfound speed in your class. These measurements coupled with the fastest one-design sails in the world will give you the knowledge for speed. In sailboat racing this is a combination for power and speed!
North Sails will continue to bring you the very best in sailing service and technology. Additional knowledge can be learned from the North Smart Book. Our objective is to allow you to set the pace in your racing class.
Boat Setup
0 – 5 Knots
Mast Rake: 24′ 7″
Sidestays: Just loose enough to let mast rotate.
Cunningham: Leave wrinkles in luff.
Vang: None.
Traveler: Leave on center line.
Boards: Full down.
Blocks: Set for 45 degrees rotation of mast.
Jib Leads: 4″ back from front of cockpit.
Jib Luff: Leave wrinkles in jib for fullness.
Trim: Ease main sheet so that upper batten is parallel to the boom. Allow loose trim on jib so that upper batten twists off.
5 – 15 Knots
Mast rake: 24′ 6″
Sidestays: Tight.
Cunningham: Remove most wrinkles when becoming overpowered.
Vang: As soon as boat is hard to hold down, tighten vang and work the mainsheet in the puffs to keep the boat relatively flat.
Traveler: Center line.
Boards: Full down.
Blocks: Set for 45 degrees rotation of mast.
Jib Leads: 4 1/2″ back from front of cockpit.
Jib Luff: Tighten to remove wrinkles, but not any tighter.
Trim Main: Harder as wind increases to keep the upper batten parallel to boom.
Trim Jib: Generally harder with increased wind, but careful trim is necessary to help the skipper steer properly. Do not allow the top batten of jib to curl inward.
15 Knots and UP
Mast rake: 24′ 5″
Stays: Very tight.
Cunningham: Remove all wrinkles.
Vang: Hard. Ease your mainsail in large puffs to keep the boat on its lines.
Traveler: Down to rudder posts (18″).
Boards: Up 2″.
Blocks: Set for 45 degrees rotation of mast.
Jib leads: 5 1/2″ back from edge of the cockpit.
Jib luff: Tighten down hard.
Trim: Very hard trim on the main, but easing with any puffs to keep the boat on its lines. The jib will have to be eased or trimmed in order to steer the bow around the waves.
Racing Techniques
0 – 5 Knots
The first objective here is to get plenty of heel on the boat so the windward rudder is just out of the water. This will account for less surface area in the water and will make the boat go faster. The skipper and crew must sit very still on the boat so there is no disruption of wind in the sails. The skipper must steer smoothly, not pushing the rudders across the boat. Adjustments in steering and trim must be smooth. Downwind the crew weight should be together and slightly forward. If your combined weight is over 290 pounds you should be sitting forward downwind in all conditions. Here the skipper must build up speed and then head the boat down, when the boat starts to slow again, the skipper should head up and gain speed again. This process must be continued the whole downwind leg.
5 – 15 Knots
These are optimum winds for the M-16 scow. The boat performs best with smooth steering and consistent crew work. The angle of heel should be flatter now. The windward rudder should be skimming the water. Once you have two on the high side hiking the rudder should be 3/4 of the way in the water. Crew weight should be together with crew hiking at an angle back towards the skipper. In choppy conditions both should shift back slightly. Downwind the crew weight should be placed together and on the windward side if there is enough wind. This however, will only be effective if you lean out and heel the boat. Weight again should be forward. With the leaning out of the crew the boat will not nose dive. Just lean the boat, steer down and increase your momentum for the next set of waves.
15 Knots and UP
The main thing in this amount of wind is keeping the boat on its lines and not letting it stall out in the waves. If this happens this increases your chance of getting a big puff and having it tip you over. This is because your speed is not up to where it should be for the wind velocity. The crew should have the jib sheet in hand so if this does happen a simple ease of the jib sheet will allow the boat to head up and stay on its lines. The skipper must constantly be working the mainsheet so the boat stays flat. Easing in the puffs and a trim back in with the lulls will give exceptional speed. Your boom vang should be very tight so the mainsail does not get fuller when you ease the sheet. With this process and hiking hard, you can be a very competitive boat regardless of your combined weight.
All these generalizations are norms and averages that have proven fast over many years. Some experimentation by your part may be necessary to fine tune your particular rig and sailing style.
Good luck with your new sails and please feel free to call us with any questions you may have.
Sail Care
Your North Sails are constructed out of the best materials on the market today. We make sure of this by testing every roll of cloth we use. Through proper care and maintenance your sails will give you the performance you have come to expect from a North Sail.
The most important factor for a long life for your sails is to watch them for signs of wear and tear in high load and chafe areas. Be sure to wash the sails off with fresh water and dry the sails thoroughly before storing. A dry, mild climate is best. Excessive heart can cause problems with the sails due to the possibility of shrinkage. It is best to roll the mainsail and jib.
Mainsail
When hoisting and lowering the sail try to minimize the amount of creasing or wrinkling of the sail. Every time the sail gains a crease the cloth breaks down that much faster. Always have someone contain the leech and luff during these procedures.
The battens can be left in the sail without any problems. Be sure to roll the sail down the leech so that the battens will not twist. This could cause damage to the battens.
Jib
When rolling the jib keep the battens perpendicular to the leech. Pay special attention to the battens and batten pockets for wear and tear.
Spinnaker
The spinnaker is fairly straight forward. Be sure to repair all tears and pulled stitches. Folding the sail when storing is best.
READ MORE
READ MORE

09 May
MATT PRANGE WINS C SCOW ICEBREAKER
MATT PRANGE WINS C SCOW ICEBREAKER POWERED BY NORTH I-1 GOLD
Congratulations to Matt Prange, Katie Bruder and Debbie Prange for winning the C Scow Icebreaker Regatta held at the Cedar Lake Yacht Club on May 7-8, 2017. They used North Sails I-1 Gold Mainsail to win the regatta, followed by Dave Harris, Lou Morgan and Quinn Harris in second place also powered by North Sails.
Matt Prange, Katie Bruder and Debbie Prange – Winners
Dave Harris, Lou Morgan and Quinn Harris – Second Place
READ MORE
READ MORE

09 May
JOB OPENING SALES MANAGER NORTH SAILS BENELUX
NORTH SAILS BENELUX ZOEKT...
Sales Manager, fulltime
North Sails is de grootste zeilmaker ter wereld en marktleider in het produceren van zeilen voor zowel het cruise- als het race-segment. De zeilmakerij is gericht op innovatie en staat aan de basis van high-tech ontwikkelingen zoals deze worden toegepast in bv. de America’s Cup en de Volvo Ocean Race. De unieke innovaties, bijvoorbeeld op het gebied van 3D-zeilen, geven North Sails een voorsprong in de zeilerij. Door deze voorsprong leveren we de beste cruise en race zeilen in de markt.
Het is onze missie om alle klanten het perfecte zeil te leveren en te zorgen dat zij genieten van het zeilen. De verstandhouding die we opbouwen met onze klanten is gebaseerd op onze jarenlange ervaring in het zeilmakers vak, vertrouwen, integriteit en openhartigheid.
Ter versterking van ons team op onze North Sails Benelux vestiging in Almere zoeken wij per direct een enthousiaste fulltime sales manager.
We zijn op zoek naar een commercieel talent met affiniteit voor de watersport die geen 9 tot 5 mentaliteit heeft. Bij voorkeur een ervaren zeiler(ster). In deze functie ligt de nadruk op jouw commerciële en communicatieve vaardigheden. Zeiltechnische kennis evenals wedstrijdervaring zijn een pré.
Taken en verantwoordelijkheden
Je adviseert over het gebruik en onderhoud van onze zeilen, zowel vanaf kantoor als op locatie. Meedraaien tijdens de watersportbeurzen is hier onderdeel van. Je bent binnen het team verantwoordelijk voor het onderhouden en uitbreiden van ons netwerk met Nederlands, Duits en Engelstalige klanten. Dit houdt ook in dat je aan boord stapt bij een klant om te adviseren en te beoordelen. Werkzaamheden kunnen buiten kantooruren plaatsvinden.
Profiel
- HBO werk- en denkniveau
- 1 tot 2 jaar ervaring in een sales/verkooprol of soortgelijke functie
- Nederlands en Engels in woord en geschrift
- Proactief, oplossingsgericht, initiatiefrijk, energiek en stressbestendig
- Flexibele instelling, afspraken met klanten vinden ook ’s avonds en in het weekend plaats
- Watersportliefhebber
Het Team
Wij werken in een klein team met veel praktische kennis en een groot netwerk. Van iedere werknemer wordt zelfstandigheid en verantwoordelijkheidsgevoel verwacht. Naast de flexibele instelling om ook in het weekend en tijdens zeilevenementen te kunnen werken, vinden wij het belangrijk dat er een goede balans blijft bestaan tussen werk en privéleven.
Informatie / Solliciteren
Graag ontvangen wij je CV en een korte motivatie per e-mail voor 31 mei 2017.
Voor meer informatie over deze functie en het insturen van je CV en motivatie kun je contact opnemen met Tom Luijks, te bereiken op +31 (0)6 22 520 989 of tom.luijks@northsails.com.
READ MORE
READ MORE

08 May
JET 14 TUNING GUIDE
In this tuning guide we have tried to introduce a healthy dose of “why” we do certain things and what we are looking to accomplish with certain settings.
You will find that the settings on your particular boat will vary a bit from the numbers given here. The important thing is to keep an open mind and a sensitive touch on the tiller. With a bit of practice and by following the principles outlined on the next few pages you should find yourself going faster and getting the best performance out of your boat and North Sails.
Good Luck and Good Sailing!!
Basic Rig Setup
With the mast down, we want to adjust our spreader length and angle. These two things determine how much the mast will bend, and how easy the boat will be to power up in light air and depower in heavy air. Before stepping the mast check the following items:
SPREADER LENGTH
This dimension, measured from the side of the mast to where the shroud intersects the spreader. For most boats this length is 17 1/4”. The length of the spreader affects the side-to-side bend of the mast primarily. After stepping the mast and going sailing you will want to sight up the back side of the mast and make sure it is straight side to side from the deck to the hounds. This is very important: if the mast is sagging to leeward in the middle, shorten the spreaders until it is straight. If the mast bows to windward in the middle make the spreaders longer until the mast is straight.
SPREADER ANGLE
The angle of the spreaders affects how much the maximum mast bend will be. Heavier crews will want a stiffer mast and lighter crews will want a softer mast. The starting point for the adjustment on this setting is where the shroud is not deflected out of straight between the chainplate and the hounds. Heavier crews may set their spreaders so the shroud is slightly deflected forward (1/4 -1/2 ”)while lighter crews may deflect the shroud aft (1/4”). Check to make sure that the sweep aft on each spreader is the same so that the mast bends consistently from side to side. Another good check on spreader sweep is the spreader tip to tip measurement from shroud to shroud. This measurement should be close to 32”….. farther apart for heavier crews and closer together for lighter crews.
MAST BUTT LOCATION
The mast butt position is measured from the center of the centerboard pin to middle of the mast. The best starting point is 19 3/8”. Moving the mast butt forward will reduce prebend while moving it aft will induce prebend ( important in “encouraging” proper mast bend in light winds.) We strongly suggest using the keel stepped mast as it makes the development of proper prebend/mastbend much easier.
SHROUD ATTACHMENT LOCATIONS
For most boats position the shrouds close to 72” aft of the jib tack. This will help the main go out further downwind and allow the mast to bend easier fore and aft while providing more sideways stability. Different shroud positions will require different spreader settings to achieve the same mastbend from boat to boat.
MAST RAKE AND RIG TENSION SETTINGS
To start, attach a 25’ tape measure to your main halyard and pull and lock the halyard in the position where the main would be hoisted to the top band. If it is pulled all the way up the measurement will be too long. Measure down to the top of the transom.
In medium winds ( 5-10mph) with the rig tensioned to 150 lbs ( by the jib halyard and measured on the shrouds), we suggest setting up your shrouds so the rake is close to 20’ 8”. In winds of 10-15mph, tension the rig to 180lbs and check that the rake is close to 20’ 8 ½”. In winds of 15 plus tension your rig to 200lbs. In winds below 5mph set your rig tension to 80lbs. Lighter rig tension in lighter winds will allow more headstay sag and therefore make the jib a bit more powerful.
Check your Prebend: At your medium wind setting your mast should develop approximately ½-3/4” of positive prebend. Sight up your mast’s luff slot to check this. Pull your main halyard ( or the tape measure if you’re checking your rake) along the backside of the mast and view the distance between the halyard and the back of the mast.
Block your mast, or set your restricting lines to lock the mast in place at this ½- 3/4” prebend position.
Sight up the backside of the mast and make sure the mast is perfectly straight side to side when the rig is tensioned in medium winds. If it is not you will need to check that the mast is centered in the boat…or more important centered through and above the mast partners at the deck. You may find it necessary to adjust the shrouds on one side and add to the other to make the mast straight. The mast should be shimmed snugly side to side at the deck (yet still able to move freely fore and aft).
Now you are set up to go sailing in moderate breeze. The first thing to do when you go sailing is to again doublecheck the mast bend side to side. Sight up the back of the mast on both tacks and make sure the mast is straight from the deck to the hounds. If it sags to leeward shorten the spreaders. If it pops to windward lengthen them. This is critical to good boat speed.
With the boat hiked flat you want to have an absolutely neutral helm in the boat. You should just need finger tip pressure to hold the tiller. If the boat has lee helm consider raking the mast back. If it has weather helm raking the mast further forward may be in order.
Main trim
MAINSHEET
The mainsheet is the throttle on the Jet and must be adjusted regularly to keep the boat going at top speed. The idea is to keep the top batten on the main parallel to the boom at all time and in under 7 knots of wind have the top telltale flying 70% of the time. If the telltale flies constantly the main is too loose. If it stalls all the time it is too tight. Trimming the main is a constant exercise in easing and trimming as the wind increases and eases.
In above 10-12 knots of wind the top telltale will fly all the time and the top batten should be nearly trimmed parallel to the boom.
CUNNINGHAM
The main cunningham controls the fore and aft position of the draft in the sail. Keep it loose until you begin to be overpowered and then tighten it to open the leech of the main by moving the draft forward in the sail. In light winds there should be 6-8” wrinkles perpendicular to the luff from head to tack. As the wind velocity builds the cunningham will be tightened until the wrinkles are minimized to just the lower ¼ of the main. In breeze above 18mph the luff should be nearly smooth.
OUTHAUL
In all but the very lightest conditions the outhaul should be tight when sailing upwind. In very light winds the outhaul will be eased until the foot is smooth and the shelf foot open about 1” in the middle of the boom. Downwind ease the outhaul about 2-3” to make the bottom of the main more powerful and to open up the shelf foot in the bottom of the sail about 3-4” in the middle of the boom.
BOOM VANG
The boom vang is used to hold the boom down when the mainsheet is eased and to bend the mast and depower the main in a breeze. Leave the vang completely slack until overpowered. Then take the slack out of it so that when a puff hits the main can be eased slightly with out losing leech tension. As the breeze picks up more (until constantly overpowered and the sheet is always eased) trim the vang much harder. This bends the mast and flattens the main and lets you play the mainsheet in the puffs with out loosing main leech or jib luff tension. The idea is that in very heavy winds, the vang is set hard enough that the mainsheet acts like a traveller and the need for an actual traveller is eliminated.
Downwind, you want to use the vang to keep the top batten parallel to the boom. Ease the vang substantially before reaching the weather mark to make sure you don’t break your mast or boom in a breeze. In some conditions, mostly light air and flat water, the vang can be quite loose with the top batten outside of parallel, which allows you to sail a bit by the lee. However be carefull! In heavy air this makes the boat unstable and can result in the dreaded “death roll”.
TRAVELER
Many skippers in the Jet have eliminated the traveler, relying on vang tension to keep the main trimmed properly. With vang sheeting you tighten the vang to keep the boom down and the tension on the leech when the mainsheet is eased. For sure vang sheeting eliminates another the need for the traveler…just be sure you have a powerful, easily adjusted vang.
For those boats using a traveler, as the breezes builds and the boat gets overpowered it is helpful to drop the traveler until the helm of the boat is neutral and the boat is flat.
Jib trim
SHEET AND LEADS
To help judge the trim of the jib your North Jet jib has a leech telltale 1/3 of the way down the leech. The sail also comes with a trim line on the clew. To start set the jib lead so that the sheet is lined up with the trim lime on the clew of the jib. From there you will want to fine-tune the lead so that the telltales on the luff of the jib break evenly (watch through spreader window). Move the lead forward if the top luffs first. Move the lead back if the bottom luffs first. In heavy winds move the lead aft up to 2”.
Although many Jet sailors measure and set their leads by measuring from the tack to the sheet bearing point on the lead ( should be close to 82”), remember that slight differences in rake, jib lead position vertically and actual lead fittings make it difficult for this measurement to be accurate. The trim line is always accurate.
If it practical for you to move your leads laterally so they are 32” apart you will find better performance. Some Jet sailors have moved their leads as close as 29” apart. Tighter inboard leads allow the jib to be trimmed more eased at times without sacrificing pointing. This trim is more forgiving to steer yet still high and fast.
After getting the lead position correct, we want to trim the jib in so that the telltale on the leech is just on the verge of stalling. You will need to adjust the tension on the jib sheet constantly as the wind builds and eases to keep the telltale just on the edge of stalling.
JIB CLOTH
The jib cloth tension should be tightened just enough so that there are always very slight wrinkles in the luff of the sail. In very heavy wind you will want to add tension and make the luff of the jib smooth to open the leech of the sail.
Spinnaker trim
Always sail your North spinnaker with a 6″ to 12″ curl in the luff. Careful concentration is necessary. Use short, smooth, in and out motions on the sheet
to keep the spinnaker trimmed correctly. Try to keep from jerking the sheet when the spinnaker begins to collapse! Set the pole so it is nearly perpendicular to the wind. A telltale on the topping lift a foot up from the pole works great as a reference.
Keep the clews even at all times through adjustments to your topping lift (pole). If the top of the spinnaker breaks high first, lower the pole. If the bottom luff breaks first raise the pole slightly. In light puffy conditions the pole height will be adjusted nearly as much as the sheet and guy!
Sail Care
Your North Sails are constructed out of the best materials on the market today. We make sure of this by testing every roll of cloth we use. Through proper care and maintenance your sails will give you the performance you have come to expect from a North Sail.
The most important factor for a long life for your sails is to watch them for signs of wear and tear in high load and chafe areas. Be sure to wash the sails off with fresh water and dry the sails thoroughly before storing. A dry, mild climate is best.
Excessive heat can cause problems with the sails due to the possibility of shrinkage. It is best to roll the mainsail and jib.
MAINSAIL
When hoisting and lowering the sail try to minimize the amount of creasing or wrinkling of the sail. Every time the sail gains a crease the cloth breaks down that much faster. Always have someone contain the leech and luff during these procedures. The battens can be left in the sail without any problems. Be sure to roll the sail down the leech so that the battens will not twist. This could cause damage to the battens.
JIB
Roll the jib keep parallel to the seams.
SPINNAKER
The spinnaker is fairly straight forward. Be sure to repair all tears and pulled stitches. Folding the sail when storing is best.
This tuning guide was compiled with the help from many National Champions’ assistance and represents the latest thinking on sailing a Jet 14 fast. Thanks especially to Brent Barbehenn.
Please give us a call if you have any questions. We look forward to helping you get the most from your new North sails. Good luck!
READ MORE
READ MORE

08 May
INTERNATIONAL 110 TUNING GUIDE
North Sail’s philosophy has always been to make tuning sails easy. We feel that it is very important to spend your time on the water sailing, and not thinking about your sail, rig and boat settings.
When Oakley Jones and I sailed in the 110 Nationals, we wanted to be able to set up the boat quickly and concentrate on making the most of the wind and current conditions. The following measurements and concepts are those that we found to be the fastest for the North 3DL RM sails.
MAINSAIL
TRAVELER
Keep the traveler in the middle third of the traveler range. In light air (0-9kts) keep it pulled up to the top of the middle third (about 9-11” above center). Once the wind increases to marginal hiking/trapping (9-13 kts) keep the traveler in the middle region of the track. In stronger winds (above 13 kts) utilize the bottom of the middle third (about 9-11” below center) of the track.
MAINSHEET
Light air or whenever the boat needs power, ease the mainsail until the top telltale is fully streaming. The last thing you want in light air is for the sail to be stalled. When the telltale is streaming aft this ensures that there is an even flow of air across the sails two surfaces.
Heavier air or once the wind increases to 9 kts or greater the main can be sheeted in hard.
OUTHAUL
In boats with an overlapping headsails, like the 110, it is important to have the bottom third of the mainsail flat. The outhaul should be pulled on very hard in most conditions. The only exception to this would be in 0-5 kts where it can be eased to create a little bit of pocket in the sail.
BACKSTAY
The backstay should remain off (no tension) until the winds reach approximately 18kts or stronger. When the winds reach this level the backstay should be used very sparingly. However, if you find yourself wanting to “foot” pulling on the backstay (a bit) can increase your power through this type of move.
CUNNINGHAM
Pull on the Cunningham until there are only very small horizontal wrinkles along the luff of the sail. In heavier winds 18kts and over the Cunningham should be on full and the luff should be wrinkle free.
GENOA
SHEET TENSION
Light air or 0-9 knots: sheet in the sail until the foot is slightly touching the base of the shroud at the chainplate.
Medium air or 9-13kts: make sure it is pressed up against the shroud base.
Heavy air or 13kts or more: trim the sail until the foot is aggressively rubbing against the shroud base.
LEADS
Our boat did not have adjustable leads so we set them up at the start of each day and never changed them from then on.
We use the age-old technique of making the telltales break evenly from the top to the bottom.
HALYARD TENSION / CLOTH
Tension the halyard until no horizontal wrinkles appear on the sail. If the wind increases to heavy, 13knts or more, then you can pull it till vertical wrinkles JUST START to appear along the luff of the sail.
RIG
Adjusting the tension on a 110 can be a hassle so it is a good idea to choose just two settings.
Light air: In the light stuff we adjusted the shourds till the leeward shroud just started to show some dangling.
Heavy air: From the light air setting, we put turns on enough to keep the leeward shroud taught and not dangling.
We used the light setting on the first day approx. 4-9kts and the heavy air setting on the last two days with winds 10-18 kts.
MAST BEND
Light air: 3” of prebend in the mast is most effective.
Heavy air: 2-3” is best in order to keep the mast straight so that the forestay does not sag.
SAILING TECHNIQUE
110’s, like most racing one-design sailboats, sail faster when they are flatter and kept inside the “groove”. Being in the “grove” can be described as a balancing act between maximum pointing ability and stalling the boat. Most boats perform their best within the “groove” and maintaining it involves a certain amount of concentration. Once the boat is in the groove you will have to do very little adjusting, don’t over steer.
While we cannot guarantee immediate victory by following this guide, we can assure you will be taking a major step in the right direction. After experimenting you may find a slightly different setting that may mean even better boat speed for you and your style of sailing. If you have any questions or problems, please don’t hesitate to call. We are anxious to help you go faster and win more races!
Good sailing!
READ MORE
READ MORE

08 May
INTERCLUB TUNING GUIDE
Here is an overview of the current and future tuning recommended for the Interclub Dinghy to the current standard model North Sails RadIC. These principals have been used to win the Nationals and Wharf Rat Challenge in 2007, 2008, and 2009 not to mention lots of regattas, races and fleet championships.
MAST STEP
The mast step is measured on the diagonal from T1 at the center of the deck and transom to the back of the mast in the step. The Vanguard style keelson and mast step height is the standard and used here.
Baxter: 66 / 110.25 inches
Benj: 50 / 110.50 inches (add 0.25 inches due to high keelson on 50) so use 110.75 inches
Dowd: 81 / 109.75 inches (very fast in light winds)
Max forward / 111 inches
The step should be adjusted for conditions. Aft in light air and forward in heavy.
MAST PARTNERS
The Class Rules state the aft side of the mast partner from T1 must be between 8 feet 10 inches and 9 feet, or between 96 and 98 inches. The aft side of the mast partner should be set up as far back as legal, therefore at 96 inches from T1.
The mast is adjusted in the partners by blocks. One inch of adjustment is allowed. There should be 8 mast blocks, each of these should be 1/8 inch thick.
In light air all blocks are used behind the mast. In heavy air four blocks are used behind and four in front.
The mast partner rule was the subject of typos and discrepancies in the Class Rules. Some documents say the minimum from T1 is 8 feet 10.5 inches but these documents are incorrect. You can rely on 8 feet 10 inches to be correct.
The mast partners should have the custom rectangular plastic fitting of the Benj design.
SHROUD TENSION
The shrouds should be adjusted by Stamaster turnbuckles to make the mast straight side to side. In light air the shrouds should be almost slack. In heavy air the shrouds should be very tight. Never the less the leeward shroud will still go slack.
FORESTAY AND RAKE
Once the step and partners are set up then the forestay and shrouds control the rake. The rake is measured by locking the main halyard in the halyard lock with the tape measure shackled as though it were the head of the mainsail. Measure to T1. For light air the rake should be reduced to 19 feet 0 inches, or less rake (greater measurement). 19 feet and ½ inch seems to be a fast setting. Some boats are trying 19 feet 3 inches or even 19 feet 4 inches (very little rake, mast is nearly vertical, but powerful!).
The rake should be measured with the headstay on, and off. In light air since the headstay is slack the headstay will not affect the rake measurement.
In heavy air the rake should be increased to 18 feet 5 inches. This can be accomplished by moving the mast step, the partner mast blocks, and tightening the shrouds. The rake with the headstay pulled on to its sailing position should be 18 feet 8 inches.
CENTERBOARD
The centerboard must be positioned carefully with this tuning system. First locate the pin. These dimensions may help:
T1 to center of pin on the diagonal – 79.25 inches.
Height of center of pin above inner surface of hull – 1 and 7/8 inches.
Distance of center of pin aft of intersection trunk bottom forward corner and inner surface of hull – 4 inches. These two measurements are from Baxter’s Vanguard #66.
T2 (center of transom and bottom) to absolute tip of the centerboard when maximum raked forward – 100.5 inches.
T2 to leading edge of centerboard at hull bottom when maximum raked forward – 80 and 1/8 inch.
T2 to absolute tip of the centerboard when it is perpendicular – 89 inches.
T2 to leading edge of centerboard at hull bottom when perpendicular – 79 and 1/8 inch (when the board goes from perpendicular to max forward rake this dimension increases by one inch).
The centerboard should be positioned at maximum forward rake in flat water and medium winds, but not when tacking or accelerating to start from slow speeds. Therefore it must be raised for tacks, and slow speed starts, and then lowered again once at full speed (by the crew). The centerboard will stall easily in this tip forward position and must be raised immediately when stalled and in waves.
In heavy winds the centerboard should be perpendicular.
In light winds the centerboard should be half way between perpendicular and maximum forward.
OUTHAUL AND LUFF TELLTALES
The RadIC responds well to a loose outhaul in light winds. The distance from the side of the boom to the center of the foot should be more than a hand spread or 8 inches. In heavy winds the outhaul should be quite tight.
The RadIC, and the Benj design Interclub sail before it, both exhibit a tendency for the bottom leeward telltale to stall in light air. During the development of the RadIC, and before that the RadIC06 we had the goal of eliminating or reducing this feature. The RadIC is the latest version of a fully re-faired Benj design. The RADIC06 is fuller in the bottom and flatter in the top than the Benj design, which is no longer produced. The RadIC is another step in that direction.
If you are seeing your bottom leeward telltale stall try easing the outhaul, increasing the forestay tension, dropping the travelling car lower, reduce bend in the mast, and or sheet less hard.
CUNNINGHAM
The RadIC likes a loose cunningham and wrinkles in the front of the sail in light winds and flat water especially when new. In heavy winds use the cunningham to remove all the wrinkles along the luff. Be sure to ease the cunningham in lulls and slack completely downwind.
VANG
The RadIC when set on a Kenyon mast can use a hard vang to advantage in heavy winds. The Zephyr mast can not withstand as much vang tension but some can be used. In light winds the vang should simply keep the boom from lifting while tacking.
TRAVELER
In heavy winds the traveler should be all the way to leeward. In light winds and flat water the traveler can be as high as 7.5 inches up however 4 or 5 inches is a more normal setting
MEDIUM WINDS
Many of the techniques above apply to light or heavy winds. In medium winds a compromise will have to be found among the variables, tending toward the light wind settings until fully hiked.
READ MORE
READ MORE

08 May
HIGHLANDER TUNING GUIDE
Congratulations on your purchase of North Highlander sails. We have worked hard to design and produce the fastest sails available. We are confident you will find superior speed over all conditions. Our sails are designed to be fast, easy to handle and trim.
BOAT PREPARATION
The following measurements are those we have found to be the fastest settings for your new North sails. After experimenting, you may find that a slightly different setting may mean even better boat speed for you. If you have any questions or problems, please don’t hesitate to call. We are anxious to help you go faster and win races!
J MEASUREMENTS
The J measurement (the measurement from the forestay to the front of the mast) should be a minimum of 67″
RAKE OF THE MAST
To measure the mast rake on the Highlander, hoist a 50 foot tape to the top of the mast and measure the distance to the intersection of the transom and the back deck. With the rig set to the proper tension (very tight), this rake measurement, with the tape on the main halyard, should be 30’5″ to 30’7″.
RIG TENSION
To help control the rig and reduce jib luff sag, we suggest you set the rig up very tight. A good gauge for this is that the leeward shroud should not go slack until all three people are on the high side and starting to hike. If you have a tension gauge (we suggest the Loos, Model A Tension Gauge), it should be set at 25 to 32 on the forestay.
DIAMOND TENSION ON THE MAST
We suggest you set your lower diamond tension very tight. It should be possible to squeeze the diamonds to touch the mast no further away than 4″ from the attachment points to the mast. We suggest setting the upper diamonds so you can squeeze them 8″ from the attachment points. When using the Loos tension gauge, the number should be 15 to 18 for the lower two diamonds and 4 to 6 for the higher one. On the older gold aluminum masts and wood masts, set the diamond tension slightly lower (about 4 to 5 numbers lower on the Loos gauge).
SHIM THE BACK EDGE OF THE BUTT OF YOUR MAST
We suggest placing a 3/16″ to 1/4″ spacer under the back of your aluminum butt casting. This will help reduce the usual reverse bend common in light winds and it will allow the mast to bend more easily in heavy winds.
RIG TUNING & SAIL TRIM
JIB CLOTH AND MAIN CUNNINGHAM ADJUSTMENTS
In both of these adjustments, just enough tension should be applied to barely remove the wrinkles. In fact, it is best to leave very slight wrinkles along the luffs of your sails to be sure they are not too tight. On the jib, we watch for slight “crow’s feet” from the hanks, on the main we watch for slight horizontal wrinkles from the luff on the lower quarter of the sail.
JIB LEAD – STANDARD INBOARD
For the standard jib (not clewboard) the lead position should be placed 15″ to 16″ off centerline. For a rough set of the fore and aft placement of your leads, measure from the jib luff wire attachment point at the stem plate to where the sheet, if extended through the jib lead block, would intersect the seat. This measurement should be close to 9’4″ at the intersection of the sheet and the seat. In heavier winds of 15 to 18 mph, move your jib lead back 1″. In winds above 18 mph move your jib lead back 2″ from the standard position.
In the standard position, the luff of your jib should break just a little bit earlier up high than the lower section of the jib. As the lead is moved farther aft, the upper sections of the jib will become flatter and the luff will break slightly earlier than the lower sections.
JIB LEAD TRIM LINE
Your North standard inboard jib is built with a “trim line” penciled in from the clew grommet out towards the body of the sail. As a final check (and most accurate) when your leads are positioned properly, your jib sheet should appear as an exact extension of the trim line. In heavy winds with your leads aft, your sheet should angle aft slightly off the trim line.
JIB LEAD – CLEWBOARD
On the clewboard jib, a good starting point is to place your sheet in the middle clewboard hole. Move the shackle forward to flatten out the foot of the jib and open the upper leech. Move the shackle aft to tighten the leech up top and make the bottom of the jib fuller. As with the standard jib, you want to set your clewboard so the jib luff breaks slightly earlier up top as the boat is luffed into the wind. In heavy air, it is best to see more break up high, so move the jib sheet forward on the clewboard as the breeze picks up. Laterally, the clewboard lead position should (where the sheet turns through the sheave of the block) be 16 1/2″ to 17″ off centerline.
JIB SHEET TRIM
The spreader window allows the skipper to line up the leech of the jib with the lower spreader for use as a trimming guide.
The upper batten should be positioned out from the centerline approximately 5 to 10 degrees. The jib sheet will have to be altered constantly to adjust to the puffs and lulls, and to keep the correct twist. In light to medium winds, with the leads and sheet trimmed correctly, you should experience very little to no backwind in your main. In heavy winds, slight “breathing” of the lower 1/3 of the mainsail luff is not unusual.
MAINSHEET TRIM
An excellent guide to trimming your North Highlander main is to line up the upper batten parallel to the boom. This is viewed by sighting directly underneath the boom. Use this upper batten setting in all conditions, except in very light or very heavy air. In light air, the upper batten may hook due to the weight of the boom. Pulling the traveler to weather and easing the sheet helps to reduce this problem.
We are, however, still trying to reach the position in which the upper batten is parallel to the boom. In very heavy winds, it is necessary to ease the sheet to keep the boat balanced and tracking well. It may be eased out past parallel by as much as 20 degrees.
THE BRIDLE TRAVELER
Play bridle traveler, easing it down in puffs and back up in the lulls to keep the boat balanced. The bridle height, measured to the top of the block from the back deck is 22″. If your bridle is easily adjusted in height, ideally the bridle height should be 26″ in very light winds and 20″ in very heavy winds. However, if the bridle height is fixed, again 22″ is the best all-around position. If you need further information on rigging the bridle traveler, please contact us here at the loft.
OUTHAUL TENSION
Your North mainsail is constructed with a shelf foot so it is possible to make the lower half of the main deeper when sailing downwind. Usually the outhaul is tight enough upwind so that there will be only a 1 1/2″ to 2″ gap between the side of the boom and the shelf foot seam in the middle of the foot. In heavy winds, pull the outhaul tighter to close the shelf and flatten the main. In extremely heavy winds, above 18 mph, the outhaul should be tight enough so there is a hard crease from the tack to the clew. In lighter winds or choppy seas, ease the outhaul until the gap between he side of the boom and the shelf seam is 2 1/2″. When going downwind, ease the outhaul until the gap is a full 5″ and the shelf is open.
BOOMVANG
The boomvang is used downwind to keep the upper batten parallel to the boom. In puffs, when the boat is overpowered and heeling, the vang is “dumped” to keep the end of the boom from hitting the water.
Upwind, the vang is also used in moderate to heavy winds to keep the boom and leech controlled while easing the sheet in puffs. Heavy vang tension upwind will also bend the mast and flatten the sail, which will help keep the boat under control in heavy breezes.
SPINNAKER TRIM
Always sail your North spinnaker with a 6″ to 12″ curl in the luff. Careful concentration is necessary. Use short 2″ “ins and outs” on the sheet to keep the spinnaker trimmed correctly. Keep the clews even at all times through adjustments to your pole topping lift.
Another guide is to adjust your pole height, keeping the center vertical seam in your spinnaker parallel to the mast.
Note: Skipper/crew teamwork is important for good downwind speed.
It is important that the crew ease the spinnaker sheet as much as 3″ in a puff, so that the skipper can bear off and keep the boat under the chute. Of course in lulls, the spinnaker must be retrimmed quickly.
Note: At times it is difficult to fly the spinnaker when the wind comes forward of the beam. If in doubt, don’t fly it.
SAIL CARE
Your North Sails are constructed out of the best materials on the market today. We make sure of this by testing every roll of cloth we use. Through proper care and maintenance your sails will give you the performance you have come to expect from a North sail.
The most important factor for a long life for your sails is to watch them for signs of wear and tear in high load and chafe areas. Be sure to wash the sails off with fresh water and dry the sails thoroughly before storing. A dry, mild climate is best.
Excessive heat can cause problems with the sails due to the possibility of shrinkage. It is best to roll the mainsail and jib.
MAINSAIL
When hoisting and lowering the sail try to minimize the amount of creasing or wrinkling of the sail. Every time the sail gains a crease the cloth breaks down that much faster. Always have someone contain the leech and luff during these procedures. The battens can be left in the sail without any problems. Be sure to roll the sail down the leech so that the battens will not twist. This could cause damage to the battens.
JIB
When rolling the jib keep the battens perpendicular to the leech. Pay special attention to the battens and batten pockets for wear and tear. Since this sail is manufactured from yarn tempered Dacron, problems can arise due to mishandling.
At North Sails we are constantly striving to make our products better. If you have any comments on this tuning guide and how it could be improved for your purposes we’d love to hear from you. Please give us a call or drop us a line.
Rev. Q05
READ MORE
READ MORE

08 May
CORONADO 15 TUNING GUIDE
Proper boat speed depends mostly on constant and consistent adjustments to your rig and sails. The following measurements are those that we have found to be the fastest settings for you new North sails. We have brushed and tested different tuning settings to be sure that we have the fastest and easiest measurements available. If you have any questions, please don’t hesitate to call.
MAST BUTT PLACEMENT
The back edge of the stock butt plate should be 111” from the inside of the transom when measured along the floor of the boat. The back edge of the mast, when sitting on the forward pin in the step, should be 114” from the transom.
MAST RAKE
To measure your mast rake, hoist a metal tape measure on your main halyard, lock it, and hold the tape tight at the top of the transom in the middle of the transom. The measurement is always taken with the jib up, and with all the load on the jib halyard and luff wire. This measurement should be 23’ 5” in heavy air and 23’ 6” in light air.
RIG TENSION AND SHROUD PLACEMENT
We suggest setting your shrouds so that the rig will be tight enough that the leeward shroud will not go slack sailing upwind until the wind is blowing approximately 10 mph.
An excellent method to determine a more precise tension is to use a Loos Tension Gauge Model A on the shrouds. The reading with this smaller tension gauge will be 18. In light air this reading should be around 200 lbs., in heavy air it should be around 300 lbs. (over 15 knots of wind)
SPREADER LENGTH AND CANT
Your spreaders (with the standard mast) should be 19” long, with a 6” sweep. Spreader cant will be determined by your crew weight. Heavier crews will sails with shorter numbers (spreader tips farther apart.)
MAST PREBEND
With the proper rake, rig tension, and spreader set your mast should develop approximately 1/2” of positive prebend when sighted up the back of the mast.
MAST BLOCK
At this point, the mast should be blocked at the deck in order to limit mast bend. This will insure that the mast will not overbend and overflatten the mainsail in heavy winds.
NOTE: It is suggested to remove this block downwind to avoid any undue strains on the mast at deck level.
MAIN CUNNINGHAM AND JIB CLOTH
For both the main and jib, never apply more luff tension than is necessary to just barely remove the wrinkles. Most times it is actually better to leave a hint of horizontal wrinkles in the lower 1/4 of the luff of your main and jib to be sure you haven’t pulled too tight.
JIB LEAD TRIMLINE
Your North jib is built with a “trimline” penciled in from the clew grommet out towards the body of the sail. This is the most accurate check in determining proper jib lead position. When the jib lead is positioned properly, your jib sheet should appear as an exact extension of the trimline. At this point both telltales, tip and bottom, should break evenly as the boat is luffed into the wind.
In heavy winds, when the boat is overpowered, move your jib leads aft as much as 2” at which point your jib sheet will angle slightly aft of the trimline and your jib will become flatter up top with the leech more open.
JIB SHEET TRIM
Unfortunately, there is no easy guide for trimming the jib sheet. We are looking for a parallel slot between the exit of the jib and the entry of the main. The guide which has been very successful is that of imagining a middle batten on the jib at mid-leech. This “batten” should be set parallel to the centerline of the boat which will make the upper half of the jib leech twist outboard slightly, and the lower half twist inboard slightly. In light air, 1-2” off shroud base, in medium air the foot should be curled to just touch the chainplate and in heavy air there should be a horizontal crease appearing along foot.
It is important to be careful not to overtrim the jib and hook the imaginary batten tighter than parallel with the centerline of the boat. It seems that 90% of the boat speed problems experienced are due to faulty jib sheet trim.
MAINSHEET TRIM
Trim the main through use of the mainsheet and the boomvang so that the last 1/3 of the upper batten is parallel to the boom (sighted from under the boom, looking up the sail.) In light winds it will be impossible to keep the upper batten from hooking slightly to windward due to the large roach of the C-15 main. In these conditions set the upper batten parallel to the centerline of the boat (instead of parallel to the boom.) This will position the boom farther off centerline which is acceptable since in light winds the boat is driven much harder and not pointed near as much as it is in medium and heavy winds. It is also important to try to keep the leech telltales flying in all conditions.
In heavy winds, maximum mast bend will open the upper leech so that the upper batten will be angled 5 to 10 degrees out from parallel to the boom.
BOOMVANG
Downwind we trim the vang just enough to keep the boom down and the leech “set” on the mainsail (the back 1/3 of the upper batten parallel to the boom.) Because the shrouds are swept aft preventing the boom from going out on a run, ease the vang to allow the top batten to be perpendicular to the wind when running.
Upwind it has become popular to use the vang to keep the upper batten parallel and force more bend into the mast. In puffs, when the mainsheet must be eased out quickly to help balance the boat, easing the mainsheet in a puff would actually allow the mast to straighten up, causing the sail to become fuller. In effect, keeping the vang set tight upwind in a breeze will actually set the tension down on the boom, allowing the mainsheet to control the angle of the boom to the centerline.
TRAVELLER
The traveller is used to further depower the main. The skipper should be able to easily reach the traveller controls while hiking.
This way, when a puff hits, it is easy to drop the traveller to leeward to keep the helm and boat balanced. When the wind lightens, the traveller must come back up. In very light winds, pull the traveller to windward to help keep the boom closer to centerline and still maintain the aft 1/3 of the upper batten parallel to the boom. Be sure to pull it up to windward as quickly after a tack as possible and not leave it to leeward for any length of time.
Boom end sheeting with a bridle traveler is becoming more popular in the C-15 class. The height of the bridle should be determined by the mainsheet almost being able to “two-block” in a medium (12 to 15 ) mph wind. If your bridle and mainsheet blocks touch before proper mainsheet tension has been applied, the boat will not develop top speed or pointing capabilities.
Many C-15 sailors are now using a “split mainsheet” boom end system which makes trimming the mainsheet much easier. Basically a purchase is reduced at the end of the boom so that the traveller bridle legs can be sewn into the mainsheet where it enters the boom end block. Call us if we can help you set this up.
OUTHAUL
Pull the outhaul to the band except in very light or choppy conditions when extra power is desired. In these conditions it is advantageous to ease the outhaul 1” to 2”. When the outhaul is pulled out tight you will notice the beginning of a crease just above the boom. This crease is normal as it is the extra fullness built into the sail for power when the outhaul is eased.
North C-15 sails have been designed to be fast and easy to adjust. If you have any questions or problems please don’t hesitate to give us a call.
READ MORE
READ MORE

08 May
CATALINA 22 TUNING GUIDE
Thank you for choosing North Sails for your Catalina 22. We hope using this tuning guide will help you get the most from your new North Sails. Please feel free to call us if you have any questions.
Our goal is to give you a rig set up that is fast in all conditions and easy to adjust. Some relatively minor modifications are necessary to the standard Catalina 22 deck layout in order to get the most from your boat and sails.
General
GENOA TRACKS
We have found it a huge advantage to install inboard genoa lead tracks. These should be 2-3’ long centered on the aft edge of the cabin. The track should be 2” out from the intersection of the deck and the side of the cabin. Before drilling make sure you have access underneath the deck for bolting down the track. Be careful of wiring for deck lights.
SHROUD ROLLERS
A good idea to improve tacking is to install shroud rollers on the upper and forward lower shrouds. Install 36” rollers on the forward lowers and 12” rollers on the upper shrouds.
ADJUSTABLE BACKSTAY
In order to properly control the shape of the genoa and mainsail it is a big help to have a easily adjustable and fairly powerful backstay. Give us a call or refer to back issues of the “Mainsheet” for ideas how to set one up.
Mast Tuning
BEFOR SAILING
First loosen shrouds until they are somewhat loose.
MAST RAKE
The mast rake is probably the single most important element of tuning your boat. Note the mast rake should vary from fixed to swing keels with swing keels having slightly less rake.
Start with boat sitting on its lines in the water. Hang a weight from the end of the main halyard and cleat off halyard with weight and shackle 12” below the boom. Measure distance from the aft face of the mast to where the halyard crosses the boom. This measurement should be 8” for fixed keels, 6-7” for swing keels. Adjust the headstay turnbuckle to achieve desired measurement.
Tighten backstay until snug, no slack. Remove weight from halyard, attach a tape measure to halyard and haul to top of mast. Measure from side to side tightening or loosening upper shrouds until mast is centered.
Now start tightening upper shrouds until they have show 28 on the gauge. Tighten forward lowers until they show 24 on the gauge. Tighten aft lowers until they are 24 on the gauge too. To measure shroud tension use a Loos Model A Tension Gauge. The end result here is to have the mast straight fore and aft with a small amount of rake to give the boat some “bite” upwind.
Now you’re ready to go sailing!
On the Water
Sailing upwind with moderate backstay on, sight up the backside of the mast checking that it is straight. Tighten or loosen lower shrouds until mast is straight side-to-side. Your mast is now tuned for moderate winds. The reason for checking the mast while sailing is that the shrouds will stretch slightly under load. We want to make sure the mast is straight, especially side-to-side, under sail.
SAIL TRIM
LIGHT AIR (0-8 knots)
Main
Outhaul should be tensioned so clew is 1-2” in from band. Cunningham/halyard should be loose so there are horizontal wrinkles coming off mast.
Traveler should be centered or slightly to windward. Adjust mainsheet tension so top telltale is flying 90% of the time. Note: Top batten will be slightly outboard of parallel to boom, this may be impossible in very light wind.
Genoa
Tension genoa halyard so that there is a hint of wrinkles in the luff. Be careful not to over tension. Adjust genoa lead fore and aft so luff breaks evenly (roughly 30” forward of deck drain). If top telltales luff first, move car forward. If bottom telltales luff first, move car back.
Backstay should be adjusted so you have about 6” of forestay say.
Upwind, trim your sail so it is approximately 4-6” away from the end of the spreader.
MODERATE AIR
Main
Pull foot out to band-traveler in center. Tension mainsheet so top telltale flies 70% of time; top batten will be parallel or slightly in board of parallel. This helps to generate power. Tension main halyard/ cunningham to just remove horizontal wrinkles in luff.
Genoa
Trim sheet so sail is 2-3” from end of spreader. Tension backstay to medium setting. This will straighten headstay and slightly flatten sail (3-4” of sag). If sailing in waves and chop, move genoa lead forward 1-2 holes to generate more power.
HEAVY AIR
Main
Outhaul out to band – max tight. Tension halyard or cunningham hard to keep draft forward. Tension aft lower shrouds to keep mast from bending too much. Backstay on very tight. Top batten should be outside of parallel. Traveler should be dropped to leeward all the way. Tension the vang tight enough so that the boom does not go up when the mainsheet is eased. This will allows you to “vang sheet” to keep boat on its feet. Remember, flat is fast. Play the mainsheet aggressively in the puffs to keep the boat flat.
Genoa
Tighten halyard quite tight to keep draft forward. Move lead 1-2 holes aft of light air position. Trim sail so it is 3-4” off end of spreader. Tighten backstay very tight to make headstay as straight as possible and flatten sail.
* Please note that the above trim settings should be taken as starting points only. These are meant to show the range of settings from light to heavy air. We have found it useful to keep a logbook every time we go sailing to note fast settings or ideas.
READ MORE
READ MORE

08 May
CAPRI 22 TUNING GUIDE
Thanks for your purchase of North Sails for your Capri 22. We have designed these sails to be fast, easy to use and long lasting. The following tuning guide is meant to be a starting point for setting up your rig. We have developed these settings and instructions in order make your C 22 easy to sail and fast throughout the wide range of conditions.
MAST RAKE
Factory head stay length is 25’5”, Gibb hook to end of stud. Attach toggle on bottom of turnbuckle to the farthest forward stem hole, and extend turnbuckle to max ease setting. This is your light-air rake/tension setting. (Be sure to remove any additional toggles, as these will induce too much weather helm.)
Wind Speed
Upper Shroud Tension
Lower Shroud Tension
Head Stay
0-5
28
18
Max rake
6-9
31
20
Max rake
10-14
+2 Turns
+1 Turn
+10Turns
15-20
+4 Turns
+2 Turns
+20Turns
21+
+6 Turns
+3 Turns
+30Turns
Using Loos Model PT1
Go out and sail this setting to ensure the main sets up smoothly to the rig. If it doesn’t, you may need to make some minor lower adjustments to fit the main sails luff curve with your mast. Be sure to remove the spinnaker pole mast track and substitute a fixed ring. This will allow more flexibility in the lower sections of your mast and allow for a wider range of settings.
HEADSTAY TENSION
These numbers are flat water and steady breeze only. The more wave/swell and breeze fluctuations, the less turns you should put on.
GENOA LEAD POSITION
Remove stock genoa lead tracks and replace with race tracks. These have more holes and provide finer adjustment. Place the car all the way forward for the light air setting. The turning block should be on the trim in until the foot of the genoa touches the upper shrouds with increases in windspeed. If the mainsail starts to over back-wind the mainsail, drop the car back one hole at a time until this problem stops. Be careful not to move the lead back too far as you can lose necessary leech tension and also your ability to point.
BACKSTAY
“A little bit of a properly rigged one of these, goes a long way.”
Since the mast of the Capri is relatively soft, applying backstay can depower the sail plan thus reducing helm related drag and increasing your ability to keep the boat tracking. A 16:1 purchase system is recommended. Synthetic line is not only class legal, but much softer on your mainsail than the factory wire and recommended. The backstay and mainsheet work together between your standard rig settings to handle the inevitable fluctuations in sea state and wind velocity.
CREW WEIGHT
Since there are no limitations on number of crew, or their combined weight, sail with at least three crew to maximize maneuvers. As the breeze builds into the 10-14 range and up, try to sail with additional crew members, or heavier ones. A good minimum racing crew weight is 600 lbs. You may want to be closer to 700 or more if you anticipate winds in excess of 15 knots steady. Try to accomplish this with four to five crew, as any more gets crowded.
AFTERMARKET RUNNING RIGGING IMPROVEMENTS
Recent changes to the Capri 22 Class Rules now allow for changes as long as they are “not used in such a way as to change the fundamental sailing characteristics of the Capri22.”
Some of the bases include:
Windward Sheeting Traveler Car
Racing Genoa Tracks
Adjustable Backstay
Ratchet Spin Sheet Blocks
Ratchet Genoa Sheet Blocks
Adjustable Twings
Main Cunningham
Light Weight Aluminum Spinnaker Pole
Tapered Synthetic Sheets/Halyards/ Control Lines/Backstay
Electronic Mast Mounted Compass
READ MORE
READ MORE

08 May
CAPRI 14.2 TUNING GUIDE
Thanks for your purchase of North Sails for your Capri 14.2. We have designed these sails to be fast, easy to use and long lasting. The following tuning guide is meant to be a starting point for setting up your rig. We have developed these settings and instructions in order make your C 14.2 easy to sails and fast throughout the wide range of conditions you will encounter on the racecourse.
Setting up the Rig
Since the rig on the C-14.2 is pretty simple, tuning it is very easy. Our goal is to set the boat up so that the boat will have practically “neutral helm” when sailing upwind. We need this neutral helm so that we do not have to use the rudder too much upwind.
MAST RAKE
To achieve a neutral helm we need to set the boat up with as much rake as permitted. The forestay length should be the maximum allowed (15’3 3/4” per class rules). If the forestay is short either buy a new one or add shackles until it is the right length.
SHROUD TENSION
The one thing that has the most effect on the shape of your jib is the tension on the shrouds. Because we want the sail to be flatter upwind than downwind, the shrouds are set quite loose on the C-14.2. This allows the mast to tip forward down wind and get fuller.
To check your shroud tension, pull a tape measure to the top of the mast and measure to the middle of the transom while your crew is holding the mast forward by pulling on the forestay. The measurement should be 21’ 10 1/2” to 21’11”. Adjust your shroud pins up or down as needed to achieve these measurements.
Sail Trim
JIB
Because the leads on the C-14.2 are set so far outboard, it is important that the jib be trimmed quite tightly compared to other boats when sailing upwind. In light to medium air you will want a slight curve to the foot. However when the breeze is up and both skipper and crew are hiking trim the sail hard so that there is a slight crease running between the clew and the tack.
Always sail with the jib lead all the way forward. Your sail is cut with this in mind and having the lead forward will make the sail trim correctly.
Jib halyard tension is also very important and the halyard tension needs to be adjusted for changes in wind speed.
Basically we are looking to have a slight hint of wrinkles in the luff of the sail at all times. As the winds picks up you will need more halyard tension and as it decreases it will be necessary to ease off the halyard.
Downwind it pays to let off the jib halyard a bit to make the sail fuller and more powerful.
MAINSAIL
The mainsail has a few more adjustments than the jib and is actually a much more versatile sail because of that. Follow these guidelines for trimming the different main controls.
BOOM VANG
The vang is used primarily to control the boom so that it does not rise up and release power from the main when the sheet is let out.
Downwind tension the vang so that the top batten is parallel to the boom.
Upwind in light air the vang can be kept loose. However, when you need to start easing the sheet, to keep the boat on its feet, it’s time to tension the vang. In moderate air trim the mainsheet in, to it’s correct upwind setting, then take all the slack out of the vang. As the wind picks up more you will need to put more tension on the vang to de-power the lower part of sail and keep tension on the main leech as the sheet is eased.
CUNNINGHAM
The cunningham controls the fore and aft position of the draft in the main. Generally the cunningham is kept completely loose until the wind reaches about 8 12 knots, from there we tension the luff of the sail so that it is just smooth.
OUTHAUL
The outhaul is used to control the fullness in the lower part of the sail and is kept tight upwind except in the very lightest of winds. Downwind, let the outhaul off about 3” to fully open up the shelf foot in the bottom of the sail. Be careful not to let the outhaul off too much as you can reduce the mainsail area projected to the wind.
MAINSHEET
The mainsheet is the throttle on the boat and needs to be adjusted constantly. The best sailors rarely cleat their mainsheet. They are continually playing it to optimize their boat’s speed.
We start by making sure that the main traveler is set up so that mainsheet block stays in the middle all the time. You will need to tie knots in the traveler to restrict the block’s movement. Next set the height of the apex of the traveler to 28” above the top of the transom. This will insure that when you trim the main in all the way the blocks in the back come together.
Trim the main as tight as you can to keep the boat on its feet and sailing flat. Use the mainsheet to control the heel of the boat and keep it tracking upwind. Be careful not to over-trim the sail as this will cause the boat to go slow and be prone to tipping over quickly in a puff.
We hope this guide will be a good starting point for you as you get to know your new North Sails. As always, please feel free to give us a call if you have any questions.
READ MORE
READ MORE

08 May
CAL 20 TUNING GUIDE
The following tuning guide is meant to be a good starting point in setting up your rig and sails. We are trying to achieve a setup that is fast in all conditions. Your new North Sails are designed for all around sailing performance.
MAST RAKE
The Cal 20 sails best with one or two degrees aft mast rake. While the factory stepped the masts in different fore and aft positions, we still need some sort of reference starting point. First, check that the black bands are in the correct position on the mast. Make sure the top of the bottom band is 30 inches above the deck and that the top of the upper band is 23 feet above that. Step the mast and then slide a 5/16 slug into the main sail groove and raise a tape measure up 23 feet to the top band. Pull on just enough backstay to make the head stay snug and measure back to the top edge of the transom on the centerline of the boat. 28 feet seems to be a universally acceptable starting point for the rake. Sometimes a toggle must be added to the forestay to achieve this much rake. If your boat has consistently too much helm upwind, the rake should go probably forward.
SHROUD TENSION
One fairly unique feature of the Cal 20 is the lower shroud placement. Since they are well aft of the mast base, they have a huge effect not only upwind on the side bend of the mast, but downwind as well since they restrict how far forward the mast can go. With the backstay snug, I measure down from a fixed point on the backstay bridle to the top of the transom.
Then I let the backstay off and make sure that my measurement reference point on the backstay can rise up at least 18 inches. This seems to be far enough forward downwind to be fast. At this point the lower shrouds should be tight. If the mast won’t go this far forward, the lowers must be eased and if the reference point goes past 18 inches, tighten the lowers till snug.
The next step is to make sure the mast is straight sideways. Mark your main halyard and swing it to a common reference point from one side of the hull to the other. Adjust the uppers shrouds so the measurement is even side to side.
The side shrouds are adjusted while sailing to windward. The mast should be straight in winds below 3 knots. From 5 knots up until the boat is overpowered, the mast should have a slight sag in the middle.
Once overpowered (usually above 10-12 knots), the uppers should be eased to straighten the mast and help flatten the main. Sighting up the aft mast groove with sail pressure on the rig and making slight adjustments to the turnbuckles is the easiest way to obtain the results desired.
JUMPERS
Especially on larger, stiffer mast sections, the windward jumper should be loose when going upwind with no backstay on. The reason for this is that since the lower termination point of the jumper is at the spreaders, any tension on the jumper won’t let the mast sag to leeward and will depower the main if too tight. As the mast bends fore and aft from the backstay tension in the windier conditions, the jumper will start to take load and keep the tip from falling off too much.
BACKSTAY
The backstay should be tightened just enough to keep the headstay from bouncing too much. This requires constant attention. Too much backstay tension tends to bend the mast too much and open the main leech too much. A common symptom of too much backstay is not being able to point upwind. In puffy conditions it is best to play the backstay constantly to keep the boat both powered up in the lulls and flat in the puffs.
BOOM VANG
The boom vang bends the lower part of the mast allowing the main to be flattened. Once the boat is overpowered and you have to ease the mainsheet to keep the boat on its feet, the vang must come on pretty hard upwind. Note: Remember to ease the boom vang after rounding the windward mark because considerable stress is put on the middle of the boom when the sheet tension is released.
LUFF TENSION
Both main and jib should have just enough tension to maintain maximum draft position as follows:
Main 50% aft of the mast
Jib 35% – 40% aft of the headstay
Don’t overstretch the sail! Too much luff tension moves the draft forward, which is very slow.
BARBER HAULER – JIB SHEET
Probably the most controversial adjustment on a Cal 20 is the barber hauler or jib traveler positioning. We have prepared a chart to give you a good starting point for different wind and water conditions. The percentages relate to how far inboard from the outer rail to the hatch the positioning should be.
Wind
Water Conditions
Barber Hauler Position
0-5
smooth
90% inboard
0-5
rough
75% inboard
6-11
smooth
98% inboard
6-11
rough
85% inboard
12-15
smooth
95% inboard
12-15
rough
85% inboard
16-21
smooth
75% inboard
16-21
rough
50% inboard
Be sure to watch that the leech is not hooking to windward due to excessive boom vang or mainsheet tension. Also, mainsheet must be eased when the boat heels more than 15 degrees. A Cal 20 must be sailed “on her feet”.
DOWNWIND SAIL TRIM
A few tips that will be helpful:
Ease backstay and jib halyard so they match each other.
Try to balance crew weight so there is a neutral helm.
Watch that the boom vang is not on tight enough to hook the leech to windward.
Keep crew weight as low as possible to avoid pitching from side to side.
SAIL CARE
Rolling your sails is very important, not just because they will last longer, but also to avoid getting permanent wrinkles. Rinse sails with tap water to remove salt and keep out of hot enclosed areas.
READ MORE
READ MORE

08 May
BULLSEYE TUNING GUIDE
The stable, safe Bullseye provides wonderful racing. Since it is a fairly heavy under powered boat, to get the best upwind performance the sails need to be trimmed so they are full and twisted in most conditions.
MAST TUNING
Spreader length and angle
Free Swing? Yes, should pull the shrouds in ½ to 1” from the straight line.
STEP POSITION
Is there any choice? No
HEADSTAY AND SHROUD TENSION
General, tight or loose: moderate to loose
MAIN TRIM
To trim the main to best advantage rig a bridle. The object of the bridle is to enable the boom to be trimmed close to the centerline, without over tightening the leech of the mainsail. Rig the bridle by attaching a single block fixed at the center. Tie or run the ends of the line through the normal mainsheet blocks on the aft deck. When properly adjusted the length of the two bridle lines (equal on both sides of the boat) should hold the sheeting block just below the boom, over the centerline of the boat when the mainsheet is trimmed to make the top batten parallel to the boom.
MAINSHEET TRIM
To judge proper mainsheet trim, sight from under the boom, and trim sufficiently so the top batten is parallel to the boom. We recommend installing a head knocker type mainsheet cleat forward of the skipper’s position. Too little trim will reduce pointing and trimming too tight will increase weather helm and slow the boat. This allows the helmsman to adjust the mainsheet while keeping the boat on course.
MAIN OUTHAUL
Your North main has a lens shaped piece of light material fitted to the bottom of the sail. This allows easing the outhaul to make the bottom of the sail much fuller. In under 16 knots of breeze, ease the outhaul until the lens foot is completely open.
Sometimes, easing a little more works well too. When it blows hard tightening the outhaul flattens the main sufficiently to sail easily in 25 knots of breeze without excessive heeling.
CUNNINGHAM
Allow the lower half of the main to develop significant wrinkles. Tightening the cunningham to pull the wrinkles completely out pulls the draft in the main too far forward, and reduce pointing.
JIB ADJUSTMENT
There are two important items here. Set the wishbone between the bottom hank and the second hank instead of the 2nd one. Use a light piece of line to support the wishbone at the half way point. This allows the top of the jib to twist properly, because the clew can rise up as the sheet is eased. The other point is there should be a telltale on the top batten.
JIB SHEET
The jib trimmer uses this telltale to determine proper jib trim which is just as critical to good speed and pointing as mainsail trim and needs to be adjusted more often.
When the jib is trimmed correctly, the telltale will just be flowing. To determine this trimming point, while the helmsman steers the boat on the wind, the crew pulls the jib in until the telltale flutters then eases it out until it flows again. It is helpful when speed drops coming out of tacks or when sailing into bid waves, to ease the jib sheet. Paying close attention to the leech telltale helps determine how much ease is best. The helmsman needs to steer the boat so the weather telltale on the luff of the jib lays down, but when the leeward telltale flutters, the sheet should be eased until the boat can be headed up again.
CLEW POSITION
Clew position is determined by the wish-bone setting.
JIB HALYARD
Be careful not to over tension the jib halyard. Set it so there is a slight hint of horizontal wrinkles in the jib luff. In a breeze these will show up at the hanks. In lighter air they should show evenly along the luff tape.
READ MORE
READ MORE

08 May
BUCCANEER TUNING GUIDE
Congratulations on your purchase of North Buccaneer sails. We are confident you will find superior speed over all conditions.
Time has been spent to insure that not only are your sails fast, but they are also easy to handle and trim.
The following measurements are those we’ve found to be the fastest for your new North sails. After experimenting you may find slightly different settings which may mean even better boat speed for you and your style of sailing. We have found that neutral helm is a good goal of the tuning process. If you have any questions or problems, please don’t hesitate to call. We are anxious to help you go faster and win more races!
Onshore Adjustments
The two key tuning adjustments, mast rake and centerboard position, differ greatly for low mast step pre 1980 Buccaneers and high mast step boats built after that date.
MAST RAKE
The Nickels Buccaneers are set up to sail with neutral helm at 4.5 degrees of rake. To set up the mast with the proper rake the simplest method is to run a tape measure from the main halyard shackle pulled to the sheave at the top of the mast to the transom. With the “standard” mast length of 23’5” (281”) the distance to the outside edge of the transom will be 24’7” (295”). As a rule of thumb, 2” represents 1 degree of rake. This must be done with the jib on and the rig fully tensioned. You increase rake by moving the pins on the shroud adjuster down.
Some Cardinals and Gloucesters have a mast that is 2” longer (283”) – use 297” to 299” to determine rake. Chrysler masts are 3” shorter so use 293” to 295” to set the rake OR add blocking to raise the mast higher). If this causes too much weather helm – rake the mast forward until the helm is neutral.
On pre-1980 Buccaneers with low mast steps, less rake is needed. With the longer mast, the same amount of rake would move the center of effort aft more than on post 1980 high mast step boats. If the rake is increased as much as suggested above, the centerboard may need to be moved aft (see below). It is best to set up the mast rake on your older Buccaneer so that with the correct amount of rig tension (less rig tension than on newer boats) the mast will be 1/4″ to 3/8″ away from the forward edge of the deck partner (on boats where the mast is stepped below deck level).
This is important as it will allow the mast to bend adequately in heavy air with the boomvang tension on tight. As a final check the boom should be drooped slightly below parallel to the horizon at the outboard end when trimmed in and sailing upwind in a 10-15 mph breeze. In winds below that (8-10 mph) the boom should just be level with the horizon.
Two tables help to determine mast rake, either from a plumb bob measurement (Table 1) or from the masthead to transom measurement (Table 2). The plumb bob method uses a plumb bob (or other suitable weight) attached to the main halyard. This method must be performed with NO wind and the boat carefully leveled on its waterline to be accurate. The foredeck is sloped forward at 0 to just over 1.0 degrees, but a useful quick method of leveling the boat is to level the fore deck just in front of the mast and deduct 1.0 degree from the value from Table 1. Because of the variability of the deck angle this is only an approximate level. Measure aft from the mast base to the plumb bob and read the angle from the table for the appropriate mast length.
The second method uses a long measuring tape hoisted to the mast head on the main halyard. The measurement should be taken from the mast head to the transom inboard of the of the hull-deck joint. Use Table 2 to determine the mast rake for the appropriate mast length. A more complete discussion of mast rake and boat leveling is contained in Spira and Twombly’s Buccaneer Tuning Guide.
RUDDER POSITION
The rudder must be capable of being set to vertical so that the leading edge is approximately perpendicular to the waterline. Any significant rake aft will lead to a tug on the helm and cause excess drag.
CENTERBOARD LOCATION
Newer Buccaneers are equipped with pivot hangers mounted on the centerboard cap. The ideal location is 7.5” from the center of the hangers (pivot point) to the bulkhead. This is the placement on the Nickels boats. Many older Buccaneers have come from the factory with the centerboard over 1” forward of where it is located on the newer boats. To take advantage of the full 4.5 degrees of rake you may consider relocating the centerboard further aft or the additional rake will simply cause excessive weather helm. The stopper can also be removed from the tip of the centerboard so it can be used in its full down position while going upwind effectively moving the board forward, while the pivot has been moved aft.
RIG TENSION
We have found that the Buccaneer performs better with the rig set up very tight. Measured using a Loos gauge, a minimum of 250 lbs will barely keep the lee shroud from sagging in light air. We recommend 350 lbs for most conditions. This will keep the jib stay tension so that the leeward shroud does not go slack when sailing upwind until it is blowing 10-12 mph. This rig tension can be tuned in with the jib halyard through the use of a 16:1 cascade, magic box, a lever, or a series of balls on your halyard hooked to a plate assembly. Up to 400 lbs can be used, if necessary in higher winds. More tension than that can damage the boat so be careful.
To set up this amount of rig tension without a magic box or lever, ease off your spinnaker halyard enough so that a person can stand at least 10’ in front of the boat and hold onto the spinnaker halyard. Then, recleat the halyard and pull on it hard enough so that the correct amount of rig tension can be “tuned in” with your jib halyard.
JIB LEAD POSITION
Your jib lead angle should be 8 – 10 degrees off the centerline. This corresponds to locating the jib track near the inside edge of the seat – about 1.5”. Unfortunately there are several different jib lead positions on the different model Buccaneer boats built. We suggest measuring out 10 degrees and try to set your lead accordingly side to side to meet the adjustment.
As for fore and aft trim, set your jib leads so that the jib luff breaks evenly from top to bottom in light to medium winds. In winds above 10-12 mph it is best to move the leads back 2″. In winds above 20-25 mph it is best to move the lead back another 2″.
With the rake at 4.5 degrees we have found that the median jib lead position is 34” aft of the bulkhead, measured along the front edge of the seat. This position moves further aft with less mast rake.
Sailing Adjustments
MAIN AND JIB CUNNINGHAM
For both the main and the jib, never pull tighter than to just remove the wrinkles. It is best to leave just a hint of horizontal wrinkles from the luff of your main and jib to be sure that you don’t have it pulled too tight.
Your North Buccaneer jib is fitted with a small plastic clam cleat so you can easily adjust the cloth tension on your luff wire. As on the main, it is a good idea to set the cloth tension so there is just a hint of wrinkles coming off the luff of the jib. It is better to err toward the loose side than the tight side of luff tension on your North Buccaneer sails.
OUTHAUL
Your North Buccaneer main is fitted with a shelf foot which, when eased, will give the main incredible power. We suggest pulling the outhaul tight enough to close the shelf (so that the top seam is parallel with the boom) when sailing upwind in all conditions except very light winds with extreme chop. In these conditions it is advantageous to ease the outhaul 1 1/2″ to open the shelf up approximately 1 ½-2″ at the center of the boom. When sailing downwind or on a reach it is a good idea to ease the outhaul off so that the shelf is open and the sail is close to 4” open in the middle of the boom. However, never ease the outhaul to the point where vertical wrinkles appear.
JIB SHEET TRIM
An easy guide for jib sheet trim on the Buccaneer is to trim until the foot skirt of the jib is even with the line where the spinnaker sheets, pulled tight, lay on the deck. Basically, we are looking for a parallel slot between the exit of the jib and the entry of the main. The guide that has been used with success is that of imagining a batten in the jib at mid-leech. This imaginary “batten” is usually set parallel to the centerline of the boat which makes the upper leech of the jib twist outboard slightly and the lower leech of the jib twist inboard slightly. It seems that 90% of the boat speed problems on the Buccaneer are due to faulty jib sheet trim.
MAINSHEET TRIM
The mainsheet should be pulled tight enough so that the last 18″ of the upper compression batten on the main is set parallel with the boom. This is sighted from underneath the boom and lining the batten and the boom parallel on a horizontal plane. In light winds it is sometimes impossible to keep the upper batten from hooking slightly to weather because of the weight of the boom hanging on the leech of the sail. In these conditions and in choppy water we suggest easing the sheet out approximately 6″ so that the upper batten will then become more or less aligned with the centerline of the boat. In choppy conditions ease the mainsheet approximately 6″ to open the upper batten slightly to or past parallel to the boom. This is a “power” gear which will allow the mast to straighten slightly and the main become fuller. Picture the mainsheet as your accelerator. As your boat picks up speed, pull the main tighter and tighter until the upper batten is parallel to the boom. In light winds or when the boat is hit with a wave and is slow downwind, ease the mainsheet so that the upper batten is angled outboard slightly inducing “twist” into the sail.
Use the Cunningham as the wind increases to keep the draft from moving to far aft. In light air put on only enough Cunningham so that there are wrinkles along the luff in at least the bottom half of the sail. In heavy air pull it tight so the wrinkles are nearly removed and the sail is smooth ( no tighter!). Make certain that the main halyard is up as far as possible and mark this position on the halyard so this setting can be repeated easily. The halyard should be made from wire or no- stretch line such as Spectra.
UPPER COMPRESSION BATTEN
Your North Buccaneer main is fitted with a full-length upper batten that fits into plastic protectors along the luff of the sail. The Velcro adjustment allows you to change the tension on this batten as the conditions change. However, 90% of the time we set the upper batten in the pocket just tight enough to barely remove the vertical wrinkles along the pocket. To overcompress the batten will induce more fullness into the sail than it is designed for and will tend to hook the leech to windward in all but the heaviest conditions. It is best to slide the batten into the pocket, putting very little tension on the batten and pocket before setting it in the Velcro.
BOOMVANG
Downwind the vang should be trimmed tight enough to keep the boom down and the leech set on the mainsail so that the upper batten is parallel to the boom. Basically we are looking for the main to set as it does when sailing upwind in a medium breeze. Upwind in medium to heavy winds the vang is set just tight enough to keep the tail end of the upper batten parallel to the boom. In heavy breezes this may require a great deal of boomvang tension as this will also help bend the mast and flatten the sail. In light winds (below 8 mph) never use any boomvang tension upwind.
SPINNAKER TRIM
Sail your North spinnaker with a 6-12″ curl in the luff. Careful concentration is needed. Use short, smooth ins and outs on the sheet to keep the spinnaker trimmed correctly. Try to keep from jerking the sheet when the spinnaker begins to collapse.
Keep the clews even at all time through the adjustments on your topping (pole) lift. In some conditions it is difficult to see the leeward clew behind the mainsheet so you can use another guide of adjusting the pole height so that the center vertical seam in the spinnaker is parallel to the mast. The pole position to the wind should be set so that the pole is nearly perpendicular to the wind.
TABLE 1: Mast Rake from Plumb Bob Measurement, for different mast heights
Note
1
2
3
4
MAST HEIGHT
278
281
283
288
Rake
Offset In
Offset In
Offset In
Offset In
0
0.0
0.0
0.0
0.0
1
4.9
4.9
4.9
5.0
1.25
6.1
6.1
6.2
6.3
1.5
7.3
7.4
7.4
7.5
1.75
8.5
8.6
8.6
8.8
2
9.7
9.8
9.9
10.1
2.25
10.9
11.0
11.1
11.3
2.5
12.1
12.3
12.3
12.6
2.75
13.3
13.5
13.6
13.8
3
14.5
14.7
14.8
15.1
3.25
15.8
15.9
16.0
16.3
3.5
17.0
17.2
17.3
17.6
3.75
18.2
18.4
18.5
18.8
4
19.4
19.6
19.7
20.1
4.25
20.6
20.8
21.0
21.3
4.5
21.8
22.0
22.2
22.6
4.75
23.0
23.3
23.4
23.8
5
24.2
24.5
24.7
25.1
5.25
25.4
25.7
25.9
26.4
5.5
26.6
26.9
27.1
27.6
5.75
27.9
28.2
28.4
28.9
6
29.1
29.4
29.6
30.1
7
33.9
34.2
34.5
35.1
8
38.7
39.1
39.4
40.1
9
43.5
44.0
44.3
45.1
10
48.3
48.8
49.1
50.0
Measure aft from the mast base.
Notes:
High step Chryslers-after 1980, Starwinds, and early Gloucesters
Standard Height-Nickels and adjusted earlier models
Later Gloucesters and Cardinals
Low mast step Chryslers
TABLE 2: Mast Rake from measurement from masthead to stern for different mast heights
Note
1
2
3
MAST
278
281
283
MB TO T
123
123
123
Rake
MH to T
MH to T
MH to T
0.00
301.3
304.1
305.9
0.25
300.8
303.6
305.4
0.50
300.3
303.1
304.9
0.75
299.8
302.6
304.4
1.00
299.3
302.1
303.9
1.25
298.8
301.6
303.4
1.50
298.3
301.1
302.9
1.75
297.9
300.6
302.4
2.00
297.3
300.1
301.9
2.25
296.8
299.6
301.4
2.50
296.3
299.1
300.9
2.75
295.8
298.6
300.4
3.00
295.3
298.1
299.9
3.25
294.8
297.6
299.4
3.50
294.3
297.1
298.9
3.75
293.8
296.6
298.4
4.00
293.3
296.0
297.9
4.25
292.8
295.5
297.4
4.50
292.3
295.0
296.9
4.75
291.8
294.5
296.3
5.00
291.3
294.0
295.8
5.25
290.8
293.5
295.3
5.50
290.3
293.0
294.8
5.75
289.8
292.5
294.3
6.00
289.2
292.0
293.8
6.25
288.7
291.5
293.3
6.50
288.2
290.9
292.8
6.75
287.7
290.4
292.2
7.00
287.2
289.9
291.7
7.25
286.7
289.4
291.2
7.50
286.2
288.9
290.7
7.75
285.7
288.4
290.2
8.00
285.1
287.9
289.7
8.25
284.6
287.3
289.2
8.50
284.1
286.8
288.6
8.75
283.6
286.3
288.1
9.00
283.1
285.8
287.6
9.25
282.5
285.3
287.1
9.50
282.0
284.7
286.6
9.75
281.5
284.2
286.0
10.00
281.0
283.7
285.5
Notes (table 2):
High step Chryslers- after 1980, Starwinds, and early Gloucesters
Standard Height-Nick- els and adjusted earlier models
Later Gloucesters and Cardinals
Table not useful for Low Step Chryslers-different geometry
READ MORE
READ MORE

08 May
ATLANTIC TUNING GUIDE
This tuning guide will cover mast tuning, sail care, boat preparation and sail trimming tips. If you have any questions or need any advise please feel free to contact us.
Remember, this is the general mast set-up and tuning used by the top Atlantic sailors. If you tune your boat by these instructions you will give yourself that advantage you need to win the season series, fleet championship or Nationals.
Tuning the Rig
Before Stepping Mast
Make sure spreaders are solidly fixed and the brackets tightly riveted to the mast. Check to see that they are even height at the shrouds.
Check rake
Hook tape to main halyard and hoist completely to top of the mast (use a safety line in case tape breaks.) Measure to intersection of transom and deck at centerline of boat (back of boat) 40′ 8″ to 40′ 5″, adjust headstay so that you fall in this range.
Tensioning the Shrouds & Centering the Mast
Remove all gear from boat and make sure that ballast is centered. Hook a tape measure on jib or spinnaker halyard and measure down to water on each side of boat alongside of chainplates. Make sure that with tension on the tape being equal that this measurement is also equal on both sides of boat. For future reference, make note if it is equal to the rail on both sides of the boat. On most, it’s 1/8″ or 1/4″ different. Tension the upper shrouds to 880 lbs. Check the rake and adjust the headstay if necessary.
Blocking the Mast at Partners
Put wedges or blocks behind the mast to push the mast forward until you have 2″ – 3″ of pre-bend. Also, put wedges or blocks at the side of the mast to keep it centered in the boat. The center of the boat is not necessarily at the center of the mast partners. Position the mast so it is straight sideways. This may be more easily done after tensioning the lower shrouds.
Tensioning the Lower Shrouds
Tension so that the mast is straight sideways.
Tension should be 620 lbs.
Pre-bend should now be 1 1/2″ – 2″.
Headstay should be barely measurable on the gauge – approximately 5-10. If it is more, push the mast further forward in the partners (thicker blocks behind) and re- tension lower shrouds accordingly. Check rake again to see that is hasn’t changed too much.
Important Things to Remember
Less than 5 knots
Make certain you loosen headstay 3 – 5 turns and use some backstay tension. This will optimize your main and jib shape for light air performance.
Put a shackle or line to let the tack of the jib 4″ above deck. It is too low, the foot will lay on the deck and you won’t be able to get sufficient leech tension.
Setting your Jib Leads
2′ 2″ apart at 8′ 2″ back from headstay. Use a barber hauler to pull the lead outboard 2″ in slop or heavy air (over 20 knots.) Range of fore and aft sheeting is 8′ 1″ to 8′ 6″ with 8′ 3″ to 8′ 4″ being the average – forward for light air and slop (with 2″ barber hauler at same time.) Aft for smooth water and medium air or for heavy air.
Setting the Main Outhaul
Loosen the outhaul so some shelf opens in light air approximately 4″ for smooth water or 8″ for rough water. Tighten progressively as the wind blows harder.
Setting the Main Cunningham
Allow slight wrinkles to come in luff of main up to spreaders in anything under 12 knots. In stronger winds, when the boat is easily heeled down to her lines, pull the luff smooth. If in doubt, allow slight wrinkles in the lower 1/3 of the sail.
Setting the Jib Luff
Loosen halyard until you get a slight wrinkle at each hank for light air. In more wind, pull it just smooth.
Proper Mainsheet Trim
Trim to make top batten parallel to the boom. The sail trimmer should get under the boom and sight up to check for this. It needs to be checked each time another adjustment is made. For flat-water moderate breeze conditions, the mainsheet can be over trimmed to make the top batten point to weather 5 degrees. In light air, slop or in heavy air, under trim so the top batten points to leeward 5 degrees.
Proper Jib Trim
Trim to make the middle batten parallel to centerline. Top batten in light to moderate air points to leeward 10 degrees to 45 degrees, depending on wind pressure — less wind pressure ease some more. More wind pressure, trim harder. As the wind blows harder, the top batten gets more nearly parallel to the middle batten and hence the centerline.
Sail Care
Your North Atlantic sails are constructed with the best materials available on the market. Before we made your sails we tested many different fabrics from the best suppliers in the world.
Mainsail
It is not necessary to remove the battens from the main when storing it. Be certain to roll the sail up parallel to the battens to avoid putting a permanent twist in them.
Watch the mainsail for signs of wear on the batten pockets and where the sail hits the shrouds. Wash the sail off with fresh water when it gets salty and dry thoroughly before storing.
When lowering the mainsail have a crew member at the leech pull back on the leech to help keep the sail from folding on itself.
Jib
When rolling the jib, keep the battens parallel to the leech. Roll from the head to foot. Avoid stepping on the sail when lowered for downwind sailing. Attempt to pull back on the leech when lowering the
jib. Wash the jib off with fresh water when salty and dry thoroughly before storing.
Spinnaker
To prolong the life of your spinnaker, always store it dry and clean. Rinse with fresh water when it gets salty and dry before storing. Fold your spinnaker to store it if possible.
READ MORE
READ MORE

08 May
X BOAT TUNING GUIDE
Knowledge is power. We see this in every sport throughout the world. Racing sailboats is much different from the other sporting events. Sailing requires tuning for different wind and water conditions. Many of these tuning adjustments are very small, yet important.
Provided here is an outline of items to work through on your X boat. These are guidelines and helpful hints. The measurements achieved have been tested through countless hours on the water in a variety of conditions. What is truly unique with this North Sails Tuning Guide is the fact that we have simplified the tuning process for the X Boat in order to make the process easy for our customers. You will be able to achieve newfound speed in your X Boat. These measurements coupled with the fastest one-design sails in the world will give you the knowledge for speed. In sailboat racing this is a combination for power and speed! Thank you for sailing with North Sails.
BOAT SPEED TIP
When sailing in the vicinity of a faster boat try matching or paralleling that boats course. Also, match your angle of heel. Then adjust sails slightly until speed starts to equalize with the faster boat.
Listed below are the best settings for the X Boat through a variety of conditions. While the sails, mast and boom have gone through some changes the boats sailing characteristics are still pretty much the same. The most important thing you can do when sailing your X Boat is to sail the boat flat once the wind is above 5 m.p.h.
We have seen many of our X Boat sailors sailing too flat in the 0-5 wind range and in some cases actually heeling to windward, please do not this as it is very slow.
How do we sail the boat flat if we are a light or medium weight crew and it is very windy? Steering technique and mainsheet trim have the most effect on the boats ability to sail flat. Do not ease the jib except a click here, a click there for a better overall setting.
Also, there are a few other areas of importance when sailing the X Boat. The mast rake numbers we have listed below are very important.
We have seen to many X Boat teams with their mast rake too far forward. Be very careful in this area. Don’t forget when measuring mast rake this is done on the trailer, hopefully in light air with the jib up.
0-5 MPH
6-15 MPH
Mast Rake - 21' 0" with side stays snug.
Downhaul and Cunningham - Top of car should be above the black band on the mast. Wrinkles should appear. Cunningham off.
Vang - Loose.
Centerboard - All the way down. This is very important. Make sure your board can go deep as possible without hitting the leading edge of your board box underneath the boat.
Jib Luff - None, you should have noticeable wrinkles.
Main Trim - Ease main sheet so that the upper batten is parallel to the boom. In a drifter let the boom out to the corner of the transom.
Jib Trim Loose trim so that the upper batten twists off. Jib lead should be set so that the sail luffs evenly up the luff when you slowly come into the wind with the jib trimmed. If the sail breaks up high first then your lead is to far aft, if it breaks low first then your lead is to far forward. You may move your jib lead forward one or two positions from your normal position in light air. If your tracks have been installed exactly as shown in our diagrams you will find the best position for the lead is all the way aft with two holes showing behind the car.
Mast Rake - 21' 0" and 20' 11" in 10 to 15 Knots and side stays snug.
Downhaul and Cunningham - Bring downhaul car down to the top of the black band on mast. Wrinkles should now be partially gone. Cunningham can be applied to remove wrinkles and flatten luff of sail if you cannot hold boat down with hiking and mainsheet trim.
Vang - Fairly tight in 5-10 Knots, but a lot tighter in a breeze ranging from 12-15 Knots.
Centerboard - All the way down. When the wind reaches 15 Knots with big chop, bring board up 3-4 inches. This will enable the boat to drive through the chop and allow the skipper to steer much easier.
Jib Luff - All wrinkles along the luff of the jib should be gone.
Main Trim - Trim top batten parallel to boom.
Jib Trim - Generally harder with increased wind, keep top batten tell-tale flowing aft, if the tell-tale is stalled against the sail then try easing the sail out slowly until the tell-tale starts flowing. Jib lead normal position.
16-25 MPH
Mast Rake - 20' 10" with side stays snug.
Downhaul and Cunningham - Top of car should be at the bottom of black band on the mast. This will remove all wrinkles. Cunningham on hard upwind and off downwind.
Vang - Head the boat into the wind and trim the main sheet as tight as possible. Then tighten the boom vang. Pull hard. This allows you to vang sheet your main going upwind.
Centerboard - Up 4 to 5 inches for less helm / easier steering. Allows the boat to sail faster upwind with less helm. Do this = SPEED
Jib Luff - Tight, no wrinkles.
Main Trim - Trim is based on how well you can control the angle of heel. If you are heeled way up, you need to ease your main considerably. Possibly as much as 4’. Goal is to keep the boat flat and driving through the water. Heading the boat up into the wind / pinching is not fast in this condition. Ease the main, keep the boat flat and go for speed through the water.
Jib Trim - Tight all the time. Jib lead can be moved aft one or two positions to open up and twist off the top of the jib. Sail the boat off the jib. Ease the main when needed to keep the boat perfectly flat. Again keep the tell-tale flowing aft.
Special Note:
Always roll your new North Sails jib, do not fold windows. Always keep jib trimmed so that sail is not luffing hard this will help the sail age better. Obviously when leaving the dock and coming back to the dock you will have to luff your jib this is okay, we suggest that you do not allow your jib to luff for long periods of time. The jib window material is as strong as the sail but if abused can tear so take care of this special and fast sail. All these generalizations are norms and averages that have proven fast over many years. Some experimentation by your part may be necessary to fine tune your particular rig and sailing style. Good luck with your new sail and please feel free to call us with any questions you may have.
READ MORE
READ MORE

08 May
T-10 TUNING GUIDE
The North Sails T-10 team has been working hard to make sure you are getting the most updated info and getting the most performance out of your new North Sails. Collectively we have all combined our notes, tips, and tricks for making the T-10 go fast and we are excited to share all this info with you. If you have any questions about the information in this Tuning Guide or would like to learn more about Tuning, Sail Trim, or Sailing Techniques please do not hesitate to contact any of our T-10 experts.
Sail Care
Properly caring for your North Sails will prolong the life of the sails. When storing your sails, keep them clean, dry, out of direct sunlight and away from areas of extreme heat. Rolling the mainsail and jib when they are not being used and folding your spinnaker (instead of stuffing it in a bag) will help all your sails remain wrinkle free and last much longer. In addition, releasing the tension on the full-length battens in the mainsail and headsail, for storage, will increase the life of the sails.
Tuning Tools
Some basic tools are required to accurately setup and tune your T-10 mast. These include: Steel Measuring Tape, Model B Loos Tension Gauge, Calipers, Permanent Marker, Bucket and Electrical Tape. Each of these tools will be mentioned in this tuning guide and will aid in the proper tuning of your mast. Tuning tools needed to accurately setup and tune your T-10. Another important setup tool is the use of reference marks. MARK EVERYTHING! While this sounds basic, marking settings can make it much easier to repeat your setup and tuning on the water. Mark your shrouds to be consistent in which side is which (port vs. starboard) as this will make it easier the next time you tune your mast. Mark your sheets, halyards, and control lines as well to make settings repeatable and more accurate.
Mast Set Up and Tuning
Initial Rig Set Up - Mast Down
Spreader Trim Marks
- Before stepping the mast, mark the spreaders with tape stripes to use as a reference when trimming the jib. These marks will indicate the location of the leech of the jib when it is trimmed for upwind sailing. Measuring from the side of the mast, along the aft edge of the spreader, put tape stripes at 30”, 31 1/2” and 33” with the measured edge of the stripe closest to the mast.
Headstay Length
- Make sure your headstay is at the class max for allowable length. Forestay measured from the center of the eye to the forestay attachment point (lower edge of the T-ball fitting where it rests on the forestay attachment point), to the bearing point of the hole which connects to the link plates. Refer to the measurement table in the class rules to ensure your forestay is at class max length.
Mast Butt Position
- The “J” dimension (measured from the pin at the bottom of your headstay link plates to the front face of the mast at deck level) should be 12’ which is the class minimum specification. Mast butt position and headstay length will affect your mast rake. With the headstay at max length and the “J” at minimum you will be sailing with maximum mast rake.
Measurement Marks to Center the Mast
- With the boat out of the water, you must place marks on each side of the hull equal distance aft from the headstay pin and equal distance up from the keel. This will ensure that your mast is inline and centered with the keel, not just the deck. Refer to image below.
Measure aft from the headstay pin connection and place a mark on the hull near the toe rail. Next measure up from the center of the front edge of the keel to your mark measured aft from the forestay and place another mark making a cross hare. This mark will be used to center the mast with the keel.
Tuning
Before the mast is stepped, with the mast down and supported, track side facing up, sight from end to end to ensure the mast is straight. If any S or bend is evident this will come into play later when we tension the lower shrouds.
Center the Mast Side to Side
- With the lower shrouds disconnected, backstay disconnected, and boom off, hand tighten your upper shrouds as evenly as possible. Using the Jib Halyard, attach to your bucket (halfway filled with water, this will create even weight to measure the mast side to side). Place the bucket over the side of the boat and lower it down past your markings on the side of the hull.
To measure the rig side to side you can place a tape mark 2-3’ above the deck on the halyard. Now measure down from this mark to your markings on each side of the hull. Adjust each upper shroud accordingly to get the mast centered and inline with the keel.
Get Your Mast in Column
- With your lower shrouds attached now, we need to get the middle of the mast in column with the hounds (we centered the hounds to the keel), the tip of the mast may fall off one side or the other if the middle of the mast is bowed to one side or the other.Sighting up the mast track, adjust each lower shroud to get the middle of the mast in column with the hounds. Remember if the mast had any S or bend to it prior to stepping, if so, you may not be able to get the mast perfectly straight, and that is not uncommon with T-10 masts, we will talk about tuning on the water and getting the mast to set up evenly tack to tack later in the tuning guide.
Getting Tensioned to BASE Tune
- Set the base shroud tension. The base tension for the upper shrouds is 40 and the lower shrouds is 22 using Model B Loos tension gauge. While adding tension to get to the base setting, occasionally sight up the sail track on the aft side of the mast to ensure the length of the spar is straight. If the mast track has any side bend or curve, adjust the shrouds to bring the mast into column.A helpful tip if you are struggling to get the upper shrouds tight enough to read 40 on the Loos Tension Gauge is the tension the backstay extremely hard. Tensioning the backstay will lower the tension on the upper shrouds, making it easier to adjust using the turnbuckles. Be sure to release the backstay completely before taking a new tension reading.
Check Mast Pre-bend
- After setting the shroud tensions at 40-22, check that the mast has the proper pre-bend (aft bend) by pulling the main halyard down taught to the bottom of the mast track near the gooseneck (see pic). The pre-bend distance between the back of the mast track and the front of the main halyard (at the spreaders) should be between 1.5” to 2”.
Use Calipers to Record BASE Settings
- Use calipers to check your base settings. After setting the base rig tensions and checking the side-to-side center position of the mast, it is a good idea to use calipers to measure the distance between the studs on the Upper and Lower Shrouds. This measurement can help you get the rig back to base setting more easily, especially if unsure of the turns or tensions while on the water.
Rig Tuning While Sailing
The T-10 class is one of a few classes that allow for rig adjustments while sailing during a race. It is critical that you pay close attention to your shroud tension, the headstay sag, as well as how your sails are setting up tack to tack. In various wind speeds and sea states it is important to properly set the shroud tension to optimize the sails shape. We have produced a Quick Tune Guide that has recommended adjustments for certain conditions, but every rig can set up different. It is important to pay close attention to how your mast is setting up, and how it is affecting your sails shape. Remember when making tuning adjustments to always trend on the looser side.
Light Air | Under 8 knots
A looser rig is required to increase sail depth for power. There is a difference however between sailing in light air flat water vs. light air and chop.
Light Air and Flat Water
Decreasing upper shroud tension and lower shroud tension will create a deeper and more powerful sail plan. However, in flat water we do not want the rig tension to be too loose. In flat water conditions it is not ideal to have a sail plan that is too full as you can lose your ability to trim the sails tight enough to have an advantage in pointing ability. Adjust your upper shrouds so that the leeward upper is snug, not tight, and not lose, you want to have some tension on the leeward upper shroud. This will ensure that you are still able to create pre-bend in the mast. Having pre-bend in the mast will help to flatten the mainsail enough so you can trim harder with out stalling the leech of the mainsail. The upper shroud tension also has a direct affect on the headstay tension (headstay sag). Setting your upper shroud tension this way will generate a little more headstay sag vs. having the uppers too tight, but not too much headstay sag making the headsail too deep. If the headsail gets too deep you lose the ability to trim the sail tight enough to gain a pointing advantage. Adjust your lower shrouds so that when sighting up the mast (place your eye next to the gooseneck and sight vertically up the mast slot to the top of the mast) you want to see the middle of the mast (at the spreaders) sag to leeward 1”. This tension for the lower shrouds allows the mast to bend more, creating more pre-bend.
Light Air and Chop
When sailing in lighter air conditions and a choppy sea state, generating power in the sail plan is more important than generating the ability to point. Adjust your upper shrouds so the leeward upper is starting to go completely loose. You do not want to see the leeward upper shroud so lose that it is doing 2” circles, rather you want to see and feel the leeward shroud at the point it is under no load. Adjust your lower shrouds to achieve 2” of leeward mast sag (when sighting up the mast slot). This will help create more sail depth in the middle of the mainsail. By setting the rig tension up this way you are creating a deep and powerful sail plan. The mast will have little to no pre-bend as the upper shrouds will be loose. The headstay will have more sag creating a deeper headsail shape. Pay attention to the headstay though, if the headstay is moving around (bouncing) you may need to snug the backstay slightly but be careful not to apply tension to the backstay. If you need to apply tension to the backstay to control the headstay bounce, that means your shrouds are too loose. The difference in turns from light air and flat water to light air and chop should only be one full turn difference.
Medium Air | 8-15 Knots
Tuning your T-10 mast for medium air is similar to tuning for light air. We still need to consider the sea state, are we sailing in flat water conditions, or choppy conditions.
Medium Air and Flat Water
Still paying close attention to the leeward upper shroud, we want to feel some tension on it, you do not want it to be lose nor do you want a lot of tension on it. Adjust the uppers accordingly to achieve the “snug” feel of tension. What you are looking for when making adjustments in lower shroud tension involves sighting up the mast slot as we do in the light air tuning. Set your lower shroud tension so the mast has a slight amount of leeward sag at the spreaders. You are looking for close ½” of leeward sag. This lower shroud tension will help create pre-bend in the mast, so the main is not setting up too full for the flat water conditions, however the lowers are now tight enough that when we apply backstay in puffs, the main sail does not over flatten (overbend wrinkles).
Medium Air and Chop
Setting up your rig tension for medium air and chop is like light air and chop. We tend to keep the rig tension a little looser when sailing in chop. One full turn looser is usually a good setting or starting point for medium air and chop vs. medium air and flat water. Start by setting your upper shroud tension for the leeward upper is just starting to go loose. When tuning for medium air and flat-water conditions however you do not want to see any leeward mast sag. What you want to see is a straight mast. By having the lowers slightly tighter you now can use backstay in puffs to control the mainsail shape as well as headstay tension with out over flattening the mainsail (overbend wrinkles). If the lowers are too loose, as you apply backstay, the main sail will get too flat too quickly, resulting in the loss of power to help get you through the choppy conditions. Also, having the lowers slightly tighter you have more control over the headstay, keeping the headstay stable in choppy conditions is critical.
Heavy Air | 15 + Knots
As the wind speed increases, creating more rig tension is required to control our sails shape, our sail trim controls will have more effect on sail shape with the rig tuned properly for the conditions. Unlike sailing in light air and medium air, the heavy air rig setting focuses more on Headstay tension and main sail shape. To properly set your shroud tension, start by setting your upper shrouds so the leeward upper is still under some tension. If the uppers are too loose, we will lose some control of the mast’s pre-bend as well as the headstay tension. Your lower shroud tension becomes more critical in heavy air conditions. The lowers control the middle of the mast as well as the ability to use backstay to control headstay tension. In heavy air conditions getting your headstay tight enough is critical to your boat’s performance. The lowers need to be tight enough so we can apply backstay without generating over bend wrinkles in the mainsail. In flatter water the headstay needs to be very straight, little to no headstay sag. This means we need to be able to tension the backstay awfully hard, pay close attention to the main sail and tension your lowers so the main is flat but not inverting. In a choppy sea state, your shroud tension needs to be tight enough so you can control headstay tension without the use of too much backstay. To set your rig tension in heavy air and chop, set your lowers the same way you would for flat water, but take one full turn off the upper shrouds.
Sail Trim Settings
Mainsail Trim
Mainsail trim on the T-10 is an important factor in getting the boat up to speed. Check each of these for proper mainsail setup:
Make sure the mainsail hoist (luff tension) is appropriate for the conditions. In lighter air set the main sail halyard tension so small wrinkles appear along the mast. In medium to heavier air conditions, the halyard should be set so no wrinkles appear. It is also good to lower the main slightly when sailing downwind but be sure to get the main back to a proper upwind setting prior to rounding the leeward mark. Having marks on the main halyard will allow you to have repeatable settings.This setting should be checked regularly as the halyard could stretch out during the day.
Correct batten tension is important to achieve proper mainsail shape.Each batten should be tensioned so that all the wrinkles are removed from the batten pocket and the batten can pop from side-to-side easily. If a batten is too loose, winkles will appear along the batten pocket and if a batten is too tight, it will be difficult to pop the batten from side-to-side.
Tack pin location. On the T-10 you may have several options to pin the tack of your main sail, make sure you are using the tack pin location that creates a smooth sail in the tack area, if you have wrinkles appearing in the tack area, try using a different tack pin location.Trimming the mainsail on the T-10 is a balance between power and stalling. If the sail is trimmed properly, you will get the maximum amount of power out of the sail and if not trimmed properly, the sail could stall, and your boat speed will suffer. The controls that most directly affect the trim of the mainsail are the mainsheet, the main traveler, the boomvang, the outhaul and the backstay. Here is what to check for each control when trimming the mainsail:
Mainsheet Tension
Mainsheet tension is the place to start for proper trim. In most conditions, the T-10 mainsheet should be trimmed so that at max trim the leech telltale at the top batten of the main is stalling 20% of the time. In light wind or when building speed the upper leech telltale should be flowing 80- 100% of the time. As the wind speed increases, it is critical that you input enough twist into the mainsail by easing the main sheet more, but you do not want to ease too much, ease the main to the point where the top tell tale just starts to fly at 100%.
Boom Height
Boom height relative to the boat’s centerline, is another important factor in mainsail trim and the mainsheet traveler is the way to set the boom height properly. Until the boat becomes overpowered, the traveler should be set so that the boom is near the centerline of the boat while sailing upwind. It can be set slightly above center to help in pointing, but there is risk of stalling the sail. If the boat loses speed when the boom is raised above centerline, the traveler or the mainsheet should be eased to help return the boom to centerline and build speed. In heavier air conditions, you may lower the traveler below center line to help de-power the boat. Remember that easing the main sheet too much is bad, so lowering the traveler is a good way to depower the boat.
Boomvang
When the wind gets stronger the boomvang is used to help depower the lower part of the mainsail. Adding tension to the boomvang flattens the lower main sail and allows the trimmer to ease the mainsheet in the puffs and still maintain some leech tension on the sail. It is important to remember to ease the boomvang when the wind speed drops to add shape and power back into the mainsail.
Outhaul
The shape of the foot, and lower section of the mainsail can also be changed using the outhaul. The outhaul should be set looser when the boat needs more power and tighter as the power increases. A good indicator of proper outhaul tension is the lowest batten. When the mainsheet is trimmed properly, the lowest batten will hook slightly to windward of the boom. If the lowest batten hooks too much, the outhaul might be too loose and if it is parallel with the boom, the outhaul could be too tight.
Backstay
Like the boomvang and outhaul, the backstay is used to change the power in the mainsail. When the wind gets stronger, more backstay tension will help to depower the upper part of the mainsail and take sag out of the headstay. Increasing backstay tension bends the top of the mast and flattens the upper part of the main and tensions the headstay flattening the jib. Also, like the boom vang and outhaul, the backstay should be eased off if the wind drops so the mainsail and jib will gain depth and power. In medium wind speeds, when main sheet adjustments are more frequent, it is important that you take the slack out of the backstay so you can ease the mainsheet and not loose headstay tension.
Headsail Trim
Trimming the headsail in a T-10 requires constant attention. The boat responds well to headsail trim adjustments, but before we get into those adjustments it is important to properly set your headsail up for the conditions.
Jib Lead Position
Measured from the headstay pin to the center line of the jib car sheave you should read 14’1”. This is your BASE jib lead setting, and you should place a mark on the deck in this location. From this BASE setting, the jib lead will only move forward in wind speeds less than 5 knots and moved aft 1 hole from BASE in wind speeds greater than 15 knots.
Jib Halyard Tension
Depending what jib you are using will determine how to set your jib halyard tension. Below is a chart for recommended jib halyard settings for the different wind speeds and sea states for paneled headsail as well as the 3Di headsail. The wrinkles refer to the distance the wrinkles (crows’ feet) move aft in the sail.
Sail
Light/Flat 5-8 knots
Light/Chop 5-8 knots
Med/Flat 8-15 knots
Med/Chop 8-15 knots
Heavy/Flat 15+ knots
Heavy/Chop 15+ knots
Paneled AP
2" wrinkle
6" wrinkle
2" wrinkle
1" wrinkle
Tight
Smooth
3Di AP
Smooth
1" wrinkle
Smooth
Smooth
Tight
Tight
3Di Light/Wave
Smooth
1" wrinkle
Smooth
Smooth
Tight
Tight
.
Jib Sheet Tension
The T-10 responds well to an active jib sheet, meaning in the changing conditions (puffs, lulls, waves) the jib sheet should be adjusted. To make these adjustments properly and effectively it is recommended that you incorporate a system to be able to trim the active jib sheet from the windward winch (windward cross sheeting). In 10 knots of breeze trim your jib sheet so the middle batten of the jib is parallel to the centerline of the boat. This trim setting will position the leech of the sail at the 30” mark on your spreader. In lighter conditions, overpowering conditions, or wavey conditions, the jib sheet should be trimmed outside of the 30” mark, depending on the conditions. It is not uncommon in windy conditions, or extreme choppy conditions to trim the jib sheet so the leech of the sail is even with the spreader tip.
Sailing Tips
When making tuning adjustments before each race, always trend on being looser vs. tighter
Loosening the rig tension in light air OK, but pay close attention to your headstay, if it starts to bounce around too much the rig to too loose
As soon as your team is starting to hike, your rig tune should be set so the mast is straight when sighting up the mast slot. No leeward sag in the middle of the mast is necessary.
When the boat is becoming overpowered, continue to tension the uppers so the leeward upper maintains tension and adjust your lowers to keep the main sail from inverting (overbend wrinkles)
Jib sheet adjustments are critical in maintaining good boat speed. Ease the jib before large puffs or bad waves, trim the jib in during flat spots
Proper Jib Halyard tension is critical. Make sure you have a marking system on your halyard to create repeatable settings
When sailing downwind, it is beneficial to Fraculate the rig forward. By attaching the jib halyard to the tack fitting or having a snap shackle on a line extending from the tack fitting attached to the jib halyard, pull the rig forward to help increase downwind performance.
T-10 Quick Tuning Charts
DOWNLOAD QUICK TUNING CHARTS (PDF)
READ MORE
READ MORE

08 May
SONAR TUNING GUIDE
This comprehensive tuning guide will give you the key information needed to stay in the front of the Sonar fleet, whether you are sailing at the local or national level. Our sails are designed with proven technology in cloth as well as shape to insure durability and speed on the race course. Our sails are also designed to keep things simple in order to give you the confidence that is needed to keep your head out of the boat while sailing in close One Design competition.
TOOLS NEEDED
50 Foot Tape Measure
Shims (At mast partners)
Electrical Tape
Silicon
Screw Driver
Level
Mast Blocks (six 1/2″ blocks)
Indelible Marker
Adjustable Wrench
Model “A” Loos gauge
Before Stepping the Mast
Forestay should be 25′ 11″ when measured from the bearing point of the Tee fitting aloft to the center of the turnbuckle clevis pin.
Clean and lubricate turnbuckles.
Spreader angle: set deflection at 2 3/4 — 3″.
**To get proper deflection measure from the back face of the mast to a line extending between the holes in the spreader tips. This distance should be 2 3/4 — 3″.
After Stepping the Mast
Adjust partner to fit snugly side to side (so mast is centered).
Mast step: Measure the distance from the aft face of the mast where it meets the step casting to the gel-coat edge of the center of the cabin opening lip near the floor. This should be set between 28 1/4″ and 28 3/4″. (Ontario boats only.)
Next, measure the distance from the forward edge of the mast partner opening to the center of the headstay anchor point. The class rule limits this dance to 7′-11.5″.
Fine Tuning the Rig
Center the mast laterally using a tape measure on the jib halyard to a common spot on the port and starboard rails.
Remove any mast blocks as well as the lower shrouds from the chainplates.
Remove the slack from the backstay until the headstay just becomes taut (no mast bend.) Place a mark on the deck abeam of the aft face of the mast. This is your reference point in the relaxed state.
Now pre-bend your mast at the deck with mast blocks on the aft side until you have moved the mast 1″ forward of the mark. Make a new mark and erase the old. This is the new “Neutral” position.
Next, you want to tension your upper shrouds in equal increments on both sides to between 230-260 pounds using a “LOOS-Model A” tension gauge (cable size is 5/32″ or equivalent.) Check the mast laterally again by repeating step #l.
Finally you want to attach the lower shrouds and adjust them so that you can make 8 to 10” circles with them at shoulder height. This requires some guess work but loose lowers are required to keep the tip of the mast in column when you are sailing. Minor adjustments should be made to you’re lowers when you first go sailing by sighting up the mast track and tightening or loosening the lowers to keep the rig straight. Now you have a great starting point and adjustments will be made from and relative to this position depending on different wind strengths and sea conditions.
Trimming Your Sails
It’s important to mark all your shrouds, sheets, tracks, outhaul, backstay, etc. Keep records of your tuning set-ups for different conditions in order to be able to reproduce settings when you know the boat was going fast.
BLOCKING
You want to make six 1/2″ wide plastic blocks from the template shown below, this will give you the proper amount of blocks to take up the extra space and allow you to block the mast according to our chart. **Blocking measured from aft face of mast relative to the neutral position.
Blocking Positions:
Light Air/Flat Water: 1″ in front of neutral
Light Air/Lump:1/2″in front of neutral
Medium Air/Flat Water: Neutral
Medium Air / Lump: Neutral
Heavy Air/Flat Water: 1/2″ behind neutral
Heavy Air/Lump: 1″ behind neutral
Mast blocking has two profound effects. First, the more blocks you put behind the mast the less headstay tension you will have and the more the headstay will sag. This results in a deeper and more powerful jib for light and lumpy conditions.
Secondly, blocking in front of the mast will create more headstay tension thus a flatter jib for windy conditions. The second effect is relative draft position of the lower part of the main. In lighter air blocking to induce pre-bend (behind the mast), will remove forward draft and decrease the depth of the sail. In heavy conditions, you will want to block in front of the mast in order to power up the bottom part of the main in order to help you through rougher seas. Remember blocking in front also give you more tension on the headstay for a flatter jib.
Mainsail
Trim the mainsheet hard enough to make the top batten parallel to the boom.
You can check this by sighting from underneath the boom on a vertical plane. Once the boat has accelerated and you want to point higher, trim harder (2-3″) to cock the top batten slightly to weather. If the mainsheet is too tight (top batten hooking to weather), you will slow down. In light air and choppy water, the top batten should be parallel or twist off slightly. You may want to mark your mainsheet somewhere in the middle so you have a nice reference point for mark roundings and upwind sailing. Pull the traveler car to windward until the boom is on centerline. To check this, have your crew sight aft along the boom and line up the center of the boom with the eye that attaches the backstay to boat (this should be in the center of the transom). Keep the boom on centerline up to 12 knots and gradually drop the traveler to keep helm and heeling under control as wind speed increases. The lens foot allows the sail to act as a loose-footed sail. Upwind the lens foot should not be fully open. To set your outhaul properly, use the following guide:
**This chart is based on settings relative to the black band
KNOTS
OUTHAUL TENSION
0-5
Eased 1 1/2″
6-10
Eased 1”
11-14
Eased 1/2″
15+
Maximum
**On reaches and runs the outhaul is eased 1 – 2″.
The cunningham is used to position the draft in the main. Your goal should be to keep the maximum draft position 50% back in the sail or just slightly forward of this. In a new sail, we use no cunningham up to 6 knots, enough to remove most of the wrinkles in 7 – 14 knots and progressively tighter in higher winds so there are no wrinkles. Pull the cunningham very hard above 18 knots to move the draft forward in the top of the sail. Under most circumstances, you do not need much backstay tension.
The exception would be in breezy, extremely puffy conditions, particularly when combined with flat water. In these conditions, you can use the backstay as a power control. Pulling the backstay reduces the power in the mainsail up high by opening the leech, thus reducing heel and weather helm. Remember, backstay has a large effect on luff sag. A tighter backstay equals less luff sag. More luff sag makes the jib entry fuller and moves the point of maximum draft back. This is best in light air and flat water. As the breeze freshens, a straighter jib luff produces a flatter jib entry. Use the boom vang downwind and on the reaches to control the amount of twist in the mainsail. The twist should be the least amount that still permits attached flow at the upper batten telltale and stalling is unavoidable. From 100 degrees or so to a dead run set, the vang so the top batten is parallel to the boom. Your main sail is equipped with a leech cord. The primary function of the leech cord is to prevent the leech from fluttering. In windy conditions, tension the leech cord to prevent the leech from fluttering. In light to moderate conditions, pull it just tight enough to eliminate flutter.
Jib
Your North Sonar jib does not have a wire in it. Therefore, luff sag is controlled by headstay tension (see blocking and backstay section of tuning guide). Luff sag is measured as an offset from the center of the jib luff to a straight line between the head and tack of the jib. To trim the jib correctly, you must have the lead in the proper fore and aft position. This is accomplished by moving the lead forward or backwards until all three telltales on your jib lift at the same time as you begin to pinch the boat above a close hauled course. If you find that the windward telltale on the top of the sail lifts before the ones lower down, this is an indication that the lead is so far aft and should be moved forward. Conversely, should the windward telltale on the bottom of the sail lift before those higher, then you should move the lead aft. After experimenting in say 8 to 12 knots and you have your central lead position, you may want to move the lead forward a little in very light air and aft a bit when the breeze is above 15 knots. The most critical adjustment you will make with your jib is the sheet tension. The best way to gauge this is to pull the sheet is when you are going upwind until the upper batten is parallel to the center line of the boat at the back end, or perhaps points just to leeward from parallel. In no instance do you want the upper batten pointing to windward towards the mainsail. This will create backwinding and stall the boat which will slow you down.
Spinnaker and Downwind Sailing
Set the vang so the top batten is parallel to the boom. Ease cunningham, outhaul and backstay. Trim the spinnaker so there is 6″ to 8″ of curl in the luff. Keep pole perpendicular to apparent wind. Keep outboard end of the pole even with the free clew. On runs you may want to use some leeward tweeker to keep the leeward leech from opening too much.** Remember, over trimming the spinnaker (never allowing the luff to curl) chokes down the slot between spinnaker, leech, and main. The result is a boat driven sideways instead of forward.
Steering Technique
The Sonar has a very big main, therefore, it is very important to balance the boat for different wind strengths. If your boat is not balanced, you will feel it in the helm. In heavy conditions you want to de-power the main in order to reduce windward helm. Since hiking is limited in the Sonar class, it is a good idea to sail with four people, you can use these people to your advantage by moving them around in the boat. Use crew weight to help steer the boat upwind as well as downwind. In light air, keep the crew weight low and forward in the boat as the wind freshens moves the crew weight to the windward rail and forward and close together. In all conditions playing the mainsheet, traveler and backstay will keep you in close tune with the helm. Remember, steering fast is a function of concentration and balance of your boat.
This tuning guide has provided the numbers and know-how to balance your boat. Now it is time to get out and practice and enjoy the upcoming racing season.
Sail care
Your new main and jib are made from stiff resinated cloth. With just a little extra care, they will perform at top speed longer than softer materials. Both main and jib come in tube bags. They should be rolled starting at the head straight down the leech so that the battens remain parallel. The spinnaker should be flaked so that the leech tapes do not get wrinkled. The spinnaker should not be stored wet for long periods of time — some bleeding of colors may occur and this is not covered by warranty. All sails should be rinsed periodically to remove salt and should be dry when rolled up. Diligence in these areas will dramatically extend the life of your sails.
READ MORE
READ MORE

08 May
2.4MR TUNING GUIDE
The tuning guide is written to give you the best performance from your North sails. The preparations and settings are those we have found to give the best VMG on a Norlin MKIII. However, there is a lot of useful information even for those sailing another design.
There is an infinite variety of sailing conditions and a tuning guide like this can help you to a good base tuning, which will make it easier for you to find the optimal tuning in the actual situation. We hope this will give you successful and fun sailing.
Preparations
OUR PHILOSOPHY
A 2.4 has the same tuning possibilities as a large keelboat. The difference is that everything including steering and tactical decisions has to be done by one person. The sailor can not waist attention on controls that don’t make a significant difference on speed or ability to point. We have systematically tested which controls do make a difference and removed those that do not. This makes it easier to focus. We have also designed the sails to be forgiving in the sense that a slight mistune or a wiggle by the helmsman will not give a drastic change of boat speed.
TOOLS
Tuning scales (stickers) are used in several places to make a good tuning repeatable. (One unit on the tuning scale is 12,5 mm).
Shroud tension is measured with a “Tension Gauge” from Loos & Co. It comes in two base models and for different shroud dimensions. Note that the gauges are individual and the readings differ +/- 2 units between them.
MAST
The masts from Vene Bjorndahl are excellent. A softer mast does not work as well and indications are that an even stiffer mast would be an advantage.
HEADSTAY
The headstay shall have the same length regardless of weather conditions. That gives a number of advantages and we have not found any disadvantage. We have systematically tested mast rake in the interval 5500-5600 cm without noting any difference in VMG.
The largest advantage with a permanent mast rake is that a mark on the mainsheet will make tuning of the main exact. This is important as an adjustment of 1 cm on the mainsheet will make a significant difference on speed and ability to point. The permanent headstay also makes the marks on the backstay more meaningful and it makes it easier to move the headstay forward on the bow.
RIG POSITION
The headstay shall be mounted as much forward as possible. The mast is thereafter placed to use maximal J (1560 mm).
It is necessary to move the shrouds forward on older boats when the mast is moved forward. It will otherwise be difficult to push the mast forward on downwind legs. Moving the shrouds forward often requires some work.
We do not think that it is a good idea to move the mast forward without moving the headstay. That will narrow the slot between main and jib and make it difficult to make the main work correctly in strong winds.
Use lower and upper shrouds and spreaders from Vene Bjorndahl. They will make the distance from the mast to the center of the shroud 295 mm. Lower and upper shrouds shall go through deck at the same point. A straight line drawn between the port and starboard deck through point will cross the mast 10 mm forward from the aft edge of the mast. The distance between the port and starboard deck through points for the shrouds are 490 mm.
As a stiff mast is an advantage we do not recommend sailing without lower shrouds. In strong winds the pressure on the mast in the mast hole at deck level will increase substantially and several masts has actually snap there.
MAST RAKE
The mast rake should be 5570 mm.
We measure mast rake from the lower edge of the upper measurement mark on the mast to the aft most point of the hull . To make the measurement band stay close to the mast when hoisted, a traveler is introduced in the mast track and tied to the measurement band. The backstay shall be tightened only to prevent it from sagging. Tighten it hard and then ease it again before measurement to make sure that the headstay is stretched. The length of the headstay is fixed to make the rake 5570 mm.
SHROUD TENSION
The upper and lower shrouds are tightened such that the reading with tension gauge model A is 21 and 9 respectively and 15 and 9 respectively with gauge model PT-1. Observe that these readings are valid for rod. Other types of shrouds will give different readings.
BACKSTAY
A 4:1 purchase for the backstay is fine and we use 3 marks on the trimline. Take the slack out of the backstay in same manner as when you measure mast rake. Put the first mark on the 55 mm from the centre of the cleat (Figure 4). The third mark is placed 490 mm from the first and the second half way between the first and third mark. When we further on write that the backstay shall be on 1,25 or 1,75, we mean positions between mark 1 and 2. If you follow the recommendation for distance between the deck trough positions for the shrouds is that the same as the distance between mark 1 and 3 on the backstay trim line.
MAST BEND INDUCER AND RESTRICTOR
These are not used for trimming but the mast bend inducer is used to hold the mast forward downwind.
MAIN SHEET
As mentioned earlier, 1 cm adjustment of the main sheet gives a significant change in speed and ability to point. Hence, tying the mainsheet with a knot is not accurate enough. Sew an eye on the permanent end of the mainsheet and fasten it in a permanently mounted shakle behind the hatch on aftdeck. Make a hole through deck and mount the shackle in the support for the rudder shaft. A traveller is not used and observe that they normally flex substantially on the standard boat.
The mainsheet should be 1:1 without purchase. That reduces the sheet that has to be taken in to half when rounding the leeward mark.
Put a trimscale on the aft side of the mast above deck. Put 1 at the top and mark the main sheet such that the mark is at 3 when the main is trimmed in 3-5m/s. This means that the upper batten is parallel with the boom and that the top tell tail flies 60-70% of the time.
MAIN TACK
The mainsail tack should be fixed in a way to make sure it stays in the same position with different outhaul tension. At the same time it is an advantage if the tack can move an inch or so along the mast. The best way to achieve this is to have a slug slide sewn to the tack of the sail. If the opening in the mast track is extended all the way down to the boom, you can’t use a slide. Instead a thin rope with low friction is tied through the tack grommet and around the mast. Make sure the tack of the sail is close to the mast to prevent the clew to go beyond the black band when the outhaul is pulled tight.
OUTHAUL
Make a mark on the trimline for the outhaul and stick a trim scale such that the mark is on 1 when the clew is at the measurement band on the boom. Let the reading increase as the outhaul is eased. We use 1:1 purchase for the outhaul.
MAIN HALYARD
To make the sheeting of the main exact it is equally important to hoist the main to the same point each time as is the permanent length of the headstay and avoiding tying the main sheet with a knot. This is simple to arrange either with a halyard lock in the top of the mast (best solution) or a hook at the mast foot where an eye on the halyard can be fastened. It is impossible to hoist to the same height with an ordinary cleat.
SPREADER REFERENCE FOR JIB LEECH
The sheeting of the jib is described as the distance between the spreader tip and the leech of the jib. A small trim scale on the spreader helps to judge the distance. The measurements later described is valid for the standard 295 mm spreaders. If you have different length spreaders you have to compensate for the difference.
FOOT CAMBER JIB
The depth of the jib at deck level is described as the distance between the point where the jib meets the rail. The distance is measured 850 mm back from the headstay.
SHEETING ANGLE JIB
The holes in deck for the jib barberhaulers shall be 120 mm behind the aft edge of the mast and the distance between them shall be 465 mm.
WHISKER POLE HEIGHT
The eyestrap holding a 100 mm long rope and a block for the whisker pole line shall be mounted 210 mm above the lower measurement band. Check that the line pulling the whisker pole to the boom is long enough to allow the whisker pole to come all the way up to the block.
Sail Trim
Observe that the trim given below is valid for “normal” sea conditions. In choppy sea controls shall be eased and in flat water tighter/flatter trimming is possible
SAIL FAST AND POINT
Most important for good speed and height upwind is to find the right balance through good trimming and concentrated steering. Right balance is equivalent to the right rudder pressure. You achieve this by trimming main and backstay and in stronger winds by pointing to reduce the pressure on the sailplane. I often sail with the jib slightly luffing. In flat water a stronger rudder pressure can be allowed as choppy seas require an almost neutral rudder to facilitate easy steering. The rudder easily turns into a brake.
Start by sheeting your main to the proper mark then trim the backstay for right balance. If extra power is needed the jib may be trimmed fuller.
MAINSAIL
Sheeting
In 3-5 m/s the mark on the main sheet is on 3. The top batten is then parallel to the boom and the top tell tail flies 60-70% of the time. This is the reference trim for the main and the starting point for the readings below.
In very light wind the top tell tail shall be visible as much as possible. The top batten will then point leeward. This can be difficult to achieve with an older main which batten row may tend to fall in. The mark on the main sheet is in very light conditions above the scale and in 2 m/s on 2. 3-5 m/s is the reference wind. In 7-9 m/s breeze the mark shall be on 5 and in 10-12 m/s on 6. The whole leech shall always fill.
If you have an old and soft mast the main may get overbend wrinkles from the clew to the mast when the backstay is pulled very hard. These can be reduced by tightening the cunningham. However, it is better to have a well balanced boat then a good looking main.
Backstay
The backstay is only used to stabilize the headstay in 0-2 m/s wind and is not even pulled to the first mark. In 3-5 m/s it will be trimmed between 1,25 and 1,75. In 6-8 it will be on 2-2,5 and it will be trimmed to 3,25 as a maximum when the wind increases above 10 m/s. If you manage to steer more into the wind without loosing speed less backstay tension is needed. Consequently, the backstay has to be pulled harder in choppy conditions as more active steering is required then.
Cunningham
Cunningham affects the camber position. In light winds the mast is relatively straight and therefore the main has enough draft forward without using cunningham tension. The camber position is moved backwards as soon as the backstay bends the mast and short horizontal wrinkles is seen at the luff. Pull Cunningham until the wrinkles disappear.
Outhaul
The outhaul is on 7-8 in 0-2 m/s and on 3 in 4-6 m/s. It is on 1 in stronger winds, which means that the clew is at the measurement band on the boom.
JIB
Marks are not used on the lines used for trimming the jib. Instead trim scales are in two places that give a well defined shape of the sail. That is at the spreader and at on the rail.
The jib Cunningham is pulled harder when the wind increases. To avoid that the foot is resting too much on deck in strong winds and to make sure that there is no gap between deck and skirt in light winds the jib is hoisted to different heights.
Sheet and barberhauler effects the shape of the jib in a way that it is often nessecary to adjust both at the same time.
Spreader Reference
The jib is sheeted to 5 units outside the spreader in 0-2 m/s and it is sheeted to 2-3 units outside in 3-5 m/s. It is then gradually opened to be 9-10 units outside in winds above 10 m/s. The main sails from North have a window allowing you to see the distance between the jib and the spreader having your head on the windward side of the sail. It is always better to sail with a too open jib than a too closed one, which can be very slow.
Foot Camber
The jib is sheeted 2 units outside the rail in 0-2 m/s wind (let us call that -2 units). The foot is sheeted to 3 in 3-6 m/s and in 7 m/s and above it is sheeted to 5. A fuller jib is needed in choppy conditions a flatter one is better on a flat sea.
Jib Cunningham
The jib Cunningham is always pulled just enough to remove the sag between the luff buttons.
Headstay sag
Hedstay sag is set by the backstay and is hard to control without changing the balance of the boat. However, a very flat jib (too little sag) is often an indication that the backstay should be eased.
DOWNWIND TRIM
Mast Rake
The mast shall be pushed as much forward as possible downwind. Let the backstay out and pull the mastbend inducer to keep the mast forward. The headstay will be loos and allow the jib to be spinnaker like. When the apparent wind is 70 degrees from behind or more the backstay is tightened to give 10-15 cm sag.
Mainsail
The main shall have much draft and the chamber position should be close to the centre of the cord. This is achieved by letting cunningham and outhaul loose. The vang is adjusted such that the top batten is parallel to the boom. Let the boom out to 90 degrees with the wind from the stern. With a wind angle sheet such that the top tell tail flies but is slightly irritated.
Jib
The full length of the whisker pole shall be used and cunningham shall be loose to create clear bows between the luff buttons.
Sailing angles
In very light conditions a shy wind angle is necessary to make the jib fly. In other conditions angles between 0-20 degrees form a dead run give the same VMG and you can let tactical decisions decide the angle. If you have options chose the one closest to the mark.
READ MORE
READ MORE

08 May
INTERLAKE TUNING GUIDE
Congratulations on your purchase of North Interlake sails. We are confident that you will find superior speed over all conditions. Time has been spent to insure that not only are your sails fast, but also easy to trim. Please read the following guide, set up your boat to the numbers specified, and go racing! If you have any questions or problems, please don’t hesitate to give us a call. We are anxious to help you go faster and win races.
BASIC RIG SETUP
MAST BUTT PLACEMENT AT DECK
Maximum forward – 6’4” (76”) from the stem to the forward edge of the mast. Remember that the measurement is from the imaginary intersection of the hull and deck. Do not include the rub rail.
MAST RAKE
Measure mast rake by hoisting a tape measure on the main halyard and latch it where the halyard would be at the top black band. Pull the tape back to the middle of the transom at the joint between the transom and the deck. The measurement at this point should be 25’3”.
Keep in mind that you will measure your rake measurement when the rig is tensioned, whether it is by jib halyard tension or by tensioning the forestay itself
RIG TENSION
We have found that the Interlake performs best when the rig is set up fairly tight.
There are several different methods Interlake sailors use to set up and tension their rigs when sailing. Some set the forestay very tight and adjust the halyard tension to set the cloth/luff tension. Some set the forestay only snug and then add more tension through adjustment to the jib halyard (which will make the forestay actually become slack as all the tension is taken on the luff wire in the jib) with a powerful block and tackle arrangement.
In either case, ideally the tension will be tight enough that the leeward shroud would just become slack when sailing upwind in a 10 mph breeze.
For those who like to check the rig tension more precisely with a Loos tension gauge, we suggest the tension be set so that the shrouds register around 250lbs In lighter breeze ( below 8mph) ideally the tension will fall between 200 and 250lbs. For breeze over 12 the proper tension will be increased to nearly 340lbs.
CENTERBOARD ANGLE
Your centerboard should never swing farther forward then straight down (leading edge vertical) or perpendicular to the hull when it is lowered to its maximum. If your board swings past vertical, tie a knot in the centerboard pennant to limit its travel.
Some Interlake sailors have had success in heavier winds raising the board slightly in order to help maintain a balanced helm.
JIB
JIB LEAD PLACEMENT
Your Interlake jib has a trim line drawn from the clew grommet towards the body of the sail. This line provides the most accurate check for your basic jib lead position (below12 mph winds). Your jib leads should be positioned so that the sheet is a direct extension of this trim line. This is more effective than a measure from the stem because of variations in jib lead fittings, deck styles and small rake differences.
In heavy winds (above 12 mph), move the leads aft 1- 1 1/2 inches from the basic trim line position.
JIB CLOTH TENSION
Setting the cloth tension along the luff of your North jib properly is important in setting up the designed shape. Again there are several different methods used by Interlake sailors the cloth tension.
The “adjustable luff” system means your boat is equipped with an adjustable jib tack/Cunningham. Shackle the luff wire to the bow plate and attach the jib cloth shackle to the grommet in the sail. The tension is usually adjustable back in the cockpit.
The “furler luff” jib is fitted with a small clam cleat near the tack that allows the tension on the cloth to be adjusted independently of the luff wire tension.
Like the adjustable luff jib, the halyard is attached to the luff wire at the head of the jib and usually tensions the rig.
The “Burkhardt luff” system actually has two halyards, one for tensioning the rig (and attaches to the luff wire) and one for adjusting the cloth tension ( and attaches to the grommet in the cloth at the head). This system is used primarily with a jib furler.
In all three systems, adjust the cloth tension just tight enough to barely leave the horizontal wrinkles along the luff that appear as “crows feet” at each snap. In winds above 10-12mph, tension the cloth so that the luff is just smooth and no wrinkles or crows feet are present.
JIB SHEET
Trim the jib sheet so that in “boat speed” conditions the middle batten is straight aft parallel with the centerline of the boat. In light wind and/or sloppy conditions, ease the jib sheet so the middle batten is angled outboard 10 degrees. Also in breezy conditions, ease the sheet for more twist in the leech.
Only in medium winds and relatively flat water will the jib ever be trimmed so that the middle batten is just slightly hooked to windward and the top batten nearly straight back…and for only short periods of time.
MAINSAIL
TAPERED BATTENS
Included with your new North mainsail are special tapered battens specifically chosen to perform best with your sail. When inserting the tapered batten, the thinnest end of the batten should be inserted first for the greatest flexibility on the inboard end.
OUTHAUL
Pull the outhaul tight enough to just induce a slight horizontal wrinkle along the foot. In heavy winds or when the boat is overpowered, tension the outhaul until you will notice a horizontal crease along the foot.
Downwind, ease the outhaul only until the foot is smooth…never to the point of vertical wrinkles off the foot.
CUNNINGHAM
Your North mainsail is built with a maximum length luff. As a result, cunningham tension is used to tighten the luff of the mainsail and position the draft (maximum depth) properly ( nearly 45- 50% aft) in the sail.
In light winds (less than 6 mph) there should be small wrinkles perpendicular to the luff all the way from the head to the tack.
In medium winds there should be horizontal wrinkles only in the lower 1/3 to 1/4 on the mainsail.
In heavier winds, tension the Cunningham until the luff is nearly smooth.
MAIN SHEET TRIM
The main should be trimmed so that the upper batten is parallel to the boom (sighted from under the boom looking up the sail).
In lighter winds, or when sailing in a great deal of chop, it is helpful to ease the mainsheet slightly so the upper batten is angled out approximately 10-15º.
In drifting conditions, when the boom is hanging on the leech and hooking the upper batten, set the upper batten parallel to centerline of the boat. Only in drifting conditions should the main be trimmed this way, as this will place the boom approximately 2′ (61 cm) off from centerline.
In very heavy winds ( above 12mph), with the help of the boom vang, set the mainsheet tension so the upper batten is again angled outboard approximately 5º from parallel to the boom. It is important, in winds above 15 mph, to apply heavy boom vang tension so the mast and boom will bend correctly to sufficiently flatten the sail. It has been found that the boom may be deflected from the straight line nearly 3” in heavy breezes. This heavy boom vang tension will help make playing the main much easier, as the sheet will not have quite as much strain as it does in even moderate winds.
Note: Make sure when rounding the windward mark that the boom vang is eased to your normal downwind trim so more strain is not applied to the mast and boom!
BOOM VANG
The boom vang is used downwind to keep the upper batten parallel to the boom. A sailcloth telltale is attached to your mainsail leech at the upper batten. This telltale is used to help determine the proper boom vang tension (and therefore mainsail twist) on reaches or runs. Too much or too little vang will stall this telltale and will indicate that vang adjustment is necessary.
Note: We suggest not using this telltale to determine mainsheet trim upwind as proper trim upwind will result in the telltale showing a stall 50-75% of the time.)
Upwind, as indicated above, the vang is used in heavy winds to help maintain the upper batten parallel to the boom. If the vang is properly adjusted, when the mainsheet is eased in a puff, the boom moves outboard laterally. When tensioned properly in bigger breeze, there will be as much as 3” of bend in the boom.
TRAVELER
The traveler is used to depower and balance the boat by easing the mainsail sideways in heavy winds. When heavy windward helm develops ( the boat wants to turn up into the wind) the traveler is eased to help keep the boat flat. The traveler bridle height should be 24” from deck level to the top of the block, or as high as possible to allow centering the boom in light winds while still allowing enough mainsheet tension to adjust
the leech tension in moderate to heavy breezes. If your bridle height is adjustable, set the height at 28” in light winds and as low as 18-20” in very heavy winds. Be absolutely certain that the traveler height is set so that you will never run out of distance between the traveler blocks on the bridle and the mainsheet block (“two block”). Running out of mainsheet trim before the upper batten becomes parallel with the boom will greatly hinder your Interlake’s ability to point.
SPINNAKER
SPINNAKER TRIM
Keep the two clews of the spinnaker even with the deck by adjusting your pole height with the topping lift. The halyard should be lowered so that the spinnaker flies 8 inches off the mast and away from the mainsail. Start with the spinnaker pole positioned perpendicular to the apparent wind direction as indicated by the masthead wind indicator. Try to always carry 6-12 inches of curl in your spinnaker luff. No curl means the spinnaker is over trimmed. The crew and the helmsman must work together closely when sailing in heavy winds with the chute. The crew must ease sometimes as much as 3 feet to allow the skipper to bear off in a puff to keep the boat flat. The skipper must always be prepared to ease the mainsail downwind to keep the boat flat and balance the helm.
The only exception to keeping the boat flat is when sailing directly downwind. Under these conditions, balance the helm and allow the spinnaker to swing out behind the mainsail by heeling the boat to windward. Pull the centerboard up as far as possible; only leave enough board down to allow the boat to answer the helm without crabbing sideways or to prevent excessive rolling. If rolling occurs, lower the centerboard at least halfway IMMEDIATELY to prevent the infamous “death roll” to windward, and then pull it back up when the rolling ceases.
OTHER IMPORTANT ITEMS
WEIGHT
We suggest sailing with a combined crew weight of 390-460 lbs. Keep the boat almost perfectly flat upwind (except in very light wind) and place the crew weight as far forward as possible. Keep the crew and skipper close together and line up directly behind the shroud when there is enough wind to have all three on the weather rail. The only exception is when sailing in waves where the crew all move back one foot to allow the bow to ride up and over waves more easily.
STEERING
Rapid tiller movement seems to slow the Interlake. Instead, slow, gradual movements are best when sailing upwind. Tacking is quickest when actually steered through slowly. Keep the boat moving.
ROLLING THE SAILS
Leave the battens in the mainsail. Start at the head of the sail and roll the sail parallel to the seams (which are parallel with the battens so they won’t get twisted). Put the luff end of the sail into the tube bag first. If the jib sheets remain attached, they can be left out of the tube to dry if they are wet.
READ MORE
READ MORE

08 May
A SCOW TUNING GUIDE
Knowledge is power. We see this in every sport throughout the world. Racing sailboats is much different from the other sporting events. Sailing requires tuning for different wind and water conditions. Many of these tuning adjustments are very small, yet critical.
We have outlined tuning information for many different boats that we race on a regular basis. The measurements achieved have been tested through countless hours on the water in a variety of conditions.
What is truly unique with this guide is the fact that we have simplified the tuning process for all of these classes in order to make the process easy for our customers. You will be able to achieve newfound speed in your class. These measurements coupled with the fastest one-design sails in the world will give you the knowledge for speed. In sailboat racing this is a combination for power and speed!
North Sails will continue to bring you the very best in sailing service and technology. Our objective is to allow you to set the pace in your racing class.
The Swept Spreader Rig
The new swept spreader rig was developed to take A scow racing to the next level of simplicity and enjoyment. This new rig is deck stepped, making the rigging process for two people a fraction of what it was with the old rigs. The new rig is pre bent via the upper shrouds running through the spreader tips back to the base of the mast. This set up allows us to remove the permanent backstay and the ram as the mast bend can be fine tuned with the upper shrouds. This rig is more forgiving to use in regard to all aspects of rigging and sailing. This new rig allows the boat to accelerate in the puffs making the boat much easier to sail and in light air the mainsail shapes to the mast correctly, bringing the fleet closer together in terms of boat speed.
Mast and Shroud Setup
Untie the mast from the boat, place the mast rest pole in the boom rest socket.
Attach the mast head fly to the top of the mast and retrieve any halyards that are pulled to the top and attach the running backstays into the mast, take care to go around upper shrouds properly so that when mast is flipped over tunnel down the running backs are properly lead.
With a person at each end of the mast, flip the mast over so the tunnel is down, carry aft and latch in the base of the mast in the deck plate and rest the top of the mast in the mast support.
Attach the Intermediates to the aft hole in the chainplate, make sure the spinnaker sheets are lead outside the chainplates when attaching the shrouds.
Attach the Lowers to the forward hole in the chainplate.
Tie the jib halyard feeder line onto the end of the jib halyard and pull jib halyard through deck and out the side of the back bone. Be careful not to lose feeder line inside back bone or the line will have to be relead through the pulleys.
Pull the jib luff lines tight on both sides of the deck and insure that they are properly cleated, attach the block and tackle of the mast stepping pole to the jib luff, attach the forestay to the eyestrap on the other side of the mast stepping pole, place the mast stepping pole saddle over the base of the mast. Stand on the front side of the mast stepping pole purchase and with a person on each side of the boat holding on to an upper shroud to guide the mast and keep the mast centered on the way up, pull up the mast using the purchase system. Make sure that the mast stays centered on the way up so as not to damage the mast step.
Make sure the spinnaker sheets are lead in front of the forestay and attach the forestay.
Remove the mast stepping pole and stow away.
Attach boom and finish rigging and running lines and taping all necessary fittings.
Mast pre-bend
The upper shrouds run through both spreader tips and back to the base of the mast. When the upper shrouds are tensioned, they pre-bend the mast. The all purpose setting for the pre-bend is 5”. This is found by running a string along the back of the tunnel and measuring at the midpoint of the spar.
TUNING CHART
Light Air 0-12
Medium Air 10-18
Heavy Air 18 +
Mast rake
15”
16.5”
18”-19”
Upper Shrouds pre-Bend
Ease off 2 turns 4”-4.5” Pre-Bend
Back up 2 turns to 5”-5.5” of Pre-Bend
Standard spot 5”-5.5” of Pre-Bend
Intermediates
180-200 lbs on Model A Loos gauge
+ 8 Full turns
+ 8 Full turns
Lowers
Set up so mast Has ½” sag
+ 6 Full turns
+ 6 Full turns
Removing the pre-bend for storage
The pre-bend should be taken out of the spar for winter storage. Mark the turnbuckles and spin off the turnbuckles or, if you have the levers, either release those with the mainsail up and trimmed in, or when the spar is down on horses and you have someone put their weight on the middle of the spar to bend and take pressure off the upper shrouds. Never remove the pin on the lever when the uppers are under load.
Mast rake
We now measure the mast rake from the deck up to the junction of the forestay pin along the forestay. The measurement range is between 15” and 19”, 15” being the max forward position in light air and 19” would be max aft in the big breeze.
FINE TUNING MAST RAKE
Light air
The light air mast rake setting can be as far forward as 15”, especially if you are sailing with heavy crew weight. You may even want to experiment with the rake further forward if you sail heavy.
Heavy air
The mast should be raked aft so that the mainsheet pulleys trim close to “block to block”. This measurement should be around 19”, some fine tuning may be necessary to dial this in to the perfect rake. Basically, when you have big breeze and you have the running backstay cranked on hard, you will want to be able to trim out the mainsail and close up the top batten. If you are raked too far aft, the mainsail will stay twisted open too much.
DOWNWIND
When sailing downwind, the only adjustment we have to make in regard to the mast and the standing rigging is with the running backstays. You only want to snug up the backstays downwind to help support the mast and take some of the shock load off the chainplates in big waves and big puffs. Generally, you could sail downwind with no backstays on at all if you wish as the upper sidestays support the top of the mast and with the chainplates swept aft, you do not need the backstays to support the mast. It is recommended that in medium to heavy air you snug the windward runner to ease the load on the chainplate area, however, take care not to pull the runners too tight and invert the mast up high. It is a good idea to have a crewmember sight the mast bend and make sure there is not too much running backstay on.
Jib Set Up
The jibs should be set up so that they are low to the deck. The foot skirt should curl on the deck. In light air, the jib should be set up fairly full down low, and the luff should break evenly as you slowly head into the wind. As the wind builds you will want to gradually flatten the foot of the jib and twist open the upper leech, causing the jib luff to break sooner up high when luffing into the wind slightly. The upper leech should have a telltale on the top batten. This telltale should always be flowing. To find the correct trim, trim until the telltale stalls and then ease the sheet until it begins flowing— that would be maximum trim.
Jib luff
Just pull the wrinkles out in all conditions. Over tensioning the luff may over stretch the sail.
Jib track
The maximum inboard position would be even with inboard edge of cockpit. Ease outboard in medium/heavy wind to keep mainsail from “backwinding”. Set to the maximum outboard setting when reaching and running.
RUNNING BACKSTAY
Light Air
Keep soft to sag headstay and power up the jib, you can even tape forward along sidestays to get them out of the way if you wish.
Medium Air
Ease in lulls, pull hard in puffs to depower and flatten jib, and depower and twist open mainsail.
Heavy Air
Pull very hard to depower and flatten jib and mainsail.
Mainsail Controls
CUNNINGHAM
Light Air
None
Medium Air
Pull out wrinkles
Heavy Air
Pull hard to move draft forward and open leech
VANG
Light Air
Loose
Medium Air
Start to play the vang on in the puffs to bend the mast and depower the mainsail.
Heavy Air
Very firm to vang sheet in puffs and to flatten the mainsail.
OUTHAUL
Light Air
Ease in approximately ½” to ¾” from boom band to power up bottom of mainsail.
Medium Air
Pull to black band to flatten and depower.
Heavy Air
Pull to black band.
SHEET
Light Air
Twist top batten open, keep top leech telltale flowing as much as possible. Choppy conditions require more mainsail and jib twist with fullness down low.
Medium Air
Trim until top telltale stalls half of the time. Or sight back 1/3 of top batten parallel to boom. Again, more twist if the chop is big.
Heavy Air
Flatten and twist main, work sheet to keep the boat on her lines and driving.
TRAVELER
Light Air
Pull to windward of centerline approximately 8″-10″, this allows you to keep a loose mainsheet tension and allow the mainsail to twist open as much as possible up high. As the breeze builds and the crew starts to move towards the windward rail, ease the traveler down to center and trim the mainsail harder to remove twist.
Medium Air
Center and work down in puffs to keep boat on her lines.
Heavy Air
Work up and down in puffs. Maximum out is at rudder posts.
Asymmetrical Spinnakers
0 – 6 knots
Use the small VMG asymmetrical. Induce Maximum leeward heel. Take jib down if necessary.
Over 6 knots
Use the big one. Keep maximum heel, Use 2/3’s to max board board. Work the shifts. Work the puffs. If the breeze is up, everyone must hike, mainsheet in fairly tight and press the boat up to go as fast as possible all the time.
Hoisting Asymmetricals
Hoist halyard first, under main and keep sail under control to leeward. At the same time pull out bowsprit. When the kite is approximately ½ to 2/3 of the way up, pull out tack making sure that a crew member feeds the kite out of the bag keeping tension on the foot and the tack line to keep it up on the deck and out of the water, and fill chute. The helm should bear away during the hoisting process to not fill the kite too quickly, however, if it looks like the kite is going to go in the water and shrimp, the helm should head up to fill the kite and lift it out of the water.
Heading up too high could cause a capsize.
Gybing Asymmetricals
There are two gybes that work best on the A scow, the Mexican gybe and the pre-gybe.
Mexican Gybe
The Mexican gybe works best when there is over 7 or 8 mph of breeze. To perform the Mexican gybe, the trimmer overtrims the kite as the boat bears away, strapping the foot tight as if to do a Mexican takedown. As the kite loads up on the new gybe, the trimmer blows the sheet off and the other trimmer overhauls the new sheet. Make sure that the sheets run free and that there are no sharp objects at the sidestays or the forestay. The helm will come through the first part of the turn fairly quickly to help load up the kite on the new gybe, the helm will hold the turn at the point where the kite loads up on the new side to give the kite a chance to fill, then freshens up to accelerate.
Pre Gybe
The pre gybe works best in light air when there is not enough pressure to load up the kite on a Mexican. On the pre gybe, the helm bears away to almost dead downwind, the trimmer starts to trim the kite around to the new side and at the same time the bow overhauls the new sheet at the shrouds to help the kite around. The helm waits until the clew is at the sidestay before gybing through the wind onto the new gybe. If done properly, the kite will come out filled and off you go.
Asymmetrical Takedown
Windward take down
Head the boat straight down wind, start jibing spinnaker and overhaul windward sheet around until clew is near the mainsheet position. An early release on the tack line will help take the pressure out of the kite to pull it around faster. The jib trimmer must tend to the tack line to keep it from running out too far and going under the boat. The helm should steer under the kite to help blow it on the deck and a forward crew should control the foot to keep it out of the water.
Leeward take down
On a leeward takedown you must first throw the lazy spinnaker sheet foreward around the headstay into the water to blow it aft alongside the leeward side of the boat. A crew member grabs the lazy sheet pulling off the clew as far foreward as possible in the cockpit, right behind the shrouds. The helm bears away to take some load off, the tack is blown off and the clew is pulled in and down quickly under the boom. Pay attention to the upper leech of the mainsail as the kite will sometimes catch on the leech. Also, you must tend to the tack line to keep it from running out too far and getting tangled in the rudder or board.
Mexican take down
Approach the leeward mark on starboard tack approximately 1.5 boat lengths to windward of buoy. When just shy of port lay line gybe the boat and at the same time trim the chute tight on the port side, release the bow sprit and the tack line to allow the kite to be trimmed further aft behind the shrouds, and as the chute blows into the rig release the halyard and drop the chute on the deck. Keep control of the foot and sail to keep it out of the water, steer under sail, tail tack and halyard lines down. This is the most effective take down if done properly. In a Mexican, there is very little time in between the steps and the crew needs to practice the steps to get it down properly and quickly.
Troubleshooting
Too much windward helm
Pull on max outhaul, then rake mast aft, then more running backstay, if that doesn’t do it then pull some board up.
Can’t point
Jib car might be too high, or jib is set-up too full down low. Rig may be too tight or mast rake too far aft or both. Mainsail may be set up too full.
Leeward helm downwind
Not enough board.
Sail Care
Your North Sails are constructed out of the best materials on the market today. We make sure of this by testing every roll of cloth we use. Through proper care and maintenance your sails will give you the performance you have come to expect from a North sail.
The most important factor for a long life for your sails is to watch them for signs of wear and tear in high load and chafe areas. Be sure to wash the sails off with fresh water and dry the sails thoroughly before storing. A dry, mild climate is best.
Excessive heart can cause problems with the sails due to the possibility of shrinkage. It is best to roll the mainsail and jib.
Mainsail
When hoisting and lowering the sail try to minimize the amount of creasing or wrinkling of the sail. Every time the sail gains a crease the cloth breaks down that
much faster. Always have someone contain the leech and luff during these procedures. The battens can be left in the sail without any problems. Be sure to roll the sail parallel to the battens so that the battens will not twist. This could cause damage to the battens.
Jib
When rolling the jib keep the battens perpendicular to the leech. Pay special attention to the battens and batten pockets for wear and tear.
Spinnaker
The spinnaker is fairly straight forward. Be sure to repair all tears and pulled stitches. Folding the sail when storing is best.
Always dry a spinnaker after every use. Do not hoist the spinnaker up the mast to flog it dry unless there is very little wind. The flogging breaks down the material much faster.
READ MORE
READ MORE
08 May
SABOT TUNING GUIDE
SETTING UP THE BOAT
When buying a boat the important thing to look for is the condition of the hull. The brand is not that important as long as the hull and blades (leeboard and rudder) are in good shape. The bottom and blades should be free from all nicks and scratches.
For masts there is little difference between the Proctor, LeFiel and Gold Finger spars. Again look for a mast that is free from dents and that is not bent permanently in any one direction.
MAST RAKE
Mast rake is a very important consideration in the Sabot. It determines how much helm the boat will have upwind and has a great deal to do with boat speed in general. To measure mast rake, tape a tape measure to the top of the mast and measure down to the top center of the transom. This measurement should be about 13’3 3/4″. There is no way to change the mast rake on the water. So you’ll have to come back to a dock and get someone to hold the mast for you while you change the setting.
** Remember these settings are only a starting point, the best way to find your perfect rake is to go sailing and to see what works best for your boat. A good reference point on the water while you are sailing is that when the sail is fully sheeted in the boom should be about 16 inches above the corner of the transom. A boat that has a problem pointing or holding a lane may have too much mast rake. On the other hand, a boat that points well but can’t go through the water may have too little mast rake. These measurements can be a matter of an inch or two. It’s always good to get the opinion of someone else or take a picture of you sailing to see for yourself.
LEEBOARD POSITION
The leeboard and rudder are important parts of your boat and taking care of them carefully should be your first concern. The best shape for either blade is very thin and as wide as possible below the waterline. The thickness of a well-shaped blade is 3/4″. A good way to get this is to try and get a hold of some templates and shape them skinnier than the slot and max in the mold. When sailing upwind rake the leeboard slightly forward until about 10 knots. I about 10 – 14 knots you will start to rake the board more straight up and down. If the breeze increases more and the boat still has a lot of helm you may need to rake the board just slightly aft.
** Remember upwind on starboard tack to sail the boat as flat as possible. It is OK on port tack to sail with a slight heel.
SAIL TRIM
UPWIND
When sailing your Sabot always be aware of your mainsheet tension, as this is a gas pedal as well as a brake if you’re not too careful.
When sailing upwind in light air (0-7 knots) be careful to not pull on the mainsheet so hard that it stalls your upper telltales and closes down the back of your sail. You will also have no downhaul or boomvang on. You will have a very powered up sail at this with the outhaul eased having about 6 inches between the boom and the sail. It is always better to err on the eased side of things when sailing in light air. As the breeze increases you will have to trim things a little harder.
When sailing upwind in medium breezes (8-13 knots) trim your mainsheet so that you are just beginning to stall the top telltales about 30% of the time. You will be pulling on the downhaul just enough to get rid of the wrinkles and then easing it off again as to not have much tension on it at all. You will also have your outhaul a little tighter, as you will need to pull it to the point where you are just beginning to see a very small crease in the foot of the sail. As the breeze gets windier (13+ knots) you will have to start to pull everything a little harder. The outhaul will be pretty tight. The downhaul will be just tight enough to take all of the wrinkles out of the sail, and you will be sheeting pretty tight, but never past the corner of the boat. You may in the puffs be easing the mainsheet enough to get you on your feet again. When easing the mainsheet in a puff try to anticipate the puff and never ease more than 3-6 inches, anymore and the boat will stop going forward. You will also have your boom vang on just snug so that when you ease in the puff the leach of your sail doesn’t twist off too much. You want to try and maintain the same tension on the leach as you had while you were trimmed in.
** Marks or reference points on all of your control lines are a great idea!!!
DOWNWIND
When sailing the sabot downwind find a comfortable angle of heel so that you can concentrate on the BIG PICTURE around you and not weather your boat is going to flip over. When sailing downwind it is recommended that the leeboard be lifted out of the water, but only if you feel comfortable doing it. Be very aware that when the leeboard is out of the water this limits your maneuverability on the course. (i.e. heading up or gybing)
When sailing downwind remember to ease all of your control lines off, as this will severely hamper your downwind speed. The vang should be pulled on just enough as to have a firm leech with the batten parallel or with a slight twist to it. Experiment with this and you will be able to tell the difference pretty quickly. Also downwind you should never let the boom out past 90 degrees. In more than 14 knots you may have the boom pulled in a little to help with the stability of the boat. Try to feel comfortable in the boat and do not use downwind as a time to rest as some of the biggest gains on the coarse can be made on the downwind legs.
SUMMARY
When sailing upwind be aware of how your body weight effects how the boat lies in the water, so that the bow is not digging and that the stern is not dragging. Because everyone weighs a little different this position may vary from person to person, but the general rule of thumb is to sit as close to the thwart as possible. Remember to always keep the boat driving forward, especially in chop. In flat water if you can sail the boat a little higher, but not to give up any speed on your competitors try to, this can be a huge weapon. Remember that a happy medium is the best way to sail your boat. Try these settings, practice and go sailing. If you find something that works a little better for you or have any questions about the Sabot in general please contact our Sabot experts at North Sails San Diego.
Good luck with your new T-5/T-6 and sail fast!
UPWIND
LIGHT (0-7 knots)
MEDIUM (8-13 knots)
HEAVY (14+ knots)
OUTHAUL
6 inches from boom
4 inches, just showing creases in foot
2 inches, tight always showing crease in foot
DOWNHAUL
None
1/2 of the wrinkles out
No wrinkles
MAINSHEET
All telltales flowing
Top telltales just stalling 30%
All top telltales flowing
LEEBOARD
Raked slightly forward
Straight
If too much helm rake slightly aft
VANG
None
None
Just snug, maybe vang sheeting
DOWNWIND
LIGHT (0-7 knots)
MEDIUM (8-13 knots)
HEAVY (14+ knots)
OUTHAUL
Eased
10-8 inches from the boom
6 inches from the boom
DOWNHAUL
None
None
None
MAINSHEET
Eased to 90 degrees
Eased to 90 degrees
Pulled in to 80 degrees
LEEBOARD
Pulled up
Pulled up
Pulled up
VANG
Top batten just twisting off
Tight, top batten parallel
Tighter, top batten parallel
Rev R05
Rev R05
READ MORE
READ MORE

08 May
DAYSAILER TUNING GUIDE
Congratulations on your purchase of North Day Sailer sails. We are confidant you will find superior speed over all conditions.Time has been spent to insure that your sails are not only fast, but also easy to handle and trim.
The following measurements are those we have found to be the fastest setting for your new North sails. However, we urge you to experiment because you may find slightly different setting will mean even better boat speed for you and your particular boat. If you have any questions or problems, please don’t hesitate to call. We are always anxious to help you go faster and win races.
MAKE RAKE AND SHROUD TENSIONTo measure the aft rake of your mast, hoist a tape measure on your main halyard and hold it tight at the intersection of the transom and rear deck. This measurement, without your jib up and your rig set “snug” (no play in any shroud or forestay), should be 24 11” to 25’ 1”. Then hoist your jib and pull the rig forward through either a magic box, a block and tackle, or using the forestay (as a bow and arrow effect) until you achieve a 25’1” to 25’2” measurement at the transom. With this rig tension (approximately 150 lbs on the shrouds) the leeward shroud should not go slack until the wind velocity is approximately 10 mph. This may require more rig tension than you are used to carrying, but this tension is important in keeping the jib luff sag down to a minimum for maximum speed and pointing capability.
National Champ Dave Keran sets his rig tension very tight solely with the forestay tension. His rake is set at 25’1” with the forestay tensioned to 200-210 lbs. The shrouds will be accordingly 300-320 lbs. They do not use the jib halyard to tension the rig at all…in fact it is used only to tension the cloth on the luff of the jib. The rake and rig tension are set and not altered at any time….making for a very simple, yet effective tuning setup.
MAST STEP AND SPREADER TUNEAfter the mast is setup at the proper rake and rig tension there should approximately 1” of positive prebend in the mast. This can be sighted by holding the main halyard at the gooseneck and determining the distance between the halyard and the back of the mast at the spreaders.
When sailing upwind in a 10 to 12 mph breeze you should see just a hint of diagonal overbend wrinkles in your main which will appear below the spreaders and aim back towards the clew of the main. These overbend wrinkles are important to show us that the mast bend/mainsail shape is matched together perfectly. These wrinkles are just an indicator and should barely show in these conditions. In heavier winds, above 15 mph, the diagonal wrinkles should be more definite. In winds above 20 mph, the wrinkles should be definite enough to give them the name “speed wrinkles.”
To achieve this type of mast bend, careful adjustment to the mast step and spreaders is necessary. Mast bend can be divided up into three sections with each being separately adjusted.
The top section or the one above the hounds (where the shrouds and forestay attach to the mast) is solely dependent on the relative bendiness of the mast and is really not capable of being adjusted. Some masts are bendier up top while other masts are stiffer. Your North main will readily adapt to either mast bend through controlled cloth stretch.
The mast bend in the middle third is controlled through spreader length and sweep. Spreader length is adjusted to side bend of the mast and it is important to check the relative sideways straightness when sailing upwind in an 8 mph breeze. Simply look up the luff tunnel of the mast along the luff of the main facing forward. If the mast is bending to leeward at the spreaders, your spreaders should be shorter. If the mast is bowing to windward, the spreaders should be longer. Ideally, we want to see a perfectly straight mast from side to side or a very slight amount of bend to weather. We suggest cutting your spreaders off no more than ½” at the time because it really doesn’t take much to make a major change in mast bend. As a rough starting point, many Day Sailer masts setup with 21 ½” spreaders.
The spreader sweep fore and aft adjusts fore and aft mast bend. If your main is too flat in light winds (even showing overbend wrinkles above the spreaders) cock your spreaders slightly farther forward. You can tape battens, pennies, etc., under the back edge of the spreader so they will be held farther forward. Adjust the sweep forward so that overbend wrinkles are just barely visible above the spreaders when sailing upwind in a 10 mph breeze. If the spreaders are too far forward ( the tips too far apart), the leech of the mainsail will hook to windward and the mainsail will be too deep.
The lower third of the mast bend is controlled by moving the bottom of the mast forward or aft on the keelson. By moving the bottom of the mast forward, the lower third of the mast will be stiffer. By moving the bottom of the mast aft, the lower third of the mast will be bendier. Again, after setting up your rake and spreaders, you can adjust the lower third of your mast bend so that these overbend wrinkles are just evident in the 8 to 10 mph breezes. As a base starting point we’d suggest setting the butt of the mast 11’1/2” measuring from the inside of the transom forward to the aft face of the mast along the floor of the boat.
We can offer another guide that may help you position your spreaders very close initially. Pull your spinnaker halyard down to the chainplate to help determine the proper spreader “poke” and “cant”. Feed it around behind the spreader. Pull the halyard very tight and is just touching the chainplate where the shroud attaches. There will be a gap between the halyard and the spreader at this point of approximately ½”. The spreader should extend out past the taut spinnaker halyard approximately 3 ½”. While these numbers are not the perfect answer for every boat they should help you get close initially.
Shaping your mainsail correctly through mastbend is important for excellent upwind performance. We realize that this is sometimes difficult to achieve due to the different mast sections, shroud placements, etc. in the Day Sailer class. Therefore, we urge you to consult us so that we may help you out with the correct mastbend control.
Overbend wrinkles in the lower section of the main are a good indication of proper prebend and mast bend setup.
MAINSHEET TRIM
The mainsail should be trimmed so that the upper batten is parallel to the boom (sighted from under the boom, looking up the sail.) In lighter winds or when sailing in a great deal of chop where power is needed, it is helpful to ease the mainsheet so that the upper batten is angled outboard from parallel to the boom approximately 5 degrees.
In drifting conditions when the boom is hanging on the leech of the main and hooking the upper batten, it is best to set the upper batten parallel to the centerline of the boat. Only in drifting conditions should you trim the mainsail this way, as this will place the boom approximately two feet off the centerline of the boat.
In very heavy winds and with the help of pulling on the boomvang, set the mainsheet tension so that the upper batten is again angled outboard approximately 5 degrees from parallel to the boom. It is important in winds above 15 mph to apply some tension so that the mast will bend correctly to sufficiently flatten out the sail for these conditions.
The mainsail is very important in helping steer the Day Sailer upwind. The skipper should always hold his mainsheet and be ready to ease it out quickly when he feels an increase in his weather helm (i.e. load on the helm acts as a brake.) When the boat is tracking well and the helm is balanced, the skipper should slowly trim the mainsail back in.CUNNINGHAM AND JIB CLOTH TENSIONPull the Cunningham on your main and the jib cloth tension just tight enough to barely remove horizontal wrinkles. It is best to leave just a hint of horizontal wrinkles on the mainsail and slight “crow’s feet” off the snaps of your jib so that you know the luff tension on both sails is not too tight.
OUTHAULPull the outhaul so that the bolt rope on the foot is just standing up straight in all conditions except in very heavy winds when overpowered. In these conditions pull the outhaul nearly to the band. Ease the outhaul 2” to 3” when sailing downwind.
BOOMVANGDownwind trim the vang hard enough to keep the boom and the leech supported on the mainsail. Use the guide of setting the upper batten parallel to the boom. When the boomvang is trimmed correctly, the telltale should fly straight off the leech at the upper batten. We feel that in the Day Sailer class there is a tendency for the boomvang to be pulled too hard when sailing downwind. This will over tighten the leech up top and due to the side bend of the mast, over flatten the mainsail.
As mentioned earlier, upwind in heavy air the boomvang is set hard enough to resist upward movement of the boom to adjust the upper batten to ease no more than 5 to 10 degrees past parallel to the boom. The mainsheet, in these conditions simply acts as a traveler and allows the boom to move mostly sideways and outbound.
JIB TRIMTrim the jib sheet so that upper leech of the jib is angled outboard about approximately 10 degrees in most conditions. In very flat water and medium winds you may be able to trim the sheet slightly tighter. In light lumpy conditions trim the sheet looser so the middle of the leech is slightly open as well.
JIB LEADSet your jib fore and aft so that the tell- tales break nearly even from top to the bottom on the jib as you luff the boat slowly into the wind. If the upper telltale breaks first, move the jib lead slightly aft. If you were to err one way or the other, you should make the top of the jib break slightly ahead of the bottom.
A good starting point is set the lead jib block 9’3 ½” aft from the jib luff wire measured around the cuddy.
In heavy winds, it is helpful to move the lead aft 2” to 3” so that the top of the jib does break early flattening out the upper section of the jib and therefore helping to de-power the boat.
Most Day Sailer skippers have fitted their boats with inhaul lines to help pull the jib leads inboard for proper upwind performance. These lines, added to the top of the cutty, will pull the jib sheet inboard to a point where the sheet if extended would cross the cutty 16” from the centerline. This is not the sheave position on the block, but where the sheet would strike the fiberglass if extended on.
In breezy conditions we suggest moving your leads outboard (and aft) 1-1 ½”. If very light, and especially choppy conditions move your lead outboard 2” to 18” off centerline. Be sure to ease the sheet in these conditions.
Dave Keran, Day Sailer National Champion, describes his method and set-up of using his inhaulers below. Thanks Dave!!
“The barberhaulers exit from through-deck bullseyes on the vertical face on the aft end of the cuddy. The exits are about 8” from centerline and lines cross to the other side of the boat from where they exit. We sail with the barberhauler block positioning the jibsheet 12” off centerline which means the block is 20” from the bullseye. I believe that the position of the bullseye (both fore and aft and laterally) and the length of the barberhauler line are important in getting the right trim on the jib. If the lines exit forward, on the top of the cuddy, they cause the jib to cup into the main when closehauled and the shape becomes less than optimal. Secondly if jib is pulled down to the cuddy either by a short line or to a track with a block I think the leach gets too tight. By allowing the barberhauler block to float I feel the jib is properly tensioned on the leach and the foot.”
SPINNAKER TRIM
Sail your Day Sailer spinnaker with a 6” to 12” curl in the luff. Careful concentration is necessary. Use short 2” eases and trims on the sheet to keep the spinnaker trimmed correctly. Keep the clews even at all times through adjustments to your topping lift. In some conditions, it is sometimes difficult to see the leeward clew behind the mainsail so you can use another guide where you adjust your pole height to keep center vertical seem parallel to the mast.
We wish you good luck and fast sailing! Don’t hesitate to give us a call if you have any questions or problems.
READ MORE
READ MORE

08 May
HEADING TO THE CEDAR POINT ONE DESIGN REGATTA
CEDAR POINT YACHT CLUB ONE DESIGN REGATTA
An Awesome Venue and a Guaranteed Fun Time to Kick-off Your Summer Racing Schedule
June 3-4,2017 – Cedar Point Yacht Club – Westport, CT
North Sails is excited to be the title sponsor of the Cedar Point Yacht Club One Design Regatta, the premiere opening event for a great Summer of sailing on Long Island Sound. Cedar Point Yacht Club is a quaint and user friendly venue that provides a fun and family-friendly atmosphere. The North Sails team has decades of experience sailing and training in the waters off of Westport, CT and can offer valuable insight and individualized attention to each team which makes this regatta both a great tuning and learning event for your whole team. Whether preparing for Block Island Race Week, to win your club championship or getting ready for the big summer events, the CPYC OD Regatta is a great chance to get in some practice for your team, learn from the North experts and enjoy the unequalled hospitality of the Cedar Point Yacht Club.
Here’s what you can expect to be included in your registration for the CPYC OD Regatta:
FRIDAY: North Sails Practice Day
FREE on-the-water coaching with the North Sails Team, including practice starts and short races with video and debrief at the North Sails hospitality tent in the late afternoon wrap up.
SATURDAY: North Sails Regatta Services
North Sails regatta specialist Chuck Allen will be on the water taking photos and videos during the races for a post racing debrief at the North Sails hospitality tent.
REGISTER TODAY!
READ MORE
READ MORE

05 May
SHIELDS TUNING GUIDE
Pre Race Preparation
THE IMPORTANCE OF THE PROPER TUNING
The Shields is one of the most successful, classic design keelboats in the world. However the same classic, elegant looks that make people notice the boat are also some of the reasons it is one of the more difficult boats to prepare to race. The class limitations allow for very strict one design conformance, which make tuning and sail design extremely important for performance and longevity.
The fact that class rules allow only one sail acquisition per calendar year added to the fact that the three sails that are carried while racing must go through wind ranges of 0-30 knots are very large obstacles that we all must face while racing the Shields. We need our sails to be very flat in heavy air yet full and powerful in the light stuff. Through some simple adjustments to the headstay and trim we are able to make the Shields perform through all conditions.
HULL PREPARATION
We all know a smooth, fair bottom makes any boat go faster and a Shields is no exception. We recommend that the bottom be faired (see rule 4.4) and properly finished with a racing bottom paint before launching at the beginning of the season. Be certain to check with the Chief Measurer before any major or professional work is done to your hull. During the season it pays to have the bottom cleaned at least once a week and preferably two or more times during the active marine growth period of your region.
RIGGING
The simpler your control lines work the easier it is to sail a Shields fast. There are many ways to set up your controls but we have found the following to be among the most important:
Gooseneck – The fixed gooseneck is available through many sources including Cape Cod Shipbuilding. This is an easy to install item that all but eliminates the possibility of gooseneck failure. When installing make certain that the fitting conforms to Rule 5.10.
Cunningham – A purchase of 4:1 is suitable for all adjustments to mainsail luff. Make certain that the Cunningham is easily accessible from either rail and will not bind up when used.
Vang – The maximum purchase of 8:1 is required to get sufficient tension on the mainsail leech when running in heavy air. A cascading 8:1 purchase is best is the best vang purchase. This purchase system allows for ease of cleating and most important provides the power for reaching. easing must be considered. When installing or updating your current system consider whether the system used provides for the easy ease of the vang.
Backstay – An 8:1 purchase led to a cleating system that exits amidships where the skipper sits is a must for changing gears in the Shields. Having the backstay led side to side allows for quick adjustment to mast bend and headstay tension, which is most critical in sailing fast through wide wind ranges.
Traveler – The traveler is perhaps the most important control of all. The traveler must be led to the midship position across from the skipper so that the skipper or the main trimmer can quickly and easily make the adjustments. An 4:1 or 5:1purchase is recomended. It needs to be set up so that it can be played, cleated and uncleated while sitting on the weather rail.
Twing Lines – Spinnaker twings are very inexpensive to install and make controlling jibes much simpler. We use Harken 146 bullet blocks snapped onto the twing line with a stainless steel snap hook so that the twing block can be removed in light air.
RIG TUNING
Before stepping mast
Before stepping your mast the following procedures need to be followed:
Make certain your mast has the black band on it at the proper position at the gooseneck as defined by rule 5.8 (2’ 5” above the deck).
Run your backstay down the aft face of the mast and make a mark (use nail polish or similar) 11” up from the bottom of your mast. If your backstay is too short you will need to add length. If too long, it will need to be shortened. Please consult a local rigger for the best way to do this. This mark will be referred to as “Backstay Datum” mark for the rest of this guide.
Run your forestay down the front face of the mast and make a mark on it at the top of the black band at the gooseneck. This mark we will call the “Forestay Datum”
A backstay guide needs to be installed on the back deck to measure the amount of backstay that is pulled on at any one moment. We use an old batten mounted on an angle bracket with 1” marks for a length of about 12”.
After stepping mast
Using the “Forestay Datum” adjustthe headstay so the mark is 47” from the point where the headstay meets the deck. This is your standard rake position. Typically, at least one Merriman 3 1/8” toggle is needed. The Merriman part number is 5770-312 for bronze and 5770- 412 for chrome. Prices should be around $20 to 23 each.
Put chocks and/or blocks in the mast partners so that the mast is pushed as far back in the partners as possible and it will not move.
Attach the upper and lower shrouds and check to be certain that the spreaders are bisecting the shroud angle. This should put the spreaders at an angle about 2” to 3” above perpendicular to the mast.
Tension the upper shrouds to 800 pounds using a “Loos” tension gauge. Check that the mast is centered in the boat by taking the jib halyard and checking for mast tilt side to side at the clevis pins.
Tension the lower shrouds to 300 pounds. Sight up the aft face of the mast to be certain that the mast is straight throughout its overall height.
HEADSTAY ADJUSTMENTS
All active Shields racers have, at one time or another, seen the foredeck crew of a competitors boat on the bow adjusting his/ her headstay length. The following table (Headstay length table, The table above indicates headstay length adjustments for three typical wind conditions.
When adjusting your headstay length please be certain to take caution in hazardous conditions. We have found that having the headstay not at the exact proper length is still faster than having a crew fall over-board. Also, carry extra clevis pin “ring dings” on the boat for the ones that may (read: will) fall overboard during some adjustment.
The table indicates target numbers to use as a guide to get going. You may find that your particular boat and sailing style may deviate from these recommendations.
Trying different adjustments may help you find the edge you are looking for to win the fleet championship or Nationals. Keep experimenting, but use these numbers to get you in the game.
HEADSTAY LENGTH
WIND SPEED
NOTES
47”(Standard)
8-20 MPH
This setting should be used as the all-around setting. It is the best setting for all-purpose conditions.
47 3/4”(Light air)
0-10 MPH
Light air, drifting conditions when maximum power is needed. This setting helps get the mainsail flat while increasing headstay sag to help power up the jib while increasing pointing ability.
46”(Heavy air)
19+ MPH
Shortening your headstay here allows you to pull on enough backstay to get the forestay very straight while allowing the mast to bend and not over flatten and invert your mainsail. The straighter the headstay in heavy air the faster you will go. Pull the backstay on HARD when the breeze is up!
HOW TO GET THE PROPER HEADSTAY LENGTH
Ched Proctor’s method
No sails hoisted, no jib on the headstay.
Upper and lower shrouds set as described in the tuning guide
Apply backstay tension until the headsty is just not slack
Put a PT2 Loos gauge on the headstay at Shoulder height
Adjust the backstay until the gauge registers 7
Check the bend in the mast.
For Light air set up should be 3” to 3-1/2”
For Heavy air set up should be 1” to 1 1/2”
To use a pre bend gauge:
tie the spinnaker halyard to the gauge. put a line on the bottom loop to pull it back down
Lead it around behind the upper shrouds to allow hoisting the pre bend gauge in the sail groove.
hoist it to approx 3′ above the spreaders
pull the main halyard taught and hold it against the back side of the mast at the top of the gooseneck
read the bend amount where the halyard passes the gauge
Sail Trim
Learning the set up and trim of your North Shields sails takes only a few minutes of practice time. The following notes will help you determine what to look for to get optimum trim and speed out of your Shields sails.
MAINSAIL SETTINGS
The three key adjustments for the mainsail are the mainsheet, backstay and traveler. The outhaul, Cunningham and vang help set sail shape and twist.
Mainsheet – When trimming the mainsheet we use, as a trimming guide, the aft 12” of the top batten. For most conditions we will get this section parallel to the boom. In light to moderate air and flat water we will trim it so that it is 2 or 3 degrees closed. If the boat stalls or begins to slow down, ease the sheet to get it going again. In heavy air the top batten will be open 10 to 12 degrees.
Traveler – We use the traveler very aggressively on the Shields to balance the helm and actually help steer the boat.
Under 10 knots of breeze, after adjusting the mainsheet, pull the traveler so that the boom is within 6” of the centerline of the boat. Over 10 knots ease the traveler up and down to balance the helm. Try not to allow the traveler to go all the way down in any condition as this will make steering the boat and keeping it tracking very difficult. Generally the traveler will not fall below the cockpit coaming.
Backstay – The backstay’s main use is to tension the headstay. In light air you should be able to adjust the backstay so that the draft is in the middle of the mainsail while the jib does not get too flat. Your mast should have about 1/2” of bend and the headstay should still sag about 6 (Headstay length table).
If the headstay is not long enough, pulling on any backstay will over flatten the jib and this is very slow. If the mainsail looks circular and the jib looks round in the front then you have achieved the proper light air.
Headstay – As the breeze comes on, and it is over 10 knots, you should set your headstay shorter. This will allow you to pull hard on the backstay and straighten the forestay to keep the jib flat. In breezy conditions (16 knots +) you should have the backstay pulled on so that the headstay has no movement or bounce in it. If the mainsail develops overbend wrinkles (wrinkles from the clew radiating out towards the luff of the sail then your headstay will need to be shortened to achieve this look. Once you have these measurements on your boat and know where to set your headstay and how hard to pull the backstay (use the gauge that you have installed on your back deck with the 1” increments) to document and duplicate the settings for future use.
Outhaul – The outhaul is set so that in light to medium winds the clew is 1 1/2” from the back band and in heavy air the clew is 1/2” to 3/4” from the band. The band position is measured from the aft side of the mast to the end of the boom and should measure 13’ 3 5/8”.
Cunningham – The Cunningham we leave slack until over 10 knots of wind. Above this we tension the Cunningham to remove wrinkles and keep the draft forward on the mainsail. It is important to note that while there is no band measurement at the top of the mast, the top of the boom cannot be closer than 2’ 5” to the deck,at the black band. If you do not have a fixed gooseneck at 2’ 5” make certain that you slide the boom down to that point after hoisting the mainsail and pull the Cunningham on to that point to keep the boom from riding up the track of the mast.
Vang – The vang should have an 8:1 purchase to make adjusting it as easy as possible. Set the vang so that downwind the top batten is parallel to boom. In very heavy air downwind pull the vang on very hard to help limit the amount of rolling.
If you do broach while going downwind, blow the vang to help relieve load at the top of the mast and get the boat upright again.
JIB SETTINGS
The three adjustments on the jib are sheet, lead and halyard.
Jib Sheets – We use 1:1 jib sheets because they are faster on the tacks and they don’t easily foul. Sheet to the inboard fore and aft track only.
Jib Leads – In light to medium wind put the lead at the “T” where the side to side tracks intersect the fore and aft track. In heavy air you may decide to move the leads back one hole. At the tack of the jib use a long shackle to get the tack 4” off the deck. To be certain that your lead position is correct view the foot of the jib where it hits the deck. The foot skirt should lie about 6” to 7” in from the hand rail that is on the deck (not the toe rail that is at the edge).
Jib Sheet Tension – To judge sheet tension use the middle batten of the jib.
This should be parallel to the centerline of the boat. For light to medium conditions this will put the leech of the jib about 4” inside the spreader tip. In heavy air the batten will be twisted open about 5 to 10 degrees from the centerline.
Jib Halyard – The jib halyard should be set loose enough in all conditions so that there are just a hint of wrinkles coming off of the hanks. As the sail ages (1 season or older) the halyard should be pulled so that all the wrinkles are removed.
Sail Care
Your North Sails are constructed out of the best materials available on the market today. Before we made your sails we tested many different fabrics from the best suppliers in the world.
MAINSAILIt is not necessary to remove the battens from the main when storing it. Be certain to roll the sail up parallel to the battens to avoid putting a permanent twist in them. Watch the mainsail for signs of wear on the batten pockets and where the sail hits the shrouds. Wash the sail off with fresh water when it gets salty and dry thoroughly before storing.
When lowering the mainsail have a crew member at the luff and leech and pull back on the leech to help keep the sail from folding in on itself.
JIBWhen rolling the jib keep the battens parallel to the leech. Check the battens and batten pockets for signs of wear and chafe. Avoid stepping on the sail when lowered for downwind sailing. Attempt to pull back on the leech when lowering the jib. Wash the jib off with fresh water when salty and dry thoroughly before storing.
SPINNAKERTo prolong the life of your spinnaker always store it dry and clean. Rinse with fresh water when it gets salty and dry before storing. Fold your spinnaker to store it if possible
Shields Racing Clinics
This tuning guide just begins to cover all there is to know about sailing and racing the Shields. The North Shields Team is prepared to give in depth Shields Racing Clinics if your fleet is interested in learning more. In the course of a weekend you will learn more about Shields racing than you could learn in a season of racing. Please call us for more details.
At North Sails we are constantly striving to make our products better. If you have any comments on this tuning guide and how we may be able to improve it we would love to hear from you. Please give us a call or drop us a line.
READ MORE
READ MORE

05 May
J/80 TUNING GUIDE
North Sails has been sailing J/80s since they were first introduced. Our commitment to the class and to its sailors sets us apart from any other company in the sailing industry. Welcome to the North Sails Program, the relationship we are about to build is of utmost importance to us. We look forward to working with you.
The measurements and the settings included in this book are one that we have found to be the fastest the J/80 designs available from North. Since crew, wind and sailing conditions vary, you may find slightly different settings are better for you.
BOAT PREPARATION
MAST RAKE
Mast rake is very critical in getting the best all around performance from your J/80. Because of differences in the measurement from the black band to the main sail halyard sheave box, combined with slight differences in the total length of the spars, we have determined that rake must be measured at base rig shroud tension, also making sure the backstay is fully eased. Adjust the back stay turn buckles so that blocks are hanging approximately 12” below the top of the bridal.
STEP-BY-STEP:
Set your mast but so the aft side of the mast step is 7.75” from the bulkhead. This is only a mast step starting point and most likely will have to be adjusted later in this rig set up procedure.
Attach tape measure to main halyard and raise to top of mast.
Measure down to top of black band at boom goose neck and adjust halyard so tape measure reads 30’ at that point and cleat. Again, this measurement needs to be exactly 30’ to top of black band at the goose neck.
Swing the tape measure out to the stern and rap the tape around the stern next to the tiller. Measure to the center of the tiller cut on the very aft part of the boat hull. Where the tape measure first hits fiberglass at the aft center of the tiller cut out should read 37’ 2 3/4”.
Remember that every time you move your mast but location to achieve your correct 3.5”to 3.75” of prebend your rake number and shroud tension will change. It will take some going back and forth to achieve perfect prebend and rake together, but the payoff can be big gains up the beat.
FINAL MAST BUTT POSITION & PREBEND SETTING
Once your headstay is set for the correct mast rake it is now time to adjust your mast but position for the 3.5” to 3.75“ pre bend which best suites your J/80 main sail for a wide range of conditions. We have found that its best to aim for the 3.75” prebend number in flat water venues and the 3.5” prebend number in windier , choppier venues. We have also found that moving your mast but forward .5” from your standard spot in winds over 20 knots can be very fast , especially in big wave conditions when a eased main sheet ,bow down mode is required to go fast upwind. Moving the mast but forward in big breeze also allows you to sail with more headstay tension for a given amount of back stay and shroud tension which in tern helps transform the jib into more of a flatter draft forward heavy air shape.
Make sure your spar is in the standard factory position, well chocked side to side and for and aft so the spar can’t move at the deck.
Position the aft side of the mast step 7 3/4” from the bulkhead but remember that this is only a starting point and you will most likely have to adjust from there to acquire your desired prebend. Due to inconsistencies in bulkhead placement and mast placement at the deck, there is no way to give you the exact placement from the bulkhead for you to achieve your exact desired prebend.
To check to see if the 7 3/4” position is giving you the correct pre-bend:
Attach the main halyard to the goose neck as close to the back of the spar as possible and tension the halyard hard.
Hoist someone with a tape measure up the mast on the jib halyard and have them stand on the bottom spreader , taking there weight off the halyard. Another way to measure brebend is to put a ladder up on the front of the mast and have some one climb up to the the first spreader and measure maximum prebend from the ladder.
While some one is standing on the deck ,pushing the main halyard against the back of the mast just above the goose neck, have the person up the mast measure the maximum distance from the back of the spar to the closest part or forward edge of the main halyard. Again, the maximum distance or prebend should be a couple of feet above the bottom spreader. Have the person up the mast move the tape measure up and down in that area to determine max pre-bend.
This pre-bend measurement should be between 3.5” and 3.75”.If your pre-bend is less, then move your mast back to increase pre-bend and if your pre-bend is more, then move your butt forward to reduce pre-bend.
Pre-bend is very critical in allowing your mainsail to react correctly with back stay adjustments along with the correct slot between luff of the main and the leech of the jib.
TAKE THE TIME TO ADJUST YOUR MAST BUTT FOR THE REQUIRED 3.5” to 3.75” PREBEND FOR MAXIMUM PERFORMANCE WITH YOUR NORTH SAILS!
Once your mast but is in the correct position, scribe a permanent line on the beam that the butt sits on so you will never have to go through this process again.
CENTERING THE SPAR
Measure back from the stem fitting 9’ 7” to each rail and mark with permanent marker.
Attach a tape measure to the jib halyard and raise a couple of feet.
Measure to each side and adjust the uppers so the measurement is the same on both sides.
SHROUD TENSIONS
Once the mast is centered, tighten the uppers so that they read 28 on your Loose tension gauge.
Tighten the intermediates so they read 12 on the Loose gauge.
Sight the rig by looking up the mast track and adjust the intermediates in 1/4” increments so the rig is straight. If you tighten one side a 1/4 turn,ease the other side a 1/4 turn, to insure you keep the same approximate tension on each intermediate.
Tighten the lowers to 5 on the Loose gauge.
Again, repeat step 3 until the spar is straight side to side.
NOTE: If you find that it requires much more lower or intermediate tension on one side than the other to keep the spar in column, then the mast may need to be re chalked from side to side at the deck. If not corrected, you will be sailing with different head-stay sag from tack to tack, which will make it impossible to duplicate jib lead position and jib sheet tensions from tack to tack.image
Your rig is now tuned for base setting 6-10 knots. We recommend leaving dock at base setting and adjusting from that point up and down for different wind strengths. We also advise that you buy some measuring calipers and measure your turn buckle distance at base so you can always get back to base setting on the water.
NOTE: Remember to adjust your backstay turnbuckles with your shroud turnbuckles. As your shrouds are tightened , your backstay will become to loose and won’t have the throw you need to tension properly if the turnbuckles aren’t adjusted with the shrouds. This also is true when easing your shroud tension.
When easing your shrouds for lighter conditions , remember to also ease your backstay turnbuckles to achieve proper headstay sag.
TIP#1
Learning to fine tune your intermediates and lowers by sighting your rig sailing upwind can pay big dividends on the beat. Always follow the tuning guide for upper adjustment, but learn to adjust your lowers and intermediates to always keep your mast perfectly in column while sailing to windward. We have found that the J 80 sails faster upwind , under 10 knots with a 1/2” to 3/4” of smooth leeward mast sag. The tuning matrix numbers will get you close to the correct side to side mast sag, but sighting up the rigs mast track while sails are trimmed correctly and weight placement is correct will tell you if small adjustments are needed for perfect tune.
TIP#2
Quick rig tune check is to make sure your lowers and intermediates are snug on the leeward side when sailing over ten knots. As the breeze increases to over 15 knots, your lowers and intermediates should be tighter than snug.
This quick check can’t be used with the uppers on a J80 because the shroud bases are very close together. The uppers on the leeward side should always be much tighter than snug to assure your spar is in column at the hounds.
The information put forth in this updated tuning guide is a combination of rig settings developed by multiple North American and World Champion Max Skelley, combined with information learned and tested in extensive two boat sail testing.
J/80 TUNING MATRIX
Using the Loos Gauge B
WIND SPEED
0-5 knots
6-10 knots
11-15 knots
16-20 knots
20+ knots
UPPERS
27
28
30
32
34
LOWERS
Slack
5
15
22
26
INTERMEDIATES
5
12
15
22
24
NOTE:The thread size of your turnbuckles will determine the amount of turns it will take to get from one setting to another. We recommend making a chart with the amount of turns so that you can change settings easily on the water between races.
SAIL CARE
Always store your sails away from the sun and make sure they are clean and completely dry.
Be sure that you always “roll “your upwind sails. This will help then last longer and remain wrinkle free.
READ MORE
READ MORE

05 May
STAR TUNING GUIDE
MAST SETUP (RIG DOWN)
Before we put the rig up in the boat there are a few things that need to be looked at. First we want to check to see that the mast is straight fore and aft and also sideways. Small bends can be fixed. If you have large bends or kinks you should contact your mast supplier for their advice.
Next check the intermediates and adjust if necessary. To do this pull the upper shroud down the front of the mast and make a mark on the mast at the bearing point of the shroud (this is the inside bottom of the loop on the shroud). This should be done on the opposite shroud also. After both uppers are marked pull the intermediates down the front of the mast and mark as you did for the uppers. Measure the difference between these marks. You should have a measurement of between 73 (2 ⅞”) and 76 mm (3”). Tighter measurement here is better in heavier air or for lighter teams, longer measurements develops more power for lighter air.
Most boats now have a long, continuous headstay. Lay the headstay along the front of the mast and put a mark where it intersects the top of the lower black band by the gooseneck. This will be used later to set the rake measurement.
The next thing you need to do is to set the spreader sweep and square the spreaders to the mast butt. Do this with the mast track down and the spreaders swept back in the upwind position. Take a thin piece of shock cord and tie it to each shroud right below the spreaders. This piece of shock cord should be stretched tight to make a straight line from shroud to shroud. Next, measure from the back of the mast to the shock cord. This should measure between 5” and 5 ½” ( 127 to 140 mm). Less sweep tends to make the middle section of the mast stiffer. More sweep allows the middle of the mast to bend more, flattening the main and requiring more lower checkstay.
After setting the spreader sweep you need to make sure they are square to the mast butt. To do this leave the shock cord on the shrouds that you used to measure the sweep with. Get a batten and put it on edge on the leading edge of the butt casting. Stand back at the butt of the mast and sight along the batten and this should line up with the shock cord that is stretched between the shrouds. The batten should line up with the shock cord. If this does not line up adjust with the Allen screws in the spreaders. Make sure that you adjust each screw the same. You will have to screw one in and screw the other out to keep the sweep at the proper amount. Be sure to seize the allen screws with locktite so that they do not move while sailing.
One quick note about spreader sweep, if you feel your mast is soft you might have to use less sweep and conversely if your mast is stiff you will have to use more spreader sweep.
MAST SET UP (RIG UP)
Now that you have the mast ready, put it up in the boat. After you have all the shrouds and backstays attached put the boat on a level place to finish the set-up of the rig.
Once the mast is stepped in the boat you need to check the butt location. This is done by taking a tape measure from the back of the mast at the base back over the aft edge of the cockpit along the deck to the transom. Using a straight edge along the transom measure the location. The measurement should be between 14’ 10” (4520 cm) and 14’ 9” (4495 cm) depending on the age of your boat and the keel location. Older boats have the keel further aft and require the mast butt further aft. Newer boats have the opposite. This is very critical to the upwind balance of the boat and may require a good bit of sailing to find the correct spot.
Next with the mast in its upwind sailing position, spreaders back, put some tension on the back stays. The lower shrouds need to be in line with the front of the mast and the uppers approximately ½” (1.3cm) in front of the lowers.
The final step is to make sure the mast is centered in the boat. This is done by running a tape measure to the top of the mast using the main halyard. Running the tape measure in front of the spreaders, measure to the top of the shroud track just in front of the shroud car. Do your best to make this measurement the same from side to side.
RIG TUNING
To measure the shroud tension we use the Loos Pro Model Gauge (PT-1).
Using the Loos Gauge, start by putting 10 on each upper backstay. Now check your rake measurement. 36 ½” to 37 3/4” (93 to 96 cm) seems to work well on most boats.
Now using the Loos Gauge measure the tension on your upper shrouds. This should be 22 to 23.5 for your base setting. Make sure the forward mast bender is not on when setting this tension and that the spreaders are locked aft.
Finally you need to set-up your inner lower shrouds. First measure up from the tip of the black band up the front of the mast 36” (91.5 cm) and make a mark. Now measure across from shroud to shroud. By pulling the shrouds together this measurement should be 27½” to 29” (70 to 74 cm).
Now the mast is set to go sailing. The measurements and settings that we have suggested are a very good starting point. Sight up the mast when sailing upwind to check the side bend. In light air, a small amount of leeward sag at the spreaders will help power the boat up. Likewise, in heavy air, more lower shroud tension will pull the middle of the mast to windward and help to de-power the boat. You might have to make some small adjustments to fit your sailing style, wind and wave conditions, and crew weight.
Before you leave the dock you should mark your jib lead position. First measure the fore and aft position of your jib lead. Measure from the head stay back to the center of the jib car. To start this measurement you should start out at 7’ 2” ( 215 cm). This is a very good all around position. You can experiment by moving the lead forward ½” (1.3 cm) in rougher water, which will make the lower part of the jib a little fuller and give you a little more power to help you get through the waves. As it gets windier try moving the lead back ½” (1.5 cm). This will make the lower part of the jib a little flatter and give you just a little more twist. This should help you de-power and make the boat more manageable.
Next you need to mark the athwartship position of your jib lead. Measure from the centerline of the boat out 14” (36.5 cm) to the center of your jib car and make a mark on the deck. Your jib car should stay at this location in all but the windiest conditions. And then only let it out 1” (2.5 cm). This will help open the slot.
SAIL TRIM ON THE WATER
Mainsail
The most important adjustment for the main is the main sheet itself. Small adjustments make very obvious changes in performance and balance of your boat. Trimming harder gives you a tighter leech with more power and helm, which translates into pointing higher. An eased main gives you a more twisted sail, which translates into less helm and the ability to go fast forward. The difference between being trimmed hard and eased might only be 1” to 2” (2.5 to 5 cm) of trim on the main sheet. If you have a single type main sheet marking it is a good idea so that you can reproduce your settings. If you use a double type main sheet you cannot mark the sheet so you will have to look at the main to judge your mainsheet trim. Typically the boom will be 7 – 8” (17.5 to 20.5 cm) off the deck at the transom in moderate conditions, closer in heavy conditions and further off the deck as it gets lighter.
The outhaul controls the depth in the bottom third of the sail. In very light air and flat water the outhaul should be pulled out near the band. As the water gets rougher and the wind picks up you can ease the outhaul in but no more than 1 ½” (3.8 cm) from the band. As you start to get over powered pull the outhaul back on until it is at the black band in 14 knots of wind.
In all but the windiest conditions the Cunningham should only be used to just pull the wrinkles out of the luff of the main. As you start to get overpowered you will have to pull harder on the Cunningham to help open the top of the main and de-power the boat. But it is very important to ease the Cunningham as soon as the conditions get lighter.
Your backstays are two more adjustments that help you get the most out of your sails. The lower backstay controls the bend in the lower part of the mast. In very light air and flat water there should be no tension on your lower backstays. As the wind increases and the water gets rougher you will need to pull on your lower backstay to give the boat enough power to sail through the waves. As the wind further increases and you start to get overpowered you can start to put some tension on your upper backstays. This bends the mast which helps flatten the sail and twists open the top part of the main. This also tensions the head stay which makes the jib a little flatter. All of these things help de-power the boat and make it more manageable in windier conditions. Again as with the Cunningham, it is very important to ease the upper backstay as soon as the conditions get lighter.
The mast bender should be in a neutral position in all conditions. Except in very light wind and flat water you can experiment by pulling some mast forward on.
Jib
Once you are on the water set your jib halyard so the jib tack is 1” (2.5 cm) off the deck. Remember the height of the jib halyard has a big effect on the lead position. If the jib is higher off the deck, it is like moving the lead forward and vice versa if it is lower. It may take some small adjustments to maintain the correct jib height in different conditions.
Your jib Cunningham should only be pulled hard enough just to pull out the wrinkles in all conditions.
Now you have your jib leads set and your halyard in the proper position. You will want to trim your jib to the 18” (45.7 cm) mark on the spreader. This works well in most conditions. Watch trimming inside of this mark. A general guide would be to always have the upper leech tell tale flowing. This is especially true in light and bumpy conditions.
ON THE WATER QUICK GUIDE
Helm and Speed
The goal in sailing upwind is to get the sails and mast working most efficiently for the conditions. When racing against other boats, you will have a very good measure of how your boat speed is, otherwise you will have to “feel” how your boat is going. The helm should be almost balanced with just a slight weather helm. If the boat is overpowered, you will have too much weather helm and will need to de-power the main. When the boat feels sluggish and underpowered, or if you do not have any punch through the waves, you need to power up the sails. As a general rule, lean towards de-powering because the Star is almost always overpowered.
Controls
Light (0-6)
Medium (6-12)
Heavy (12+)
Mast Rake *
95.5 cm
94.5 cm
97 cm
Upper Shroud Tension
21
23.5
26
Outhaul
¾” (2 cm)
½” (1.25 cm)
Maximum out
Cunningham
None
Snug
Increase tension to bleed power
Jib Cloth Tension
Enough to remove wrinkles at all times
Jib Car (Fore & Aft)
7’ ½” (217 cm)
7’ 2” (218.5 cm)
7’ 2 ½” (220 cm)
Jib Car Athwartship
14” (35.5 cm)
14” (35.5 cm)
14 1/2” to 15”(38-7.0 to 38.5 cm)
Upper Backstay
Slack
Snug
Hard
Lower Backstay
Slack
Tight for maximum power
Ease as necessary to bleed power
*Rake settings for newer boats. For older boats, settings are about 2 cm shorter.
SAIL CARE
Your North Sails are constructed out of the best materials on the market today. We make sure of this by testing every roll of cloth we use. Through proper care and maintenance your sails will give you the performance you have come to expect from a North Sail.
The most important factor for a long life for your sails is to watch them for signs of wear and tear in high load and chafe areas. Be sure to wash the sails off with fresh water and dry the sails thoroughly before storing. A dry, mild climate is best. Excessive heat can cause problems with the sails due to the possibility of shrinkage. It is best to roll the mainsail and jib.
Mainsail
When hoisting and lowering the sail try to minimize the amount of creasing or wrinkling of the sail. Every time the sail gains a crease the cloth breaks down that much faster. Always have someone contain the leech and luff during these procedures.
The battens can be left in the sail without any problems. Be sure to roll the sail down the leech so that the battens will not twist. This could cause the battens to warp.
Jib
When rolling the jib keep the battens perpendicular to the leech. Pay special attention to the batten pockets for wear and tear. Since this sail is manufactured from yarn tempered Dacron, problems can arise due to mishandling.
STAR BOAT CLINICS
This tuning guide only begins to cover all there is to know about racing the Star. The Star team at North One Design has prepared a professional, in depth Star boat racing clinic that you and your fleet will be interested in learning more about. In the course of an evening or weekend you will learn more about racing you Star than you could possibly learn in a season of racing on your own.
At North Sails we are constantly striving to make our products better. If you have any comments on this tuning guide and how it could be improved for your purposes we’d love to hear from you.
READ MORE
READ MORE

05 May
VIPER 640 TUNING GUIDE
MAST TUNING - CARBON MASTS
SET SPREADER DEFLECTION
Check spreader deflection measurement by placing a straightedge or string between the shroud tips at the spreaders. Measure from the side of the straightedge or string closest to the mast, to the back of the sail track. We prefer to have this between 290mm and 300mm. Ideally, set it at 295 mm (11 3/8”). If you have to choose between a deflection measurement slightly under 295 vs slightly over 295, we suggest choosing the larger deflection measurement. Ideally set the overall spreader length set to 683mm (26 ⅞”). This is measured from the mast to the tip of the spreader when the spreader is attached to the mast. You can slide the end fitting in or out on your spreader tip to achieve this measurement. Having to set your spreader length to 27” in order to achieve the proper deflection measurement is not uncommon, and therefore you shouldn’t be worried if you need to do this.
MEASURE YOUR HEADSTAY
From the lower side of the “T” fitting at the top of your headstay to the center of the pin at the bottom, this measurement is 7576 mm. We recommend taking this measurement with the headstay wire laying on the ground as straight as possible - detached from the mast.
MAST STEP POSITION
Check which hole in the step to place the aft pin by measuring from the front edge of the keel slot at the cockpit floor to the aft pin in the mast butt track. This measurement should be about 552mm (1’9 ¾” ). This often leaves 2 holes showing behind the mast on the mast butt track.
MAST PARTNERS
In order to best tune your Viper, it is necessary to restrict the forward mast movement in the partners. You can do this with the line and cleat that comes with the boat. We recommend using mast blocks in front of the mast in order to solidly control mast bend. Adding blocks provides greater headstay tension to keep the jib flat and twisted as the breeze increases. It also helps control the depth in the lower part of your mainsail. The aft block which fits against the front of the mast needs to be filed away to accommodate the angle from the rake and curve of the mast. This will help keep the blocks from climbing up. We recommend a “base” tune of ⅛” of fore-and-aft play (“wiggle”) in the blocks between the front of the mast and the front of the partners. If you are sailing in less than 6 knots, you may want to remove ¼” - ½” of blocks from “base” to induce pre-bend in the mast and slack in the headstay. Once the crew is fulling hiking, you will want to add ¼” of blocks to your “base” to keep the pre-bend and headstay targets. When you are fully de-powered and using heavy vang, you will want to add another ¼” of blocks (having +1/2” total). Your boat may require a different amount of blocking. See the tuning chart below. Use a line to hold the mast forward against the blocks and to keep the blocks from climbing up. This line is absolutely necessary to prevent the mast from inverting when sailing downwind in heavy air. Also remember that as you increase blocks, it may be important to increase the amount of vang tension you carry downwind to avoid mast inversion. The forward most crew has the best vantage point while sailing to look up at the mast and see how much bend is in the mast downwind. We suggest keeping the vang on snug enough to achieve about 1 inch of aft bend in the mast at a minimum while sailing in planing conditions downwind.
UPPER SHROUD TENSION
Put sufficient tension on the upper shrouds with the lowers completely slack to register 15-20 on the PT1 gauge. Sight up the track of the mast and get the track as straight as possible. Then, center the mast by hanging a decent amount of weight (like a tool kit, or a bucket full of water) on the spinnaker halyard and measuring to the shroud base on each side of the boat. The bucket should meet the rail at the same height on both sides of the boat when the mast is centered. Once the mast is centered, tighten the upper shrouds in equal turns on each side to a tension of 26. Once you have your mast straight and centered, insert enough mast blocks in front of the mast (leaving about ⅛” of play between the mast and the blocks). Your headstay tension should read about 15 on the PT1 gauge. Check pre bend by pulling the main halyard down to the goose neck against the back of the mast. Judge distance between the halyard and the back of the sail track at the max distance. This is usually just above the spreaders. You can use a pre-bend checker pulled up on the spinnaker halyard. Picture example shows how it works. The yellow line is the main halyard pulled straight to the gooseneck. For a base setting you would like to attain 2 ¼” of pre bend with headstay 15 and uppers 26 on the PT1 Loos gauge. This is a good base setting for 7 to 10 knots. How much and how soon you need to increase rig tension to de-power and control headstay sag is dependent largely on crew weight and to some degree on sailing style and wave conditions. The chart below represents a guide for roughly 575 lbs of crew weight and the spreader sweep as outlined above. The number of turns will likely vary from boat to boat:
Wind (TWS)
Inches of Blocks
Turns from Base Uppers
Turns from Base Lowers
Shroud Tension
Headstay Tension
0-4
- 1/4”
- 2
- 1.5
20
10
5-7
- 1/8”
- 1
- 1
23
12
7-10
BASE
(1/8” wiggle)
BASE
-
BASE
26
15
10-13
+ 1/8”
+ 2
+ 1
31
19
12-14
+ 1/4”
+ 4
+ 2
34.5
24
14-16
+ 1/4”
+ 6
+ 3
37
27
15-18
+ 1/2”
+ 8
+ 4
39
30.5
18-20
+ 1/2”
+ 10
+ 5
40
32.5
20+
+ 1/2”
+ 12
+ 6
41.5
33.5
LOWER SHROUDS TENSION
To find “base” for your lowers, put a mark on each lower shroud and each upper shroud that measures 4ft up from the deck on each shroud. Now pull the lower shroud towards the upper shroud just barely finger tight and measure the distance between the two marks. This measurement should be about 5 ½”. This technique gets you in the ballpark, but the tension on the lowers need to be adjusted precisely under load while sailing. For this reason we recommend putting turnbuckles on the lowers. In under 8 knots, your lowers should be set such that when you sight up the mast while sailing, you notice about ¼” of leeward “sag” at the spreaders. Once your crew is on the rail, you want to tension your lowers until the mast looks very straight with little to no leeward sag in the middle of the mast when sighting up from the bottom. As you go through the rig tune as the breeze comes up, adjust the lowers to maintain a straight mast. If you are over-powered and trying to execute a “bow down” mode in big breeze, you might tension the lowers enough to see about ¼” of mast “poke” (poking to windward) at the spreaders. Note: It is critical to not over tension the lower shrouds in heavy air. If the lower shrouds are too tight, it could contribute to inverting the mast while sailing downwind and causing breakage. The more tension you carry on the lowers, the more vang tension you should carry downwind.
SAIL TRIM
JIB LEAD POSITION
*** For a jib tack shackle height of 2 ¾” *** The standard shackle on a Viper is 2 inches. We suggest adding a ¾ inch twist shackle to the 2 inch shackle provided with the boat to achieve the optimum 2 ¾” jib tack height. Generally the jib lead should be set more forward in light air to allow the foot to have 6” of round in it. This will have 7 or 8 holes showing behind the jib lead. As soon as the breeze is strong enough to justify hiking, the lead should come aft as much as needed to flatten the foot nearly to a straight line when the leech is properly trimmed. This setting typically has 5 holes showing behind the jib lead.
JIB SHEET TENSION
Your North jib has a leech telltale ¾ of the way up he leech. This telltale can be observed by the jib trimmer from the leeward side in light air. In any hiking breeze it can be observed through the luff window in the main. This is to use in judging sheet tension. In most conditions trim the jib in until this telltale no longer streams aft, then ease it out until it just streams aft. Generally the middle batten in the jib will point straight aft when it is properly trimmed. The top jib batten is full length. In under 6 knots, use the soft batten provided. As soon as the breeze is over 6 knots it is important to change to the stiffer top batten. This helps keep the leech open as the wind increases. Once you are fully de- powered, go to the stiffest batten you have, and you might consider putting the light air batten AND the heavy air batten in at the same time!
WEATHER SHEETING
Many teams have found that weather sheeting can be quite effective sailing upwind in winds from 5-15 knots, or until your team is fully overpowered. A general base setting while weather sheeting puts the clew of the jib directly over the top of the inboard fiberglass combing that the jib track is recessed into. This is about 2 inches of clew movement to weather, and about 4 inches of weather jib sheet pulled through the cleat (because the jib sheets are a 2:1 purchase). The further aft you move the jib car, the more effective weather sheeting becomes.
JIB SHEET TENSION
Your North jib has a leech telltale ¾ of the way up the leech, and another one off the leech at the top batten. This telltale can be observed by the jib trimmer from the leeward side in light air. In any hiking breeze it can be observed through the luff window in the main, or leaning forward and looking in front of the mast from the rail. This is used to judge sheet tension. In most conditions, trim the jib in until this no longer streams aft, then ease it out until it just streams aft. Generally the middle batten in the jib will point straight aft when it is properly trimmed.
TOP JIB BATTEN
The top jib batten is full length. In under 6 knots, use the soft batten provided. As soon as the breeze is over 6 knots it is important to change to the stiffer, standard top batten. This helps keep the leech open as the wind increases. Once you are fully de-powered, go to the stiffest batten you have, and you might consider putting the light air batten AND the heavy air batten in at the same time!
MAINSAIL OUTHAUL
Easing the outhaul in light air powers up the main. Judge the outhaul tension at the mid-point of the boom. Look at the distance between the side of the boom and the foot of the sail. In rough water light air conditions easing the outhaul to open the foot as much as 3-5” can be fast. In smoother water generally keep it tighter. As soon as there is enough wind to hike, tighten so the sail lays against the side of the boom.
MAINSHEET TENSION
In light and moderate conditions when heeling can be controlled with hiking, the aft end of the upper battens (on either side of the Viper insignia) should be parallel to the boom. This may require quite a lot of sheet tension. In stronger breeze, applying vang tension and a couple of inches of sheet ease will allow you to keep the jib pressed, and the bow down with the boat moving forward. The goal here is to find the angle of heel that allows the boat to sail with as little helm as possible. Use vang adjustments, mainsheet adjustments, and feathering to keep that angle of heel as consistent as possible. Remember that the mainsheet is the biggest controller of your head stay tension. If you need to ease your main sheet to keep the boat flat, be sure you have adequate mast blocks and lower shroud tension. If the head stay still looks too “saggy,” ease the jib sheet an inch or two to de-power the jib and straighten the head stay.
GNAV (Reckik in Britain, or Vang)
Under 10 knots make sure the gnav isn’t applying any downward pressure on the boom. This applies for both upwind and downwind. As the wind becomes stronger, apply progressively more tension to keep the boom down as the mainsheet is eased in the puffs. Not only does the Gnav help keep leech tension when easing the main, it bends the middle and bottom of the mast which flattens the main and de-powers it. It is only necessary to pull max vang tension on if it is choppy enough that you need to use the “bow down” mode to power through the chop. It is essential to have the appropriate amount of blocks in front of the mast to ensure the headstay stays tight.
GNAV & CUNNINGHAM RELATIONSHIP
As you will notice, when you progressively apply more vang tension, the mast will bend progressively more, therefore the luff of the mainsail will develop progressively more wrinkles. As you pull on the vang to depower, ideally you will pull the cunningham on as well to help smooth out the luff of the sail. If you ease the vang (i.e. you sail into a lull), make sure to ease the cunningham too. The two controls (vang and cunningham) should be adjusted together appropriately.
READ MORE
READ MORE

05 May
C SCOW TUNING GUIDE
REVIEW YOUR EQUIPMENT
Take the time to check all your pins and stays for wear. Clean your mast and spreaders with soap and water or acetone. Also, please check your wire halyard for any frayed wires and or cracked swages. Clean and lubricate your turnbuckles. Tape your turnbuckles so that they stay in the selected position you choose.
SETTING UP YOUR MAST – MEASURING YOUR MAST RAKE:
Please install your sidestay turnbuckles in the forward hole of your chainplates. Tighten the bolts with 7/16th wrenches. Have the bottom of the spar held down on the mast step ball while you walk the spar up. Hook up your forestay.
Once you mast is up and in place take a 50ft. steel tape measure and attach it to the shackle on the wire main halyard. Pull your rope halyard so that the tape goes all the way to the top of the spar.
Be sure you latch the halyard ball into the halyard latch at the top of the spar just like when you hoist and lock your sail in place. Pull down on the halyard to make sure the ball is locked in place.
MAST RAKE MEASUREMENT
For Melges Boats Up to 2012: When measuring, measure the tape to the center of the boat where the deck and stern meet. The starting point for your set up should be 31’10.5”. After you get to this measurement you are ready to adjust your sidestays.
For Melges Boats 2013 and Newer: Follow the same mast rake measurement procedure as noted above. On the 2013 and newer Melges Boats the forestay is fixed at the bow. There is not any internal adjustment. This will change the starting point for your mast rake measurement.
Mast Rake 0-10 mph – 31’ 9.5”
Mast Rake 11-25 mph – 31’ 9”
SIDESTAY TENSION
With your mast rake at the forward measurement your sidestays need to be taught. If you tighten the sidestays as tight as you can without a tool, by hand, your tension will be correct. Do not over-tighten.
JACKSTAY SETTINGS
Measure your jackstays either on your trailer or on your boa lift. With tow fingers, lightly move up the stays until the stay touches the mast. Have your mast marked with the below dimensions for reference.
If you need to measure and adjust your jackstays on the water makes sure you put the boat head to wind, release your mainsheet tension and the measure your jackstays with the above method. Ideally you have reference numbers from your Sta-Master turnbuckle so you can quickly adjust.
We keep the settings for our jackstays very simple. If you set your jackstays to the following you will be fast and you will achieve maximum pointing with your North Sail. Please keep in mind that when you sail with 3 people your desired combined crew weight is below 475lbs. Whether you are using the I-1 Gold or the Harecut – the tension does not vary.
Two People Racing Jackstays: 36”
Three People Racing Jackstays: 28”
To measure your Jackstays, take a tape measure from the deck of the boat next to the mast, and measure up the mast. It is best to start at 28” and put a mark on your mast every 2” until you get to 36” . This will allow for a quick reference on where your Jackstays are when you are on the water.
Measure your jackstays either on your trailer or lift.
I-1 GOLD Mainsail Set Up
The I-1 Gold Mainsail will excel in all conditions however it is ultra quick in the 0-15 mph. This sail also excels in lumpy, choppy conditions as there is not a more powerful sail in the C boat class. The I-1 Gold Mainsail has won race after race and championship after championship. This sail is fast and easy to tune. Here are some helpful hints.
Please run through the following checklist so that your boat is in tune for your new I-1 Gold Mainsail.
0-10 KNOTS
MAST RAKE:
31’11. This is your maximum forward mast rake measurement. Used only in the light air. The spar can be pulled this far forward for downwind sailing too.
New boats 2013 or newer you would go to 31’9.5” as your forward mast rake.
BOARD HEIGHT
The head of your board should be just 2” above the board box slot.
CUNNINGHAM
No tension. Leave the horizontal wrinkles in the luff of the mainsail – this gives you maximum fullness.
OUTHAUL
Be sure to have the foot of the sail tight. Remove all wrinkles and pull hard enough to begin to develop a “shelf” in the foot of the sail.
VANG
No tension upwind or downwind. A small amount of tension may be applied if bouncing through powerboat chop. Be quick to ease though once back in smooth water.
TRAVELER
4” down from the centerline is where you should have your traveler car in this condition. Keep a soft sheet so that you promote twist in the sail.
DOWNWIND SET UP
Tension your leech cord and ease your outhaul 2”. Your leeward board should be down ¼ of the way. The helmsman needs to sit on the leeward side as far forward as possible. The crew needs to stand and hold the boom out. Have your crew look back to help with downwind boat position (clear air) and have him watch for wind.
11-15 KNOTS
MAST RAKE
This needs to go back to 31’10” but no further.
On new boats 2013 or newer your mast rake would move to 31’9”.
BOARD HEIGHT
As the breeze builds to 12 mph (nearing
White Caps) you need to slide your board up so that the head is 3-4” above deck. This will allow the boat to steer easier as the helm increases in the building breeze.
As the breeze builds you will be looking to de-power your boat. Remember, you never want the boat to heel so much that your leeward rail or gunnel gets wet. If the boat begins to over heel you need to follow this sequence.
OUTHAUL
Pull your outhaul control hard enough to make a firm shelf in your sail along the foot. This is important in relation to your pointing and upwind performance.
DEPOWERING SEQUENCE
Traveler – drop the traveler down as the breeze builds. All the way if necessary.
Cunningham – pull this hard so that the horizontal wrinkles are removed from the luff of your sail.
Vang – apply this in order to bend the boom and lower portion of the spar. This will flatten the sail and open the leech of your sail. Anytime you are in need of easing your sail in the breeze you need to have a fair amount of tension on your vang. When racing in heavy air, do not be afraid to pull the vang on very tight as it allows the boat to get into an extra gear.
In order to power the boat back up you can follow the sequence in reverse. Be quick to power your boat back up through the lulls. Anticipate the changing wind velocity so that the boat stays on an even heel all the time.
DOWNWIND TECHNIQUE
With the building breeze you and your crew will want to reverse heel the boat – sitting on the high side and leaning out to weather. You have to pull on the straps in order to get the boat to heel. If you want to go fast you have to do this. You and your crew should sit in your normal upwind positions. There is no need to slide your weight back. Your windward board should be down ¼ of the way and your leech cord will be tensioned again. Ease your outhaul 3”.
Harecut Mainsail Set Up
This sail is FAST. The Harecut mainsail will perform best in the breeze. The sail is designed for lighter crew weights and for boats that want to go ultra fast upwind and downwind in these conditions. The Harecut is the sail to have as the breeze builds!
12-25 KNOTS
MAST RAKE
31’10” is your max aft rake unless it gets above 25 then you can drop back to 31’9”. With the promotion of mast bend for top speeds you do not want to go back any further than the above number.
2013 or newer boats you would want to put your mast rake at 31’9”.
BOARD HEIGHT
The head of your board should move up to 4-6” above the board slot. This is critical to the overall speed of your boat upwind.
OUTHAUL
Pull this control to the maximum out position on your boom which is the inside position of the black band on outboard end of your boom.
DEPOWERING TECHNIQUE
The same process applies to the Harecut Mainsail in these conditions. You must pull much harder however as the breeze builds. The Cunningham must be pulled very hard. The vang needs to be pulled to its max. and the traveler needs to be all the way out.
The most critical control in this condition is your mainsail trim. As the boat overheels you have to throw your sheet out 6-20” so that the boat remains “on its feet” (meaning not overheeled). For maximum speed you cannot cleat your mainsail in these conditions. You must be prepared to trim and ease according to the wind.
DOWNWIND TECHNIQUE
Ease your outhaul 3” and tension your leech cord. If you are sailing with 3 people in the breeze all of you must be leaning out in order to get the boat to heel to weather. This is one way to prevent nose diving in the larger waves. The other way is for your helmsman to steer around the waves.
The board should be down ¼ of the way still. As the breeze increases have your crew increase vang tension. This will allow the boat to be more stable downwind in the increased velocity.
Rev. R04
READ MORE
READ MORE

05 May
SNIPE TUNING GUIDE
Dear Snipe sailor:
Thank you for choosing North Sails for your Snipe. As Snipe sailors ourselves we truly share your enthusiasm for this great boat and the worldwide camaraderie that Snipe sailors share. We wish you many happy seasons of racing your boat and hope that whenever you have any questions about making your boat go fast that you will give us a call. We are always pushing to make our sails faster, longer lasting and easier to use and we always welcome your comments.
In this tuning guide we have tried to introduce a healthy dose of “why” we do certain things and what we are looking to accomplish with certain settings.You will find that the settings on your particular boat will vary a bit from the numbers given here. The important thing is to keep an open mind and a sensitive touch on the tiller. With a bit of practice and by following the principles outlined on the next few pages you should find yourself going faster and getting the best performance out of your boat.
Good Luck and Good Snipe Sailing!!
Equipment
Sailing is a very equipment intensive sport. To achieve the best possible results we must optimize our equipment to extent that the Snipe class rules allow. This involves taking a top to bottom look at all our equipment and taking a “no compromise” approach.
THE HULLMake sure that your hull is minimum weight (381 lbs.) and that it is as smooth as possible. Fill and fair all imperfections in the hull. Pay special attention to the area around the bailer.
Most top sailors sharpen the last 4-5’ of the chines and the intersection of the transom and hull in the back of the boat. This allows the water to clear away from the hull more smoothly and promotes planing quicker when the breeze is up.
THE MASTThe mast and its tuning are probably the single most important thing, to good consistent boat speed in a Snipe. Presently there are four “popular” masts in use,Sidewinder Gold, Sidewinder, Proctor and Persson. The Sidewinder Gold is the stiffest followed by the Sidewinder, Proctor and Persson.
It is important to know that no two masts are exactly the same and each boat will need a little bit of fine tuning to get it set up right. It is preferable to have adjustable spreaders (both length and angle) as you will generally want to make some adjustments as you get your boat up to speed.
On many masts especially the stiffer models, you may want to file down the forward part of the mast butt. This will help to induce pre-bend in the mast especially for light air.
CENTERBOARDThe class rules allow you to taper the edge of the boat to within 1” off the edge of the board. You should make sure your board is tapered on the front, bottomand aft edges. We suggest a “bullet” type shape for the leading edge and more of a “V” shape for the after edge of the board.
Be sure to rinse your board after sailing in saltwater and dry it completely. This will save it from becoming pitted with corrosion. You want to always wet sand the centerboard before sailing unless it is anodized.
You may want to consider cutting out some of the board in the top of the board where it stays inside the boat when down all the way. This makes the board lighter and less work for the crew to lift. Overweight boats can shave off a few pounds here by cutting away some of the top of the board. Check the SCIRA rulebook for limitations on how much board can be cut out.
LAYOUT OF CONTROLSThe layout of control lines is wide open on the Snipe. We suggest running most of the controls to the crew with the exception being the traveler. This allows the skipper to concentrate on driving especially at crowded mark roundings.
THE CREWCompetitive crew weights range from 275 lbs. to 325lbs. Generally you can sail lighter in flat water than in rough water. Heavier crews will want to set their boats up for more power (see below) where lighter crews can set up with somewhat flatter sails.
Basic Rig Set Up
With the mast down, we want to adjust our spreader length and angle. These two things determine how much the mast will bend and how much power will be in the sails, and how easy the boat will be to power up in light air and depower in heavy air. Before stepping the mast check the following items:
SPREADER LENGTHThis dimension, measured from the side of the mast to where the shroud intersects the spreader. For most boats this length is 16 ¾” (42.5 cm). The length of the spreader affects the side-to-side bend of the mast primarily. After stepping the mast and going sailing you will want to sight up the front side of the mast and make sureit is straight side to side from the deck to the hounds. This is very important: if the mast is bending to leeward in the middle, shorten the spreaders until it is straight. If the mast bows to windward in the middle make the spreaders longer until the mast is straight.
SPREADER ANGLEThe angle of the spreaders (tip to tip measurement) affects how much the maximum mast bend will be. Heavier crews will want a larger tip-to-tip measurement (stiffer mast) and lighter crews will want a smaller measurement (softer mast). The starting point for the adjustment on this setting is 29 1/4” (74 cm) measured from shroud to shroud with the spreaders pulled all the way back. In heavy air or with a heavier crew we move the spreaders forward so this measurement is 29 3/4” (76 cm). Check to make sure that the sweep aft on each spreader is the same so that the mast bends consistently from side to side.
FORESTAYCheck your forestay so that it is maximum allowable length (mast not touching back of partners). You will want to attacheda piece of lightweight shockcord 15” up the forestay and tie it to the bow or stem fitting to keep the forestay snug when the jib is up. This will keep the whisker pole from catching during jibes downwind.
MAST BUTT ANGLECheck the bottom of the mast and make sure it is cut off perfectly square. Any deviance from this can cause the mast to not develop pre-bend or develop too much. If you later find the mast does not develop enough pre-bend, file the front of the mast step casting to allow the mast to rock forward and bend more.
SHROUD ATTACHMENT LOCATIONSFor most boats position the shrouds at the maximum forward location of 70” aft of the stem. This will help the main go out further downwind and increase projected sail area. If you are having trouble developing enough power, move the shrouds back slightly which will make the mast somewhat stiffer. See figure 1.
JIB TACK LOCATIONPosition the jib tack at its maximum forward position 11” back from stem. This helps make the sail plan longer and opens up the slot between the main and jib. See figure 2.
To start attach a 25’ tape measure to your main halyard and pull all the way to the top and lock the halyard in position.
Download the PDF for a chart of the three different settings we use. All measure to the top of the transom. This is based on the Persson deck crown.
Note that it is very important to use a Holt Allen staggered hole style shroud adjuster or Sta-Masters to have fine enough increments on your shroud tensions.
Mast Rake Settings
Now sight up the backside of the mast and make sure the mast is perfectly straight side to side. If it is not you will need to remove shims from one side and add to the other to make the mast straight. The mast should be shimmed snugly side to side at the deck (yet still able to move freely fore and aft).
As a last step, we want to mark the “neutral” position of the mast. With the pusher/puller off and the mast taking its natural position make a mark on the side of the mast at the deck and a corresponding mark on the deck of the boat. Mark both sides of the mast so you can see it on both tacks. Now make marks on the deck 3/8”, 3/4” and 1” in front of neutral. If you feel you have an extra bendy mast (Sidewinder Jr.) make the aft mark 3/8” behind the neutral position.
Now you are set up to go sailing in moderate breeze. The first thing to do when you go sailing is to check the mast bend side to side. Sight up the front of the mast on both tacks and make sure the mast is straight from the deck to the hounds. If it sags to leeward shorten thespreaders. If it pops to windward lengthen them. This is critical to good boat speed.
Main Trim
With the boat hiked flat you want to have an absolutely neutral helm in the boat. You should just need finger tip pressure to hold the tiller. If the boat has lee helm rake the mast back. If it has weather helm rake the mast further forward.
Your North Snipe Main comes set up for a tack line to hold it in place at the mast. Using a low stretch small diameter line tie the tack of the sail so the edge of the sail is about 3/8” aft of the backside of the mast. Do not tie the tack right to the mast as this will keep the tack from rotating downwind and make the sail full in the bottom.
MAINSHEETThe mainsheet is the throttle on a Snipe and must be adjusted regularly to keep the boat going at top speed. The idea is to keep the top batten on the main parallel to the boom at all time and in under 7 knots of wind have the top telltale flying 70% of the time. If the telltale flies constantly the main is too loose. If it stalls all the time it is too tight. Trimming the main is a constant exercise in easing and trimming as the wind increases and eases.
In above 7-10 knots of wind the top telltale will fly all the time and the top batten should be trimmed parallel to the boom.
CUNNINGHAMThe main cunningham controls the fore and aft position of the draft in the sail. Keep it loose until you begin to be overpowered and then tighten it to open the leech of the main by moving the draft forward in the sail.
OUTHAULIn all but the very lightest conditions the outhaul should be tight when sailing upwind. Downwind let it off about 2-3” to make the bottom of the main more powerful and to open up the shelf foot in the bottom of the sail.
BOOM VANGThe boom vang is used to hold the boom down when the mainsheet is eased and to bend the mast and depower the main in a breeze. We leave the vang completely slack until we are hiking hard. Then we take the slack out of it so that when a puff hits we can ease the boom slightly without losing leech tension. As the breeze picks up more we will pull the mast back to the aft mark at the deck and trim the vang harder. This bends the mast and flattens the main and lets us play the mainsheet in the puffs without losing main leech or jib luff tension.
Downwind, you want to use the vang to keep the top batten parallel to the boom. Ease the vang substantially before reaching the weather mark to make sure you don’t break your mast in a breeze. In some conditions, mostly light air and flat water, the vang can be quite loose with the top batten outside of parallel, which allows you to sail a bit by the lee. In heavy air this makes the boat unstable and can result in the dreaded “death roll”.
TRAVELERIn most conditions, even heavy air, the trend lately is to keep the traveler in the middle of the boat. Make sure your mainsheet bridle is set up so the “y” of it goes slightly inside the boom. This will keep the boom centered in light air without putting too much tension on the leech of the main.
As the breeze builds and the boat gets overpowered you may find it helpful to drop traveler until the helm of the boat is neutral and the boat is flat.
Others will find vang sheeting preferable. With vang sheeting you tighten the vang to keep the boon down and the tension on the leech when the mainsheet is eased. Make sure to have the mast back at the aft mark when vang sheeting to keep the jib’s luff tight.
PUSHER/PULLER
The mast pusher/puller controls the bend in the lower part of the mast and has big effect on rig tension. In light air (crew inside the boat) we push the mast forward to the forward deck mark. This bends the mast and opens the leech of the main. It also sags the jib luff giving you more power for light air.
As soon as the crew and skipper are sitting on the windward side of the boat we move the mast back to the neutral mark to power up the sails. As the breeze builds, we will pull the mast back more at the deck to counteract the forces of the vang.
A note on soft vs. stiff masts: As the breeze really builds (15+ knots) softer mast owners will want to keep the mast back at the aft mark. This is because the forces of the vang cause the softer masts to really bend down low and the mast must be held back at the deck to keep the softer masts from over bending.
Stiffer mast owners will want to let the mast go back forward to the neutral mark when the breeze builds. The stiffer masts do not bend as much down low and need to be let back forward as the breeze builds to help depower the main.
Jib Trim
SHEETTo help judge the trim of the jib your North Snipe jib has a leech telltale sewn on it 1/3 of the way down the leech. The sail also comes with a trim stripe on the clew. To start set the jib lead so that the sheet is lined up with the trim lime on the clew of the jib. From there you will want to fine-tune the lead so that the telltales on the luff of the jib break evenly (watch through spreader window). Move the lead forward if the top luffs first. Move the lead back if the bottom luffs first.
After getting the lead position correct, we want to trim the jib in so that the telltale on the leech is just on the verge of stalling. You will need to adjust the tension on the jib sheet constantly as the wind builds and eases to keep the telltale just on the edge of stalling.
You may also want to make a mark on each side of the splash rail 15” out from the centerline of the boat. The foot of the jib will fall in this vicinity upwind and this mark can be used as a reference point for jib trim.
JIB CLOTHThe jib cloth tension should be tightened just enough so that there are always very slight wrinkles in the luff of the sail. In very heavy wind you will want to add tension and make the luff of the jib smooth to open the leech of the sail.
JIB HALYARDBe sure your jib halyard has at least 10-12” of throw in it. You will also want to make sure that the halyard is clearly marked at the up position so you can easily get the halyard set in the correct position at mark roundings.
Dead downwind let the halyard all the way off to project the jib as far to windward as possible. When reaching with the pole up you will find it fast to tighten the jib halyard 1/3 to 1/2 the way to tighten the luff of the sail and make the sail more powerful and easier to steer to.
Contact Us
Thank you for purchasing North Sails. This tuning guide was compiled with the help many National, North American and World Champion’s assistance and represents the latest thinking on sailing a Snipe fast.
Please give any member of the North Snipe team a call if you have any questions. We look forward to helping you get the most from your boat. Good luck!
READ MORE
READ MORE

05 May
VX ONE TUNING GUIDE
This guide for the VX One has been developed through extensive testing, tuning, and practical racing experience by some of the top sailors in the country. New changes in the class and developments in sailcloth and sail design technology continue to bring about improvements in the VX One’s performance, and North Sails is an important part of these innovations.
While we can’t guarantee you immediate victory on the race course by following this guide, we can assure you that you’ll be taking a big step in the right direction!
BOAT SETUP
Step Position
The mast butt should be in the pin the 3rd hole from the aft end. Make sure you are in compliance with class rule: C.9.3
Mast Centering
To aid in centering the mast laterally in the boat, place a pencil mark just in front of the shrouds on one side of the shear line. Measure from that mark to the front of the boat and make a mark the same distance from the bow on the opposite side of the boat. Then hoist a tape measure on the jib halyard and measure to these pencil marks. Adjust the upper shroud lengths correspondingly on each side of the boat until the mast is centered. Be sure to adjust the intermediate shrouds as well, maintaining a straight mast (sighted up the back of the mast).
Base Mast Tune Setup
To set the base rig tune, use a PT-1 Loos Tension Gauge to check tensions on the cap shrouds and intermediates. First adjust the uppers to 28 on the tension gauge. (The check stay should be slack throughout the cap and intermediate shroud setup process.) Then set the intermediate shrouds to 11. (Be sure to go back and double check the uppers and then the intermediates in the process because they will both change when you tension or de-tension one of them.) Finally, once the uppers and intermediates are set, tension the check stays with the tension gauge on the intermediate shroud. You are looking to tension the check stays until they start to affect the tension gauge reading on the intermediate shroud. If you measure the check stays with the tension gauge once they are set, they should register about a 6.
Check that you have developed the proper pre-bend in the mast (positive bend) by pulling the main halyard taut to the gooseneck. The distance between the back of the mast and the main halyard at the spreaders should be close to 2.25”.
Adjusting the Rig
For lighter winds, you need to loosen your rig tension to allow for more headstay sag, which will create a more powerful jib. The lightest wind settings should be 2 steps down on the tuning chart at the end of this tuning guide. This chart generally follows a 2:1 ratio of turns for the caps: intermediates.
In heavier winds (above 19 knots), much more tension is needed to maintain proper forestay sag and mast bend. In the 19-20 knot breeze range, the upper shrouds should be tensioned to 3-4 steps up on the chart. Note that the 2:1 ratio shifts here to a 1:1 ratio.
ON THE WATER
Tuning References
The visual method given here is our suggested way to set your shroud tension for all crew weights and in all wave and breeze conditions. We feel that it is not only a relatively simple technique to use, but also the most accurate way to achieve proper and consistent rig setup in the VX One.
Set your rig tension so that the leeward upper shroud just starts to appear slack – not sloppy, but just not taut. Start out close to the upper shroud tension suggested in the chart below for your best guess of the present wind velocity. When sailing upwind under proper sail trim, watch the leeward upper shroud, and if it has a great deal of “wiggle” (more than a ½” back and forth), tighten both sides equally until the leeward upper is again just starting to go slack. If the breeze lightens, or you start out too tight (no wiggle at all), back off both uppers equally until a slight wiggle just appears.
The intermediate shroud tension is checked by trimming the main and jib to the proper position upwind and looking up at the main. Sheet the main about a 3-5 clicks of the mainsheet block tighter than what your normal sailing position should be. If the intermediate shrouds and the check stays are correct, you should see overbend wrinkles in the main that start just below the spreaders and go towards the clew. If the wrinkles start above the spreaders, your intermediates are too loose. If they start well below the spreaders, your intermediates are too tight. The wrinkles should extend from the luff of the sail just above the check stays about 50% of the way back towards the clew. If they extend farther than that, your check stays and intermediates are too loose. If they extend only 30-40% of the way back, your check stays and intermediates are too tight. In full cunningham conditions, it may be hard to see the overbend wrinkles, so try letting the cunningham off a little to get an idea of where the wrinkles are.
MAIN TRIM
Mainsheet
Trim the mainsheet hard enough to make the top batten parallel to the boom. You can check this by sighting from underneath the boom on a lateral plane. Once you’ve accelerated and you want to point higher, trim harder to cock the top batten slightly to windward. We generally recommend sailing with the top leech telltale stalling 75% of the time. In flat water, you can trim harder, but in light air and choppy water, you’ll need to ease the mainsheet ( there should be no vang) to twist off the top of the main so that the top batten is eased open about 5-7 degrees from parallel. In heavy air, the mainsheet is the gas pedal. It isn’t important to keep it in tight and stall the telltale; it is more important to use it to control the boat’s heel angle. If you are heeling more than 5 degrees, ease the main, flatten the boat, and then trim back in. At times, you might find that the main is over the leeward corner of the boat. That’s OK if the boat is flat.
Downwind, you are looking to once again be using the main to keep the heel of the boat correct. In light air, you want to have the main eased enough so that with any more ease it would be luffing because of the spinnaker. When in doubt, tighter is better than looser, and you should always feel pressure in the mainsheet.
Outhaul
You can use the outhaul for power in the bottom of the mainsail because outhaul tension primarily adjusts the shape in the main’s intermediate third. A looser outhaul increases lower leech “hook” and adds fullness. This can aid pointing ability as well as increasing power. A tighter outhaul flattens the lower sections of the main, which helps to minimize windward helm and reduce drag. Remember that in flat water and light winds a flatter sail is fast, whereas in chop, a slightly fuller sail is needed to give the necessary punch.
A good guide for tensioning the outhaul is the distance between the side of the boom and the middle of the foot of the main. In heavy winds, the outhaul should be tensioned tightly so that there are about 1-2 finger widths between the boom and the middle of the foot of the main. In choppy conditions or when power is needed, ease the outhaul so that there is about a 3-finger gap. Never have the outhaul any looser except while sailing downwind, at which time it can be eased so that there is about a 4-4.5 finger gap.
Cunningham
The main cunningham is used to position the draft of the sail. Aim to keep the maximum draft point close to 40-50% back in the sail (sighting from luff to leech). In up to 10 knots of breeze, you need very little cunningham. In 11-12 knots, use just enough cunningham to remove many of the wrinkles in the main. And as winds rise above 12 knots, progressively tighten the cunningham to remove all the sail’s wrinkles (a smooth luff) and maintain proper draft position in the top of the sail.
Downwind, the cunningham should be off completely.
Vang
The boom vang is a critical control in heavy air because it helps to hold the boom down and maintain leech tension when the main needs to be eased. This helps the boat point upwind. In light air, the vang should be just snug until the boat is consistently heeling more than 5-7 degrees. As soon as you start having to ease the main, the vang should be pulled tighter and tighter the farther out the boom is off centerline. Max vang occurs when you can’t pull it any farther and the boat is heeling more than 5-7 degrees with the boom over the boat’s leeward corner.
Downwind, the vang should be eased so that the top of the sail is twisted and the leech telltales are flying 100% of the time. The windier it is, the more vang you should be easing downwind.
JIB TRIM
Jib Sheet
Proper jib trim upwind has one of the greatest effects on speed and pointing. Usually, the biggest mistake most VX One sailors make is over trimming the jib sheet. This sheet is normally trimmed so that the middle batten is straight aft parallel to the boat’s centerline. In light wind and/or sloppy conditions, ease the jib sheet so that the middle batten is angled outboard 5-7 degrees. Also, in breezy conditions, ease the sheet for more twist in the leech. Generally speaking, the jib leech telltale should be flying but just about to start stalling. In the bigger breeze, however, this telltale will be less likely to stall because the jib is eased. Note that trimming the jib harder for short periods of time (where the middle batten is slightly hooked to windward of parallel to the centerline) is only effective in “ideal” boat-speed conditions (medium winds and flat water) because it narrows your steering “groove.” In heavier air, if the main is luffing in order to keep the boat flat, the cause generally isn’t from the wind coming across the boat, it is from the wind coming off the jib. If the solution of dropping the jib car to leeward in the puff isn’t effective at stopping the main from luffing because the car is consistently more than 75% of the way down the track, the jib sheet might have to be eased slightly to twist the top of the jib open. Once the main is trimmed back in, the jib sheet can be trimmed in as well.
Downwind, the jib should be furled in only the lightest of breeze. As soon as you are moving well, the jib can be out with the sheet eased. A good rule of thumb is to trim the jib sheet so that the middle telltales on the luff of the jib are trimmed correctly. This means that the bottom ones might be too tight, and the top might be luffing, but the trim is optimal.
Halyard
The jib halyard tension is key in the VX One and should be played constantly, especially in puffy conditions. For light and medium breeze conditions, the jib halyard should be set so that slight wrinkles emanate from the luff, extending back no farther than the first radial panel in the sail. As the breeze increases, these wrinkles will become less and less visible as the halyard tension is increased, and they should disappear at about the same time you are halfway into the vang. As the wind continues to increase, use more and more jib halyard tension. To get maximum tension for survival conditions, turn the boat downwind, and the middle crew should then pull the jib halyard as hard as possible.
Clewboard
The starting jib clew position (called the “standard position”) should be the 4th hole from the bottom of the clewboard. In lighter air, you might use the 5th hole from the bottom, and in heavier wind, you might use the 3rd hole. The clewboard position is not the main driver of jib shape as much as the sheet tension is.
Car
The jib car should be high enough on the track that in normal sailing conditions, with the jib trimmed correctly, you just start to see a little bit of backwind on the luff of the main. This is about 5-7 degrees from centerline for light-air conditions. In heavier wind conditions, you should move the car down 2-3 degrees more to stop the backwind, but you should also rely on easing the jib sheet. Sailing with the jib car all the way down for prolonged periods of time to stop backwind in the front of the main is not fast, but it can be dropped to leeward for 1-2 seconds to stop the main from luffing and recover from major puffs.
SPINNAKER TRIM
The general rule of spinnaker sheet trim is to allow 3-4” of curl in the luff of the spinnaker. In light air, the sheet should be being played constantly. In heavier air, you will find that the sheet is more constant, and the curl is dictated by the driver turning the boat up and down to make the heel angle correct.
The most important trimming technique in light air is to concentrate on good communication between the helmsman and the spinnaker trimmer. The goal is to sail as low as possible while still maintaining good pressure on the kite and good boat speed. When the puff hits and the boat accelerates, use that speed to head further downwind. Once the puff subsides, you will have to turn back up to power the boat back up. An easy way to monitor this is to assess the tension on the sheet. It’s important not to sail too high, which translates into longer distances, but also don’t sail too low, or you’ll sacrifice boat speed. It is important to remember that the fastest way to sail downwind in a VX One is with a constant apparent wind angle. This means that when the boat is going faster, the true wind can be further behind the boat, and when the boat is going slower, the true wind must be further forward on the boat.
GENERAL BOAT TRIM
Upwind
The fastest way to sail the VX One upwind is with 5-7 degrees of leeward heel and with the windward jib luff telltale at 45 degrees up while the leeward luff one is streaming straight back. In light air, you might have both telltales streaming, while in heavy air, you might have the windward one lifting straight up, but no more than that. Keeping the boat moving fast is critical because that makes the foils work more efficiently and translates into height. The harder you hike, the faster you go, but at some point you just can’t hike any harder. That’s the time when you will have to start easing the sails to keep the boat flat. Once again, the temptation may be to pinch to keep the boat flat, but that’s simply not fast! Even at the same point as the boats around you, you can still be slower than they are. Match their speed before you match their angle. With increased boat speed will come more lift from the foils and therefore more point.
Downwind
Downwind, you should sail the boat with 5-10 degrees of heel. Be very conscious of crew weight placement fore and aft. In light air, you should try to sit far enough forward that there is smooth water coming out from behind the boat, not gurgling water. In heavy air, you should sit farther back once you’re on a plane to keep the bow out of the water. You are looking for the bow to be consistently 4-6” out of the water in heavy breeze.
The VX One is a blast to sail. So as always, don’t forget to have a blast out on the water!
WIND SPEEDKnots
CAP SHROUDS(# of turns from base)
INTERMEDIATE SHROUDS(# of turns from base)
CHECK STAYS(# of turns from base)
0-8
-2
-1
-0.5
8-10 (BASE)
BASE (28 on PT-1)
BASE (18 on PT-1)
BASE (11 on PT-1)
10-12
2
1
0.5
12-14
4
2
1
14-16
6
3
1.5
16-18
8
4
2
18-20
10
5
2.5
20-22
12
6
3
22+
14
7
3.5
Note: This tuning is for the boats with Southern Spars masts. For the boats with CST masts, the base tune for the cap shrouds is 30 on the PT-1. Everything else remains the same.
CREW WEIGHT: 430 lbs
ANGLE CAR POSITION
SHEETING ANGLEKnots
DISTANCE FRM CENTERLINE(# of turns from base)
5 degrees
193
SWEET SPOT
260
7.5 degrees
290
10 degrees
386
READ MORE
READ MORE