NORTH SAILS BLOG
Alle
Events
Guides
News
People
Podcast
Sustainability
Tech & Innovation
Travel & Adventure
guides
OFF-SEASON AND WINTER SAIL CARE GUIDE
North Sails Service Expert, Ben Fletcher shares his top tips on how to protect and care for your sails in the off-season.
READ MORE
READ MORE

guides
FOUR KEY COMPONENTS TO OFF-SEASON SAIL CARE
The off-season is the ideal time to give your sails the TLC they deserve. Keeping your sails on an annual maintenance schedule will aid in extending the lifespan of your sails and maintaining peak performance.
READ MORE
READ MORE
guides
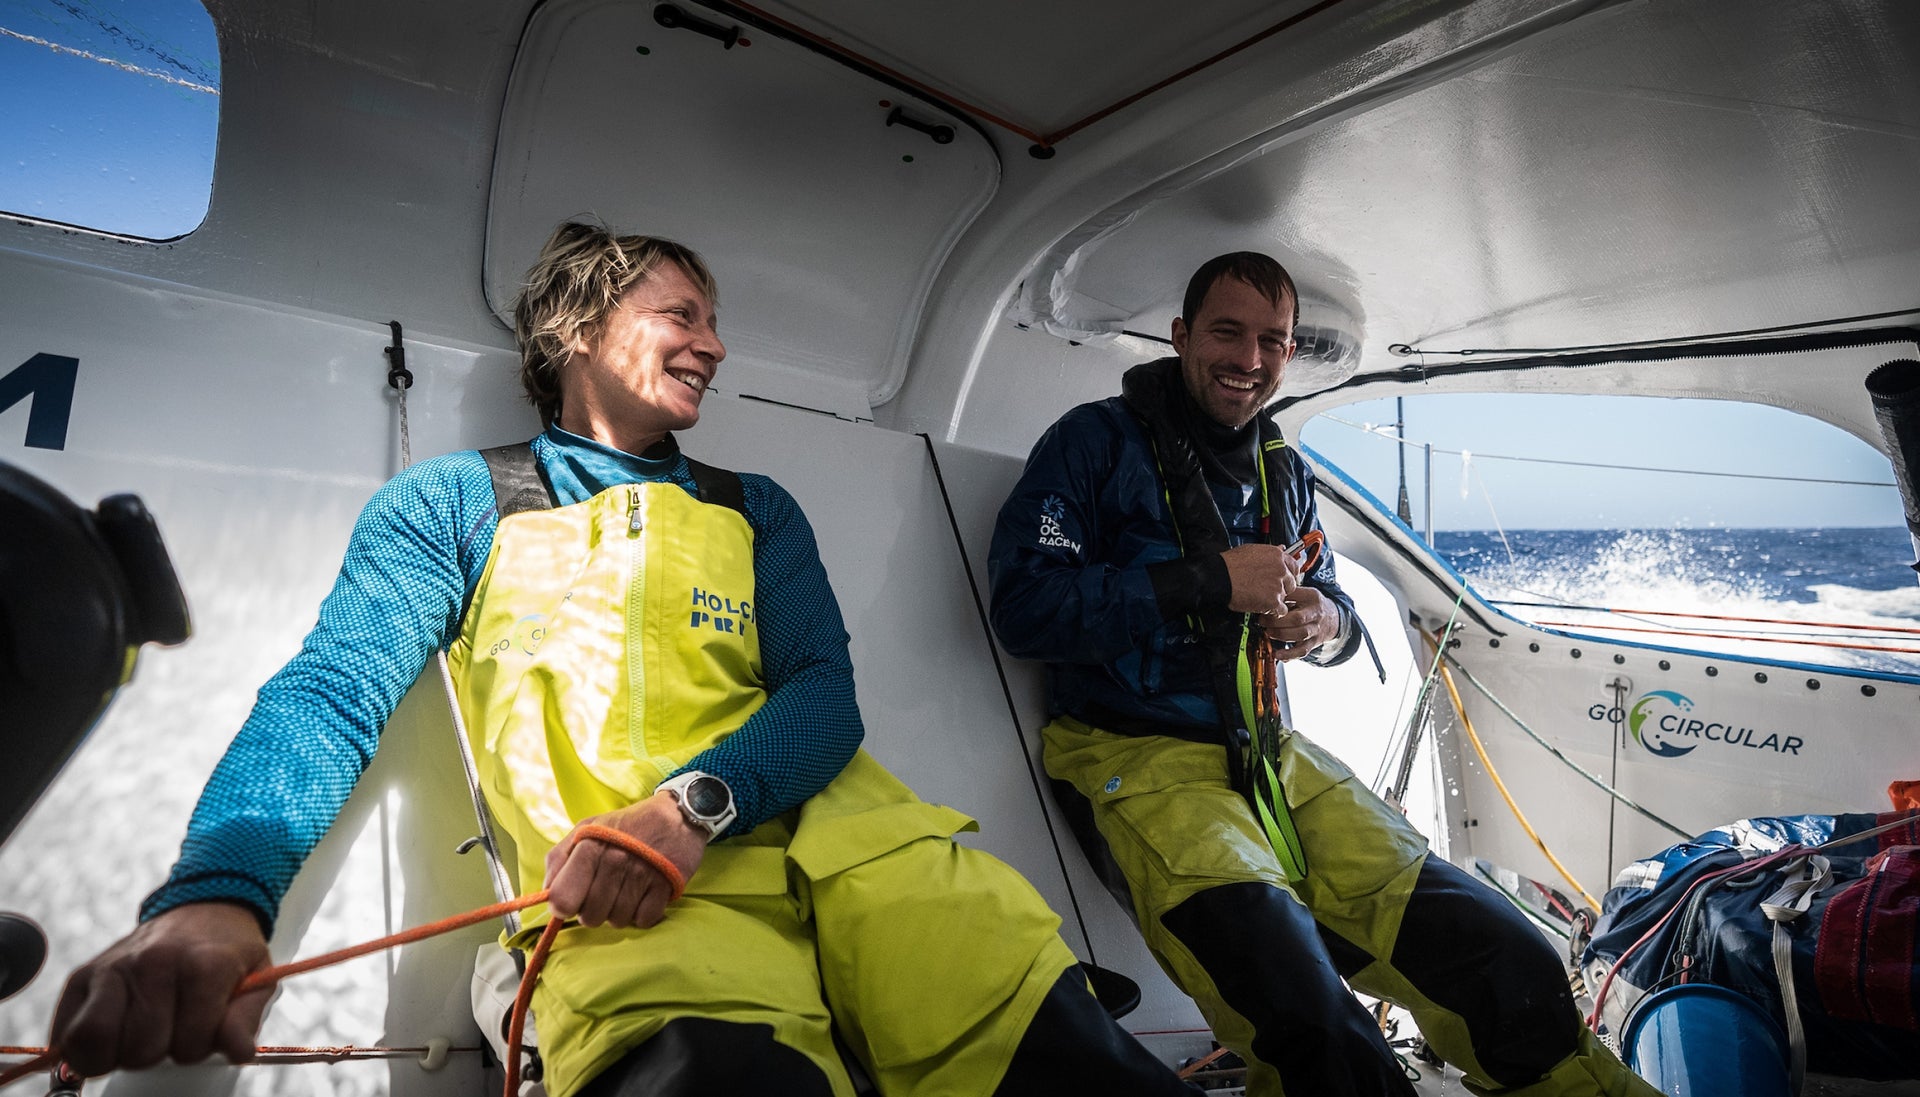
OFFSHORE SAILING GUIDE
When venturing offshore, there are numerous considerations to ensure a safe and successful journey to the finish line.
READ MORE
READ MORE
guides
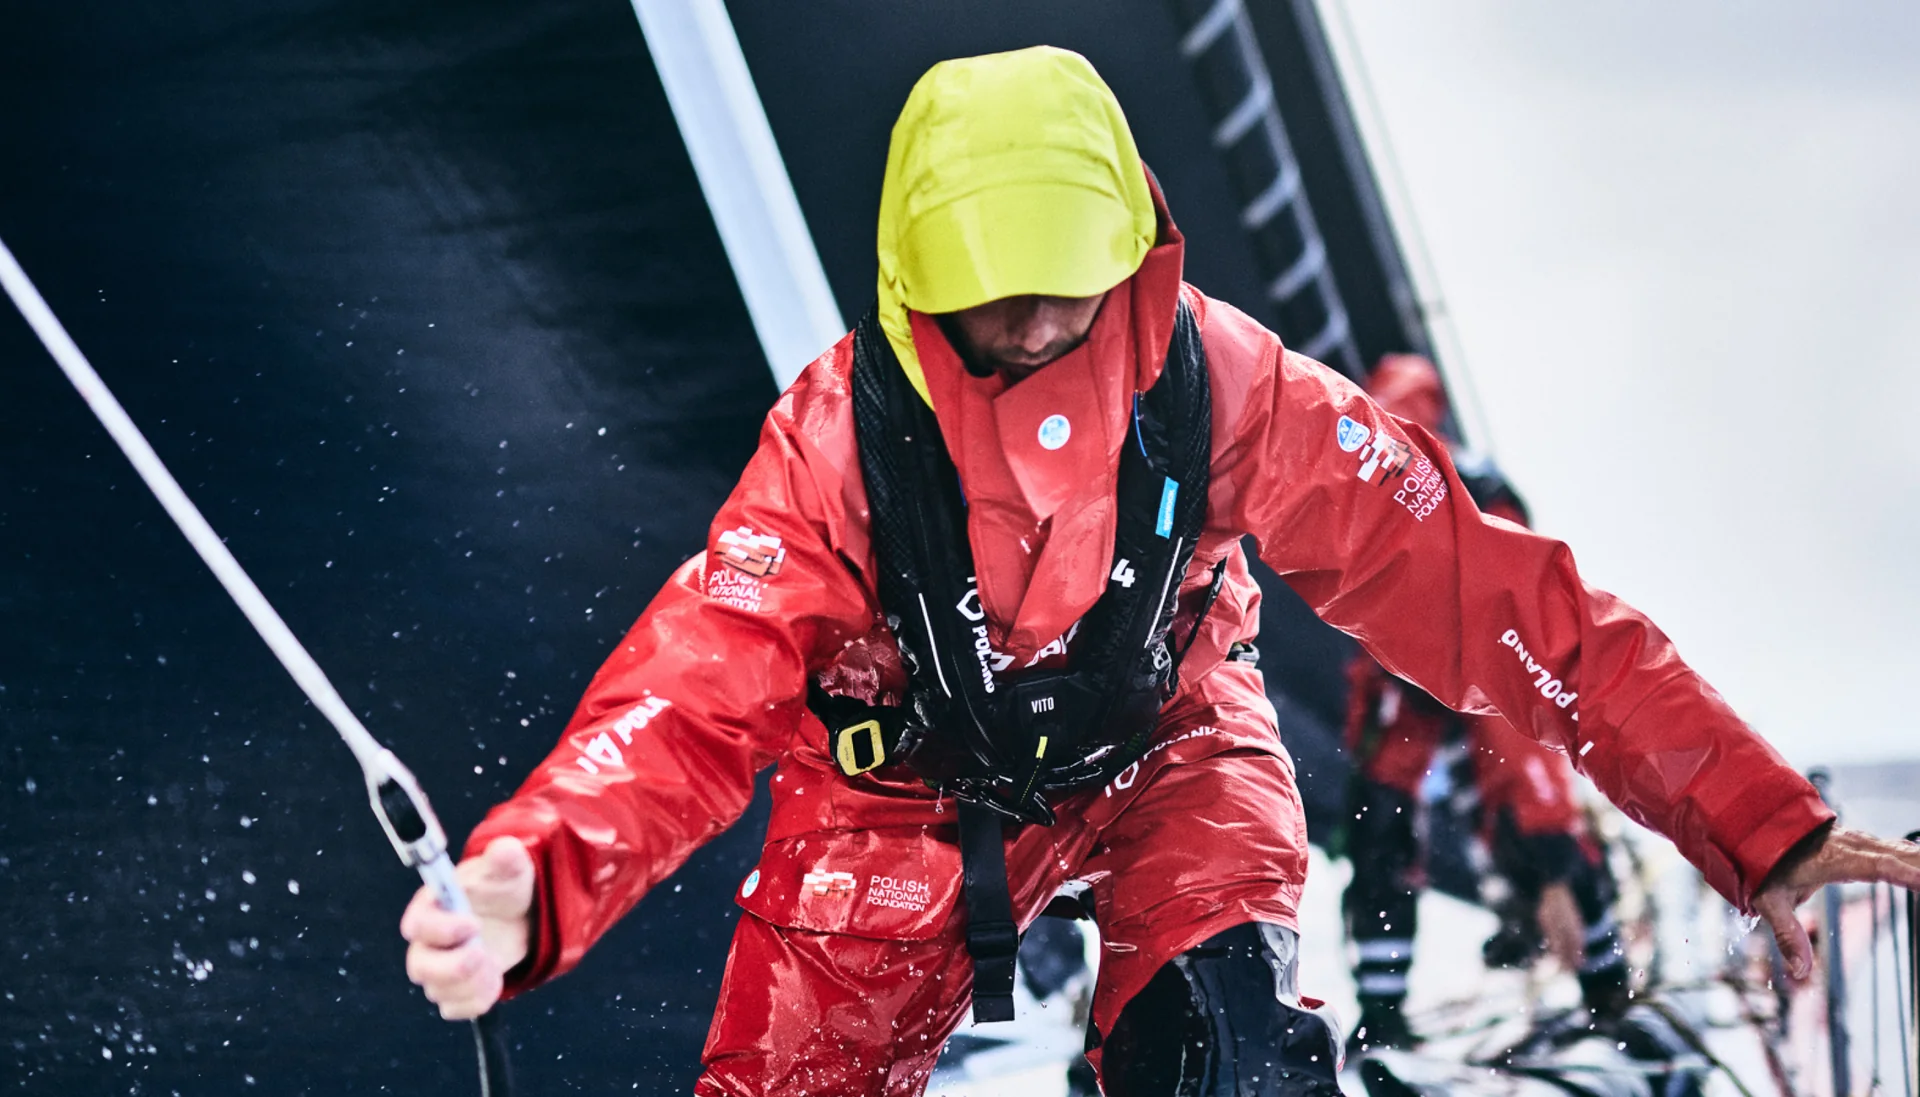
HOW TO CARE FOR YOUR FOUL WEATHER GEAR
Nigel Musto, North Sails Performance Clothing Director, gives us his top tips on maximizing the life of Foul Weather gear.
READ MORE
READ MORE

guides
FLYING SAILS 101
North Sails President and world-renowned race winner Ken Read lends his expertise to our Flying Sails Guide, a new breed of offwind sails that can add as much as 40 percent more sail area.
READ MORE
READ MORE

guides
CAPE 31 TUNING GUIDE
The Engine Above Deck
The North Sails team has focussed hard on the Cape 31 Class since its inception and as a result it is no surprise that North Sails have been so dominant. North Sails IRC designs were the foundation of the Cape 31 One design rules. Starting as the sole sail maker in South Africa with tri-radial paneled, North Sails have worked to perfect their 3Di sails since the Cape 31 arrived in the UK in 2019.
After countless hours sailing, testing and competing in the Cape 31, North Sails shares our tuning notes in an effort to get sailors and teams up to race winning speed quickly for the most competitive racing. As we learn more about the Cape 31 and further its development, new information regarding setup, tuning and trimming techniques will be updated online at northsails.com. As always, contact your North Sails Expert for all the most up to date information and for help tuning your boat.
Tuning Guide
Dock tune
Mast heel position: 135-145 mm from the aft edge of the mast to the center of the front keel bolt. Set the mast heel position to achieve the desired pre bend (see below). Moving the heel aft increases pre bend, moving the heel forward reduces pre bend.
Setting the mast rake: 1,715mm. To do this, put a mark on the forestay, and measure the distance from this mark down to the middle of the forestay pin at the deck intersection.
Swing the fixed end of the jib halyard back to the mast and mark the halyard in line with the top of the gooseneck measurement band.
Next swing the jib halyard forward to the forestay and mark the forestay in line with the jib halyard mark.
Measure the distance from the top of this new forestay mark to the middle of the forestay pin. On most boats this is the load sensor pin, the pin that the tack of the jib attaches to.
The next step for tuning the rig is to make sure the mast is square in the boat.
Set the shroud tension close to base tension and loosen the D1’s (& D2’s).
Swing the jib halyard from one shroud base to the other and make sure the hounds are in the middle.
Tighten the D1’s (& D2’s) back up to the tuning guide and make the mast look straight side to side.
Base deck chocks: It is best to have light pressure on the front chocks. A good base deck chock setting is normally 4 to 8 mm of positive chock (fill the gap in front of the mast, plus 4-8mm). It is worth checking that when on +1 chocks compared to base that there is still a small amount of pre bend. Moving deck chocks has a large impact on the D1 tension.
Measure pre bend by pulling the most forward main halyard down to touch the back corner of the lowest bit of the mast track just above the gooseneck (see image). Pull the halyard tight on a calm wind day and then measure the gap between the back of the mast track and the nearest piece of rope. Pre bend is measured at the height of the lowest spreaders. Measure on base with base chocks in and with the runners loose and the boom down. The ideal pre bend is between 40mm and 50mm.
Tuning Matrix
This tuning matrix is developed for the unique 3Di North Sails technology. 3Di is a fundamentally unique construction process leading to lighter and stronger sails.
TWS (kts)
V1 “Shrouds”
(PT-3M)
D1 “Lowers”
(PT-2M)
D2 “Uppers”
(PT-2M)
Forestay
Deck Chocks
4-7
Base -2
Base -3
Base -2
Base -8
Base +1
8-9
Base-1
Base-2
Base -1
Base -4
Base
10-11
Base
Base-1
Base
Base -2
Base
11-12 (Base)
Base (20)
Base (35)
Base (25-27)
Base
Base
12-14
Base
Base +1
Base
Base +2
Base
14-16
Base +1
Base +1
Base
Base +4
Base
16-18
18+
Base +2
Base +3
Base +1
Base +2 (37)
Base
Base
Base +6
Base +8
Base
Base -1
Each turn listed on the tuning matrix above is a 360 degree turn.The numbers in brackets on the tuning matrix are rig tensions.
Battens
A couple of stiffnesses of carbon full length battens in the head of the mainsail (and jib) help to perfect the sail set up across the wind range. North Sails have standard recommended batten upgrade options, please get in contact with a North Sails expert to discuss this further.
Jib Trim
Crossovers
Helix technology in the jibs defies conventional sail design limitations enabling one sail to perform optimally across a wider range of conditions than ever before. Engineered for active camber control, Helix upwind sails enable sailors to radically adjust and control sail shape and power as well as minimizing luff sag by adjusting the jib halyard fine tune.
J1 (J1-3): 5 -11 knots *new design
J2 (J2-1) 10 –17 knots *new design
J3 (J3-3) 15-21 knots *new design
J4 Heavy Weather OSR (J4-3): 20+ knots *new design
Storm Jib: for use to satisfy a class rules requirement instead of taking the J4 sailing.
JIB CARS. It is best in light and medium winds to be max inboard on the car. If out of range, or at the very top of the range, on a jib going one step outboard on the jib car works well. There is jib car height adjustment line next to the main hatch. Car height is the main car tuning tool for setting the depth and twist in the jib.
SPREADER MARKS: It is really useful to have spreader marks on the underside of each spreader. Place these in the center of the spreader and 150mm inboard and outboard of the central mark.
Mainsail Trim
MNi-5: All purpose mainsail *new design
TRAVELER. Maximum height and power are generated by having the traveler all the way up in light winds. In strong winds it is best to not go far below the centerline with the traveler car, use the fine tune to twist open the main. Once overpowered it is fastest to only have the traveler just above the centerline. Easing the traveler is one of the first moves to depower.
RUNNERS. Off in sub 6 kts, then progressively tighter until max combined headstay / tack load of 1.8 tonnes. 1.8 tonnes is the max load according to the builders.
OUTHAUL: Just loose so the sail is not touching the boom below base, and then tighten it when the wind builds.
CUNNINGHAM: Off downwind and in light winds. Progressively pull it tighter as the wind builds, especially when sailing at/over +4 on the headstay. This helps to bend the mast and flatten the mainsail whilst holding the draft forward.
Downwind
Spinnaker Crossovers
A1.5:(A1.5-2) 5-9 knots *new design
A2 Minus (A2 Minus-1): 8-12 knots *new design
A2 (A2-1): 11-18 knots
A4 (A4-3): 18+ knots
A3 (A3-3) Reaching
Techniques
In light airs the kite flies best and the gybes are best with the jib lowered.
In over 8 knots of true wind speed sail VMG angles based on heel and apparent wind / true wind angles. It is fastest to leave the jib up.
RUNNERS. Loosen the runners downwind to generate depth and power. Keep the windward runner snug. When the wind increases, tighten the runners just enough to keep the headstay straight / tight.
Further Information
Please get in contact with a North Sails expert to further discuss techniques and settings.
Ben Saxton - North Sails Class Lead
ben.saxton@northsails.com
+44 7962 238 742
Crossover Chart
READ MORE
READ MORE
guides
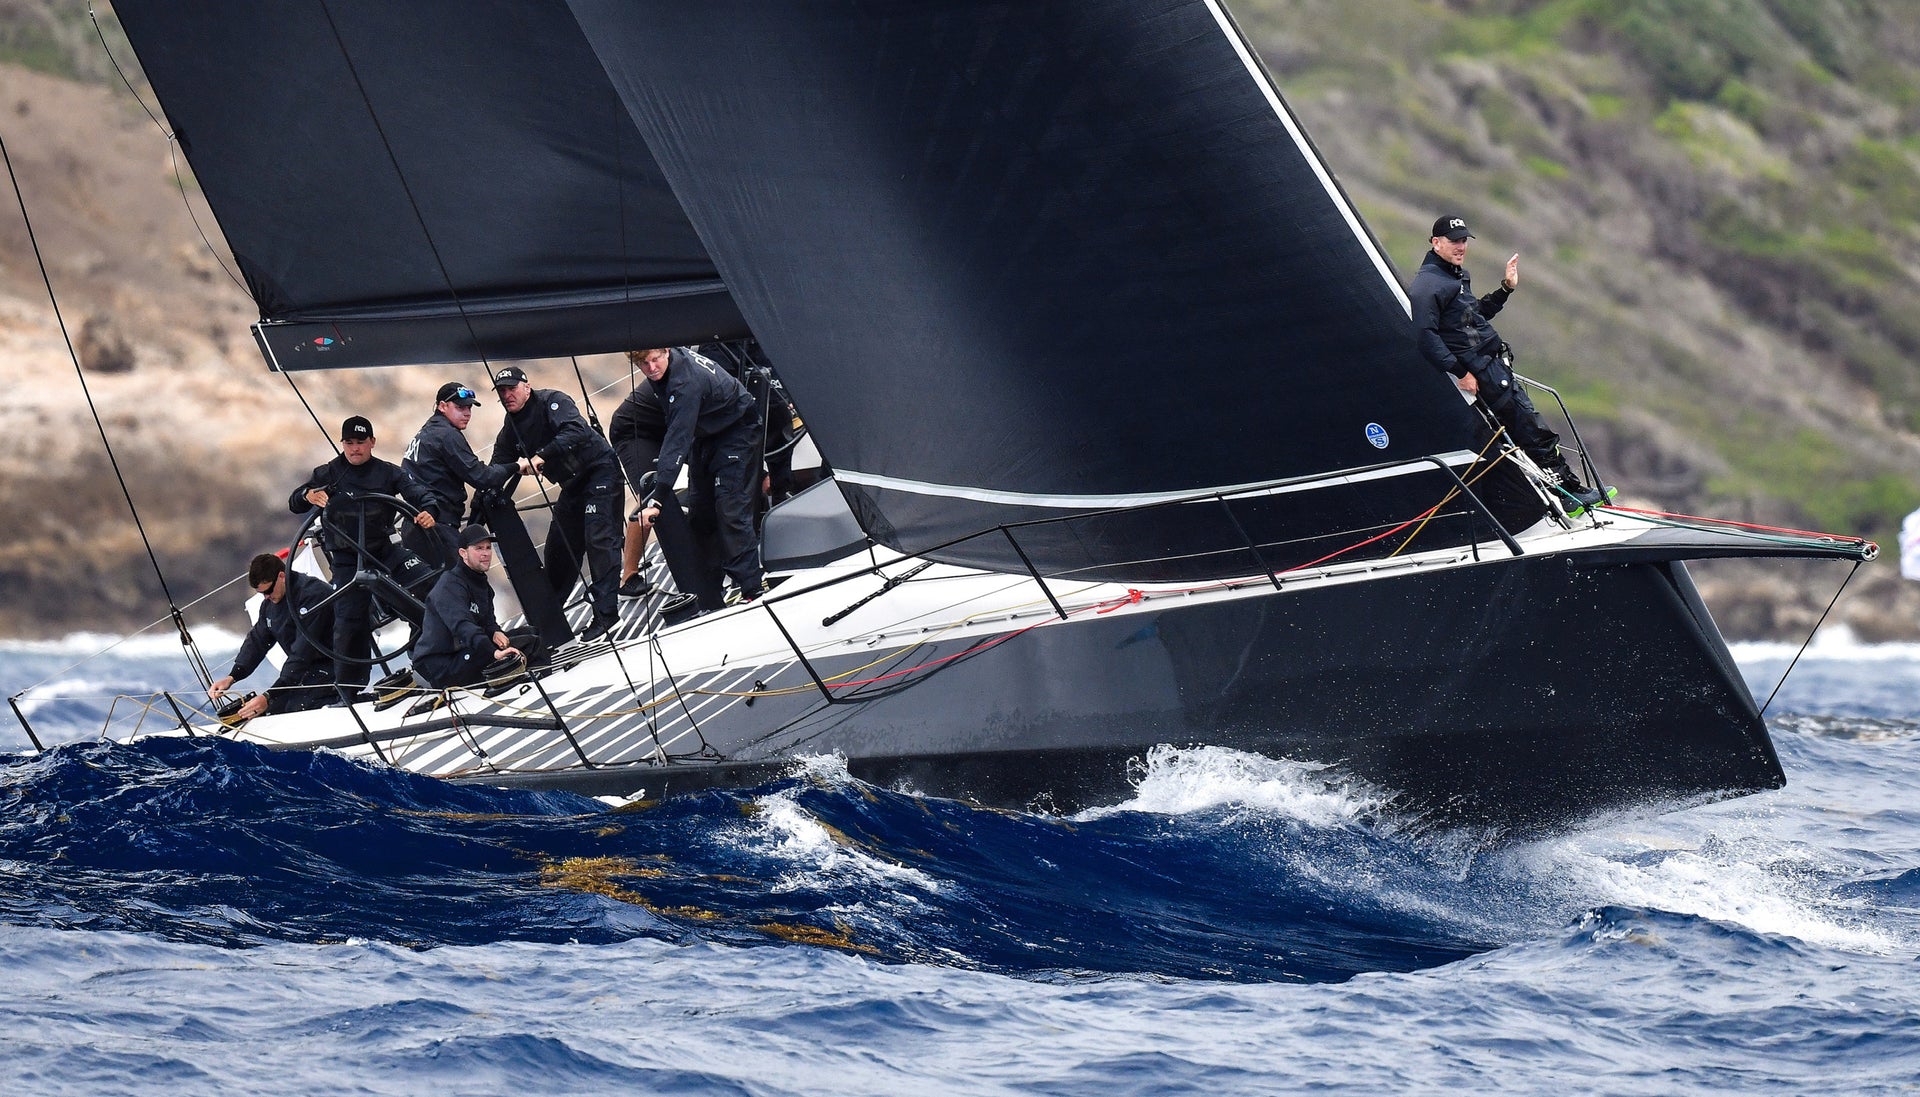
NORTH SAILS EXPERT VIEW ON 2024 IRC UPDATES
Optimizing your IRC rating for your specific boat is no simple task. If you find yourself unsure about the ideal sail inventory, we strongly recommend reaching out to our experienced team of experts today.
READ MORE
READ MORE
guides
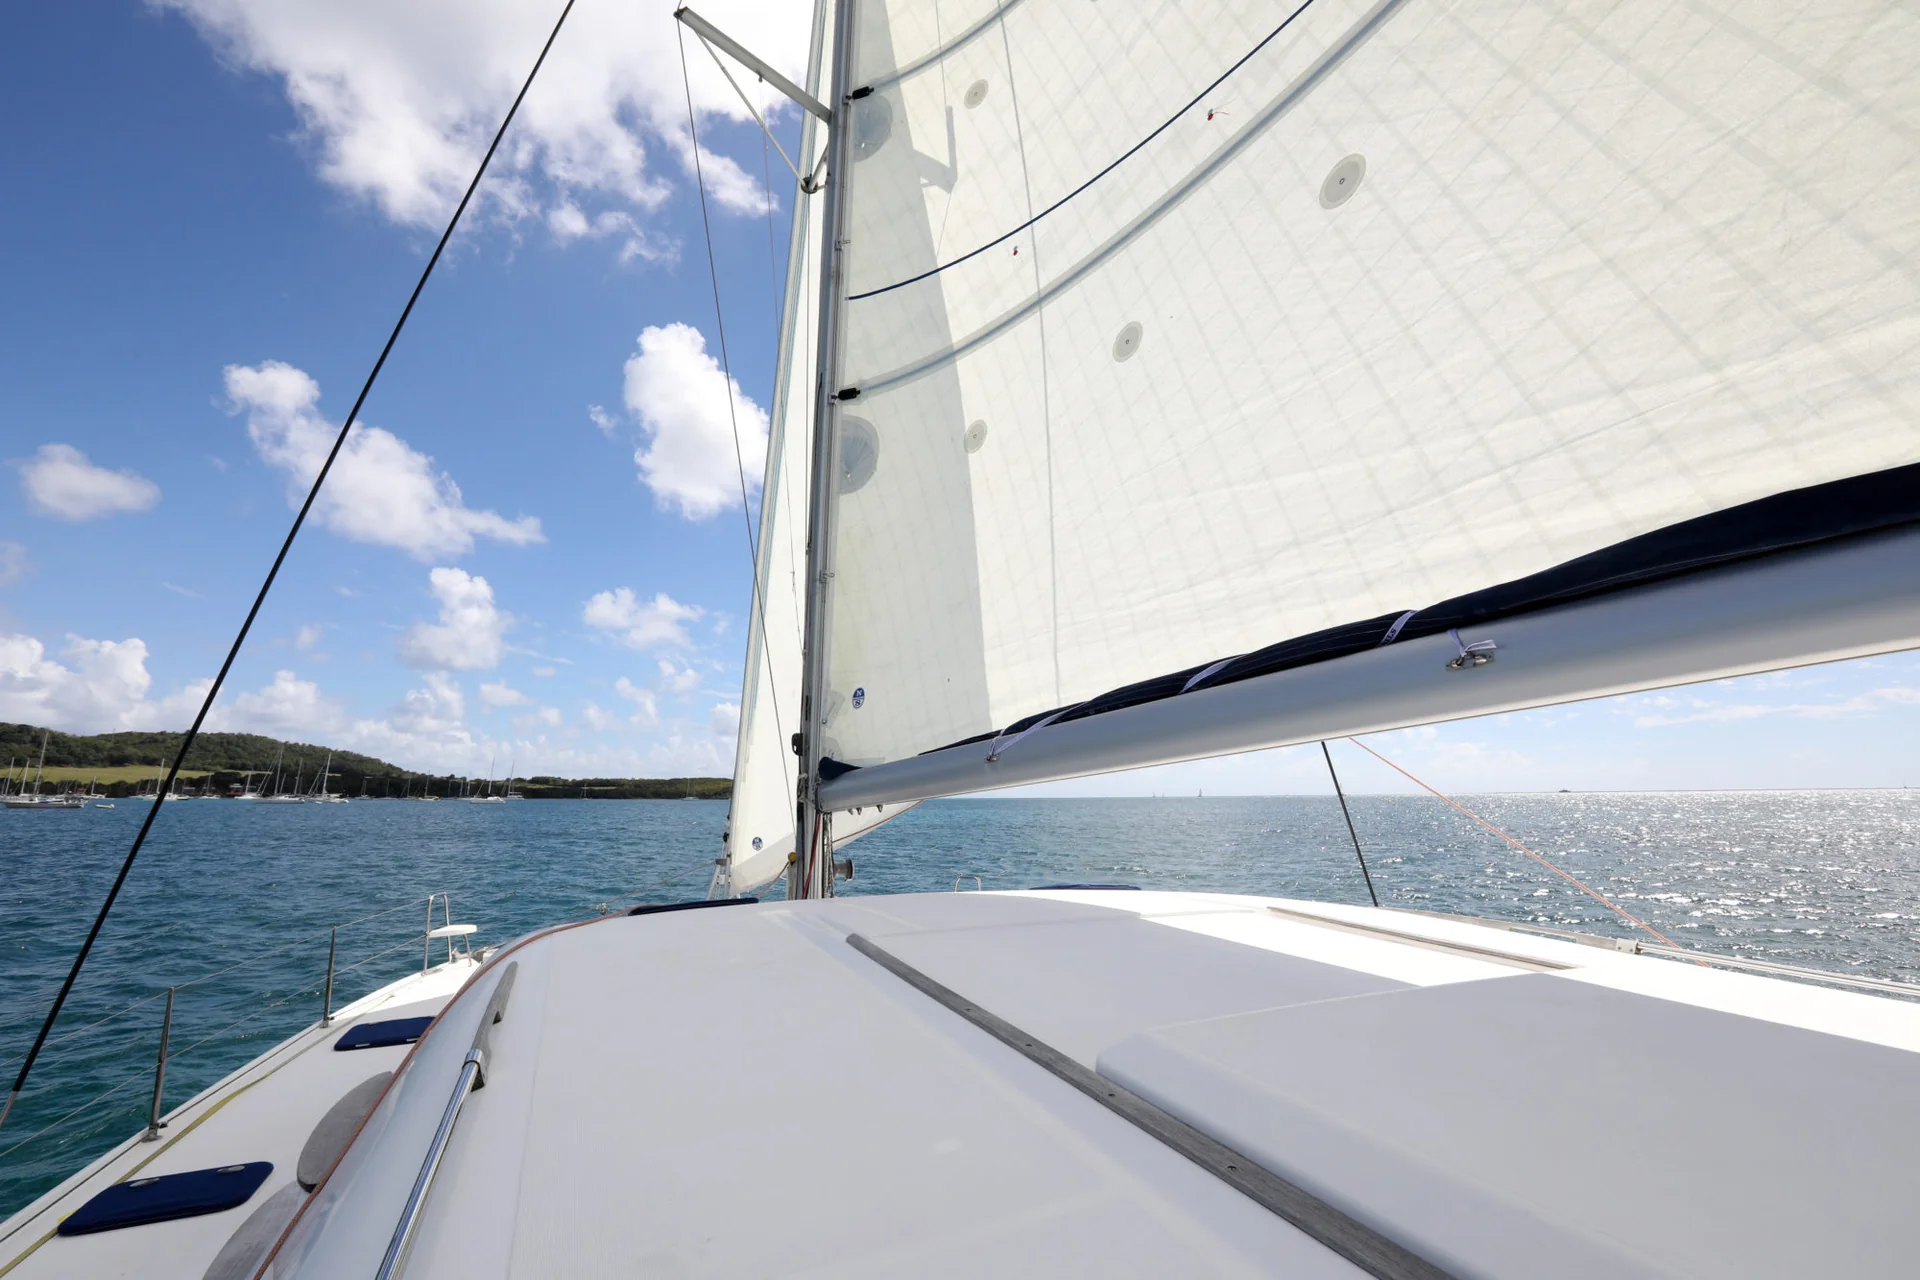
FIBERS & FABRICS: A SAILOR’S GUIDE
Modern sailcloth begins life as industrial fiber and film. Some of these products are well known to sailors by a specific supplier’s brand name. A better understanding of the characteristics of these fibers can be helpful in choosing the right sails for your boat.
READ MORE
READ MORE
guides
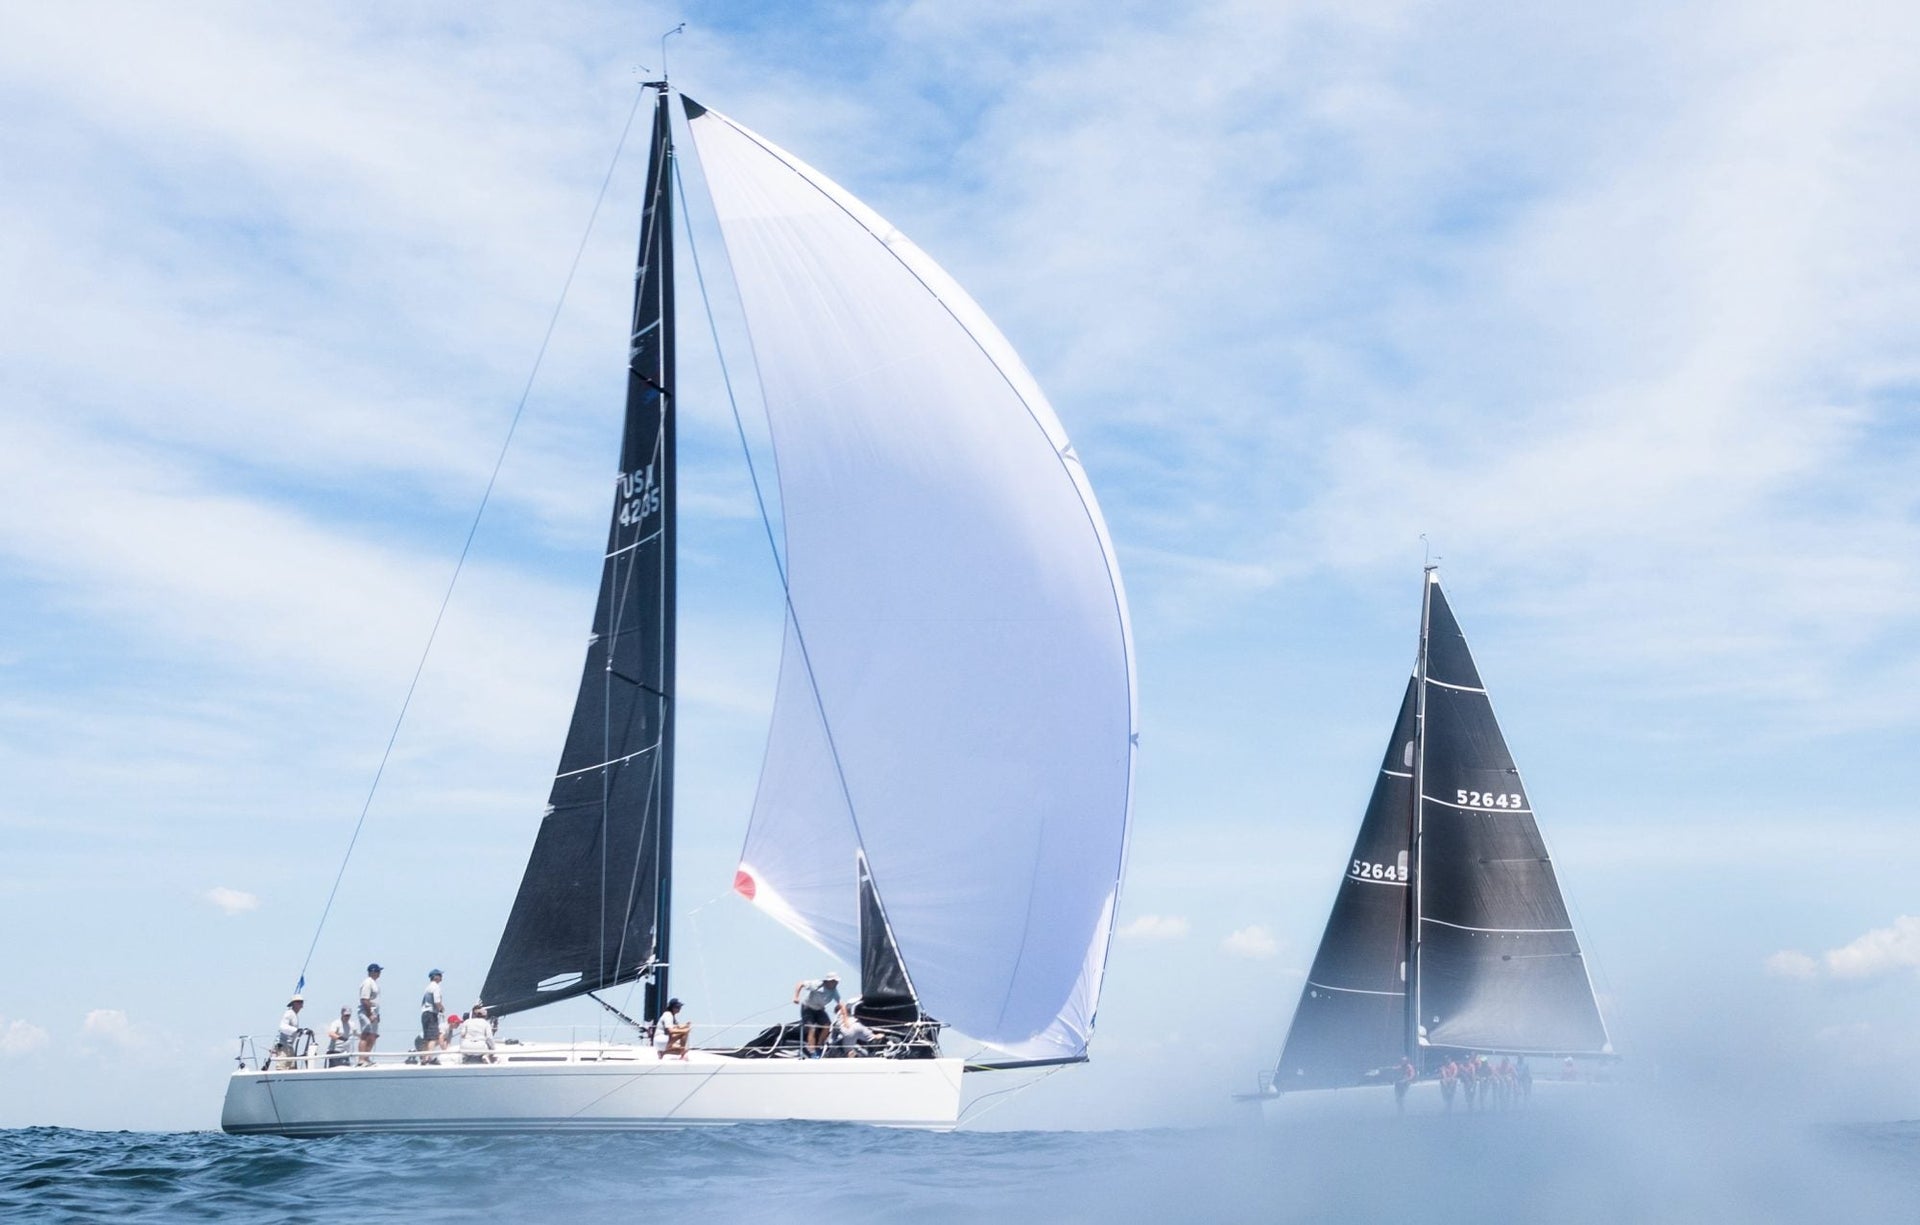
WHEN TO REPLACE YOUR SPINNAKER
Remember when your spinnaker was new—how crisp and clean the material felt and the way it crinkled going into the bag? The whites were white and the colors were bright, and it even smelled like the brand new nylon that it was.
READ MORE
READ MORE
guides
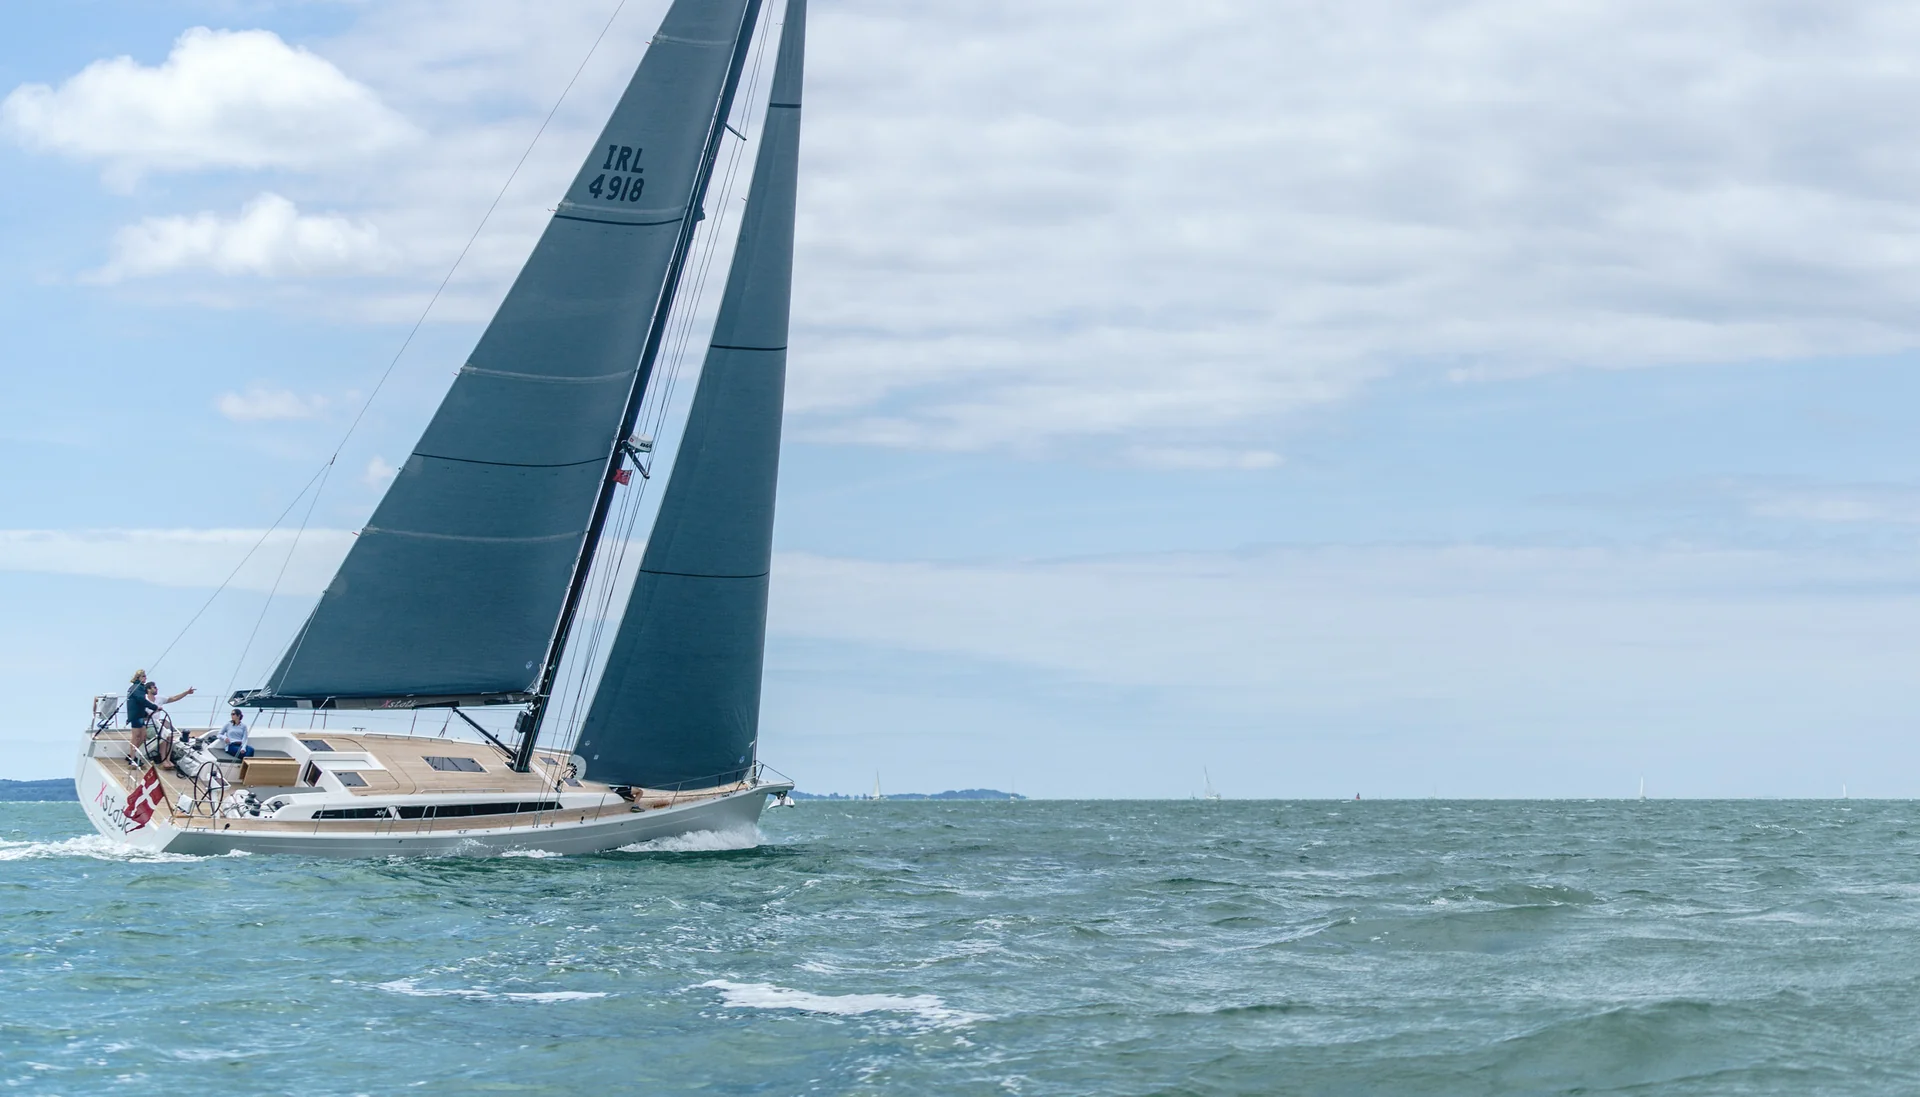
CRUISING SAILS MATERIAL GUIDE
North Sails offers three material options to help you find the right sails for your needs. Every North cruising sails is custom-designed for your boat and sailing style. By matching the right materials to your sailing goals, you'll be even happier with your new North sails. That could mean easier furling and flacking, smoother tacking and jibing, headache-free sail handling and storage or optimum performance and longevity.
Cruising sailcloth comes in three styles: woven Polyester dacron, cruising laminates, and 3D composite material. Each provides a different balance of durability and performance. Dacron fabrics are the toughest and most structurally stable. Cruising laminates offer lighter weight and increased shape holding. 3D composites are a new generation of cruising materials with exceptional shape holding and structural integrity beyond many laminates.
READ MORE
READ MORE
guides
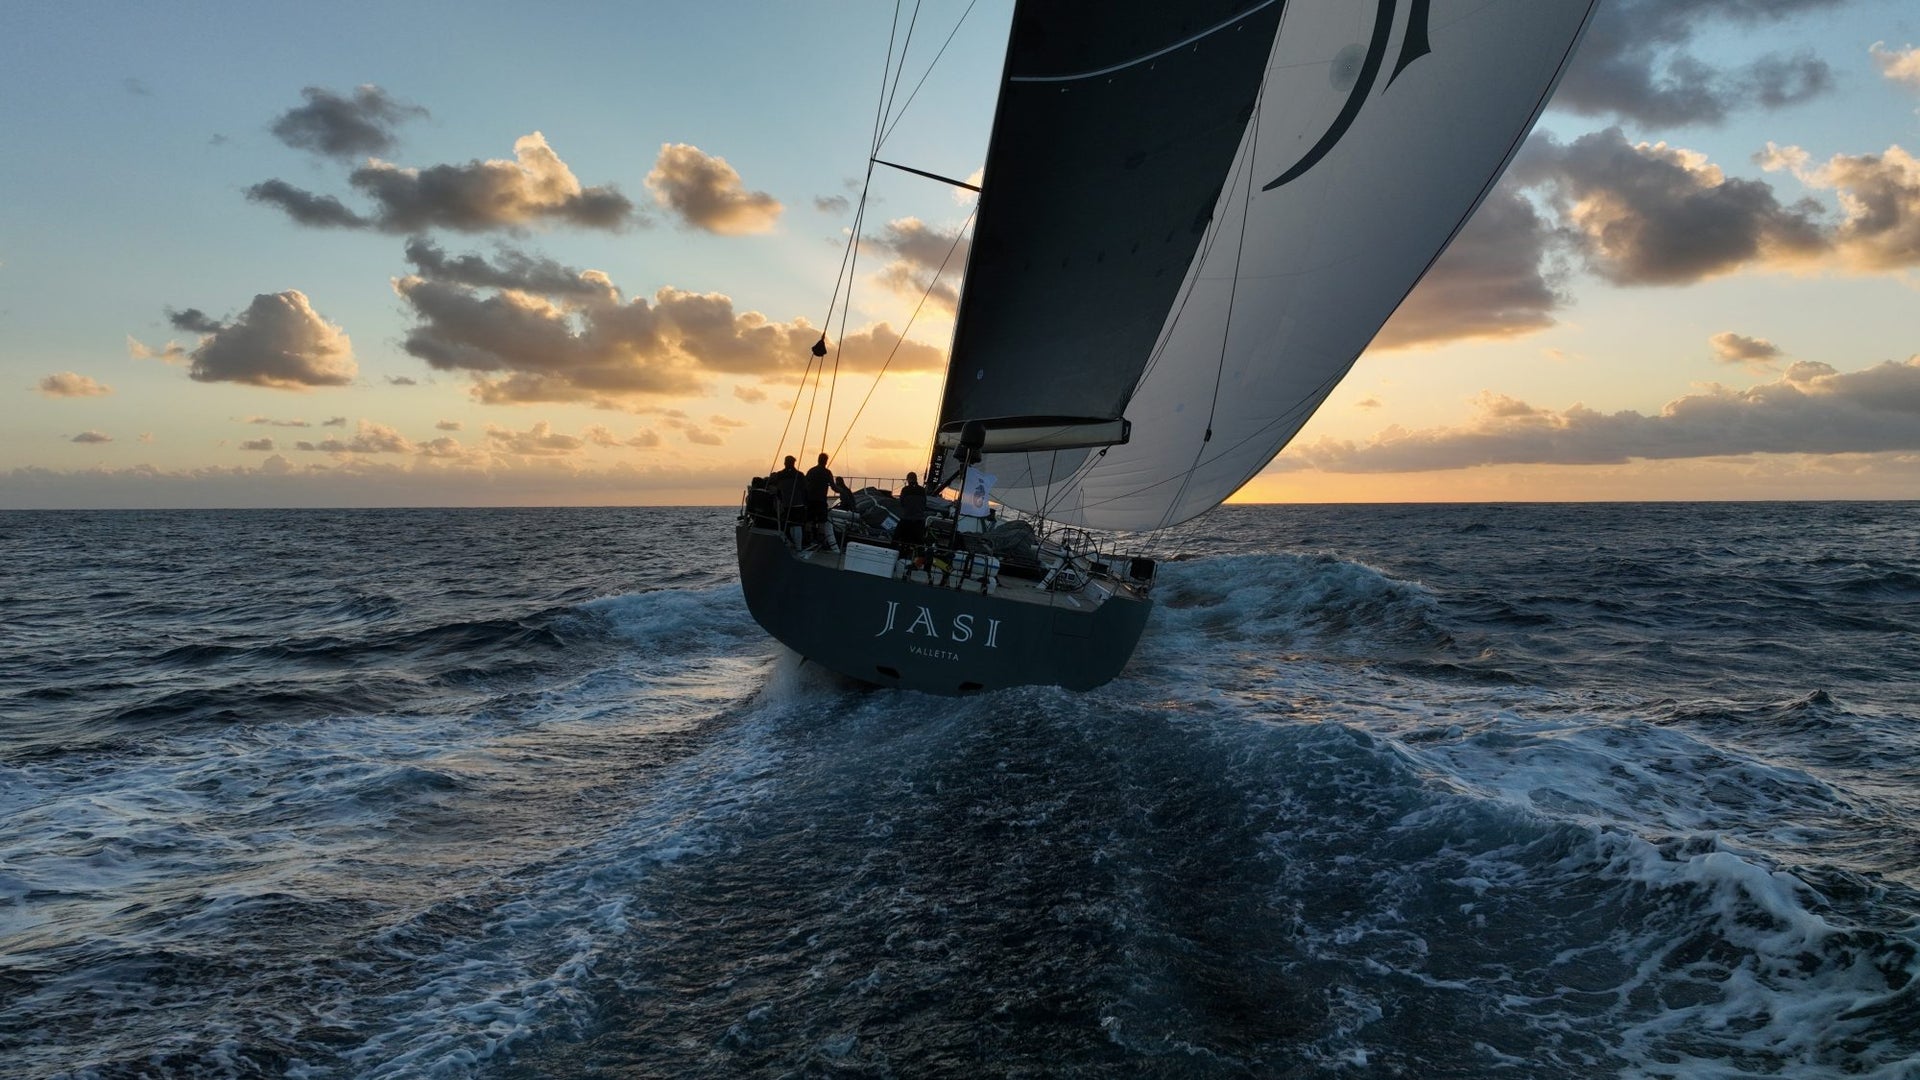
JASI: SUPERYACHT SPEED IN RORC TRANSATLANTIC RACE
JASI: SUPERYACHT SPEED IN RORC TRANSATLANTIC RACE
North Powered Swan 115 Sets Unofficial Superyacht Race Record
📸 Balta Montaner
North Sails and North Technology Group President Ken Read has logged thousands of ocean miles in three round-the-world race programs, over a dozen Transatlantic crossings, and countless high-profile distance races. For the 2023 RORC Transatlantic Race, Ken was a Watch Captain on board Swan 115, Jasi. A true performance cruiser, Jasi completed the 3,200-mile race in an elapsed time of 09 days, 14 hours, 43 mins, and 37 seconds. Notably, this is the fastest time for a superyacht in the nine-year history of the race, besting the previous “unofficial” superyacht record set by the 130ft Baltic My Song in 2018 by 15 hours.
“This was a completely different experience from any other offshore racing I have ever done. When you go down below on Jasi, you walk into a luxurious, quiet, air-conditioned condominium that just so happens to have some pace.” said Read. “On board, the crew takes showers, eats excellent food, and each has a bunk to sleep in. This race was a downwind dream ride, but on a boat of Jasi’s size, you have to manage safety and competitiveness in equal measure.
Up on deck, it was definitely a boat race. The primary mission for Jasi’s owner and his two friends, dubbed the ‘three amigos,’ was to experience a true offshore adventure. And the RORC Transatlantic Race delivered.” Trim, tactics, pace, crew work, sail changes, squalls, watch systems all on a 90-ton superyacht to drive down waves and push like a race boat.
“Jasi, as a sailing machine, was still new to racing. She had done a few inshore regattas but had yet to put on any real ocean miles. We had a bunch of first-time transatlantic sailors on board, and it was fun for me to pass on a bit of knowledge and share my experience, especially with the younger crew members. Hopefully, I helped them avoid some of the mistakes I have made (and learned from).”
📸 Balta Montaner
Learning on the Fly
“Very quickly during this race, the three amigos settled into the watch rotation, and the crew opened up their personal playbooks to start sharing their knowledge of offshore sailing.” According to Ken, wWatching the amigos experience offshore sailing and learning was the trip’s highlight.
The owner made an incredibly quick study of apparent wind driving, and Jasi is a challenging boat to drive. He was fearless, never missing a beat driving through a 27-knot squall. He never thought about relinquishing the helm, nor did it cross our minds to ask him.
Jasi had a team of 21, living together in reasonably close quarters, so like all offshore adventures, everyone had to be on the team. For example, a few days into the race, one of the newbies came up on deck with ten sandwiches. He never would have done that at the start of the race; more likely simply making one sandwich for himself Making ten wouldn’t have occurred to him. “When offshore, it is not just the subtleties of learning how to use a boat; it’s also learning how to be a team player.”
Jasi’s program in the Caribbean will include the famous Supermaxi regatta, St. Barths Bucket. Read believes that the lessons learned in the RORC Transatlantic Race will be of great use at the regatta. “The skills and knowledge learned are 100% transferable to inshore racing.”
View this profile on Instagram
Royal Ocean Racing Club (@rorcracing) • Instagram photos and videos
“In many ways, the Transatlantic was a ten-day practice session for the ‘Bucket. Changing spinnakers, for example, all of the systems and maneuvers will be the same, and during the Transatlantic, we got progressively better and compiled comprehensive speed, angle, and polar data. The big goal for the team and the owner is to finish each day satisfied that we sailed the boat well and let the chips fall on where we stand after time correction.”
Ken knows that there is no question that the transatlantic rookies all went home telling all their friends about their amazing experiences. “We need to bring new blood into our sport, and the RORC Transatlantic is a perfect way to do that. For many yachts who started the race, it was never about winning and losing, but it was about the experience; the stars at night, the marine life, and living offshore.”
📸 Balta Montaner
Jasi’s Inventory: Her Engine Above Deck
Mark Sadler from North Sails Palma, was the project manager for Jasi’s sail inventory and also raced on board for the RORC Transatlantic Race. Mark is a fantastic sailor in his own right and was a watchmate of Ken’s for this trip. For over a decade, Sadler has competed in and supplied sails to many Superyacht, Offshore, and Grand Prix regattas for North Sails. Like all successful teams, its people like Mark and their experience that remain a significant strength for North Sails.
Jasi’s sail inventory is made up of: 3Di Raw 870 mainsail, 3Di Raw 870 Helix J2, 3Di Raw 760 Helix J4, J5 storm jib, 3Di Raw 760 Genoa staysail, Cuben fiber Spinnaker staysail, A1.5 Nylon spinnaker, A4 Polyester spinnaker, A6 Polyester spinnaker, Top Down Furling Helix Code 0, Storm Trysail
Ken recalls, “We may have done about 30-40 sail changes during this race. We used the J2 only at the start and the finish, but the Code Zero saw a ton of use. The J4 was used as a staysail and a Genoa Staysail as a triple-head sail. We had three kites that had plenty of use, and the loads kept working against us. We had to attend to some small nicks after the lazy sheet burned a few holes in the luff sections.“
Worth Noting
One recommendation Read had for future racing with Jasi is to bring a sewing machine on board. Squalls are a huge part of sailing in the ocean, morning, evening, and nighttime, requiring multiple sail changes to ensure they didn’t have too light a sail flying in the more punchy squalls.
This race was a great reminder of the total team effort it takes to pull off any transatlantic race, not just out on the water but also in advance, getting the boat race-ready. Toby Clarke and all the permanent crew did a fantastic job. Read shares “A big thank you to the Royal Ocean Racing Club for providing a safe and well-organised race.”
North Sails powered all of the major winners in the 2023 RORC Transatlantic Race, including Multihull Line Honours winner Maserati, Monohull Line Honours winner I Love Poland, and the Overall Winner, NMD54 Teasing Machine.
READ MORE
READ MORE
guides
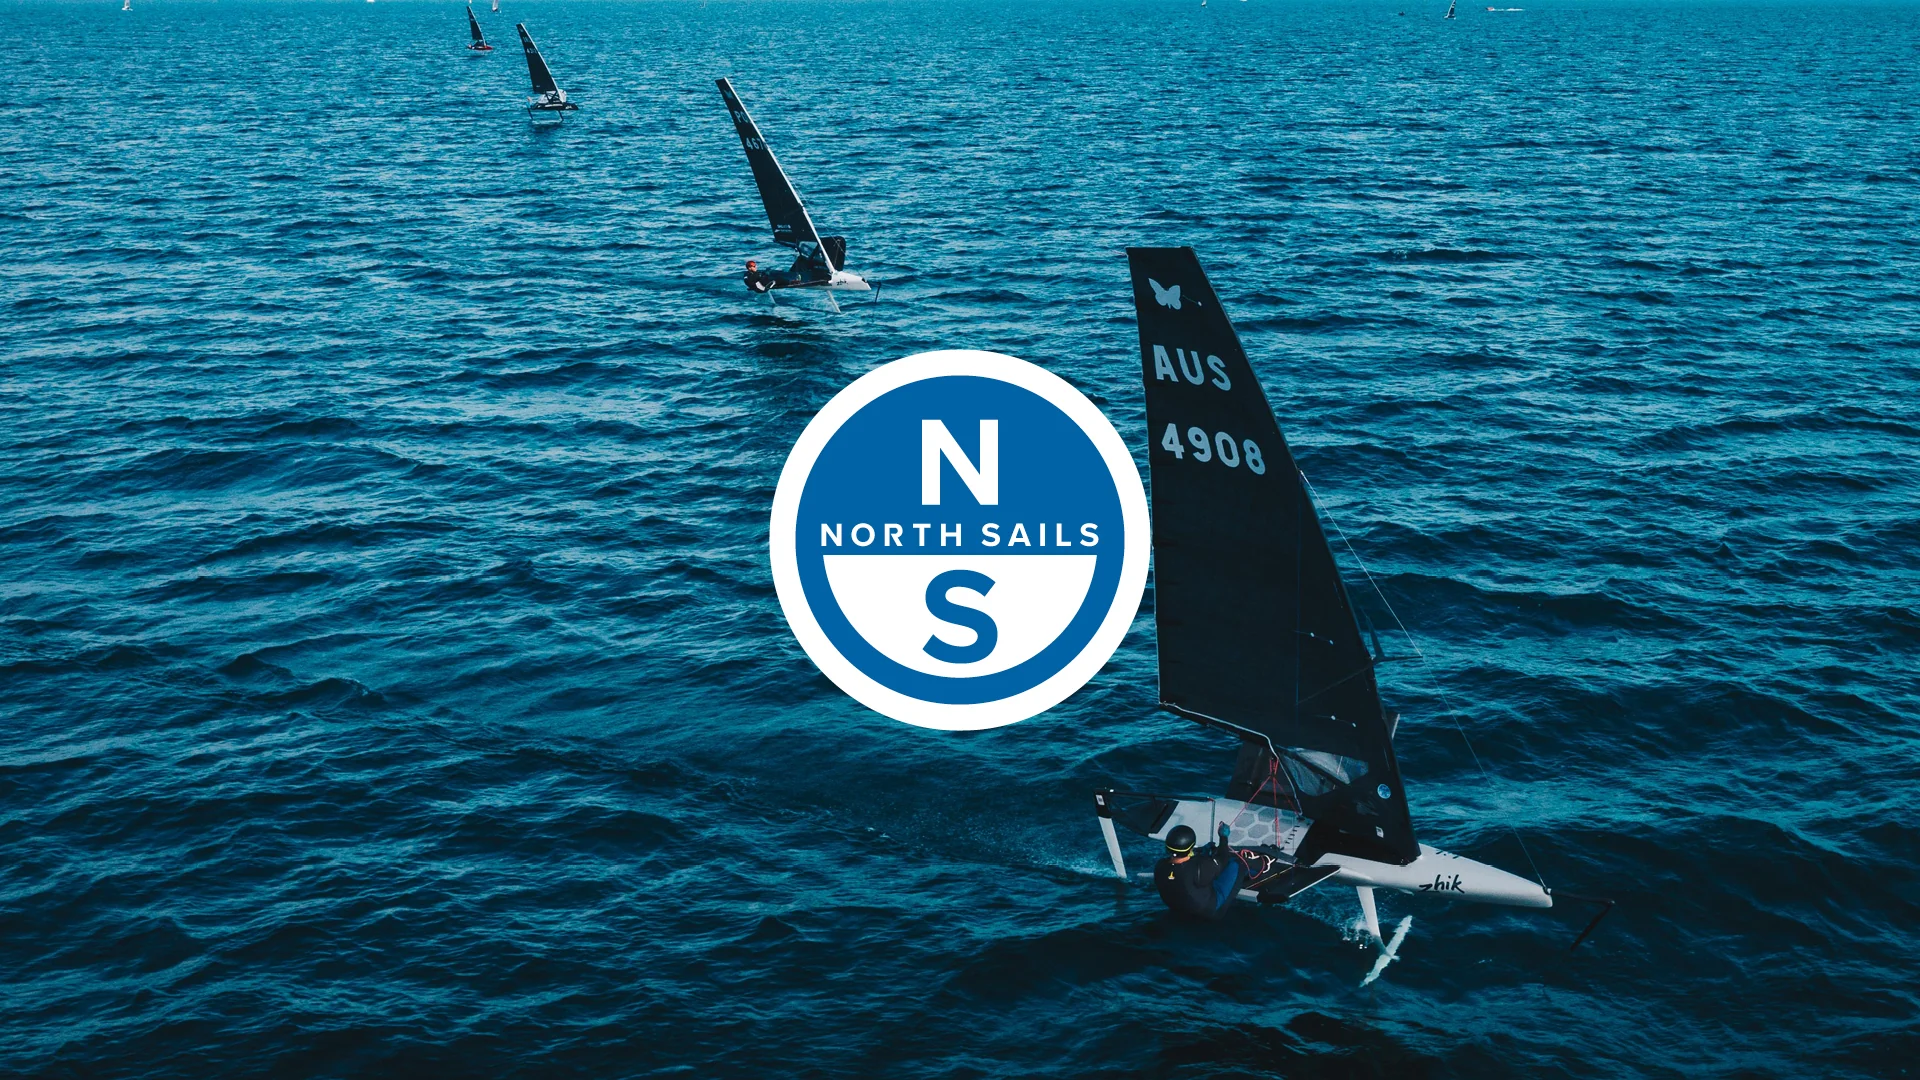
INTERNATIONAL MOTH TUNING GUIDE
This guide is designed to add additional support information to sailors rigging their International Moth Helix sails for the first time. There are some fundamental differences with the Helix sail, ‘twin-skin’ split batten technology, compared to previous models. The Helix sail offers a large step forward in performance, however, there are some new learnings required when rigging, which once understood, is neither complicated nor time-consuming.
Initial Set-Up
When your sail arrives the following should be included:
1. 7 x Full Length Split Battens
2. 6 x Decksweeper battens – Glass RB
3. 13 x Rocket Adjusters
4. 6 x mast cups. Numbered 1-6
These battens should be cut to length and there should be no requirement to adjust the length of them. Please contact a North Sails representative if you feel the battens need to be adjusted. Any batten length adjustment should be off the back of the batten and not from the split end.
Batten lengths may vary +/-20mm
These parts should be fitted, but if not, take the following steps:
Battens
Step 1: Batten Cups
The battens cups need to be threaded onto the webbing strap found inside the luff tube. The webbing strap prevents the cups from moving in a vertical direction whilst sailing, hence the cups grip onto the strap quite tightly.
Once the cups are threaded onto the webbing strap, pass the strap down the luff tube, ensuring to remove any twists from the strap.
The Cups may need adjusting slightly once you are rigged. Follow the impression of the batten along the batten pocket and aim to keep it aligned or fractionally on the high side of the pocket. The webbing strap may be overlength and can be cut to length – around the height of the boom. There is no requirement to locate the lower end of the strap.
Step 2: Batten insertion
Batten #1
The top batten doesn’t have a mast cup. There are however 2 batten pockets on the luff tube, one on each side. The split batten end needs to pass into each of these pockets. The batten pockets are offset so that each of the split tips can be inserted in turn. Put your hand up inside the luff tube from the zip at batten #2. Pass the tip of the #1 batten into the pockets on each side of the sail. This process can be slightly tricky but easily managed and only has to be done once.
Batten #2 - #7
These battens are to be inserted from the rear end and then the split tip is inserted into the receptacles on the rear face of the cups. There are sacrificial pieces of plastic within these receptacles that are designed to break and distort to add friction to the batten and prevent it from falling out. The batten will need to be pushed firmly into the batten cup receptacle. At batten #7 there is a batten holder on each side of the luff tube. Each half of the batten needs to be passed through these.
Add rocket batten tensioners to all battens.
Step 3: Deck Sweeper Battens
There are 6 x deck sweeper battens that can be fitted and rocket tensioners added.
The diagonal deck sweeper battens are the only battens that need removing for de-rigging and sail rolling.
Rigging
Step 1
Insert the mast into the luff tube, as per all previous models, ensuring to pass the mast above the battens and not through any of the split battens.
Note:
Avoid wrapping the mast tip around the webbing strap
At batten 7 there are batten holders on each side of the luff tube, the mast must pass in front of these.
Once the mast tip reaches batten #2, the uppermost batten cup, ensure to thread this batten cup onto the mast (pushing the mast in front of the cup). Continue to push the tip of the mast into the head of the sail.
Step 2
Shuffle the luff of the sail down the mast until you can see the forestay and spreader fittings.
KEEP ALL BATTEN CUPS OFF THE RIG AT THIS STAGE (except for Batten #2 – cup #1)
Step 3
Continue to rig the sail onto the boat. Attach the clew and boom vang. Some pre-bend will be required to attach the batten cups.
Step 4
Once there is some pre-bend, achieved by some vang load, the next step is to put the batten cups onto the rig. Work from the top down, carefully putting each cup onto the rig. Normally twisting them slightly can help to get them on. Once all the cups are on, slide the luff tube downwards and attach the cunningham.
De-Rigging
Aim to do the above procedure in reverse. Remove cups from the rig before releasing the clew. This de-loads the sail and it's far easier to remove spreaders etc.
Tuning & Race Set-Up
Battens
In general batten tension should increase from top to bottom. Aim for one or two small creases in batten #1, one crease in batten #2, half a crease in batten #3, and no creases in battens #4-7. Luff round and sail camber can be tailored with batten tension in the lower battens. Adjusting batten tension to different wind conditions will produce performance variation as the batten tension will increase camber.
Batten cups
When fully rigged with vang and cunningham loads @ 70% ensure the battens run along the batten pockets and the cups are not sitting too high or too low. Aim to have the batten and cup just high within the batten pocket.
There are a few nuances to this new design, but once understood, rigging time is very similar to previous models.
Please feel free to contact Rob Greenhalgh with any questions.
READ MORE
READ MORE
guides
LIGHTNING TUNING GUIDE
Proper boat speed depends mostly on constant and consistent adjustments to your rig and sails. The following measurements are those we have found to be the fastest settings for your new North Sails.
READ MORE
READ MORE

guides
470 TUNING GUIDE
Quick Tuning Guides:
N14-L18 Mainsail
N13-L12 Mainsail
N13-L16 Mainsail
N12-L9B Mainsail
N10-L5 main
N10-L5(H) main
N9-L5 main
L5-N15 Mainsail
See also: Tips for Adjusting the Bolt Rope on Your 470 Mainsail
READ MORE
READ MORE
guides
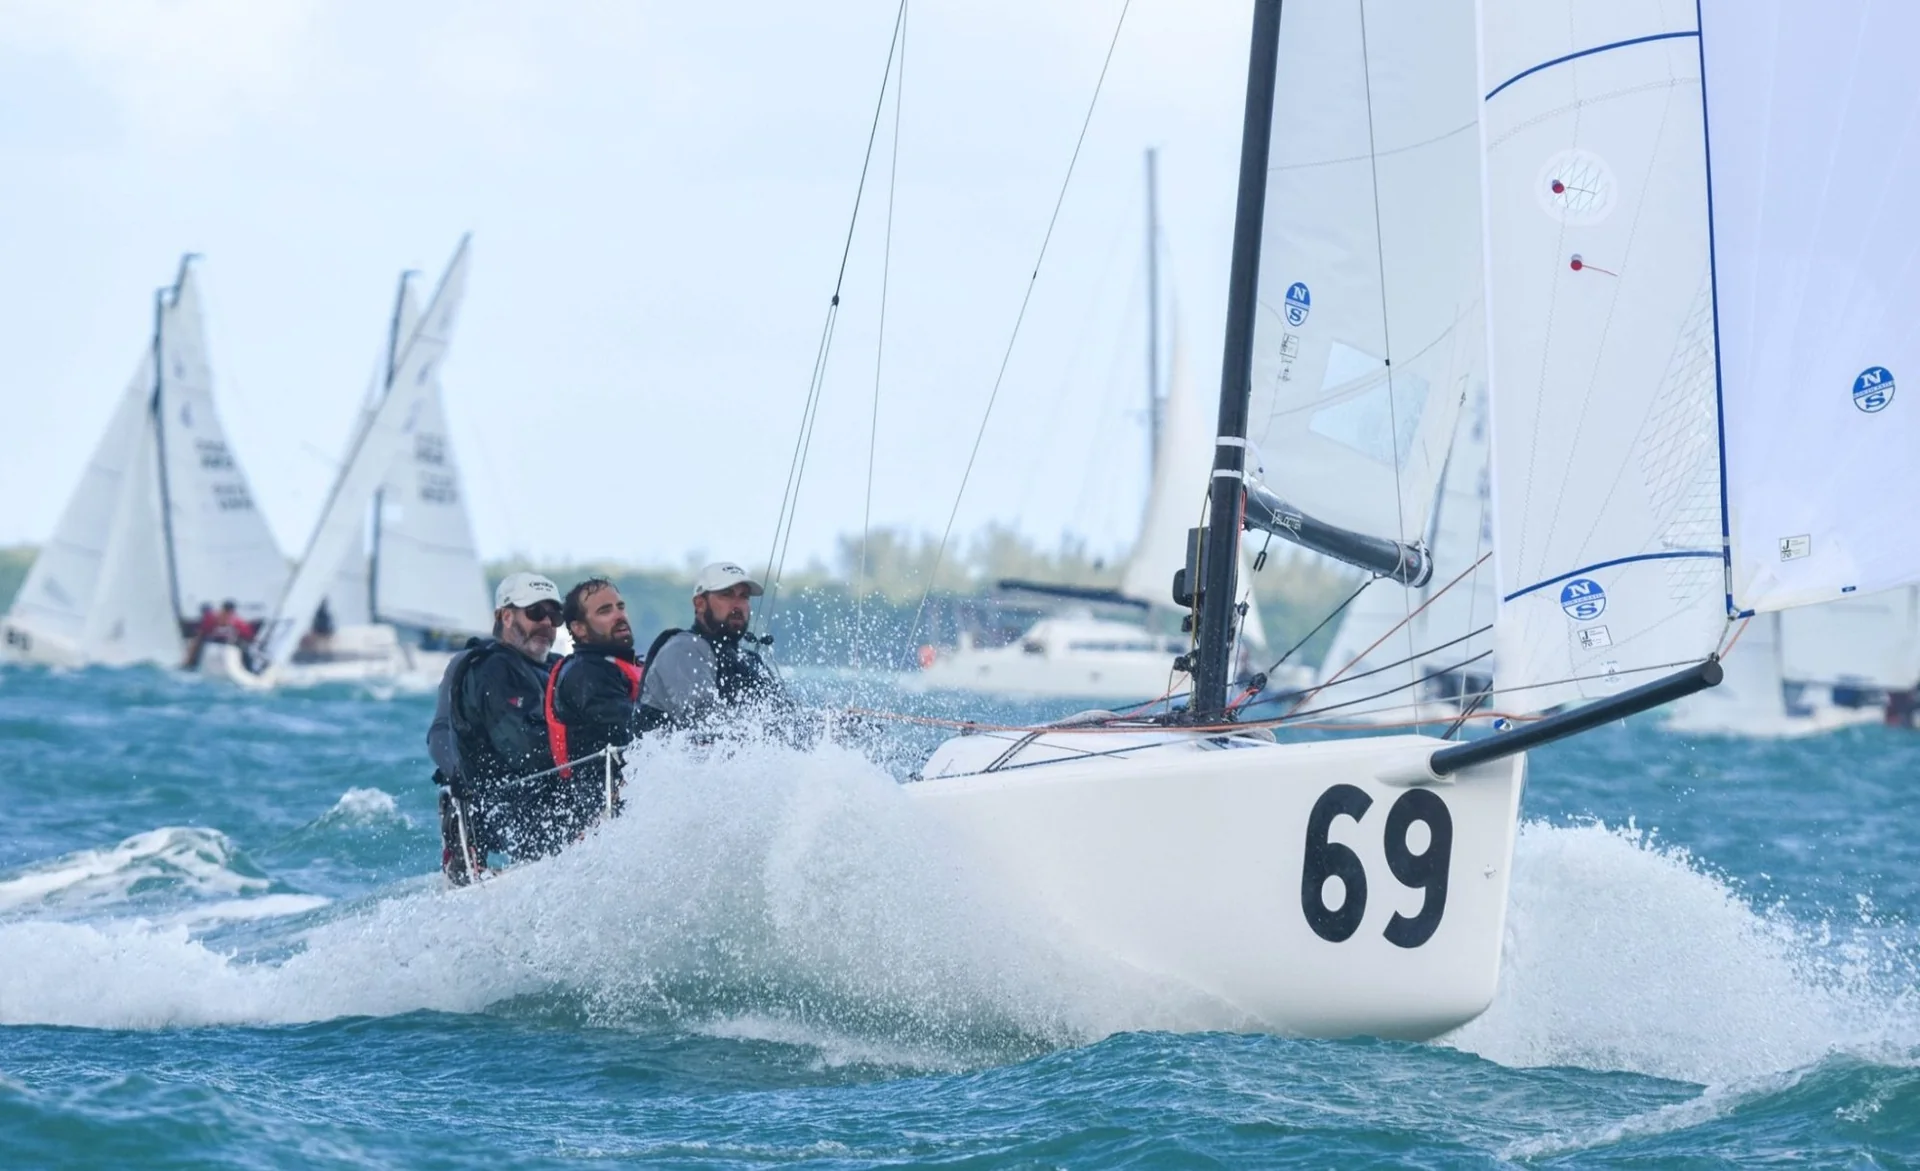
ZEKE HOROWITZ'S J70 TIPS TO THE PODIUM
ZEKE’S J70 TIPS TO THE PODIUM
Lessons Learned at the Helly Hansen Sailing World Regatta – Marblehead
📸 Chris Howell
As usual, the town of Marblehead pulled out all the stops for competitors to descend upon the quaint New England town for a weekend of racing in multiple one design classes. The J70 class showed up in full force with most of the top American teams including several class World Champions. At stake were two 2 qualification spots for the 2023 Worlds in St. Petersburg (1 open, 1 Corinthian) so the racing was as tight and competitive as ever. As crew for John Heaton on Empeiria, along with teammates Zach Mason and Will Felder, we were fortunate enough to come away with the Championship and a berth in next year’s Worlds. In addition, our North Sails teammates on Smokeshow, skippered by North Sails North American One Design Manager Allan Terhune with Paul Sevigni, North Sails Expert Chris Larson and Dave Hughes finished second, rounding out a weekend to celebrate for North Sails.
Our team was successful at the Helly Hansen Sailing World Regatta Series Marblehead by relying on lessons we’ve learned over the past couple of years. Admittedly part of our success is due to having sailed together for over 2 years and there is really no substitute for being comfortable with and confident in one another – trust that comes with time. However, aside from our team experience, there were past lessons we drew from during this event that helped us stay fast in the wide range of conditions presented. The J70, due to its rig and hull dimensions, is a boat that has a very fine line between being underpowered and overpowered. The conditions in Marblehead exaggerated this characteristic as the wind range was constantly hovering on either side of this fine line. So it was imperative to adjust your sail and body trim to accommodate for either the lack of power or abundance of power since it was rare to have the rig tuned perfectly. Following are some of our tips that should help keep you fast through the transitions in your next race.
Outhaul
The outhaul is one of the controls that’s easiest to ‘set and forget!’ But it’s actually an incredibly important adjustment for your power package. Due to the high aspect ratio (tall and skinny) of the J70 mainsail, the outhaul affects a larger area than it does on a sail with a lower aspect ratio. So a quick ease of the outhaul will put a boost of power into your sail plan to give you something to hike against. Our team has learned to be very diligent with this adjustment when we are transitioning from hiking to bodies in. Zach is our jib trimmer and we try to leave him in the boat the longest so he has a view of the jib as long as possible. If he is in the boat, we leave the outhaul quite loose to power up the main and try to get him hiking. We’re desperate to get him hiking as more righting moment = more speed! At this setting there is probably 6-8 inches between the boom and the foot of the main. As soon as he’s able to get on the rail and start hiking, we pull the outhaul back on to flatten the main and reduce drag. Any time Zach moves in or out of the boat, we make the appropriate outhaul adjustment.
Jib Foot/ Inhaul
How much to inhaul the jib can feel like quite the moving target… and it is. Its important to set the weather sheet in the cleat in a place where the jib trimmer can play it by “banjoing” it on when we need more power and then easing it back when we want to flatten the bottom of the jib and open the leech. When set correctly, this can be done without adjusting the weather sheet in the cleat. Think about your jib lead and inhaul setting similar to how we set the outhaul as described above. In light air or chop, you want more power in the bottom of the jib which means you want more depth in the foot compared to when it’s windy or flat water. A good rule of thumb is to try to get the foot of the jib to contact the cabin house as much as possible to prevent air from jumping through the gap under the foot. If it’s windy, you’ll need to pull the lead back a bit to depower the sail in order to inhaul enough to bring the foot to the cabin house. If it’s light air, you’ll need to push the lead forward a bit in order to provide enough depth in the foot (power) when the foot is along the cabin house. A good range on the jib lead is between 6 – 7.5 holes showing between the front of the car and the forward most factory bolt in the jib track.
Cunningham
The cunningham tends to be neglected just like the outhaul. Most of the time it’s not the most critical adjustment to make but there is a time when it becomes your very best friend. We saw this condition on the second day of racing in Marblehead when the breeze ranged from about 8 knots in the lulls to upwards of 16-18 knots in the puffs. We all know it’s best to set your rig tension for the lulls and do your best to survive the puffs and that’s where the cunningham comes in. For most, if you’re caught with your rig too loose, your first move is to whale on the backstay to depower and keep the headstay tight. But the problem is that without adequate rig tension, the tight backstay will quickly invert or wash out the main sail leaving you with huge overbend wrinkles and that ‘inside out’ look. But your headstay is still unstable making the boat hard to sail. This is when you want to really whale on the cunningham. To be clear, I don’t mean to just take those luff wrinkles out, I mean WHALE on it! Loads of cunningham tension pulls the draft of the main forward, putting some shape back into the sail (un-inverting it). This then allows you to pull even more backstay on to control the headstay. Your leeward shrouds will be doing basketball sized loops – blowing in the wind, but your headstay will be controlled and you’ll still have shape in your mainsail – albeit a flat shape. Will sits all the way forward going upwind and he keeps the cunningham in his hand. If we hit a light spot, he eases the cunningham as I ease the backstay to power up the rig and then as the next puff hits, he trims it on as I trim on the backstay. Keep your eye on the inversion wrinkle that comes out of the clew and goes up to the inboard end of the bottom batten. When overpowered, you want to see this wrinkle only and use the cunningham to eliminate the wrinkles below/forward of it. More cunningham = ability to pull more backstay = more controlled headstay = FAST!
Weight Placement
The J70 likes to have the crew weight forward going upwind. In fact, in light air it’s difficult to get forward enough. Some teams have experimented with sending their forward-most crew just in front of the shrouds and it seems to be pretty quick when the breeze is very soft. It’s also important to know that fore/aft weight placement can help the boat with moding. All other things equal, pushing weight forward tells the boat to point while moving weight aft helps with a bow down mode. In light air, it’s also important to think about body drag through the air. Try to hide the bodies from the wind as much as possible by tucking up to the cabin house or to your teammate in front of you. Also think about how you can position your body to be as aerodynamic and small as possible. Instead of facing forward with your shoulders square to the breeze, scoot forward and rotate your shoulders so they’re more in line with the wind direction. Sounds insignificant but reducing drag is the name of the game,
It seems like no matter how much we learn in the J70, we’ve never learned enough. It’s important to always be thinking critically and creatively about how to get faster. Keep the learning curve steep and watch your results improve! For more in depth information or for any specific questions, don’t hesitate to reach out to your J70 class North experts.
Contact your North Sails J70 North American Experts here:
ZEKE HOROWITZ ALLAN TERHUNE ALEX CURTISS
READ MORE
READ MORE
guides
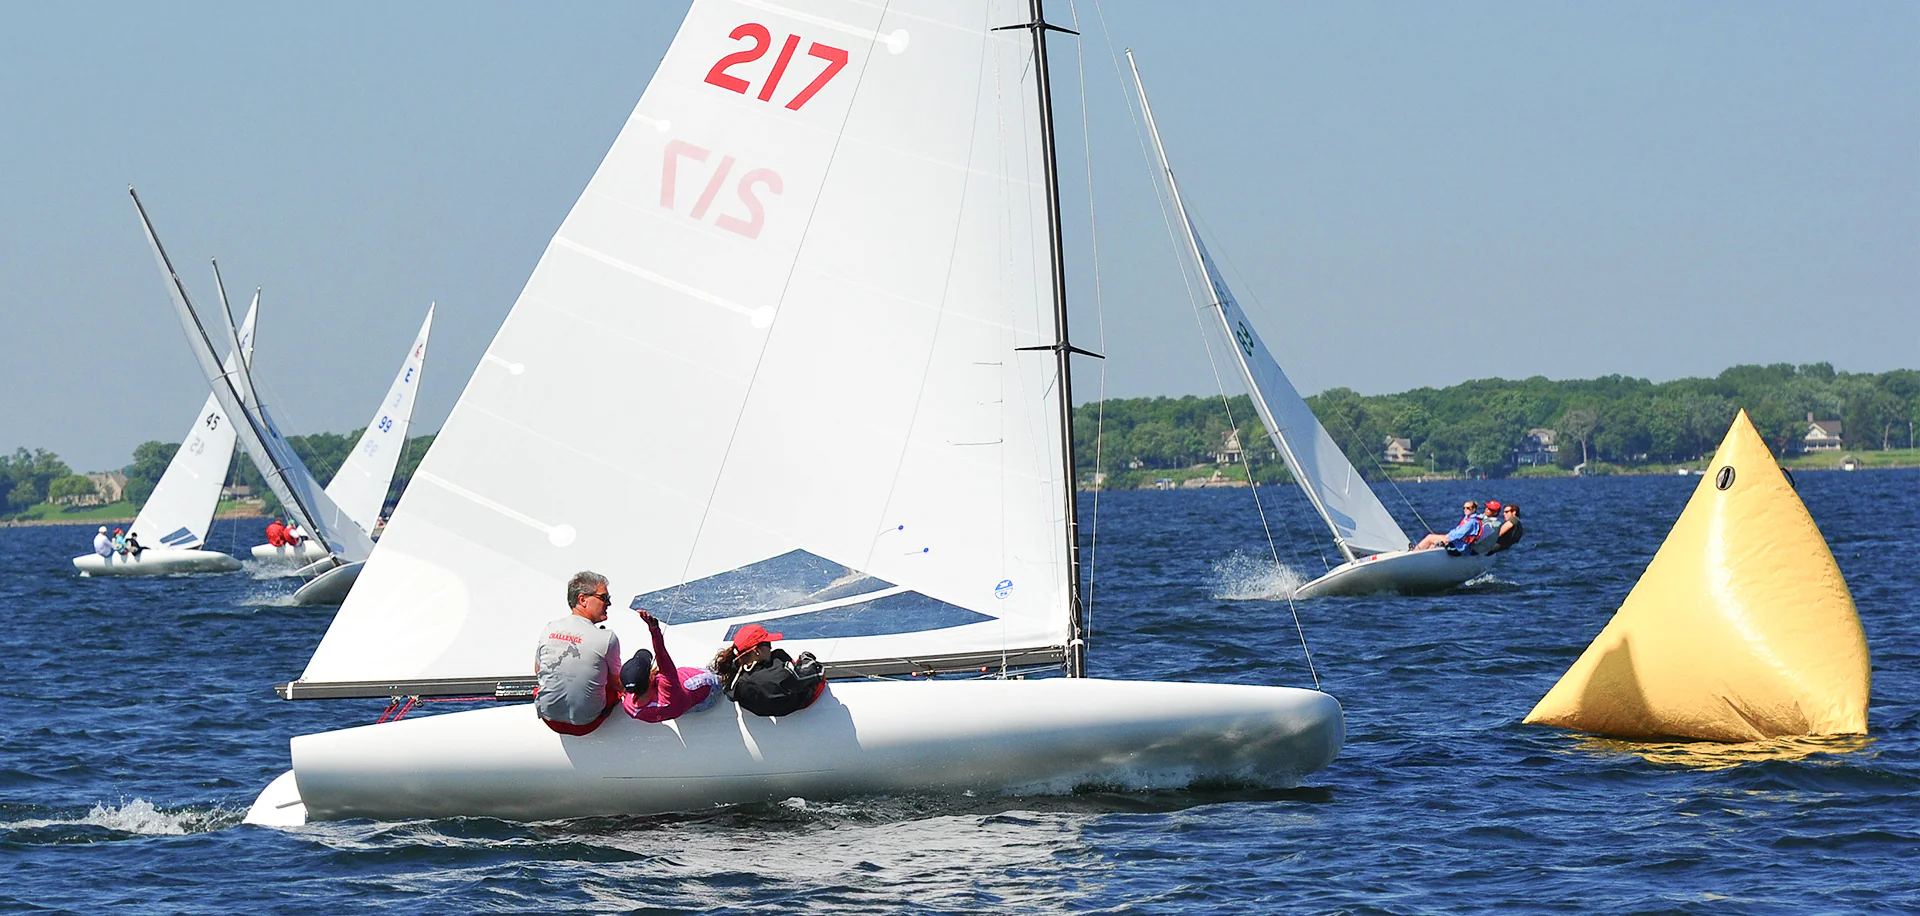
THE SCOW SAILOR'S GUIDE
THE SCOW SAILOR’S GUIDE
North Sails Tuning Guides, Webinars and More
📸 Hannah Lee Noll
North Sails has been manufacturing and designing championship winning scow sails for over forty years and look forward to doing so for forty more. The North Sails One Design team has a long tradition of serving one design fleets all over the country and we look forward to working with you! Our network of local one design experts and dealers are available to help you get the most out of your sails so you can reach your goals whether it is an informal evening race, or the Class Championship. North Sails is continually developing and improving our products and services to enable you to sail faster is not just our goal; it is our obsession.
“The North Sails team will have a presence at every major scow regatta on the calendar, and we’re dedicated to providing the latest tips, tricks and tuning info to get the most out of your North Sails scow designs. We have put a huge effort into modernizing our product line using the best software, best materials and hundreds of hours on the water to refine the designs,” says North Sails Expert, Jeff Bonanni.
Get to Know Your Class Experts
Allan Terhune has won eleven North American Championships (in the Lightning, Flying Scot and Thistle Classes) and was crowned the 2013 J/22 World Champion, a two time E Scow Eastern Champion crew and is the current ILYA MC Scow Champion. Allan is also a class expert in the E Scow, MC Scow, Etchells, J/70, J/80, J/88, J/105, J/111 with many podium finishes in each class. Allan is a resident of Annapolis, MD. In 2007, Terhune was awarded US Sailing’s One Design Leadership Award and named Rolex Yachtsman of the Year Finalist in 2008 and 2013. Allan has been with North Sails since 2007.
Jeffrey Bonanni has won 5 National and North American Championships, including the 2015 E Scow National Championship. He is one of a small handful of helmsman to have won all 6 National Championship trophy races. Jeff actively races in the E Scow, Melges 20, Melges 24 and Etchells classes, as well as coaching the Northeast’s top junior sailors on Barnegat Bay. Jeff currently serves on the National Class E Scow Association’s Board of Directors and is the Commodore of the Eastern Class E Scow Association. Jeff is a resident of Little Silver, New Jersey and a graduate of Boston College, where he was an ICSA All American Skipper.
Eric Doyle – Eric was raised in Pass Christian along the Mississippi Gulf Coast, where he learned at a ripe young that he was hooked on sailing. Eric began his career at North Sails in 1992. Shortly after starting at North Sails One Design, he was hired by Dennis Conner to sail with Stars & Stripes America’s Cup campaign in 2000. Continuing on he raced with BMW Oracle for the 2003 and 2007 America’s Cup campaigns. Eric’s passion is with smaller keel boats like the Etchells, Melges 24, and J/70, but his favorite boat is the Star in which he won the World Championship in 1999 as skipper and the coveted Bacardi Cup in 2019! Eric is currently based in our San Diego Loft and when he’s not racing or coaching he’s constantly working on R&D sails for the One Design team.
Tim Carlson – Tim Carlson has been selling North Sails for over 5 years as a North Sails representative in the Upper-Midwest and offers a wide variety of services to the vibrant sailing scene in the Twin Cities. Tim is proud to serve the members of Wayzata, Minnetonka, and White Bear Lake Yacht Clubs which host some of the most competitive weekly races in the country. While Tim is fluent in the ways of inland lake sailing, he is no stranger to offshore sailing on the Great Lakes. Over the years, he has participated in the Chicago Mac, Bayview Mac, Trans-Superior, and many more.
📸 Hannah Lee Noll
Tuning Guides
North Sails Experts carefully create and update each class’ tuning guide each season and upon the launch of new sail designs. Make sure you are optimizing your rig, sails, and boatspeed by downloading your class’ guide below.
A SCOW
E SCOW – Newly Updated in May 2022
C SCOW
MC SCOW
M-16 SCOW
M-20 SCOW
X-BOAT
Client and Expert Testimonials
“After North updated their sail selections recently the Magnum has been the only sail that I use. Upwind it is easy to trim and keep the boat on rails but downwind is where it really shines. I was sold on it once I realized I was able to keep pace in the light stuff with the smaller sailors. ” – Sean Bradley
“E Scow racing rewards the teams that put in 100% effort around the race track. The boat is so dynamic and fast, you’re always within striking distance of the next pack. My favorite races are not the wins, but the races where we passed thirty boats to finish fifth.” – Jeff Bonanni
“The MC Magnum is a powerful sail. The results are here and we are very confident that the MC Magnum will be a huge success this summer. We made some significant changes to the MC Tuning Guide, including shroud tension and board angles, which are crucial for boat speed. Make sure to check it out! The MC Magnum is a MUST HAVE!” – Allan Terhune
Webinars
North Sails Experts and Class Champions conduct regular webinars to touch on teaching moments from past events, discuss changes to the tuning guides, explain new sail designs and their intricacies and take the time to answer your questions. Take a look through our collection of Scow Webinars, and learn something new from a class expert!
NORTH SAILS SCOW WEBINARS
READ MORE
READ MORE

guides
E SCOW TUNING GUIDE 2022
This tuning guide is for E Scow sailors using the rig with the chainplates at the max aft position with longer spreaders. With this rig, backstays are not required, allowing the skipper to fully concentrate on tactics and boat speed.
BEFORE STEPPING THE MAST
Clean and lubricate turnbuckles, make sure that the top and bottom threaded studs are even in the turnbuckle tube.
Position mast so that base is locked in mast step plate on deck and top end is resting in the boom rest support.
Check all pins, wires, and fittings for wear, and attach upper and lower shrouds.
Pull the forestay down along the top of the mast, pull firmly, and mark the wire with a permanent marker at the top of the mast base casting or where the tube is cut off at the bottom. You will use this mark to measure your mast rake once the mast is in the up position.
Check the spreaders to make sure they are pinned in the forward hole for an all-purpose setting. This puts the spreaders in the aft-most position.
Make sure that all halyards are pulled down and are not fouled.
Using the feeder line that comes up through the mast step, tie this onto the bottom end of the jib halyard and pull the jib halyard through the deck.
Take care not to loose the feeder line through the deck or you will have to re-run through the pulleys inside the backbone.
Using a person on the foredeck pulling on the spinnaker halyard and someone walking up the mast, step the mast and attach the forestay.
After stepping the mast, proper shroud tensions should be obtained.
If you have a new North mainsail with the slug sewn into the sail, remove the screw holding the slug slide in the mast and remove the slug slide.
This slide can be shackled on another sail for use of an older mainsail.
ALL PURPOSE SETTINGS
For base setting of the mast rake, start by measuring up from the top of the deck at the forestay along the forestay wire to the mark on the wire that corresponds to the mark you put on the wire at the bottom of the mast tube. Please refer to the mast rake chart and use the measurement which corresponds to the year your boat was built.
At this point, tighten the upper shrouds (shrouds that go to the forestay) so they measure 37 (560 lbs) on a PT-1 Loos tension gauge. Make sure the uppers are in the aft-most hole in the chainplates and also make sure you tighten each turnbuckle the same amount. If you want to really fine-tune the rig, measure down to the deck at the chainplates using the jib halyard and adjust the intermediates to center the mast athwartship.
Set the lower shrouds at 21 (240 lbs) on the PT-1 gauge and the diamonds at 23 (280 lbs). You will have to work back and forth between shrouds to achieve these base numbers.
Note: If you have a new boat or new shrouds it is important to sail a few times in heavy air to stretch out the rigging before setting permanent marks on the shrouds and the mast rake. Double check the mast rake measurement after tightening shrouds and after sailing in a good breeze.
Rake Setting
The proposed rake settings below are based on the year your E Scow was built.
1998 - 2011
2012 - 2015
2016 or newer
26"
26 1/4"
26 3/8"
Easy Tuning Charts
Note that all recommended turns are from the base settings.
M3 Mainsail / J4 Jib
TWS
6 knots
BASE - 8 knots (2-3 on rail)
10 knots
12 knots
15 knots
18+ knots
Uppers
-
37
+1
+1.5
+2
+3
Lowers
-1
21
+1
+1
+2
+2
Diamonds
-1
23
-
-
+2
+3
Boards
2 holes FWD
1 hole FWD
1 hole FWD
AP
1 hole AFT
2 holes AFT
Outhaul
Smooth
Smooth
Smooth
Smooth
Max
Max
Vang
Loose
Slack Out
Firm
Firm
Max
Max
Cunningham
Loose
Loose
Loose
12" Wrinkles
Smooth
Smooth
Main Traveler
Up 2-6"
Center to up 2"
1/4 to 1/2 to Post
1/2 to Post
3/4 Down or Post
Post
Jib Traveler
Max Up
Max Up
Max Up
Down 2"
Down 3"
Down 4"
Clewboard
2nd Hole From Top
2nd Hole from Top
2nd Hole From Top
3rd Hole From Top
Bottom Hole
Bottom Hole
Tack Height
4"
4"
3.5"
3"
2.5"
2"
MAINSAIL TOP BATTEN - 6-12 knots go to 10180c, >12 knots increase to 10230c
2021 Easy Tuning Charts
Easy Tuning Charts (pre 2022)
Jib Tack Height
Jib tack height at base measured from the deck to the bearing point of the jib tack control line. Mark your control line to ensure you can quickly find your base setting. Adjusting the jib tack in in small increments during a race is a quick way to power-up or de-power the jib and has a more meaningful effect on jib shape than a 1 hole adjustment on the clewboard. See below.
Jib Spreader Mark
18.5"-19" measured from center rivet on front of spreader bracket, alongside the front of spreader.
In most conditions, the jib leech should be at or near this mark. Periodically sight through the mainsail window or from behind the mainsail to check your sheeting is accurate.
RACING YOUR ASYMMETRICAL
We wanted to provide you with some helpful tips so that your learning curve moves upward. Please follow some of these initial tips so that you reach maximum performance right out of the gate. Teamwork is a major factor in this sport. So, work with your team and see what techniques may work for you specifically. The tips provided are a baseline to work from. When setting up your Asymmetrical sheets – be sure to rig them so that you are doing “inside jibes”. The clew passes between the luff of the kite and the forestay. A quick way to ensure this is to lead the tack line over the starboard spinnaker sheet when you rig your sheets. Tack over sheet.
IMPORTANT MAST TUNING AND ASYMMETRICAL TECHNIQUES TO LEARN
As with any masthead spinnaker configuration, the rig is more loaded and will require more attention to rig tuning and some changes in sailing technique.
DIAMOND STAYS
The diamond stays on the mast help to support the mast head spinnaker configuration and the tension on the diamonds is important to ensure that the mast stays pre-bent and in column. It is important to follow the tuning guide recommendations and not stray too far from these numbers. Diamonds that are too loose when it is windy will not support the masthead kite properly and cause the mast to invert. Note: Diamond stays will stretch when they are new and you must check them before and after heavy air races, especially when the rig is new. Diamond stays will also measure differently with different tension on the Intermediates and the lowers.
SPREADERS
Spreaders should always be in the maximum aft setting on the mast to ensure maximum spreader sweep. Note: This is the fast setting for all wind conditions, and this is true for the aft chainplate boats as well as the forward chainplate boats. The upper spreaders are set from the factory with approximately a 6-1/4” sweep when measuring from the back of the mast to a straight line from tip to tip where the wire passes through the tip. Sweeping the spreaders forward will make the top of the mainsail fuller, sweeping them aft will flatten the top of the mainsail.
SIDESTAY TENSION
With the forward chainplate rigs it is important to start to put some tension on the uppers once the breeze is over 10 knots. 400 lbs. On the uppers is necessary to insure that the mast stays prebent when sailing downwind. We recommend sailing with the uppers closer to 600 lbs once the breeze is over 15knots. This is the same for the aft chainplate rigs. With the aft chainplate rigs we rarely go below 600 lbs on the upper sidestay tension.
MAINSHEET TECHNIQUES
It is important with the Asymmetrical to sail at slightly hotter or higher angles than with the symmetrical kites to achieve the greatest performance. This, along with the higher speeds you are achieving will bring the apparent wind angle forward and require the mainsail to be trimmed at a tighter angle. Also, more vang can be carried since you are sailing at hotter angles with more load on the mainsail. Because you are sailing at hotter angles and the A sails are so easy to jibe you should not ease the mainsail out too far on the jibes. The maximum the sheet should ever be eased is about 10’ measuring from the aft corner of the boat to the boom. This technique along with keeping some vang on will help maintain a positive bend in the mast and regardless of backstay tension will help ensure that the mast does not do an inverted bend.
RECIPE FOR MAST DAMAGE
Crew weight should never exceed 675lbs. on an E Scow. The target weight for 4 people sailing in heavy wind is 630-650lbs. Sailing heavier will dramatically increase loads on the boat and rigging and amplifies mistakes made with tuning and mainsail handling. Jibing in heavy air with the vang loose and the mainsail eased out too far can be a recipe for mast problems. This is the single most important thing you need to concentrate on when sailing the A sail configuration. When you go into a jibe do not slow the boat down, go from high-speed mode right into the jibe. I equate this to a high-speed windsurfing jibe. If the diamonds are too loose and the uppers are too loose this will also compound the situation and cause the mast to invert and could cause failure. As with any powered-up masthead configuration you have to learn the techniques to ensure that you are safely performing the maneuvers. Once you understand the mechanics of the rig you will realize how much fun the A sails are and how much easier they are to sail. With the proper mechanics of boat handling and rig tuning, the rigs are very durable and will stand up to a lot of wind. It is very important to stay within the recommended rig settings. Do not overload the shroud tension or the crew weight as this places too much compression load on the mast and boat and can cause failures.
Downwind Asymmetrical Techniques
SETTING THE ASYMMETRICAL
Pull the bow sprit all the way out – Important – You cannot pull the bowsprit out until you break the plane of the windward mark. Only pull bow sprit out prior to hoisting without kite launcher and one pull tack line system.
Mid crew opens the bag and prepares for the kite to exit the cockpit. Only if you don’t have a kite launcher.
Make sure to keep the boat flat when in the hoisting process as this helps keep the spinnaker out of the water. Not as important with kite launcher.
Mid Crew pulls the spinnaker halyard all the way up - Tip – Make a permanent mark on the halyard in the “full up” position so you pull to that point every time.
With kite launcher on hoist countdown, jib crew pulls windward jib sheet in through ratchet and cleats to windward to clear kite launcher hole.
After the halyard is ¼ of the way hoisted, Jib Crew now pulls the tack of the asymmetrical all the way out and then immediately uncleats the jib sheet and properly trims jib.
Helmsperson Tip – on the set it is very important to help your crew out by bearing away a bit on the hoist. This allows the kite to go all the way up with ease. It is important to also make sure the mainsail is not let out too far. The halyard and head of the kite can get hung up behind the spreader delaying the hoist. Keep an eye on these things.
Once the halyard is up your mid crew should communicate “made”. The helmsperson should freshen (head up) right away so that the kite blows away from the rig and then fills.
Limit your mistakes on the set – do not sail too high on the set – this makes it harder to pull the halyard up and the kite will fill early making it harder on the crew. With practice, you can push this limit higher.
Limit your mistakes on the set.
Practice your timing on all of these things and know when you can push the envelope for the ultimate set!
THINGS TO THINK ABOUT AND PRACTICE
When sailing downwind with the asymmetrical we sail with our boards all the way down. In varying conditions, you may want to experiment with pulling your boards up some. This could be especially good in moderate winds and wavy conditions. Practice this technique and find out what is fast for your team. When in doubt though – keep the boards all the way down.
The angle of heel will not vary from the symmetrical kite setup.
It is very important to keep your lines clean and drop coiled. You need to drop coil your spinnaker sheets after every jibe so that the sheet runs free through this maneuver.
Compass – it is very important to watch your compass angles downwind while staying in the freshest breeze on the course. These boats will be going very fast. Angles and wind really make the difference. Watch your compass as much if not more than you do going upwind.
Downwind Sailing Angles – this will vary some. Many think that you have to sail hot and fast in all conditions with this setup. This is not the case. Here is a brief guideline to go by.
WINDS 0 - 8 KNOTS
A higher angle is required so that the boat builds apparent wind. With this speed, you can begin to sail low. As soon as the boat slows even slightly or the boat begins to flatten in angle of heel – you need to head right back up and fire up the speed again. This requires constant attention and focus. One key factor in this condition is mainsheet trim. As your apparent wind moves forward you need to keep your mainsheet trimmed a lot more. Make sure your mainsail is not luffing. You will be amazed as to how the boat reacts to a tighter mainsheet and how much the boat likes to have the mainsheet worked downwind. Practice this. In this wind range, you want to practice float jibes where you bear away slowly and ease the kite out and start pulling it around so it floats around the bow.
WINDS 9-12 KNOT
You can experiment with sailing a lower or deeper angle in these conditions. As the breeze hits and the boat heels, begin to drive the boat down and sail deeper. Work your mainsheet. As you sail deeper the main will need to be eased slightly, but not nearly as far as would for a symmetrical sail.
WINDS 13 - 15 KNOT
This is where it is really fun! Rock and Roll time! Crews should all be on the high side in their hiking straps. The mainsail will need to be trimmed in – almost all the way at times – as your apparent wind is way forward. The Jib Crew will need to work the jib and also the vang. It will feel like you are sailing at a higher angle due to the speed build-up. You really need to get the boat up and rolling – do not sail low or keep people in the boat – put them on the rail and go for a fast ride! The key is the mainsheet, keep the main trimmed. Do not ease the main much through your jibe either! Keep the sail in! In this wind condition you want to perform Mexican jibes, the skipper turns right into the jibe, you trim the sheet tight, strap the foot of the kite, let it back slightly onto the rig on the new windward side of the boat and as the main is coming across you blow the sheet off and trim the new sheet on quickly.
ASYMMETRICAL TAKEDOWNS
The easiest takedowns are the Windward takedown or the Mexican take-down. The leeward takedown is your third option.
WINDWARD TAKEDOWN
Head the boat virtually dead downwind.
Middle crew begins to pull the windward spin sheet around and then the Jib crew releases the tack line shortly after that. You can release the bow sprit line shortly after. With the kite launcher, mid crew counts down 3-2-1 as they start to pull on the kite retrieval line, jib crew uncleats halyard on 0 and then tack line, tailing as they drop to keep the kite out of trouble. All sheets have to run smoothly to keep the kite coming in freely.
Middle Crew - Pull the windward sheet aggressively through the ratchet - all the way back so that the clew reaches the ratchet block. The sail will have inverted. Only if you have no kite launcher.
Middle Crew - Call for the halyard once you have the sail in hand. See #2 for kite launcher.
Helmsperson - Before the halyard begins to drop be sure to steer up slightly so that the sail blows onto the deck of the boat. If you are dead downwind or sailing by the lee the kite will blow out away from the boat and go into the water. This is not good. It is very important that the helmsperson helps out the crew by steering up.
The Middle Crew stuffs the sail into the bag and prepares for the rounding. Only if you don’t have a kite launcher.
MEXICAN TAKEDOWN
This takedown is effective when approaching the leeward mark on starboard tack and you need to jibe to go around the mark. As you reach a 3 boat length circle from the leeward mark you prepare to go into action. The key is that you need to be at about 150 degrees to true wind as you complete your jibe and you sail on port tack to the mark ( as you jibe you need to have the ability to head up on port jibe slightly so that the asymmetrical stays on the deck of the boat. If you come out of the jibe dead downwind the spinnaker will fall right into the water – again, the helmsperson needs to do their job to make the takedown easy and effective). So, your relation to the leeward mark is critical – you want to exit the jibe and begin to reach toward the leeward mark.
You enter the three boat length circle on starboard tack.
Helmsperson calls for a Mexican.
Middle Crew - Be sure to drop the windward board before entering the jibe.
Begin the jibe – the Middle Crew needs to trim the sheet hard so that the clew goes to the ratchet on the port side of the boat. This brings the clew and the foot of the sail to within reach for the takedown.
The helmsperson turns the boat and enters the jibe. As the boom goes across he yells for the halyard release. The Jib Crew needs to release the halyard and the mid crew will already be taking in the retrieval line.
The helmsperson needs to head up so that the sail gets “pressed” into the rig on the port side. The key is to head up so that the sail falls onto the deck and into the rig keeping the sail away from the water.
The crew needs to be on the high side – on this port jibe as you approach the leeward mark – very important if it is windy as the boat will accelerate once you begin to reach to the mark.
The tack line and bowsprit line are the last two items to be released. The Middle Crew needs to stuff the sail into the bag and hike hard as the boat rounds the mark. Refer to #2 on windward takedown for jib crew steps.
Middle or jib crew pulls the board up on the port side as soon as possible or before the leeward mark.
LEEWARD TAKEDOWN
The key here is that the helmsman heads down for an easy takedown.
Release the tack line and trim the spinnaker sheet in.
Release the halyard slowly or with friction for the first 8 feet so that the halyard does not blow out and get hooked on the leech of the mainsail.
Middle Crew stuffs the kite into the bag.
Final release is the bowsprit line which can occur shortly after the release of the tack line.
Takedown with kite launcher:
Helm bears away, mid crew starts retrieval in counting down, 3-2-1 halyard is released, then tack. Flatten boat as much as possible to all crew to windward. Speed on the retrieval line is the name of the game.
SET UP
It is important to follow the North Sails Tuning Guide – I-1 Rig. Follow the amount of rig tension suggested for the varying conditions.
SPECIAL CONSIDERATIONS
The angle of heel is very important on an E Scow. Upwind in up to 10 knots, go for a maximum heel, but never let the water get up on the leeward deck. In more wind, sail with the bilge board vertical in the water. Don’t let the boat heel too much when sailing in a chop: it might feel good, but it is not fast. Just make sure that the bilge board is vertical, or that the boat is just a little flatter. When sailing in a lot of chop, be sure to have a very full jib, power up the main by keeping the rake forward, Cunningham off all the way and the outhaul pulled just until the vertical wrinkles disappear. An E Scow travels at very high speeds for a sailboat, and is very maneuverable even though the rudders are only 10” X 16”. Still, it is important for the crew to be in tune with the skipper to help steer the boat. When a big puff hits, the bow has a tendency to blow to leeward, so the jib crew must be prepared to ease the sheet to prevent this. The most important thing to do when tacking an E Scow is to lower the new board at the right time. As the boat is turning through the tack, wait until the bow is just past head to wind to lower the board: if you do this too soon, it just creates extra drag and slows the boat down. Don’t worry about raising the windward board until the boat is up to speed on the new tack. We like to ease the main slightly and then trim it in to heel the boat as we come up into the wind, and then everybody rolls the boat together. In light to medium winds, keep the jib trimmed in until the boat is head to wind and let the windbreak it across. When it starts to get windy it isn’t necessary to roll the boat, but ease the jib sooner so the bow can come up into the wind easier.
TACTICAL CONSIDERATIONS
As far as tactical considerations go, at the start just remember that E Scows accelerate quickly, so it’s important to trim in before the boats around you or you might get rolled right away. If you have the room to leeward, simply put the boat on a tight reach with 15 seconds to go, get it up to speed by the time you hit the line, and make sure you can sail over the boat to leeward. E Scows don’t seem to create much of a wind shadow, so don’t be afraid to sail in someone’s bad air if you think it’s the right way to go, since the gains in a windshift can outweigh the loss of boat speed. These boats sail so fast that you are never out of the race. If you find yourself behind, several good wind shifts can move you right through the fleet. The important thing to remember is to keep the pedal down and never give up. All these generalizations are norms and averages that have proven fast over many years. Some experimentation on your part may be necessary to fine-tune your particular rig and sailing style. Good luck!
READ MORE
READ MORE

guides
E SCOW TUNING GUIDE
This tuning guide is for E Scow sailors using the rig with the chainplates at the max aft position with longer spreaders. With this rig, backstays are not required, allowing the skipper to fully concentrate on tactics and boat speed.
BEFORE STEPPING THE MAST
Clean and lubricate turnbuckles, make sure that the top and bottom threaded studs are even in the turnbuckle tube.
Position mast so that base is locked in mast step plate on deck and top end is resting in the boom rest support.
Check all pins, wires, and fittings for wear, and attach upper and lower shrouds.
Pull the forestay down along the top of the mast, pull firmly, and mark the wire with a permanent marker at the top of the mast base casting or where the tube is cut off at the bottom. You will use this mark to measure your mast rake once the mast is in the up position.
Check the spreaders to make sure they are pinned in the forward hole for an all-purpose setting. This puts the spreaders in the aft-most position.
Make sure that all halyards are pulled down and are not fouled.
Using the feeder line that comes up through the mast step, tie this onto the bottom end of the jib halyard and pull the jib halyard through the deck. Take care not to loose the feeder line through the deck or you will have to re-run through the pulleys inside the backbone.
Using a person on the foredeck pulling on the spinnaker halyard and someone walking up the mast, step the mast and attach the forestay.
After stepping the mast, proper shroud tensions should be obtained. If you have a new North mainsail with the slug sewn into the sail, remove the screw holding the slug slide in the mast and remove the slug slide. This slide can be shackled on another sail for use of an older mainsail.
ALL PURPOSE SETTINGS
For base setting of the mast rake, start by measuring up from the top of the deck at the forestay along the forestay wire to the mark on the wire that corresponds to the mark you put on the wire at the bottom of the mast tube. Please refer to the mast rake chart and use the measurement which corresponds to the year your boat was built.
At this point, tighten the upper shrouds (shrouds that go to the forestay) so they measure 37 (560 lbs) on a PT-1 Loos tension gauge. Make sure the uppers are in the aft-most hole in the chainplates and also make sure you tighten each turnbuckle the same amount. If you want to really fine-tune the rig, measure down to the deck at the chainplates using the jib halyard and adjust the intermediates to center the mast athwartship.
Set the lower shrouds at 21 (240 lbs) on the PT-1 gauge and the diamonds at 23 (280 lbs). You will have to work back and forth between shrouds to achieve these base numbers.
Note: If you have a new boat or new shrouds it is important to sail a few times in heavy air to stretch out the rigging before setting permanent marks on the shrouds and the mast rake. Double check the mast rake measurement after tightening shrouds and after sailing in a good breeze.
Rake Setting
The proposed rake settings below are based on the year your E Scow was built.
1998 – 2011
2012 – 2015
2016 or newer
26″
26 1/4″
26 3/8″
Easy Tuning Charts
Note that all recommended turns are from the base settings.
M3 Mainsail / J4 Jib
TWS
6 knots
BASE – 8 knots(2-3 on rail)
10 knots
12 knots
15 knots
18+ knots
Uppers
–
37
+1
+1.5
+2
+3
Lowers
-1
21
+1
+1
+2
+2
Diamonds
-1
23
–
–
+2
+3
Boards
2 holes FWD
1 hole FWD
1 hole FWD
AP
1 hole AFT
2 holes AFT
Outhaul
Smooth
Smooth
Smooth
Smooth
Max
Max
Vang
Loose
Slack Out
Firm
Firm
Max
Max
Cunningham
Loose
Loose
Loose
12″ Wrinkles
Smooth
Smooth
Main Traveler
Up 2-6″
Center to up 2″
1/4 to 1/2 to Post
1/2 to Post
3/4 Down or Post
Post
Jib Traveler
Max Up
Max Up
Max Up
Down 2″
Down 3″
Down 4″
Clewboard
2nd Hole From Top
2nd Hole from Top
2nd Hole From Top
3rd Hole From Top
Bottom Hole
Bottom Hole
Tack Height
4″
4″
3.5″
3″
2.5″
2″
MAINSAIL TOP BATTEN – 6-12 knots go to 10180c, >12 knots increase to 10230c
2021 Easy Tuning Charts
Easy Tuning Charts (pre 2022)
Jib Tack Height
Jib tack height at base measured from the deck to the bearing point of the jib tack control line. Mark your control line to ensure you can quickly find your base setting. Adjusting the jib tack in in small increments during a race is a quick way to power-up or de-power the jib and has a more meaningful effect on jib shape than a 1 hole adjustment on the clewboard. See below.
Jib Spreader Mark
18.5″-19″ measured from center rivet on front of spreader bracket, alongside the front of spreader.
In most conditions, the jib leech should be at or near this mark. Periodically sight through the mainsail window or from behind the mainsail to check your sheeting is accurate.
RACING YOUR ASYMMETRICAL
We wanted to provide you with some helpful tips so that your learning curve moves upward. Please follow some of these initial tips so that you reach maximum performance right out of the gate. Teamwork is a major factor in this sport. So, work with your team and see what techniques may work for you specifically. The tips provided are a baseline to work from.
When setting up your Asymmetrical sheets – be sure to rig them so that you are doing “inside jibes”. The clew passes between the luff of the kite and the forestay. A quick way to ensure this is to lead the tack line over the starboard spinnaker sheet when you rig your sheets. Tack over sheet.
IMPORTANT MAST TUNING AND ASYMMETRICAL TECHNIQUES TO LEARN
As with any masthead spinnaker configuration, the rig is more loaded and will require more attention to rig tuning and some changes in sailing technique.
DIAMOND STAYS
The diamond stays on the mast help to support the mast head spinnaker configuration and the tension on the diamonds is important to ensure that the mast stays pre-bent and in column. It is important to follow the tuning guide recommendations and not stray too far from these numbers. Diamonds that are too loose when it is windy will not support the masthead kite properly and cause the mast to invert.
Note: Diamond stays will stretch when they are new and you must check them before and after heavy air races, especially when the rig is new. Diamond stays will also measure differently with different tension on the Intermediates and the lowers.
SPREADERS
Spreaders should always be in the maximum aft setting on the mast to ensure maximum spreader sweep. Note: This is the fast setting for all wind conditions, and this is true for the aft chainplate boats as well as the forward chainplate boats.
The upper spreaders are set from the factory with approximately a 6-1/4” sweep when measuring from the back of the mast to a straight line from tip to tip where the wire passes through the tip. Sweeping the spreaders forward will make the top of the mainsail fuller, sweeping them aft will flatten the top of the mainsail.
SIDESTAY TENSION
With the forward chainplate rigs it is important to start to put some tension on the uppers once the breeze is over 10 knots. 400 lbs. On the uppers is necessary to insure that the mast stays prebent when sailing downwind. We recommend sailing with the uppers closer to 600 lbs once the breeze is over 15knots. This is the same for the aft chainplate rigs. With the aft chainplate rigs we rarely go below 600 lbs on the upper sidestay tension.
MAINSHEET TECHNIQUES
It is important with the Asymmetrical to sail at slightly hotter or higher angles than with the symmetrical kites to achieve the greatest performance. This, along with the higher speeds you are achieving will bring the apparent wind angle forward and require the mainsail to be trimmed at a tighter angle. Also, more vang can be carried since you are sailing at hotter angles with more load on the mainsail. Because you are sailing at hotter angles and the A sails are so easy to jibe you should not ease the mainsail out too far on the jibes. The maximum the sheet should ever be eased is about 10’ measuring from the aft corner of the boat to the boom. This technique along with keeping some vang on will help maintain a positive bend in the mast and regardless of backstay tension will help ensure that the mast does not do an inverted bend.
RECIPE FOR MAST DAMAGE
Crew weight should never exceed 675lbs. on an E Scow. The target weight for 4 people sailing in heavy wind is 630-650lbs. Sailing heavier will dramatically increase loads on the boat and rigging and amplifies mistakes made with tuning and mainsail handling.
Jibing in heavy air with the vang loose and the mainsail eased out too far can be a recipe for mast problems. This is the single most important thing you need to concentrate on when sailing the A sail configuration. When you go into a jibe do not slow the boat down, go from high-speed mode right into the jibe. I equate this to a high-speed windsurfing jibe. If the diamonds are too loose and the uppers are too loose this will also compound the situation and cause the mast to invert and could cause failure.
As with any powered-up masthead configuration you have to learn the techniques to ensure that you are safely performing the maneuvers. Once you understand the mechanics of the rig you will realize how much fun the A sails are and how much easier they are to sail. With the proper mechanics of boat handling and rig tuning, the rigs are very durable and will stand up to a lot of wind. It is very important to stay within the recommended rig settings. Do not overload the shroud tension or the crew weight as this places too much compression load on the mast and boat and can cause failures.
Downwind Asymmetrical Techniques
SETTING THE ASYMMETRICAL
Pull the bow sprit all the way out – Important – You cannot pull the bowsprit out until you break the plane of the windward mark. Only pull bow sprit out prior to hoisting without kite launcher and one pull tack line system.
Mid crew opens the bag and prepares for the kite to exit the cockpit. Only if you don’t have a kite launcher.
Make sure to keep the boat flat when in the hoisting process as this helps keep the spinnaker out of the water. Not as important with kite launcher.
Mid Crew pulls the spinnaker halyard all the way up – Tip – Make a permanent mark on the halyard in the “full up” position so you pull to that point every time.
With kite launcher on hoist countdown, jib crew pulls windward jib sheet in through ratchet and cleats to windward to clear kite launcher hole.
After the halyard is ¼ of the way hoisted, Jib Crew now pulls the tack of the asymmetrical all the way out and then immediately uncleats the jib sheet and properly trims jib.
Helmsperson Tip – on the set it is very important to help your crew out by bearing away a bit on the hoist. This allows the kite to go all the way up with ease. It is important to also make sure the mainsail is not let out too far. The halyard and head of the kite can get hung up behind the spreader delaying the hoist. Keep an eye on these things.
Once the halyard is up your mid crew should communicate “made”. The helmsperson should freshen (head up) right away so that the kite blows away from the rig and then fills.
Limit your mistakes on the set – do not sail too high on the set – this makes it harder to pull the halyard up and the kite will fill early making it harder on the crew. With practice, you can push this limit higher.
Limit your mistakes on the set.
Practice your timing on all of these things and know when you can push the envelope for the ultimate set!
THINGS TO THINK ABOUT AND PRACTICE
When sailing downwind with the asymmetrical we sail with our boards all the way down. In varying conditions, you may want to experiment with pulling your boards up some. This could be especially good in moderate winds and wavy conditions. Practice this technique and find out what is fast for your team. When in doubt though – keep the boards all the way down.
The angle of heel will not vary from the symmetrical kite setup.
It is very important to keep your lines clean and drop coiled. You need to drop coil your spinnaker sheets after every jibe so that the sheet runs free through this maneuver.
Compass – it is very important to watch your compass angles downwind while staying in the freshest breeze on the course. These boats will be going very fast. Angles and wind really make the difference. Watch your compass as much if not more than you do going upwind.
Downwind Sailing Angles – this will vary some. Many think that you have to sail hot and fast in all conditions with this setup. This is not the case. Here is a brief guideline to go by.
WINDS 0 – 8 KNOTS
A higher angle is required so that the boat builds apparent wind. With this speed, you can begin to sail low. As soon as the boat slows even slightly or the boat begins to flatten in angle of heel – you need to head right back up and fire up the speed again. This requires constant attention and focus. One key factor in this condition is mainsheet trim. As your apparent wind moves forward you need to keep your mainsheet trimmed a lot more. Make sure your mainsail is not luffing. You will be amazed as to how the boat reacts to a tighter mainsheet and how much the boat likes to have the mainsheet worked downwind. Practice this. In this wind range, you want to practice float jibes where you bear away slowly and ease the kite out and start pulling it around so it floats around the bow.
WINDS 9-12 KNOT
You can experiment with sailing a lower or deeper angle in these conditions. As the breeze hits and the boat heels, begin to drive the boat down and sail deeper. Work your mainsheet. As you sail deeper the main will need to be eased slightly, but not nearly as far as would for a symmetrical sail.
WINDS 13 – 15 KNOT
This is where it is really fun! Rock and Roll time! Crews should all be on the high side in their hiking straps. The mainsail will need to be trimmed in – almost all the way at times – as your apparent wind is way forward. The Jib Crew will need to work the jib and also the vang. It will feel like you are sailing at a higher angle due to the speed build-up. You really need to get the boat up and rolling – do not sail low or keep people in the boat – put them on the rail and go for a fast ride! The key is the mainsheet, keep the main trimmed. Do not ease the main much through your jibe either! Keep the sail in! In this wind condition you want to perform Mexican jibes, the skipper turns right into the jibe, you trim the sheet tight, strap the foot of the kite, let it back slightly onto the rig on the new windward side of the boat and as the main is coming across you blow the sheet off and trim the new sheet on quickly.
ASYMMETRICAL TAKEDOWNS
The easiest takedowns are the Windward takedown or the Mexican take-down. The leeward takedown is your third option.
WINDWARD TAKEDOWN
Head the boat virtually dead downwind.
Middle crew begins to pull the windward spin sheet around and then the Jib crew releases the tack line shortly after that. You can release the bow sprit line shortly after. With the kite launcher, mid crew counts down 3-2-1 as they start to pull on the kite retrieval line, jib crew uncleats halyard on 0 and then tack line, tailing as they drop to keep the kite out of trouble. All sheets have to run smoothly to keep the kite coming in freely.
Middle Crew – Pull the windward sheet aggressively through the ratchet – all the way back so that the clew reaches the ratchet block. The sail will have inverted. Only if you have no kite launcher.
Middle Crew – Call for the halyard once you have the sail in hand. See #2 for kite launcher.
Helmsperson – Before the halyard begins to drop be sure to steer up slightly so that the sail blows onto the deck of the boat. If you are dead downwind or sailing by the lee the kite will blow out away from the boat and go into the water. This is not good. It is very important that the helmsperson helps out the crew by steering up.
The Middle Crew stuffs the sail into the bag and prepares for the rounding. Only if you don’t have a kite launcher.
MEXICAN TAKEDOWN
This takedown is effective when approaching the leeward mark on starboard tack and you need to jibe to go around the mark. As you reach a 3 boat length circle from the leeward mark you prepare to go into action. The key is that you need to be at about 150 degrees to true wind as you complete your jibe and you sail on port tack to the mark ( as you jibe you need to have the ability to head up on port jibe slightly so that the asymmetrical stays on the deck of the boat. If you come out of the jibe dead downwind the spinnaker will fall right into the water – again, the helmsperson needs to do their job to make the takedown easy and effective). So, your relation to the leeward mark is critical – you want to exit the jibe and begin to reach toward the leeward mark.
You enter the three boat length circle on starboard tack.
Helmsperson calls for a Mexican.
Middle Crew – Be sure to drop the windward board before entering the jibe.
Begin the jibe – the Middle Crew needs to trim the sheet hard so that the clew goes to the ratchet on the port side of the boat. This brings the clew and the foot of the sail to within reach for the takedown.
The helmsperson turns the boat and enters the jibe. As the boom goes across he yells for the halyard release. The Jib Crew needs to release the halyard and the mid crew will already be taking in the retrieval line.
The helmsperson needs to head up so that the sail gets “pressed” into the rig on the port side. The key is to head up so that the sail falls onto the deck and into the rig keeping the sail away from the water.
The crew needs to be on the high side – on this port jibe as you approach the leeward mark – very important if it is windy as the boat will accelerate once you begin to reach to the mark.
The tack line and bowsprit line are the last two items to be released. The Middle Crew needs to stuff the sail into the bag and hike hard as the boat rounds the mark. Refer to #2 on windward takedown for jib crew steps.
Middle or jib crew pulls the board up on the port side as soon as possible or before the leeward mark.
LEEWARD TAKEDOWN
The key here is that the helmsman heads down for an easy takedown.
Release the tack line and trim the spinnaker sheet in.
Release the halyard slowly or with friction for the first 8 feet so that the halyard does not blow out and get hooked on the leech of the mainsail.
Middle Crew stuffs the kite into the bag.
Final release is the bowsprit line which can occur shortly after the release of the tack line.
Takedown with kite launcher: Helm bears away, mid crew starts retrieval in counting down, 3-2-1 halyard is released, then tack. Flatten boat as much as possible to all crew to windward. Speed on the retrieval line is the name of the game.
SET UP
It is important to follow the North Sails Tuning Guide – I-1 Rig. Follow the amount of rig tension suggested for the varying conditions.
SPECIAL CONSIDERATIONS
The angle of heel is very important on an E Scow. Upwind in up to 10 knots, go for a maximum heel, but never let the water get up on the leeward deck. In more wind, sail with the bilge board vertical in the water. Don’t let the boat heel too much when sailing in a chop: it might feel good, but it is not fast. Just make sure that the bilge board is vertical, or that the boat is just a little flatter. When sailing in a lot of chop, be sure to have a very full jib, power up the main by keeping the rake forward, Cunningham off all the way and the outhaul pulled just until the vertical wrinkles disappear.
An E Scow travels at very high speeds for a sailboat, and is very maneuverable even though the rudders are only 10” X 16”. Still, it is important for the crew to be in tune with the skipper to help steer the boat. When a big puff hits, the bow has a tendency to blow to leeward, so the jib crew must be prepared to ease the sheet to prevent this. The most important thing to do when tacking an E Scow is to lower the new board at the right time. As the boat is turning through the tack, wait until the bow is just past head to wind to lower the board: if you do this too soon, it just creates extra drag and slows the boat down. Don’t worry about raising the windward board until the boat is up to speed on the new tack. We like to ease the main slightly and then trim it in to heel the boat as we come up into the wind, and then everybody rolls the boat together. In light to medium winds, keep the jib trimmed in until the boat is head to wind and let the windbreak it across. When it starts to get windy it isn’t necessary to roll the boat, but ease the jib sooner so the bow can come up into the wind easier.
TACTICAL CONSIDERATIONS
As far as tactical considerations go, at the start just remember that E Scows accelerate quickly, so it’s important to trim in before the boats around you or you might get rolled right away. If you have the room to leeward, simply put the boat on a tight reach with 15 seconds to go, get it up to speed by the time you hit the line, and make sure you can sail over the boat to leeward. E Scows don’t seem to create much of a wind shadow, so don’t be afraid to sail in someone’s bad air if you think it’s the right way to go, since the gains in a windshift can outweigh the loss of boat speed. These boats sail so fast that you are never out of the race. If you find yourself behind, several good wind shifts can move you right through the fleet. The important thing to remember is to keep the pedal down and never give up.
All these generalizations are norms and averages that have proven fast over many years. Some experimentation on your part may be necessary to fine-tune your particular rig and sailing style. Good luck!
READ MORE
READ MORE
guides
CODE SAILS DEFINED
CODE SAILS DEFINED
What Is A Code Sail?
The term ‘Code Sail’ means different things to different sailors. What started out as an innovative and straightforward concept has rapidly evolved into a whole new category of sails. While Code Sails may look and perform quite differently from one another, there is one common theme: Code Sails are fast, flat, free-flying sails, designed for close reaching angles.
To understand all the different names and versions, it may help to look back at the origin of these sails. Originally “Code Zeros” were designed to qualify as spinnakers under various rating rules that require the mid-girth to be 75% of the foot length. Volvo Ocean Racers coined the term Code Zero, which fit into the established North Sails coding convention: A1, A2, A3, etc. This design also became popular among handicap racers under Rules like IRC, ORR, and PHRF. As their effectiveness and ease of use became increasingly apparent, Code Sails expanded into cruising as well, and multihull sailors coined the term “Screechers” for their similar, specialized, high-performance reaching sails.
Code Sails add a great deal of sail area and power for close reaching angles. Boats with non-overlapping headsails see the biggest benefit from Code Sails, as they better fill the inventory gap between upwind headsails and downwind spinnakers.
REQUEST A QUOTE CONTACT YOUR LOCAL EXPERT LEARN MORE ABOUT CODE SAILS
Helix Structured Luff: Code Sails Redefined
While Code Sail is a term used by sailmakers across the board, in recent years North Sails has redefined what it means to have a North Code Sail, with the introduction of its Helix Structured Luff technology.
A design philosophy first introduced for offshore Grand Prix, the performance benefits of Helix have reverberated around the sailing world, making Helix Code Sails the go-to tool for improving aerodynamics and increasing range.
View this post on Instagram
A post shared by North Sails (@north_sails)
With their unique luff structures, Helix Code Sails give sailors another gear, increasing power potential by projecting the sail further forward and optimizing load sharing, for a positive sail shape and enhanced control. They are custom-designed – optimized to react to dynamic sailing loads, easily and efficiently handle torque for furling, and offer load-sharing characteristics suited to a much wider wind angle and wind speed range.
As of January 2022, Helix is now a feature of all North Racing Code Sails. The exact implementation of the Helix Structure varies according to the specific version of Code Sail. When purchasing a Code Sail, your boat’s performance, target wind angles and anticipated wind speeds, your onboard sail handling systems, and the sail material you have chosen are all taken into consideration. Then, the sail is designed around your specific needs.
Helix Code Sails and Mid-Girth Measurements
Note: Some rating/handicap systems strictly limit the available mid-girth specifications of rule-eligible sails, barring sails with mid-girths greater than a headsail’s 50%/less than a spinnaker’s 75% . Other rating systems heavily penalize mid-girths greater than 50%/less than 75%. And other systems attempt to generate accurate ratings with no special consideration given to mid-girths between 50 and 75. Discuss with your North Sails representative the rating system under which you will be racing to determine whether and which any rule restrictions or prohibitions apply.
Helix Code Zero Asymmetric Spinnaker – Mid Girth (SMG) >75%
For systems that disallow mid-girths between 50 and 75%, this sail remains much the same in concept as the original Code Zero. The design requirement is the flattest possible sail with a spinnaker mid-girth of 75%. The challenge of designing and building a Code Zero Asymmetric Spinnaker is meeting the 75% girth measurement while producing a sufficiently flat sail shape with no excess area”flapping” in the wind. Code Zeros carry an unsupported mid-girth sail area that is not aerodynamically efficient for light-air close reaching. Code Zeros can be made in 3Di Downwind or Code style aramid laminates.
Helix Code 50 – Mid Girth (SMG) <54%
North Sails’ newest code sail, the Code 50 is a free-flying sail for offshore racing. Ideally suited to ocean racing Grand Prix yachts such as IMOCAs and Ultime Trimarans, it uses a new 3Di Downwind (RAW) 700 material, uniquely suited to the hybrid requirements of offshore, free-flying sails – exceeding the limitations of standard 3Di Downwind 600, 700 & 800 material.
Helix Code 55 + 65 (SMG 51%-74%)
A Code 55 has a 55% SMG while a Code 65 features a 65% SMG. (SMG is the width of the sail measured at half the sail’s height, expressed as a percentage of foot length). Code Sails with mid-girth between 50% and 75% are highly efficient and versatile sails. However, as noted above, these sails are sometimes treated unfavorably (if not outright banned) by certain rating rules. Where allowed, these Code Sails provide pure reaching performance – ideal for offshore racing, multihull sailing, and performance cruising. A smaller SMG percentage implies a flatter sail for closer wind angles, while a higher SMG percentage implies a slightly fuller sail for wider wind angles. An SMG less than 51% is considered a genoa, while an SMG greater than 74% is considered a spinnaker.
REQUEST A NEW SAIL QUOTE
CONTACT YOUR LOCAL EXPERT
READ MORE
READ MORE
guides
HOW TO SAIL SAFELY THROUGH A STORM
HOW TO SAIL SAFELY THROUGH A STORM
Tips And Tricks To Help You Get Home Safe
📸 Kurt Arrigo/ ROLEX
Compared to the quick response and sudden nature of a squall, sailing through a storm in open water is an endurance contest. In addition to big wind, you’ll have to deal with big waves and crew fatigue.
Sailing in Waves
Sailing in big waves is a test of seamanship and steering, which is why you should put your best driver on the helm. Experienced dinghy sailors often are very good at heavy air steering, because they see “survival” weather more often than most cruisers.
Avoid sailing on a reach across tall breaking waves; they can roll a boat over. When sailing close-hauled in waves, aim toward flat spots while keeping speed up so you can steer. To reduce the chance of a wave washing across the deck, tack in relatively smooth water. A cubic foot of water weighs 64 pounds, so a wave can bring many hundreds of pounds of water across the deck.
Sailing on a run or broad reach in big waves is exhilarating, but be careful not to broach and bring the boat beam-to a breaker. Rig a preventer to hold the boom out.
📸 Carlo Borlenghi / ROLEX
Storm Sails
If reefing isn’t enough to reduce power, it’s time to dig out your storm sails — the storm trysail and storm jib. They may seem tiny, but since wind force rises exponentially, they’re the right size for a really big blow. Storm trysails are usually trimmed to the rail, but some modern ones are set on the boom. The storm jib should be set just forward of the mast to keep the sail plan’s center of effort near the boat’s center of lateral resistance. This helps keep the boat in balance.
Storm Strategy
The first decision before an approaching storm is the toughest: Run for cover, or head out to open water for sea room? With modern forecasting, a true storm will rarely arrive unannounced, but as you venture further offshore the chances of being caught out increase. While running for cover would seem the preferred choice, the danger lies in being caught in the storm, close to shore, with no room to maneuver or run off.
Two classic storm strategies are to try to keep away from land so you’re not blown up on shore, and to sail away from the storm’s path — especially its “dangerous semicircle,” which is its right side as it advances.
Storm Tactics
Storm tactics help you handle a storm once you’re in it. There are several proven choices, all of which aim to reduce the strain and motion by pointing one of the boat’s ends (either bow or stern) toward the waves. No one tactic will work best for all boats in all conditions.
Sail under storm jib and deeply reefed mainsail or storm trysail. This approach provides the most control. Sails give you the power to steer and control your boat in the waves.
Run before the storm with the stern toward the waves, perhaps towing a drogue to slow the boat. This tactic requires a lot of sea room, and the boat must be steered actively. Another concern is that you will remain in front of an approaching storm, rather than sailing out of its path.
Heave-to on a close reach with the jib trimmed to windward. Heaving-to can be an excellent heavy weather tactic, though some boats fare better than others.
Deploy a sea anchor while hove-to or under bare poles. A sea anchor is a small parachute set at the end of a line off the bow. A sea anchor helps keep the bow up into the waves so the boat won’t end up beam to the seas. One concern is the load on the rudder as waves push the boat aft.
Another alternative is lying ahull, simply sitting with sails down. This passive alternative is less reliable than the other tactics, as you lose the ability to control your angle to the waves and may end up beam to the seas. Furthermore, the motion of the boat rolling in the waves without the benefit of sails can be debilitating.
Want to order a storm trysail or storm jib for your boat? Contact a North Sails Expert here.
How to Heave-To
Wouldn’t it be great if, during a heavy air sail, you could just take a break, and relax for a bit? Imagine a short respite from the relentless pitching and pounding: a chance to rest, take a meal, or check over the boat in relative tranquility. Well, you can. The lost art of heaving-to allows you to “park” in open water.
To heave-to, trim the jib aback (i.e., to the wrong side), trim the main in hard, and lash the helm so the boat will head up once it gains steerageway. As the jib tries to push the bow down, the bow turns off the wind and the main fills, moving the boat forward. Once the boat begins to make headway, the lashed helm turns the boat toward the wind again. As the main goes soft the jib once again takes over, pushing the bow down. The main refills, and the rudder pushes the bow into the wind again.
The boat won’t actually stop. It will lie about 60 degrees off the wind, sailing at 1 or 2 knots, and making significant leeway (sliding to leeward). The motion will be much less than under sail, and dramatically more stable and pleasant than dropping all sails and lying ahull. You will also be using up less sea room than if you run before the storm at great speed.
Achieving this balance will require some fine tuning, depending on the wind strength, your boat design, and the sails you are flying. Also, fin-keeled boats do not heave to as well as more traditional designs.
In storm seas, some boats will require a sea anchor off the bow to help hold the boat up into the waves while hove-to.
📸 ROLEX
Alternate Storm Strategy: Don’t Go
If conditions are wrong, or are forecast to worsen, don’t go. If you can avoid the storm, then do so.
If you’re at home, stay there. If you’re mid-cruise, button up the boat, make sure your anchor or mooring or dock lines are secure, and then read a book or play cards. Relax. Enjoy the time with your shipmates. Study the pile of Owners’ Manuals you’ve accumulated with each piece of new gear. Tinker with boat projects.
Put some soup on the stove, and check on deck every so often to make sure the boat is secure. Shake your head as you return below, and remark, “My oh my, is it nasty out there.”
If your boat is threatened by a tropical storm or hurricane, strip all excess gear from the deck, double up all docking or mooring lines, protect those lines from chafe, and get off. Don’t risk your life to save your boat.
Misery and Danger
Although everyone will remember it differently years later, a long, wet, cold sail through a storm can be miserable. As the skipper, you need to make the best of it: watch over your crew, offer relief or help to those who need it, and speak a few words of encouragement to all. “This is miserable, but it will end.”
Take the time to marvel at the forces of nature, and at your ability to carry on in the midst of the storm. Few people get to experience the full fury of a storm. It may not be pleasant, but it is memorable.
While misery and discomfort can eventually lead to fatigue, diminished performance, and even danger, do not mistake one for the other. Distinguish in your own mind the difference between misery and danger. Don’t attempt a dangerous harbor entrance to escape misery; that would compromise the safety of the boat and crew, just to avoid a little discomfort.
Interested in a new sail quote or have questions about your sails? Fill out our Request a Quote form below and you will receive a reply from a North sail expert in your area.
REQUEST A QUOTE
READ MORE
READ MORE
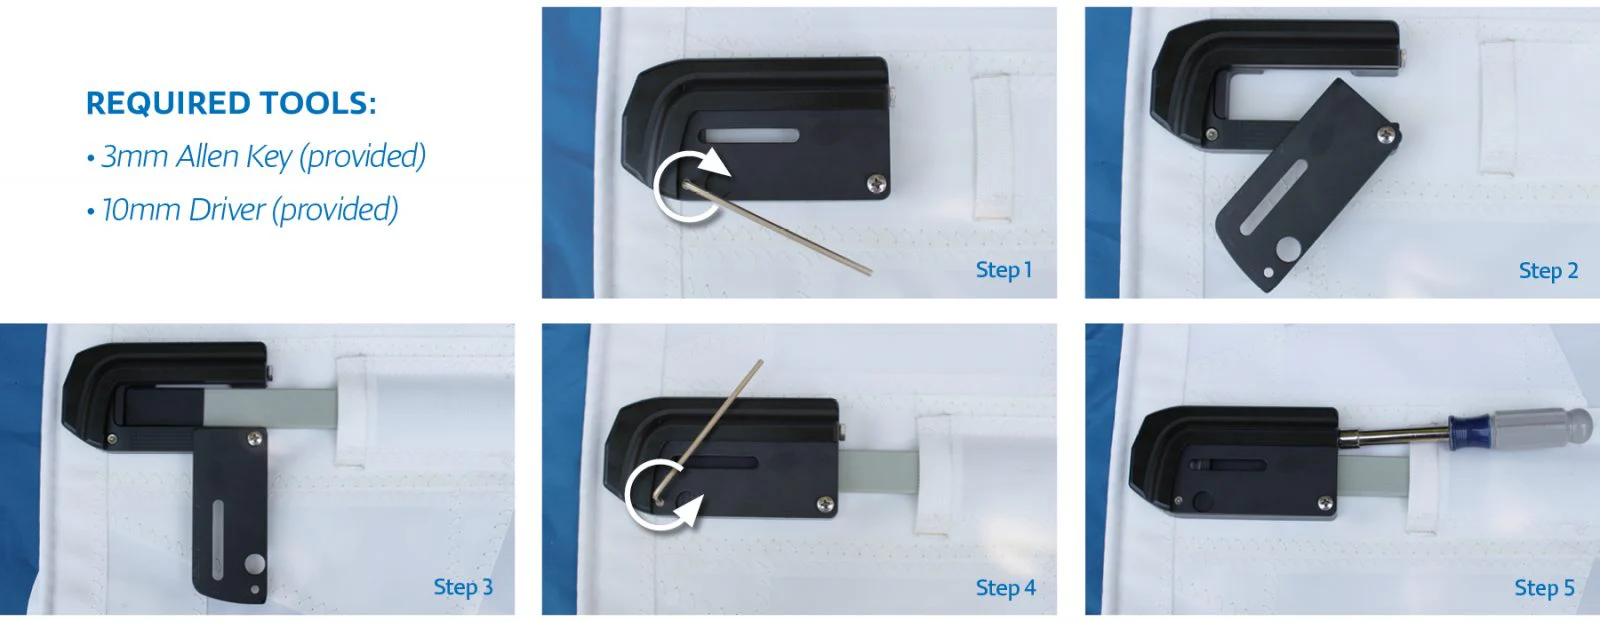
guides
19MM & 25MM BATTEN BOX INSTALLATION GUIDE
19mm & 25mm BATTEN BOX
Installation Guide
North Sails full-batten mainsails come with North Sails adjustable batten boxes installed on the luff end of the pockets. Our batten boxes eliminate batten loss through “shake out,” allow easy compression adjustments, and create a closed, low-profile leech end. They are easy to use and require just five simple steps to install.
Step 1:
Using the supplied 3mm Allen Key, remove the retaining screw in the luff end of the batten box door by turning it CLOCKWISE.
Step 2:
Rotate the batten door down to get it out of the way.
Step 3:
Insert the batten into the pocket, making sure the batten is oriented correctly.
Step 4:
Close the batten door and tighten the retaining screw by turning it COUNTER CLOCKWISE.
Step 5:
Apply the desired amount of batten compression using the supplied 10mm driver to adjust the screw on the aft end of the batten box.
Note: After sailing, the battens need may need additional compressing. If there are vertical creases along the batten pocket, increase batten compression until the wrinkles disappear.
READ MORE
READ MORE

guides
YOUNG 88 TUNING GUIDE
Young 88 Quick Reference Chart
True Wind Speed (knots)
Cap Tension (Loos)
Lower Tension (Loos)
0-8
13
Slack
9-12 (Base)
17
7
13-18
21
13
19+
24
19
True Wind Speed (knots)
Mast Step
Chocks*
0-8
Aft 15 mm
10-20 mm behind
9-12 (Base)
Base 5370 mm
Neutral (Float)
13-18
Fwd 5 mm
10 mm front
19+
Fwd 10 mm
10 mm front
*Chocks: Measures from Neutral. Neutral is floating position of mast ad deck with slack out of forestay NOTES:
Dock Rig Measurement Position: measure rig with chocks taken out and slack out of forestay by pulling on backstay.
Base Mast Rake - Top of mainsail track to top of boom: 11.140 m; to deck: 11.950 m; to transom: 14 m
Mainsail Track at Hounds Height to transom - 11.380
Mainsail Track at spreader height: 7.785 cm
Arc measured from underside of bottom mast band on forestay
Young 88 Playbook
MORNING
Prior to Dock Out
Bow
Check spinnakers are packed
Mast
Run Sheets etc
Pit
Interior chief, check essentials are onboard, food/water
Floater/Brace
Run sheets etc. Bail boat out etc
Main
Check batten tensions
Helm
Check weather, tide, noticeboard, team briefing prior to dock out
Jib/Spin Trim
Check correct Sails are onboard before you leave the dock
Pre-Start Warm-Up
Bow
Set up spinnaker and pole on correct side. Get line transit.
Mast
Help Bow with set up.
Pit
Check Headsail halyard tension with trimmer.
Floater/Brace
Practice calling breeze, looking up the course.
Main
Check settings for first beat (outhaul, cunningham, etc)
Helm
Check in with the Committee boat. Go through course with team. Practice runs at the line, lay lines etc. Look up the course to plan your first beat.
Jib/Spin Trim
Select Headsail and Spinnaker to plug in.
PRE-START
Light Air
Bow
On bow calling time and distance.
Mast
Weight on rail where required.
Pit
Calling time every 10 seconds from 3 minutes down.
Floater/Brace
Looking at wind up the course. Tactical input.
Main
Mainsail trim, set traveler for the final approach.
Helm
Steering, work on final approach getting a good lane.
Jib/Spin Trim
Trimming and relay if there are boats to look out for.
Heavy Air
Bow
Weight up where possible, only on bow for final approach at line to call time and distance.
Mast
Weight on rail where required.
Pit
Calling time every 10 seconds from 3 minutes down.
Floater/Brace
Looking at wind up the course. Tactical input.
Main
Mainsail trim, set traveler for final approach.
Helm
Steering, work on final approach getting a good lane.
Jib/Spin Trim
Trimming and relay if there are boats to look out for.
UPWIND
Light Air
Bow
Weight on rail where required. Relay obstacles like weed.
Mast
Weight on rail where required. Lean in and out for lulls/puffs.
Pit
Weight on rail where required. Lean in and out for lulls/puffs. Make sure Headsail Halyard is left on Winch.
Floater/Brace
Calling breeze for the Helm/Trim team.
Main
Main trim, work with the helm to keep the boat balanced and fast. Traveler up.
Helm
Steering, looking at Headsail Woolies etc.
Jib/Spin Trim
Headsail trim, work with the helm to keep the boat balanced and fast, full power. Check Luff tension.
Heavy Air
Bow
Weight out. Relay obstacles like weeds.
Mast
Weight out.
Pit
Weight out. Make sure Headsail Halyard is left on Winch.
Floater/Brace
Calling breeze for the Helm/Trim team.
Main
Main trim, work for the helm to keep the boat balanced and fast. Traveler down in puffs.
Helm
Steering, looking at Headsail Woolies, etc.
Jib/Spin Trim
Headsail trim, work with the helm to keep the boat balanced and fast, de-power (car aft) if needed.
TACK
Light Air
Bow
Cross boat around mast, skirt headsail if need be.
Mast
Cross boat under boom.
Pit
Cross boat through companionway.
Floater/Brace
Cross boat through companionway.
Main
Traveler up on new side ASAP. Speed build, then final trim.
Helm
Call "Standby to Tack," followed by "Tacking in 3,2,1..."
Jib/Spin Trim
Cut and tail, speed build out of tack, final trim.
Heavy Air
Bow
Cross boat around mat, skirt headsail if need be.
Mast
Cross boat under boom.
Pit
Cross boat through companionway.
Floater/Brace
Cross boat through companionway.
Main
Ease a little mainsheet going into the tack. Sort traveler, speed build, back to final trim.
Helm
Call “Standby to Tack”, followed by “Tacking in 3,2,1….”. Be very loud so Bow team can hear.
Jib/Spin Trim
Cut and tail, speed build out of tack, final trim. Indicate if Headsail Skirt is required.
TOP MARK
Light Air
Bow
Pole up on final approach. Get ease in Windward Spin/Jib sheets. Drop Headsail after rounding.
Mast
Weight on rail. Bounce topper if needed. Hoist Spinnaker once Helmsman calls it.
Pit
Topper Up, Headsail halyard off winch ready to drop. Tail Spinnaker Halyard to Full Hoist with clutch CLOSED, Drop Headsail ASAP.
Floater/Brace
Weight on rail. Move to Brace if needed.
Main
Ensure Mainsheet is free to run, ease cunningham, outhaul at a suitable time.
Helm
Steering around mark. Call “Ready to hoist”, “Hoisting in 3,2,1…”.
Jib/Spin Trim
Ease Headsail and lock off for Hoist. Set Spin/Brace up. Sheet/Brace on. Trim.
Heavy Air
Bow
Pole up on final approach. Get ease in Windward Spin/Jib sheets.
Mast
Weight on rail. Bounce topper if needed. Hoist Spinnaker once Helmsman calls it.
Pit
Topper Up, Headsail halyard off winch ready to drop. Tail Spinnaker Halyard to Full Hoist with clutch CLOSED, Drop Headsail ASAP.
Floater/Brace
Move to Brace for hoist. Brace on and Trim.
Main
Ensure Mainsheet is free to run, ease cunningham, outhaul at a suitable time.
Helm
Steering around mark. Call “Ready to hoist”, “Hoisting in 3,2,1…”. Be loud!
Jib/Spin Trim
Ease Headsail and lock off for Hoist. Set Spin/Brace up. Sheet/Brace on. Trim.
STRAIGHT LINE DOWNWIND
Light Air
Bow
Weight in front of mast. Holding downhaul.
Mast
Weight to leeward holding out boom. Call wind.
Pit
Weight forward where needed.
Floater/Brace
Weight forward where needed if Spin Trim can do own Brace.
Main
Set Traveler, Main trim is crucial when sailing angles.
Helm
Concentrate on driving smoothly. Work with Trimmers.
Jib/Spin Trim
Be dynamic with Spin Trim, call pole forward/ aft where needed. Talk helm about pressure in spinnaker.
Heavy Air
Bow
Weight behind mast. Hold downhaul if you can.
Mast
Weight aft where needed. Call wind.
Pit
Weight aft where needed. Can stand in companionway hatch.
Floater/Brace
Trimming brace. Pole forward if needed to stop boat rounding out.
Main
Main eased. Look out for other boats, wind, etc.
Helm
Keep the boat on its feet, work with trimmers.
Jib/Spin Trim
Be dynamic with Spin Trim, call pole forward/ aft where needed. Talk to helm about pressure in spinnaker
GYBE
Light Air
Bow
Wait for Gybe Call, Trip both pole ends, clip new Brace in, push pole forward to clew as you push out and onto mast.
Mast
Human pole on new side. Hold shrouds for balance.
Pit
Weight across or in companionway. May need to ease more Downhaul for Gybe.
Floater/Brace
Grind Brace aft as you go into Gybe to help rotate the spinnaker.
Main
Pull Leeward Tweaker on for Gybe. Release Tweaker on Spinnaker sheet after Gybe.
Helm
Call “Standby for Gybe”, “Gybing in 3,2,1…”. Steer the boat smoothly. Only Gybe when Spinnaker is set!
Jib/Spin Trim
Keep Spinnaker Set throughout the Gybe!
Heavy Air
Bow
Wait for Gybe Call, Trip both pole ends, clip new Brace in, push pole forward to clew as you push out and onto mast.
Mast
Human pole on new side. Hold shrouds for balance.
Pit
Weight in companionway. May need to ease more Downhaul for Gybe, then pull back on once set.
Floater/Brace
Grind Brace aft as you go into Gybe to help rotate the spinnaker.
Main
Make sure tweakers are on for Gybe!
Helm
Call “Standby for Gybe”, “Gybing in 3,2,1…”. Only Gybe when Spinnaker is set! Be very careful about your exit angle, not too high or too low!
Jib/Spin Trim
Keep Spinnaker Set throughout the Gybe!
DROPS
Windward Drop
Bow
Wait for Jib Up and Pole off Call. Pole off and stowed between Jib Car and Cabin Windows Leeward side. Make sure Lazy Jib Sheet is behind the Hatch. Open Hatch ready for Drop. Human Pole will hand you the Clew for the Drop. Close Hatch and double check sheets are clear, then relay to the back of the boat “Clear for a Tack”.
Mast
Hoist Headsail once call is made, then shift to Human Pole as the Pole comes off. Hand Windward Clew to Bow person for Drop.
Pit
Tail Headsail Halyard, leave on winch and get to the correct setting for the Trimmer. Gently ease Topper as pole goes to Deck. Spin Halyard should already be run. Control the Spinnaker Drop for Bow team.
Floater/Brace
Ease Brace for Bow Team.
Main
Trimming Main. Get set up for Upwind – Outhaul, Cunningham etc.
Helm
Angle for Drop is critical! Cannot be reaching, you must be low downwind! Call “Ready to Drop”, “Dropping in 3,2,1…”.
Jib/Spin Trim
Release Spin Sheet and set up working Headsail sheet. Trim on Headsail for Drop. Final trim around Mark, then set up for a Tack.
Leeward Drop
Bow
Wait for Jib Up and Pole off Call. Pole off and stowed between Jib Car and Cabin Windows. Make sure Lazy Jib Sheet is behind the Hatch. Open Hatch ready for Drop. Reach under Headsail and grab Leeward Sheet to Drop. . Close Hatch and double check sheets are clear, then relay to the back of the boat “Clear for a Tack”.
Mast
Hoist Headsail once call is made, then shift to Human Pole as the Pole comes off. Help Bow person drop Spinnaker if needed.
Pit
Tail Headsail Halyard, leave on winch and get to the correct setting for the Trimmer. Gently ease Topper as pole goes to Deck. Spin Halyard should already be run. Control the Spinnaker Drop for Bow team.
Floater/Brace
Ease Brace for Bow Team. If Pole is on for the Drop, ‘smoke’ the brace out all the way off the winch!
Main
Trimming Main. Get set up for Upwind – Outhaul, Cunningham etc.
Helm
Angle not as critical, but make it as easy for the team. Call “Ready to Drop”, “Dropping in 3,2,1…”.
Jib/Spin Trim
Release Spin Sheet and set up working Headsail sheet. Trim on Headsail for Drop. Final trim around Mark, then set up for a Tack.
POST RACE
After Races
Bow
Rig check, area check, pack Spinnakers.
Mast
Area check, pack Spinnakers, flake sails.
Pit
Area check, Clean out interior. Check Water for following day.
Floater/Brace
Bail boat, help with Sails, get beers for team.
Main
Check Mainsail for chafe, Batten damage etc.
Helm
Check sheets etc are all in before turning engine on. Check noticeboard for protests, amendments etc. Team Debrief, Plan for next Race Day.
Jib/Spin Trim
Check Headsails as they are getting flaked up for chafe, Batten Damage etc.
A note about repairs/damage:
Deal with it right away, do not leave for the morning!
Take ownership of all your areas.
Race hard & have fun!
READ MORE
READ MORE
guides
OPTIMIST TUNING GUIDE
V-Series Important Settings for Key Performance
Power your new North Sails Optimist V-Series mainsail for speed following the recommendations on this quick tuning guide.
BASE SETTINGS
Sail ties can be adjusted in the range of 1-5mm in light wind and heavy wind to have comfortable depth and shape.
LIGHT WIND: Smaller space at the middle so that leech becomes easier open.
HEAVY WIND: Smaller space at the middle so that you can make the shape comfortably flat enough to reduce the power.
Sail Ties:
Top: 2mm
Middle: 2mm
Bottom: 2mm
* Parallel to the mast.
Distance of space distribution to be made from top to the bottom.
Adjustment is required only for suitable sail shape (depth) for each condition and to be done only when needed.These are sometimes required depending on mast stiffness and sailor’s weight, but only when if needed.
BASIC TRIM
Wind Range
0-8 knots
8-12 knots
12-16 knots
Mast Rake
2780 – 2800 mm
2770 – 2790 mm
2770 – 2780 mm
Sprit
Wrinkles
Some Wrinkles
A Few Wrinkles
Vang
No tension in upwind
Light tension in upwind
Tension
Prebender
2 turns /Some Slack at Luff
2 turns /Some Slack at Luff
No Wrinkle at Luff
Center Board
Max
Max
Max
Wind Range
16-24 knots
25+ knots
Mast Rake
2750 – 2760mm
2790 ±10mm
Sprit
Wrinkles
Wrinkles
Vang
Lots of tension
Cleat with main sheet trimming harder
Prebender
Tension on Luff
Tension on Luff
Center Board
0-50 mm up
30-70 mm up
OUTHAUL CONTROL – VERY IMPORTANT FOR KEY PERFORMANCE!
You have to pay attention to the outhaul to adjust it properly according to the conditions and sailors weight.
You need to find the best position that fits your weight, mast rake( boom position), sea status, weather helm feeling for each condition.
Playing outhaul in the range of 20mm at the boom end.
Ease it maximum in 10-14knots and clew end has to be located 30-40mm away from the boom end.
FLAT WATER – Trim 10mm more than the normal position.
LIGHT / VERY STRONG WIND – Bottom to be flattened comfortably.
READ MORE
READ MORE

guides
LET'S TALK RIG TUNING WITH ANDY RICE & CHARLIE CUMBLEY
LET’S TALK RIG TUNING WITH ANDY RICE & CHARLIE CUMBLEY
North Sails One Design Expert Charlie Cumbley Joins Andy Rice To Discuss Etchells & J70 Rig Tune
Join North Sails One Design Expert Charlie Cumbley joins Andy Rice from Sailjuice.com to share the art and science behind optimal rig tuning and boat setup.
Browse the North Sails Etchells/ J70 class page for news, tuning guide, and inventory options or contact North Sails Expert Charlie Cumbley below.
ETCHELLS CLASS PAGE
J70 CLASS PAGE
CHARLIE CUMBLEY
READ MORE
READ MORE

guides
WHAT YOU SHOULD KNOW ABOUT BATTENS
WHAT YOU SHOULD KNOW ABOUT YOUR BATTENS
Batten Installation and Tensioning Instructions for All Sailors
Thinking about battens? Preparing for a new season is something that is on everyone’s mind. Whether you’re staging your boat to launch, planning an extended cruise, or hoisting your sails for a weeknight club race, it’s important to make sure you’ve got your battens installed properly and tensioned correctly. Checking your battens will provide better sail shape and performance – and ensure you don’t lose them after the first tack or jibe!
Sail expert Hugh Beaton from North Sails Toronto explains some important details to remember.
Proper installation for proper sail shape.
Make sure the battens are inserted with the tapered (thin) end towards the luff and the stiffer (thick) end towards the leech. We sometimes see battens interested the wrong way and as a result, the sail will not have the correct draft (depth) and curvature (location of maximum depth) – so it is worth double checking that the batten is oriented correctly.
Make sure your battens are secure.
Some battens enter from the luff, others from the leech so check to make sure that the closure system where the battens have been inserted has been properly secured. For North Sails Velcro closures, there is a specific compartment for the batten, and another for the two surfaces of Velcro to make contact. Lashing systems have another procedure to follow, as do RBS wing tip end caps. In all cases correct installation will keep the battens securely in place for the season.
📸Mike Egan
Correct tension creates a smooth sail.
Your batten tension also needs to be looked at. If there is insufficient tension there will be a number of vertical wrinkles along the length of the batten. If there is too much tension there will be visible horizontal tension pulling along both sides of the pocket, with the fabric looking stressed. When the tension is correct, the batten pocket is smooth and correctly supports the designed flying shape of the sail.
Have questions about your battens? or need help with proper installation?
Please reach out to your local North Sails representative for guidelines and instruction on how to make sure your battens are loaded correctly and your sails are ready for the season.
Learn more with North Sails batten specific installation guides.
READ MORE
READ MORE
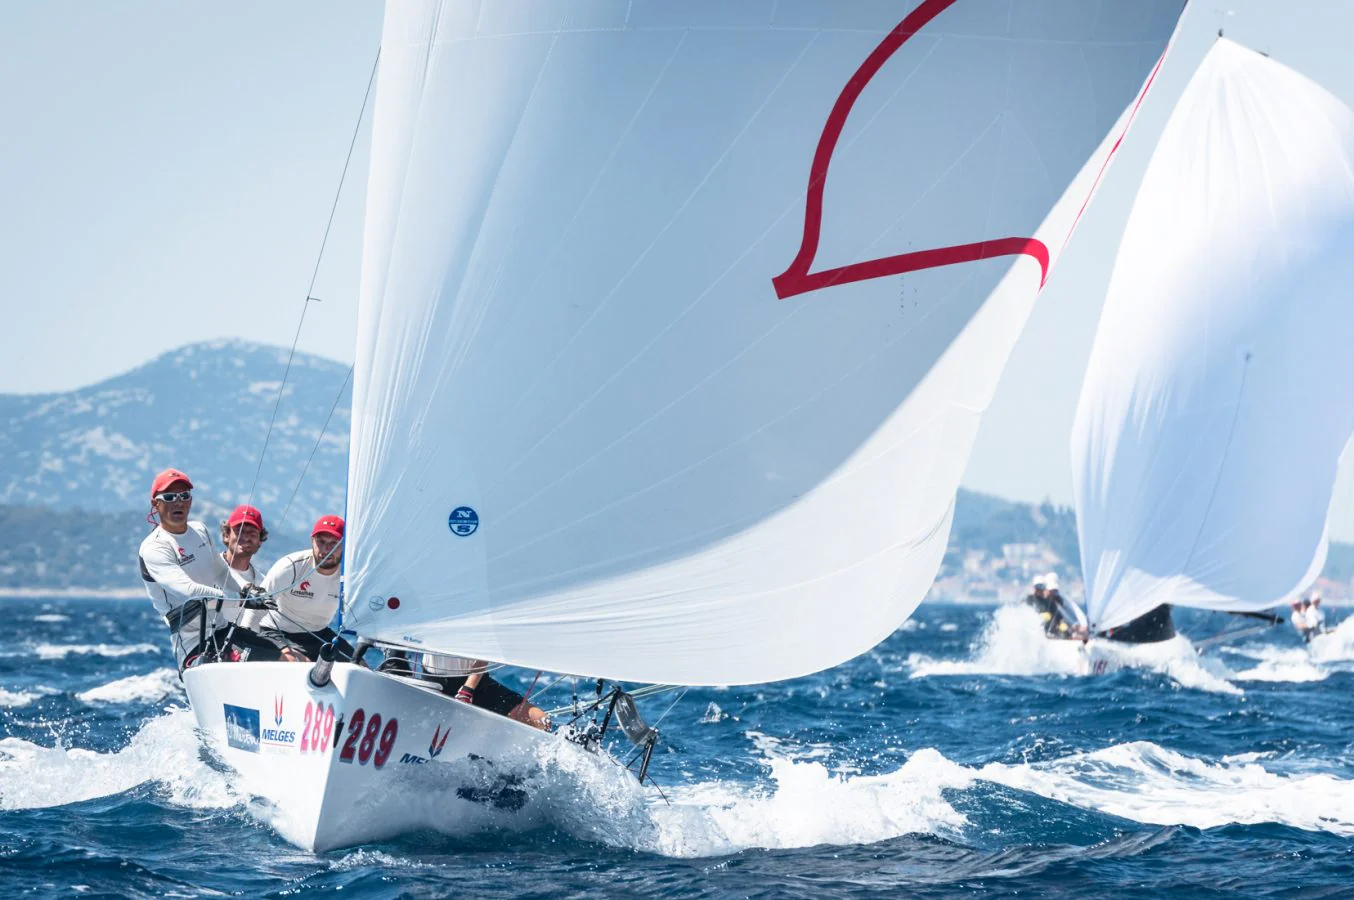
guides
LEARN TO LOVE SAILING IN HEAVY AIR
LEARN TO LOVE SAILING IN HEAVY AIR
If Sailing In Breeze Isn’t Your Strong Suit, You Are Not Alone
© Barracuda Communications
When I was about ten years old I starting racing sailboats on Cape Cod and the sound of the wind whistling overnight through the pine trees outside my bedroom would make it hard to sleep. Even the next morning I’d have a knot in my stomach when I woke.
Forty years later, I still get the knot in my stomach with just the thought of sailing in heavy air but luckily, I’ve learned more about the technique and in turn, have become more confident when it comes to heavy air sailing. If sailing in a strong breeze intimidates you, you are not alone, but you can learn to get better at it and actually start to dominate in the breeze. Here are some tips to help shake your nerves and get you confident for that next heavy air event.
Wear a Lifejacket
Seems pretty basic, but there was a day when wearing a lifejacket was not as prevalent as it is now. As soon as the breeze comes up, put one on yourself and make it mandatory that your crew do the same. It will give you more confidence to be more aggressive in moving around on deck and when trimming/pumping your sails. And it’s the right thing to do.
Know your Settings
Once you are out on the water and it starts blowing, there is no time to be figuring out how many turns to go up on the rig. Be sure to pre-measure your rig tension and know how many turns it takes to get to your heavy air settings for each wind speed.
Setup your Boat so it’s Easy
In all boats, flat is fast in breeze. It’s also important to keep the boat on an even angle of heel. If the boat is constantly heeling over you tend to use more rudder which creates drag, which will eventually cause the boat to stall out head to wind. Concepts to keep in mind:
Set Up for Twist. Tight leeches on the main and jib will make the boat more sensitive to tipping over each time you get a puff. To induce twist:
Sail with the backstay VERY firm
Ease the main and jib (simultaneously)
Vang on hard if effective on your boat. This will flatten the lower portion of the main and open the lower leech
Play the sails. Play the main especially to keep the boat on an even angle of heel. The smaller the boat the more you play your sheets.
Keep the traveller on or slightly above the centerline.
Try not to Hit Waves Dead-on. If you do, at least make sure the boat is flat. Back when I learned to sail the mantra with steering in waves was to “head up the face of the wave and bear off on the backside of it. Today we use as little rudder as possible to steer around the big sets. Inevitably, you will hit waves, and some straight on. When you do, be sure your boat is flat. The boat will stop, but if it is flat it will not slip sideways as much.
Have fun. Sailing in heavy air is exhilarating. Enjoy the process of getting better each time you go out in a breeze!
READ MORE
READ MORE
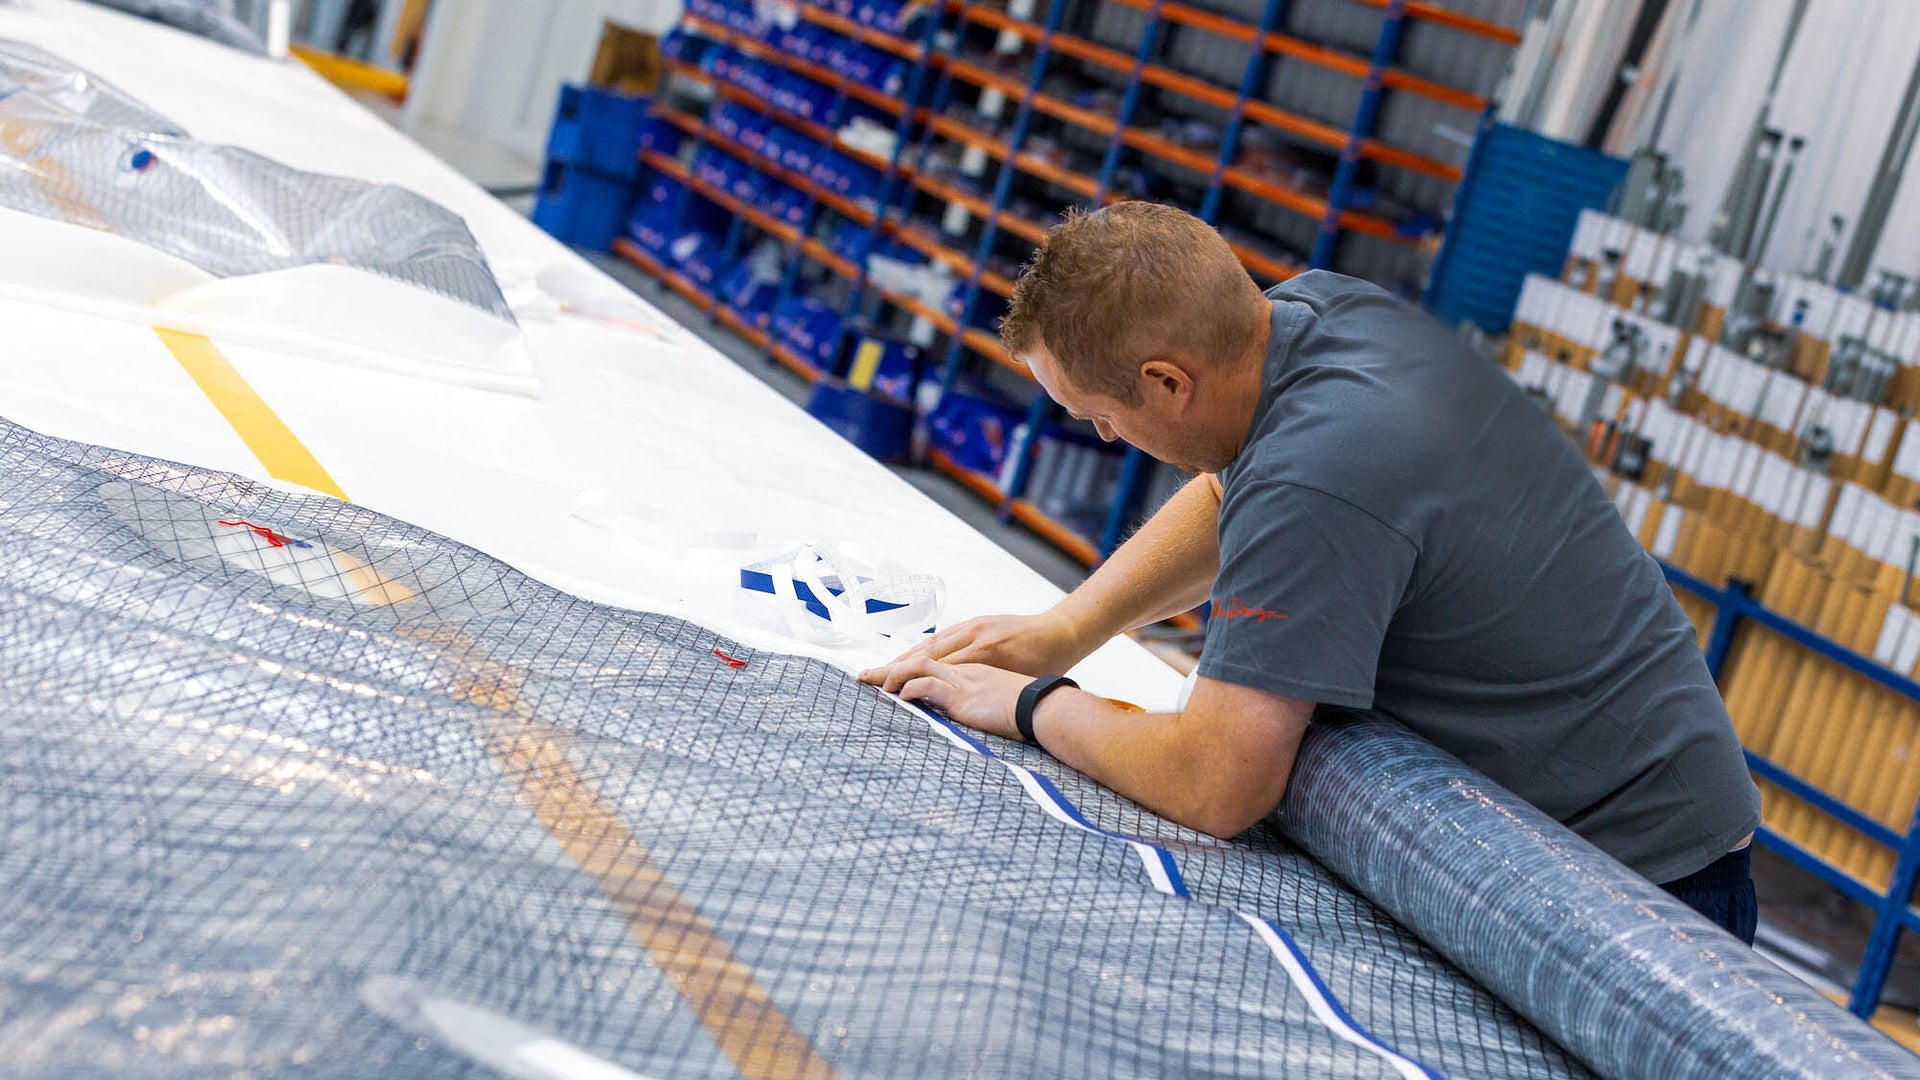
guides
SAIL RECUTS & ALTERATIONS
SAIL RECUTS & ALTERATION METHODS
Benefits, Usage, and Common Examples
We don’t hear much about sail recutting and alterations, although it is still a big part of the sailmaking world. Because sail fabrics have improved dramatically over the years with sail shape holding and chafe-free components (like 3Di), the days of major recuts are not as prominent as they were in the days of strictly laminates, Dacron, and polyester sail materials. However, many clients worldwide are getting sail alterations, and altering sail shape has not only helped them optimize their inventory, it has given new life to sails that are in perfectly usable condition, but perhaps retired from high-level racing programs.
Noel Drennan, One Design Manager based in Sydney, Australia commented; “In the early days of Dacron and Kevlar cloth, racing yachts required constant recutting to keep the sails close to their original racing shape– and we are glad those days are over!”
Why a recut?
Recutting a racing sail usually starts with getting a photograph of the sail while the sail is in use while sailing in its correct wind range. We take a series of sail scan images from the foot up and compare those images to its original, intended flying shape. The measurements are also compared to the original dimensions so we know what has changed in sail shape.
The principles of recutting to keep the sails at premium racing shape is still the same as the old days but the recut is substantially less often and down to the smallest increments of change required, which is a fraction of what it used to be with only traditional sail materials.
North Sails 3Di has an incredible composite structure which prevents delamination like that of a string-type sail. Delamination is another common reason why a client would request a recut. Noel comments; “It’s nice to know that any reshaping or alterations of your sail is not wasted on a failing base structure, rather the normal up-keep and maintenance required to help a materials lifespan.”
📸 Ian Roman
Ben Costello, Service Manager based in Auckland, New Zealand comments; “Sometimes getting a sail recut from another boat to fit is a great option. For some owners, a new 3Di type product for racing may be above their budget, but because many high-level grand prix teams (often found in the TP52 fleet) replace their sails more frequently, it doesn’t mean their one-year old sails are no longer usable or have lost integrity. Their sails still have plenty of life left, and are perfect for a club racing team that has a tighter budget. A small recut or luff curve adjustment to get the sail to fit their type of boat can be cost effective and can help the team achieve more speed and better results.”
With restricted class rules, when it comes to the number of sails, recutting is a great way to get the most of what you already have, just slightly modified to be class approved/ or better usage potential instead of going out and buying a completely new sail. This also applies to boat owners who find themselves with a similar boat but slightly different. If it’s close to the same size, and same luff and foot dimensions, the sail can most likely be recut to fit the new boat, or made into something that the new boat can use.
Examples of common recuts
Common recuts consist of horizontal cuts or seam alterations, also referred to as ‘moon pie’ alterations which are either lengthening the material or taking up (cutting shorter). When a sail has seen three or more seasons, this is when this type of recut would most commonly take place as the sail has experienced extensive UV exposure and shrinkage.
An example of a sail recut would consist of a larger grand prix style boat that wants to add a little luff curve to their light air headsail. When the sails are used more often, and for different things, it is not uncommon to see them in the loft to add a little bit of extra to certain areas of the sail, which in turn allows the increase in performance.
A Kerr 40 jib at TWS at 11 knots. Image taken before sail recut, showing the degradation in the target light air flying shape.
Standard sail recuts often occur every two years. For an older sail where the base material is still in good shape, a small recut can still make great improvements in performance. Everytime the sail is used, it causes wear of some kind. This can affect the shape of a sail; be it from hitting a stanchion on every tack, pressing on spreaders, maneuvering around radar, or even a mast light. These can cause the sail to hook or dump off on the leech-end. We can refer to a genoa for example. You could get a small take-up on the material under a patch which can easily help straighten the leech.
Another example of a sail recut would consist of a larger grand prix style boat that wants to add a little luff curve to their light air #1 jib/genoa. When the sails are used more often, and for different things, it is not uncommon to see them in the loft to add a little bit of extra to certain areas of the sail.
Ben comments; “Often we have customers that change their forestay set up to a furling system. This is when we would cut down the existing headsails to fit on the furler and then convert a racing jib to have a hollow-down near the tack to connect to the furling unit.
A common alteration we’ve seen lately is adding reefs to headsails to help fill in a gap that some boats have in their inventory, especially for shorthanded sailing where they need less sail area and reefing is easier to do underway than a full jib change. Sometimes clients get new masts, which mean they need to make their existing sails fit the new mast height. This is all part of maintaining balance of the boat, allowing more or less rake.”
Spinnakers often get resized for a variety of reasons. A more common scenario of this is reducing or increasing the sail area to fit the type and usage of the boat, to minimize or maximize power. A sail recut that would make the spinnaker smaller and more manageable, and be ideal when the boat sails shorthanded. Sometimes boats end up with kites that are made for larger boats. After testing it out, the client may realize it’s just too much and the boat is overpowered. This could entail simply removing a panel from the spinnaker to make it slightly smaller, and fit better into the size range for that size boat.
The Kerr 40 jib at TWS at 12 knots. This image is after the sail recut.The sail is flying at its original design depth and profile.
“An alteration we’ve done lately is adding reefs to headsails to help fill in a gap that some boats have in their inventory, especially for shorthanded sailing where they need less sail area and reefing is easier to do underway than a full jib change. Sometimes clients get new masts, which mean they need to make their existing sails fit the new mast height. This is all part of maintaining balance of the boat, allowing more or less rake.
Spinnakers often get resized for a variety of reasons. A more common scenario of this is reducing or increasing the sail area to fit the type and usage of the boat, to minimize or maximize power. A sail recut that would make the spinnaker smaller and more manageable , and be the result of having less hands onboard. Or maybe a client has a spinnaker for a slightly larger boat, and wants the kite to be a bit smaller so they are not overpowered. This could entail simply removing a panel from the spinnaker.
Sail recuts and alterations are as important as maintaining sail servicing, says Noel. “This is the best way to maximize the lifespan of your investment. Sail servicing should not be thought as just repairing tears in the cloth– it’s way more than that. It’s amazing what little changes we can make to sails by recutting that affects the overall performance of the boat and helps clients who are looking for some in between, competitive inventory options.”
📸 Amory Ross / North Sails
READ MORE
READ MORE
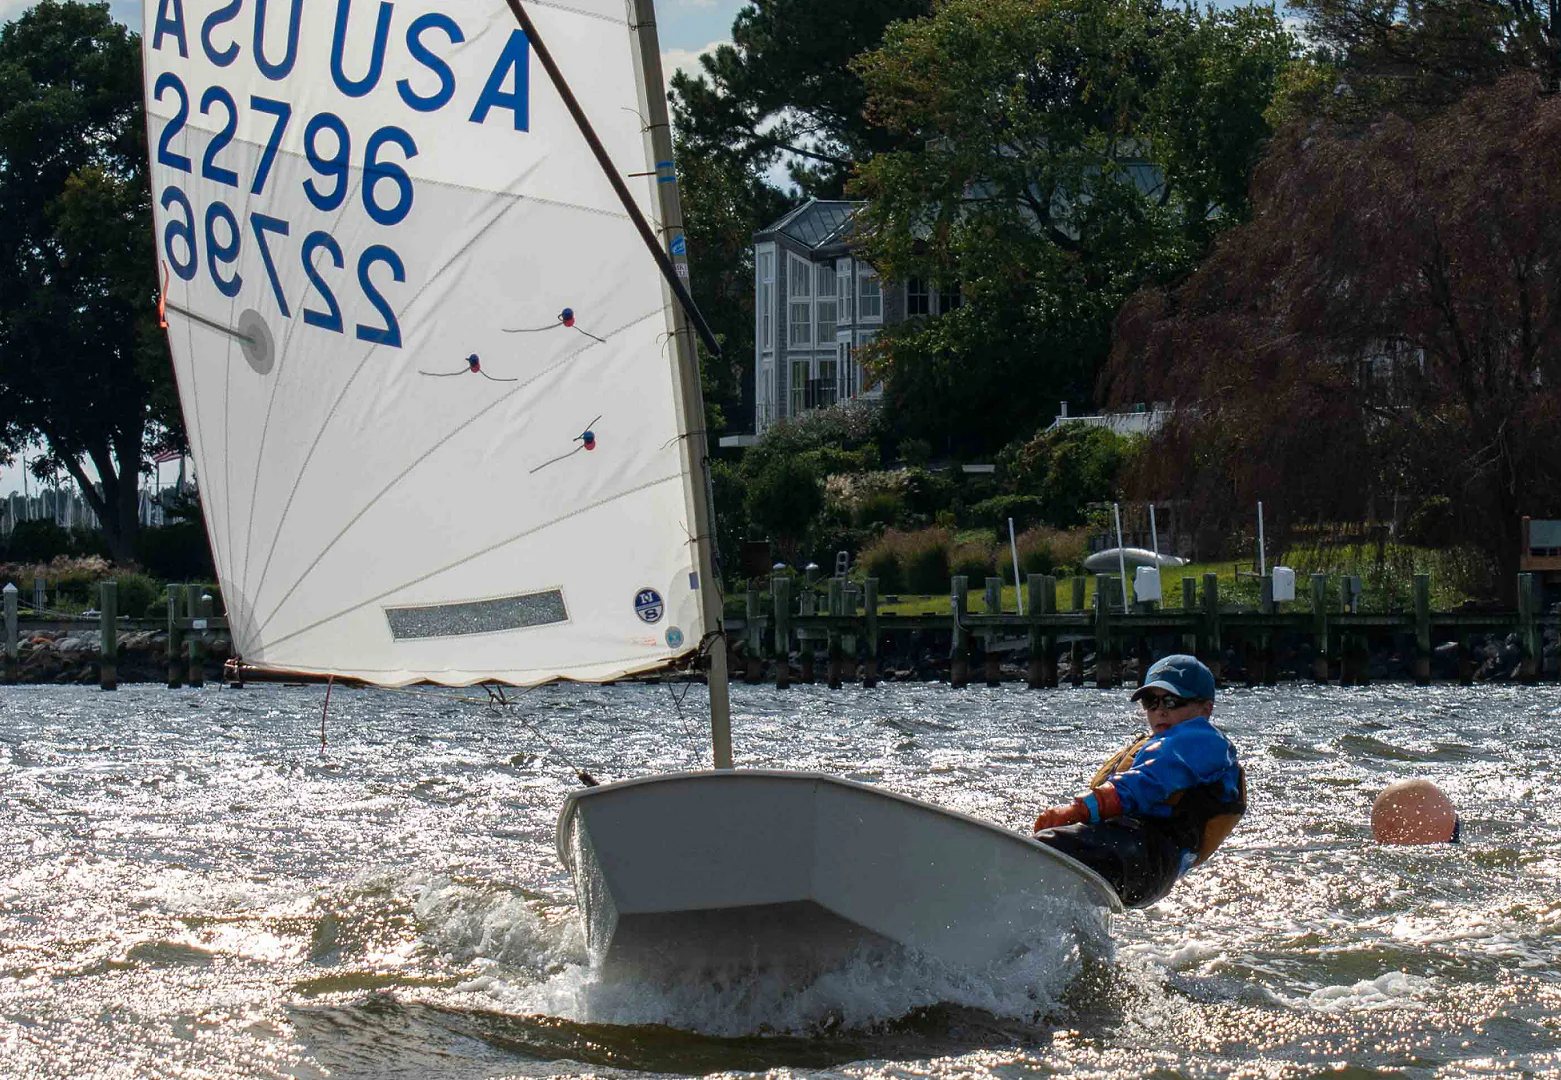
guides
NEW OPTIMIST V-SERIES TUNING TABLE
OPTIMIST V-SERIES QUICK TUNING TABLE
Important Settings for Key Performance
Power your new North Sails Optimist V-Series mainsail for speed following the recommendations on this quick tuning guide.
BASE SETTINGS
Sail ties can be adjusted in the range of 1-5mm in light wind and heavy wind to have comfortable depth and shape.
LIGHT WIND: Smaller space at the middle so that leech becomes easier open.
HEAVY WIND: Wider space at the middle so that you can make the shape comfortably flat enough to reduce the power.
Sail Ties
Top
2 mm
Middle
2 mm
Bottom
2 mm
* Parallel to the mast.
Distance of space distribution to be made from top to the bottom.
Adjustment is required only for suitable sail shape (depth) for each condition and to be done only when needed.
These are sometimes required depending on mast stiffness and sailor’s weight, but only when if needed.
BASIC TRIM
Wind Range
0-8 knots
8-12 knots
12-16 knots
16-24 knots
25+ knots
Mast Rake
2780 – 2800 mm
2770 – 2790 mm
2770 – 2780 mm
2750 – 2760mm
2790±10mm
Sprit
Wrinkles
Some Wrinkles
A Few Wrinkles
Wrinkles
Wrinkles
Vang
No tension in upwind
Light tension in upwind
Tension
Lots of tension
Cleat with main sheet trimming harder
Prebender
2 turns /
Some Slack at Luff
2 turns /
Some Slack at Luff
No Wrinkle at Luff
Tension on Luff
Tension on Luff
Center Board
Max
Max
Max
0-50 mm up
30-70 mm up
OUTHAUL CONTROL – VERY IMPORTANT FOR KEY PERFORMANCE!
You have to pay attention to the outhaul to adjust it properly according to the conditions and sailors weight.
You need to find the best position that fits your weight, mast rake( boom position), sea status, weather helm feeling for each condition.
Playing outhaul in the range of 20mm at the boom end.
Ease it maximum in 10-14knots and clew end has to be located 30-40mm away from the boom end.
FLAT WATER – Trim 10mm more than the normal position.
LIGHT / VERY STRONG WIND – Bottom to be flattened comfortably.
READ MORE
READ MORE
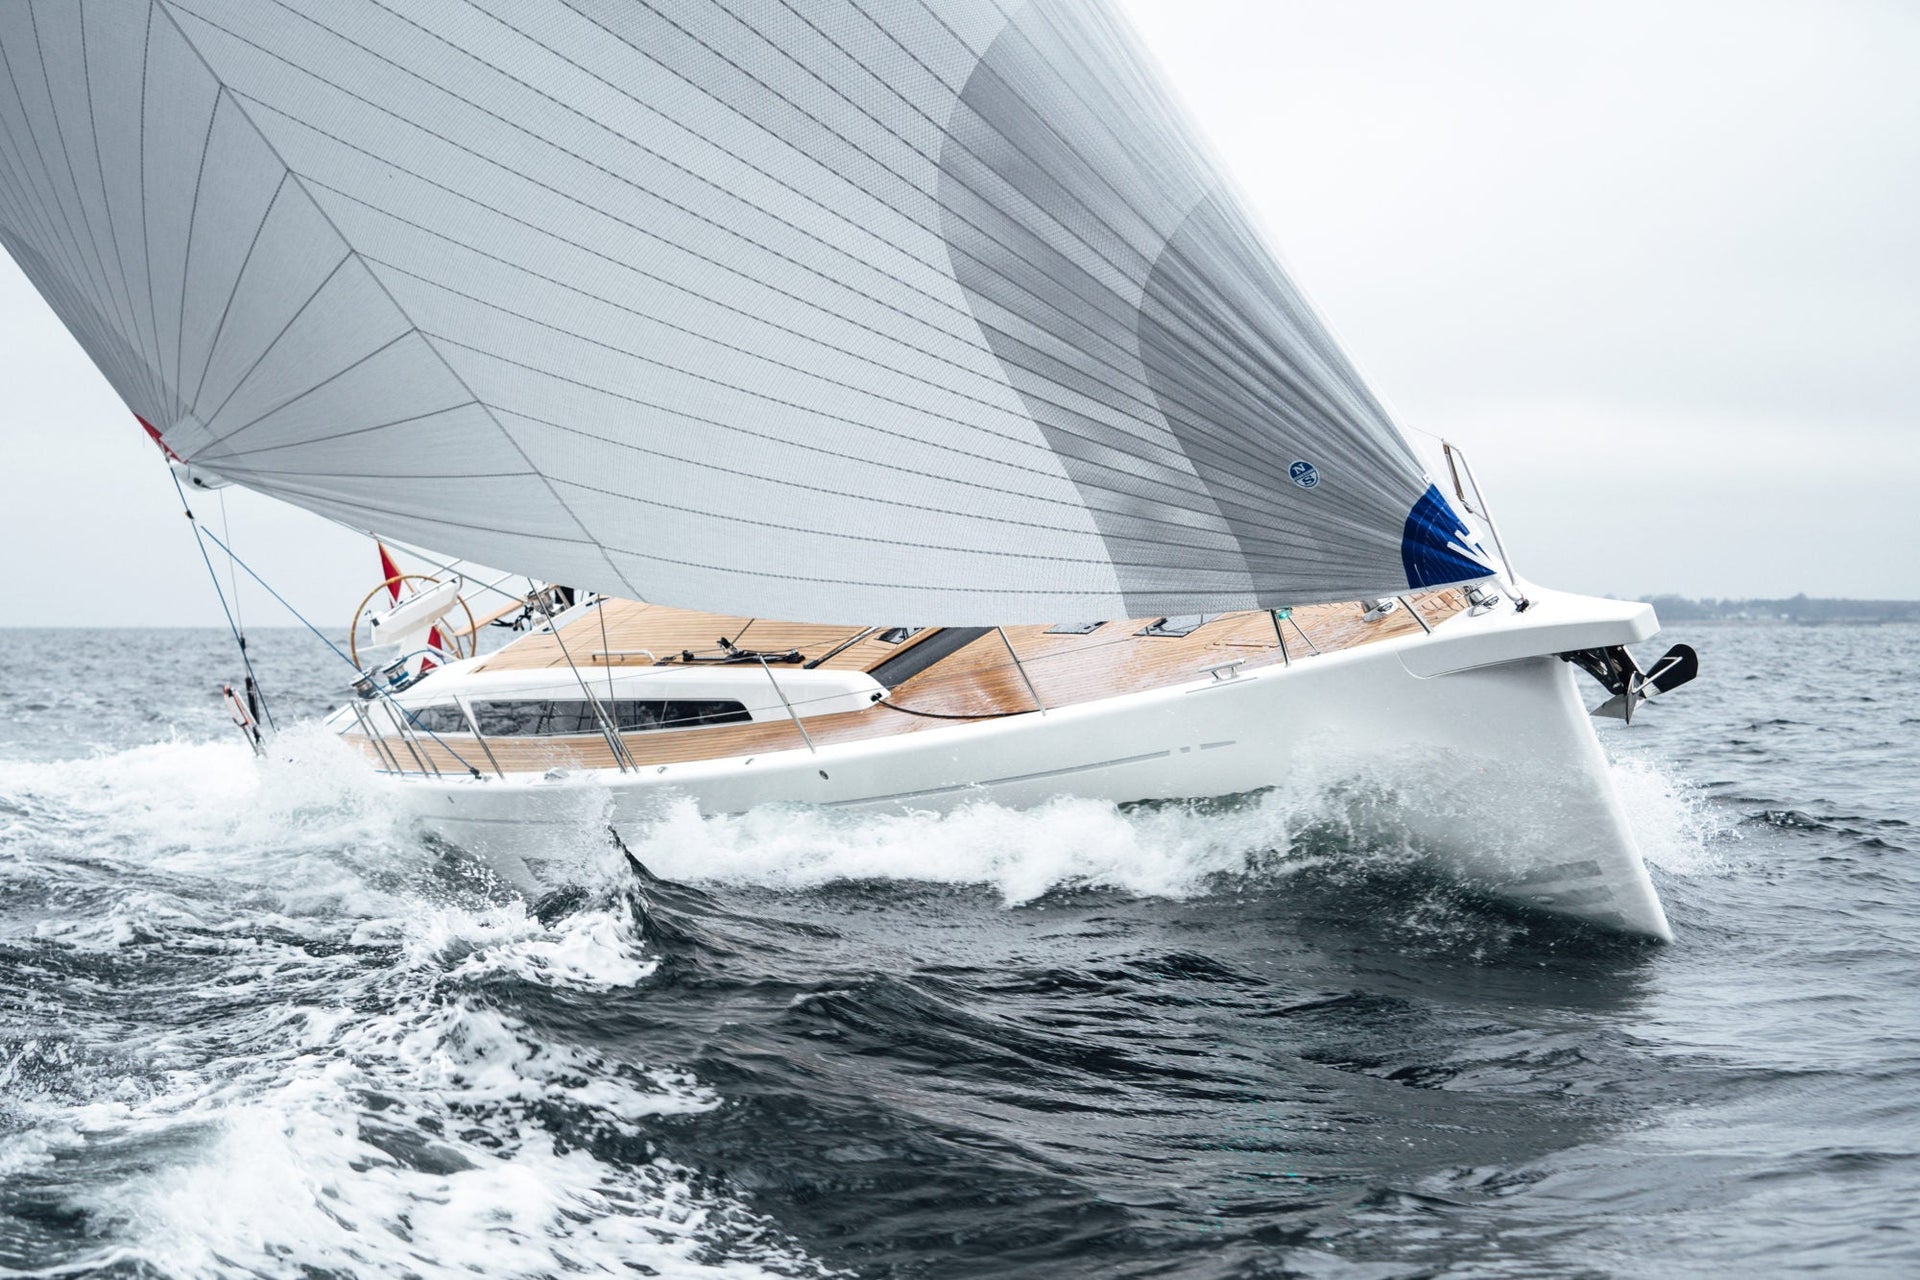
guides
HOW TO' VIDEO SERIES WITH BOUWE BEKKING
‘HOW TO’ WITH BOUWE BEKKING
Introducing a 7-part Video Series Geared to Cruisers
We’ve teamed up with our friends at X-Yachts and are excited to release an all-new ‘How To’ video series aimed at every type of cruiser. All seven videos are now live and available to watch on the North Sails YouTube channel.
As a seasoned eight-time Volvo Ocean Race sailor, professional Dutch sailor Bouwe Bekking turns his hand to the world of cruising to share his knowledge onboard an X-Yacht. Joined by North Sails Expert Jesper Feldt, Bekking talks us through the key aspects of sailing a cruiser, from boat maneuvers to trimming every sail in the inventory.
Filmed throughout the summer on the waters of Øresund near Copenhagen, Denmark, these videos provide tips and tricks on handling a cruising boat fully equipped with North 3Di ENDURANCE.
READ MORE
READ MORE
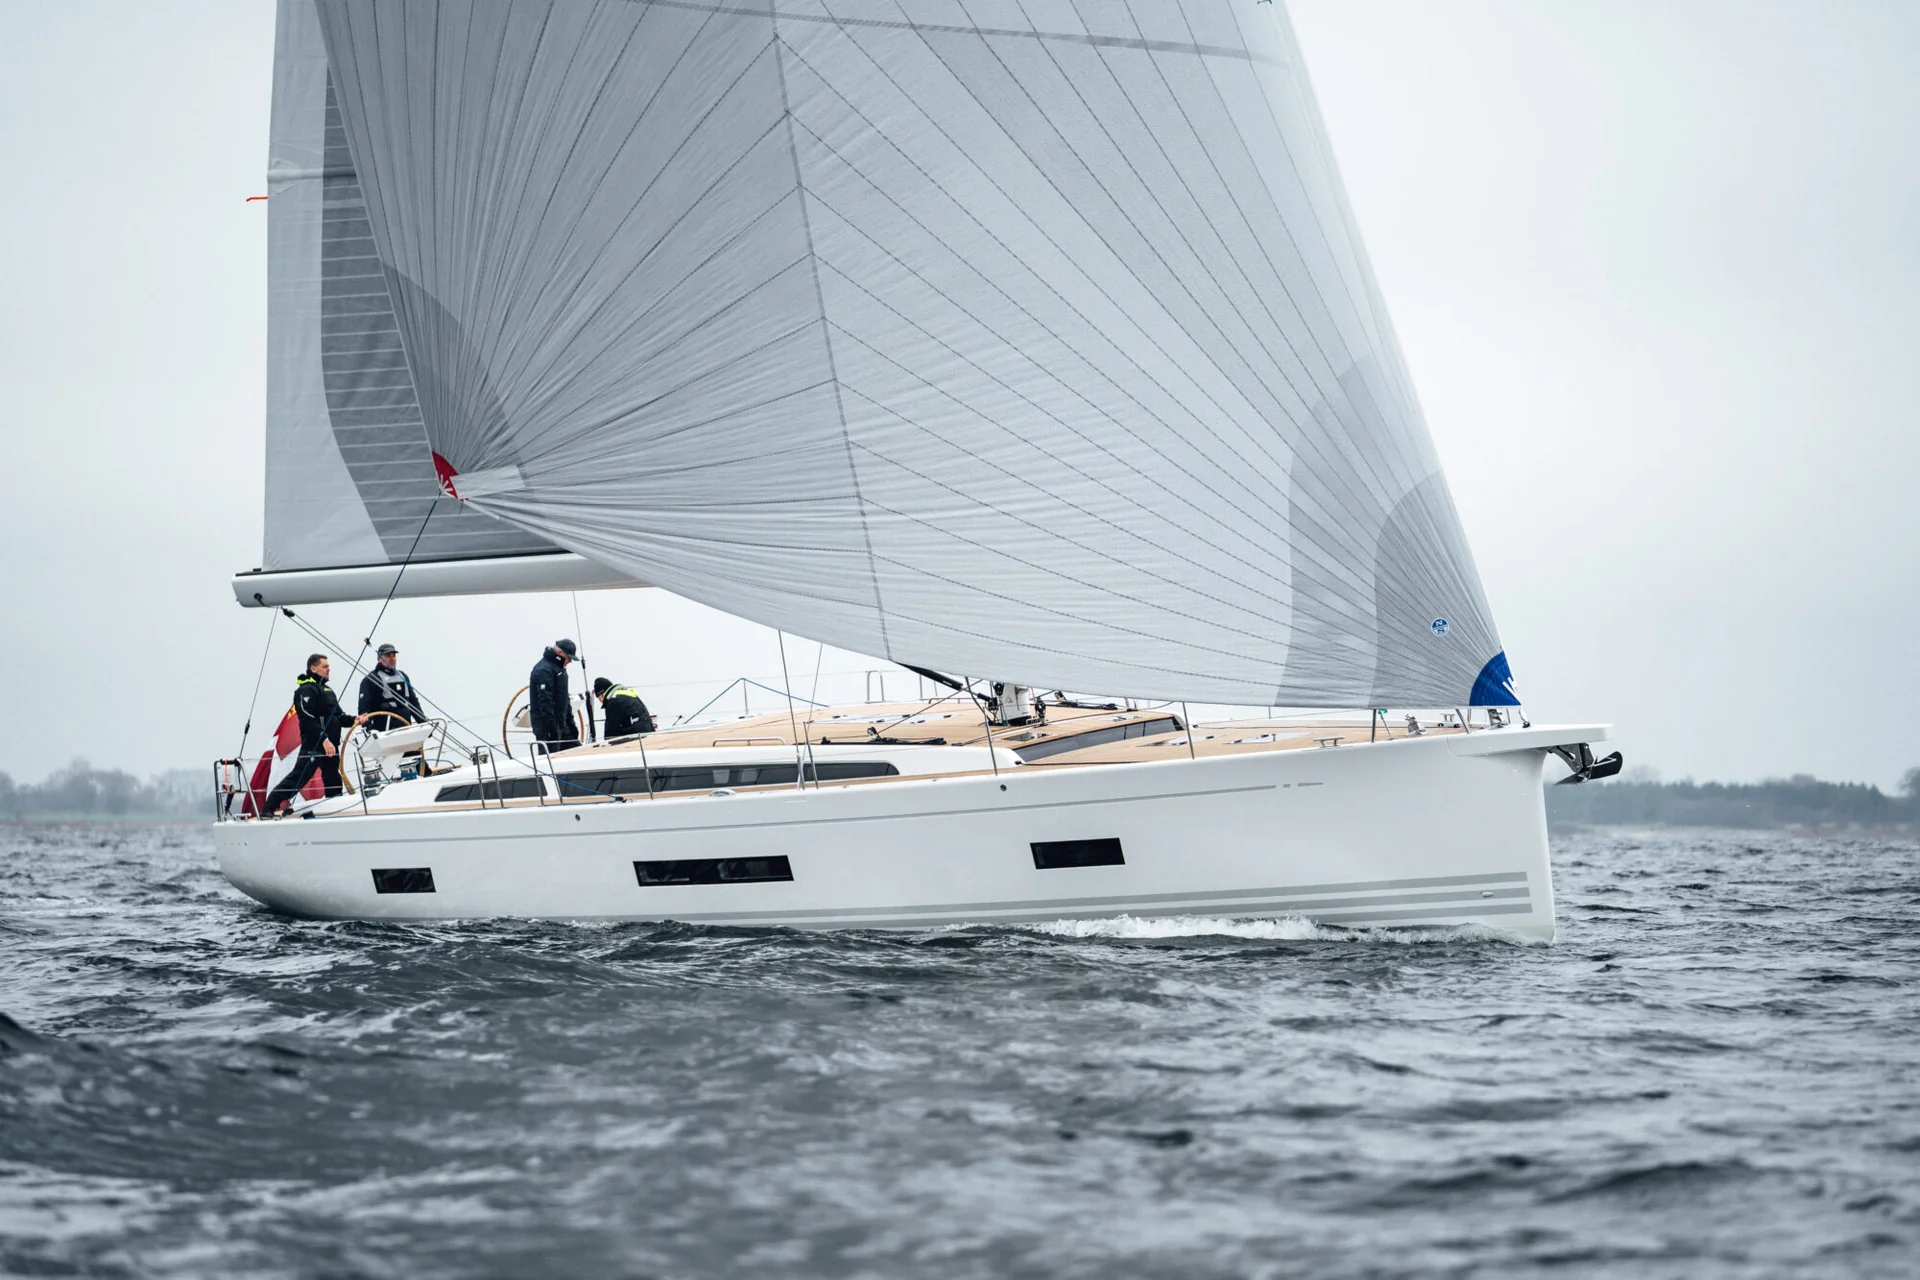
guides
CRUISING INVENTORY RECOMMENDATIONS FOR LIGHT AIR
INVENTORY RECOMMENDATIONS FOR LIGHT AIR CRUISING
Top Picks, New Additions, Rigging and Tuning Tips
📸 Amory Ross / North Sails
Being prepared for whatever Mother Nature serves up is key to maximizing your cruising adventures. Our cruising experts share their inventory top pick, which sails to consider adding and light air rigging and tuning tricks.
An all-purpose cruising gennaker is a great first step. It offers a broad range of horsepower and can be used for higher and lower angles off-wind. Cruising gennakers are great for both tight reaching and broad reaching.
The Helix Furling Gennaker is North’s new option that is a reliable, top-down furling sail. The Helix Furling Gennaker is lighter weight and meant to be furled, providing easy, accessible horsepower that isn’t problematic. Most cruisers don’t sail upwind as often as they sail off-wind, which is why gennakers have become more popular and highly recommended as the perfect all-around sail choice.
Code sails are another great inventory option for more experienced cruisers. Code Zeros and G Zeros offer an extensive amount of power, which a lot of cruisers don’t realize until they’ve sailed with one.
The convenience of a full-batten mainsail outweighs the performance. It’s a quick option for boats with a lazy jack set up so at the end of your sailing day, you come in, simply let the halyard go and secure it to the boom. Enjoy your cocktails sooner! Full-batten mainsails also offer more support when it comes to sail shape. With standard cruising mainsails there is more time at the end of your day making sure your sail is put away properly. Keep in mind, your local North Sails service team can retro-fit any cruising mainsail with battens to help extend the life of your sail, improve sail shape, and make the derigging process quicker and easier. It’s standard to have reef points, especially in cruising sails, which will give more flexibility when it comes to reducing sail area which is key in long distance cruising, especially if weather is expected (or unexpected!).
Foam luffs on genoas also aid with flying shape if you are not ready to add a spinnaker or gennaker to your inventory. Foam luffs have more side to side symmetry and can assist with flying shape, especially for DDW angles.
There are an array of different sail options that can support cruisers of all kinds depending on their needs. Contact your local expert to get help deciding which options may be best for you.
View this post on Instagram
A post shared by North Sails (@north_sails)
Upwind inventory top choices
3Di OCEAN is a great step up from traditional materials. It lasts longer, is lighter weight, has lower stretch, and provides more stability– which makes cruising more comfortable.
NPC CROSS-CUT is the preferred dacron option for everyday cruising. NPC RADIAN would be our recommendation for in-mast furling system setups. When it comes to headsails, a 135% genoa is a great place to start. Keep in mind, no sails want or like to be furled, so 3Di OCEAN is the most robust product that will last the longest and withstand furling.
Our Favorite Inventory Additions
For cruisers willing to leave the comfort of the cockpit, a spinnaker snuffer is the way to go. They are easy to hoist and when it comes time to douse, you simply pull a line, the sock comes down, and it drops on deck. This can be set up too where the sock drops directly into the front hatch.
If you are not up for going to the foredeck, that’s where the furler comes into play. Both options are affordable, but all depend on what you are willing to do and your set up. Furlers are also convenient when you want to leave the sail up for extended periods of time. Simply unfurl or furl whenever you want. External cables come into play depending on the furler you have and the sail type you choose. With North Helix Structured Luff, there is no external cable.
Rig Settings and Tuning
Moving the fairlead forward will allow for a more powerful sail shape. Halyard tension should be tighter in stronger wind and more sea state, looser in flatter water and lighter air. When it comes to weight placement, if you know you’ll be on the same tack for a long time, adjust things below deck accordingly. It’s good to accept a bit of heel, as this helps keep the sails powered up and keeps them full as the breeze dies off. Once you’re set up for speed, all you need to do is keep an eye on the instruments.
Outhaul should be eased, as well as cunningham and vang which controls leech twist. Too much twist in lighter air conditions will de-power the boat.
For downwind sail settings, you can float the tack when you are running. As the wind lightens up, you want the tack lower.
Ease outhaul, cunningham, vang to control leech twist. You don’t want too much twist because that de-powers the boat
Floating the tack is an option:
Running in more breeze you can raise the tack up
Light air day you want the tack a little lower than you normally would
Attachment points for non-conventional rigs: Sometimes the headstay doesn’t go all the way to the bow, so we install a pad eye in front of the headstay and a free floating block. You can purchase a keeper that will keep the tack from floating from side to side. Acts as a bowsprit with a fixed tack point. Tack will sit just above the bow pulpit, 3-4 feet from the headsail and with two snap shackles in the back and the right lines leading back to the cockpit makes an affordable/ simple option.
📸 Amory Ross / North Sails
READ MORE
READ MORE

guides
LET'S TALK MOTH RACING WITH TOM SLINGSBY, IAIN JENSEN AND ROB GREENHALGH
LET’S TALK MOTH WITH TOM SLINGSBY, IAIN JENSEN & ROB GREENHALGH
2021 Moth Italian Nationals and Foiling Week Recap
Having claimed victories at the 2021 Moth Italian Nationals and Foiling Week, both Jensen and Slingsby are at the top of their game in the class. Learn from this panel of Moth experts and look ahead to the upcoming World Championship in Malcesine, Italy.
READ MORE
READ MORE
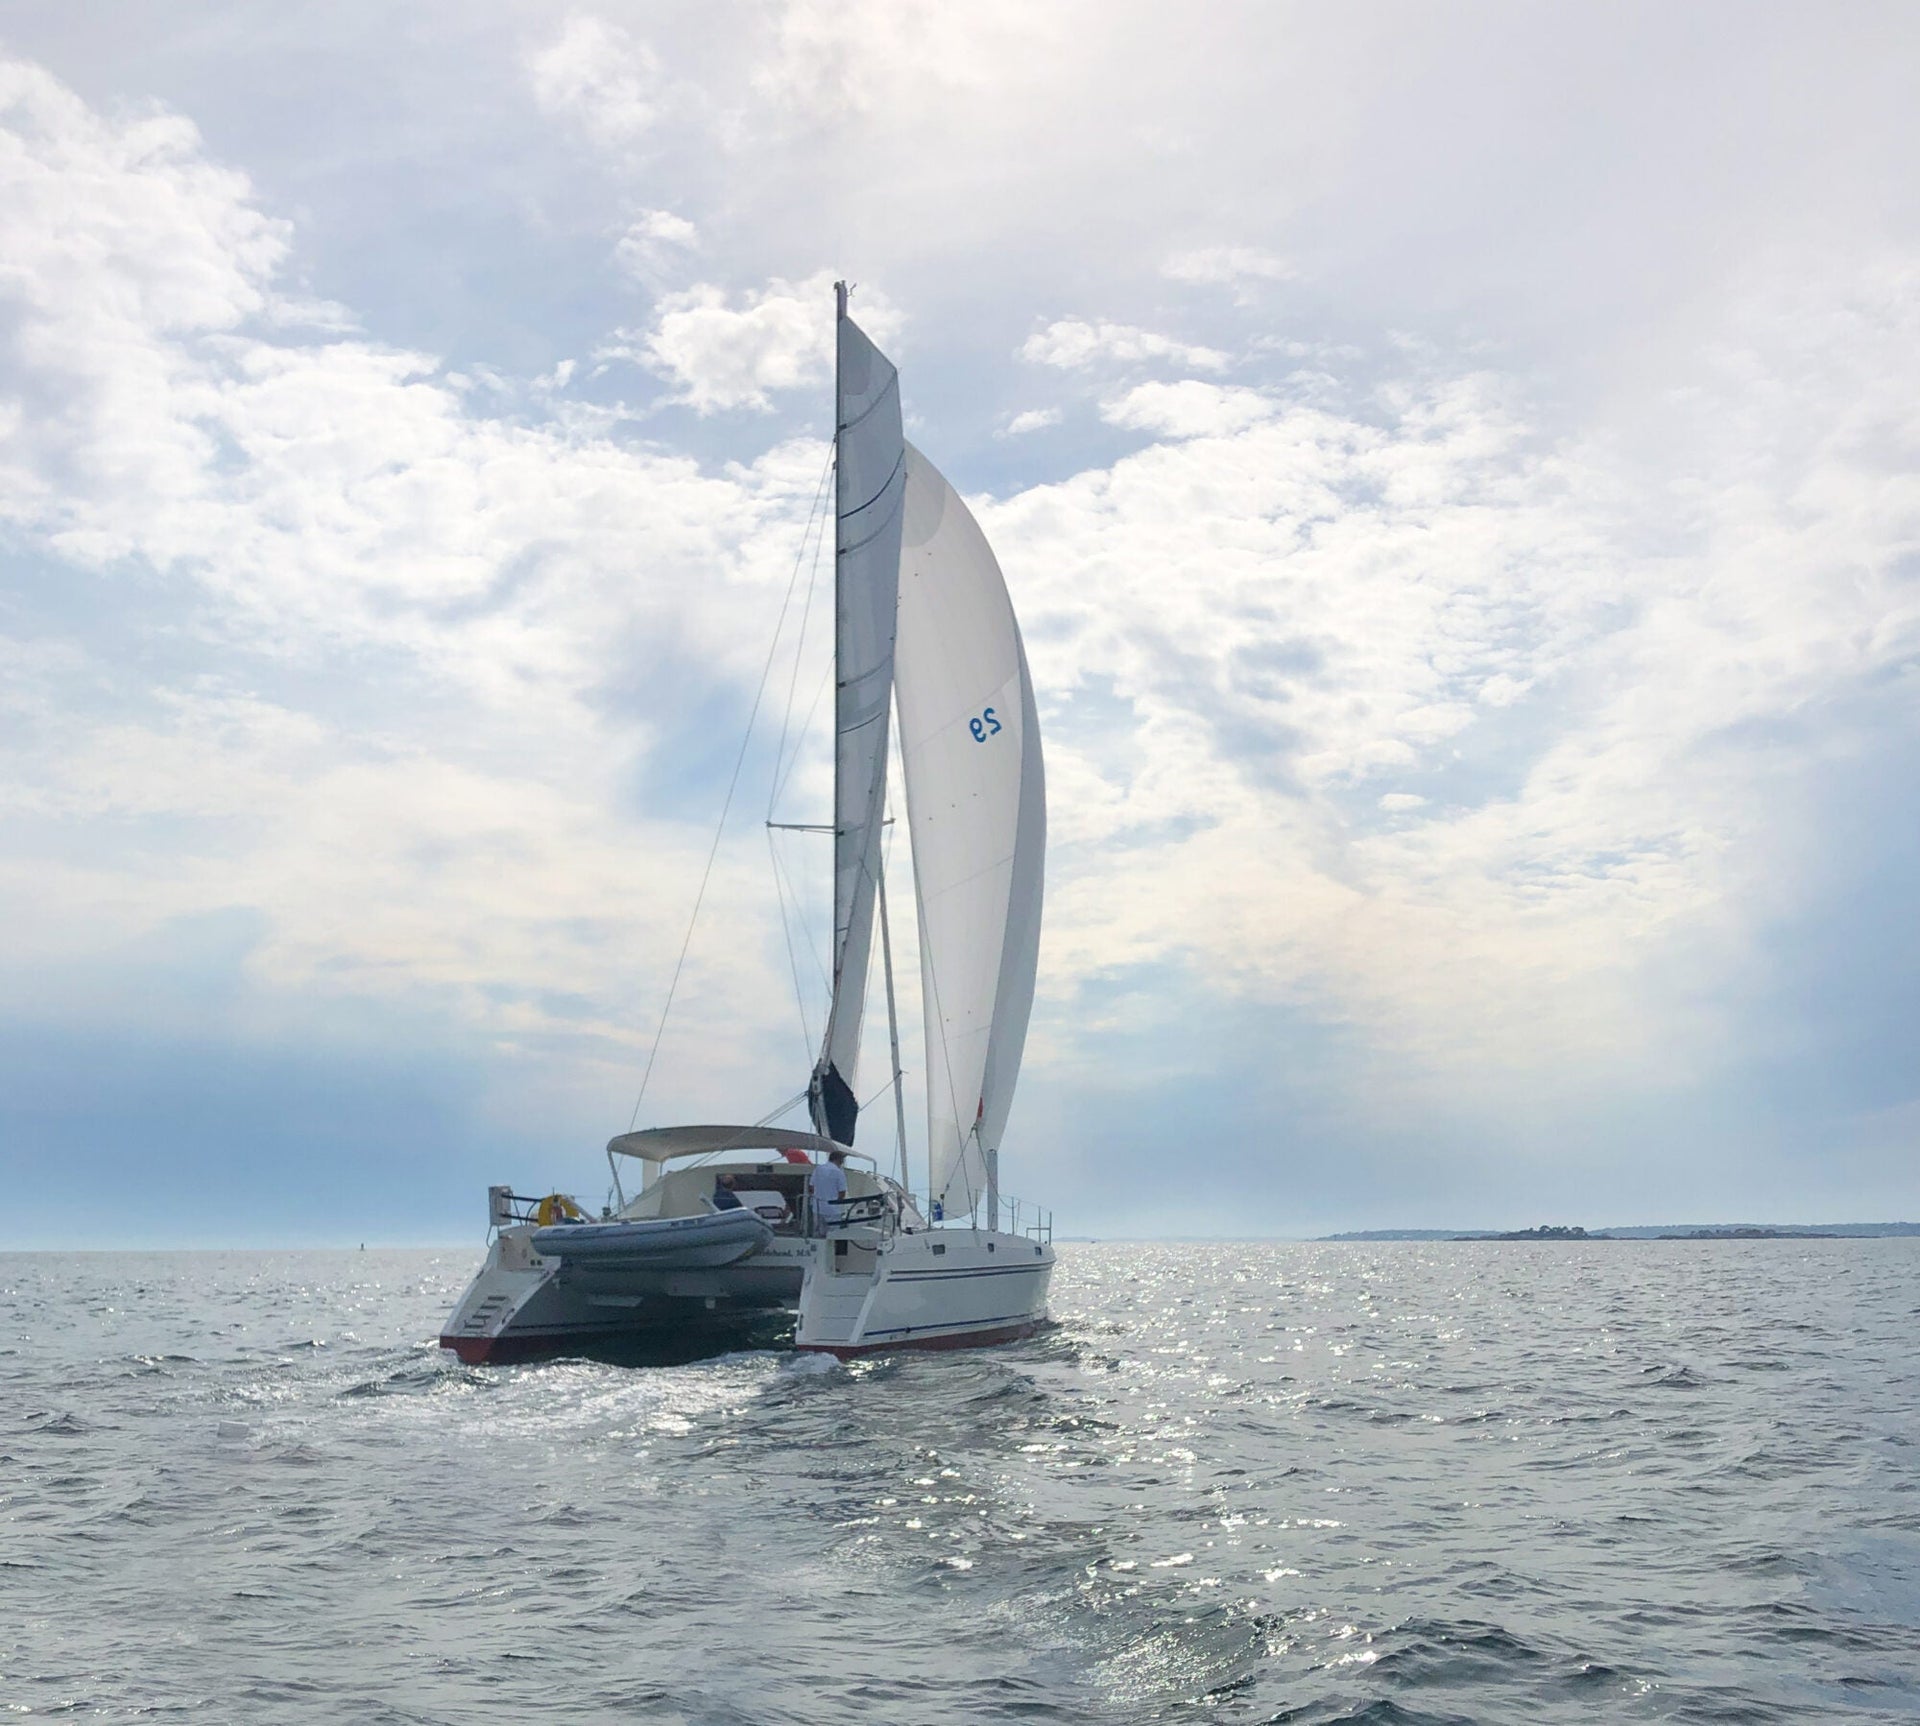
guides
FIRST IMPRESSIONS OF THE HELIX FURLING GENNAKER
FIRST IMPRESSIONS OF THE HELIX FURLING GENNAKER – PURPOSE-BUILT FOR CRUISING
North expert Bob Meagher gives his first-hand experience and explains why you should consider adding this sail to your cruising inventory.
I’ve been fortunate to serve hundreds of cruising multihull sailors in the past 20 years, often with downwind sails designed to eliminate the terrible feeling of performance loss when these boats bear away under mainsail and genoa. Apparent wind, boat speed, and the sense of freedom all plummet when the upwind sail plan just can’t make the boat go past a certain point, and you can almost hear the engine key whispering, “turn me!”
Most owners have learned how cruising Code Zeros offer very convenient “ beam reaching” performance but require larger-than-zero asymmetrical spinnakers for sailing deeper angles. I was always happy to offer two sails to cover wind angles from close reach to broad reach/run. And while this is still the best choice for those wishing to have optimum performance over the greatest possible wind range (ie. long-distance cruisers), I’m honored to have been part of the North Sails development team for a new “single-sail” solution – the Helix Furling Gennaker. I’ve experienced the Helix Furling Gennaker on various catamarans, from high-performance cruising McConaghy 60 to a more traditional Lagoon 46. I have been thrilled to learn its benefits and satisfied with its inevitable limitations.
At the dock, you’d think you’re looking at a Code Zero. It lives up, and furled, on the bowsprit or bow, ready to deploy. Looking more closely, you see a very tight roll in the top third, an area where other Code Zeros can roll too loosely. Unlike standard Code Zeros, North designed the Helix Furling Gennaker to roll from the top-down, not the bottom-up, eliminating a loose furl toward the head that tends to catch the wind and sometimes even shake loose in a big breeze. And once unrolled and sailing, other differences compared to a Code Zero become clear.
A cruising Code Zero has a straight luff, supported by a thick (12mm – 19mm) cable in a sleeve up the luff, and a relatively straight leech, approximating a Genoa, but fuller. The Helix Furling Gennaker is cut more like an asymmetrical spinnaker, with a curved, forward-projecting luff and a rounder leech, resulting in a deeper sail, but one carefully designed to strike a balance. It has a very light, skinny, and flexible (8mm – 10mm) anti-torque cord running along the luff – but this cord has to carry only about half the load of an old-style luff cable. The sail itself features a structured luff to shoulder the other half of the load; allowing this lighter, smaller diameter cord to do a superior, trouble-free, job of top-down furling. When sailing closer to the wind, the halyard is tensioned tight like a Code Zero, enabling apparent wind angles of 70 degrees or a little better. The boat will perform exceptionally well when the sail is used like a traditional reacher (though the added shape in the sail does make it look a bit “knuckle-forward” when in Code Zero mode). It’s when you turn downwind that the real magic happens.
Our goal was to make a sail that can point and perform like a Code Zero, and furls easily like a Zero – but with a significantly deeper downwind range. Bear off with the sail’s luff pulled tight and the sail suffers from the exact thing Code Zeros do: it ends up blanketed by the mainsail, and power is lost. But this isn’t a straight-luffed Code Zero – it’s an especially agile Gennaker, whose superpower activates when easing the halyard and sheet. Easing the halyard, so the sail takes its “spinnaker” shape, transforms the luff into a large, positive curve, deepening the center of the sail. Easing the sheet simultaneously allows the whole sail to rotate to windward, capturing more breeze, undisturbed by the mainsail. What was previously a beam-reacher just became a powerful broad reaching sail. If you want to sail even deeper on a cat, you can move the furled sail to a pad-eye on the windward hull and unroll it there, gaining another 10-12 feet of windward projection.
We’ve sailed deep and stable to 125-130 degrees apparent wind angle (about 160 degrees true wind angle) in 18 knots of true wind speed. We didn’t need to sail above 90 degrees AWA in that much breeze because at that angle and higher, the main and genoa drive the boat just fine. When sailing deep with the halyard eased, the head will have a mild tendency to move around a bit. We experimented with achieving the same luff projection by allowing the tack to raise, but this meant allowing the furler itself to rise to maintain furling ability. It doesn’t make sense to have the furling unit bounce around two to three feet up in the air.
Furling the sail does require a bit more attention than furling a cruising Code Zero. The thumb-thick cable in a code zero is always pretty tight, and it’s a skinny sail without much roach in the back, so furling a Zero can be almost as simple as a genoa (as long as you take care to not let it get too loose up top). With the Helix Furling Gennaker, the halyard should be re-hoisted fully, if it had been eased for broader angle sailing. A firmer halyard/cord transmits torque to the head better, and even more critically, a loose cord could be damaged if it kinks at the bottom when furling. Simple advice: get it tight before starting the furl. With larger sails of this type an electric winch is almost mandatory – not because there’s extreme load on the furling line, but due to the much greater number of rotations needed to furl a top-down system versus a bottom-up. Finally, unlike a straight or hollow-leech code zero, there’s more area toward the leech of a Helix Furling Gennaker, so you will want to keep an eye on the leech to ensure it furls without folding under or over on the way into the roll. If it does, stop furling and trim a bit of sheet — it will unwind some of the sail, and you can ease it back and try again. Learning the relative sheet tension to use when furling takes a time or two, but it’s pretty straightforward. And remember, if you’re furling in a hurry, ignore “neat and tidy” and just roll it up if you need to get the sail away.
By far, the most gratifying successes of these sails came after I left the boat. All these owners sail with few crew – usually it’s just a couple enjoying their retirement, not interested in hassle. Following up with each of my clients some weeks later, I was thrilled to hear that the sails worked as well for them as they had during our trials. They remembered to tighten the luff before furling, had determined the ideal sheet tension when rolling the sail in, and were already playing with relative luff tension at various points of sail to get the most out of the sail. For each, gone are the days of struggling to get a large asymmetrical up out of a bow locker, or going forward in too much breeze to struggle with a snuffer sleeve on a pitching deck. Instead, the Helix Furling Gennaker offers a single-sail, from-the-cockpit solution, for sailors wanting more power. This is a terrific new sail type for a wide array of different boats around the world.
READ MORE
READ MORE
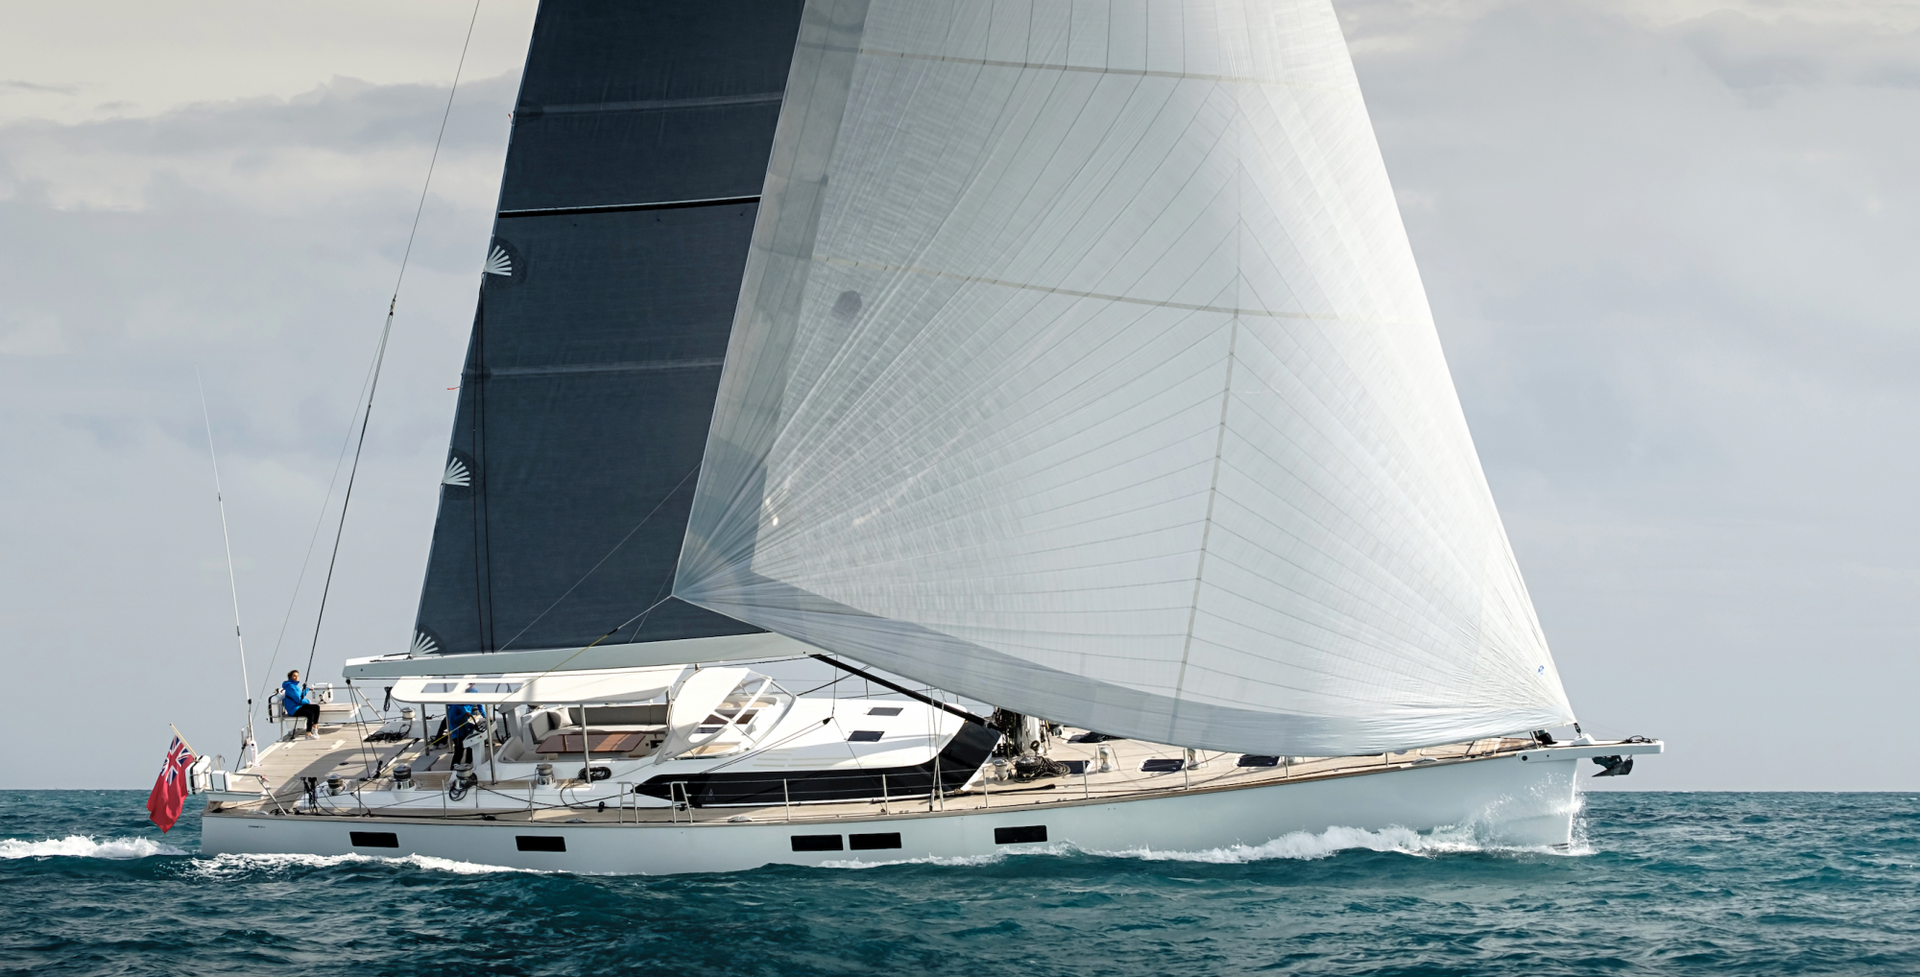
guides
FULL-BATTEN VS. STANDARD CRUISING MAINSAILS
Here’s a summary of the differences to help you understand which sail type is best for you.
READ MORE
READ MORE
guides
SPRINT SAILING EXPLAINED
Ken Read dives into sprint sailing, and how to best manage what little time you have to the finish line.
📸 Mirpuri Foundation Racing Team / The Ocean Race
First of all, you can really break sailing into three categories: around the buoys or laid marks, sprint sailing, and full blown offshore distance sailing. Around the buoys sailing is everything from your dinghy sailing, weeknight Beer Can racing, TP52 events or America’s Cup. Full blown offshore events are a minimum of three days, in the ocean, mostly away from land. Events like the Ocean Race Europe are classified as “sprint sailing.” But what exactly is sprint sailing and how is it different from the other type of sailing we do?
For a lot of us, it’s a fine line between sprint sailing and offshore sailing. So I’ll classify sprint sailing as typically 1-3 days, around a lot of headlands and other natural features that you wouldn’t find in the middle of the ocean. With sprint sailing you have to manage your time and you have to tweak a crew to really be able to withstand lack of sleep. It’s all about not losing a meter when the opportunity comes and gaining a meter when the opportunity presents itself. In this type of sailing, very often races are won and lost by very small distances.
📸 Sailing Poland / The Ocean Race
I personally think that sprint sailing is as hard or in some ways harder than full blown distance racing. And the reason is simple: You can’t really find your rhythm. You can’t find a good watch pattern and sleep pattern so you can replenish your batteries. In these short races, often you do it with very, very little sleep. And when the sleep that comes, it comes due to true exhaustion. Therefore, as soon as you start to wake from your sleep, you’re panicked that you’ve missed something really important because, frankly, in sprint sailing, those little things are really important.
Building a crew around sprint sailing is probably a little different as well. In our last article here, we talked about the need for fixing things and having a crew who is very adaptable to several different types of boat maintenance or types of jobs on board a boat. Well, in sprint sailing, you really can’t afford to slow down and fix things. So you’re either full bore, 100% or you’re not. Which makes it even more about speed and trimming and navigation than your typical offshore racing.
Finally , sprint sailing is reliant on navigation and often local knowledge; how and when to use the shoreline, how and when to use sea breeze, how and when to get away from shorelines and sea breeze. Local knowledge might affect a race course too, especially around headlands. And then of course, current and how current affects the race course. Because again, you’re going around places where current is probably far more of an opportunity or deterrent than what it would be in the middle of the ocean.
📸 11th Hour Racing Team / The Ocean Race
I personally think it is really hard and that’s why I love it so much. The double handed sailing that I did this past summer on Alchemist was classic sprint sailing, where you really just couldn’t sleep. Not only were you under manned onboard the boat, but the race was going to be short enough that any meter you could gain was a good meter.
For the Ocean Race Europe, my final thought is that quite a few of these teams are using this event as a try out for the main event next year—around the world. This sprint sailing is a bit of a teaser for what an individual sailor or entire team is like on board the boat. With a three day race, you start to get a good feel about what a crew person is going to be like for the long haul, out in the middle of the ocean when the chips are down or when things are good. And it’s a great opportunity for the skippers and team leaders of these programs to get a feel for who is good at what. However, they have to remember that this is still a sprint and that it is a different world once you get out, offshore, in a 20-plus day leg. I guess at the end of the day, a little bit of an interview, no matter how short the time may be on board the boat, is better than nothing.
Linked Out / The Ocean Race
READ MORE
READ MORE
guides
ADVICE FOR BUILDING AN OFFSHORE TEAM
The first thing to always talk about when going offshore is, what are the rules? They’ve created fantastic rules to be incredibly inclusive for people who may not otherwise have a chance to join high-profile sailing teams.
READ MORE
READ MORE
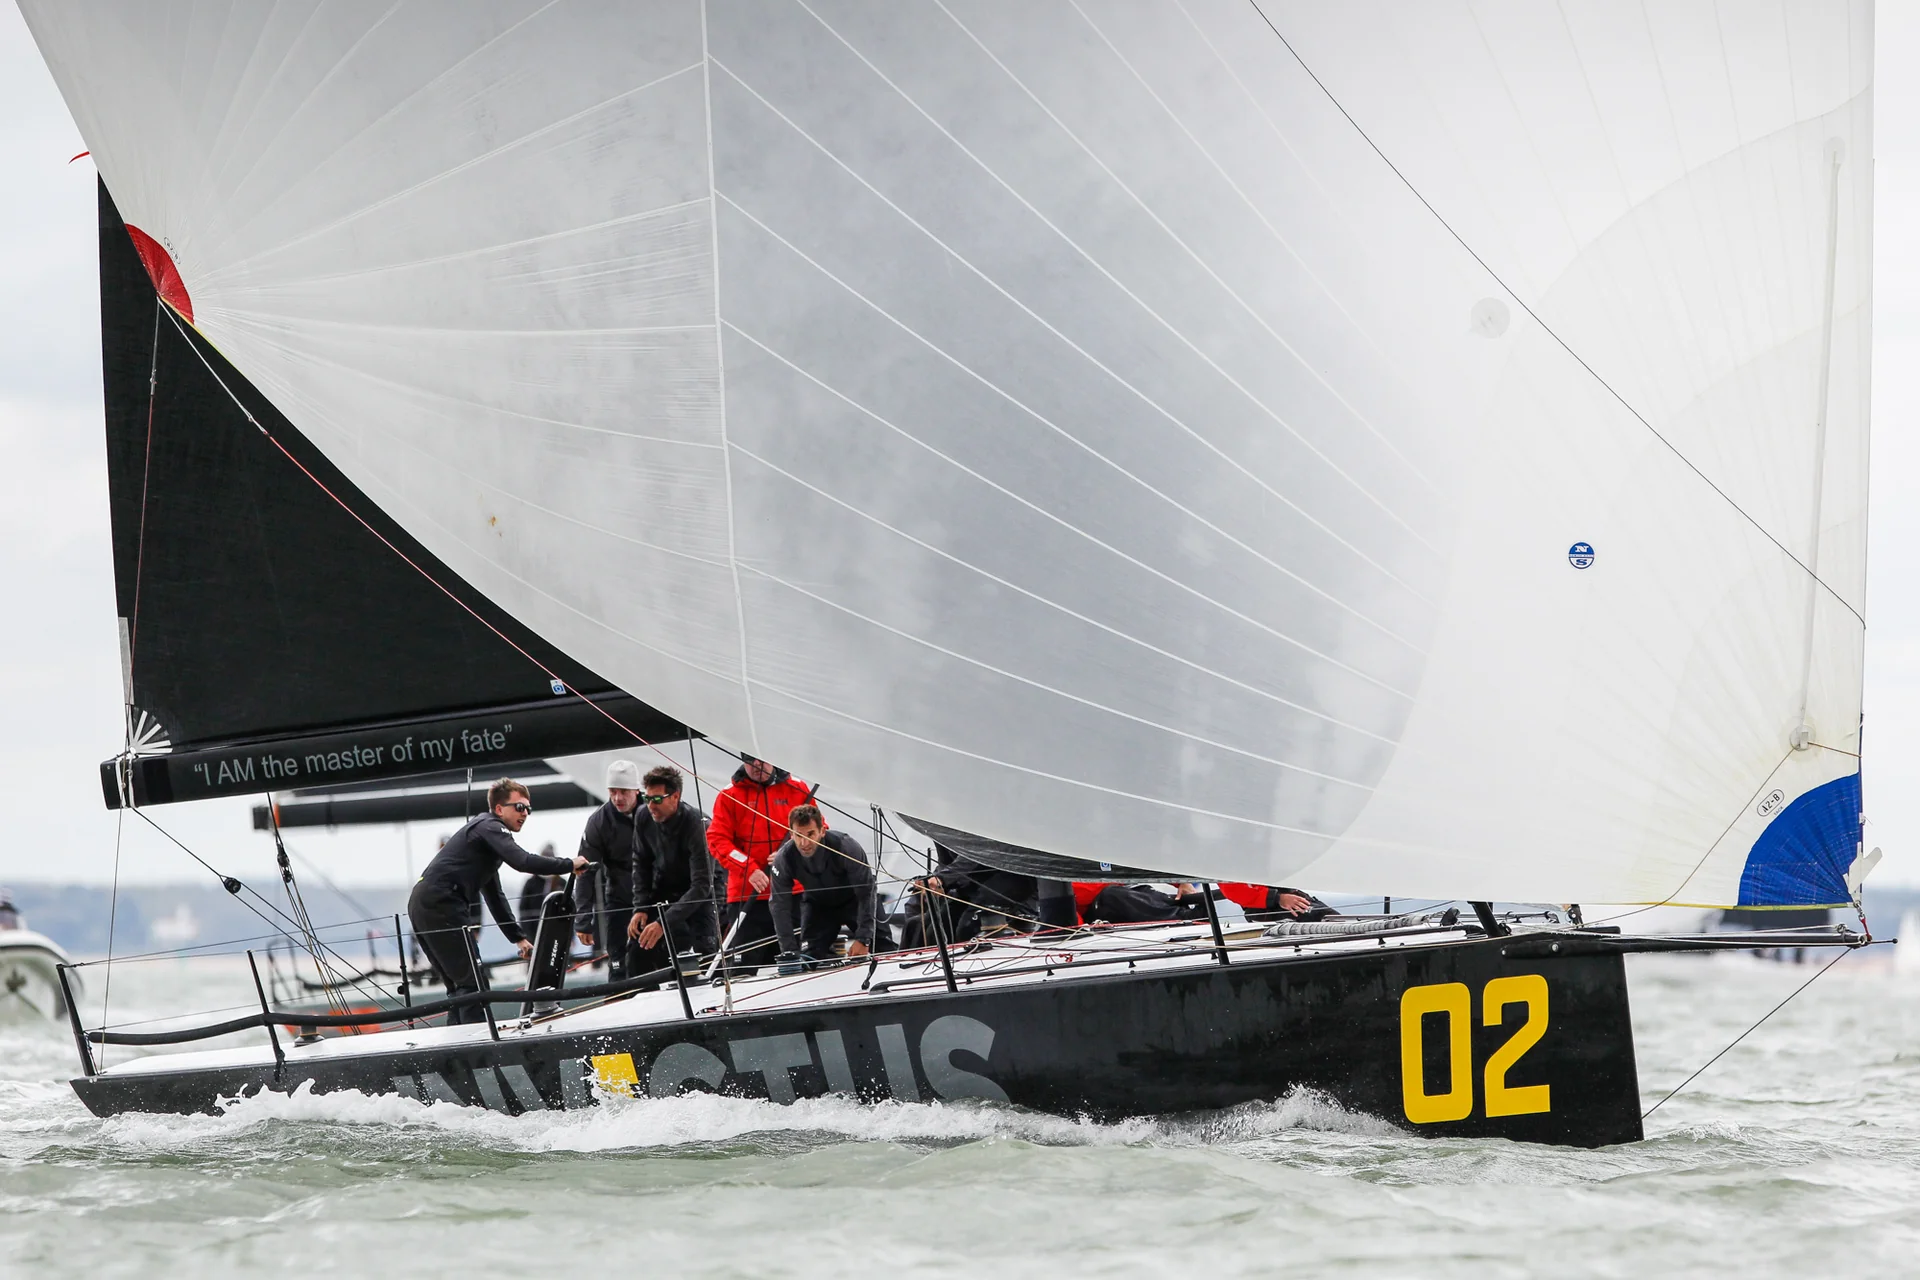
guides
HOW TO: SPINNAKER ZIPPER SYSTEMS
HOW TO: SPINNAKER ZIPPER SYSTEMS
A Smoother, Cleaner, Quicker Hoist
📸 Paul Wyeth
When it comes to hoisting your spinnaker, there are some details to consider that make everyone’s life easier (or harder).
Angle off the wind is often underestimated and this can cause issues when the kite is hoisted too soon. Especially in heavier air, sneaking the halyard is really just to clear the head so it can freely go up in front of the spreaders as soon as the boat turns down around the windward mark or offset. If the kite is fully hoisted before the boat turns down, you can count on a broach or altercation if there is a boat close to leeward trying to make a mark. In a perfect world, the spinnaker is pre-fed, tack out, and the head flows freely, clear from the rigging and the jib or genoa, and as soon as the boat turns down it’s a game of who can ring the bell the fastest.
Why use zippers?
Zippers help keep the kite contained, making it easier to sneak and hoist your spinnaker. As the kite goes up, the zippers hold it together so it doesn’t fill, allowing a few more seconds for the mast position to get it fully hoisted. Zippers help keep the foot and the tack of the kite neat and tidy too, which your bowman will appreciate. The head is easier to bring forward if the kite is properly zipped, which will guarantee a smooth, clean hoist that can even help set you up for an immediate jibe if needed.
Older systems used velcro bands, woolies or rubber bands. They worked, but didn’t hold as long and after time would fail and the debris would be lost overboard. Having zippers instead of bands is a great way to simplify things and help keep trash out of the ocean. In offshore racing, it’s mandatory–as it should be. Here are the steps you should take when properly setting up your kite zipper system.
After the take-down, hook the head to the inside of the bow using a carabiner or slip knot. This will help hold the sail in place and make it easier, as you’ll be below deck while the race is still on!
From there, gather the material between the zipper sides like they are a hotdog bun, and feed the zipper onto the track (the same as zipping up your jacket, making sure the two zipper ends are even).
As you work your way down, very carefully run your finger along the underside of the zipper car to keep the spinnaker material out of the teeth. This is imperative as catching in the zipper will tear the material!
Once you get to the end, hold it together with one hand and pull the zipper off the track. Then use the fixed velcro strap to temporarily secure the zipper from unzipping, by pulling the velcro across and pressing it down to secure it.
Once the velcro retainer is in place, gently break the zipper end so under pressure it will naturally unzip.
Use this same technique on the foot, making sure to keep tension on the material as you work your way towards the clew. This will keep it from bunching up and not fitting in the zipper.
Once you are zipped, remove the zipper car and store it on the spinnaker bag, or below deck on the carabiner, ready for the next douse. You can pack the kite easily now that the spinnaker is more manageable.
It sounds easy, and generally it is! But keep in mind you’ll be doing this as soon as the kite comes down and some boats don’t have a ton of headroom. You also may be doing this alone. Hooking up the head so you don’t have to hold, feed and zip at the same time is very helpful. Practicing this method and timing yourself is a great place to start. Depending on how long the upwind leg is, you may be strapped for time. Getting comfortable using the zipper method and being able to do it on your own puts you on the fast track to becoming a great bowman.
Pro Tip: If the breeze is up and weight on the rail is necessary, try to position yourself down below so you are on the same side as your teammates.
READ MORE
READ MORE

guides
THE KEY TO UPWIND PERFORMANCE
THE KEY TO UPWIND PERFORMANCE
Dynamic Tuning with North Expert Charlie Cumbley & Cyclops Marine
With the help of smarttune load sensors from Cyclops Marine, North Sails One Design Expert, and J/70 World Champion Charlie Cumbley explains how the dynamic balance of upwind performance hinges on forestay load.
Click here to learn more about how smarttune can boost your performance, or inquire at info@cyclopsmarine.com.
Find your local North Sails expert for any sail-related inquiries or questions.
FIND YOUR LOCAL EXPERT
READ MORE
READ MORE
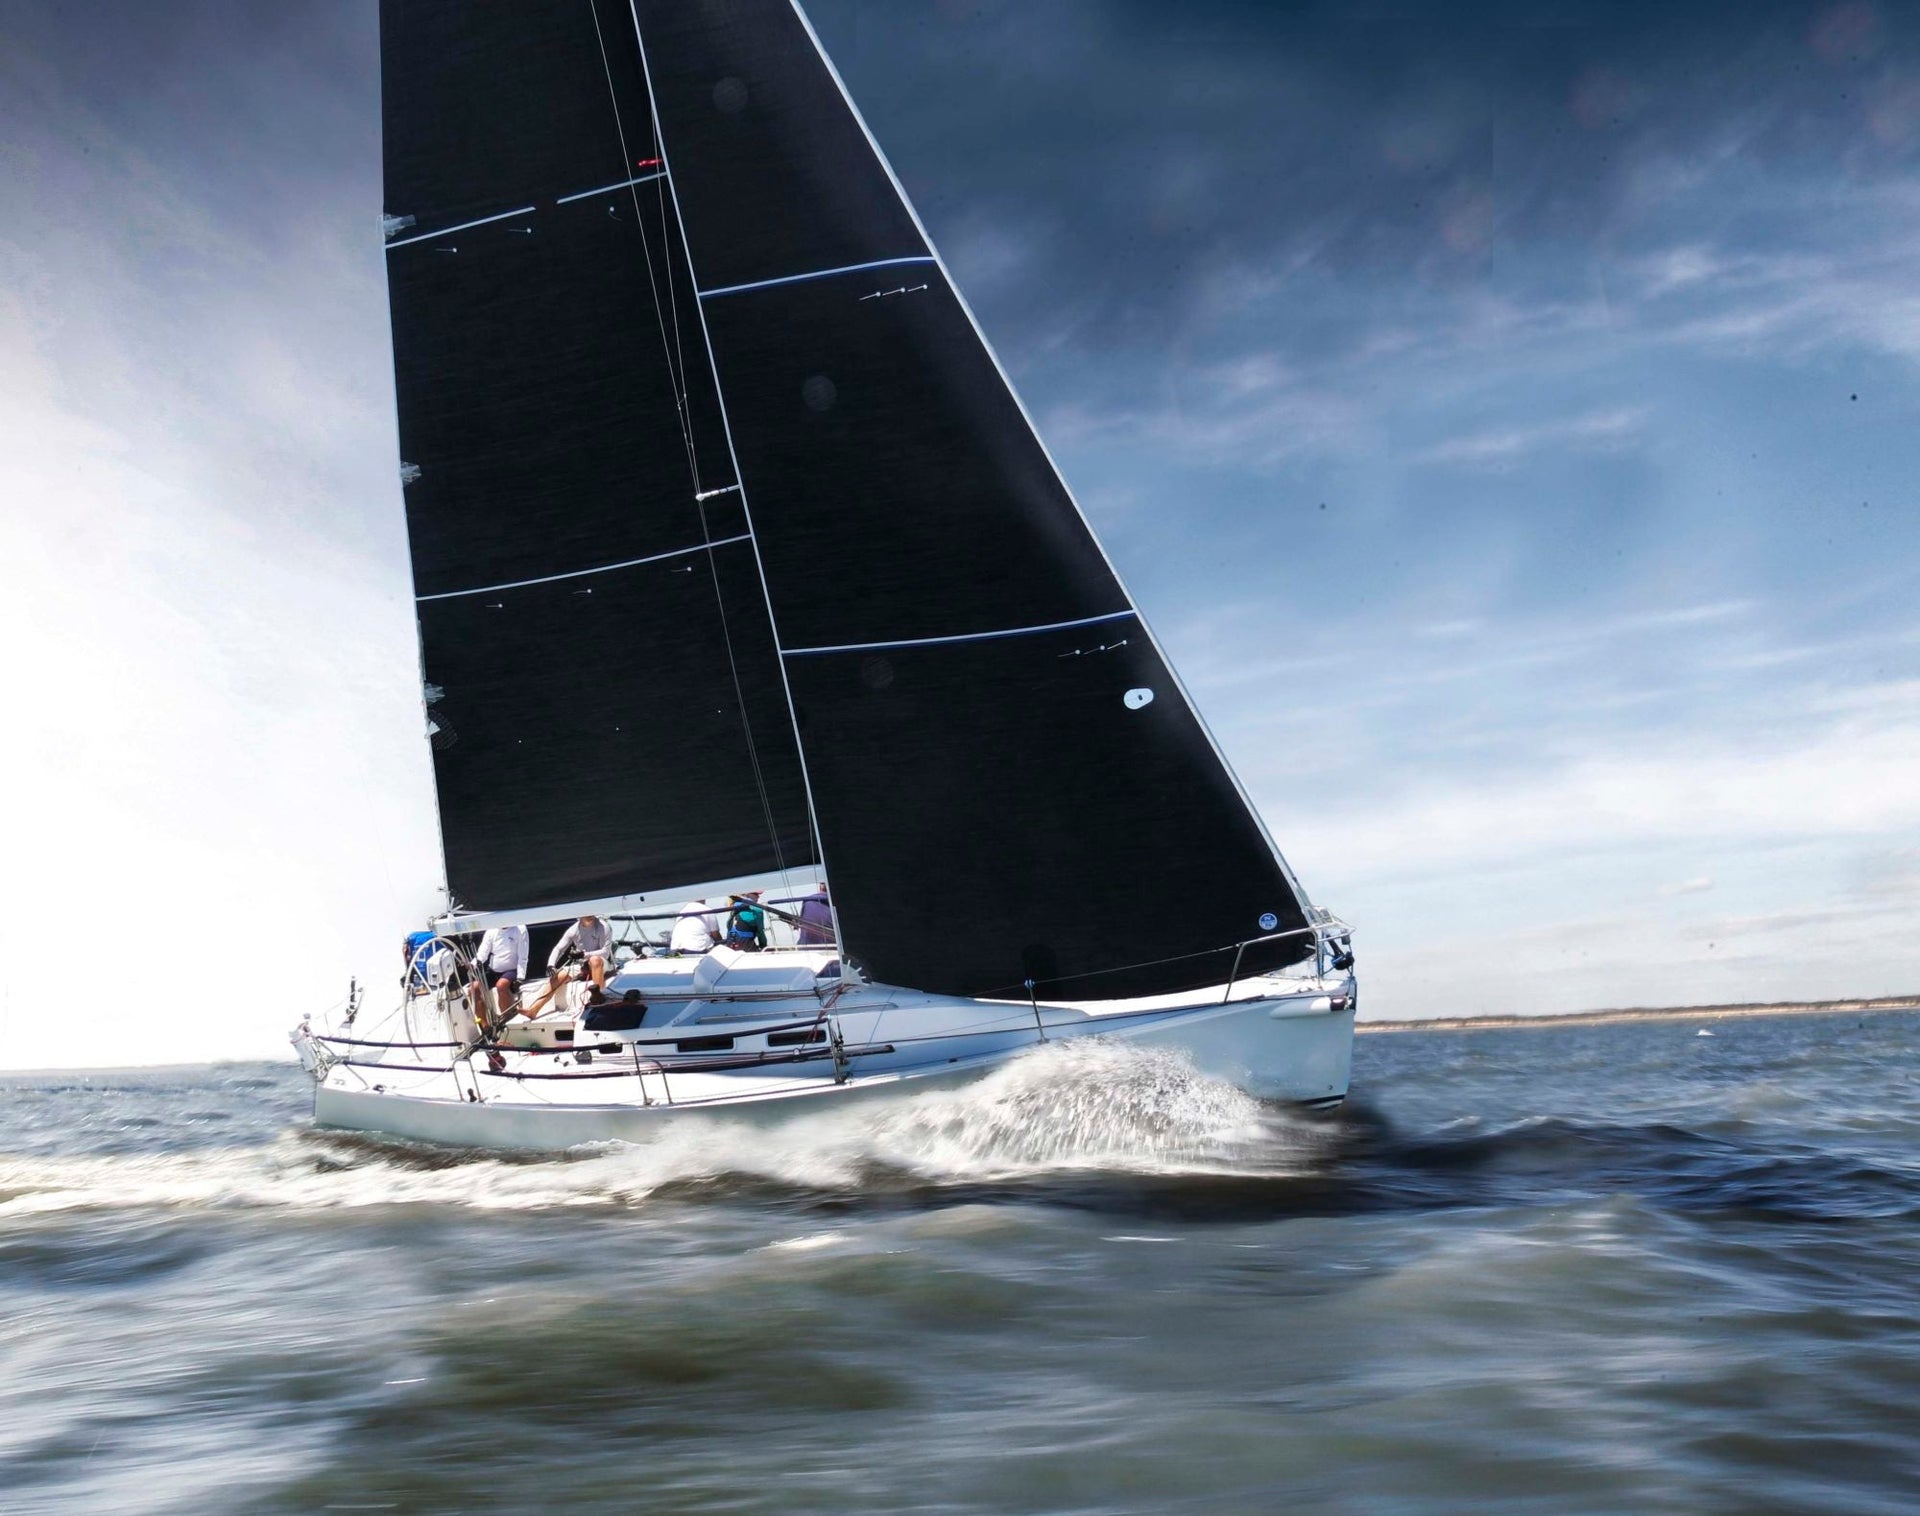
guides
CUSTOM SAILS: WHAT GOES INTO THEM?
Every Sail is Designed to Match Specific Customer Requirements
All North Sails are designed and built to match the specific customer requirements. According to our Director of Design and Engineering JB Braun, the result is that each sail made in a North loft is custom and personalized to your boat and sailing style.
“As much as we would like to compartmentalize them into some type of standard feature or standard item to try to reduce the costs… the reality is, all the sails we build are custom.”
Why does North put so much time into each and every sail? Because each and every customer and boat is slightly different. That’s why we’ve taken all the knowledge acquired from building high-end race inventories and let it trickle down to our cruising customers, because you, too, deserve a sail that perfectly fits both your boat and your sailing plans.
📸 Paul Wyeth
A CUSTOM SAILS DESIGN UNIQUE TO EACH BOAT AND SAILOR
The seamless collaboration between the sales and design teams at North is what makes such customization possible, JB explains. “The sales consultant works with the customer to define their goals and objectives. That information goes directly to the designer, who also takes into account the boat’s displacement, righting moment, sail area, type of sail, etc.”
HOW THE CUSTOMER INTERVIEW INFLUENCES THE SAIL DESIGN
North Sail expert Mark Sadler says that initial discussion with the client is the most important step, because it helps him to establish exact requirements. “The next most important thing is being sure the design team has a clear understanding of the requirements and can feed back solutions.”
North Sail expert Hugues Destremau starts by asking what kind of sailing you intend to do. Your questions back to him might be more specific: “Why is this material better than this one? Which color will my sail be? How long is it going to last?” For help, he reaches out to the design team. The designer recommends a product tier and specific material, and clarifies any unique details.
You might even specify a desired “sweet spot” for a sail. JB gives an example; “I want the range of the sail to be 12 to 18 knots, and I want it to be the best at 14 knots.” All of that information is entered into the order.
Next, the designer creates a model of your boat on-screen and chooses the closest option from North’s extensive sail design library. Narrowing down to what’s best from a vast database of virtual shapes is why the sail consultant is so valuable, JB explains. “Their experience with the product, their experience as a sailor, their experience with the customer is a huge value to North.” The designer uses that additional input to decide on an exact design direction. “Once we’ve done that, a customized design pops up on screen with all the details in it. The result of all that work is a sail design uniquely set up for your boat and sailing style.”
📸 Jeff Brown
CAPTURING THE FINAL DETAILS
In addition to basic dimensions and shape, the final design includes all the sail information the production team will need: the number and placement of battens and reefs, choices like bolt ropes or slides, and potential chafe locations (lifeline stanchions, pulpits, etc). The information gathering and design process are exactly the same whether you order a 3Di or paneled sail; it’s only once the sail starts the manufacturing process that the two types diverge. “If it’s a paneled sail”, says JB, “the panels will be laser cut and manufactured to the three-dimensional shape. If it’s a 3Di sail, the material is laid onto a three-dimensional mold and then vacuum-bagged and thermoformed into that customized shape, with all of the reinforcing details and additions that were ordered by the customer.”
BETTER VALUE WITH A NORTH CUSTOM SAIL
“Selling each and every customer a custom sail provides the best value in the long run,” JB says. “And North customers get an unbelievable deal when they buy sails because we guarantee a perfect fit that will lead to a better experience on the water. We have always gone about the design, engineering, and manufacturing to make it the best that we possibly can, period—and then we figure out how to do it cost-effectively. Our sails are far from the normal, stereotypical design, because that’s not how we do things. It is a unique process—and a better value for the customer.”
📸 Robert Bateman Photography
HOW TO SPEC YOUR PEFECT SAIL
Choosing a custom sail inventory that’s right for you and your boat might seem overwhelming at first. Fortunately, boat size and your sailing plans will quickly narrow down what tier of materials will be the best match. From there, your sail consultant will work with you to fine tune the details, based on the intended use. “If someone is totally into durability, they’ll be steered toward our 3Di ENDURANCE line,” JB says. “If they’re totally into performance, 3Di RAW will be their best option. If they’re in the middle, we have products for that too.”
Another way sail consultants ensure a perfect match is by actually measuring your boat—even if it is already in the design library. “A customer might have added more rake or have a different furler. One person wants a higher clew, the other a lower one.”
And if you’ve had a sail built by North since 1990, JB can almost guarantee it’s in the database.
📸 Cate Brown
FUTURE DESIGNS BUILT TO A PERFECT FIT
Another process the North Design Suite makes possible is to design and build sails for boats that don’t exist yet. “I’m working on one project that won’t launch until 2023,” JB says. Designing sails for a not-yet-built boat makes it possible to optimize the entire aerodynamic package by including input from the customer, hull and mast designers, and project manager. “Everyone works together to satisfy the objectives of the client. It’s a circular process; you design a hull, mast, and sails—that’s one design cycle. Does that performance meet our objectives? Maybe the hull needs to be lighter. So you go through the design cycle again.”
JB is old enough to remember a less scientific approach to sail design. “Years ago, it was much more of a gut feel because you didn’t have as much information. We’re lucky to be able to run these simulations and come up with answers virtually. You don’t ever have all the answers, but you have many more pieces to the puzzle to make informed decisions, which leads to much better accuracy.”
📸 Stuart PearceSTILL IN AWE
After more than two decades with North Sails, JB still marvels at the level of detailed attention that goes into each and every sail order. “The whole thing is an unbelievable process when you think about it. I don’t think everybody realizes what’s going into these sails—it’s just amazing. There aren’t many industries that have the ability to customize a three-dimensional object!”And it’s not just the details that impress him—it’s the final result.“I just look at these sails and I’m always in wonder of them—it’s a fantastic product. Big boats, little boats—we have all different products that are engineered and designed to satisfy the goals and objectives of each and every client.”Custom sails? Yes, every single one.
REQUEST A QUOTE TALK TO AN EXPERT
READ MORE
READ MORE
guides
TIPS FOR ADJUSTING THE BOLT ROPE ON YOUR 470 MAINSAIL
Correct Tension Allows for Best Sail Shape and Improved Boat Speed
📸 João Costa Ferreira / Vilamoura Sailing
The North 470 mainsail comes standard with a black flex plastic rope for the bolt rope (luffrope). Due to its great flexibility, the cunningham works efficiently to make the sail shape control easier, compared to the fiber bolt rope used before. Please read the instructions below carefully to set up the mainsail properly for the best shape and performance.
The bolt rope is fixed into the lufftape of the mainsail with some pre-tension applied during manufacture. Because of the elasticity of the bolt rope, you need to have some cunningham tension at all times to keep the main tack position where you will have the correct amount of wrinkles along the luff. The amount of wrinkles makes a significant difference in sail shape.
Control the cunningham tension according to the examples showed below. In conditions above 11-12 knots of wind, you can use cunningham as usual.
Important:
The bolt rope stretch is affected by heat, sometimes significantly when sun exposure is strong. For this reason, it is important to check and adjust the initial setup of the bolt rope tension.
If the bolt rope is elongated by UV exposure, the tack corner will fall down and sometimes the luff is stuck above the boom. In this case, you need to take a few stitches off to pull the rope out of the luff to allow more tension, so that the tack corner is lifted up roughly 10-12 cm above the lower band on the mast.
Hoist the mainsail up to the blue band (see left photo). The tack corner should be set high enough, above the lower band (right photo).
Cunningham On
When the cunningham is on, you will get a crease between cunningham grommet and tack corner (like image below on left). Pull the tack down to flatten it. If the area between the cunningham grommet and the tack is not flattened, you cannot measure the proper height of the tack corner, thus you cannotfind the proper position for your settings.
We also recommend placing a thickplastic tape at the bottom edge of the opening groove to avoid the bolt rope getting stuck when cunningham is pulled on. With the tape in place, the edge of the bolt rope will slide out without friction as soon as controls are eased anad pressure is in the sail.
Tack Down – Proper Setup
The tack corner is set at 2-3 cm distance from the upper side of the color band. Keep 2 cm offset from the back face of the mast.
Pull the tack rope down so that the area between the cunningham grommet and tack is smoothly flattened. If wind is light, you may need to help it down manually.
READ MORE
READ MORE
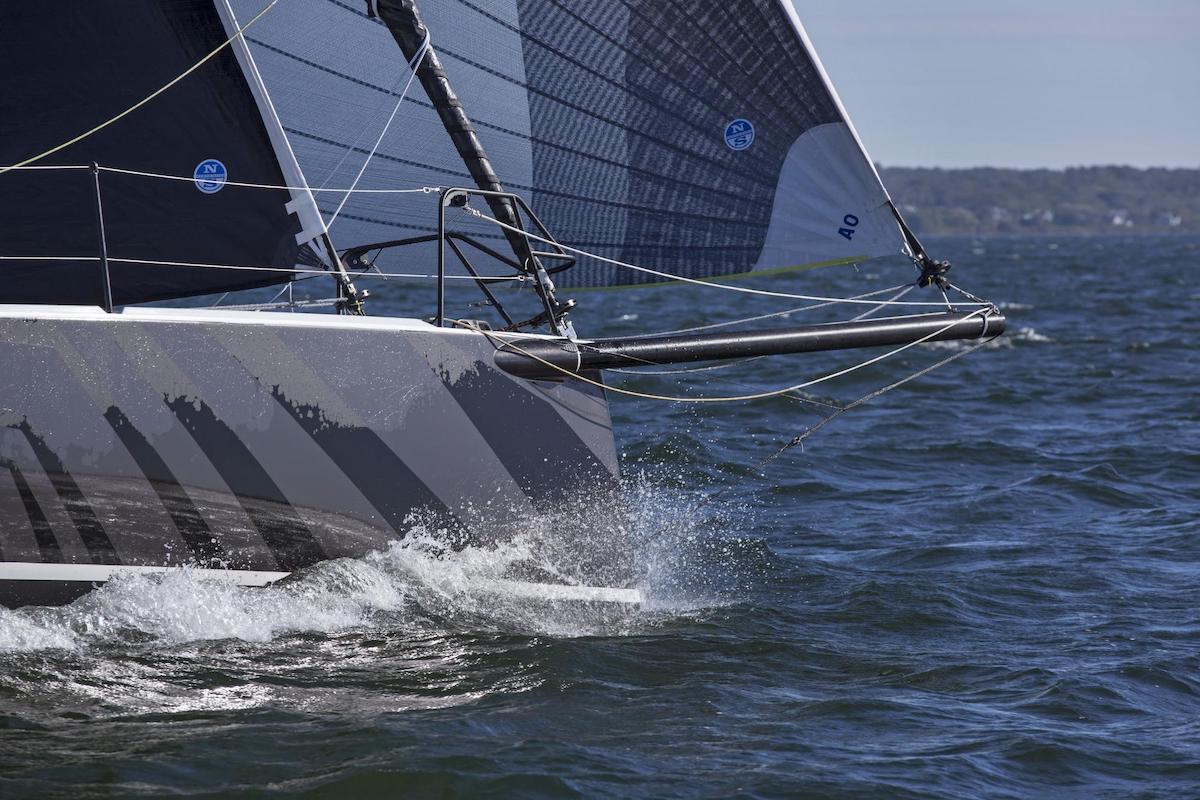
guides
CODE SAILS: WHICH ONE IS BEST?
CODE SAILS: WHICH ONE IS BEST?
North Experts explain how to decide which Code sail is best for your sailing
Even if you already understand what a Code sail is, it might not be clear why there are three different types—or which one will best fit your boat and your type of sailing. First, a quick refresher: Code sails fill the large gap between upwind sails and downwind sails, from about 65° to 135° True Wind Angle. They are free flying with a relatively high clew, sheeted like a spinnaker to an aft lead. In most cases, these sails will be furled when not in use.
To cover such a large range in true wind angles, there are three different types of Code sails. Each has a different “sweet spot” – a specific wind speed and angle where it’s most efficient.
Code Zero, Code 65, and Code 55
The Code Zero was originally designed to measure in as a spinnaker, with a minimum midgirth of 75% of foot length. Code 65 and Code 55 are named for the geometry of the sail; the number specifies the ratio between foot and mid-girth. For a sail with a foot of 10 meters, a Code 55’s mid-girth will be about 5.5 meters, while a Code 65’s mid-girth will be around 6.5 meters.
What is the best code sail for my boat?
There’s a lot that goes into that answer. First, your boat’s details are important: weight, righting moment, deck layout, etc. We also need to factor in your preferred type of sailing. Grand Prix racing has extremely specialized requirements, but for club racing and cruising, we can make some generalizations.
One way to upgrade your Code sail is to go with a Helix Structured Luff. Helix Code sails are great for both racers and cruisers on any sized boat, as this modern design philosophy produces sails with greater range. Sails with Helix Structured Luff are more versatile than a typical Code sail, and their optimized shape makes them easy to furl, self supporting and forward projecting.
Best Code Sails for Racing
If you want to boost your racing results, the best sail is probably a Code Zero. Rating rules like ORC and IRC consider it a downwind sail, which means they won’t penalize the extra midgirth. If you often sail tight reaches in light breeze, though, a Code 55 or Code 65 might well be worth any rating penalty.
IRC and ORC are both moving toward fairer ratings for Code sails with girths of less than 75%, which increases your freedom to choose the best addition to your racing inventory. Your North Sails expert can give you the latest information and help you identify the best sail for your racing.
📸 Alex McKinnon Photography
Best Code Sail for Cruising
Whether your cruises last a day, a week, or a year, Code sails are a blessing. Most modern cruising boats have jibs with a very narrow top section. Reaching with a main and jib will leave the boat quite underpowered—an unsatisfying sailing experience.
Cruisers require a sail that is easy to handle and safe to operate, so your best choice will be either a Code 55 (if you like to sail high angles in light air) or a Code 65 (if you usually sail deeper angles in stronger wind).
For most modern cruising boats, a usual personal favorite is the Code 65. This single sail will cover an incredible range of angles and wind speeds, from 65° in 6 kts true wind speed up to 125° in 16 kts. When paired with a Helix Structured Luff the sail will project forward and to windward for an added performance boost, while providing a safe, reliable and easy furl at the end of your day. Helix Structured Luff is available for all North Sails Code sails, whether cruising or racing.
How to set up your boat for a Code sail
Code sails attach to the boat in front of the headstay, though the exact location will vary from one boat to the next. If your boat isn’t already rigged for Code sails, make sure to contact your boatbuilder and/or mast manufacturer to evaluate the loads.
On race or club race boats, you may want to fly both jib and Code sail at the same time; you should have a tack point that’s far enough forward to get good separation between the two.
For cruising, you can either attach the tack to the stem fitting or rig a short sprit.
Need help picking the best Code sail?
If you’re still uncertain about what your next Code sail should be, contact your North Sails expert. We can help analyze your specific needs and figure out the best type of Code sail for you.
Contact an Expert Learn More Request a Quote
📸 Ian Roman
READ MORE
READ MORE
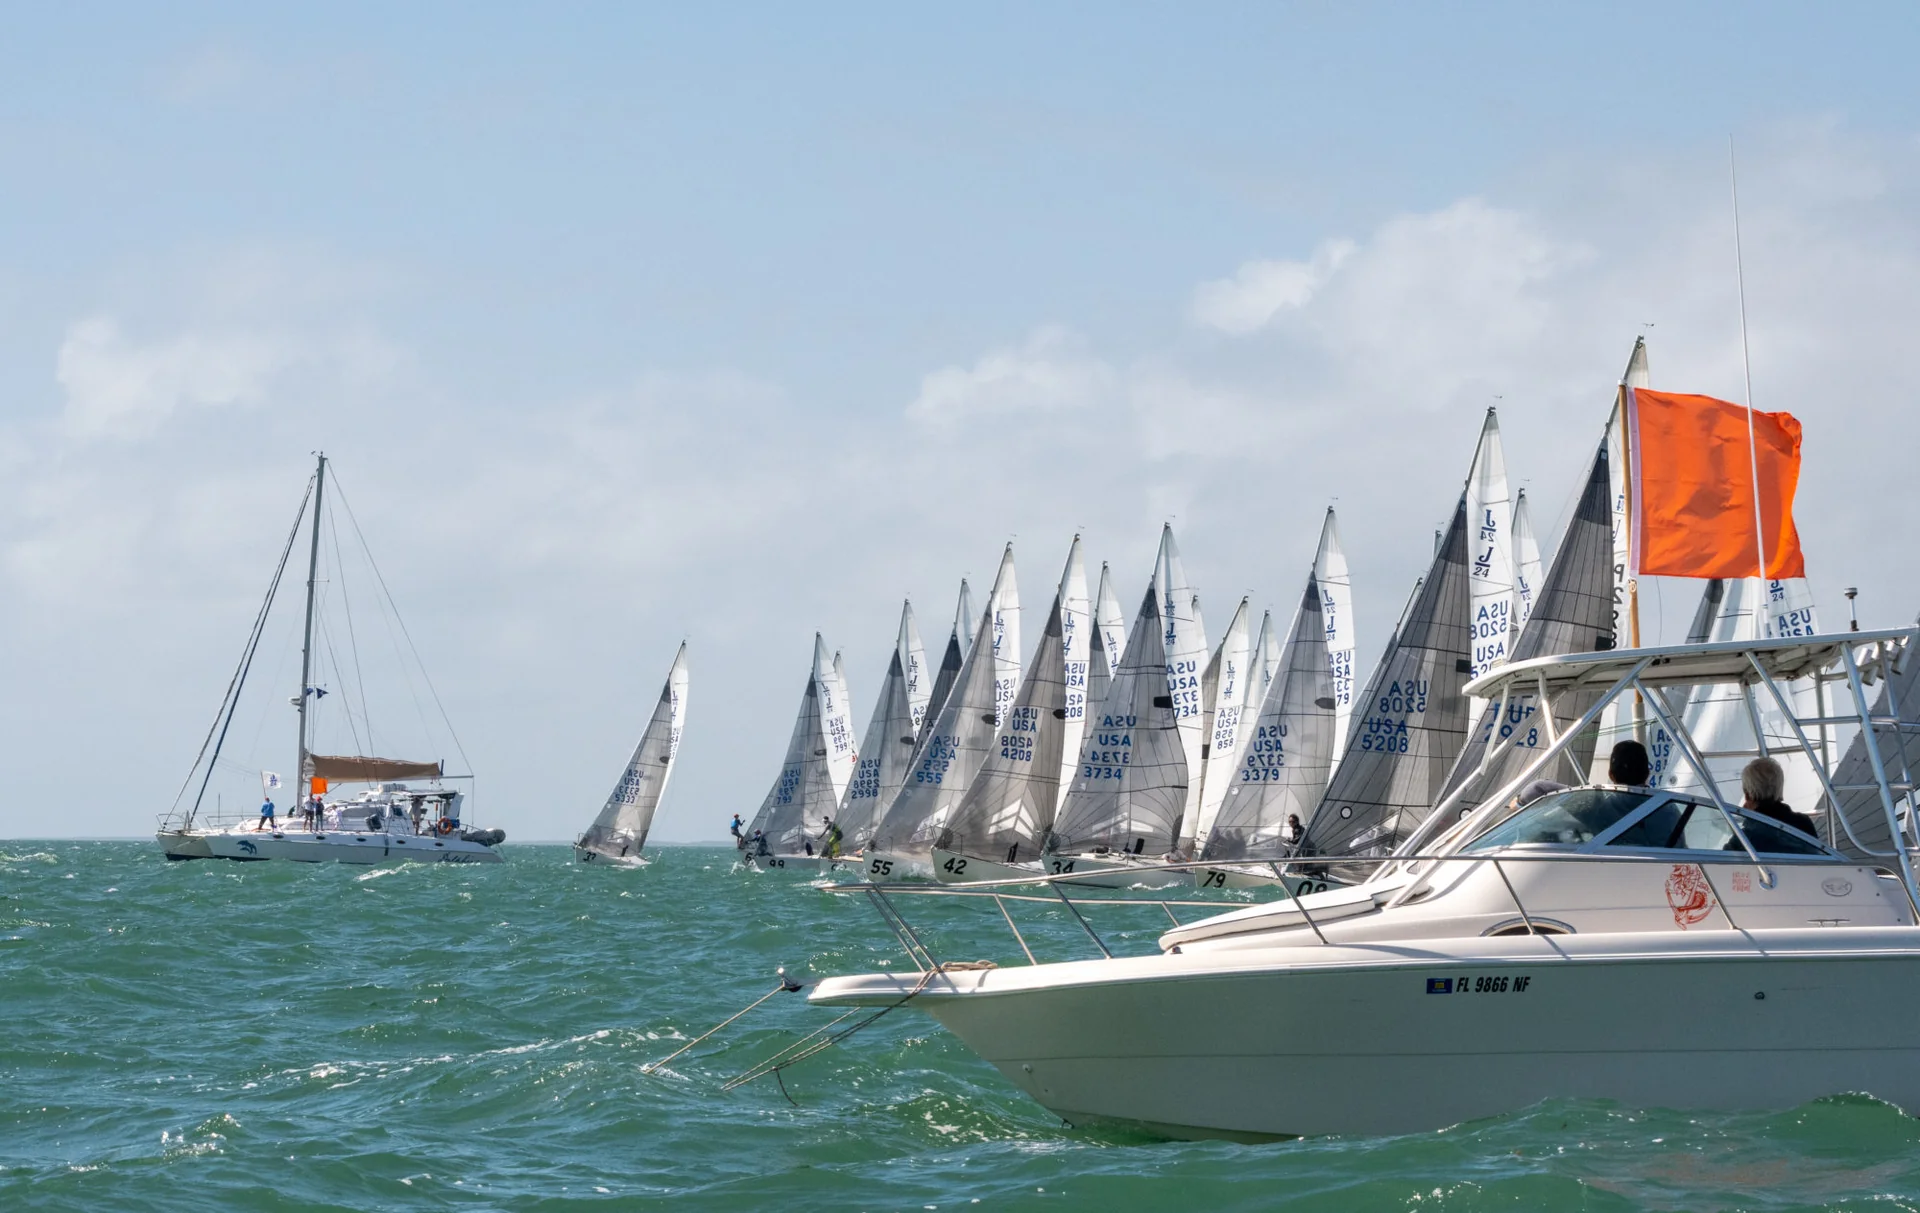
guides
J/24 RACING TIPS FOR ALL CONDITIONS
J/24 RACING TIPS FOR ALL CONDITIONS
Racing Takeaways: The 2021 Midwinter Championship
📸 Chris Howell
The 2021 Midwinter Championship in Miami, FL supplied a variety of conditions for the 29-boat fleet. North Experts with the help of Midwinters skipper John Mollicone broke down each race day by wind speed and explain the changes they made with their rig tune, body weight, crew roles, and sail trim. Although the racing took place in Florida, these tips can be related to any regatta coming up depending on wind conditions and sea state.
Tips for light to medium air: 6-10 knots
Tiny bit of weather helm in under 6
Consistent heel angle, always
Send one or more down below to get low in chop
More heel helps you stay powered up in flat water in the lightest winds
Avoid getting close to other boats to eliminate chop and disturbed air
20/15 shroud tension
Move the mast butt aft ⅜”
Look for -3 fingers on the headstay
2.25 to 2.50 inch pre-bend on the mast
Stay powered up and avoid the lulls!
📸 Chris Howell
In lighter conditions, the trimmer should stand down below and be agile and able to move up to the rail as the wind picks up. The trimmer controls the angle of heel the most. Two forward crew are last to go below if needed, but keep weight forward in light conditions.
Skipper/Trimmer Tips for lighter air:
Trim the main in hard, two handed when fully powered up so you can point a little higher, 8 to 10 knots range with everyone hiking
Trim the genoa 2-3” off the spreader tips when fully powered up, ease to 4-6” off spreader tips in the lulls.
Move the genoa car one hole forward to power up the bottom of the jib.
North Expert Paul Abdullah commented on trim,
“I like to move off the rail and move forward. When I look at other boats who have their trimmers on the leeward side by the winch, it’s not long before we are sailing right by them. Body placement is key for the trimmer in light air. I avoid sitting to leeward by the winch, if your weight needs to be to leeward it is better to do that below deck.”
📸 Chris Howell
Trimming the Genoa: Medium to Heavy Air
“It is a common misconception to trim harder in more breeze, said John. This is not a solution. You actually point higher by easing out, sometimes a full foot off the spreader tip. If you see 8” off the spreader tip it’s not a bad thing if things are working for you.”
How can you tell?
If the boat feels good, your speed is good, and you are playing the main and vang sheeting in the puffs, you will be in good shape.
Skipper and trimmer should work together with sail trim.
Never let the boat heel over too much. When you feel bound up, ease the genoa 5-6” off the spreader tips. Easing off the backstay will also help get your power back in the major lulls with the rig tight.
Rig tuning tips: Medium to heavy air
When you move your mast, 2 to 2.25” of prebend is always a good starting point.
Headstay tension should go from 3 fingers to a tight 2 fingers.
Having your backstay set up so you can move through a wider range is important.
“The mast butt on J24 is a powerful tool,” said North expert Nick Turney. “When the breeze increases you need to feel comfortable moving your mast. Ideally you move the mast at the dock before you leave. When you don’t make necessary adjustments to rig and mast, you will notice that you are losing punch. If your main is flattened too much, this is a direct indicator that your settings are not aligned.”
📸 Chris Howell
Tips for Breeze On and building: 13-18 knots
27/24 shroud tension
When the wind builds, go plus 1/plus 1 – stick to full turns if possible. It’s easier to keep track.
Moved mast butt forward, ⅜ to ½” depending on age and stiffness of mast and boat.
If the lulls are big, you’ll need power. 27/24 is great for lulls and only a tad loose in the puffs.
The North Sails tuning guide is a great place to get your set up numbers.
Mainsail set up is important, especially in bigger breeze. If you notice wrinkles from all the clew up towards the spreaders at a 45-degree angle, this is a telltale sign that you need to go tighter on the rig, sometimes an up plus 1/plus 1 can help get your main looking better, which in turn allows it to work better. You will be able to pull on more backstay, and cunningham. The cunningham for example is not easily adjusted from the rail, so we minimized how much we moved our bodies because we needed weight out mostly, we would leave the cunningham as-is and ride it out. Another thing that is crucial is crew weight. Keeping it together and close makes hiking more effective.
With the mast settings the same as medium air conditions, it allows for depth in the mainsail while keeping the backstay tight. Weight aft together hiking hard is a good look.
When changing gears, it’s important to define your modes and make adjustments. It’s very important to stay powered up and transition through the modes.
Ask yourself: “What mode do we want to be in?”
Height mode,
normal mode (balanced and going well through the water),
Or fast mode
What are the changes you have to make in the back of the boat to accomplish the different modes?
Trimmers typically call the speed, the tactician may override in certain instances. The driver has the mainsheet and backstay, the trimmer adjusts the genoa sheet accordingly, it’s a constant dialog. Together you are always making sure the boat is going full speed. If you feel like the boat is stuck ease the sails out and get it going again. When the boat stalls the boat goes sideways.
“In Miami for the Midwinters,” John commented, “5.4-5.6 was our normal boat speed. We had our bow down, and our backstay on. We looked more for 5.8 to 6.2 on our velocitek once we got going. It’s nice to gauge where you want to be and see what that feels like.”
📸 Chris Howell
When should we switch to the blade?
Start out with the genoa if you are on the fence. Try moving the mast butt ⅜ to ½” forward, which is a conservative move. Make sure your tension is adequate. In medium breeze 29/31 could work well depending on the age and stiffness of your mast.
Ask yourself:
Can we go upwind without the main flogging?
Does the boat feel balanced?
Are we slipping sideways?
Is our speed a problem?
If things are out of balance, speed is a struggle, and your main is flogging, then it may be time to switch to the blade.
Paul Abdullah commented,
“Understanding the ability of your trimmer is the real question. If you cannot tack the genoa efficiently, then you have your answer.”
The blade is good if the conditions are right for it. The genoa gives you the power and punch for getting through waves. The blade can be sufficient enough if breezy and flat water.
When you are on the edge of the blade in 14-16 knots, you might need to consider a step down on the shrouds and jib lead forward to power up the Jib. Keep in mind, using the genoa at the top end of the wind range means you have to pull the halyard on harder, move the lead back one as you go tighter on the shroud tension.
“On a shifty day with flat water, the blade could be the best weapon of choice. It varies for every team, so you have to do what is best for you, depending on what you are comfortable with,” said John.
📸 Chris Howell
Upwind strategy
Find the pressure
Set yourself up for the long term play
Get into the pressure before making a decision on your next move
It’s OK to hang in a thin lane as long as its the long tack
Try to figure out what the long tack is before the start so you can position yourself on the starting line
It can be a high risk to win the pin and you might not be able to tack so you have to recognize that early on
Choosing the midline works well if the pin is crowded. It can also open doors later on up the beat.
Minimize your maneuvers
Tacking with the genoa in mid-range conditions will result in ¾ boat length loss. Chop and puffy conditions tacks are costly using the genoa especially. We made sure our tacks counted. If we wanted to make a tactical decision, we made sure we were in the best pressure first.
Downwind Strategy
Balance crew weight
Get around the windward mark and ask yourself: do we want to stay high or go low? After the offset, are we jibing early?
All things should be openly discussed as the pole is being put on and you have almost arrived to the offset.
Steer clear of potential issues
Identify: Is there anyone around us? Are we playing defense? Recognizing scenarios early and talking about it is the key to a successful windward mark rounding and setting up for a good downwind.
📸 Chris Howell
Settling in for the Downwind Leg
After the kite is set, it’s important to get settled in. Depending on location, remember to check for weeds. If it’s windy, send the lightest person back to do this. It is hard to drive and check for weeds, especially in heavier air conditions.
Crew weight Downwind
Changes with weight will help steer the boat. The trimmer and driver are mostly in the same spots all the time downwind. Driver plays the main, sits to leeward. Trimmer stands up on the deck to trim.
Tacticians can take the guy and face outboard to help trimmer.
If it lightens up, the tactician would go below but generally stands in the companionway.
Bow guy went side to side as needed, twings could also move with bowman as both are more agile.
Keep your weight outboard out to the sides.
Keep the boat flat so if the wind increases, there is no risk of the driver losing steering due to instability.
If it is super windy you may consider two forward crew sitting to leeward to help balance.
“Weather heel downwind pole back is my favorite,” John said. “It’s fast.”
📸 Chris Howell
What Gate to Choose?
Find the path of least resistance.
Figure out which side is lifted, and try to round the side that allows you to immediately be on the long tack.
Ask yourself: where’s the competition and where is there less traffic?
Tips for Breezy Conditions Downwind
Bring both twings down, especially on the jibes.
Stacking the leeward (bow and mast) rail is a huge weapon in breeze downwind. Too much weather heel is out of control.
Vang on- be all over it. You need more than normal if it’s breeze-on conditions.
Backstay on just a little for stability.
Broad reach more, don’t sail DDW in puffs or by the lee if things are getting dicey.
📸 Chris Howell
For the Miami Midwinters, the winners used North Sails Fathead mainsail, DX-7TT Genoa, SRB jib, and FR2 spinnaker. Have questions about optimizing your inventory? Get in touch with a North Sails J/24 expert today.
Thank you Chris Howell for your support of the class on and off the water!
Miss the Midwinters Full Webinar Recap? Rewatch and rewind at your own convenience!
Watch Webinar
READ MORE
READ MORE
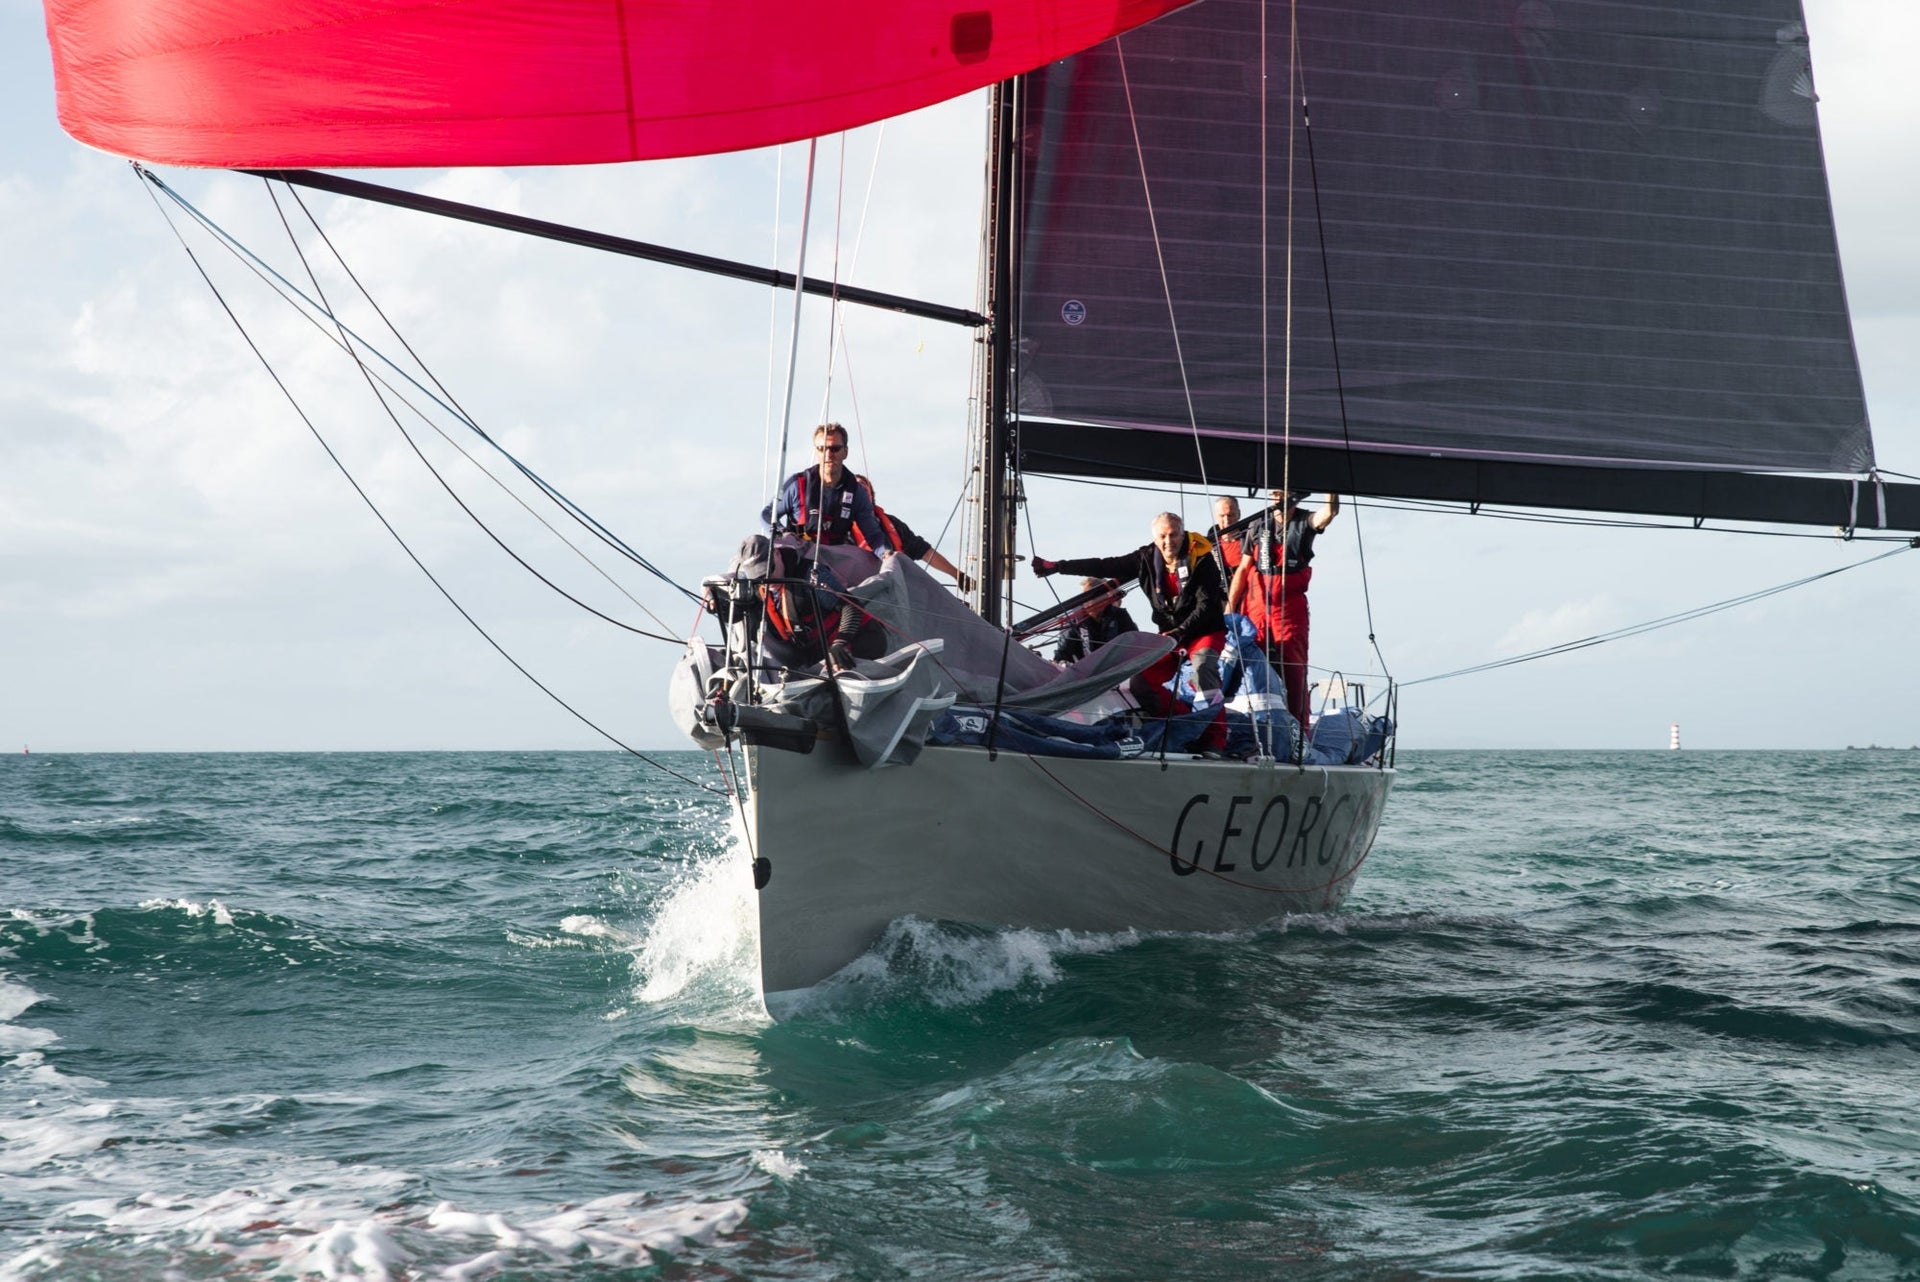
guides
ASYMMETRICAL VS. SYMMETRICAL SPINNAKERS
North Sails expert Brian Janney explains why choosing a spinnaker means understanding your own sailing style.
READ MORE
READ MORE
guides
THE HELIX FURLING GENNAKER: YOUR NEW FAVORITE CRUISING SAIL
THE HELIX FURLING GENNAKER: YOUR NEW FAVORITE CRUISING SAIL
Expert Bob Meagher explains why you should update your Inventory
In the old days, you had two options for making it to your destination in time for cocktail hour: start the engine, or go below to lug a bulky spinnaker up to the foredeck. Unless you’re on a long enough passage to justify all that work, the diesel will probably be your first choice. Now a new gennaker gives you the best of both worlds. Regardless of whether you sail a monohull, multihull, or superyacht, I’m predicting it will become your new favorite cruising sail.
Benefits of the Helix Furling Gennaker
The Helix Furling Gennaker combines the power of an asymmetric spinnaker with the convenience of a Code Zero. Hoist it once and you have an easy-to-fly sail that will take you to that next harbor fast, even when your apparent wind angle is too far aft for your Code Zero reacher. Plus, this new gennaker is top-down furling, giving you a tight, neat furl that protects the sail.
How Does the Helix Furling Gennaker Compare to a Code Zero or Asymmetric Spinnaker?
The Helix Furling Gennaker is much deeper than a Code Zero. When the wind goes aft, release a little halyard or tackline and ease the sheet, and the luff will project out in front of a straight line between head and tack just like an asymmetric spinnaker. If the wind goes back forward again, just snug up the halyard or tack line to tighten the luff and reduce the sail’s depth.
How Does the Furling Work for the Helix Furling Gennaker?
The advances North Sails has made in structured luff technology and sail design are the key to making this all-new sail type work. Unlike a traditional furling sail that wraps around a stiff and heavy torque cable, the fabric provides most of the structure. A pencil-thin proprietary Helix cable allows for top-down furling without the weight aloft of a traditional cable, and its flexibility eases both handling and stowage.
You can leave it up and furled like a Code Zero, and top-down furling makes it far more reliable than a typical bottom-up furl. When sails with large middles or low clews roll from the bottom up, the foot is sucked in first, dragging the clew forward and changing the sheet angle—which sometimes leaves the upper leech loose. Top-down Helix furling wraps securely, and the built-in suncover protects the sail from UV damage at rest (check out this video to see top-down Helix furling in action). When flying, the sail tacks in front of the genoa, but on a catamaran it can also fly from the windward hull, farther away from the mainsail’s wind shadow.
Make the Move to the Helix Furling Gennaker
From tight reaching to broad running angles, the Helix Furling Gennaker may replace both your Code Zero and your asymmetrical cruising spinnaker. This new cruising sail saves you storage space and money, and leaving it furled and ready to deploy saves aggravation. A single downwind sail you can keep rigged and ready to go, the Helix Furling Gennaker will get you to that next harbor even when the wind shifts. And that’s a lot more fun than starting the engine.
Questions about how the Helix Furling Gennaker will work on your boat? Contact your local North Sail expert to decide if this will turn into your favorite downwind cruising sail.
PRODUCT DETAILS REQUEST A QUOTE FIND AN EXPERT
READ MORE
READ MORE
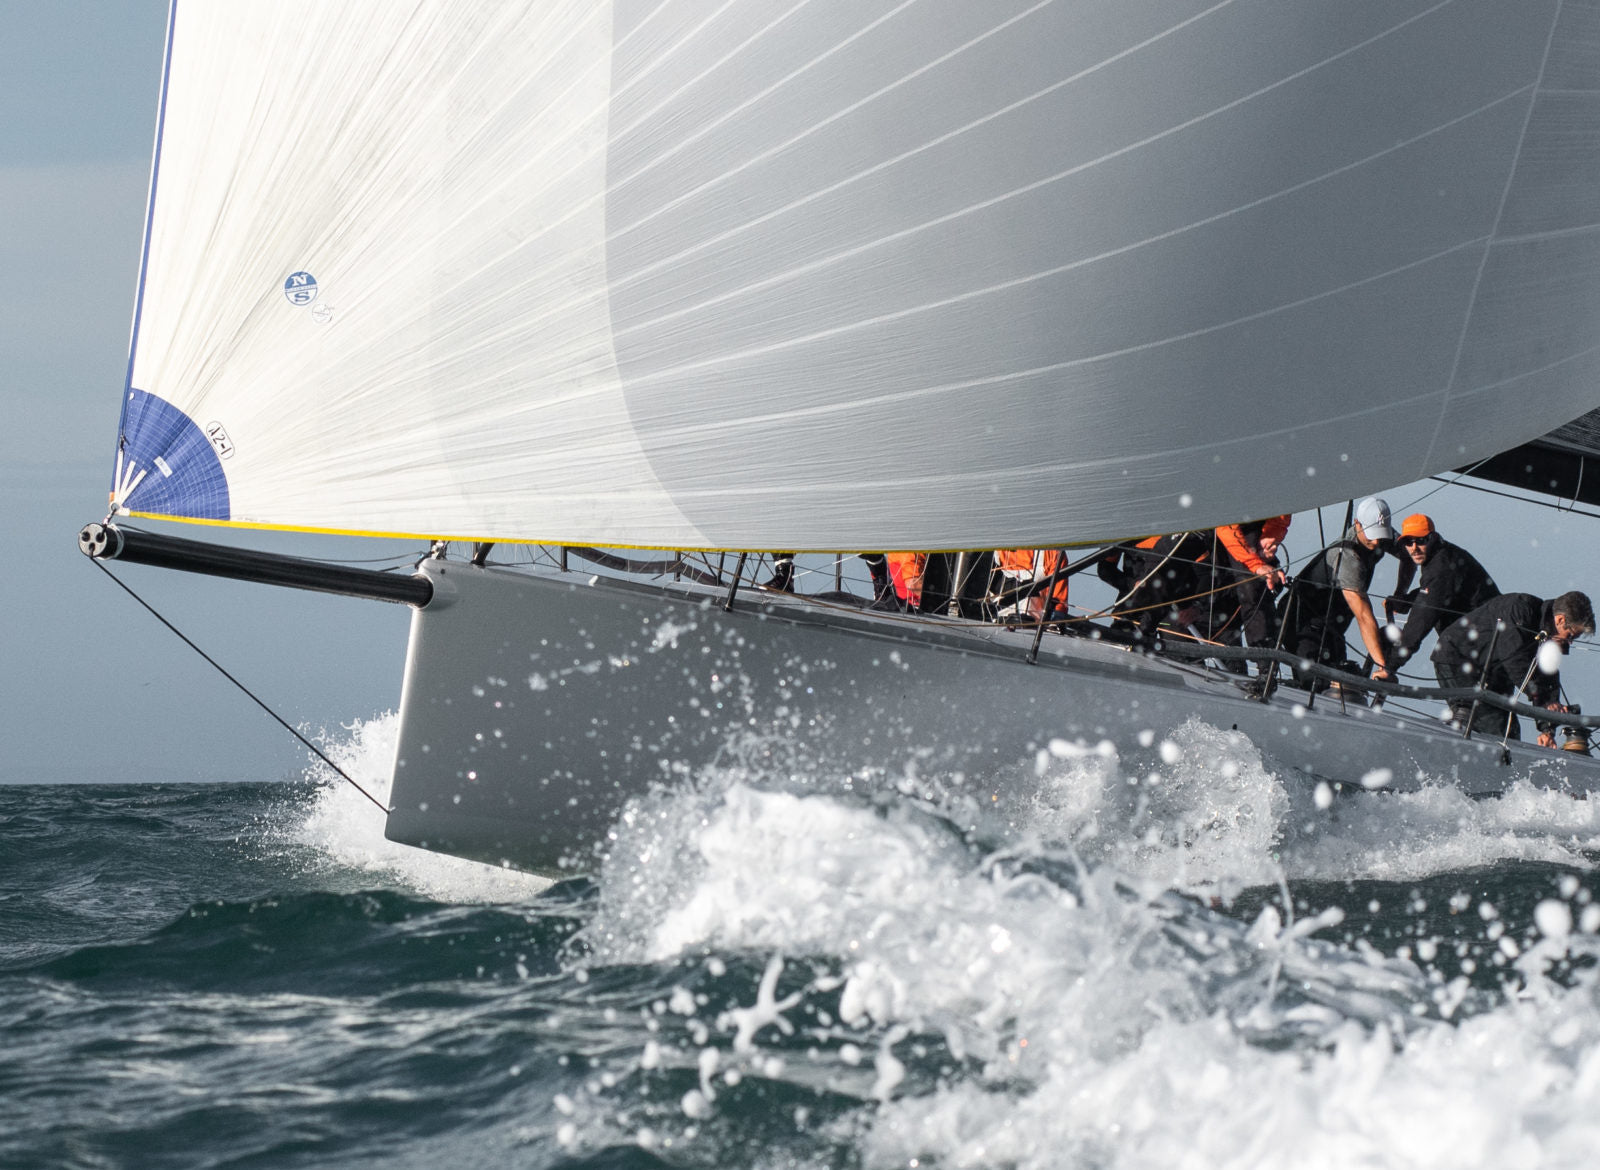
guides
ALL ABOUT DOWNWIND SAIL TRIM
ALL ABOUT DOWNWIND SAIL TRIM
Tips for Off-Wind Angles
📸 Lissa Photography
Reaching
Close Reaching
As you bear away from close-hauled to a close reach the forces on the sails rotate forward, speed jumps, and heeling forces are reduced. To make the most of the wider wind angle, retrim the sails for the new course. Ease the jib and, for best performance, move the lead outboard and forward, chasing the clew of the sail with the lead. Keep the halyard firm to hold the draft forward and prevent the back of the sail from becoming too round. If the lead is not moved as the sheet is eased, then the top of the sail will twist open, spilling power, and the bottom of the sail will hook in toward the boat, creating excess drag.
With the jib trimmed outboard, ease the main. Keep the vang tight, and ease the mainsheet or lower the traveler. As the main goes out, heeling forces decrease, and the boat accelerates. As the boom goes out, the vang is critical to control twist. As an initial setting, take the slack out of the vang while trimmed for close-hauled. As you turn to a reach and ease the mainsheet, the vang will go taut, preventing the boom from rising and the leech of the main from spilling.
When overpowered on a reach, easing the vang will spill power, reduce heel, and balance the helm. Use the telltales to fine tune trim. The leech telltales should be flowing. If the sail luffs, then trim in. Also, ease the outhaul and backstay slightly to add power to the main. On a heavy air “blast reach” keep the main flat, and ease it to half luffing, if necessary, to control heeling forces and weather helm. If still overpowered, then reef.
On a close reach, a reefed main and big jib can be an effective sail combination.
Beam to Broad Reaching
As we bear off more, the boat stands upright. Ease sails, using the telltales to match the angle of attack to your course. On a beam to broad reach, the top of the jib will spill open. Trim to keep the middle of the sail working. Ease the main until it luffs. The main should go way out—out against the rigging if necessary. If the sail doesn’t luff, let it rest against the rig. It won’t hurt the sail or the rig. Keep the boom vang firm enough to hold the top batten of the main parallel to the angle of the boom.
Reaching in a beam or following sea can be treacherous, as the boat lurches around. A preventer (a line that holds the boom out) should be rigged to prevent the boom from swinging wildly. Autopilots are at their worst in these conditions, as are human steerers. A spinnaker can add extra power, speed, and stability. Short of that, motor sailing is an option—or consider a new destination.
Running
Wing and Wing
Running dead before the wind under jib and main requires careful steering to avoid an accidental jibe. In light air, it often pays to reach up, sailing with the jib in normal position, as the extra speed will make up for the extra distance.
In more breeze, running wing and wing (with the main on one side of the boat, and the jib on the other) can be a very stable way to sail dead downwind. A whisker pole will help the genoa fly much more effectively.
The pole should be set with topping lift, afterguy, and foreguy to hold the pole in place. With the pole trimmed to position, the genoa sheet is run and trimmed through the end of the pole.
In heavy air there are often following seas, which can make steering a challenge. A poled out jib allows sailing above a dead downwind course, which provides a wider steering lane and reduces the chance of an accidental jibe.
To control the main and boom, rig a preventer. The line should run from the end of the boom to a block well forward on the rail, and then back to the cockpit, near the mainsheet cleat. Every time you ease the mainsheet, tighten the preventer. It doesn’t have to be bar-taut – just tight enough to prevent the boom from jumping around. If it’s led this way, the preventer can easily be adjusted or cast off as necessary.
Learn more about trimming an asymmetrical spinnaker here.
Gennaker Trim
Cruising spinnakers or gennakers are remarkable sails for their ability to change shape to match your course and wind angle. By trimming both the tack line and spinnaker sheet, we can transform the sail from a genoa to a spinnaker, and back again. For best performance, a symmetric spinnaker must carry a curl. In contrast, a gennaker will deliver top performance without trimming on the edge of a luff. Ease the sheet until it curls to make sure the sail is not overtrimmed, and then trim just enough to remove the curl. For optimum performance, play the gennaker sheet constantly. (Me? I check it between naps.)
Learn more about cruising sail trim here. What’s the difference between a spinnaker and a gennaker? Learn more here.
Adjusting the Tack Line
It is adjustments to the tack line that allow us to so drastically change the shape and performance of the sail. On beam reaches, keep the tack line snugged down and the luff of the spinnaker pulled firm. The Gennaker assumes the shape of a great reaching genoa.
On a broad reach, ease the tack line and allow the tack to lift. Easing the luff lets the Gennaker roll out from behind the mainsail to assume a more powerful spinnaker-like shape.
📸 Marc Turner / CCC
Spinnaker Trim
There are three initial settings for spinnaker trim and refinements that can further improve performance.
For starters:
Trim the guy to set the pole perpendicular to the wind.
Raise or lower the topping lift so the pole and tack are the same height as the clew.
Ease the sheet to curl the luff, and trim to just take out the curl.
From these initial settings we can fine tune trim in several ways.
Unless it’s very windy, the guy can be trimmed aft further than square to the wind. The goal is to get the luff to run vertically from the shoulder of the spinnaker down to the tack, and to get the shape across the foot to match the mid shape.
If the shoulder is rolled out, and the foot is too round, then trim the guy to pull the pole aft. If the foot is stretched flat, and the tack is poking out to windward, then ease the guy to let the pole forward.
Learn more about setting a spinnaker here.
Pole height can be fine tuned:
On a broad reach fly the pole higher, keeping the two corners (clew and tack) even. In fresh breeze beware of flying both corners too high, which lets the spinnaker get too far from the boat and may decrease stability. If the boat is rolling side to side, try lowering the pole, pulling the pole aft, and/or choking down the sheet lead.
📸 Lissa Photography
VMG Tip
In lighter winds, the key to success is sailing fast angles. Do not sail dead downwind in light air—reach up until you feel some apparent wind from the side. Often the best course may be as much as 40 degrees above straight downwind. You’ll sail extra distance, but you will go so much faster that you’ll arrive downwind sooner, and you’ll have a more enjoyable sail to boot!
See also: How to Hoist and Douse a Gennaker
READ MORE
READ MORE

guides
BASIC RACING RULES OF SAILING EXPLAINED
BASIC RACING RULES OF SAILING EXPLAINED
Visual Interactive Webinar
In this webinar, North Sails experts Zeke Horowitz and Brian Hayes explain and demonstrate basic rules according to the US Sailing “Racing Rules of Sailing”. Using a whiteboard, Zeke re-creates many scenarios that we experience on the racecourse to explain the rules and when they can be applied. The webinar was presented to Flying Scot sailors, but the rules apply to all one-design classes. Below are the timestamps if you want to jump to a specific topic of interest.
Definitions:
4:41 – Clear Ahead and Clear Astern; Overlap
6:57 – Keep Clear
8:45 – Leeward and Windward
10:30 – Proper Course
12:21 – Room
14:08 – Zone
Scenarios:
17:01 – Starting Line Situations (Windward/Leeward, Rule 16, Rule 17, “Barging” and Rule 13)
50:04 – Mark Room (Weather and Leeward Mark)
1:22:00 – Open Water (Room to Tack, Room to Duck, Tacking too close, Rule 17, Rule 18)
If you have a question, please don’t hesitate to contact Zeke or Brian.
READ MORE
READ MORE

guides
LET'S TALK MC SCOW | FIRST LOOK AT THE MC MAGNUM
LET’S TALK MC SCOW
First Look at the New MC Magnum
The MC Scow Happy Hour was held virtually on Friday, February 5th, for a virtual debrief about the Lake Eustis Training Week/Train Wreck Regatta with North Sails MC Scow expert Allan Terhune and North sail analyst Eric Doyle. During a week of training in Lake Eustis, FL, Allan and Eric had a chance to test the new MC Magnum sail, which is an optimization of the very successful MC Z-Max. They shared their impressions on the new sail and tuning findings for light conditions. In fact, Eric and Allan are working on a new Tuning Guide for the MC Scow class to incorporate a lot of what they learned about the boat.
Take a seat and enjoy the conversation!
Related story: MC Scow Training Week / Train Wreck Regatta
READ MORE
READ MORE
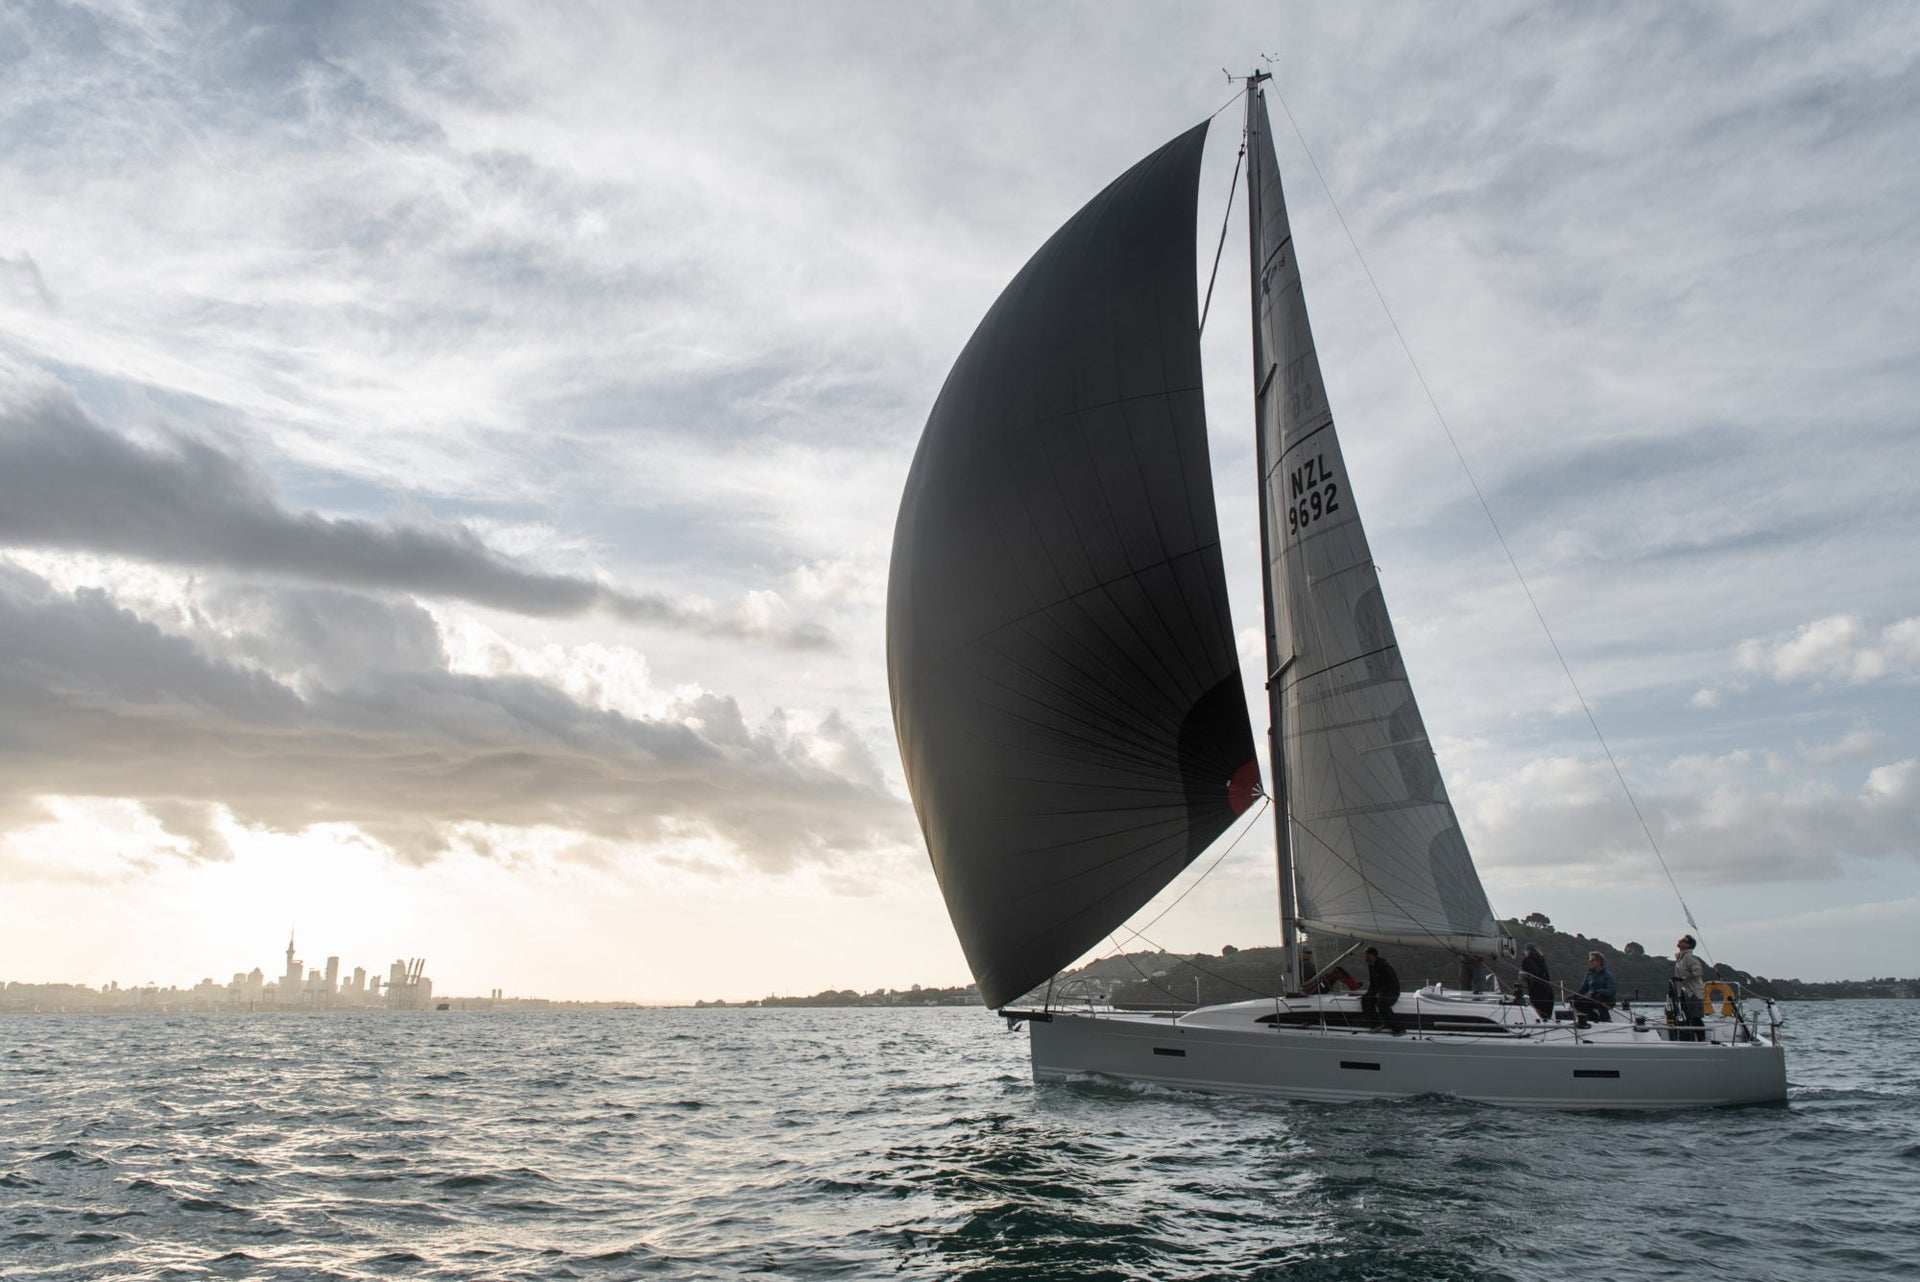
guides
THE DIFFERENCE BETWEEN A SPINNAKER AND A GENNAKER
Understanding these two sail types can help you figure out which will be best for your boat.
📸. Lissa Photography
Like the Spork (a combination of spoon and fork), the name gennaker came from combining two very different sail types into one: a genoa and a spinnaker. Unlike the spork, gennakers are an entirely new sail type that demonstrate the sailing industry’s leading edge.
What exactly is a gennaker? In short, a gennaker has a genoa’s form (asymmetric, head and tack pinned, sheets tied to the clew) with the wide girth of a spinnaker. The gennaker is an all-purpose downwind sail, while spinnakers are built for specific downwind apparent wind angles.
Because designs are changing so quickly, the term gennaker can seem complicated. First, let’s make sure we understand the two original sail types: the spinnaker and the genoa.
What is a Spinnaker?
A popular online dictionary defines spinnaker as: “a large three-cornered sail, typically bulging when full, set forward of the mainsail of a yacht when running before the wind.” When spinnakers were all symmetric, that dictionary definition would’ve been fine.
Today, things are a bit more complicated.
Symmetric Spinnakers and Asymmetric Spinnakers
We now describe the spinnakers in the picture below as symmetric spinnakers. Divide one in half vertically, and the two sides are mirror images. The windward corner is held out with a pole attached to the windward side of the mast, and to change course (or jibe), that pole is switched to the opposite corner. Unlike a headsail, there is no defined tack or clew; both are clews, until the pole is attached and that corner becomes the tack.
(Told you it was complicated.)
Fleet of symmetric spinnakers. 12 Metre Worlds 2019, Newport, RI 📸. Ian Roman
Symmetric spinnakers remain a viable sail type for downwind sailing on boats equipped with spinnaker poles and the necessary running rigging. They fly well when sailing “deep,” with the spinnaker pole squared well aft – or as the dictionary says, “when running before the wind.”
Over the past few decades, another spinnaker type has become increasingly popular – the asymmetric spinnaker or “A-sail.” An asymmetric spinnaker has three distinct corners:
the head (attached to the halyard and hoisted all the way up the mast);
the tack (attached by a short adjustable tackline to the bow/bowsprit);
the clew (attached to the two sheets that run down each side of the boat).
Hmm, that sounds a lot more like a jib or genoa…
Asymmetric spinnakers are popular on boats that have permanent bowsprits or retractable poles. They are also used by cruising sailors because they are easier to handle than symmetric spinnakers.
While symmetric spinnakers and asymmetric spinnakers look different, they are both spinnakers under the measurement guidelines of most racing rules. We won’t go into the specifics of sail measurement protocols here, but the purpose is to see that spinnakers carry substantial girth (width) and are therefore useful when reaching/running. A wide, curvy, sail like this simply won’t fly upwind.
Asymmetric spinnakers on Melges 32’s. 📸. Zerogradinord / Melges 32 Class Association
What is a Genoa?
If you google ‘Genoa’, this is what you will probably find: “a large jib or foresail whose foot extends aft of the mast, used especially on racing yachts.” All jibs and genoas are asymmetric; divide one in half vertically, and the two resulting pieces are hardly mirror images. Here again, the racing rule measurement guidelines help further define the standard form of a jib or genoa:
Triangular, with not nearly as much girth as a spinnaker,
with only one corner (the clew) allowed to roam freely (with sheets attached to keep it under control).
Genoa headsail. 📸. Paul Wyeth
What is a Gennaker?
One day several years ago, someone thought: “maybe we should take a genoa’s form (asymmetric dimensions, head and tack pinned down, a couple of sheets tied to the clew) and give it more girth, like a spinnaker. That’s just crazy enough to work! But what to call this genoa/spinnaker?” And so was born the gennaker.
A gennaker won’t fly upwind like a genoa. And it’s not as efficient as a spinnaker built for specific downwind apparent wind angles. But a gennaker fits the bill nicely as an all-purpose downwind sail for reaching/(almost) running. And because no spinnaker pole is needed, a gennaker is a lot easier to rig and fly than a symmetric spinnaker.
A gennaker has the asymmetric form of a genoa with the girth (width) of a spinnaker.
Is a Gennaker for Cruising or Racing?
Is a gennaker a cruising sail or a racing sail? Yes. Depending. Many racing rules require a specific minimum girth measurement for a spinnaker and a maximum girth measurement to qualify as a legal headsail – leaving a no-go-zone in between. As it happens, this “illegal” sail size range for racing makes for a very manageable cruising gennaker.
Recently, rating/handicap rules have begun erasing this gap zone – maybe you’ve heard the term “tweener” sail? If you have a gennaker, your sailmaker can help you determine whether it qualifies for the type of racing you want to do.
Another reason the term gennaker is confusing is that its use has evolved differently around the world. Depending on your location, the name might refer to a cruising-oriented sail configuration. Or it could describe a very high tech, close-wind angle, grand prix level A-sail. If you need help, ask your local North expert to explain the usage.
Developments in Gennaker Technology
Gennaker development has been moving very rapidly in recent years for both cruising and racing. A great example is the North Sails Helix Furling Gennaker. For more information about the industry’s leading edge, please refer to Helix, Load-sharing, and Structured Luff. So much more than a spork, a gennaker is a great addition to your downwind sailing inventory—for racing or cruising.
Helix Furling Gennaker
North Sails is excited to introduce the Helix Furling Gennaker, a new sail type for the cruising community. The structured luff Helix Furling Gennaker eliminates the heavy cable needed for traditional furling and is the most reliable and easy to use top-down furling cruising sail in the world.
Helix Structured Luff transforms how sails fly and is key to building a modern inventory. Our cruising sails with structured luff provide a more reliable furl than a sail weighed down with a heavy furling cable, are lighter and easier to handle, and have a wider range of wind angles. That cuts down down the number of sails you need onboard, as well as wear and tear, which make them the perfect downwind addition to your cruising wardrobe.
With a range of materials to choose from, a Helix Furling Gennaker is customized to boat size and use: from family cruiser to superyacht. Once reserved for 3Di sails, Helix Structured Luff is available in a range of materials from woven polyester to 3Di. Where requested, an optional LightWeight UV Cover can be added to the Helix Furling Gennaker. For more information, contact your nearest North Sails expert.
READ MORE
READ MORE
guides
NORTH SAILS ZOOM BACKGROUND DOWNLOAD
DOWNLOAD YOUR ZOOM BACKGROUND
Show Friends & Colleagues Where You’d Rather Be (other than on Zoom!)
Need a change of scenery from your ‘home office? Jump onboard with North Sails Zoom Backgrounds and put yourself out on the water! Zoom is now an integral part of our daily workflow, so we’ve created a selection of backgrounds for you to choose from to upgrade your Zoom experience. Put yourself in the cockpit of a VO65, battling the Southern Ocean, or on the deck of a J Class superyacht. More into the cruising lifestyle? Sit back and relax on the leeward side and take in all the feels of a warm, open-ocean breeze. Whether you are Zooming with friends or with work colleagues, you can now set the scene and show your fellow Zoomers where you’d rather be. Click on any background below to download.
Download Background
Download Button Interstitial
First Name
*
Last Name
*
Email
*
By entering your email address, you agree to receive emails from North Sails as well as promotional offers and announcements from North Sails. Collected information will not be shared with any third party.
Privacy Policy Opt-In
*
I have read and understand North Sails privacy policy
Age Consent Opt-In
*
I am 16 years or older
Continue
Download Background
Download Button Interstitial
First Name
*
Last Name
*
Email
*
By entering your email address, you agree to receive emails from North Sails as well as promotional offers and announcements from North Sails. Collected information will not be shared with any third party.
Privacy Policy Opt-In
READ MORE
READ MORE
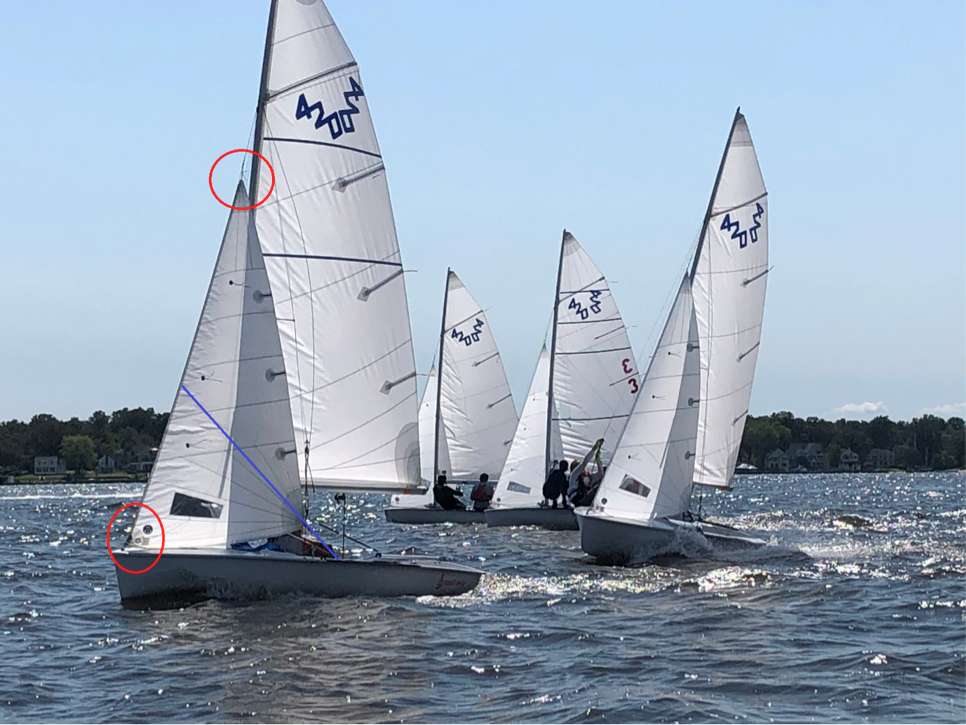
guides
I420: CONTROLLING THE JIB LEECH TENSION
CONTROLLING JIB LEECH TENSION
How to Effectively Finetune Your Fairleads with Fixed Positions
Sailing dinghies are all unique. It is always fun to go from one one-design class to another and check out what makes them different, what controls they have, and in this case, what they might not have available for the crew to use to adjust and tune.
One very important tuning device for jib trim is the fairlead position. Fairlead position defines sheeting angle for the jib, and many classes of course have adjustable fairleads; that is, the position can be moved fore and aft (or in some cases up and down, and in and out). When it gets windy, it’s often nice to be able to open the leech of the jib a little bit, and this can be achieved by moving the fairlead position aft. Conversely, moving it forward can create a more powerful shape.
The 420 was designed, for better or worse, without adjustable fairleads; it is, as they say, where it is. How do you effectively move the fairlead fore and aft in a boat with fixed fairlead positions? The answer on the i420 is jib height. To achieve this, i420 sailors can raise and/or lower the height of the jib on the luff wire to achieve proper leech tension on the jib for given conditions and mast rake.
You may notice boats in-between races that are capsized on their coach boat; often this is done to change jib height to match expected conditions for the next race. The peak rope fixed (and adjustable) at the head of the jib controls jib height. The boat also has an adjustable jib tack control to accommodate changes at the peak. Normally the jib should be fixed by having a proper deck sweeping effect. However, for the i420 class it is important to know the height should be adjusted to provide the optimum jib lead angle. Since, as we said, the sheeting point is fixed, you should adjust the peak rope to move the jib clew up or down to achieve the desired sheeting angle.
In short, lower the jib down a bit to open the leech and ease power when the winds are up; in light winds, raise the jib for more power and jib leech return. It is also imperative to remember that mast rake also has a significant effect on jib leech tension. Raking back effectively opens the jib leech, and conversely, raking forward closes it. Don’t forget this when you tune the boat.
Adding jib height to your tuning regimen can make a performance difference. Experiment, find the right balance, mark your settings, and go faster!
For more information and questions on how to match your North i420 sails perfectly, please contact North Sails clas expert Tom Sitzmann.
2020 Miami One Design Development Program
READ MORE
READ MORE
guides
NORTH SAILS RELEASES NEW T-10 TUNING GUIDE
NORTH SAILS RELEASES NEW T-10 TUNING GUIDE
Maximize Your T-10 Performance For Different Conditions
📸 Dave Mathias
The North Sails T-10 team is excited to release a brand new Tuning Guide for 2021. The T-10 can be a simple boat to sail, however it can be rather difficult to sail the boat to its full potential and have that extra edge over your competitors. Our new Tuning Guide focuses on the importance of setting your T-10 up for the different sailing conditions such as flat water vs. chop.
When tuning your T-10, it is important to know how your mast bends and reacts to rig tune changes. It is also important to know exactly what to look for when tuning in different conditions or as the conditions change throughout the sailing day. Our new Tuning Guide will walk you through the whole process of tuning, from getting your mast inline with your keel for optimized tack to tack performance, to knowing how to power up/de-power the rig as conditions change. The hardest part of rig tune on any boat is knowing what changes need to be made and when to make them.
Visual Tuning
The new Tuning Guide is based on visual tuning. The concept of looking at your leeward shroud tension while sailing upwind, as well as sighting up the mast to visually see if the mast is bending side to side, if the top of the mast is falling off to leeward, or if the mast is straight in a side-to-side plane. Visual Tuning also involves looking at your headstay tension, or headstay sag.
The T-10 being a deck step mast, your upper and lower shroud tension becomes critical in controlling your headstay sag. In some conditions such as flat water, you will want to sail with a tighter headstay. That will allow you to trim the headsail in more, which will allow you to point higher. This can be achieved by sailing with a tighter rig tension. In other conditions, such as medium air and chop, you will want to sail with more headstay sag to make the Jib deeper and more powerful. This can be achieved by sailing with a loser rig tension.
Live Webinar – Sign Up!
To learn more about our new Tuning Guide and Visual Tuning, sign up for our T-10 Webinar on Wednesday, January 13th, at 19:30 EST.
T-10 Class experts Nick Turney and Perry Lewis will share critical updates to the Tuning Guide and explain in more detail the concept of Visual Tuning on the water. Nick and Perry will also discuss the differences between a one-jib program and a two-jib program, the advantages and disadvantages for either. Sail designer Mike Marshall will present the difference between 3Di, 2D string sails, and paneled sails. Sail expert Allan Terhune will moderate the webinar.
VIEW NEW TUNING GUIDE SIGN-UP FOR WEBINAR
📸 Dave Mathias
READ MORE
READ MORE
