NORTH SAILS BLOG
All
Events
Guides
News
People
Podcast
Sustainability
Tech & Innovation
Travel & Adventure

MELGES 24 WORLDS TOOL KIT
Fine Tune With North
Find your groove. Get your numbers. Be confident in all wind conditions. After countless hours sailing, testing, and competing in the Melges 24 our tuning guide will help you achieve race-winning speed.
Raise The Bar With 3Di
Lucky Dog confirms new 3Di sails make a difference in the race course at the Melges 24 North Americans.
What To Expect In Villasimius
Fresh from winning the Pre-Worlds, North Sails Expert Giulio Desiderato provides his intel on what competitors should expect at the upcoming Melges 24 World Championship.
Get Up To Speed
Pulling all the pieces together can be challenging. The North Sails Melges 24 Speed Guide leverages our expertise to help you improve your team’s performance.
World Champions Tips
What worked for Team Altea in the past Worlds? Take a look at the tips from the winning team and get inspired to sail fast.
Our Experts Make It Happen
Have questions? Contact your local Melges 24 expert today for more information on choosing the right sails for your Melges 24.
READ MORE
READ MORE

MELGES 24 SPEED GUIDE
Class leader Brian Janney answers your Melges 24 speed and boathandling questions.
Who sails in the Melges 24 class?
In the early 2000s, sailors in the Melges 24 class began to enlist coaches and include professional sailors in their crews, but that trend collapsed and participation dropped way off after 2009. Gradually, the class has been growing again and we are seeing an increasing number of Corinthian teams sailing at major events, using older boats. Local fleets are coming back in North America also, in places such as Vancouver, Western Michigan, and Atlanta. There are more regional regattas on the schedule, and they are by nature much more Corinthian. (Learn more at the International and North American class websites.)
How physical is the Melges 24 to sail?
The Melges 24 is a great boat if you like to be active when you sail. It requires athleticism, but not brute strength. The loads are not that high and there are no winches—ratchet blocks only. You have to hike hard, but since the class changed to shorter stanchions and tighter lifelines, hiking is less painful. Overall, it’s a good combination of keelboat and dinghy. In light air, it rewards roll tacking and jibing, but in heavy air it loads up like a keelboat and you have to think about the timing of your maneuvers.
Athletic sailing is the norm for Melges 24 crews, shown here after a start at the 2018 Melges 24 World Championship. Piret Salmistu/IMCA photo
What are the top 3 ingredients to compete successfully in the Melges 24?
Practice mark roundings—good sets and douses are key.
Practice light-air downspeed maneuvers—the pre-start under main alone is key.
Build a consistent crew—top performance is all about teamwork.
What is the ideal Melges 24 crew size?
Top teams sail at the max weight limit of 825 pounds (375 kilograms). The majority sail with five in the crew. Larger people sail with four.
Crews sail with four or five to meet the crew weight maximum of 825 pounds.
What does each crewmember do on the Melges 24?
The helm drives and handles mainsheet and backstay. The tactician trims the jib upwind and sometimes handles the mainsheet downwind. The spinnaker trimmer hikes upwind and hoists the chute if they are the biggest crewmember. On a boat sailing with five, the two forward crew furl the jib, douse the spinnaker, and handle the tack line and pole.
On boats sailing with four crew, the forward crew handles the tack line, jib furl, and spinnaker hoist/retrieval.
The tactician pulls the pole out and then grabs the spinnaker sheet, handing it off to the trimmer once the halyard is up.
New or used Melges 24s— what are my options?
A new Melges 24 costs in the $70,000 range and includes a trailer, covers, and an upgraded line package. The company periodically builds runs of four or five boats. As of 2018, hull numbers ran up to about #900. Used boats range from a 1990s boat for less than $20,000 to somewhat newer boats with covers and a trailer with dock boxes for about $30,000.
Beyond the basics, what kind of prep is needed to make a used boat competitive?
Older boats may need mast-step reinforcement or repair of stanchion bases. They may also need the new, shorter stanchions. The Melges 24 has a carbon-fiber rudder and keel. Look for a boat without dings in the foils, or be prepared to make repairs. We keep a close eye on the trailing edges of keel and rudder. When we trailer the boat, we pad the back of the keel with a pool noodle we’ve cut in half. Check for wear on normal gear as well, such as cam cleats.
The jib halyard system is unique and needs attention on all boats.
Instead of the usual separate forestay and jib halyard, the halyard connects to the wire in the luff of the jib, which then serves as the forestay. Where the wire goes over the halyard sheave, it can break strands on a windy day, so we recommend checking it after every windy day of sailing and replacing the wire frequently.
How do you transport the Melges 24?
Melges 24 trailers come from the builder with shaped supports. The boat rides about five feet off the road, at shoulder height. You put the boat in the water with the keel in the “up” position and then lower it with a “keel crane,” which fits into a molded socket right behind the keel. You can also ramp launch the boat if you wish.
What's involved in rigging and derigging the Melges 24?
To rig the Melges 24, first attach the shrouds, spreaders and backstay, then pull the halyards down from the top of mast. Because the mast is deck-stepped, two people can raise it. Rig the spinnaker halyard forward so it acts like a temporary forestay. A team that knows the process can be ready to launch within an hour. Once you’re in the water, put the keel down, fasten down the cover plate, and attach the rudder. There is a small gas outboard, so once that’s in position, you’re ready to go.
What kind of inventory does North recommend?
North offers the championship-winning 3Di mainsail and jib. There are two spinnaker designs, a reacher and a runner. You are allowed to carry two spinnakers, and most top teams will have one of each aboard. The reacher is used in planing conditions when you’ll spend more time sailing in a “bow up” mode. The runner was recently redesigned to be a bit twistier, allowing a larger crossover with the reacher.
Melges 24 Tuning
What are the most important ways to tune the Melges 24 rig?
Tuning the rig is described in detail in the North Melges 24 Tuning Guide. The key parameters are rake and shroud tension. Because the spreaders are swept aft, as you add tension to shrouds, the mast bends and becomes raked more. Unlike some classes, you’re allowed to adjust the shrouds while sailing; knowing the number of turns for each setting, the forward crew can make the adjustments while hiking. From the base setting to 20 knots, it’s 20 turns. Top boats have shifted to open-body turnbuckles because they’re twice as fast to adjust and easy to pin using a piece of batten held in place with shock cord.
This is the shockcord/batten for quick adjustment of turnbuckles. Photo courtesy APS
What are the key steps to setting up the rig?
The first step is to hoist the internal jib wire and set the rake at the turnbuckle above the Highfield lever. Rake is measured
from the top of the mast to the intersection of the transom and the bottom of the hull. This measurement should be 36’6.5” (11.140m).
Dial in the rake by adjusting the turnbuckle belowdecks. Photo courtesy APS
Next, add shroud tension until it is 16 on the Loos gauge. You may have to adjust the turnbuckle above the Highfield lever to maintain the proper rake adjustment. It helps to have two people to do this.
Are there other special considerations when setting up a Melges 24?
It’s easy to scratch or damage the keel when hauling and launching. The North Tuning Guide includes what to watch for there, as well as several tricks to marking control lines and setting up your deck.
Melges 24 Upwind Sailing
Upwind, where does the Melges 24 crew sit?
The normal or “base” crew position starts with the bow person a half-body width aft of the forward stanchion; all others sit close to the person in front of them. In light air, push the forward crew right up against the stanchion. As waves pick up, everyone moves aft until the aft crew is right against the aft stanchion. The tactician should be the first person to move off the rail in lighter air, so they can trim the jib and look around.
Even in light winds, the Melges 24's powerful sailplan requires the crew to hike.
What do you focus on when trimming main and jib?
Always watch the top telltale on the jib leech when sailing upwind. You can see it through the mainsail spreader window. The jib sheets are on a 2:1 purchase and go through a ratchet block. Two cleats, one on each side of the cockpit, make it possible to “banjo” the sheet in from the weather rail. Usually we don’t play the jib much.
Most upwind control is done with the main due to its large size. In the puffs, the helm pulls on backstay or drops the traveler. Few helmsman are strong enough to play mainsheet, although one class veteran, Brian Porter, can do it and is very fast. Tighten the backstay to keep the boat on its feet and ease when the puff rolls away. Have your forward crew count down to puffs; it really helps the person driving concentrate on boatspeed. Most boats have speedos now, and the helmsman can’t look around, although they do tell the tactician about traffic to leeward since they are facing inboard.
In 12 knots, your jib telltale can be stalling slightly; as it gets windier, ease the jib out half an inch. The jibs are pretty high aspect, and this will create more twist in the head and allow the telltales to stream more. You can also foot a little more, which increases your lift and helps you point.
Hiking as a team upwind in a breeze is vital in the lightweight Melges 24. Piret Salmistu/IMCA photo
Going upwind, how should the top telltale look on the Melges 24 mainsail?
The mains carry quite a bit of twist. In lighter air you’ll close the top of the main for power, but in 10 knots you’re close to overpowered so the top telltale should be streaming. Your helm should be light, nearly neutral, so if you make a change and it gets out of balance, you can tell right away.
What other trim settings should you look for upwind on the Melges 24?
Pay attention to shroud tension. My rule of thumb is to have 75 percent of the backstay on from 12 knots and up. The backstay purchase is at the feet of the helmsman and most people use a number scale on the deck behind that. If you are easing off a lot on the backstay, that means you need to ease shroud tension. If you are close to maximum backstay tension, try tightening the shrouds. We have our tactician watch for that, too.
Who is in the typical dialogue loop and what's a typical conversation?
Probably the most important upwind dialogue is a countdown to puffs—that’s key for the driver. If you don’t depower, the boat will tip over and do a little roundup.
In a good breeze downwind, a top crew slides aft and extends arms and torso outboard to maximize leverage. Piret Salmistu/IMCA photo
Melges 24 Downwind Sailing
Where does each person sit when sailing the Melges 24 downwind?
In lighter air, which we call “soak mode,” everybody pushes forward to get the transom out of the water. The tactician and one bow person are to leeward; everyone else sits to weather. As the breeze comes up, everyone moves to the high side and begins to slide aft. When the boat is on a full plane, everyone except the trimmer moves behind helmsman.
In light air downwind, the crew consolidates their weight at the forward end of the cockpit, with one crew to leeward in front of the chainplates.
What do you focus on when trimming the main and other sails?
The Melges 24 starts planing at about 14 knots, flying all three sails. We call it “lazy planing mode.” Everyone is pushed back against the aft stanchion, hip to hip. As the breeze comes up, move one person behind the stanchion; then move others aft as needed..
In most conditions, trim with a slightly firmer spinnaker luff—not over-trimmed, but not a lot of curl. In light air, ease the sheet and begin to “test” the curl a bit more. As you start planing, you have to trim in as the wind goes forward. Your spinnaker trimmer is sitting down at this point, and your tactician moves aft to trim the mainsheet—at least that’s the norm among tacticians with dinghy backgrounds.
In this Facebook video, the 2018 world champions demonstrate how to sail on a flat-out plane with three sails flying in a strong breeze on Lake Garda (on a day racing was canceled).
What are the key gear shifts in a Melges 24 as wind and sea state change?
The main question downwind is whether you can surf the waves or not. If you can readily plane, sail a couple degrees higher until the Melges 24 takes off. Some people try to force it too quickly and sail a lot of extra distance compared to those who sail lower and slower but cover much less distance. The boats have no wind instruments, so as the breeze builds, those who pick up on this transition first will make huge gains. You need to learn your transition point, which is right at about 14 knots of wind.
Who is in the dialogue loop downwind and what's a typical conversation?
Your spinnaker trimmer and helmsman should always talk about pressure in the spinnaker sheet—typically that means the spinnaker trimmer is talking, or the driver is asking the trimmer what they are feeling. Puff calling is the other key input to the conversation; that should be the same person who was calling the puffs when sailing upwind.
Are there special situations or techniques downwind in the Melges 24?
With the jib unfurled, it takes a little practice to get all three sails across in a jibe. It also requires coordination for the tactician to flip mainsheet over the helmsman’s head at the right time.
On the way to the offset mark, a Melges 24 crew preps the spinnaker to go up (at right) while continuing to hike the boat flat (at left). Piret Salmistu/IMCA photo
Melges 24 Boathandling
What's a typical Melges 24 start like?
Starts in the Melges 24 are more like dinghy starts than keelboat starts. Set up early, sail slowly, and jockey for position. Keep the jib furled and try to create a hole to leeward so you can unfurl, sheet in, and go. The boat accelerates quickly.
What makes a big difference on the starting line?
Set a minimum boatspeed, usually 2.5 knots. Any slower, and when you sheet in the boat will go sideways before it goes forward due to lack of flow over the keel. Velocitek speedos are allowed, so assign someone on to watch it and speak up if you’re slowing down too much. Assuming you have pinged the starting line, the Velocitek will also read the distance to the line.
What mistake slows the Melges 24 down most in a tack?
A key mistake is not coordinating how everyone gets off the rail. Hiking out, the crew is sitting hip to hip, so if the first person in doesn’t give others room it’s hard for everyone else to get off the rail. You can get pinned to the rail on a crash tack, which is a great reason to communicate when traffic is coming.
What does each crewmember do in a tack?
Normally, the helmsman handles the traveler and main, and the tactician tacks the jib. The rest of the crew scrambles to cross the boat in good form. The traveler usually stays fairly close to center, but in very light air it needs to move to windward. If the tactician can’t help, ask your smallest person to move behind the tactician and help.
Key tips for good light or heavy-air tacks in a Melges 24?
Making a smooth turn with the helm is important. It’s easy to over-rotate, and you don’t need to come out at a deep angle because the boats accelerate fast. The helm needs practice to learn exit angles. We put a mark on the jib sheet, draw a scale on the deck, and pull it in 90 percent of the way. After hitting the rail to hike out, the tactician leans in as soon as possible to banjo the jib sheet in the rest of the way
What mistake slows the Melges 24 down most in a jibe?
The key move on the jibe is properly rotating the spinnaker. In light air and up until the boat is lazy planing, make sure a forward person grabs the spinnaker sheet and pulls it around the headstay.
Here is a great video of a “blow-through” jibe in strong winds. Note the forward crew, briefly pulling the spinnaker leech in against the jib.
What does each crewmember do in a Melges 24 jibe?
The helm steers, the tactician deals with the mainsheet, the spinnaker trimmer handles both spinnaker sheets, and the forward person or people help overhaul the new sheet. In light air, the keys are to have quick hands on the spinnaker sheet and to come out at a good exit angle, sometimes a little hotter (higher) than you think. In heavy air, hitting the right exit angle is big and you make a slower turn. As you bear away, the helm watches the clew of the chute and pauses until the clew gets around the headstay, then finishes the turn. If the helm turns too fast, the spinnaker may get a wrap.
What is the key to a fast spinnaker set?
Having a good mark on your tack line is critical to a good set on a Melges 24. Preset the tack line at that mark, and then hoist the halyard while the pole is going out. If your tactician sees a wrap starting to happen, they should give the sheet a quick pump and then quickly ease it back out.
Who does what in the Melges 24 crew on a bearway set?
The helm handles the main while the tactician eases the jib sheet and cleats it, and then picks up the spinnaker sheet. The trimmer hoists the spinnaker halyard before taking over the sheet. Of the two forward people, one is to leeward, helping to feed out the spinnaker. They also uncleat the jib sheet and furl the jib when the chute is up. The other person pulls the pole out and eases the vang so you can bear way.
What is the key to a good spinnaker takedown?
We always take down to port on the Melges 24. Also, we usually drop the chute behind the shrouds instead of between the shrouds and the mast. If it’s a weather strip, one bow person overhauls the spinnaker sheet, the same as they would in a jibe. The spinnaker trimmer hauls on the sheet as well. When the forward person has a hand on the cloth, the other forward person releases the pole, then the halyard, then the tackline. Typically the smallest person on the boat is uncleating everything. The trimmer throws the chute into the cockpit and then the smallest person stuffs it below. The two largest people get on the rail!
On a leeward douse, more of a turn-down is required of the helmsman. As soon as we can grab some spinnaker cloth, we say, “Pole in, halyard down, then tack line.” Some people blow the tackline off so the forward part of the sail flags.
Any special tricks to Melges 24 takedowns?
Make sure to unfurl the jib before you start to take down the spinnaker to avoid fouling the spinnaker halyard in the roller-furling swivel aloft.
Doing circles is slow; how do you minimize the pain when you have to spin?
The Melges 24 has lots of mainsheet. The tactician takes the mainsheet from the helm, and the spinnaker trimmer handles the jib. Steer with your weight and backwind the jib if need be to turn the boat through the wind.
How easily does the Melges 24 broach or capsize?
It’s fairly easy to wipe out when you’re planing, especially if you stay too close to the high edge. Typically, if you broach coming out of a jibe, the helmsman turned too quickly, the trimmer had to overtrim the chute, and then when it popped open you were overpowered. To recover, backwind the jib and ease the vang, and the boat should turn back downwind.
What are the most common boathandling mistakes made in the Melges 24?
During the sets, pulling the pole out too quickly can sometimes allow the tack to drop into the water. That’s like setting a very big parking brake. The same thing can happen on the douse—keep the tack out of the water! Also, when jibing in light air, don’t forget that you may need to pop the top battens on the main.
Do you have any suggestions for drills to improve boathandling?
Go out and do loads of tacks and jibes—especially jibes. Practice sailing and maneuvering at low speeds alongside a buoy. See how long you can sit next to it and how much you’ll go sideways before going forward. Your starts will improve.
READ MORE
READ MORE
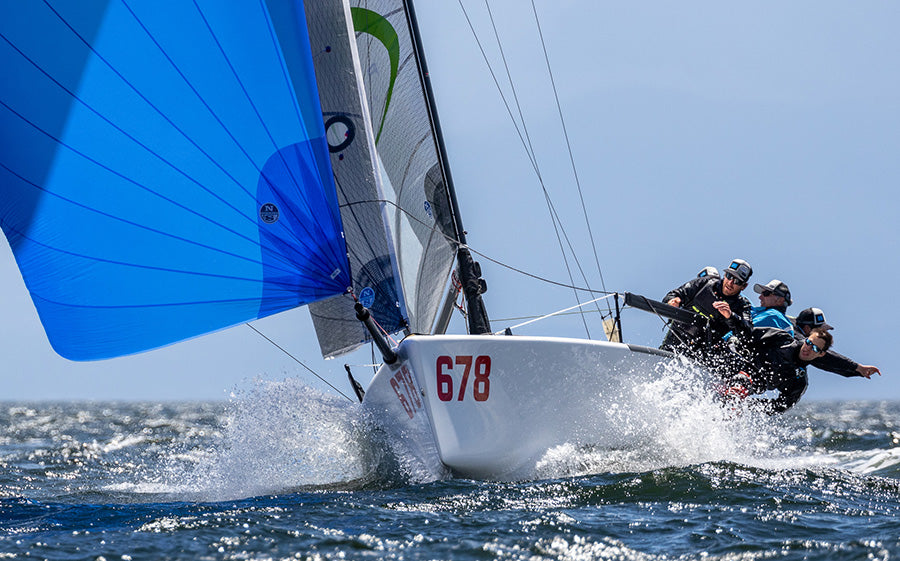
MELGES 24 WORLD CHAMPIONSHIP
ITALIANS TAKE THE MELGES 24 WORLDS
Congratulations Team Altea and Team Full Circle, Winners in the Open and Corinthian Divisions
Andrea Racchelli’s Team Altea, 2018 Melges 24 World Champions. ©IM24CA/Zerogradinord
Great breeze and blue skies welcomed forty-one teams from five different nations for the 2018 Melges 24 World Championship held at the Royal Victoria Yacht Club in Victoria, BC, Canada. Tough competition with a total of ten races made for some very close results. The Italian team Altea, skippered by Andrea Raccelli with crew of Filippo Togni, Gaudenzio Bomni, Matteo Ramian, Michele Gregoratto claimed their first Melges 24 World Championship title finishing the event with only 30 points.
We caught up with Andrea Racchelli to get his impressions and emotions on his big win:
How did you and the team prepare for the Worlds?
This year we sailed two events in Italy (Punta Ala and Malcesine) and had one training in Malcesine. We are quite experienced on the Melges 24 as we have been sailing since 2001, so usually we don’t do a lot of training. We arrived late in Victoria for the World Championship as most of our crew members were busy in a Melges 32 regatta in Italy. We had just one day of training on the racing area of the event, while other teams spent there more time to learn about difficult current and wind conditions.
What were the 3 main factors contributing for the winning?
The three main factors were:
We used a charter boat that was really perfect and super-fast.
We had a new set of North sails fast as well (we used the AP-3K main, J-7K jib and P-3 Runner)
Of course the crew! We have been sailing together from many years and we are a group of friends first of all.
What was the most exciting moment of the event?
Winning two races in day 2 in light and shifty wind conditions we nice, and of course the last day: We had two points to recover, it was a perfect day with strong wind and huge current. After the first two races we were leading and we had just to control the last one. We didn’t have a very good start in the last race but we had very good speed and a fast upwind leg, and… we crossed the finish line as the 2018 World Champions!
What’s next for Team Altea?
In the end of June we are going to an event of European Sailing Series in Torbole, followed by the European Championship in August.
Congratulations again to the Team Altea!
Learn more about North’s fast Melges 24 sails.
2018 MELGES 24 WORLD CHAMPIONSHIP
1
ITA 722 – Altea / Andrea Racchelli
2
USA A829 – WTF / Alan Field
3
USA 851 – Monsoon / Bruce Ayres
4
USA 849 – Full Throttle / Brian Porter
5
CAN 838 – Mikey / Richard Clarke
6
USA 825 – Was Canoe / Michale Goldfarb
7
CAN 835 – Mikey / Welches/Rhodes
9
USA 675 – 12happythoughts / David Brede
10
CAN 415 – Full Circle / Robert Britten – 1st Place Corinthian
Full results
Andrea Racchelli, Filippo Togni, Gaudenzio Bomni, Matteo Ramian, Michele Gregoratto win their firts Melges 24 World title. ©IM24CA/Zerogradinord
2018 Corinthian World champions, Robert Britten’s Team Full Circle. ©IM24CA/Zerogradinord
90% of the boats at the Worlds were powered by North. ©IM24CA/Zerogradinord
©IM24CA/Zerogradinord
Team War Canoe going fast downwind. ©IM24CA/Zerogradinord
READ MORE
READ MORE

MELGES 24 TUNING GUIDE
The following tuning guide is meant to be a good starting point when setting up your Melges 24. Depending on total crew weight, wind and sea condition and sailing style you may have to alter your set up slightly from what is given here. As you read this tuning guide, write down any questions you might have and we will be happy to discuss them in detail with you. The goal of this tuning guide is to achieve a rig set up that is fast in all conditions upwind and down. Your new North sails are designed with this “all around” philosophy in mind.
CLASS RULES
We have a great set of rules that many of the Melges 24 owners along with the International Sailing Federation have developed over the years since the introduction of the Melges 24. The current class rules can be downloaded from melges24.com. If you have any specific questions about class rules please feel free to ask any of our Melges 24 class experts to help you with clarification.
PRE-RACE PREPARATION
One of the most important items you and your team can do in preparing for high performance racing is to have your Melges 24 ready to race. Listed in this section are just a few items we feel are critical for success on the racecourse.
TRAILER AND BOAT
Make sure when transporting your Melges 24 that the keel bulb always sits perfectly in the keel bed of the trailer. If the boat is sitting where she belongs on the trailer you will find the bulb resting perfectly in the keel bed with space in the keel box both in front and in back of the keel. Also packing pre-cut foam between the keel edges / sides and the keel box will help prevent any movement of the keel when trailing. Many teams seal the top of the keel bulb and the top of the keel box with plastic so that dirt and other debris cannot scratch or damage any part of the keel when traveling.
Hull, Rudder and Keel
Class rules do not allow re-shaping of these items.
Hull
For trailing the investment of our 3-piece bottom cover and 1 piece top cover is well worth the protection it affords.
Rudder
The rudder should always be removed when not in use and kept in its padded rudder bag.
Keel
We just talked about taking care of your keel when the boat is on the trailer. When lowering the keel either with the keel crane or by picking the boat up with an electric hoist make sure you have rinsed out the keel box along with the delrins. Because of the tight fit between keel and the delrins even small bits of debris can harm the finish of the keel.
Launching and Retrieving The Boat
Believe it or not this is when most damage occurs to Melges 24s. When trailer launching make sure keel box is well packed, as the keel wants to shift as soon as the transom starts floating. When using an electric hoist be sure to keep the boat level or maybe a few inches down in the bow. Again we are trying to protect the keel. Also by holding the bow down just a few inches we are protecting the spreaders from possibly hanging up on the hoist arm as the spreaders pass the arm.
Deck Preparation
The factory Melges 24 comes ready to race. There are a few small class legal modifications that really help with sailing the boat.
With your spinnaker up at maximum hoist mark the halyard with a black permanent marker.
With your bow sprit fully extended also mark the bow sprit extender line.
With the bow sprit retracted (to class maximum extension when sailing upwind) we want to put a knot on the bow sprit retraction line.By having the pole extended that few extra inches we prevent water from coming in the gasket area of the pole when sailing upwind in larger waves. Also, add an additional rubber gasket to the pole so that when the pole is retracted the second gasket retracts over the one on the hull.Most now do not use the retraction line at all and use the tack line to pull in the bow sprit.
Lubricate your bow sprit with a Teflon based jelly like compound. Super Lube, Vaseline are some examples.Do not use a dry Teflon spray because this will not lubricate and protect your gasket seal.
The addition of a small batten (soft 6”) to the end of your bow sprit will help prevent the tack line from dropping over the end of the pole on a take down
Mount a Wichard hook or Carabiner on the bottom of the boom at the outhaul turning block.We will place the spinnaker halyard tail in this hook for spinnaker douses.You will find that by placing the tail through this hook that the halyard will not re-cleat itself when the spinnaker is on the way down.
On older boats it is only necessary to drill extra holes in the jib track next to the third bolt head (from the back of the track). Drill one of these holes just in front of the third bolt head, between the factory hole and the bolt head. Also, drill the third bolt head out a little for extra lead adjustment position and drill three extra holes aft of the third bolt head in between the factory holes for finer adjustment.
PRACTICE - PRACTICE - PRACTICE!
It has been said that each mark rounding can be worth a minute on the course. Now that is a reference between the first group and the last group of boats. That is a lot of time and a majority of it comes at the corners and the first few minutes of a race. Knowing how your Melges 24 accelerates off the starting line is something you need to practice. Sets at the windward mark are critical, especially if you want to gybe right away. Having the ability to pass between two leeward gate marks absolutely requires that you and your crew understand all three spinnaker takedowns, the Mexican, the windward and the leeward. You do not have to have rock star crews in the Melges 24 class to be successful; you do need to have a regular steady crew who are willing to practice. If we had “Time On The Boat Meters” you would find the top finishing boats in our class had the most accumulated time together sailing the Melges 24.
RIG SETUP
MAST DOWN
As the Melges 24 comes almost completely ready to race straight from the factory there is very little to do to prepare your boat and mast to be competitive. With the mast down, be sure to mount your masthead backstay batten and wind indicator to the top of the mast. We like to put a dark colored piece of tape around each spreader 12” in from each tip. Our jibs are designed with relatively straight leeches and tighter sheeting angles, thus the 12”(305mm) mark. This will be used later for judging how tight or loose the jib is trimmed. Another thing we like to do is tie some light weight shock cord between the two lower shrouds around the front of the mast 6”- 8” down from their attachment points. This keeps the head of the spinnaker from getting jammed between the shrouds and mast on hoists.
MAST UP
With mast stepped and the jib halyard hyfield lever locked down attach a 50’ tape measure to the main halyard and hoist to the top (two blocked). Be sure to remove the factory main halyard shackle and run the halyard straight through the end of the tape, tie a overhand or figure eight knot in the end of the tape.
Check to see that the mast is close to centered by measuring to the chainplates on both sides of the boat. At this point the upper shrouds should be snug (16 on a Loos Model B tension gauge) and the lowers should be loose. Tighten/loosen the upper shrouds on each side so that the mast is centered side to side.
Now measure from the top of the mast to the intersection of the transom and the bottom of the hull. This measurement should be 36’6+1/2”(11.140). Tighten or loosen the turnbuckle above the hyfield lever to achieve this measurement. Make sure that you achieve this measurement with 16 on the uppers.
Tension the lower shrouds so when using the Model B Loos gauge and pulled to the line, you measure 68mm from the the shroud to the end of the gauge.
Now tighten the uppers 18 turns and the lowers 15 turns to load up the rig. Measure the side to side as per below and check for the mast column to be straight at this point.
Finally, with the upper shrouds back at 16 on the Loos tension gauge, recheck to be sure the mast tip is centered side to side and that the mast rake is 36’6+1/2”. To check the rake it is best to use the tape measure on the main halyard by taking a 3/16”(5mm) short piece of line and tying a knot in each end maybe 4” (100mm) apart. Put one knot in the mast tunnel and put the other end of the line through the end of the tape measure or the knot in the halyard then put the other knot in the mast tunnel and raise the halyard to where the upper sidestays intersect the mast. Measure down to the deck on each side of the boat at the upper sidestay position and center the mast side to side.
RIG TENSION
The tension on the upper shrouds is critical to the upwind shape of primarily the jib and to a smaller degree the mainsail. For maximum speed it is important to adjust the tension on the upper and lower shrouds depending on wind and sea conditions. For the uppers, which get quite tight, we use a Loos Model B tension gauge to measure shroud tension and adjust the tension depending on the wind strength using the following chart.
The lower shrouds control the side-to-side sag or bend of the mast and to a smaller degree how much the mast can bend forward in the middle. The lowers have a lot of control over the shape of the main because of this and it is very important to be sure they are adjusted correctly. Because the tension on the lowers is so light, we prefer to set their tension by sighting up the backside of the mast to see how much sag the mast has to set the lower tension. It is not fast except in very windy conditions to have the middle of the mast bending to windward. When it becomes so windy that the mainsail turns inside out and begins to luff or flog in the puffs, then it is fast to tighten the lowers so that the mast falls off to leeward above the spreaders. This keeps the bottom section of the mast from over bending fore and aft and thus keeps the bottom section of the mainsail working while twisting open the top half to depower.
SPECIAL NOTE
When sailing with lowers this tight it is extremely important to keep some backstay on going downwind. If the backstay is not on, the mast will invert and most likely break!! Always have the forward crew sight up the mast to insure that there is enough backstay on!
Below is a chart of the settings on the upper and lower shrouds that we have found fast: This chart was formulated for the Ronstan turnbuckles and the internal wire jib halyard system. For the open body turnbuckles use ½ turn to equate to this chart of 1 full turn for the Ronstan turnbuckles.
As you can see from the chart we have a very detailed adjustment schedule. The goal is to be within a 1 step range of the correct setting for the given wind range. The chart you build for your boat may vary slightly on the number of full turns on or off to achieve maximum performance.
After you have set up the uppers to the correct wind speed, sail the boat on both tacks checking the mast sag side to side and adjusting the lowers according to the wind speed. After you have sailed the boat a while you can create a chart of the shroud tensions and the number of turns needed to be put on or taken off the shrouds for each significant change in wind speed. Also, create a chart for turnbuckle numbers for each side of the boat. This will enable you to exactly duplicate settings without counting turns. If you have the open body turnbuckles it is best to measure the gap between the ends of the threaded studs with a micrometer and record those numbers when the rig is at base so you have a starting point to return to.
Note that in heavy seas you will want to err a little bit on the tight side to allow for a softer backstay and loose mainsheet and in flat water you can err a little bit in the light side to allow for more backstay and a bendier mast. While class rules allow you to adjust your shrouds anytime during a race we like to set the boat up for the lightest wind speed we expect to see on the first beat. Then if the wind speed changes significantly during a leg we adjust our shrouds according to our chart.
Having a base setting using your light medium numbers is a good way to leave the dock each day for the races. It is easy to spin up and down from there. Develop this habit and you will find tuning the rig is not such a mystery but actually rather simple.
WIND
UPPER TENSION
LOWER SAG
0-6 - Light
Loosen 2 turns from base
¾” leeward sag, loosen 1 turn from base
6-8
Loos 16 --
Base Setting
¾” leeward sag --
Base Setting
7-10
Plus 3
Plus 2
10-11
6
4
11-12
9
6
12-13
12
8
13-15
15
11
15-17
18
14
17-19
20
17
19-21
23
20
21-23
25
24
23+
Loosen forestay 5 turns - Go to 29
27
The chart below is for the FIXED FORESTAY set up with the Vectran jib halyard:
WIND
UPPER TENSION
LOWER SAG
0-6 - Light
Loosen 2 turns from base
¾” leeward sag, loosen 1 turn from base
6-8
Loos 16 --
Base Setting
¾” leeward sag –
Base Setting
7-10
Loosen Forestay turnbuckle 6 full turns from base Plus 2 on uppers from base
Plus 1.5
10-11
5
3.5
11-12
8
5.5
12-13
Loosen Forestay turnbuckle 12 full turns from base Plus 10 on uppers from base
7.5
13-15
12
9
15-18
Loosen forestay 18 full turns from base Plus 15 on uppers from base
12
17-20
18
14
19-21
21
16
SAIL TRIM
MAINSAIL
Like other boats main trim on the Melges 24 in keyed off the end of the top batten. In light to moderate air we trim the main so that the telltale on the top batten is stalled about 25% of the time (the second telltale from the top -at the second batten, is flying 100% of the time). As the wind increases both telltales will fly all the time. In light to moderate air the back end of the top batten should be parallel to the centerline on the boat, in heavy air it will be pointed out about 5 degrees. Don’t forget that mainsheet tension is how you tension your forestay, which directly effects on your pointing ability. There is a fine line on having enough tension for good pointing ability and over-trimming the main. Usually most over-trimming of mainsails occurs in light air.
Following is an overview of each main control and how it should be adjusted.
BACKSTAY
The backstay controls the overall power in the sail plan, particularly the main. Generally we do not use any backstay upwind until about 12 knots true. Then we will start putting the backstay on to depower the boat and keep it on its feet. It is vital that every time you adjust the backstay you adjust the mainsheet as well. When you tighten the backstay tighten the mainsheet to keep the top batten angle the same. In reverse when you loosen the backstay be sure to ease the main as well. This is not the case in heavy air, as you can leave the mainsheet more constant and work the backstay to change power. In puffy conditions we find it better to play the backstay rather than the mainsheet. The mainsheet also effects how the jib luff sags so it is faster to keep the main trimmed and initially play the backstay in a puff. The jib will not get fuller in the puffs and the boat will accelerate faster this way. When it is really windy, you can switch back to working the mainsail and keeping the backstay on really hard.
OUTHAUL
Because the slot on the Melges 24 is quite narrow, the bottom of the main generally needs to be on the flat side. Keep the outhaul tight (clew at black band) in conditions when the crew is on the rail. When the crew is in the boat you can ease the clew in 1” from the black band. Clew should be 2-3” in from band downwind except in heavy air tight reaching when it should be tight.
VANG
We use the vang upwind as soon as the boat is overpowered. At the early stages of being overpowered we simply snug the vang with the mainsheet trimmed while going upwind. We do this so that when easing the mainsheet in the puffs we do not lose control of main leech. As you become more overpowered we pull the vang harder to flatten the bottom 1/3rd of the mainsail. Downwind adjust the vang so the top batten is parallel to the boom. Generally the vang with the slack taken out of it upwind will be too tight for downwind sailing. We like to make a mark on the vang itself for an approximate downwind setting and then ease the vang to that mark just before rounding the weather mark.
CUNNINGHAM
We do not use the main Cunningham until the wind gets to over 16 knots. Then we pull on just enough to remove any horizontal wrinkles in the sail. Under 16 knots be sure the Cunningham is loose enough to allow for some slight horizontal wrinkles in the luff of the main. Downwind the Cunningham should be off.
TRAVELER
As a rule of thumb, keep the traveler car between the skipper foot rests when sailing upwind. Never sail with the car above the windward one nor to leeward of the leeward one. In light air (crew in boat) the car will be at the windward foot push. As the crew comes up on the rail we find it very fast to center the car or pull it above centerline if it is choppy conditions. As the breeze continues to build, keep the car centered or up depending on chop. If it is choppy then you want to err on the traveler higher with a looser mainsheet to allow the top of the main to twist. In really heavy air when the mainsail tends to “turn inside out” keep the traveler centered or raised to stop the main from luffing and put some power in the bottom of the sail. In moderately heavy air, with lots of chop, you can experiment with keeping the backstay on hard to keep the headstay straight, and pulling the main traveler to windward with a soft mainsheet to keep twist in the main.
JIB TRIM
Because the jib on the Melges 24 is a high aspect sail (tall and skinny) it is very sensitive to small adjustments in jib sheet tension. Tightening or easing the jib sheet 1/2” can have a big effect on boat speed and pointing.
With the 36’ 6 1/2” mast rake setting you should use the third bolt head from the back of the jib track for a base setting, the next special drilled hole just forward of that third bolt for ligther wind and the holes just after the third bolt for conditions above base conditions. The jib lead should be moved aft to flatten the jib as the wind increases ending up 3 holes aft of base in heavy conditions. In choppier conditions you will want to err on keeping the lead further forward.
We have placed a telltale on the upper leech (near the spreaders) of the jib to help you judge how tight or loose the sheet should be. The general rule of thumb is to trim the sheet hard enough so that the upper leech telltale is just on the edge of stalling. Just as with the mainsail it will be easy to stall the telltale in light air and very hard to stall in heavy air even with the sheet trimmed very hard.
JIB CLOTH TENSION
Adjust the small line at the tack of the jib so the luff of the sail has some slight horizontal wrinkles coming off it. It will be necessary to change the tension depending on the wind speed to achieve some slight wrinkles at all times. In very heavy air, tension the luff so that the sail is smooth and you are pulling out all the wrinkles.
LEECH CORD
Be sure that your leech cord is not too tight. It is very easy to put a lot of tension on the cord in heavy air and have it too tight in light air.
SPINNAKER TRIM
Spinnaker trim on the Melges is much easier than that of a conventional poled boat. There are a few tricks that can make you faster downwind and make your sail handling easier. Tack height on the sail is important. Generally, we keep the tack down tight to the pole end when reaching (broad or beam). Letting the tack up on reach will just move the sail to leeward and increase heeling. When we can let the tack line off when the tack will ride straight up or just slightly to leeward. We have found this setup to be faster in these conditions. We will generally let the tack off in these conditions 12-18”.
Two other topics that always come up are whether to take the spinnaker down between the shrouds and the mast or behind them. The other topic is whether to gybe the spinnaker inside it’s luff or outside. We’ve found that it almost always seems easier to take the spinnaker down behind the shrouds. This makes setting the spinnaker easier as it does not have to fit between the shrouds, the vang, the jib and the boom. When setting the spinnaker, it is best to take the whole sail out of the bag prior to setting. This makes it much easier to hoist the sail. Normally, we’ve found that it is just as fast and a lot safer to gybe the spinnaker inside its luff. This eliminates any chance that the lazy sheet could fall in the water, it makes for a less sheet for the spinnaker trimmer to pull in, and it allows you to perform any of the three takedowns at the leeward mark.
GYBING THE ASYMMETRIC
There are two types of gybes. The inside gybe and the outside gybe. How you hook up your tack line to your spinnaker tack dictates whether you will gybe inside or outside. By placing your tack line on top of the spinnaker sheet when hooking the tack line up to the spinnaker you are setting up for an inside gybe, where the spinnaker passes between the luff of the spinnaker and the furled up jib on the headstay. Hooking up the tack line underneath the spinnaker sheet sets you up for an outside gybe. Most of the time though, you will see teams gybing inside. On the gybe, the fastest method is to have the trimmer ease the kite as the boat heads down, another crew starts to trim the new sheet and the forward crew overhauls the new sheet just behind the shrouds. The forward crew then pulls down on the clew to untwist the head as the kite comes around. Almost everyone is now gybing inside and not using the outside gybes.
SPINNAKER SETS
We have found that it is best to always set the spinnaker from behind the shrouds. This does mandate taking the spinnaker down behind the shrouds, which is the easiest way for all three takedowns.
SPINNAKER DOUSES
There are three types of takedowns: the windward, the leeward, and the “Mexican”.The windward douse is used when doing a port rounding and you are app
READ MORE
READ MORE
