NORTH SAILS BLOG
Tout
Events
Guides
News
People
Podcast
Sustainability
Tech & Innovation
Travel & Adventure

guides
NORTH SAILS HOLIDAY GIFS
NORTH SAILS HOLIDAY GIFS
Add Some Holiday Flare to your Instagram Stories + Reels
Remember what it was like when GIFs didn’t exist? Over the last few years, they’ve become our favorite social addition so this year we’ve added some fun options for you to enhance your next Instagram story or reel. Want to add some spice to your next post? Express your holiday spirit with a few new special effects made by your favorite sailmaker. Not sure where to start? Open Instagram, select your image, and then follow the video instructions below to add your favorite holiday GIF to any post.
Open Instagram. Take a photo -or- select a photo or video to post.
Scroll up and select “GIF”.
Search: “North Sails” to view our collection of GIFs.
Select, click and drag to place anywhere you want in your photo or reel.
TIP: You can make the GIF larger by using two fingers to zoom in, or out.
You can select multiple GIFs to include in each post. Just repeat steps 1-4 and add as many as you want!
READ MORE
READ MORE
guides
PROVISIONING FOR DISTANCE RACING
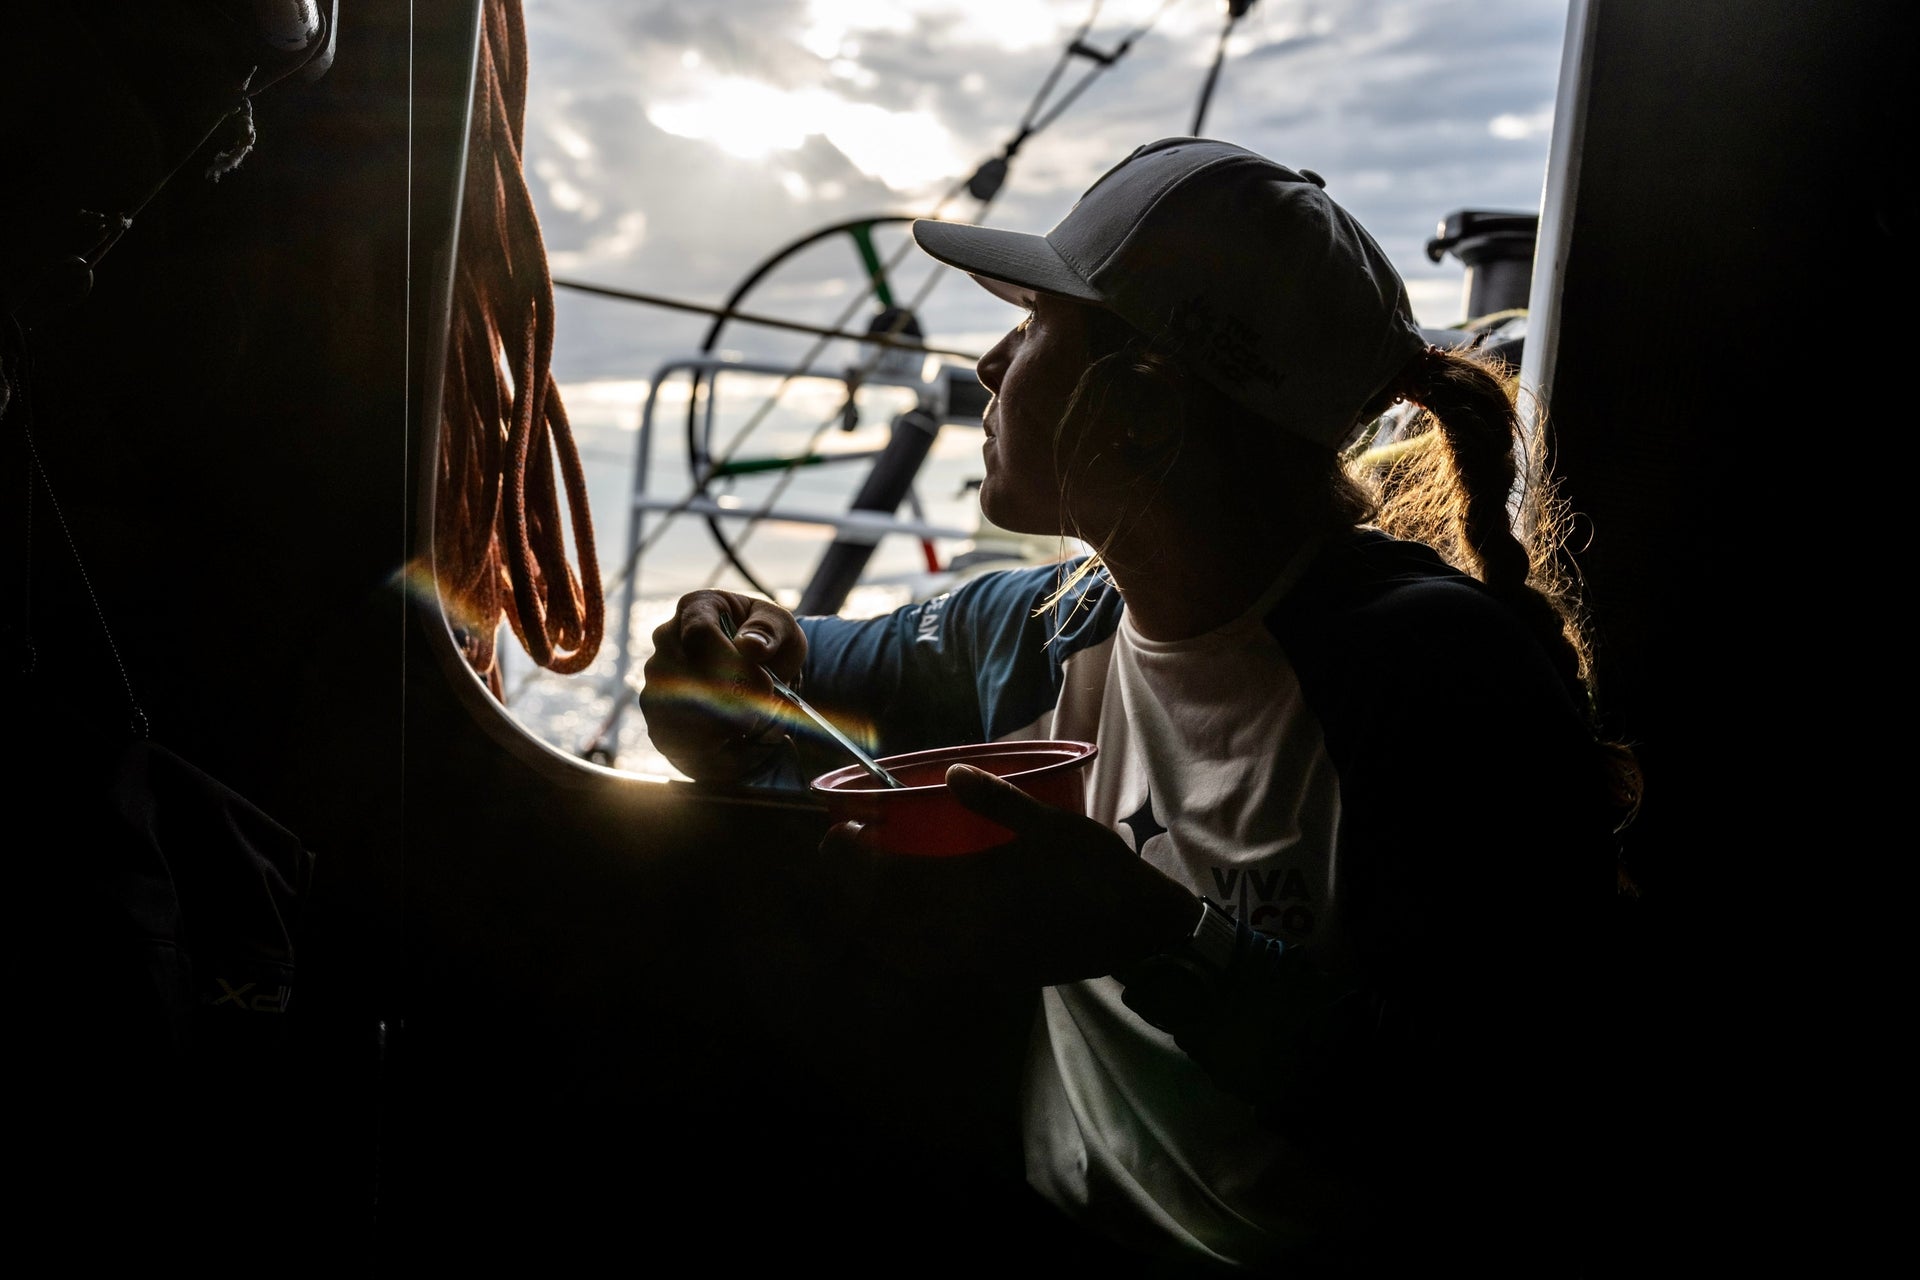
Here’s what Sarah O’Kane from Shorebase, a logistics company, says is important to properly provisioning for your next offshore adventure.
READ MORE
READ MORE
guides
OPTIMIST QUICK TIP - SPRIT TENSION
NORTH SAILS MNR OPTIMIST SAILS UPWIND QUICK TIP
Sprit Tension is The Key
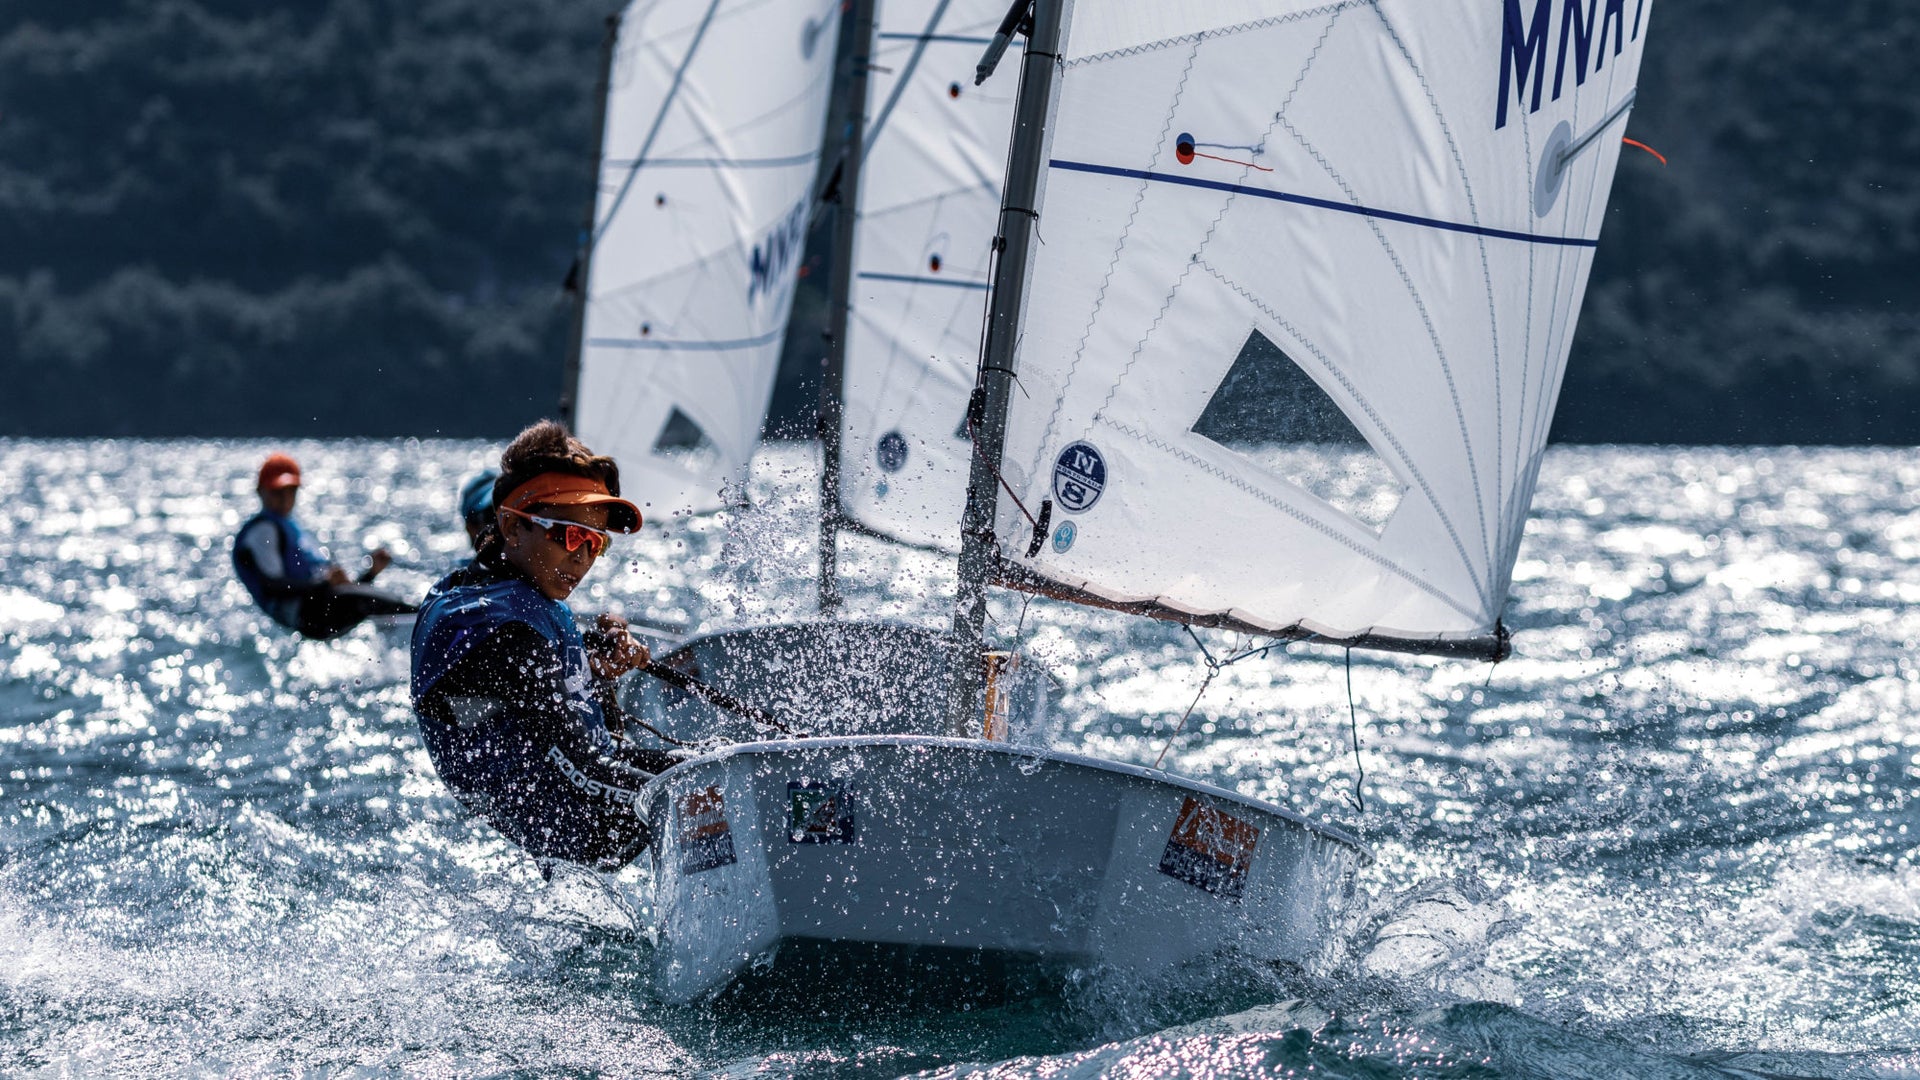
In lighter wind the clew-masthead crease is very well defined. This is max crease ease.
When you think about it, your Optimist sail has a really big job to do; it has to have a great shape in really light wind, when most sailors wish they wouldn’t run a race, and it has to also hold its shape all way to 20 knots +, when some other sailors wish they wouldn’t run a race. The North MNR sail can handle it and is very dynamic. It is designed to excel in all wind ranges, but you have to help it by following the cues and tuning guide as you sail in different conditions, and trim the sail properly.
Here’s one secret: if you want to unlock your North MNR mainsail’s full potential upwind, focus hard on sprit tension.
One of the big drawbacks of tight mainsheet tension upwind, especially with traditional Optimist sail designs, is that the back end of the sail, the leech, has a tendency to close down, sometimes in a vertical line right along the forward end of the battens. I liken this to the flaps on the wing of a plane being deployed to slow the plane and stall flow. Deploy flaps…. flow stalls; pull in your mainsheet too much…. leech closes off and you lose lift. This is s-l-o-w. Most sails have one sweet spot, but after that you cannot pull it in any more, and if you do… you really slow down.
Here’s the good news: the MNR bi-radial sail is designed with all this in mind, and with the right sprit tension, the sail can be very fast in most all wind conditions.. To unlock its potential, follow the simple guidelines below:
LIGHT WINDS (0-8 knots)
Ease off the sprit halyard quite a bit. You want to clearly see wrinkles/creases coming from the clew to the top of the mast. This may look weird, but it will keep the leech open when you sheet the sail in, and will give you great pointing height.
MEDIUM WINDS (9-15 knots)
Here is where you need to experiment. Depending on your weight, rig, and the chop, the sprit can come in a bit, but if there is any real chop of waves at all, err on the side of slightly less tension, so you still want to see some wrinkles. In very flat water, you can pull it in so the wrinkles are barely there, and you will just point higher.
In moderate wind (there were higher gusts on this day), the crease is less noticeable, but still there.
HEAVY WINDS (16-20 knots)
If you can keep the boat flat with the mainsheet in so that the boom is on, or slightly inside, the transom corner, feel free to tension the sprit so that the wrinkles are gone (but definitely not too tight). Once you are overpowered though, ease off just a bit to open the leech and de-power.
All boats/sails/rigs/sailors are unique, so everyone should experiment and work to find what setups are fastest for you. There’s more to the story for sure, so if you are interested in learning more about your North Sails MNR sail, please don’t hesitate to contact North Sails expert Tom Sitzmann. Remember, fun is fast!
READ MORE
READ MORE

guides
LET'S TALK E SCOW | UPWIND TUNING WITH JEFF BONANNI
LET’S TALK E SCOW
Upwing Tuning & Sail Trim with Jeff Bonanni
Informative webinar featuring E Scow expert Jeff Bonanni, multi-class World Champion Eric Doyle, and our one-design expert Allan Terhune. This webinar focus on upwind tips to make the E Scow fast in different conditions. Jeff, Allan and Eric share their thoughts as they review photos and a video taken during a training session. Very interesting and informative for those looking on improving performance.
The E Scow class is one of the best Scow classes, and boats powered by North Sails have dominated the past fine National Championships.
The North Scow designs are the exact same design that you have been winning with, that you know and you want.
The proven Scow designs are only available from North Sails.
Shop E Scow North E Scow Victory List E Scow Experts
READ MORE
READ MORE

guides
LET'S TALK MC SCOW | MASTERS DEBRIEF WITH MATT FISHER
LET’S TALK MC SCOW
2020 Masters Champion Matt Fisher Shares His Z-Max Tuning Tips
Informative webinar with 2020 MC Scow Masters Champion Matt Fisher and North Sails One Design experts Allan Terhune and Eric Doyle. Matt talks about his dominant win at the Masters in Iowa using the North Sails Z-MAX mainsail. He shares his experiences of his 12 year journey in the MC Scow Class, from his challenges as a class novice to becoming the 2020 Masters Champion.
“The North Z–Max mainsail is the only sail I have used since I have been sailing MCs. The Z-Max is easy to use, I follow the North Sails tuning guide and if I have any issues, it’s because I am over trimming.” – Matt Fisher
North Sails is the only manufacturer of the Z-Max mainsail that has won the 2019, 2017, 2016, 2105 and 2014 MC Scow Nationals.
It’s the exact same design that you have been winning with, that you know and you want. This proven design is only available from North Sails.
Shop MC Scow North Z-Max Results MC Scow Experts
Matt & Lisa winners of the 2020 MC Scow Masters powered by the North Sails Z-Max. 📸 Regatta Girl
READ MORE
READ MORE
guides
NORDISK FOLKEBÅD TUNING-GUIDE TIL TRÆMAST
NORDISK FOLKEÅD TUNING-GUIDE TIL TUNING-GUIDE TIL TRÆMAST
INTRODUKTION
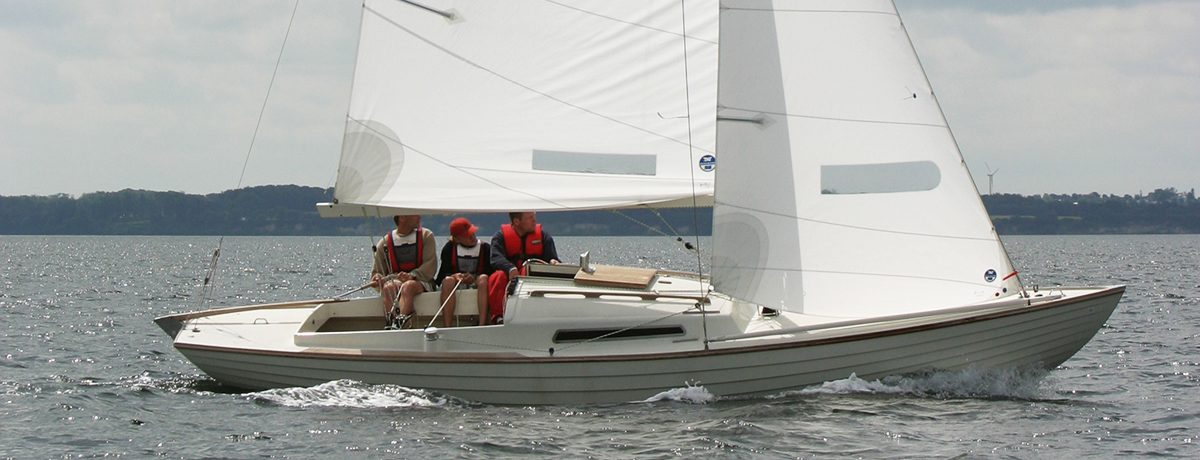
Formålet med denne trimvejledning er at give vores Folkebåds kunder en standardiseret vejledning, samt bedst mulig udnyttelse af deres nye North Folkebådsejl.
Denne trimvejledning er udarbejdet af Søren Kæstel, Per Jørgensen og Theis Palm.
Følg vejledningen så nøjagtigt så muligt. Det vil altid være en god ide at eksperimentere på din egen båd, da mandskabets vægt, bådens balance, mastens beskaffenhed samt lokale forhold også vil have indflydelse på det optimale trim.
MASTETRIM
Masten på en folkebåd er nok det mest kritiske, da træets beskaffenhed er utrolig vigtig for mastens krumning og spændstighed. Nedenstående er de udbøjnings tal som vi anbefaler til en folkebåds mast, senere i denne vejledning giver vi en ide om hvor hårdt masten skal stå på agterkanten i mastehullet. Den ultimative bøjning er svær at definere, udbøjningen skal ligge mellem 10,5 cm til 14,5 cm, målt med 16 Kg, 4,8 meter fra toppen.
1. Kontroller at din mast står lige i båden. Dette gøres bedst ved at føre vanterne ind langs masten og afsætte et mærke ud for overkanten af det sorte mærke ved bomfæste – herefter måles til dækket hvor vant skruerne er befæstet – målet skal være ens I begge sider.
2. Mastens hældning måles på følgende måde – forstaget tages af ved dækket og føres ind langs masten. Wiren strækkes så meget som muligt – der afsættes et mærke ud for overkanten af det sorte mærke ved bomfæste. Forstaget sættes på plads – der måles nu 1,31 meter fra mærke til dæk målt langs forstaget.
3. Herefter skubbes mastefoden agter over til den den lige akkurat røre bagkanten af mastehullet. Hvis masten er stiv skal den stå forholdsvis hårdt på bagkanten og trykkes 22 mm agterover for at få masten til at krumme jævnt, hvorimod hvis masten ligger omkring 12,5 cm i udbøjning trykkes 16 mm, er masten blød 14,5 cm skal den kun lige berøre bagkanten af mastehullet.
4. Strutterne justeres ved at trække hårdt i hækstaget – kig op langs hulkilen og kontroller, at strut stagene er lige stram i begge sider. Hvis ikke justeres strut stagene til masten står lige. Strut stagene skal står forholdsvis løst i let vind, og i hård vind, hvor man i mellemluft strammer 2-3 omgange på den fælles vant skrue, det svare til at faconen i toppen af storsejlet ligger ca. 47% tilbage fra forliget. Det vigtigste er at masten krummer jævnt fra dæk til top, hvis strutten står for stramt krummer masten for meget i bunden og bliver for stiv i toppen, hvorimod hvis strutten står for løst krummer masten kun i toppen og masten forbliver stiv i bunden, den jævne krumning giver et pænt jævnt twist i storsejlets agterlig.
5. Sidevanterne – er med dette trim med til at kontrollere forstagets spænding da trykket på bag kanten af masten, i mastehullet er med til at presse masten fremover og hermed får forstaget til at stå løst. I let vind skal man sejle med et forstags-fald på ca.8 cm. dette gøres bedst ved at stramme sidevanterne lige meget under sejlads til de 8 cm. er opnået. Når vinden så frisker til mellemluft strammes 1½ omgang på sidevanterne og yderligere 1½ omgang i frisk vind, på denne måde strammes forstaget op under øget vindpres. På de bløde master bruges en 2 cm. tyk kile på bagkanten til at opnå samme virkning.
STORSEJLS TRIM
Storskødet er meget kritisk og små justeringer har stor betydning for højde og fart. Skøder man hårdt, lukker agterliget mere og giver større rorpres, men til gengæld mere højde. Dette trim kan anvendes i mellemluft på fladt vand, hvor man lige kan hænge båden ned. I let vind slækkes skødet således at den øverste ticklers flyver ret bagud. I hård vind skødes godt hjem og hækstaget hales indtil båden igen bliver let på roret uden at man mister højde. I forholds vis store bølger skal sejlet twiste mere, for at få så stort et styreområde til vinden som overhovet muligt, samtidigt giver det også bedre fart og hermed også højde.
Som tommelfingerregel trimmes den øverste sejlpind parallelt med bommen i stort set alle vindstyrker.
1. Udhal på bommen. Udhalet er også en vigtig trimfaktor. I let vind (0-2 m/s) skal sejlet være 3 cm fra sort mærke. I mellem vind (2-5 m/s) 1,5 cm fra sort mærke og over 5 m/s hales helt ud på mærke.
2. Cunningham. Undlad helt at bruge cunningham i let vind. I mellem vind hales kun så meget at rynkerne langs forliget forsvinder. Når vinden er over 7 m/s hales der hårdt for at medvirke til at åbne kappen og holde faconen fremme i sejlet.
3. Løjgangen. Det er en god ide at have to vogne på løjgangen, disse to vogne forbindes med to wire stropper af ca. 40 cm længde, til en blok hvor storskødet løber igennem, dette gør sejlads i let og mellem vind væsentligt nemmere. I let vind (0-3 m/s) skødes 15 – 20 cm. til luv. I mellem vind (3-6 m/s) sættes vognene på midten. I vindstyrker der over køres vognene mod læ, således at båden retter sig op og bliver let på roret.
4. Hækstaget. Hækstaget har to funktioner, At kontrollere dybden I storsejlet og hvor meget forstaget falder mod læ. Det vil sige, at et strammere hækstag betyder et fladere og mere åbent storsejl, mindre forstags fald og hermed også fladere fok. Vi har mærket vores hækstag op for hver 20 cm, så vi hurtigt kan komme tilbage til et godt trim og have båden veltrimmet lige efter mærke rundingerne.
5. Bom nedhal. Bom nedhalet bruges på kryds, til at krumme masten i hård vind og hermed åbne sejlet forneden, samtidigt
med at den holder bommen i niveau når storskødet bliver slækket i de hårde pust.
Brug aldrig bom nedhalet på kryds under 8 m/s og gør det med varsomhed, husk altid at slække til lænse position når der faldes af til slør for at undgå at bommen knækker. Bom nedhalet bruges ellers på følgende måde, hal til den øverste sejlpind står parallelt med bommen, både på halv vind og læns under alle vind forhold.
North Sails fokke er skåret til skødning både på ruftag og på dækket .Vi må dog anbefale at skøde på ruftag for at få bedre twist i agterliget og så stor spalte imellem storsejlet og fokken så muligt, man har også væsentligt bedre kontrol over fokken, jo kortere afstanden er fra skødbarm til blok, dette viser sig specielt i hård vind.
Med skødning på ruftag må det anbefales at have en vendeblok forrest på hænge bræt for at undgå at skødet kinker på spillet.
1. Skødepunkt. Skødevognens placering er kritisk for fokkens trim, men som udgangspunkt måles 2,65 meter fra pind boldt i forstag til centrum skødeblok (hvis der skødes på ruftaget).
Fokken skal luffe jævnt langs forliget dvs. at ticklers skal stå ens både i top og bund.
2. Fokkeskødet. Skødespænding – der skødes hjem så den midterste sejlpind er parallel med centerlinien i båden under de fleste forhold, med I det lette vindområde (0-2 m/s) twistes dog 2-3˚ mere. Hvis der er meget sø skødes 2-3 huller frem på skødeviseren for at få mere dybde og trækkraft (husk midterste sejlpind skal stadig være parallel med centerlinien i båden. I hård vind skødes 1-2 huller tilbage, med aldrig så at underliget bliver løst og begynder at blafre.
3. Faldspænding. Stræk aldrig faldet for hårdt, da faconen ellers kommer for langt frem. – Fokken er designet på denne måde – . Stræk kun lige så folderne ved løjerterne forsvinde. I let vind må der gerne være små folder ved løjerterne, dette giver det bedste profil.
Din kontakt hos North Sails er Theis Palm.
READ MORE
READ MORE
guides
H-BÅD TUNING GUIDE
H-BÅD TUNING GUIDE
INTRODUKTION
Formålet med denne tuning guide er at give vores H-Båds kunder nogle retningslinjer i, hvordan man får størst mulig udbytte af sine nye North sejl. Tuning guiden er udarbejdet af Theis Palm.
Følg vejledningen så nøjagtigt som muligt. Det er dog altid en god idé at eksperimentere på sin egen båd, da mandskabets vægt, bådens balance, mastens beskaffenhed samt lokale forhold også kan have indflydelse på det absolut optimale trim. Før masten rejses skal nogle meget vigtige mål og afmærkninger følges for at kunne bruge denne trimguide.
MASTETRIM
1. Salingshornenes længde og vinkel er vigtig for storsejlets facon, da disse er med til at kontrollere mastens krumning og dermed også forstagets spænding. Længden af salingshornene måles fra siden af masten til wiren der er placeret i salingshornet, målet er 83 cm, målet tages langs midten af salingshornet. Salingshornenes vinkel måles ved at binde en tynd snor fra det ene overvant til det andet og her efter måles afstanden fra snoren og ned til bagkanten af masten den skal være 19 cm. Ved samme lejlighed afsættes to tapemærker på henholdsvis 44 cm og 55 cm målt fra siden af masten. Disse mærker bruges senere til trim af fokken.
2. Herefter holdes top-vanter og forstag ind langs masten og strækkes så meget som muligt. Der sættes et mærke på alle tre wirer, ud for overkanten af det sorte ved bom-fæste. Disse tre mærker er nu udgangspunkt for mastens hældning og om masten står lige i båden. Masten rejses.
3. Mastefoden placeres således, at afstanden fra centrum af forstagets pin-bolt til forkant mast er 2,42 m.
4. Kontroller at afstanden fra overkanten af det sorte mærke ved bom-fæste til dæk målt på siden af masten er 54,8 cm. Differencen skal korrigeres på det mål på forstaget som følger.
5. Mastens hældning bestemmes således, at afstanden fra det afsatte mærke på forstaget til dækket målt parallelt med forstaget til dækket er 1,37 m.
6. Kontroller nu – når den korrekte mastehældning er konstateret – at masten hviler på hele sin trædeflade på mastens fod. I modsat fald vil rig trykket blive ukonstant og forstaget hermed uroligt.
7. Mærkerne på overvanterne bruges til at kontrollere at masten står lige i båden ved at måle fra mærke til dæk i begge sider. Dette er mere præcist end at måle fra mastetoppen.
8. Riggens spænding er svær at definere, da ikke alle er i besiddelse af den samme rig-måler. Til denne vejledning har vi anvendt en Loose Gauge type PT-1 M, hvor vi har følgende mål:
9. Når undervant spændingen er sat, kontrolleres om masten står lige. Tallene på undervanter er kun en guideline, som er erfaringer fra vores egen båd. Det er vigtigt at masten står lige op til 10 m/sek. Herefter strammes undervanterne til masten falder 5-10 cm til læ ved fokkegodset alt efter mandskabets vægt.
STORSEJL
1. TRIM AF STORSEJL: Storskødet er meget kritisk og små justeringer har stor betydning for højde og fart. Skøder man hårdt, lukker agterliget mere og giver større rorpres, men til gengæld mere højde. Dette trim kan anvendes i mellemluft på fladt vand, så længe man kan hænge båden ned. I let vind slækkes skødet således at ticklers ved den øverste sejlpind flyver ret bagud. I hård vind skødes godt hjem, og hækstaget hales, indtil båden igen bliver let på roret, uden at man mister højde. I forholdsvis store bølger skal sejlet twiste mere for at få så stort et styreområde til vinden som overhovedet muligt. Samtidigt giver det også bedre fart og hermed også højde. Som tommelfingerregel trimmes den bagerste halvdel på den øverste sejlpind parallelt med bommen i stort set alle vindstyrker.
2. UDHAL PÅ BOM. Udhalet er en anden vigtig trim faktor. I let vind (0-2 m/sek.) skal sejlet være 3 cm fra sort mærke. I mellemvind (2-5 m/sek.) 1,5 cm fra sort mærke og over 5 m/sek. hales helt ud på mærke.
3. CUNNINGHAM. Undlad helt at bruge cunningham i let vind. I mellem vind hales kun så meget at rynkerne langs forliget forsvinder. Når vinden er over 7 m/sek. hales der hårdt for at medvirke til at åbne kappen og holde faconen fremme i sejlet.
4. LØJGANGEN. Justering af løjgangen påvirker rorpresset væsentligt og bruges alt efter mandskabets vægt. Løjgangsvognen justeres således, at bommen, så længe som overhovedet muligt, er på centerlinien af båden, altså til luv (dette for at bevare så stor vindkanal mellem storsejl og fok som overhovedet muligt og for at kunne sejle maximal højde). Når vinden så frisker, og hækstaget er halet maksimalt køres løjgangen til læ, indtil båden er i balance og let på roret.
5. HÆKSTAGET. Hækstaget har to funktioner: At kontrollere dybden i storsejlet, og hvor meget forstaget falder mod læ. Det vil sige, at et strammere hækstag betyder et fladere og mere åbent storsejl, mindre forstags sag og hermed også fladere fok. Vi har mærket vores hækstag op for hver 5 cm, så vi hurtigt kan komme tilbage til et godt trim og have båden veltrimmet lige efter mærkerundingerne.
6. BOMNEDHAL. Bomnedhalet bruges på kryds til at krumme masten i hård vind og hermed åbne sejlet forneden, samtidigt med at det holder bommen i niveau, når storskødet bliver slækket i de hårde pust. Brug aldrig bomnedhalet på kryds under 8 m/sek. og gør det med varsomhed. Husk altid at slække til lænseposition, når der faldes af til slør, for at undgå at bommen knækker.
Bomnedhalet bruges ellers på følgende måde: Hal til den bagerste halvdel af den øverste sejlpind står parallelt med bommen; både på halv vind og læns, under alle vind forhold.
FOK
1. SKØDEPUNKT. Skødevognens placering er kritisk for fokkens trim. Som udgangspunkt måles 2,88 m fra pin-bolten i forstag til centrum af skødeblokken. Fokken skal luffe jævnt langs forliget; det vil sige, at ticklers skal stå ens både i top og bund. Hvis der er meget sø og over 3 m/s, skødes 1 hul frem på skødeviseren, og under 2 m/s skødes helt op til 5 huller frem på skødeviseren.
2. SKØDESPÆNDING. Her bruges de afsatte mærker på salingshornene. I vindstyrker under 3 m/s skødes til yderste mærke (54 cm). Over 3 m/s skødes til inderste mærke (44 cm).
3. FALDSPÆNDING. Stræk aldrig faldet for hårdt, da faconen ellers kommer for langt frem. Stræk kun lige så folderne ved løjerterne forsvinder. I let vind må der gerne være små folder ved løjerterne, idet faconen i fokken derved flyttes lidt bagud og dybden øges en smule, og dette giver det bedste profil.
SPILER
Spilerstagens fæste på masten bør sidde i en højde af 1,50 m over ruffet. Stagehøjden justeres under de fleste forhold således, at den står vandret. Derved opnås den størst effektive længde af spilerstagen og det størst mulige projicerede areal til vinden. Vores spiler er designet hertil.
I let vind justeres stagehøjden således, at skødebarmene på spileren flyver lige højt for at få den bedste indfaldsvinkel på det luv sidelig, samtidig med at det læ sidelig er maximalt åbent.
I vindstyrker over 7 m/s sættes læ barberhal for at hindre spileren i at blive for levende. På skæring i hård luft må spilerstagen under ingen omstændigheder komme nærmere til forstaget end 60 cm for at forhindre, at båden kommer ud af kontrol og skærer op i pustene. Hvis du har spørgsmål vedrørende trim, så kontakt Theis Palm.
God fornøjelse på vandet!
READ MORE
READ MORE
guides
PUTTING AWAY YOUR TOYS
PUTTING AWAY YOUR TOYS
End of Season Storage and Sail Care Is Key to Prolonging Sail Life
North Sails Expert Tom Davis is particular about sail storage. He’s shared his best tips below to ensure your sails remain in top shape for next season.
Given how strange 2020 has been in many respects, sailing has, fortunately, turned out to be an ideal activity in the great outdoors. While the way many of us have put our boats to use in 2020 has differed from prior years, sailors have been able to spend lots of time under sail – perhaps even getting in more sailing days than usual.
For those living in areas where sailing has a defined season due to the approaching winter months, properly buttoning up the boat and equipment is a routine either underway or about to get started. Ensuring it is done right is critical for an effortless restart a few months from now when warmer weather returns.
While by no means intended to be an exhaustive list, here are a few tips based on personal experience to keep in mind when preparing to store your sails.
Dry
If nothing else (and as you’ll see below, there is plenty more to be done), your sails must be scrupulously dry before you put them away. That’s true of short-term storage (between sailing days during the season) and becomes essential when storing for the longer term. Why?
Moisture will encourage mildew growth, causing ugly dark stains on your sails.
Moisture will promote dye migration of colors in spinnakers, causing discoloration.
Neither of these bad outcomes is covered by sailmaker’s or sailcloth manufacturer’s warranties. After-the-fact cleaning will rarely remove all mildew staining, and cleaning will do nothing to undo dye bleeding in a spinnaker.
Mildew and dye migration are unsightly, but they don’t significantly reduce sail performance. Where long term moisture exposure will harm more than just the look of your sails is damage to adhesives, impregnations, and coatings on-and-in the sail material. Moisture hydrolyzes the components of sailcloth that keep your sails flying like foils and maintaining zero porosity. Hydro is water; Lysis is destruction. Enough said, right?
Clean
Is there any part of your boat that is well served by being dirty? Probably not. Dirt certainly damages sail material – sometimes through chemical interaction, sometimes by mechanical action. For example, dry salt crystals embedded in cloth act like tiny internal files, sawing away on fibers and films, clean sails will last longer and perform better, particularly as the hours of use increase.
So, how do you clean sails properly and effectively? For fundamental care, sail materials will handle a combination of water with a bit of detergent, some very gentle scrubbing by hand or soft brush, and liberal rinsing with fresh water. And as noted above, thorough drying after washing is essential.
Where it gets tricky is when more aggressive measures are needed to remove stains. Some fiber/film/resin types are quite robust and will accept exposure to reactive chemistry and more vigorous handling. Other materials can be very susceptible to damage from specific exposures. It’s complicated! Eliminating a grease stain from woven dacron is very different from removing a rust stain on a cruising laminate or mitigating mildew in a high modulus material. I suggest using a well-established sailing industry professional to clean beyond the basic soap/water/rinse/dry process (sailmaker, sail cleaning agency). A web search for sail cleaning tips and contacts is a good place to start, whether planning to DIY or sending your sails to a professional.
A few cardinal rules to remember (but far from everything you need to know before proceeding):
Be super careful with bleach. Some plastics have a high tolerance for bleach (polyester, aka dacron), while others are destroyed immediately by contact with small amounts (bleach is deadly to aramid fibers and nylon, among others).
Be wary of any cleaning agent other than mild detergent in a low concentration. Sometimes rust removers, “oxy” cleaners, and the like will do the intended job nicely. Still, when these are not suited to the cleaned material, disaster can strike quickly (and expensively).
“Race” sails can be cleaned with a simple water-rinse and dry.
Never rinse a nylon spinnaker in a swimming pool (you’d be surprised how often this happens!).
Once upwind sails are clean and dry, some products can be spray applied to help keep them that way – McLube Sailkote is a favorite of North Sails. Applications like these are best left to specialists, in my opinion.
📸 Michael Egan / Egan Images
Repair
A clean sail is undoubtedly nice to have – but not much use if the sail requires repair to be fully functional. Getting a needed repair completed before storage for the off-season is the right thing to do. That sounds a bit like “floss every day” or “avoid carbs”: easy to say, not so easy to do. But it will pay off (same with flossing and limiting carbs, of course). Sail washing does present an excellent opportunity to inspect and identify needed repair, whether you do the cleaning yourself or contract these services with a sailmaker or sail cleaning specialist.
Isolate
I’ve seen many examples of damage to stored sails inflicted by mice, squirrels, and raccoons. Where I live in Connecticut, I’m convinced that we’re never going to win that war by eliminating these creatures (our always stocked bird feeders aren’t helping). So, the next best thing is to keep the little devils out of your sail bags. That starts with clean and dry sails. Don’t leave salt on your sails or their bags (this is a good time to soak away salt and crud on the zippers and zipper cars of turtle bags). If you flake and bag your sails on your lawn, make sure there’s no leaves or grass in the folded sails. Store your sails in a place where small animals cannot reach them. Spinnakers are particularly attractive to rodents as it’s a meal and good nesting material. A few years ago, I started hanging my (clean, dry) spinnakers from lines attached to the ceiling rafters in my garage rather than leaving them on a shelf or the floor. So far, so good.
For questions about sail storage, reach out to your local loft!
📸 Urban Haglin
READ MORE
READ MORE

guides
FAREAST 28R TUNING GUIDE
Rig Tuning Guide
All turns from base.
TWS Knots
Forestay
V1
D1
D2
0-5
-5
-3
-1
-1
5-10
-3
-1
0
0
10-14
BASE
BASE
BASE
BASE
14-18
+5
+2
+1
+1
28-22
+10
+3
+1
+2
22+
+10
+4
+3
+2
BASE TUNING - PT-2
V1
30
D1
25
D2
7
BASE Swing
1853 mm
Using the jib halyard, pull the halyard taught against the mast at the level of the top BAS (black band). Swing the halyard to the forestay and mark the forestay at this height. Measure from the mark down to the top of the stainless steel forestay fitting. This measurement is 1853mm for base setting.
READ MORE
READ MORE
guides
TUNING TIPS FROM THE TOP
TUNING TIPS FROM THE TOP
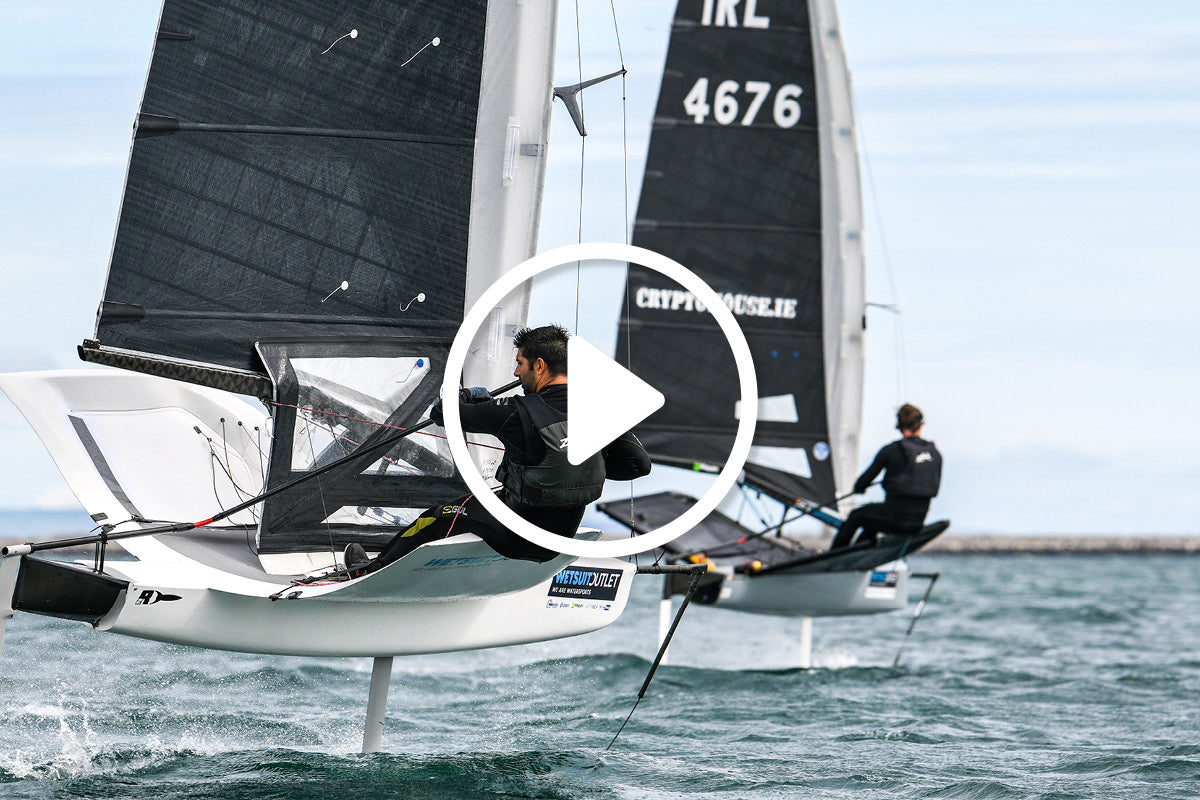
North 9DSX Moth Sail
Pros at the top of the fleet share how the North 9DSX Moth sail takes them through the range of conditions and their personal tuning tips.
Shop Moth Sails
READ MORE
READ MORE
guides
NEW VIPER 640 TUNING GUIDE RELEASED
Experts Share Fastest Numbers for the Vipers
North Sails Viper 640 experts, led by reigning World Champion Jackson Benvenutti and former World Champion Zeke Horowitz with help from Annapolis NOOD Champion Austin Powers, have been hard at work updating your Viper 640 North Sails Tuning Guide. This guide features key updates to make sure your speed stays consistent with the fastest teams in the world.
What’s New?
You will find a new measurement for a shorter headstay, an update on mast butt placement, and hear about new techniques for using your mast blocks and lower shrouds to control headstay tension. You will also discover updated guides for weather jib sheeting as well as how that relates to the vang and cunningham settings. As always, this guide serves to get everyone in the ballpark for world championship caliber speed. Your North Sails experts are eager to help you dial-in and fine tune so you and your team can be set up for success.
Contact us any time! We look forward to helping you achieve your goals.
Contact Your Class Expert Open Tuning Guide
READ MORE
READ MORE
guides
NORTH SAILS IC37 WEBINAR COLLECTION
NORTH SAILS IC37 WEBINAR COLLECTION
Sail Trim, Boat Speed, Crew Tips, and More
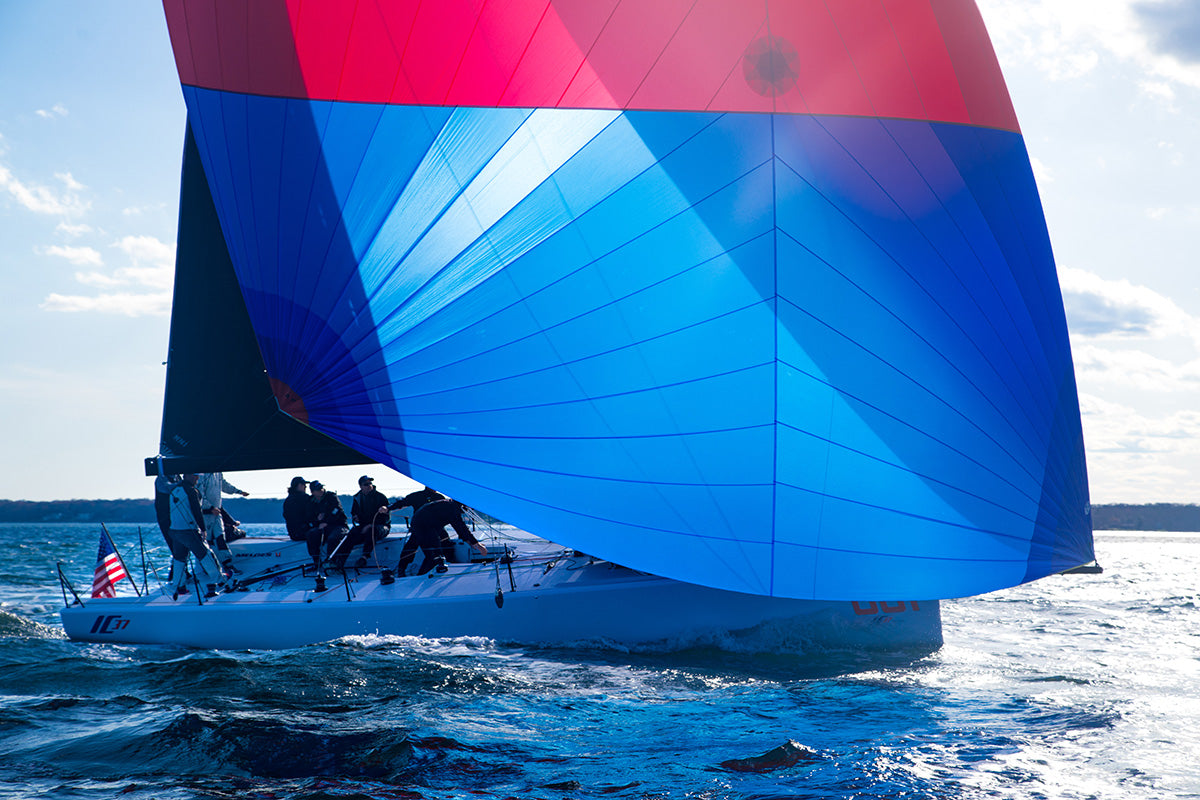
We’ve collected all five North Sails IC37 Webinars, hosted by IC37 Class Coach, Greg Fisher, featuring special guests and key experts in the class. Each webinar focuses on something new; from upwind to downwind sail trim to heavy air, overpowered sail trim and rig set up. Hear from Ben Kinney, main trimmer on Members Only, 2019 National Champs on how to obtain maximum speed and stability across a wide range of conditions. From a designers point of view, North Sails designer Mike Marshall shows us the difference in sail trim modes across the ranges using visual support. Grab your notebook and hear the best-of talk about IC37 sailing so you can become the ultimate IC37 sailor.
📸 Hannah Lee Noll / Melges IC37 Training Weekend 2019
Learn about building boat speed in light air conditions, and how sail trim plays plays an intricate role in maintaining power through the lulls.
Upwind Light Air Sail Trim
📸 Hannah Lee Noll / Melges IC37
Staying powered up but not rounding up is key in heavy air conditions. Hear more about best sail trim practices and communication between the trimmers and helmsman.
Upwind Heavy Air Sail Trim
📸 North Sails / James Tomlinson
Discover more about ideal sail trim, using jib leads to create the right entry window when it comes to headstay tension, and shifting the power up on the main to stay in control.
Sail Trim: Medium to Overpowered Conditions
📸 Melges IC37 Class Association / NYYC
The IC37 is a highly physical boat. Our experts dive into the run, going through all the details on how you can get the most speed to stay ahead of the competition.
Downwind Boat Handling
📸 Melges IC37 Class Association / NYYC
Hear from the experts on how to accomplish the perfect drop with the retriever line, and what each role is responsible for to assure a clean mark rounding.
Leeward Mark Roundings
READ MORE
READ MORE
guides
CLUB RACE TOOL KIT
Whether you live to sail on weeknights, or save your energy for the weekend, we’ve assembled a collection of articles to help make your next club race the best it can be. Tips from the North experts on helming, sail inventory suggestions, downwind communication, and DIY sail care methods– all contribute to improving race results at your next weeknight ‘worlds.’
Best Sails for Club Racing
For some, “club racing” means a casual jib-and-main evening race aboard a well-stocked boat carrying roller furlers. For others, it means a no-holds-barred weekend race aboard a Melges 32 with a full crew aboard. Hear from material expert Tom Davis as he lays out your inventory options.
Learn More
Sticking To Your Senses
Remember when your spinnaker was new—how crisp and clean the material felt and the way it crinkled going into the bag? The colors were sharp, and it even smelled like brand new nylon. When the kite filled and snapped in the breeze, you knew it was pulling your boat forward for all it was worth. Your senses knew that the sail was new, and if you allow them, they’ll help you understand when that same spinnaker is ready for replacement.
Learn More
New Sail Technologies Set The Tone
Black has not always been the fast look for sails, but lately more and more black sails are showing up on the water. Why? The simple answer is that many sails are now made with carbon fiber and carbon is black. Read how 3Di was this trendsetter and why it is unique to North Sails technology and stands out (results and color!) from the competition.
Read More
Code Sails: The Ultimate Speed Addition
Did you know that North Sails is the originator of the Code Sail concept? What started out as a straightforward but innovative concept has rapidly evolved into a whole new category of sails, including sails with the Helix structured luff. While Code Sails may look and perform quite differently from one another, there is one common theme: Code Sails are fast, flat, free-flying sails, designed for close reaching angles.
Read More
Make The Most Of Each Upwind
The most important element of upwind boathandling is tacking. Tacking seems like a minor thing, but the difference between a good tack and a poor one can be measured in boat lengths. In a race where you tack ten times, well-executed tacks can provide the margin of victory. And in a close duel, superior tacks will allow you to break free from or keep control of a rival. Find out more on each crew position and how you can together improve your uphill sailing.
Learn More
All About Battens
Thinking about battens? Preparing for a new season is something that is on everyone’s mind. Whether you’re staging your boat to launch, planning an extended cruise, or hoisting your sails for a weeknight club race; It’s important to make sure you’ve got your battens installed properly and tensioned correctly. Checking your battens will provide better sail shape and performance – and ensure you don’t lose them after the first tack or jibe!
Learn More
Steering Downwind: Less is More
Steering off the wind, on reaches and runs, requires a coordinated effort between helmsman and spinnaker trimmer. Your trimmers and tactician can sometimes conflict in feedback which makes things tricky. Here are some tips on how you can acknowledge and respond to direction, while maintaining optimum speed downwind.
Learn More
DIY Sail Care & Maintenance Tips
There are many ways you can help prolong the life of your sails. Our Certified Service experts wrote down pointers to keep you aligned with our sail care maintenance practices, which can be part of your regular routine while you are at home, or on your boat.
Read More
Create Your Own Club Race Playlist
Want to learn more about boat prep, sail care, and optimizing your rig for your weeknight race? Scroll through our webinars and personalize your own club race webinar playlist. Simply find the webinars you want to collect and under video, click ‘save’. From there you can ‘create your own playlist’, and use the drop down menu to select your privacy settings, if you want your playlist to be private. Rewatch and rewind whenever you like.
Create Your Playlist
READ MORE
READ MORE
guides
STEERING DOWNWIND
STEERING DOWNWIND: LESS IS MORE
Coordinating Commands To Perfect Downhill Steering
📸 RORC Easter Challenge / Paul Wyeth
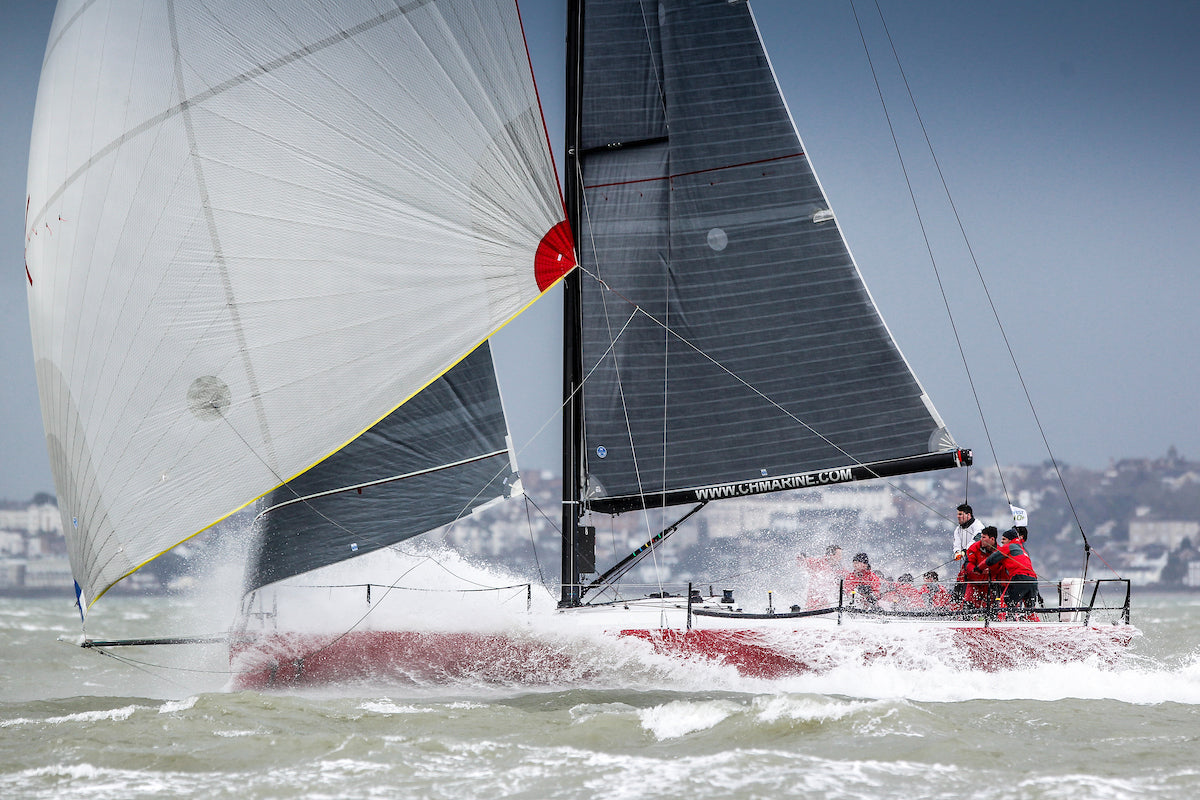
Steering off the wind, on reaches and runs, requires a coordinated effort between helmsman and spinnaker trimmer. The spinnaker trimmer often has as good a feel for performance as you do while driving, and together you can coordinate efforts to take advantage of changes in conditions. Of course, as the helm, you must respond to other inputs as well. The tactician may suggest one move, and changing sailing conditions may suggest another. At the same time, you are trying to respond to the trimmer’s input based on sheet load and boat speed. More often than not there are conflicting suggestions: Go up. Go down. Be more aggressive. Steer less.
One effective communication path is to channel all suggestions through the trimmer. Since your tactics won’t succeed without good trim, it helps to keep the trimmer in the communications loop. It also makes life easier for the helm, since you’ll only need to listen and respond to one voice.
📸 Chris Howell
Steering on The Reach
Light to Moderate Air
The shortest distance between two points is a straight line… at least, on a reach it is. Plan your reaches with this as the basic tenet. From there you will have to make modifications based on tactics and changes in the sailing conditions.
In fluctuating wind conditions, work up in the lulls and down in the puffs as necessary to maintain speed, while holding a good average course. Ask the trimmer to indicate when the sheet load is light (head up), and when the spinnaker sheet is fully loaded (bear off). The amount of course change required depends on wind speed.
Tactically on a reach there are times when you must head up abruptly, either in an effort to pass another boat or to defend your position. Alerting the trimmers prior to the move improves the chances of success. Any abrupt course change without warning your trimmers will usually doom the maneuver to failure.
Heavy Air
In heavy air, you are at the mercy of your trimmers. The vang, main sheet, and spinnaker sheet must be eased when the boat is overpowered or it will round up and broach. It is fast to carry as much power as you can as long as you can control it. Carrying weather helm is OK as long as the rudder doesn’t stall, leading to a round up. Keep a hand on the vang, and dump it when the helm is on the verge of stalling.
Don’t let an occasional round up discourage you. Regroup and see how long you can go before you round up again. If you do broach, you can speed the recovery by luffing the main and spinnaker. Bear off to a course below your desired sailing angle before you trim. Work up to a reaching course again only after you regain control at a lower angle.
Aggressive trim is needed in puffy conditions to relieve helm load and build speed. Easing the sails in puffs translates the force of the puff into speed rather than heeling force. If the course to the mark is right at the cusp between spinnaker and jib, then a change to a Code Zero can bring control and blazing speed. If you don’t have a Code Zero, sail a little low of course with the spinnaker, and then change to a jib when it is time to reach up. Do not try to sail the cusp with either spinnaker or jib.
Steering on the Run
Goals on a run vary with the wind speed and boat type. The ideas presented here are accurate for moderate displacement keelboats. Priorities will be quite different on an ultralight sportboat. Regardless of your boat type, it is critical that both driver and trimmers are working toward the same goal.
Light Air (4-10 knots true)
In light winds (up to ten knots true), the optimum sailing angle is about 140° true wind angle (40° above dead downwind). The angle changes very little as the wind speed fluctuates, so it is not correct to head up in the lulls and off in the puffs except for tactical reasons. Tacking downwind and keeping the apparent wind forward is fast. Play the sheets to the wind, while steering a steady course.
📸. Chris Howell
Moderate Air (10-15 knots true)
In moderate winds the optimum speed and sailing angle change dramatically with every change in wind speed. For every knot of wind the optimum course shifts five degrees. In ten knots of wind the optimum angle is 140° true wind angle. In fifteen knots of wind a 165° true wind angle is optimum. Try to respond to every change in wind speed, driving off with the puffs and heading up in the lulls. As you change course the trimmers must also respond, working not only the sheet, but the guy and topping lift as well.
Of course, every movement of the helm slows the boat.
Heavy Air (15 knots and up)
When the wind exceeds fifteen knots, you no longer need concern yourself with changing your sailing angles. Aim for the mark. Sail fast. Keep control. Surf if you can.
📸 Nico Martinez
Heavy Air Tips
Use crew weight to balance the helm, or try some windward heel to push the boat down—as long as you have control.
In overpowering wind—say twenty plus—control becomes a bigger issue, and windward heel is not such a good idea. A heavy air run can lead to death rolls and broaches. To control rolling, avoid sailing dead downwind, and trim the spinnaker directly in front of the boat—don’t let it float out to windward, and choke down the sheet and pole. Also, move crew weight aft. In big breeze, everyone should be in the back of the boat.
A word of caution on boom preventers. In a heavy air broach they tend to break after providing a false sense of security (or the boom breaks). The preventer can also cause a broach if the boom hits the water on a roll to leeward. And once you do broach, if the preventer holds it can keep you pinned until someone finds a way to release it.
Helmsmanship in heavy air conditions must be forceful to keep control. But remember, every jerk of the helm slows you down. Smooth is fast.
READ MORE
READ MORE
guides
HOW TO IMPROVE YOUR TACKS
HOW TO IMPROVE YOUR TACKS
Prioritizing Your Upwind Technique Can Make Or Break Your Race Result
📸 Stephen R. Cloutier
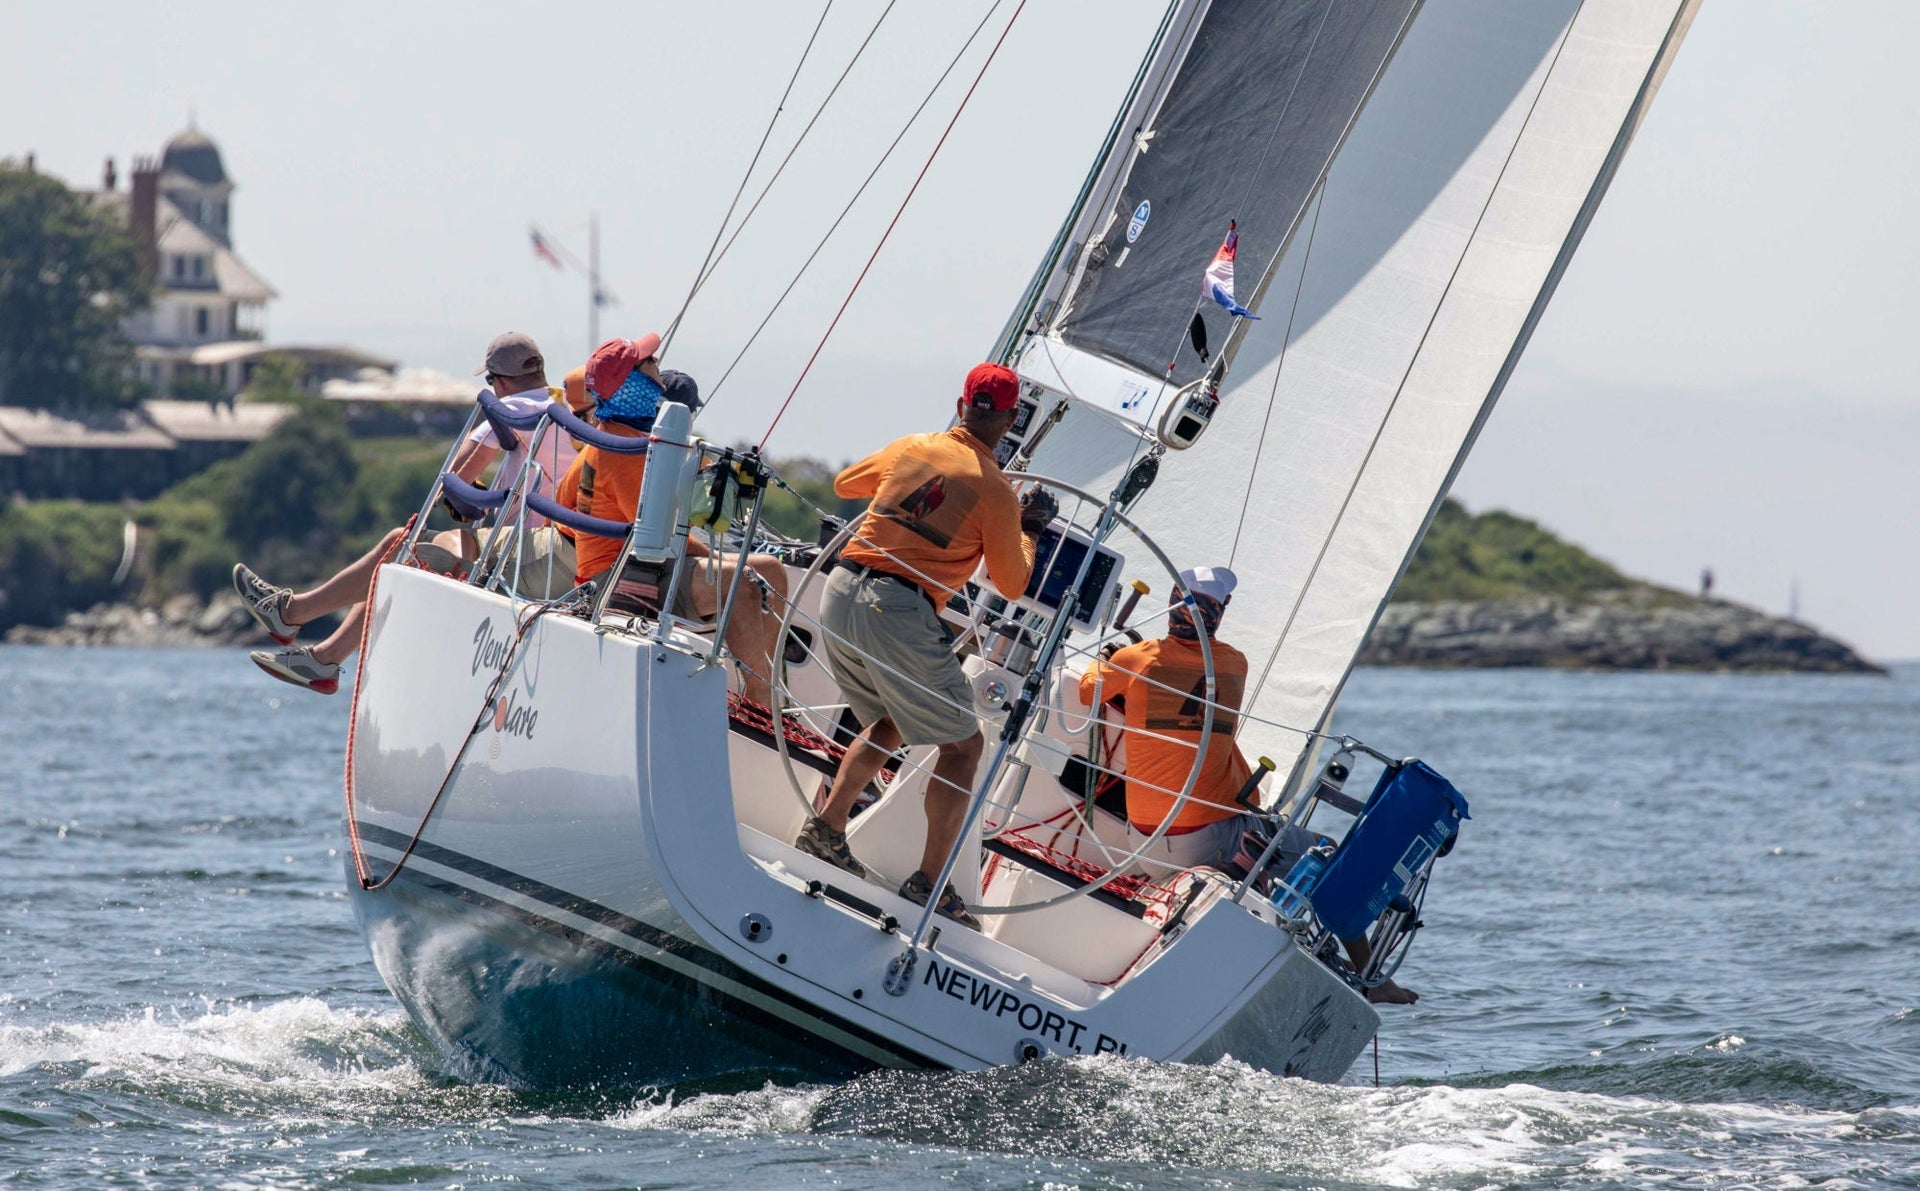
The most important element of upwind boathandling is tacking, though every once in awhile an efficient reef or genoa change could also win you a race. Tacking seems like a minor thing, but the difference between a good tack and a poor one can be measured in boat lengths. In a race where you tack ten times, good tacks can provide the margin of victory. And in a close duel, superior tacks will allow you to break free from, or keep control of, a rival. Each crew plays a role in ensuring a good tack.
Tactician
If you have some flexibility in timing, look ahead for a smooth spot. Avoid waves, chop, and wakes coming out of the tack. Also, make sure you will be in clear air coming out of the tack—don’t tack into another boat’s bad air.
Driver
The courtesy of a preparatory hail, “Ready about,” increases the likelihood of a good tack at “Hard-a-Lee.”
A proper tack starts with a slow, smooth turn to preserve momentum and allow the boat to coast upwind. As the boat comes head to wind and speed is lost, turn more quickly to finish the tack.
In waves a faster turn is called for, as momentum will be lost more rapidly. Start the turn on the face of one wave and turn quickly as the bow pops out over the crest. Try to get the bow around so the next wave pushes the bow down on the new tack, not back onto the old tack.
During the turn the helmsman must change sides and settle into position to work the boat up to speed. Come out of the tack a few degrees low and squeeze up as speed builds. Try to focus on the gradual push of the tiller as you are flattening the boat.
Crew
Keep crew movement to a minimum, and choreograph your tacks to reduce traffic. For example, at “Ready about” it makes little sense to have the genoa trimmer come to windward to tail the new sheet while another crew member moves to leeward to release. The genoa trimmer should handle the release, and crew from the rail should tail and grind. On some boats it works to have the genoa trimmer release the jib, and then turn to take the main. Meanwhile, the main trimmer abandons the main, and trims the jib.
Ready About?
Until you are on the layline you know your next maneuver, sooner or later, will be a tack. Let’s be ready sooner.
As soon as possible after the completion of the previous tack, load the lazy jib sheet on the winch and flake the working jib sheet. At “Ready about,” the trimmer should make sure she is prepared to release and the tailer should check the new winch, take up slack on the lazy sheet, and put the winch handle in place. No one else should move. You slow the boat if you get off the rail at “Ready about,” and you also telegraph your moves, letting your competitors know you are about to tack.
Even at “Hard-a-Lee,” most of the team can sit tight. As the boat stands up, the grinder should move into position. (There is nothing to grind until after the release anyway.) The longer you hike, the faster the boat will be going into the tack.
The Release
When the genoa is backed halfway across the foredeck, ease out one arm length before spinning the remaining wraps off the winch. The sheet should be flaked in advance. Make sure it runs.
📸 Melges Performance Sailboats / Sarah Wilkinson for Beigel Sailing Media
Roll Tack
Every boat can roll tack, not just dinghies. In light and moderate winds, a roll tack uses crew weight to help steer the boat and tack the sails. Here’s how: First, heel the boat to leeward to generate weather helm and start the boat turning up into the wind. Next, as the boat passes through irons, roll weight to the old windward/new leeward side. This will help the boat through the second half of the turn and throw the sails across the boat. Finally, as the sails come over, move up to the new windward side. This hikes the boat flat, helping the boat accelerate out of the tack.
Tail and Grind
Tail the new genoa sheet hard from the moment the old one is released. The tailer should pull in long even strokes across his body. The grinder should grind full speed right from the start, even when there is no load. It is sometimes helpful to have another crew member slap the sail around the rigging and drag the clew aft.
The grinder, by spinning the winch full speed, can help the tailer bring the sail through the tough spots. By keeping the winch drum spinning, he also prevents overrides. This allows all the necessary wraps to be laid on the winch from the start of the tack, which means you don’t have to stop to add wraps once the sail loads up.
Trim out of the Tack
Trim for extra power and acceleration out of the tack. Pull the jib leads forward a few inches and don’t go to full trim right away; wait until your speed builds. If you want to adjust controls, such as the backstay, for acceleration out of the tack, do it just beforehand (or in the middle of the tack) so everyone can concentrate on building speed out of the tack.
Once the sail is nearly trimmed, the grinder can move to the rail and the tailer can trim the last few inches as the boat accelerates. The trimmer should call out the overall boat speed often so the helmsman knows when the boat is approaching full speed and when he needs to press more.
Hike
If time allows, hike immediately after you tack. Do this before you set the pole, or clear halyards, or do any housekeeping. Hike out, settle the boat, and let the driver concentrate. Wait until you are up to full speed before you start moving around. This holds true in light air as well. Even when hiking weight is not needed, movement robs speed and disrupts concentration.
📸 Zerogradinord
READ MORE
READ MORE
guides
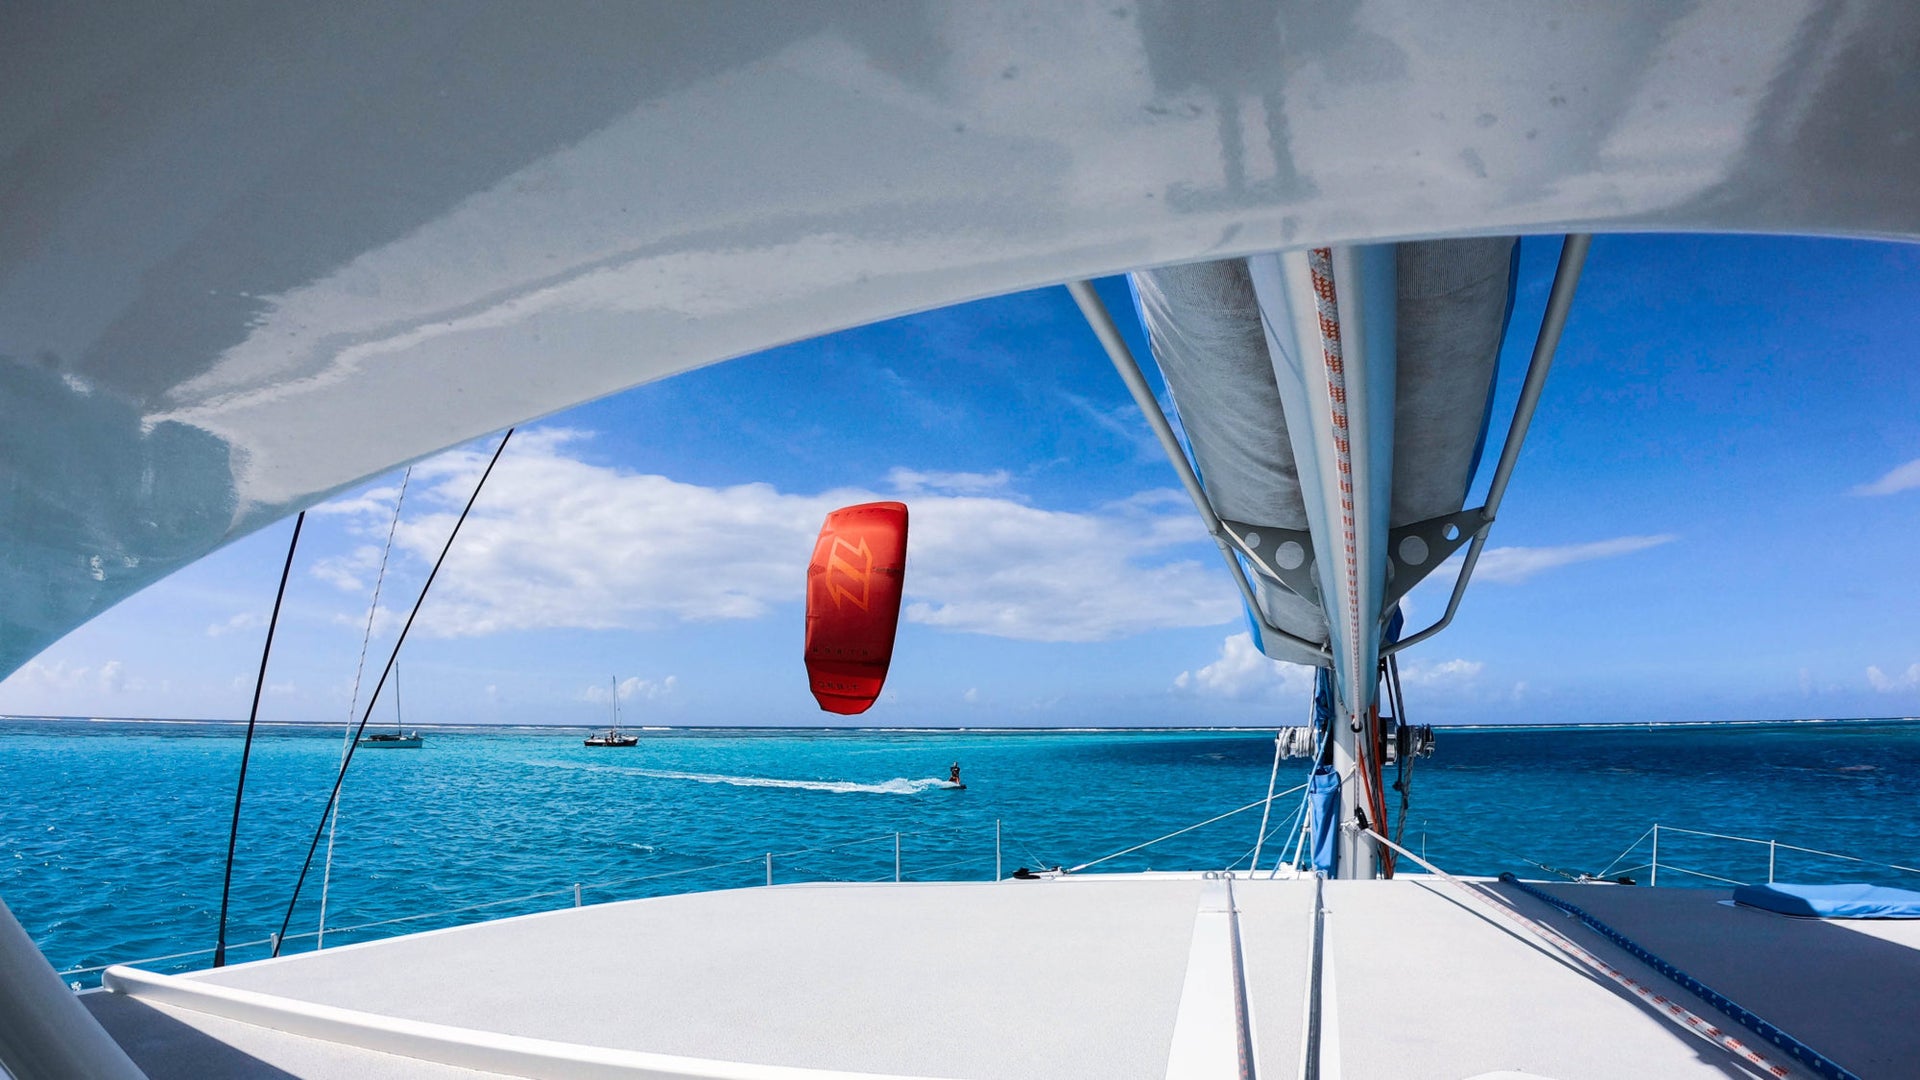
FIVE WAYS KITEBOARDING CAN IMPROVE YOUR SAILING
FIVE WAYS KITEBOARDING CAN IMPROVE YOUR SAILING
Similar Concepts Teach The Best of Both Worlds
Story by Ryan Levinson
For those who don’t know, I have a genetic disease called FSHD that causes my muscles throughout my body to weaken continuously. When I was diagnosed, there was nothing available to read except depressing stuff like clinical descriptions of symptoms, so I’ve always strived to be a public example of one possible approach to living with the disease. Kiteboarding empowers me to move and express myself with a freedom far beyond anything else possible given the effects of my disease. I once described it as feeling “like a dance across water and through the air to the rhythm set by the waves!” It’s hard to explain how much that means to someone like me whose life has always been very physical and based around my relationship with the ocean. As my disease progressed, I lost the ability to paddle a surfboard, but with a kite, I can ride waves. It’s now getting hard to walk, but with a kite, I can fly!
It is no coincidence that many of the best sailors in the world are kiteboarders. Both have a lot in common, but did you know that kiteboarding can also improve your sailing skills? Here are five ways kiteboarding can make you a better sailor:
It’s dinghy sailing without the dinghy
There is a wise saying, “To get better at sailing big boats, sail small boats!” Small boats offer a more direct feel for the forces involved with sailing. Kiteboarding takes this a step further by enabling you to literally experience sailing from the perspective of a boat’s mast. You develop an understanding of the interplay between the wind, water, and boat that usually takes much longer to gain through sailing alone. Kiteboarding is especially effective at helping you develop a comprehensive understanding of apparent wind, an essential skill for sailing well!
Fit is fast!
If you want to sail fast or far you will benefit from being fit. Kiteboarding provides a fun full-body workout to build the fitness you need to sail well. While kiting you wear a comfortable “harness” that allows you to control the pull of the kite with your entire body. This makes the kite’s pull easily manageable and provides the added benefit of strengthening key muscles used in sailing, especially your legs and “core.” Kiteboarding also builds aerobic endurance, flexibility, and coordination. It is a good idea to check with your doctor before engaging in any new form of exercise but don’t let age or physical ability serve as excuses for not getting started with kiteboarding. My 85 year old father in law took his first lesson this past winter and I’m in my 6th consecutive year of sailing full-time despite losing much of my strength due to a genetic muscle disorder. Kiteboarding plays a key role in helping me maintain the fitness I need to keep going on the water, imagine what it can do for you!
Kiteboarding is a crew factory
Do you need good crew for an upcoming regatta or passage? You have a great chance of finding them through kiteboarding. Even kiters who have never been on a sailboat can usually apply their understanding of wind, comfort in the water, and general level of athleticism to quickly become solid crew. Kiteboarder’s and sailor’s shared passion for harnessing the wind to move through water is a connection that often forms the foundation for lasting friendships on and off the water.
Sailing more makes you a better sailor
The more time you spend sailing the better you will be at it. But even the smallest dinghy can be a hassle to get rigged and ready, not to mention the challenge of just getting it to the water in the first place. Big boats are orders of magnitude more complex (and expensive) than dinghies! Kiteboarding gear is lightweight, portable, and a cost effective way to get your sailing fix. You can easily fit a complete set of kiteboarding gear in the trunk of your car (or cabinet on your boat) and get on the water quickly with little effort. Kiteboarding makes it possible for you to sail just about anywhere there is wind and water, even if it’s frozen (snow kiting is incredibly fun). Kiteboarding will greatly increase the time you spend zipping across the water developing skills and fitness that benefit your sailing.
The catch
Unfortunately there is a downside… Kiteboarding is an easily accessible way to feed your wind addiction which enables you to get a quick fix anytime the wind is up and you want to get on the water. The fitness, knowledge, and skills you will gain directly benefits your sailing thus making it even more fun and rewarding. It’s a viscous cycle of fun and progress that will keep you smiling on and off the water but if you’re not careful you could end up kiting between races or spending years of your life exploring the oceans on a boat full of kiteboarding gear, in search of steady wind, perfect waves, and endless sailing adventures…
How to start
The best way to learn how to kiteboard is to take a lesson from a qualified instructor. The learning curve is usually surprisingly quick and safe with good instruction but it is definitely dangerous (and expensive) without. Looking to get into kiting with North? Find your nearest instructor here.
Want to know more about Ryan? Read more in the Q +A with North Sails.
READ MORE
READ MORE
guides
DOUBLEHANDED TOOL KIT
The Rise of Doublehanded Sailing
Doublehanded sailing has gained momentum globally, as the gateway to getting back out on the water while remaining socially distant. It is also the latest event added to Paris 2024, so now is the time to find out more.
Armel Le Cléac’h and Clarisse Crémer Give a Rundown of Their Experiences
North Sails were lucky enough to have the two doublehanded experts Armel Le Cléac’h & Clarisse Crémer host a webinar for an in-depth masterclass. Quizzed by Ken Read, the pair discussed choosing the right teammate and how they got involved in the sport.
Learn More
Two Brains are Better than One
Suzy Leech teamed up with Ken Read to take on the Fort Lauderdale to Key West Race earlier this year. Each sailor brought a different set of skills to the table which led this powerful collaboration to take the win in the 24-hour doublehanded sprint race.
Learn More
Paris 2024 in Sight
With nearly 20-thousand miles under his belt, Sam Fitzgerald is a seasoned Class40 racer and has his sights set on being a part of the doublehanded discipline for the upcoming summer games. Read about how he plans to make his vision a reality.
Learn More
Dynamic Duo Achieves Class40 Domination
Catherine Pourre and Pietro Luciani are the reining Class40 World Champions with their North Sails allowing them to push the boat to its full potential. The pair share their best key takeaways for successfully managing a doublehanded racing program.
Learn More
Racing the Sun Fast 3300
Having never sailed the Sun Fast 3300 before, Ken Read explains why he wanted to get involved and take on the challenge of racing it from Fort Lauderdale to Key West with Suzy Leech.
Learn More
Shorthanded Sailing at a Local Level
After three months of no activity, sailing on the Solent kicked off in June with 36 single and doublehanded racers. The North RIB launched to offer coaching, sail trim tips, and support to all.
Learn More
Have questions for your local North Sails expert? Contact your local loft today.
READ MORE
READ MORE

guides
HOW TO MAKE YOUR OWN YOUTUBE PLAYLIST
HOW TO MAKE YOUR OWN YOUTUBE PLAYLIST
Collect and Save Your Favorite Videos for Yourself, or to Share.
Our YouTube channel has over eighty webinars from North Sails Experts in lofts across the world, participating in many different fleets. North Sails is proud to bring our customers a wealth of tips to help you achieve the results you are looking for. Explore topics such as cruising Code Zeros, technique from top racers in the J/70 class, or hear an exclusive talk about the majestic J Class Yachts. There are webinars for any sailor out there!
Follow along below to learn how you can create a playlist of your favorite North Sails Webinars for yourself or to share with your team.
Find a video you want to add to your YouTube playlist.
Under the video, click Save.
Select Watch later, Faves, or a playlist you’ve already created, or click Create new playlist.
Use the drop-down box to select your playlist’s privacy setting. If it’s private, only you can view the playlist.
Click Create.
If you would like to talk one-on-one to any of our experts, click here!
Step 1
Step 2
Step 3
Step 4+5
Step 6
READ MORE
READ MORE
guides
OK DINGHY TUNING GUIDE
North Sails expert Charlie Cumbley provides a detailed run-through on how to get the most out of your OK Dinghy sail. This guide will help to get your mast set up correctly for a North sail, looking at mast rake and mast position at deck level. For each of the settings, there will be a suggested range to suit different conditions, sailing fitness levels, and styles. Please use this as a guide; it’s not gospel as everyone will have a slightly different idea on how the boat should feel. By measuring these positions and getting within these ranges, you will be able to be competitive and also accurately reproduce your settings. As we learn more about the OK Dinghy or any other One Design class, new information regarding setup, tuning, and trimming techniques will be updated on the class page.
MAST POSITION AT DECK
The position of the mast at deck level will have a major bearing on how much rudder angle or weather helm your setup will produce. For any given mast rake, you can move the mast forward or aft in the boat by moving both the mast heel and deck adjusters the same amount. By moving the mast forward, you move the center of effort of the sail plan forward which will reduce the amount of rudder angle and feel. Likewise, moving it back will increase that rudder angle and feel. This position will vary depending on the boat type, foil shapes, sail shape, and conditions you are sailing in. As a rule of thumb, if you generally sail on flat water and/or light airs, you will want to move the sail plan back in the boat as this increases helm and will help you achieve a ‘high mode’ when sailing upwind. Conversely, if you are sailing in choppy/rough conditions and/or stronger winds, then you will prefer to reduce the amount of helm and rudder angle to allow for a faster lower mode upwind. As a result of this, the deck position often varies from boat to boat and depends on a sailor's preferred way of sailing. For an Ovington with a North Sail, Charlie's all-purpose measurement is 3270mm. Move the rig back 15mm to 3255mm for a flat water/light airs venue.
We recommend you measure this deck position as shown in the pictures below; measured from the aft edge of the deck ring to the aft edge of the transom.
MAST RAKE
The most traditional way to set up mast rake is to simply hoist a tape measure up on the main halyard to the top band. To make sure you are as accurate as possible each time, once hoisted, measure down the mast to the top edge of the bottom band by the gooseneck. The tape should read 5400mm. Use the tape to measure to the top of the transom - the most popular range varies from 6100mm to 6200mm. This range depends on wind conditions, sea state, and mast stiffness. In theory, you would be looking for a more upright mast in ‘max power’ conditions and flatter water, but this will depend on your own body weight and hiking fitness. In the lighter airs, you would generally opt for a more raked aft setting to reduce leech tension and increase weather helm. We would advise a setting in the middle of these for the windy setting. Once you get overpowered from your max power setting, dropping the mast rake back a little will help the sail twist open and depower as well as allow for a faster, lower upwind mode which will be needed in these windier/rougher conditions. The downside with measuring the mast rake in this manner is it does not allow for the variation in mast bend, in particular the fore/aft tip deflection. For example, if you have a mast with an f/a tip deflection of 480mm (measured in the normal manner with 10kg) and you set up the mast rake with a measurement of 6150mm, for any given upwind sheeting position (i.e with the boom end ‘1 booms depth’ from the deck), you will have more leech tension than if you were using a mast with an f/a tip deflection of 540mm. It's this leech tension that is a critical factor for your upwind performance, so we recommend an alternative method for measuring mast rake which is used extensively in the Finn class. This method is shown below.
HOW TO MEASURE LEECH TENSION
Rather than measuring your mast in a straight line ‘tip of mast to transom’ as described earlier in the guide, this system measures what tension would be put through the leech of the sail. This allows you to get more accurate settings and go afloat with a good idea of how open your leech will fly (leech twist). It will also allow you to interchange different masts and set the leech profile to the same setting no matter how different your masts may be. You can use any of the different spring/digital gauges currently on the market; Persola Spring Balance, Devoti digital strain gauge both work perfectly well. We have used the Persola spring balance in this guide.
1 - Attach tension gauge and long tape measure to mainsail halyard. Hoist halyard until the tape measures 5400mm when pulled taught down the mast to the top edge of the bottom mast band. Pull some tension onto the gauge at this point and remeasure this hoist once the halyard has bed in.
2 - Attach tension gauge onto the outhaul.
3 - Tie the traveler out to the side deck, the furthest it can be from the centreline (so the boom is positioned on the edge of the gunwale when pulled to the deck in stage 4).
4 - With the mainsheet, sheet the boom to the deck (NOTE: Always use the same side of the boat for measuring tensions. Always measure with boom end on side of the boat).
5 - Take measuring tape and measure to the inner edge of the boom black band. Adjust the outhaul so that the tape reads 5425mm when held taught.
6 - Read the numbers on the gauge to see what the mast is set up at - this is your leech tension.
Quick Tuning Table
Helm Weight
<6 knots - Superlight
5-10 knots - Light/Medium
All Purpose
>18 knots - Strong
>95kg
75lbs/34kg
79lbs/35.8kg
84lbs/38kg
82lbs/37.2kg
85-95kg
72lb/32.6kg
76lbs/34.5kg
82lbs/37.2kg
80lbs/36.3kg
75-85kg
72lb/32.6kg
75lbs/34kg
80lbs/36.3kg
77lbs/34.9kg
To adjust the tension, you can either move the chocks at deck level or move the foot of the mast (approximately 1mm chock at deck is equal to 1lb/0.5kg leech tension). Always re-check the tension after changes. This system also helps when trialing mast position fore/aft in the boat to maintain consistent leech tension. This guide will help maximize the performance of your North sail. If you have any queries, visit the OK Dinghy class page to contact any of the class experts. Check out the videos below for a detailed tuning run-through with Charlie. Happy sailing!
READ MORE
READ MORE
guides
BENETEAU FIRST 18 SE & SEASCAPE 18 TUNING GUIDE
Beneteau First 18 SE & Seascape 18 Quick Tuning Guide.
QUICK TUNING NOTES
TWS
0-4
4-8
8-12
12-16
18+
Mast Rake
8,64m
Shrouds Tension
Loos Tension Gauge 91 Model A
34
36 Base Setting
38-40
42-44
45-46
Shroud Turnbuckles
(Full Turns)
-1
0
+1 to +2
+3 to +4
+5 to +6
JIB
Cunningham
Light
Light/Medium
Medium
Medium/Tight
Tight
Clew
(Older option)
Upper
Upper
Upper
Upper
Upper
Traveler
(New option)
Middle
Middle
Middle
Middle
Middle
Twist
Medium
Minimum
Minimum/Medium
Medium
Medium
Cross Sheeting
No
No
No
No
No
MAINSAIL
A-Frame (distance - blocks)
5-10 cm
1-3 cm
1-3 cm
3 cm
Play in puffs
Outhaul (mid-foot from boom)
8-10 cm
8-10 cm
5-8 cm
Tight
Tight
Vang (Kicker)
Snug
Snug
Medium
Hard
Hard
Cunningham
No
Light
Light/Medium
Medium/Max
Max
Twist
Medium
Minimum
Minimum
Minimum/Medium
Lots
Keel Position
88° - 85°
85°
85°
85°
85°
Downwind
(App. Wind Angle)
85° - 100° Speed
90° - 130° Speed & Soaking
110° - 140° Speed & Soaking
120° - 150° Speed & Soaking
100° - 130° Speed & Soaking
Seascape 18 Speed Guide
UPWIND
TWS
BS
VMG
HEEL
AWA
AWS
TWA
TACK
6
3.9
2.9
9°
25°
9.3
42
90
8
4.7
3.5
10°
25°
12
40
86
10
5.1
4.0
12°
25°
14.4
38
84
12
5.2
4.2
15°
25°
16.5
36
80
14
5.3
4.3
16°
26°
18.5
36
75
16
5.3
4.3
16°
27°
20.6
35
75
20
5.4
4.4
18°
28°
24.6
35
75
DOWNWIND
TWS
BS
VMG
HEEL
AWA
AWS
TWA
JIBE
6
3.9
3.2
5°
109°
3.5
147
85
8
4.8
4.1
5°
115°
4.7
148
80
10
5.4
4.7
6°
122°
6
150
70
12
5.8
5.0
6°
128°
7.5
150
65
14
6.2
5.4
6°
130°
9.1
150
65
16
7.6
6.1
7°
118°
11
143
75
20
12.1
8.8
10°
100°
14
137
80
READ MORE
READ MORE

guides
THINGS TO LOOK FOR IN A GOOD SAIL
What distinguishes a great cruising sail from average? You know when it feels right. It’s that moment when you could almost let go of the wheel and the boat would steer itself. A boat in perfect balance.
READ MORE
READ MORE
guides
PHANTOM TUNING GUIDE
Phantom sailing can be made as simple or as technical as you want to make it, this is one of the main reasons for its success as a class.
Onshore Setup
Due to the adjustments available in a modern Phantom the onshore setup is really only a base on which to develop your own tuning notes.
SPREADER LENGTH
This is measured from the outer tip to the side wall of the mast = 420mm.
If you are under 85kg you can shorten the spreaders to 412mm, likewise if you are heavier than 99kg then you can lengthen them to 425mm. This adds more support to the middle of the mast, essentially stiffening the mast section.
SPREADER ANGLE
This is measured with a batten or straight edge across the aft side of the shrouds, the distance from this batten to the back of the mast is the spreader angle, this should be 145mm.
MAST FOOT POSITION
The mast foot is measured from the aft edge of transom bar to the aft edge of the mast = 3280mm.
RIG TENSION
Rig tension is actually one of the least important settings due to the fact that the Phantom is such a powerful boat that you are easing forestay to depower in relatively low wind speeds so the rig tension is actually only used for light conditions of under 6kts (dependent on helm weight).
One of the main reasons for measuring rig tension is to have a constant measurement for setting up the mast rake. Therefore I set the rig up with 300lbs of rig tension using a rig tension gauge on the shrouds.
The rake should then be as follows:
Helm Weight < 91kgs – Rake 21’7Helm Weight 92 – 100kgs – Rake 21’10Helm Weight > 100kgs – Rake 22′
Sailing Set-up
(Adjustable Lowers)I have added the lowers to sailing setup because they are key factors to setting up the sail shape once afloat. In the light airs (sub hiking) they should be slack, this allows the lower mast to bend with normal mainsheet and kicker tension, in turn this takes out a little of the excess shape from the luff of the sail. This is required because the wind doesn’t have enough energy to flow around deep sail shapes so it’s best to limit it’s effort and flatten the lower part of the sail.
As the wind increases and kicker tension is added the lowers are then tightened, this is so it acts as a brace against TOO much lower mast bend due to the kicker. Less lowers tension is needed on flat water where a flatter luff entry helps, than in rough sea conditions where a fuller luff helps to make the boat more forgiving and easier to steer fast.
FORESTAY
The forestay is the first control to ease once the breeze increases into a ‘hiking’ breeze, this helps to bend the rig and flatten the sail, although you may lose a little pointing ability, however the speed you gain from raking the rig will outweigh this, don’t be afraid to see the leeward shroud swinging wildly in the wind! This is very much an individual preference so find settings you like and use a calibration strip on the deck or the forestay adjusters to make easy reference marks ( IMPORTANT: remember when you are max rake in windy conditions to pull on the forestay downwind and prior to tacks so you can get under the boom!)
OUTHAUL
The outhaul should be used in conjunction with the lowers, so in very light airs flatten the foot so there is just 50-60mm gap between the sail and the boom at max. depth. Gradually ease this as the wind increases to a maximum of 150mm gap when looking for max. power, and then pull on the outhaul until you have a crease running along the foot when you are looking for max. depower mode.
KICKER
The key control for most singlehanders it is doubly important in the Phantom due to it’s large roach mainsail, don’t be afraid to keep pulling it on as long as the top tell tail is flying 50% of the time. Sub hiking conditions you should mainly be using mainsheet to control the leech tension with the kicker adjusted to hold this tension whenever you ease the mainsheet, then as the breeze increases the kicker should be tensioned to keep a firm leech and aid pointing. Continue to pull on more and more as the wind builds as its much quicker to sail with the mainsheet eased (boom out beyond the quarter) and a lot of kicker than the reverse of boom near the centreline with an open leech.
CENTREBOARD
In sub hiking conditions under 5 knots you can have the board right down, but as you rake the mast you will need to raise the centreboard to maintain the balance, as soon as you feel you have too much weather helm raise the board some more, you will be surprised at how little board you need to maintain height once you are flat out hiking especially when needing to steer a lot in choppy conditions.
DOWNWIND
When reaching pull on the forestay so the leeward shroud is under some tension, this helps to power up the rig, ease the outhaul too , raise the board two-thirds, and as soon as you are close to planing move your weight back and go for it! The same applies on the run where sailing by the lee can be very quick as long as you ease enough kicker to twist the head of the sail, beware this is very twitchy in anything above a moderate breeze! The Phantom rewards hard work downwind so keeping the boat flat and constantly trimming and steering for any waves will pay dividends.
Good Sailing!
READ MORE
READ MORE
guides
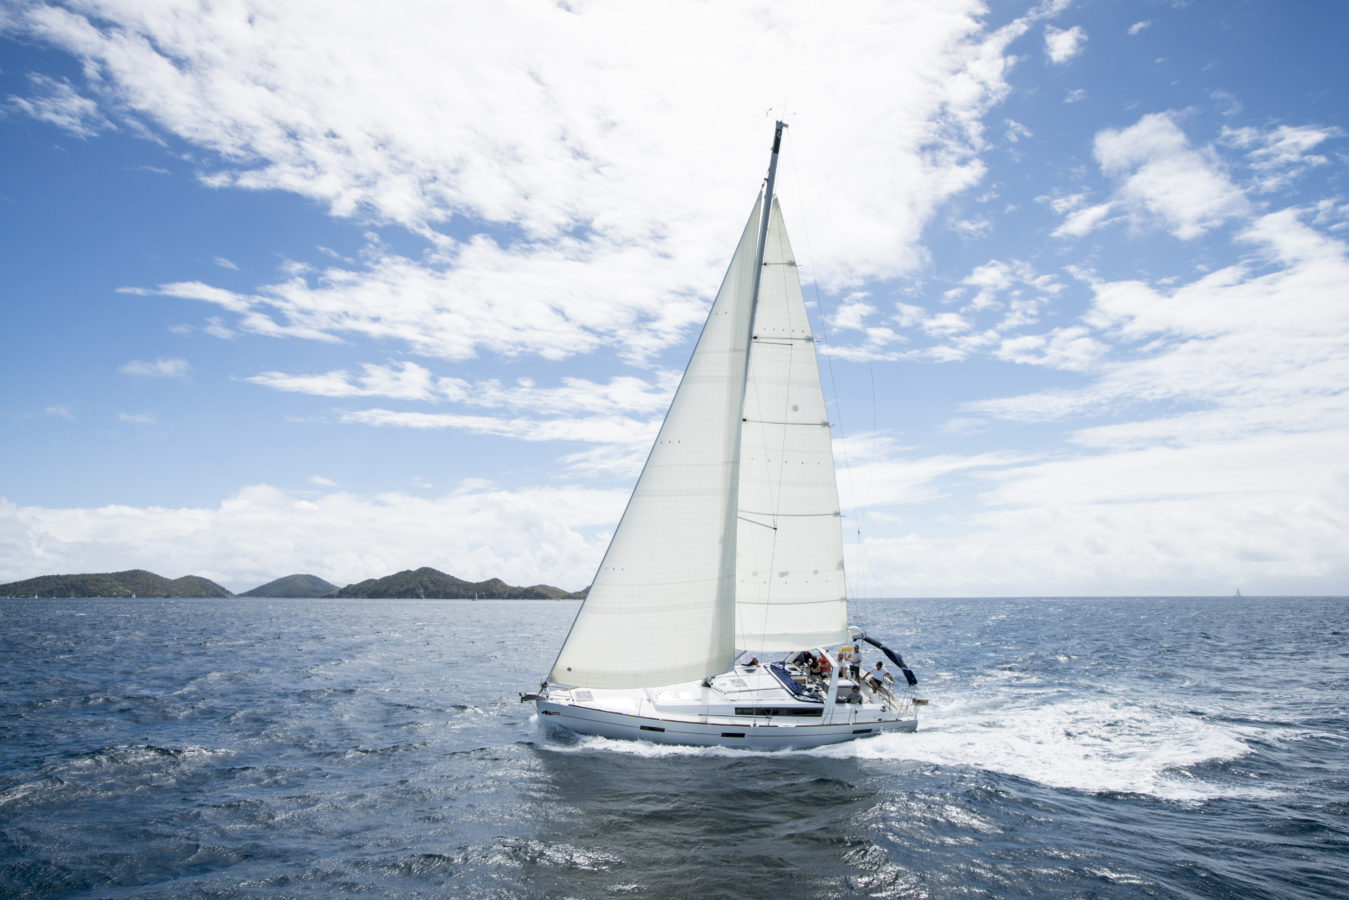
CRUISING SAIL QUALITY
North Sails stands behind our products. When you buy a North Cruising Sail, you can expect quality.
READ MORE
READ MORE

guides
ELLIOTT 5.9 TUNING GUIDE
North Sails expert Derek Scott answers your Elliott 5.9 speed and boat handling questions. Your new North sails are designed with an “all around” philosophy in mind. As we learn more about the Elliott 5.9, or any other One Design Class, new information regarding setup, tuning and trimming techniques will be updated on the class page. Sign up online for our North Sails e-mail updates and receive all Elliott 5.9 news and updates directly by e-mail.
PRE-RACE PREPARATION
TRAILER & BOAT
Make sure when transporting the boat that the keel bulb always sits perfectly in the keel platform of the trailer. If the boat is sitting where she belongs on the trailer, the bulb should rest perfectly in the keel bed and the keel fin should sit free in the keel case. Packing pre-cut foam between the keel edges/sides and the keel box will help prevent any movement of the keel when trailing. Tying the fin forward and back is a good idea to restrict movement and it is also important to ensure that the boat stays forward against the bow guide when trailering.
HULL, KEEL & RUDDER
For travelling to regattas to ensure good general care of your boat, the investment of a trailer skirt is well worth the protection it affords.Make sure your hull, keel, bulb and rudder are clean and free of major dings and scratchers. Your rudder should be kept in a padded bag for protection.
MAST SETUP & TUNING
Before stepping the mast, check all ropes and halyards for general wear and tear and replace if any halyards are damaged. Check the wire stays for any fried strands or any nasty kinks. Pull the main, jib and spinnaker halyards down and tie off to pole ring. It is always good to have a windex at the top of the mast and now is a good time to attach it before the mast gets lifted.
INITIAL RIG SETUP
Most of the time, it is just the forestay which needs to be wound on as most boats will not need to adjust the side stays and lowers to drop the mast.
To measure mast rake, tie the end of the tape measure onto the main halyard. Pull it right to the top of the mast. Measure to the middle where the deck meets the transom – a good starting mast rake is 9.580m. From here you can see how the boat feels and performs and adjust the mast rake accordingly.
EXAMPLE:
If the rudder feels heavy and the boat is trying to round up into the wind (excessive weather helm), you may need to move the mast forward. On the other hand, if the rudder feels very light or the boat is trying to bear off (excessive lee helm), you might need to rake the mast back. In the Elliott 5.9, it is important to have a small amount of weather helm as this helps with your height and pointing in the light winds – just be careful it is not too much in the windy conditions.
BASE MAST TUNE SETUP
To set the base rig tune, use a PT-1 Loos Tension Gauge to check tensions on the side stays and lowers.
Firstly, adjust the side stays to 40 on the tension gauge and then set the lower shrouds to 25 (be sure to go back and double check the uppers and then the intermediates in the process because they will both change when you tension or de-tension one of them).
TUNING CHART (New Loos Gauge Pro Model PT-2):
Step
Windspeed (kts)
Uppers (PT-2)
Forestay (PT-2
Forestay turns from Base
Lowers (PT-2)
Lowers – turns from base
-1
0-5
38
38
-6
25
+6
0
5-10
40
40
0
25
0
1
10-15
38
38
3
22
-3
2
15-20
36
36
6
20
-6
3
20+
34
34
9
20
-9
SAIL TRIM
MAINSAIL AND TRAVELLER
In light airs keep the traveler about 200-300mm above the centre line and make sure the mainsheet is eased enough so the telltale on the top batten is flying nearly all the time. This will ensure your boom will stay on the centre line and give the boat good height. Once your crew is sitting on the side, the traveler should be in the middle and you will be able to sheet the mainsheet a bit harder whilst keeping an eye on the top telltale – it should now be flying 50% of the time.
In the windy conditions when the crew is hiking hard, the aim is to keep the boat as flat as possible – remember, flat is fast! Use the traveler when the boat heels over and in the big gusts you might have to ease the mainsheet. If the mainsail starts to back, put the traveler higher, and ease the mainsheet. Twist is your friend – when in doubt, ease it out to get the boat going through the water. Keeping the mainsail trim soft and very twisted to keep the boat sailing flat is often fast.
It is important to experiment with different heel angles and mainsheet tension in different conditions to see what works best for your boat and crew.
OUTHAUL
In light to medium winds, the Elliott 5.9 likes to have some power in the lower section of the mainsail, so the outhaul should be eased 20-30mm in from the black band. In heavy airs, aim to flatten the sail by pulling the outhaul out to the black band, especially in flat water. In rougher seas, it can be fast to keep the outhaul a bit looser to make the main fuller in the lower section.
CUNNINGHAM
The cunningham on the Elliott 5.9 acts as a depowering tool and is thus not used until approximately 12 knots. In this wind, it is used until wrinkles in luff are just removed. Above 15 knots, the cunningham can come on 75%.
VANG
The vang is used upwind as soon as the boat is overpowered. At the early stages of being overpowered, simply snug the vang to help induce mast bend and flatten the mainsail. As the boat becomes increasingly overpowered, pull the vang harder to flatten the mainsail.
When sailing downwind, adjust the vang so the top batten telltale is always flowing; twist is generally good.
When sailing upwind in light airs (0-8 knots), keep the vang loose. In 8-15 knots, pull on to remove all slack (just snug). Above 15 knots, pull on firmly.
REMEMBER to let half of the vang off when you get to the top mark in windy conditions or the boat will struggle to bear away.
JIB TRIM
The jib on the Elliott 5.9 is a high aspect sail (tall and skinny), making it very sensitive to small adjustments in jib sheet tension. Tightening or easing the jib sheet by just 15mm can have a big effect on boat speed and pointing.
Generally, in light to medium breeze, set the jib lead so that when you are luffing slowly into the wind the luff breaks evenly. As the wind builds, move the jib lead up or jib car aft to flatten the foot and twist the head of the jib to depower.
In the windy conditions, if the mainsail is backwinding and flapping, this could be because:
1. The jib sheet is too tight or the jib lead is too low, meaning the jib leech is too closed and thus back winding the main.
2. The main traveler is too low, closing the slot between the main and the jib. We have placed a telltale on the upper leech (near the spreaders) of the jib to help you judge how tight or loose the sheet should be. The general rule of thumb is to trim the sheet hard enough so that the upper leech telltale is just on the edge of stalling, but never stalled. Just as with the mainsail, it will be easy to stall the telltale in light air and very hard to stall in heavy air even with the sheet trimmed.
SPINNAKER TRIM
Always sail your North spinnaker with a 10cm – 20cm curl in the luff making careful concentration necessary! Use short, smooth, in and out motions on the sheet to keep the spinnaker trimmed correctly, trying to not jerk the sheet if the spinnaker begins to collapse.
Set the pole so it is nearly perpendicular to the wind. A telltale on the topping lift a foot up from the pole works great as a reference. Keep the clews even at all times through adjustments to your topping lift (pole). If the top of the spinnaker breaks high first, lower the pole. If the bottom luff breaks first raise the pole slightly. In light, puffy conditions, the pole height will be adjusted nearly as much as the sheet and guy.
IN CONCLUSION
We hope all of the tips we mentioned are helpful to your Elliott 5.9 sailing program. Please get in touch with the North Sails Elliott 5.9 Class Expert, Derek Scott, for further details and help.
KEY POINTS
Always sail the boat as flat as possible, except in very light air where a slight louward heel is advantageous
Do not be afraid to change settings if you are slow
Set up a tuning chart and use it
Have open and positive communication on board
Sail fast and have fun!
READ MORE
READ MORE
guides
MULTIHULL DOWNWIND SAIL DESIGNS, HANDLING OPTIONS AND TECHNIQUES
CRUISING YOUR MULTIHULL
More On Downwind Sail Designs, Handling Options and Techniques
Multihull cruising has become a lifestyle by even the most competitive racers. These boats are great platforms for the outdoor living we enjoy in our moderate climate as well as being easy to cruise short-handed by couples. North Sails cruising experts share how techniques vary on multihull cruisers, and provides his tips on how you can make the most of your next sail.
The design for these boats has evolved to maximize cabin space with taller, more powerful rigs and self-tacking Jibs. These sails and systems have significant sail handling benefits with tacking becoming a straightforward process; however, by not overlapping the mast like a traditional genoa, these sail plans often lack area leading to sluggish performance in lighter conditions. At North Sails, our designers have been working hard to offer solutions for all styles of multihulls that improve performance but still allow ease of handling.
Understanding Your Usage Chart
Plots change depending on the performance of the boat. Faster boats may not see the broader angles that the G2 offers. A stable flying G Zero can be designed with enough overlap to gauge into the G One zone.
Usage chart for a Lagoon 52
How do you explain the difference?
Determine the mid-girth of the sail. Using your usage plot, you’ll see the ranges of each sail, determined by apparent wind angles and wind speed.
The Code 55 Screecher
For a boat that does not have an overlapping Genoa, the Code 55 screecher is the first sail to consider.
This sail is set from the bowsprit and is constructed in laminate materials to mimic a traditional Genoa in light winds and can sail within 15 degrees of the Self-tacking jib TW angles for a considerable gain in light air performance.
The Code 55 is engineered to cope with the considerable loads generated when being used close to the wind even in light conditions with the added benefit that they can then be used at wider angles as the wind increases, increasing the range of use considerably. Recommend options are a high-quality torque cable with a bottom-up furling system. A clew velcro to stop accidental unfurling gives an extra level of security and safety. If your preference is to store the sail hoisted, a lightweight UV can be added.
📸 Amory Ross
The G-Zero
The G Zero is the most popular cruising multihull downwind sail offering great versatility over a wider range of wind angles.
The G zero is a best-of-both-worlds sail for ease of handling and successful downwind miles. G Zeros feature a deeper shape and wider girth compared to a screecher. they are generally designed to sheet outside the main shrouds and excel at the beam close to reaching. G Zeros are compatible with both Top-Down internal and bottom-up furling systems or can be used with a snuffer. These sails can have lightweight UV strips, but because of their lightweight, we recommend lowering the sail when not in use and have no UV for the optimum performance. Cruisers sometimes use these sails without the Mainsail hoisted, and utilizing the width of the multihull and tweaking the sheet forward and outboard can achieve surprisingly low sailing angles.
📸 Amory Ross
The G2 Asymmetrical Runner
For Cruisers wanting the ultimate in downwind efficiency but less focused on ease of use, the A2 Asymmetrical Spinnaker is the answer!
These sails are designed full in-depth and girth to achieve the best-running speed and VMG to cover the most miles. Due to being specifically optimized to deeper sailing angles, we would suggest a seamless inventory should have an additional reaching option to fill the gap between the headsails and this sail. For short-handed ease of use, we recommend either a spinnaker Snuffer or a Top-Down Furling system.
The use of a tweaker or handy billy system to alter the sheeting can significantly increase the range of sailing angles and wind ranges. If the upper luff is folding first as you ease the sail and run deeper, you should deflect the sheet forward and outboard to stabilize the sail, so the luff breaks evenly, particularly important when using under autopilot for minimal trim adjustments. It is common for cruisers to use these sails with no Mainsail hoisted but always remember to use the Main topping lift and mainsheet combination as an additional backstay for added security and support to the mast.
The Tweaker or Handy Billy for Cruisers
These are reasonably lightweight purchase systems, typically ranging from 2:1- 6:1. They have a range of uses aboard any boat, but for downwind sails with a fixed sheeting position, they give the ability to change the twist and set of the sail easily while still sheeting the main load through the standard sheeting block and winch location.
The system works best with a snatch block that allows the lowest possible friction for the deflecting sheet; however this can be as simple as a friction ring, snap shackle, or carabiner.
In the simplest of forms and even without a purchase system, once you get to know your deep sailing mode requirements, this tweaking can be achieved by a fixed webbing or rope length forward of the stay and can be set up before the sail is even hoisted. A purchase system that can be adjusted under load, however, will give the best performance and stability as well as doing double duty to act as a boom preventer against an accidental gybe and also keep the Mainsail stable if you don’t have a vang.
📸 Amory Ross
Sailing angles and techniques for best handling outcomes
Whether it be a spinnaker Snuffer or either a top-down or bottom-up furling system, there are things you can do to make the process of sail setting or retrieval as successful as possible.
The first thing to establish is the best angle to have the boat heading in relation to the true wind. This will be a sliding scale through the wind range with a closer angle required in lighter winds and a deeper angle in heavier winds.
If you are too close to the wind with any of the above options, the sail will deploy too rapidly and not at a controlled pace, causing higher sheet load and flogging of the sail, and making sheeting -in much more drawn out and labor-intensive.
📸 Amory Ross
The same goes for the furling away or snuffing of a sail; the heading must be far enough away from the wind to relieve the pressure in the sail. With a Snuffer, there is plenty of sheet that is perfect to have pre-set on the winch or in a tailor or cleat for the deployment of the sail. Once you have decided upon the best angle of sail, you should experiment with the sheet setting, and you will come to a conclusion that in some wind ranges to see the sail fill with air and set close to the required sheet setting with only a small trim on required. If you are unfurling a sail by being deep enough, you will be able to release the furling line and tail in the vast majority of the sheet without significant load. From this point, you can then change the course and trim the sail as required without flogging. At the same time, sailing an angle that is too deep could make the sail unstable and risk either accidental gybe or wrapping of the sail fabric around the forestay.
Furling line paths that are simple and run cleanly are a must for the best outcomes
Consider furling or snuffing for gybing, especially in higher winds, and decide to take sails down before the bad weather hits, not when you are already in the grips of a storm!
My suggestions for A2 setting and retrieval angles are as follows if you log these from your own experiences on your boat and always go back to them, your downwind sailing will not only be more enjoyable, but you will prolong the life of your sails and rigging.
0-5 knots- Heading at 145 degrees of true wind
5-12 knots- Heading at 155 degrees of true wind
12-18 knots- Heading at 165 degrees of true wind
Above 18 knots of wind most Multihulls will not require an A2 to achieve great downwind VMG.
Other suggested valuable information to log and keep on hand to refer to are;
When to add the reefs in the Mainsail
When and how much tweaker to use in various wind ranges and angles of sail
When to partly furl headsails and so on
Through consultation with your North Sails Multihull Expert, we can provide you with a range of downwind sail options to match your needs.
📸 Amory Ross
READ MORE
READ MORE

guides
LET'S TALK J/111 | OPTIMIZE YOUR HANDICAP
LET’S TALK J/111
Optimize Your J/111 Handicap
North Sails J/111 experts Seadon Wijsen, Jeremy Smart, Allan Terhune, and Jack Orr combine their knowledge to bring you a webinar on how to optimize your J/111 racing experience. With multiple podium finishes under their belts, they have acquired a powerful collection of tips and tricks to maximize your boat speed and increase your performance in this competitive one design fleet.
Topics covered include:
1:39 Kite Hoist
6:14 Downwind – Hoist and Set
12:43 Heavy Air Bottom Mark Rounding
15:30 Rig Tuning
20:17 Handicap Sailing with the J-111
23:15 Sail Inventory
28:19 Outboard Leads
34:13 HELIX 0A expected wind targets
35:09 Code sails choices
48:40 What Is HELIX Load Sharing Technology?
52:15 Bobstays & Code Zeros
55:36 Tweakers & Code Zeros
57:41 Spinnaker Staysail
1:02:54 Jibtops
Learn more about North Sails fast J/111 designs.
READ MORE
READ MORE

guides
LET'S TALK J/70 | DOWNWIND BOAT HANDLING
LET’S TALK J/70
Downwind Boat Handling
With visual support from images and video, North experts Allan Terhune, Eric Doyle and Alex Curtiss analyze downwind techniques in different wind strengths, including displacement modes and planing in heavier air. Pick up new techniques to improve your J/70 racing experience!
Topics covered include:
1:26 – Setting the J/70 spinnaker
12:50 Soak VMG Jibing
21:00 Jibe Kite to a Wing
32:31 Jibing boom to wing on wing
41:40 Lazy Planing Jibe
47:25 Planing Jibe
56:23 Blow Through Jibe
1:01:28 Take Down
Learn more about North Sails fast J/70 designs.
READ MORE
READ MORE

guides
SELECTING THE RIGHT DOWNWIND SAILS FOR YOUR MULTIHULL
Cruising multihulls in particular benefit from specialized sails that are versatile and easy to use. Understanding downwind sail types and selecting the right sail will help you achieve top performance from your boat and enjoy your time on the water.
READ MORE
READ MORE
guides
THE SCIENCE BEHIND YOUR SAIL TRIM
THE SCIENCE BEHIND YOUR SAIL TRIM
Induced Drag and Mainsail Leeches
📸 Jeff Brown
By Tom Whidden
One of the goals for our book, The Art and Science of Sails, is to connect the theoretical with the practical. An understanding of the physics of aerodynamics will help us better trim and set our sails. To illustrate this, I’ve chosen a seemingly obscure topic – induced drag and how to minimize it – by splicing together a few excerpts from my new book.
As a tactician, I need to ensure the boat is fast. Otherwise, we’re not going to win, regardless of how well I do my job. And, since the main was always front and center for me, I was constantly studying it, ensuring my mainsail trimmer was doing his/her job. I hope the following will help you better understand the connection between the science and sail trim—and there’s plenty more detail in the book.
********
By far the largest and most destructive drag for sailing performance is induced drag. The root cause of induced drag is the changing of the direction of the air flow by the foil. With airplane wings that change is downward; with a sail it’s to weather. The change in flow direction is the beginning of the process of lift.
So, induced drag is a direct result of the creation of lift. In more technical terms, induced drag is the varying coefficient of lift (Cl) across the span. In other words, the differences in lift across or over the total area of a sail or wing cause induced drag.
📸 Bronny Daniels / Joysailing.com
How does induced drag relate to real life on a sailboat? Assuming the boat is well trimmed and properly set up, about 80 percent of the total sail area will experience relatively constant Cl. However, in the aftermost 20 percent of the sail, the velocity of the flow rapidly decreases; and with it, the lift. The rapidly changing Cl results in significant induced drag, some on the leech and some at the head and foot. This induced drag forms the vast majority of the total drag.
There are two variations of induced drag:
off the trailing edge (leech)
off the tips (head and foot)
📸 Eagle 53 in St Tropez
Induced Drag off the Leech
These are vortices, spinning counterclockwise-off that trailing edge. A deeper head section, compared to the bottom, minimizes the flow of air trying to find the shortest path from the high-pressure windward side to the low-pressure leeward side.
Leech twist is very significant for the optimization of upwind speed. It’s been said that the only reason to have a front of a main is to be able to attach the leech area to the mast! The leech of the main not only ensures that the air bent around the front of the main is allowed to exit with the least interference (induced drag), but also to help steer the boat.
So, how should the trimmer adjust the leech to best attain the above two goals while sailing upwind? With a well-designed and relatively new main, the answer is to sheet the main until the top telltale (preferably hanging off the back of the top batten) just begins to stall. If it’s constantly stalled (hidden to leeward), it’s a sign drag is too high. The lift-to-drag (L/D) ratio is lowered. If the telltale is flying straight back or there is an excess of backwind, it’s a sign that the sail could be sheeted tighter to allow the boat to sail closer to the wind. In this case, the L/D ratio is reduced for the opposite reason.
This screen shot, from a RANS-code CFD analysis, illustrates the tip vortices emanating primarily from the top leech of the main on a fractional-rigged boat. The orientation is looking back at the top of a rig and sails from just to leeward and forward of the onset flow.
Induced Drag off the Head and Foot
The second variation in induced drag is tip vortex. On a plane, these flow off the ends of the wings; on a sail, they flow off the head and foot. There is a pressure difference, or delta, from the lee side of the sail to the windward side. Nature abhors pressure deltas. It’s why we have wind. And, it’s why the flow on the high-pressure side of a sail wants to escape over the top or end to help equalize this pressure.
Almost all modern race boats employ a fractional rig. At the hounds, the main’s chord on the fractional rig is still quite long and therefore helps shed the headsail’s tip vortices. On a masthead rig, the tip vortices of the headsail are matched with the tip vortices of the mainsail. Not good!
*****
We cover this topic (and many others) in much more detail in The Art & Science of Sails Revised Edition, written by myself and Michael Levitt. If you enjoyed this short overview you’ll enjoy the book even more.
READ MORE
READ MORE

guides
LET'S TALK MELGES 24 | DOWNWIND TECHNIQUE
LET’S TALK MELGES 24
Upwind Trim with Special Guest Federico Michetti
North Sails Melges 24 experts, Olympians and World Champion sailors Maurice ‘Prof’ O’Connell and Giulio Desiderato joined by five-time World Champion, Federico Michetti in an interactive webinar focused on maximizing your downwind speed.
5:45 Light Wind (3-6 knots)
9:55 Jibe Technique: Late Main Jibe
14:36 Light to Medium Wind (7-9 knots)
18:56 Medium Wind ( 9-14 knots)
27:55 Jibing Techniques – Normal or “Mexican”?
41:26 – Strong Wind (15-20 knots)
48:21 Super Strong Wind (25+ knots)
Learn about the North Sails fast Melges 24 sails.
READ MORE
READ MORE
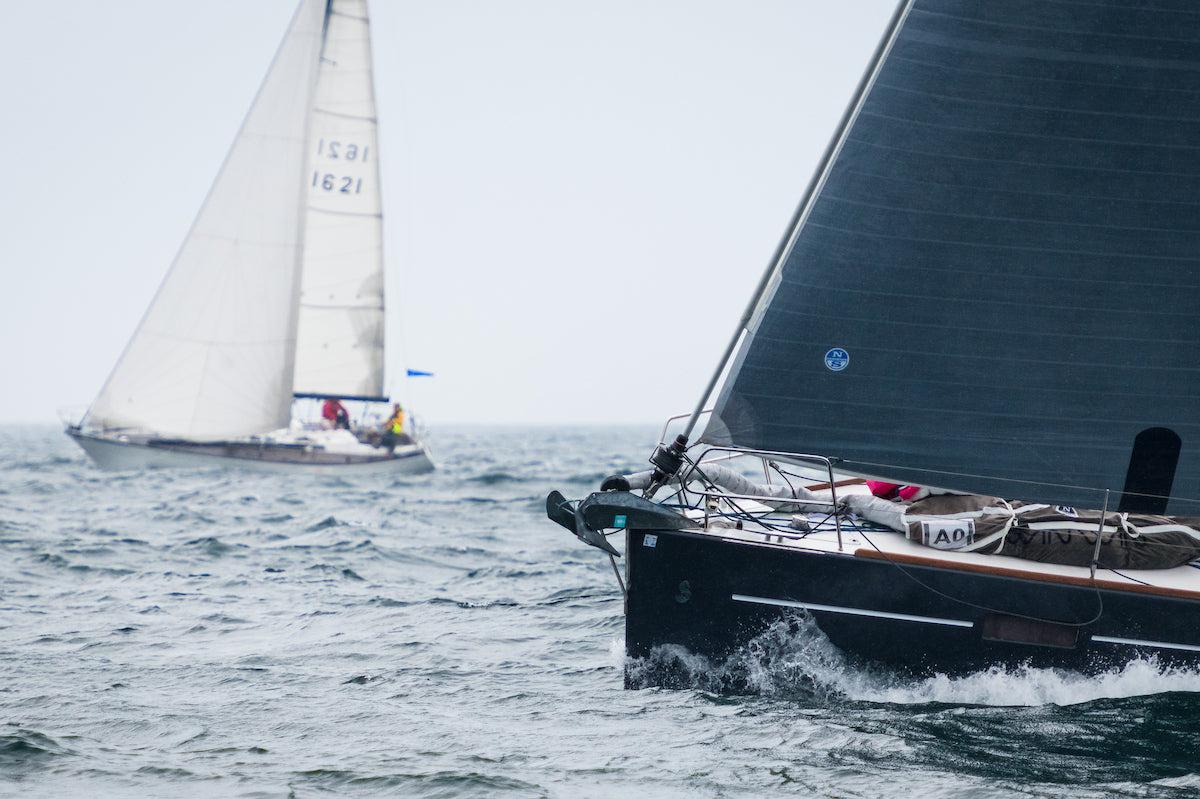
guides
PHRF RACING SPRING REFRESHER
PHRF RACING SPRING REFRESHER
Weeknight Racing Tune-Up Tips From Our Experts
📸 Cate Brown
Sail experts Tom Castiglione and Jack Orr based in Milford, Connecticut hosted a PHRF Spring Refresher webinar that will help any weeknight racer/ weekend warrior up-their game for the next series. Here are some take aways from the webinar that apply to any club racer.
How To Achieve Optimum Rig Tune.
You should try to have the same process each time when getting your rig set up for given conditions. Here’s how you can make sure you do it right, every time.
Record all of your settings: Your base, light air, medium air, heavy air settings
Be familiar with your tuning guide, and be comfortable adding turns/ taking turns off at the dock and on the water as conditions change
While at the dock, make the mast straight by adjusting the diagonals, cap shrouds. Keep in mind you are simply trying to get your baseline.
Using a Loos gauge will help you stay on track with incremental adjustments. Attach your Loos Gauge about 2 meters from the deck. Eye-level is always a good place to start
Duplicate your settings as you go, and always measure from the same place every time
If you have a great day on the water, make a note of it. It’s good to go back to base at the end of each day, but make sure you know where you were in those conditions you did well in so you can replicate settings again the next day
Tuning devices vary for different sized boats. Using electrical tape to mark your spreaders, and a marker so you can make notes on the deck will help your trimmers get to the right trim setting without question.
How does rig set up affect sail shape?
Softer rig- fuller sail
Tighter rig- flatter sail
Try to balance both sails
Adding an adjustable backstay to make your sails pull tighter will help you fine-tune on the water.
Read more on how to achieve balance in your sailplan.
Changing gears
There are Four modes of sailing. Modes are important to understand so you can power up when you have the opportunity, or maintain your lane when you absolutely have to.
Foot mode: designed to generate speed. 4-5” off. Halyard is soft, backstay is soft, trailer and sheet is CL or slightly below CL
Normal mode: not fighting for a lane, sailing your best VMG, sailing on target. 1-2” off
Point mode: you need height, shy of layline, boat to leeward you are trying to avoid. 0” off the spreaders= tight. Halyard is hard, backstay (keep pumping hydraulic backstay), the traveler is CL or slightly above, sheet top batten on CL or slightly below the boom.
De-power mode: backstay on, halyard on, vang on hard to keep boom level. If you see wrinkles coming from the mast going to the clew, you’ve inverted your mast, and you have too much backstay.
Quick Tip: Use your spreaders as a reference point. Marking your spreaders before you leave the dock helps you achieve each mode, quick.
📸 Paul Wyeth
Weight placement
Assign a crew member to help manage this for each maneuver
Keep your crew close together on the rail
In light air, send your crew down below and forward. If you remain on deck, get low!
Make sure your crew is on the rail during mark roundings. It’s essential to keep your rudder in the water! Too much heel reduces your keel depth, which causes you to go sideways. It can also force you to round up in a puff.
Ease the sails at the mark, to help you steer the boat down. If you use weight and your sails, you shouldn’t require much helm to steer the boat.
Wait until the boat is settled before you begin to clean up unless you are preparing for a quick maneuver.
The crew needs to move forward in lighter air and on the downwind. If breezy, you run the crew back downwind, but make sure you are not too bow or stern heavy. Equal body weight placement on-deck can help your boat get through the wave state better, and help you keep the boat flat and not over flatten when you are coming down a wave, or when a puff hits.
If you are comfortable, you are doing it wrong!
📸 Cate Brown / BIRW 2019
Communication
There should be a constant flow of communication happening between the trimmers and the helm. Constant dialogue keeps the sails trimmed together, and at the same time. If you are looking for more power, the main and jib trimmer needs to know so they can ease/ trim on accordingly. If one is eased and the other is fully trimmed, that is not fast. Learn more about crew communication and proper chain of command onboard.
What to do at the dock:
Clean out your boat. If you don’t need it to race, you don’t need it on the boat!
Check your hull. Any knicks, growth, wear and tear on the hull is speed lost. Even a little makes a difference!
Make sure your instruments are running properly. Check your instruments to make sure they are correctly calibrated and make sure everyone on board knows how to use them. The last thing you want is for someone to hit the ‘off’ button when you are trying to mark 5:00 minutes or ping the wrong end of the line.
Tune your rig. Without a properly tuned rig, you won’t be able to control your mast’s behavior over the full range of conditions. Fortunately, rig tuning is a straightforward step by step process for both masthead and fractional rigs. Learn more on how to effectively tune your rig.
📸 Richard Mark Dobson, Adina
Jib Top & Genoa Staysails
A Genoa Staysail can be set inside a Jib
A Jib Top can also be designed to set on the bowsprit which adds performance
Bowsprit modifications to simplify your sailing (for inshore and offshore)
Great for angles when you are not DDW often.
If you are sailing a W/L in 15 knots, you may like the symmetric option better.
In general, shifting to asym can increase the performance of the boat, adding speed, but it all depends on what type of courses you are sailing that will dictate which choice is best for you.
It’s essential to practice before it’s time to race. When you get to your racing area, what can you add to your pre-race checklist?
Spend a day getting the bugs out
Time the starting line
Spinnaker sets and douses
Tacking and jibing
Using your crew weight to go fast
Boats that practice win the races!
Missed our PHRF Spring Refresher webinar? Catch up and learn more from our experts on how you can enhance your performance on your next weeknight race / weekend regatta.
Watch PHRF Webinar
Have questions about optimizing your boat for weeknight racing? Contact PHRF experts Jack Orr or Tom Castiglione.
Email Jack Email Tom
Want to know how to choose the best sails for your next club race?
Learn More
READ MORE
READ MORE

guides
LET'S TALK J/111 | UPWIND & DOWNWIND PERFORMANCE
LET’S TALK J/111
Upwind-Downwind Performance Tips
J/111 webinar featuring North Sails Class experts Seadon Wijsen, Jack Orr, Jeremy Smart and Allan Terhune.
Topics covered include:
2:35 Upwind Trim
39:12 Downwind Light Air & Superlight
44:30 Downwind Soak Mode 10-17 knots
51:34 Downwind Wing on Wing 13-15 knots
56:51 Downwind Moderate Plane/Lazy Plane 16-20 Knots
1:09:30 Downwind Heavy Air – 20+ knots
1:11:53 Downwind – 25+ knots
1:16:00 Broach and Recovery
Learn more about North Sails fast J/111 designs.
READ MORE
READ MORE

guides
LET'S TALK J/70 | WHAT TO EXPECT AT THE 2021 WORLDS
LET’S TALK J/70
What to Expect at the 2021 Worlds in Marina Del Rey
North Sails Experts and Southern California locals Eric Doyle and Alex Curtiss talk about the conditions and what to expect in Marina Del Rey, home of the 2021 J/70 World Championship.
Topics covered include:
9:35 – Typical Southern California seabreeze
12:51 – What’s the California Eddy?
16:35 – Current
21:48 – Keys for Success – Setup & Tactics
29:45 – Recommended sail line up
43:22 – Lead up regattas
Learn more about North Sails fast J/70 designs.
READ MORE
READ MORE

guides
LET'S TALK STARS | RIG TUNING
LET’S TALK STARS
Rig Tuning with Eric Doyle & Markus Koy
Star Class champions Eric Doyle and Markus Koy present a in-detail presentation on Star Boat Rig Tuning. This great presentation is moderated by Maurice “Prof” O’Connell.
Topics include:
6:20 – How to set up your mast
34:20 – Mast position in the boat
1:01:01 – Tuning on the water
Learn about North Sails fast Star designs.
READ MORE
READ MORE

guides
LET'S TALK J/24 | UPWIND & HEAVY AIR TECHNIQUE
LET’S TALK J/24
Upwind & Heavy Air Techniques
North Sails J/24 experts Will Welles, Andrea Casale and Mike Ingham talk about J/24 heavy air techniques.
Webinar topics include:
5:03 – J/24 Blade Jib vs Genoa decision
11:45 – Balancing the J/24
26:45 – Trimming the J/24 Genoa
54:00 – Trimming the J/24 Blade Jib
1:05:56 – Sailing the J/24 in 25+ knots
Complete information on J/24 sails
READ MORE
READ MORE

guides
LET'S TALK MELGES 24 | UPWIND TRIM
LET’S TALK MELGES 24
Upwind Trim with Special Guest Mike Buckley
Melges 24 World Champion Maurice “Prof” O’Connell (North Sails Ireland) hosts Melges 24 experts John Bowden (North Sails USA), Giulio Desiderato (North Sail Italy) and special guest Mike Buckley (“Monsoon” tactician and Stars & Stripes CEO) to talk how about how to make the Melges 24 go FAST upwind across the wind range.
3:30 – Upwind roles on the Melges 24
9:15 – Light air upwind trim on the Melges 24
23:12 – Medium air upwind trim on the Melges 24
44:45 – Heavy air upwind trim on the Melges 24
More on Melges 24.
READ MORE
READ MORE

guides
LET'S TALK SAIL TRIM AND MATERIALS
LET’S TALK SAIL TRIM AND MATERIALS
Join North Sails experts Brad White and Stan Schreyer for a discussion on sail trim and materials.
Topics include: mainsail shape controls, headsail trim controls, downwind sail trim and sail materials.
READ MORE
READ MORE

guides
LET'S TALK FURLING
LET’S TALK FURLING
Furl Everything with Jack Orr and Austin Powers
Furling and stowing systems used on both Racing and Cruising boats make sailing easier and safer. North Sails experts Keith Church and Austin Powers discuss sails, systems and the best applications for you.
READ MORE
READ MORE

guides
LET'S TALK OPTIMIST [GERMAN]
LET’S TALK OPTIMIST
All Things Optimist
North Sails experts Kicker Schäfer and Miklas Meyer talk all things Optimist.
READ MORE
READ MORE

guides
LET'S TALK OFFSHORE SPRIT BOATS
LET’S TALK OFFSHORE SPRIT BOATS
Boat Setup and Tactics
With the J/109 North American Championships coming up August 13-16, 2020 and the growth in the One Design sprit boats in Chicago, Keith Church and Jack Orr share some insights in boat setup and tactics on the racecourse.
READ MORE
READ MORE
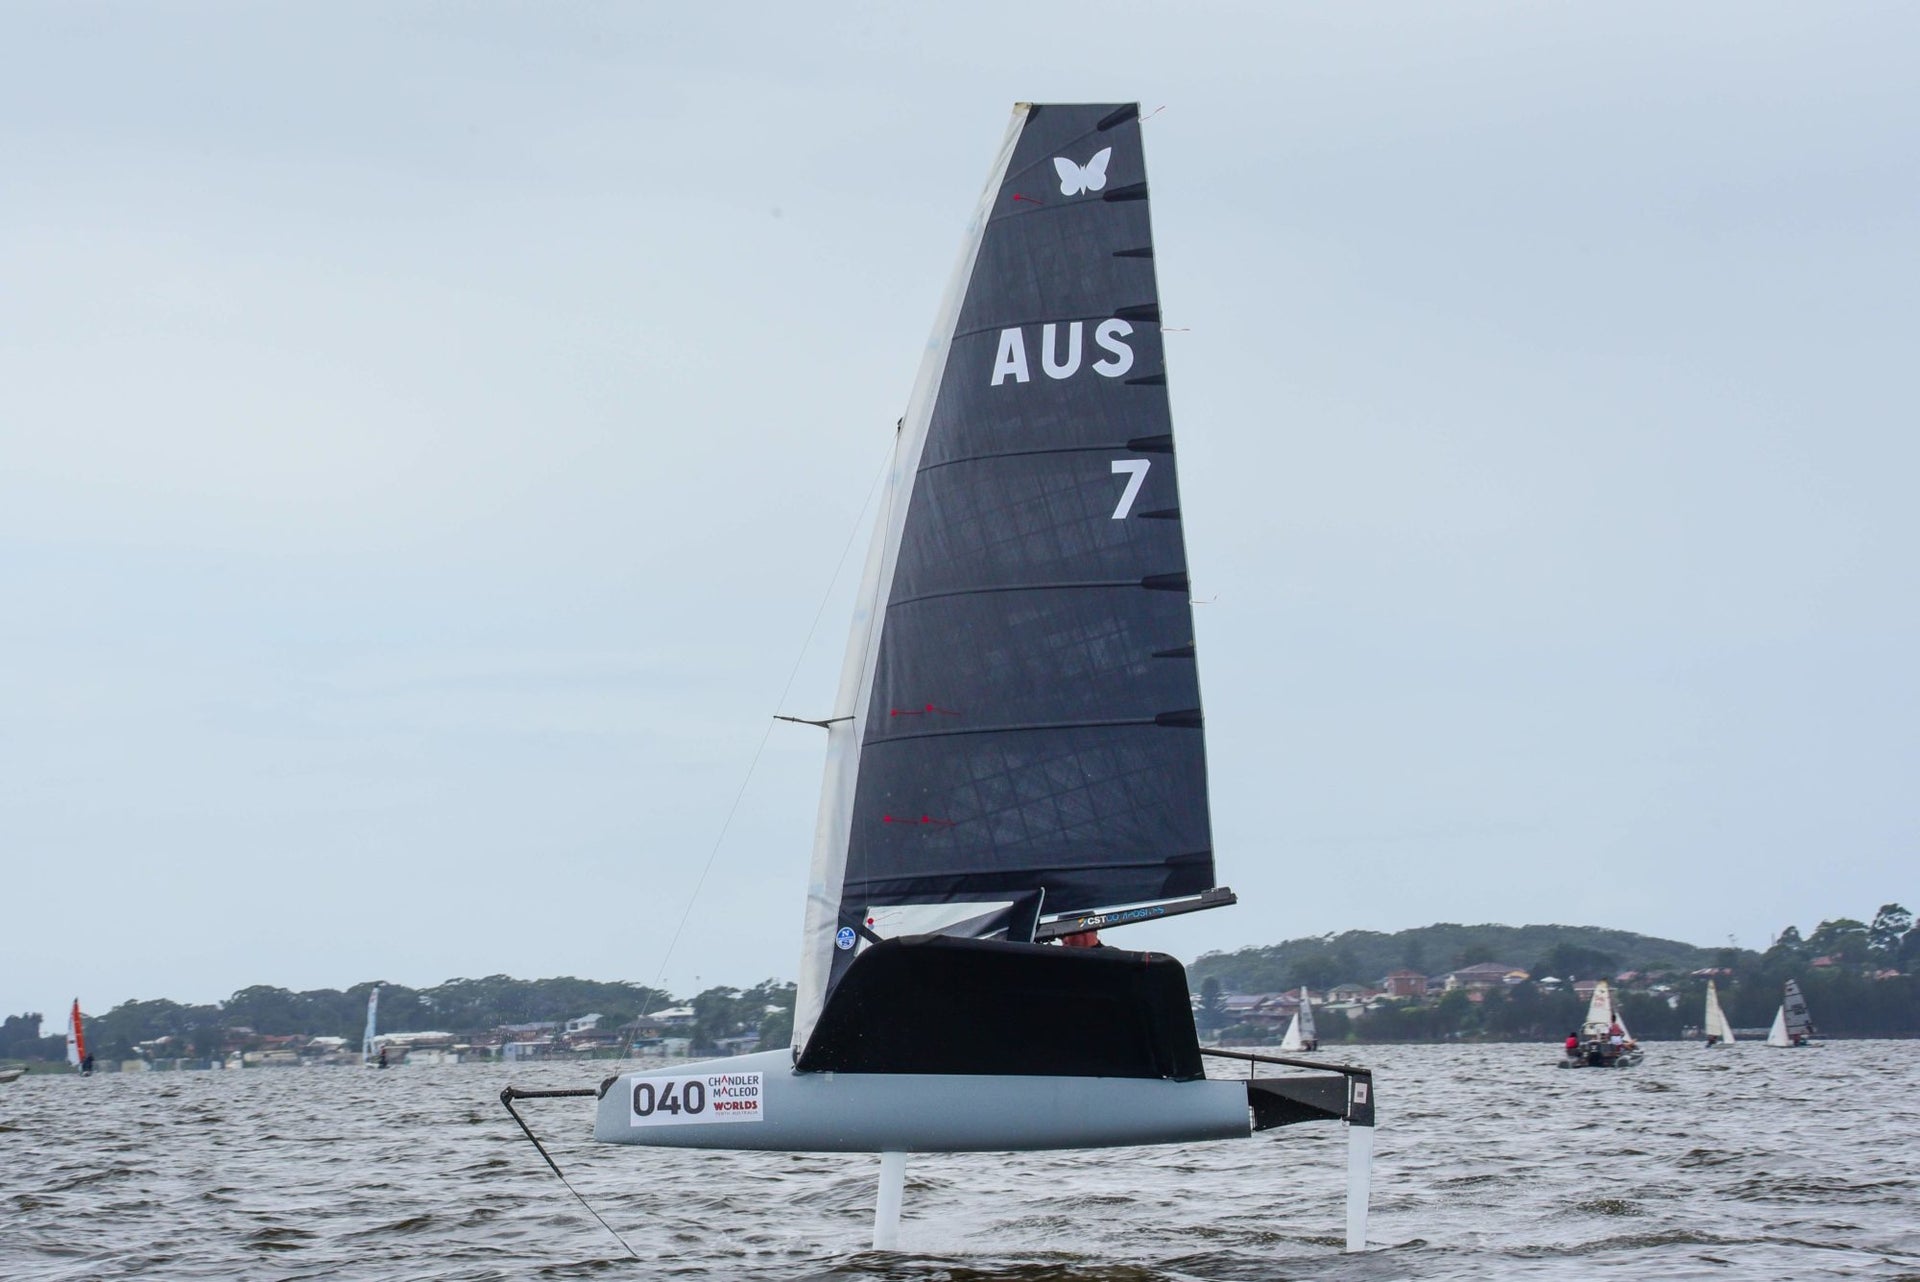
guides
CUNNINGHAM INSTRUCTIONS FOR THE NORTH 9DSX MOTH MAINSAIL
THE NORTH SAILS DECKSWEEPER CUNNINGHAM SYSTEM
Alex Hayman and Moth Class Leader Rob Greenhalgh Provide Rigging Instructions for the New 9DSX Decksweeper
📸 Susanne Souter
The Cunningham system for the new North 9DSX Decksweeper is slightly more complicated than past versions. It is necessary to distribute the load between the main part of the conventional sail (the 3Di blank) and the Decksweeper portion to obtain an ideal sail share. The load-ratio is approximately 65% in the 3Di blank and 35% in the Decksweeper. You achieved this by using a single line system configured as per the description below.
It is not necessary to use all four hooks for the Decksweeper portion, and it’s acceptable to use one hook each side attached to the outside of the sail. Two hooks on each side of the sail add an 8:1 purchase into the Decksweeper, where single hooks each side add 4:1.
The amount of purchase you choose to use on the center purchase running to the main tack of the sail (the 3Di Blank) is your choice; 8:1 or 12:1 centrally and then 2:1 or 4:1 on each Decksweeper panel is recommended.
For reference, Tom Slingsby used: 8:1 in the middle and 2:1 on each Decksweeper panel at the 2019 Moth World Championship in Perth Australia, whereas Robert Greenhalgh used 12:1 in the middle and 4:1 on each Decksweeper panel.
In the system shown below, we use a standard Exocet cunningham system but have added in four Allen a2020shk, two Harken 2698, and one Harken 2158.
The system starts with a 3:1 starting at the lead ring, going down to the double cheek block, then up around the lead ring, and finishing on the double block. You then need to tie two blocks onto the eye straps on the bulkhead and two around the king post loop. Once you have done this, you can pass the rope through all of the blocks, as shown in the photo, using the hook blocks, and then the system is complete.
Once set, the lead ring attaches to the main point at the base of the sail, and then the hooks attach to the webbing loops on the outside and inside of the Decksweeper. Picture 3 shows the system inside the Decksweeper once rigged.
READ MORE
READ MORE
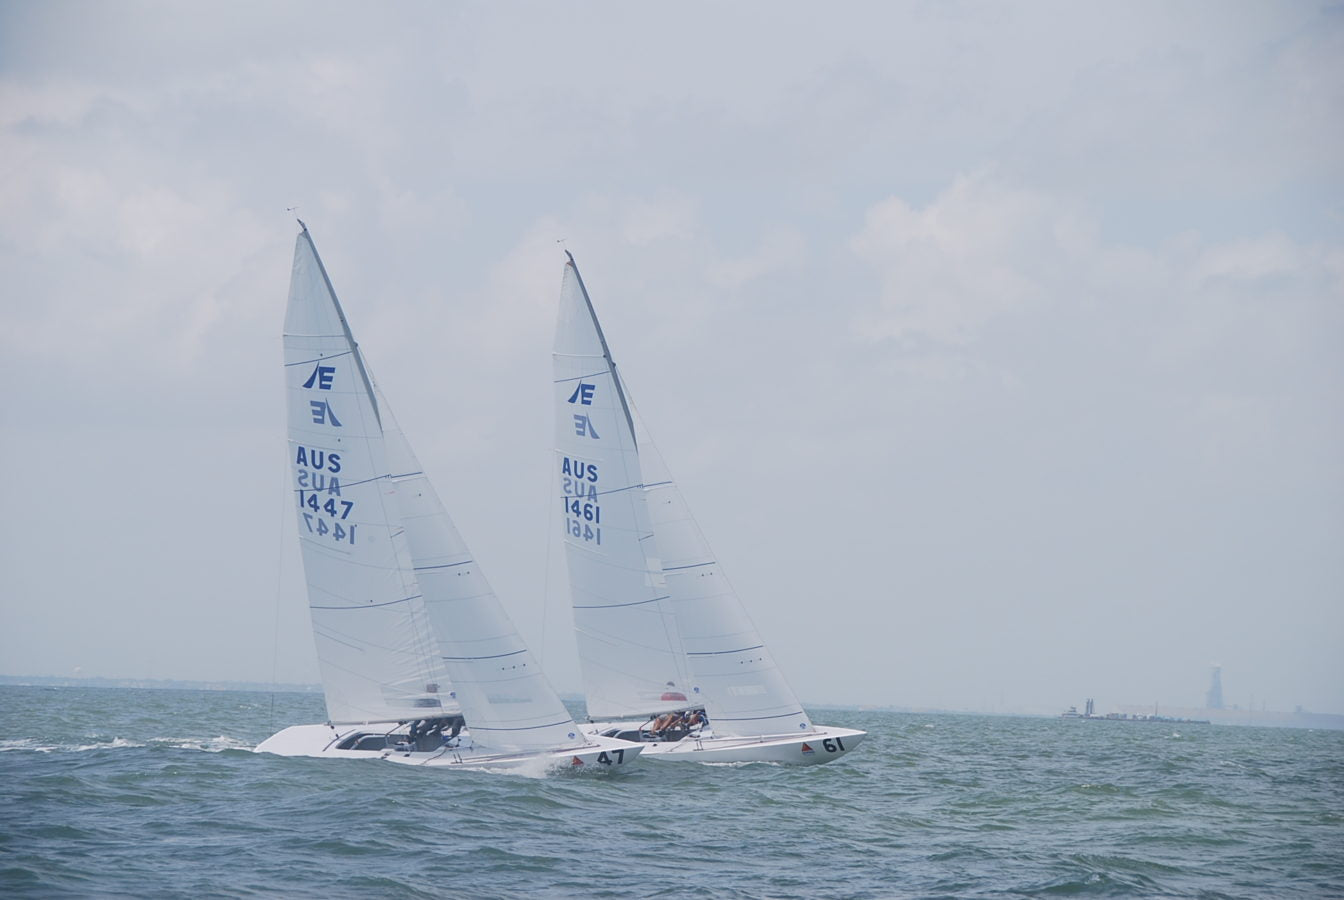
guides
ETCHELLS AUSTRALIAN SETUP Q&A
ETCHELLS AUSTRALIAN SETUP Q&A
Your Webinar Questions Answered by the North Experts
📸 Corpus Christi Yacht Club
Etchells sailors from all over the planet gathered online to watch North experts Noel “Nitro” Drennan, Eric Doyle, and Alex Curtiss talk about the new intriguing Australian setup for the Etchells. The setup that powered Iain Murray dominate the 2019 Worlds in Corpus Christi and Graeme Taylor to win the Australian Nationals. We received a massive amount of questions during the webinar, and here they are compiled for you:
Does the North MAL jib have a different batten strength, and at what range is the change?
Nitro: Yes, the MAL jib is supplied with a selection of batten stiffness. I like to use the standard batten for the majority of wind speeds since the MAL is quite full, and the relatively stiff standard batten downrange helps with increasing the leech twist. I would definitely change the battens when super light and well up-range conditions.
What are the ranges for MAL and GT jibs?
Alex: The general range of the MAL is from 0-14 knots. The GT is designed to start around 14 knots and take you all of the way to the top of the wind range. What I would say is the sails are very versatile and if you are sailing in flat water/12 knots, you might consider switching to the GT earlier. These sails are designed to simplify the jibs across the breeze range.
At what wind speed do you get max aft with the shrouds?
Nitro: 14 knots trying to combine changing to the GT jib and moving the shrouds aft at the same time. If in doubt about windspeed dropping, I would stick with the shrouds forward and only change jibs. It is definitely better to be caught with shrouds forward up-range than downrange with the shrouds aft.
What is the purchase system with the inhauler 4:1? 8:1?
Nitro: The inhauler is pretty loaded 8:1 at least
Can you talk about the measure of the 3rd spreader mark inboard from the other two that have been there previously?
Nitro: Previously, the tuning guide spreader measurement called for 490mm and 540mm from the sidewall of the mast. Now it will be 450mm(17 ⅝) 490mm(19 ¼) and 540mm (21 ¼).
What is the inhaul range on the standard LM2 style jibs? Are you able to inhaul them as aggressively as the new jibs, or do they stall earlier?
Eric: I have seen teams have good success with the LM2 jibs trimmed into the edge of the cuddy cabin. Any further than that, you better have the forestay pretty tight, or the sail will be too deep, and as a result, you will have to ease the sheet so that the head doesn’t shut down too early.
How do-able is this system, for Corinthians, club sailors? It’s cool, I grant you, but for a small minority of the boats. Am I overestimating this?
Alex: I do think you are overestimating the process. Really, this whole package was designed to make sailing the Etchells easier. Instead of standing at the dock and reading the forecast and deciding what jib to leave in the trailer box, now there is no problem just taking both sails with you.
The tighter headstay is easier to drive too, specifically in choppy conditions. Like Eric had mentioned in the webinar, if you were sailing with your LM2L with a lot of sag and you are heading to chop, you have to pull on the backstay to get the forestay tight. Well, that’s counter-intuitive! With a firmer headstay, you can now look to power the boat up while going through chop.
Personally, I think this will make it easier for club and corinthian racers to learn about jib trim, and boat set up. I know once we incorporated it into our program, it made etchells sailing more fun!
Do you need to have movable shrouds? Spreaders?
Eric: For sure, a nice noticeable gain has the spreaders rock forward the maximum amount (75mm) for downwind. They stay out of the main a bit more and help the sail shape a lot.
Upwind, stiffer masts often don’t bend enough in the middle, and as a result, the main is too full in that area- a little spreader sweep would help this. It also really helps even out the entry angle of the main. The new Whale spare averages about 30mm of aft sweep (max is 100mm). This also loads the spreaders a bit more and helps to lock in the mast and, therefore, the sail in that area.
We do offer two mainsail models with two different luff curves for soft and stiff masts. The PC+ has more luff curve and is better when sailing with more mast bend. Many customers with softer masts use this sail or if they sail in very windy venues where lots of mast bend is used on typical days.
So, back to the question about moveable spreaders – yes, I think they definitely help. Not a ton, but if you do 4 or 5 little things like this on your boat, you will certainly see a difference.
I’ve noticed there are much less main pre-bend wrinkles in the new setup from the recent photos I’ve seen. Why? Please comment
Eric: Wrinkles along the luff of the main come from tension on the luff tape and bolt rope. This helps to keep the draft aft in the main when trying to power up the boat in lighter air. With the spreaders swept and lower shrouds aft, it does lock in the lower part of the mast very nicely, and therefore you might see less overbend wrinkles.
When the wind is light, and the sailcloth doesn’t load up and stretch at all, the main is too full. In these conditions, we pre-bend the mast and get over bend wrinkles down low. A general rule is to bend the mast enough for the wrinkles to come back at least to the middle of the vision windows. This makes the main flat enough down low so that it is not too draggy and keeps the draft aft to help load the helm.
Is there a risk of over in-hauling the jib?
Nitro: Yes, definitely, there is a risk, and it’s hard to identify if you do see the lower luff of the mainsail lifting or unsettled is one indication or difficult to accelerate.
Does this new thinking mean that the old technique of sagging the forestay in light air is no longer thought best?
Alex: Like Eric mentioned in the webinar, this is just another way of sailing your Etchells. In Miami this winter, the majority of the fleet still used the traditional San Diego jibs, and they still went just as fast. If you have the LM2L jib, you still need the sag because that’s what the sail needs to get the boat moving.
At 8085, the jib leech seems too long even sheeting through the clew ring. Do you hoist the jib?
Nitro: Yes, the jibs just fit, and occasionally you do have to raise the tack up the headstay.
The clews have been raised slightly to help this situation.
What is the range of max to min mast height? Resultant error in forestay measurement?
Eric: The B (or mast bury measurement) tolerance is 15mm. However, there is also a tolerance for the actual mast step location in the boat, so altogether boats can be up to 45mm different on the overall mast height. This adds up to quite a big difference on the rake the way we have always measured in the past, the new method of measuring the rake takes this difference away and makes for a much more comparative number between different boats.
How does the setup differ between the newer stiff rigs vs. the older softer rigs when it comes to moving the shrouds?
Eric: I think the new stiffer masts necessitated the need to move the shrouds. A stiffer mast is nice when it’s windy and choppy, but is hard in light air-hence the need to sweep the spreaders and move the shrouds forward to achieve proper pre-bend.
In general, a softer mast is more forgiving in light air as it is easier to get pre-bend, but it will require a more aggressive approach to tuning when it’s windy. It is easier to achieve a tight forestay in the breeze when you have a stiff mast so you don’t have to be as aggressive as the wind starts to come up.
If you do decide to switch to the new AUS tuning, take some time to get your tensions correct at the dock when you move the shrouds. This will pay dividends later and take out some of the guesswork on the water.
Are the +/- turns measured in the tuning guide based on Bolga or PKM turnbuckles?
Nitro: The turns on the tuning guide are based on the finer thread PKM turnbuckles
I don’t have money to replace my rig just yet, what are some cost-effective easy changes I can do to get better performance out of my Circa 2012 boat?
Eric: No one is suggesting that you need to replace your mast in order to stay competitive. Spreader brackets can be retrofitted to older masts, which will help overall performance. The new inhauling system can be installed, and with the appropriate jibs, upwind speed should improve. Nothing beats time in the boat though! (Well, new sails really help, too!)
The new setup – sails and all, if you get it wrong, is it super slow?
Alex: Like any sailing or any change, there are some growing pains to getting it right. What I would say is, this setup is very forgiving.
READ MORE
READ MORE

guides
LET'S TALK MULTIHULL SAILING
LET’S TALK MULTIHULL SAILING
North Sails experts Brad White and Stan Schreyer discuss downwind multihull race tactics.
READ MORE
READ MORE

guides
LET'S TALK DRAGON [GERMAN]
LET’S TALK DRAGON
Upwind Sailing and Boat Speed
North Sails class experts Markus Koy & Stefan Matschuck discuss upwind sailing and what factors are important to get the most out of your boat speed.
READ MORE
READ MORE

guides
LET'S TALK ETCHELLS | NEW AUSTRALIAN SETUP
LET’S TALK ETCHELLS
New Australian Boat Setup
Class Experts Noel “Nitro” Drennan, Alex Curtiss and Eric Doyle discuss the new Australian setup and new sail designs for the Etchells Class.
Webinar Chat Questions Answered
READ MORE
READ MORE

guides
LET'S TALK J/70 | DOWNWIND TECHNIQUES
LET’S TALK J/70
Downwind Techniques
In this J/70 webinar, North Sails experts Tim Healy, Ruairidh Scott and Allan Terhune talk winning downwind techniques.
Topics covered include:
3:21 Displacement VMG Mode (2-7 knots)
15:31 Displacement Soak Mode (8-12 knots)
25:14 Displacement Wing-on-Wing (8-13 knots)
47:15 Marginal Lazy Planing (14-16 knots)
1:01:28 Planing (16 knots)
Learn more about North Sails fast J/70 designs.
READ MORE
READ MORE

guides
LET’S TALK FLYING SCOTS | Q&A WITH GREG FISHER
LET’S TALK FLYING SCOTS
Q&A With Greg Fisher
Experts Brian Hayes, Zeke Horowitz with Special Guest Greg Fisher lead a Q+A interactive session, open to all topics. Viewers brought questions and experts shared their answers and expert tips with the group.
READ MORE
READ MORE

guides
LET'S TALK J/22S | KEYS TO UPWIND SUCCESS
LET’S TALK J/22s
Keys to Upwind Success
Join Experts Mike Marshall & Zeke Horowitz as they walk us through their top tips on how to make your next upwind leg the best one yet.
READ MORE
READ MORE

guides
LET'S TALK CRUISING SAILS
LET’S TALK CRUISING SAILS
10 Things To Look For
Join North Sails expert Austin Powers, Peter Grimm and Bob Meagher for a discussion on 10 things to look for in cruising sails.
READ MORE
READ MORE

guides
LET’S TALK MOTH WITH TOM SLINGSBY AND ROB GREENHALGH | SESSION THREE
LET’S TALK MOTH WITH TOM SLINGSBY AND ROB GREENHALGH
Session Three
Moth World Champion Tom Slingsby and North Sails class leader Rob Greenhalgh talk us through the in’s and out’s of race day strategy, and provide tuning tips for the newly released 9DSX Decksweeper mainsail in the third webinar, ‘Let’s Talk Moth’.
READ MORE
READ MORE
