NORTH SAILS BLOG
Tout
Events
Guides
News
People
Podcast
Sustainability
Tech & Innovation
Travel & Adventure

PODIUM SWEEP AT THE 75TH THISTLE NATIONALS
North Clients 1,2,3,4 at the 75th Thistle Nationals
Congratulations Sam Ingham, Jonathan Duffett and Tanya Cuprak
The 75th Thistle National Championship took place at the Cleveland Yachting Club this past week, placing many North Sails Thistle Class enthusiasts on the #NSVictoryList.
With 96 boats competing, the racing in this One Design fleet was fierce. After the selection segment of racing, the fleet was separated into the Championship Fleet (40 boats) and the President Fleet (56 boats).
Samuel Ingham with crew Jonathan Duffett and Tanya Cuprak bested his father, an 8-time Thistle National Champion to win at this year’s National Championship. Mike Ingham, a North Sails One Design Expert, placed second with his wife Delia and Dan Fien. Ed Adams with Neal Fowler and Kira Munger placed 3rd overall, and Brian Joyce with crew Sean Joyce and Braden Joyce placed 4th overall.
2021 Thistle Nationals winners 📸 Tim Wilkes @timwilkesphoto
READ MORE
READ MORE

THISTLE HEAVY AIR TIPS
THISTLE HEAVY AIR TIPS
A Recap From the Midwinters East with Mike Ingham
📸 Cory Hall, St. Pete Sailing Center
Breeze on! The 2020 Thistle Midwinters East was sailed in overpowered conditions for the entire weekend. It was a lot of fun! Going fast was about hiking hard, steering for waves, playing the main to keep the boat flat, and good on board communication.
Here are Mike’s top 5 points on sailing fast in a breeze:
Sail Flat
Flat defined: I define this as a few degrees of heel (not necessarily totally zero degrees flat)
Helm check: You should have no noticeable helm, and to check this you should let go of the tiller and see how fast you head up. You will likely find that at 0 degrees you go straight, and with a few degrees you head up slowly. If you head up at all quickly, you are too heeled!
Hike Hard
Hard hike defined: 100% hike is unsustainable. 80% or something like that is a sustainable hike for long races on multiple race days.
Pain: 80% still hurts! There is no way around it, hiking hard is work.
Your 80%: Everyone’s 80% is different, all you can do is what you can do. Find your 80% and stick with it.
Hike steady: Don’t hike harder in a puff and softer in a lull (assuming the lull is still overpowered as most were at MWE). Sustain that 80%.
DO hike harder in critical situations. Occasionally I would say something like “100% hike until we cross this pack”.
DO hike less when not critical. “50% hike, there is a gap ahead and behind, lets save our energy to the finish”
Vang is a Big Depower Tool
Vang flattens the sail: It bends the mast down low by ‘ramming’ the boom forward into the mast. You will notice more overbend wrinkles when vang is on, less when it is off. More wrinkles means your sail is flatter, less means it is fuller.
Ease in lulls: If you do need power in a lull, ease the vang and sheet in. Still at 80% hike until you are clearly underpowered.
Pull on vang in breeze: If you need to depower more, tighten your vang. There is a limit; our boom bends a lot with vang on full. Our limit is just before we feel we will break the boom.
Main and Steering
Keep the boat flat: To state the obvious, easing the main and steering up keeps the boat flat in a puff, and vise-versa in a lull.
It takes both: It is always a combo of the main and steering, I know of no condition where I do one without the other, its the % of each changes depending on the wave condition
Main and Steering in Waves and Wind
Foot: In waves, pinching up can be super slow because the boat is slowed by waves.
Aggressive steering: I steer all over the place looking for the best path through waves. I find low spots and avoid steep waves, or in smoother waves to steer up the face and down the back.
Steer to waves, trim to heel: To do this, I have to prioritize steering where I need to for the wave while trimming the main to keep the boat flat
Main and steering in flat water:
OK to pinch: In flat water, I can steer wherever I want with no worry that I will slam into a wave
Pinch to depower: In flat water when I am overpowered, I prioritize trying to steer to the wind (up in a puff, down in a lull)
Mainsheet to fine tune: I will still need small main changes to keep the boat flat where I can’t keep up with it steering
It’s Rarely All Waves or All Flat
Most of the time, there is some combo of steering for wind and steering for waves. In the flattest water, 100% of my steering is to the wind because there are no waves. In the roughest water, I probably steer to the waves 80%, and steer to the wind 20%. I would say a typical thistle heavy wind race at MWE was 50% / 50%. The bigger waves I would have to steer through, but flat spots would allow me to steer up in a puff
ALWAYS play the main
Waves: In waves, I am steering a lot through waves, so I need to play the main constantly and aggressively. I go through a large (at times an armlength) range.
Flat: In flat water, even though I want to steer mostly to keep the boat flat, I find I need to constantly adjust the mainsheet to keep the heel just right. These are small (a few clicks here and there) but frequent adjustments
Jib
When we are overpowered, we set the jib to the main backwind bubble. That means when the main is eased a lot, we have to let the jib out too. If our main flogs the jib is to blame (until it blows about 30, then there is nothing left to do but flog both sails!) A gentle bubble of about 1 foot behind the mast is about right. More and you need to ease. Less and you need to trim.
Stay ahead of the curve by calling wind and waves
“Puff in 3, 2, 1 puff on” allows me to start easing at “2” and that prevents an initial heel in the puff. Very effective.
“Big wave”, or even better something descriptive like “Square wave” or “A lot of waves” is super useful.
“Flat spot” is great info on a bumpy day. If there are lots of waves, it seems silly to call them all, I need to just assume there are waves until told otherwise
That should cover it. Sailing flat by being proactive on depowering (vang…), then sailing the right combo of steering and main sheet is the way to go fast in big breeze. Oh yes, almost forgot – hike hard!
READ MORE
READ MORE
THISTLE MIDWINTERS WEST: COACH NOTES
THISTLE MIDWINTERS WEST: COACH NOTES
North Expert Mike Ingham Shares Clinic Tips
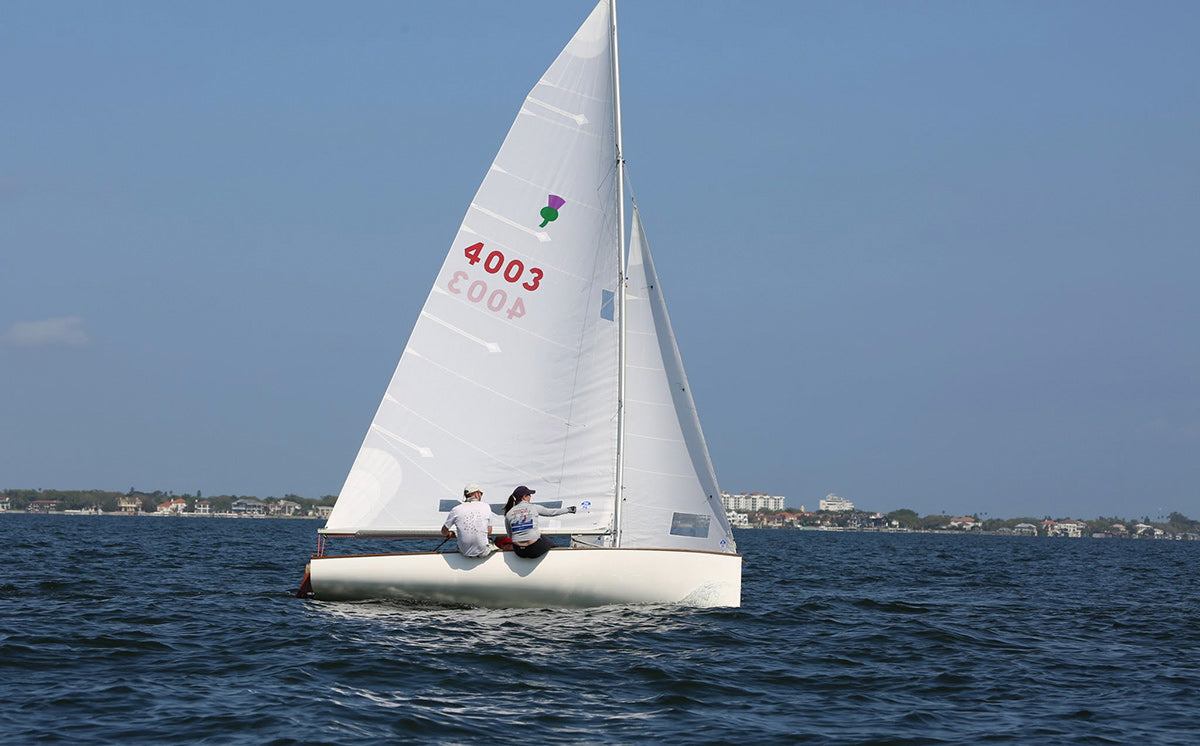
📸 Tina Deptula
North Sails expert Mike Ingham hosted a one-day clinic for over 20 Thistles in preparation for the 2020 Midwinters West in San Diego, CA. Boats were overpowered at first, but later in the day, the wind softened.
“It was nice to see both wind ranges,” Mike says. “Reviewing the on-the-water videos, I found some common threads that were well worth talking about with the group.”
If you couldn’t be there, here’s what Mike saw.
Flat, Flat
The Thistle likes to sail flat, especially in Mission Bay where there are no waves.
Depowering
To keep flat when overpowered, you need to depower. Here are a few thoughts on how to do that in flat water:
Outhaul – Tight the outhaul until the foot looks stretched. That shelf is important.
Cunningham – Make sure your main halyard is up all the way and your cunningham is reasonably snug. Wrinkles are great in lighter wind, but as it builds, pull it on to smooth them out.
Pinch – In flat water when overpowered, it is okay to pinch.
Jib Trim
A great starting point is to trim the jib leech in until it lines up with a zip tie taped to the middle spreader 10 ½” away from the mast. A lot of people did not have that zip tie, and their jib trim was inconsistent.
In Heavy Wind: If you have to ease the main out to keep the boat flat, ease the jib as well until there is just a hint of backwind in the main.
In Lighter Wind: When underpowered, if the jib leech tell tale near the middle spreader is stalled, you are trimmed too tight. If it is flowing, you may be able to trim tighter.
Mainsail Trim
When overpowered:
Vang sheet. Pull hard on the vang, and then let the mainsheet out to keep the boat flat.
If you have the North Proctor mainsail, traveler sheet.
When underpowered:
Keep the vang floppy loose so you can control the leech tension with the mainsheet.
As a starting point, try to keep the top main leech telltale flowing 50% of the time (if it stalls behind the main for a few seconds, then flows straight back for a few seconds, that’s 50%)
In flat water, you can have it flow less, say 30%
In waves or chop you will want it to flow more, say 75%
Mike’s next stop – the Thistle Midwinters East in St. Pete.
Learn more about North Sails Thistle sails.
READ MORE
READ MORE

2018 THISTLE NATIONALS
THISTLE NATIONALS
Interview with Brad Russell, 2018 National Champion
The 2018 Thistle National Championship was hosted by Cedar Point Yacht Club and their famous “Westport Mafia” hospitality provided a great time on shore. An amazing funk band, mafia night, and food trucks throughout the week kept everyone entertained and full. North Sails hosted a chalk talk each morning with Dave Dellenbaugh and Paul Abdullah with great attendance and participation. Rules expert Dave Perry was a guest on Tuesday and turned into a 5-hour marathon session during postponement ashore.
North-powered boats took all ten top spots on the scoreboard. Our Thistle expert Mike Ingham caught up with the new National champion Brad Russell for a quick interview:
First of all, congratulations on your 2018 Thistle National Championship! Start off with telling us something about your team.
I sailed with teammates Joe Hart and Terra Berlinski. Joe and I sailed together all year and have a great time on the boat together. He’s very physical on the boat, always has a positive attitude, and excels at painting the picture of what the fleet is doing, while this was the first time bringing Terra on board and she was an awesome addition with her positivity and being proactive on the boat. We were one of the heavier boats at around 500 lbs, but it didn’t seem to hurt us much even in the light air.
What were the conditions like?
Conditions varied greatly, with one race in very light air, two in heavy air, and four in light to moderate conditions
What sails did you use?
Our speed was excellent all week and in all conditions. We use a North Fisher main, Proctor jib, and Full Radial AirX500 spinnaker.
How were you set up?
The boat is setup to get overbend wrinkles halfway back the main window when fully trimmed. Our mast is 4-9-4 on the diamonds with the black Pro Loos gauge. We started the week with our forestay at 25 and moved it to 26 after Monday when the overbend wrinkles were slightly shy of the target. We didn’t use a shim on the mast step all week, but the step is shaved. After Wednesday I would have used a shim in any more races as our main was a little too full, but it was not windy enough, so we did not. Our rake was 27’ ½” and our prebend measured exactly 1” when the forestay was 25 and got slightly greater after tightening the forestay.
Any other trade secrets you would be willing to share?
We tried a few things during the week that were different than you see on most boats. In the moderate air we were trimming the jib quite hard, often over an inch inside the 10.5” tickler we use off the diamond. This only works because we use a jib leech tell tale to make sure there is still full flow between the two sails. The other thing was dropping the traveler some in heavy air, about 6-8”, to help neutralize the helm a bit.
Tell us more about that jib tale?
We felt as long as the leach tell tale kept flowing we could trim it in more. We kept experimenting with it further in and we were able to keep it flowing and it seemed fast.
You never won a race, and you were top 4 almost every race (except the last, but we will talk about that later). Tell us your strategy for the regatta and how you were able to be so consistent.
Our strategy all week was based on staying conservative and consistent. We try to sail defensively up the middle unless we are confident one side or the other will win. We rarely felt confident what side would win the first beat so we usually found ourselves trying to stay between the fleet. We would usually lose to a couple boats from the winning side, but we got to the top mark in the top 4 in all but one race. We would then try to sail fast and work with the boats around us on the reaches, instead of fighting with each other. Once the lead pack distances itself from the fleet there’s a little more freedom to fight with the boats immediately around you.
About that last race, you were winning going in, and multi time Thistle National Champ and Match Race Pro Dave Dellenbaugh needed to beat you and put some boats in-between to take the lead, that must have been pretty nerve racking, right?
The last race was really exciting, as Dave tried to match race us backwards through the fleet after we rounded the windward mark in 2nd and 3rd. After an extremely intense couple legs we only fell back to 7th. He wasn’t able to put enough boats between us to win the regatta. I never thought I’d be good enough for Dave Dellenbaugh to care to tack on me once, much less try to match race me backwards through a fleet, so that was pretty cool!
Congratulations again to Brad, Joe, and Terra!
READ MORE
READ MORE
THISTLE TUNING GUIDE
This tuning guide applies to the DSD design, VS design and the Proctor design Thistle sails. These designs are the result of hours of boat on boat sail testing and racing experience.
VS (Fisher) Quick Tuning Guide
DSD Quick Tuning Guide
Proctor Quick Tuning Guide
Northwest Quick Tuning Guide
The following tuning guide is meant to be a comprehensive guide for setting and trimming your North Sails. Please read it thoroughly before using your sails for the first time.
We urge you to read the section on sail care in order to prolong the life of your sails.
Boat Preparation and Rig Tuning
LOOS TENSION GAUGE
The Loos tension gauge is a relatively accurate instrument that will help measure the tension of your standing rigging. The newer Loos Pro gauge is spring loaded and some sailors have found it to be slightly more accurate and reliable than the Loos Model A. Following is a comparison of the numbers between the Model A and the Pro gauges. We have broken down the numbers for both 1/8” forestay tension and 1/16” diamond tension.
1/8” Cable Forestay Tension
TENSION
LOOS MODEL A
LOOS PRO GAUGE
240
28
21
260
30
22
280
31
23
300
32
24
320
33
25
340
34
26
360
35
27
1/16” Wire Diamond Tension With North Proctor model sails
DIAMOND
MODEL A
PRO
Top
12-13
9-10
Middle
15
11
Bottom
15-16
11-12
1/16” Wire Diamond Tension With North Fisher model sails
DIAMOND
MODEL A
PRO
Top
4-8
2-4
Middle
9-13
5-10
Bottom
4-8
2-4
DIAMOND TENSION
Before you step the mast, set the diamond tension to achieve proper mast bend.
Diamond tension, not only has an effect on the sideways bend in the mast, but also on fore and aft bend. The suggested numbers that we offer here will, again, get you very close so that your mast and North mainsail will work well together. Due to the nature of the aluminum extrusion and in some cases the way the masts are rigged, some masts are stiffer and some masts are softer than others. This is not a problem; it just requires slight adjustments to your diamonds. Always be sure to check your diamond tension and straightness of the mast while it is supported at both ends with the sail track upwards.
If while sailing in marginal hiking conditions (10 – 12 mph breeze) you notice slight diagonal overbend wrinkles in the upper part of your mainsail, your upper diamonds are most likely too loose which is allowing the upper part of your mast to bend too much. On the other hand, if your mainsail in the upper third appears fairly round and is difficult to flatten out in a breeze, your upper diamonds are most likely too tight.
For Proctor’s main when sailing above 490 pounds of total crew weight, set the diamonds close to 18 (number scale on the Loos gauge—the numbers do not correspond to pounds) top to bottom.
Set them progressively looser for lighter crew weights to a minimum of 10 on the Loos gauge, e.g. top crew weight of 490 pounds, scale 18; to crew weights less than 430 pounds, scale 10.
For Fisher’s main, set your diamonds at approximately 6 – 14 – 9 (not pounds and measuring from bottom to top). The lighter the crew weights, the lighter the tension on the top diamonds. Set the top diamond at 4 or less when sailing below 430 pounds in crew weight.
On wood masts, the diamond tension should be slightly less than the standard aluminum mast because of possible compression problems that could develop from excessive tension. Never tension any of the diamonds on a wood mast to more than 16.
On the older, stiffer, gold aluminum masts the diamond tension should be considerably looser to allow the mast to bend as easily as possible. You should drop the tension on all the diamonds approximately 4 numbers from top to bottom.
While the Thistle mast looks fairly complicated with three sets of diamonds, these adjustments listed above will make it fairly easy to properly tune your mast to your mainsail for all crew weights and all wind velocities. If you have any questions about the proper bend in your mast, please don’t hesitate to call us.
(Note: The numbers above relate to the Model A gauge. Refer to the conversion chart under Loos Gauge section for new Pro Gauge.)
MAST STEP/MAST BUTT
Position your mast butt casting so that the mast will be positioned at the minimum “J” —or 4′ 9″ measured from the forestay to the front of the mast on an aluminum mast or 4′ 8 1/2” measured from the forestay to the front of the wood mast.
Position the mast on the step so that it is even fore and aft. In other words, the mast butt does not protrude out over the front or back of the mast step. We have found that it works well to have the step positioned at minimum “J” dimension when the mast is set squarely on the step.
The mast should rest on the mast step in such a way that it has nearly 1/2” of positive prebend will develop when the rig is properly tensioned (we’ll discuss this later). Measure prebend by pulling the main halyard down all the way to the gooseneck so that the wire is up against the back of the mast. You will notice the prebend as the gap between your main halyard wire and the mast as it bends forward.
There should be a slight gap (nearly 1/8”- see picture) between the casting on the mast and the casting on the grating at the forward edge. The gap at the front will help the mast bend easier because it rocks slightly aft of the central axis of the mast. If the mast prebends more than 1″ (forward at the middle, aft at the head) shim the front of the step between the step and the grating. This is better than putting thickness (coins, stainless tangs, etc.) between the casting on the mast and the casting on the grating because it still allows the mast to remain flexible.
It is important that the mast butt casting be securely fastened to the bottom of the mast. Any slop whatsoever can greatly affect the mast’s ability to bend properly. A quick check to verify if the mast is set up properly is to push the mast forward from behind, halfway between the spinnaker pole eye and the lower diamonds. If the mast feels stiff or it’s bend restricted, most likely the mast butt is not set up well.
A telltale sign that the mast is bending correctly is that when all the crew weight is positioned on the weather rail (about 8 mph breeze), there will be evidence of overbend wrinkles developing in the mainsail running from the area of the lower diamond diagonally down towards the clew of the main. In heavy winds (over 15 to 18 mph) or in flat water, these overbend wrinkles could be quite pronounced and should actually run back to the near the aft edge of the windows. If not, check your mast butt and diamond tension as there is most likely not enough mast bend developing. On the other hand, if the overbend goes past the aft end of the window, then you have too much pre- bend and should add another shim under the front of the mast step.
RAKE
Mast rake is measured by hooking a tape measure on the main halyard and hoisting it all the way to the top of the mast until the shackle just hits the sheave. The measurement point on the boat is located at the back edge of the bottom of the tiller hole (not the traveler).
For those boats still rigged with the smaller 3/32″ forestay the reading should be 5 numbers lower. Too much rig tension will tend to increase prebend. Too little tension will tend to reduce it.
(Note: Refer to conversion chart under Loos Gauge section for new Pro Gauge.)
Rigging the Sails and Sail Trim
your shrouds and forestay so that your rake measurement (with the rig properly tensioned and the correct amount of pre- bend) is: 26′ 11 1/2” to 27′ 1/2” for both Proctor’s and Fisher’s mains. The major consideration with both design mainsails is to maximize rake and still be able to get sufficient mainsheet tension for all conditions.
The rake mentioned above positions the rig for proper boat balance. On some boats, however, because the traveler or boom block arrangement is not set as low as ideal it may not be possible to develop enough mainsheet tension in heavy air. To check this, hold your boom up so that the mainsheet is block to block and measure to the 11′ 11″ point at the back of your boom. On most boats this should be just in front of your outhaul sheave. Again, with the halyard pulled to the top of the mast, the measurement to the top of your boom should be 26′ 2″ minimum. If you have difficulty achieving this number, check to see if you can arrange your traveler or mainsheet blocks.
Note: In order to allow sufficient sheeting with a long leech and rake, the mainsheet needs to be properly arranged at the end of the boom. Do not dead end the sheet on the becket on the bottom of the boom block; oftentimes this can reduce available main sheeting by nearly 6″.
Instead, run the mainsheet from the boom block through the block on the traveler from front to back and dead end it on the boom, behind the block. You can either tie the mainsheet to the same slider that the block is attached to, or preferably a whole separate slider or boom bail. You can even drill a hole in the bottom of the boom and tie a knot inside the boom.
RIG TENSION
For a 1/8″, 1×19 wire forestay (which we suggest), tension your rig to the point where your Loos tension gauge reads: 30 to 35 (260 – 360 lbs) for Proctor’s main
and 28 to 32 (240 – 300 lbs) for Fisher’s main. (Important: Measure the forestay, not the sidestays).
Mainsail
MAIN HALYARD
The halyard should be pulled all the way up to allow for correct leech and luff tension. When hoisted, the top of the sail must pass the bottom of the sheave box. You may check your main halyard lock position with the mast down to be sure the shackle is tight against the sheave when fully hoisted. Stretch in the wire will allow it to come to the proper position when the sail is pulled up.
In lighter winds, using the lower ball will help reduce the tension and allow wrinkles to develop from head to tack.
An aid in hoisting the sail to the top, it helps to let the tack out of the tack pin and leave the outhaul looser. After the halyard is locked, pull the sail down with the Cunningham to help make in the tack pin (the boltrope is attached into the luff of your main sail into the luff of your mainsail under considerable tension which will help make the Cunningham snap up when released). Some Thistlers like to feed the rope back into the groove below the sail entry slot on your mast.
To do this you must put the rope in the lower groove before putting the boom on the gooseneck. Then, with the outhaul, mainsheet, and vang eased all the way
and the mainsail tack attached, you can get the boom onto the gooseneck fitting. This will help the Cunningham work better but can do harm to the sail if not treated properly. If you do feed the rope into the groove below the entry, be sure you release your outhaul before you drop the mainsail. If the outhaul is on tight, you can easily tear the bolt rope away from the sail above the Cunningham.
CUNNINGHAM
The Cunningham flattens the sail and moves the draft forward as it is tensioned. When under-powered, ease the Cunningham and when over-powered pull it tighter. Generally it is better to leave the Cunningham too loose than too tight. In light winds, if your main halyard is positioned properly, there will be wrinkles all the way head to tack. Little or no Cunningham will be required. In marginal hiking conditions the Cunningham would be tensioned slightly so that the wrinkles will be limited to the lower half of the main. In heavier winds, pull the Cunningham harder so that wrinkles are just barely showing in the lower one-third of the luff of your mainsail.
OUTHAUL
The outhaul adjusts the depth in the lower part of your mainsail. As the outhaul is eased, the shelf on the bottom of the sail opens and the seam that attaches it to the sail moves away from the boom. To gauge outhaul tension, judge the distance from the seam to the side of the boom at roughly the center of the mainsail foot.
Proctor’s main upwind
In 4 to 8 knots of wind and medium chop the seam should be 4″ to 5″ from the boom. In smooth water 3″; when fully hiked 1″. When overpowered and you’re dropping the traveler to leeward, pull the outhaul as hard as possible—until the clew slug hits the stop at the end of the boom.
Fisher’s main upwind
The outhaul will be pulled tight enough so that there is no more than a 2″ gap between the side of the boom and the shelf foot seam in the middle of the foot. In breezes above 10 – 12 mph when the boat becomes overpowered the outhaul will be pulled tighter until the seam is pulled up snug against the side of the boom (maximum outhaul).
When reaching, to find the most eased position, ease off the outhaul so the shelf is open 4-5” from the side of the boom. When overpowered on a reach, with the spinnaker, leave the outhaul set as you had it upwind. For downwind sailing, also leave your outhaul in the upwind tensioned position for maximum projected area.
MAINSHEET
The mainsheet controls the powerful upper leech of your mainsail. It is the single most important adjustment. Therefore you must judge proper mainsheet trim by two factors: angle of the top two battens and feel.
In ideal pointing and boat speed conditions, the top batten will be angled considerably to windward of parallel to the boom (nearly 15 degrees). It is not unusual that the upper batten telltale will be stalled most of the time when the sail is trimmed properly when sailing upwind. In most sailing conditions the mainsheet (and/or the traveler) should be played all the time in order to gain top speed and pointing ability. A good rule is that as long as the boat feels good and is going fast, keep pulling the sheet harder! More mainsheet tension usually relates to higher speed and higher pointing but the sail becomes easier to stall. When the boat starts to feel slow, it’s correct to ease the sheet, but for things like waves, you should try to anticipate and ease the sheet before you hit them.
In heavy wind be careful not to overtrim. If the mainsheet is trimmed too tight the boat will develop a great deal of weather helm and become more critical to steer. In very light winds, where the weight of the boom hangs on the leech and hooks the top batten greatly to windward of parallel to the boom, ease the mainsheet so that the end of the boom is nearly over the corner of the transom. You may experiment with pulling the traveler to weather (but not farther than the windward edge of the tiller hole) which will help allow the boom to rise slightly easier and the upper leech to open up quicker when the velocity increases.
TRAVELER
As mentioned above, in light winds and when you will not be tacking a great deal, some Thistlers have experimented with pulling the traveler to windward. If you have the proper rake, 6″ is the absolute maximum; 2″ to 3″ is normal. Never pull the traveler to weather where the boom is actually positioned to windward of centerline.
In moderate conditions (8 – 10 knots), and especially with the Proctor main you can keep the boat in the groove with the crew hiking with a little help from playing the traveler. The goal is that your helm should always be balanced (nearly neutral). In heavy winds (above 15 mph) the Proctor Thistle main will perform best with the traveler nearly completely to leeward and the mainsheet trimmed quite hard. Your mainsheet will control mast bend. As the sheet is eased the mast will straighten up and the main will, therefore, become fuller.
In extremely heavy winds (above 20 mph) you may experiment with positioning the traveler only slightly below centerline and easing the sheet to allow the top of the main to angle outboard more.
With the Fisher main, pulling the boom vang on quite hard (see below) helps in these breezy, puffy conditions upwind. Just be sure to ease it before you round the weather mark!
BOOM VANG
The vang is primarily used downwind to help keep the upper batten parallel to the boom (telltale flowing off the top batten). A common mistake in light to medium conditions is to over-vang and tighten the leech too much. In puffy conditions when reaching, the vang is often “dumped” to help keep the end of the boom from hitting the water and creating a disaster!
In the middle of your groove, the windward telltales should lift indicating a stall. At the “top end” of your groove (when in a high pointing mode) both telltales will lift and oftentimes the luff of your jib will actually break.
LEAD POSITION
To properly set the jib lead, use the trim line that is drawn on the clew of the jib.
This pen line runs from the clew grommet directly out into the body of the sail.
When your lead is set properly, your jib sheet should be a direct extension of this line. You should find that on most Great Midwest boats the lead would be nearly at the forward edge of the thwart. In heavy winds, move your lead aft 1″ of the sheet extension to the trim line position.
Be sure, though, to ease the vang in the lulls!
Jib
On both jibs, at the lower end of your steering groove (when you are looking to accelerate) the windward and leeward telltales should both stream straight aft.
On the Fisher jib, the lead should be set laterally so that the sheet runs through the jib lead block and intersects the thwart at 15-16” from Centerline. The Proctor jib trims best at 16″ to 17″ from centerline.
JIB SHEET TRIM
For Proctor’s jib trim the jib sheet so that the leeward side of the jib at the bottom is just barely touching the rail about 2’ aft of the bow. With the foot set this way and the distance between the end of the spreader and the leech of the sail should be 1 1/2 ” to 2″ (depending on the length of the spreaders). If while the bottom of the jib is just barely touching the rail, the distance of your jib from the spreader is more than 2″ then move your jib lead slightly forward. If the leech of the jib is closer to the spreader, then move the lead aft.
For Fisher’s jib in medium winds and flat seas, we suggest trimming so that the leech of your jib is 1″ off the spreader, at the middle diamond. In very heavy winds and very light winds, ease the sheet so that the leech of the jib is nearly 2″ to 3″ off the spreader. Do not be surprised to find that the leeward side of the jib at the bottom lays inside the rail approximately 2″ to 3″ at its middle. Fisher’s jib is flatter down low at the very bottom so that the sail will lay inside the rail when trimmed properly it will just touch the rail when eased for power to accelerate.
For both jibs remember to quickly ease the sheet if the boat needs power, after tacking, before hitting a series of waves, or after a large header. Ease the jib out to nearly 3″ to 4″ off the spreader.
Note: We have found that in many cases there are wide variances in spreader lengths. Of course, this would make it very difficult to use the spreader as a guide in trimming your jib. We are assuming 9 1/2″ spreaders (positioning Fisher’s jib at 10 1/2 ” and Proctor’s jib at 11″ – 11 1/2″). Some Thistlers have put a mark that is the same distance inside the spreader tip that you want to trim outside. Some even use a straw taped to the spreader to provide a reference!
JIB HALYARD
On both jibs, tension the halyard so that there are always slight horizontal wrinkles off of each snap tab. This is especially important in light to medium winds, while in heavier breezes the halyard is pulled tight enough so that the wrinkles are nearly removed. The wire in the jib luff is usually slack unless it is blowing very, very hard. In fact, the only reason to have the wire in jib is that the class specifications require it.
Spinnaker
Sailing your North spinnaker is fairly easy as long as you follow a few basic guides. First, always fly your spinnaker so that there is a 5″ – 6″ curl in the luff. It is much better to sail your spinnaker slightly eased and slightly under trimmed so that the slot between the spinnaker and the main will not be choked. It is important that the sheet be constantly played for maximum performance. Constant and smooth 1′ trims and eases work better than rapid 3′ jerks. Work smoothly with both the sheet and the guy to try to keep the pole basically perpendicular to the wind.
Adjust your pole height with the topping lift so that the clews are roughly equal. When you can’t view the leeward clew (because it is behind the main), set the pole height so that the center seam of your spinnaker is parallel to the mast. At this point the lower luff of your spinnaker above the pole should be nearly vertical. We recommend a pole ring height of 32″ – 33″ from the butt of the mast (this is the standard Great Midwest position).
We also suggest tying your halyard to your spinnaker with a long bowline so that the head of the spinnaker will always be 4″ away from the mast. This will also help open up the slot between the spinnaker and the main.
Sail Care
Your North Sails are constructed out of the best materials on the market today. We make sure of this by testing every roll of cloth we use. Through proper care and maintenance your sails will give you the performance you have come to expect from a North Sail.
The most important factor for a long life for your sails is to watch them for signs of wear and tear in high load and chafe areas. Be sure to wash the sails off with fresh water and dry the sails thoroughly before storing. A dry, mild climate is best.
Excessive heat can cause problems with the sails due to the possibility of shrinkage. It is best to roll the mainsail and jib.
When hoisting and lowering the sail try to minimize the amount of creasing or wrinkling of the sail. Every time the sail gains a crease the cloth breaks down that much faster. Always have someone contain the leech and luff during these procedures. The battens can be left in the sail without any problems. Be sure to roll the sail down the leech so that the battens will not twist. This could cause damage to the battens.
SPINNAKER
The spinnaker is fairly straightforward. Be sure to repair all tears and pulled stitches. Folding the sail when storing is best.
READ MORE
READ MORE
