NORTH SAILS BLOG
Tutto
Events
Guides
News
People
Podcast
Sustainability
Tech & Innovation
Travel & Adventure
guides
NORTH CERTIFIED SERVICE SPINNAKER SAIL CARE
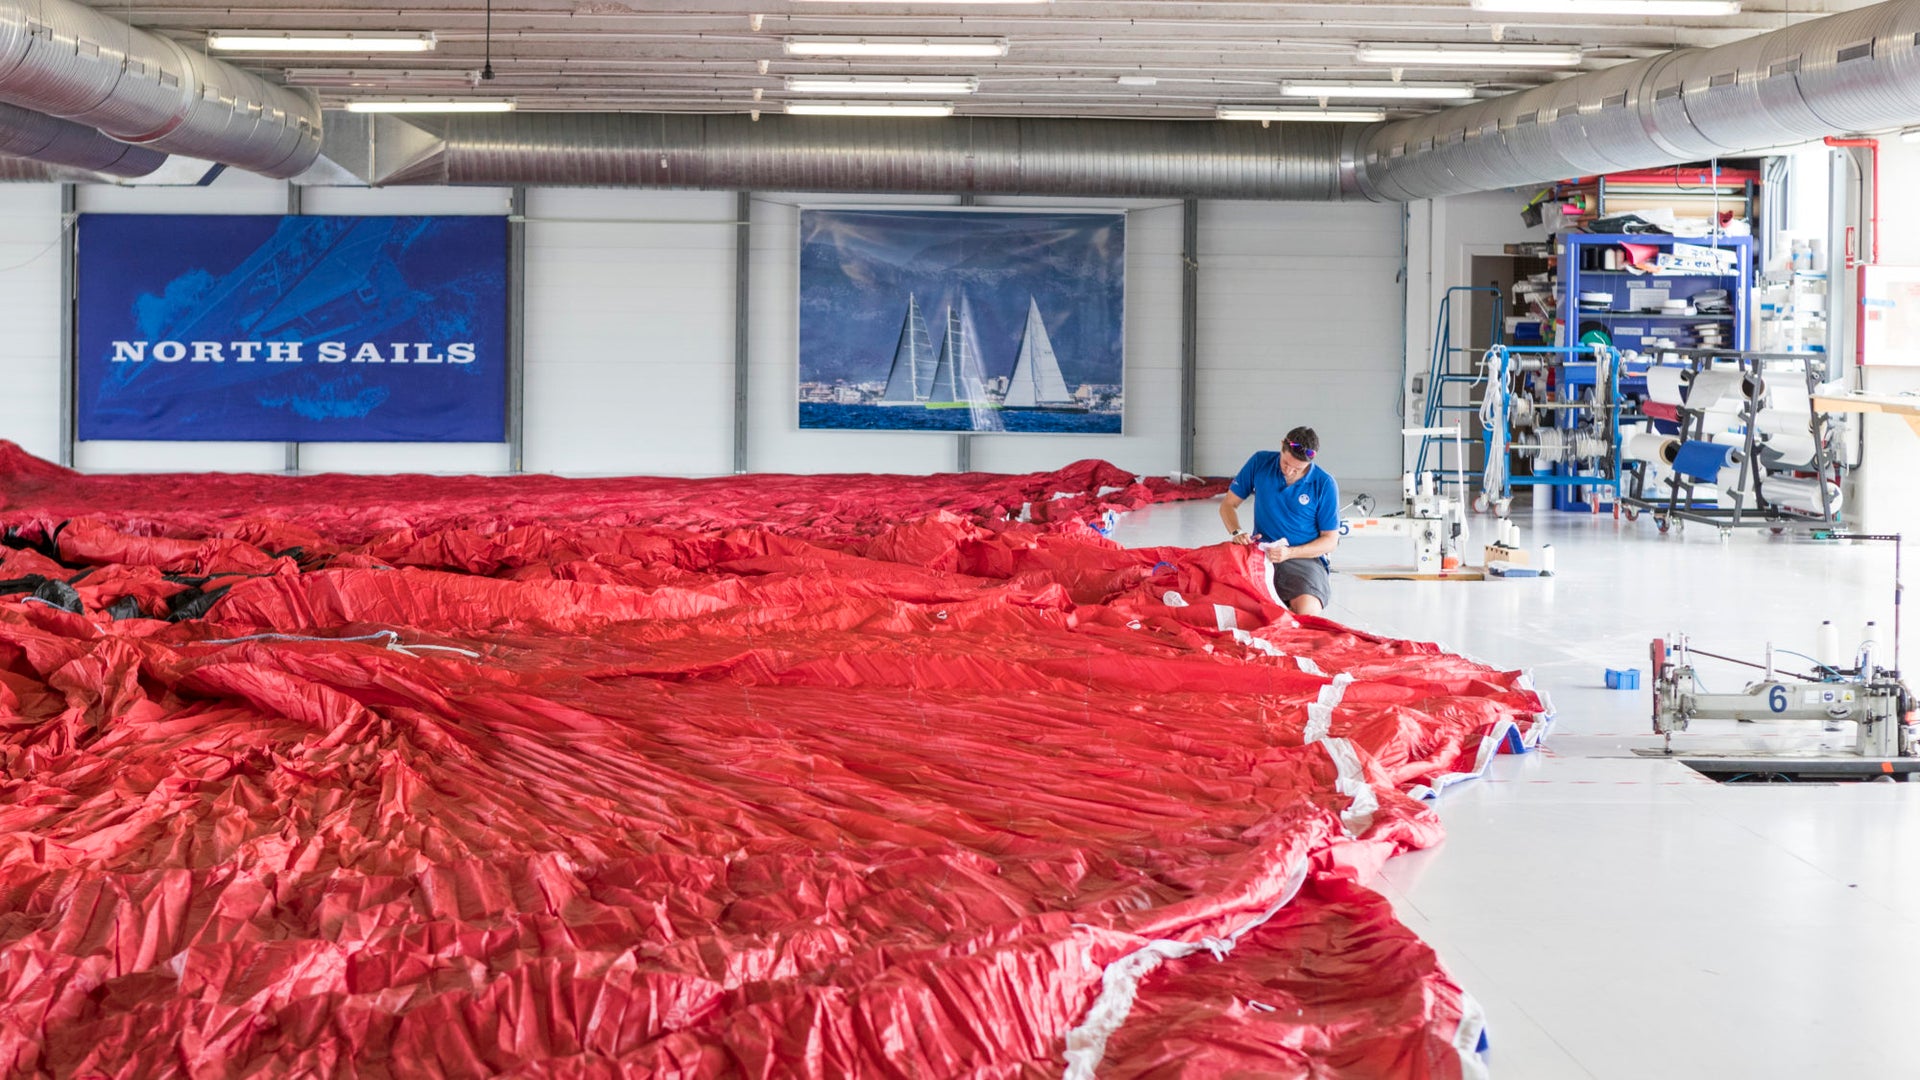
A LOOK INSIDE THE NORTH SAILS LOFTS: SPINNAKER SAIL CARE
Our Certified Service Experts Explain Review and Repair of Downwind Sails
No matter where you are in the world, you can prepare for your next event or be ready for when sailing season picks up again by knowing what to look for when it comes to a healthy spinnaker. A few months ago we published ‘When to Replace Your Spinnaker;’ a how-to on what to look for and advice on prolonging the life of nylon downwind sails. Many of the tips were visual cues for when you’re out sailing, but our service experts also have a process where they can inspect your spinnaker inside our lofts, and help to determine if it’s in repairable condition or if you should think about replacement.
We called on Certified Service managers Bacci Sgarbossa and Nick Beaudoin, from Italy and Australia respectively. Below is an explanation of their simple, but effective process for assessing the lifespan of your spinnaker. This North Sails Blue Book process holds true for spinnakers of all sizes, from one design to supermaxis.
Step 1: Rinse That Salt Off
It’s important to rinse spinnakers after sailing. Salt retains humidity making the kite heavier and more elastic. Plus, dried salt crystals in spinnaker cloth add weight. Let your service expert know if your sail needs to be rinsed when it arrives at the North loft.
Step 2: Hang Dry
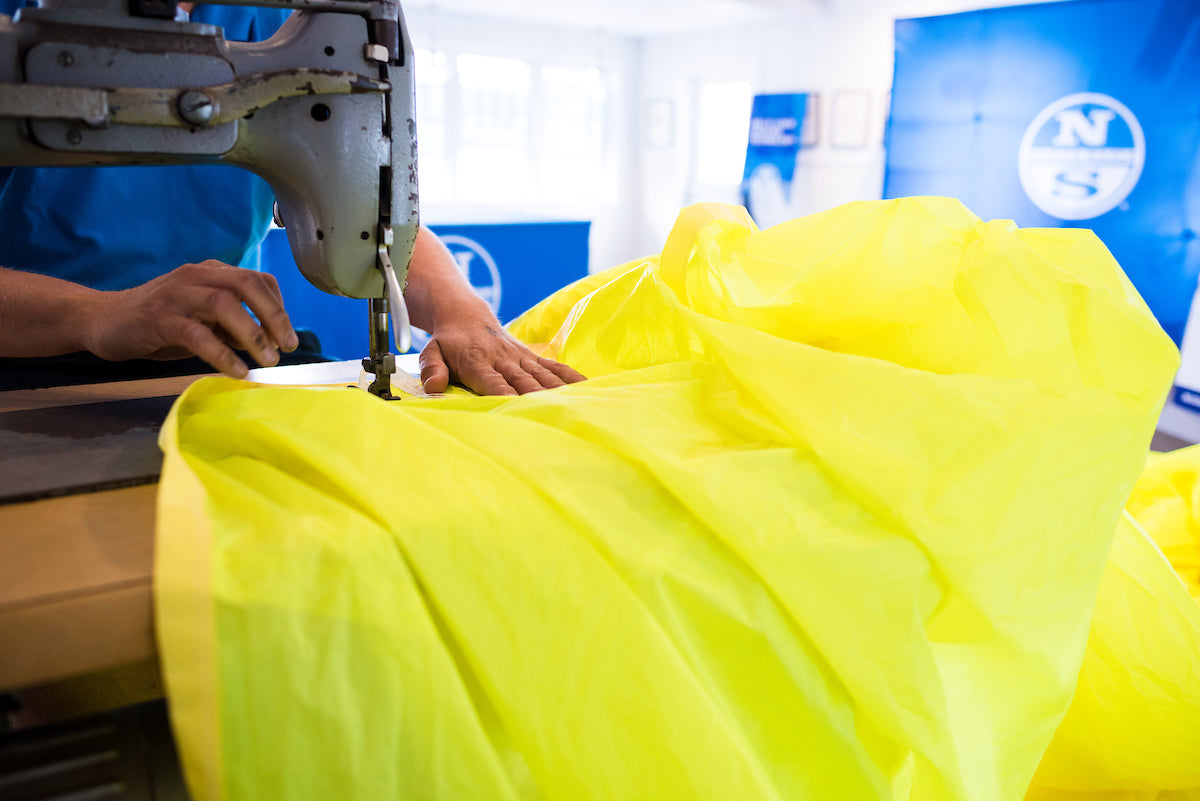
Once your spinnaker arrives at the loft, it is draped and hung up to dry overnight. Once dry, it is ready to “fly” (inside!). Depending on the size of the spinnaker, two to four staff “fly” it in the air, which allows the team to get underneath and inspect the sail for any tears and/or holes. As the sail is being flown, damaged areas are marked with fluorescent stickers.
Step 3: Repair
The service technicians use fluorescent stickers to easily identify areas that require sail repair. Pinholes and tears are patched with the appropriate cloth. Once all work is completed, each sail is flaked and bricked for easy transport and storage.
Step 4: Replace (if necessary)
There are times when a sail is beyond repairable. Your Certified Service expert will let you know when the sail is on its last legs and then get you in touch with the proper loft contact.
Find A Loft Find An Expert Request a Quote
READ MORE
READ MORE

guides
LET’S TALK VIPERS | LATEST TUNING & TRIMMING TIPS
LET’S TALK VIPERS
Latest Tuning & Trimming Tips
Class Experts Zeke Horowitz, Austin Powers, and Jackson Benvenutti give the latest on tuning and trimming tips, and how to put yourself at the front of the pack.
READ MORE
READ MORE

guides
LET'S TALK OPTIMIST WITH ANDREW WILLS, DEREK SCOTT AND CHRIS STEELE
LET’S TALK OPTIMIST WITH ANDREW WILLS, DEREK SCOTT, AND CHRIS STEELE
Session One
Optimist class experts Andrew Wills and Derek Scott talk all things Optimist with special guest Chris Steele who won the Worlds in 2007 with Wills as a coach. This session covers planning, daily routine, race routine and how to maintain a good training mindset.
READ MORE
READ MORE

guides
THISTLE HEAVY AIR TIPS
THISTLE HEAVY AIR TIPS
A Recap From the Midwinters East with Mike Ingham
📸 Cory Hall, St. Pete Sailing Center
Breeze on! The 2020 Thistle Midwinters East was sailed in overpowered conditions for the entire weekend. It was a lot of fun! Going fast was about hiking hard, steering for waves, playing the main to keep the boat flat, and good on board communication.
Here are Mike’s top 5 points on sailing fast in a breeze:
Sail Flat
Flat defined: I define this as a few degrees of heel (not necessarily totally zero degrees flat)
Helm check: You should have no noticeable helm, and to check this you should let go of the tiller and see how fast you head up. You will likely find that at 0 degrees you go straight, and with a few degrees you head up slowly. If you head up at all quickly, you are too heeled!
Hike Hard
Hard hike defined: 100% hike is unsustainable. 80% or something like that is a sustainable hike for long races on multiple race days.
Pain: 80% still hurts! There is no way around it, hiking hard is work.
Your 80%: Everyone’s 80% is different, all you can do is what you can do. Find your 80% and stick with it.
Hike steady: Don’t hike harder in a puff and softer in a lull (assuming the lull is still overpowered as most were at MWE). Sustain that 80%.
DO hike harder in critical situations. Occasionally I would say something like “100% hike until we cross this pack”.
DO hike less when not critical. “50% hike, there is a gap ahead and behind, lets save our energy to the finish”
Vang is a Big Depower Tool
Vang flattens the sail: It bends the mast down low by ‘ramming’ the boom forward into the mast. You will notice more overbend wrinkles when vang is on, less when it is off. More wrinkles means your sail is flatter, less means it is fuller.
Ease in lulls: If you do need power in a lull, ease the vang and sheet in. Still at 80% hike until you are clearly underpowered.
Pull on vang in breeze: If you need to depower more, tighten your vang. There is a limit; our boom bends a lot with vang on full. Our limit is just before we feel we will break the boom.
Main and Steering
Keep the boat flat: To state the obvious, easing the main and steering up keeps the boat flat in a puff, and vise-versa in a lull.
It takes both: It is always a combo of the main and steering, I know of no condition where I do one without the other, its the % of each changes depending on the wave condition
Main and Steering in Waves and Wind
Foot: In waves, pinching up can be super slow because the boat is slowed by waves.
Aggressive steering: I steer all over the place looking for the best path through waves. I find low spots and avoid steep waves, or in smoother waves to steer up the face and down the back.
Steer to waves, trim to heel: To do this, I have to prioritize steering where I need to for the wave while trimming the main to keep the boat flat
Main and steering in flat water:
OK to pinch: In flat water, I can steer wherever I want with no worry that I will slam into a wave
Pinch to depower: In flat water when I am overpowered, I prioritize trying to steer to the wind (up in a puff, down in a lull)
Mainsheet to fine tune: I will still need small main changes to keep the boat flat where I can’t keep up with it steering
It’s Rarely All Waves or All Flat
Most of the time, there is some combo of steering for wind and steering for waves. In the flattest water, 100% of my steering is to the wind because there are no waves. In the roughest water, I probably steer to the waves 80%, and steer to the wind 20%. I would say a typical thistle heavy wind race at MWE was 50% / 50%. The bigger waves I would have to steer through, but flat spots would allow me to steer up in a puff
ALWAYS play the main
Waves: In waves, I am steering a lot through waves, so I need to play the main constantly and aggressively. I go through a large (at times an armlength) range.
Flat: In flat water, even though I want to steer mostly to keep the boat flat, I find I need to constantly adjust the mainsheet to keep the heel just right. These are small (a few clicks here and there) but frequent adjustments
Jib
When we are overpowered, we set the jib to the main backwind bubble. That means when the main is eased a lot, we have to let the jib out too. If our main flogs the jib is to blame (until it blows about 30, then there is nothing left to do but flog both sails!) A gentle bubble of about 1 foot behind the mast is about right. More and you need to ease. Less and you need to trim.
Stay ahead of the curve by calling wind and waves
“Puff in 3, 2, 1 puff on” allows me to start easing at “2” and that prevents an initial heel in the puff. Very effective.
“Big wave”, or even better something descriptive like “Square wave” or “A lot of waves” is super useful.
“Flat spot” is great info on a bumpy day. If there are lots of waves, it seems silly to call them all, I need to just assume there are waves until told otherwise
That should cover it. Sailing flat by being proactive on depowering (vang…), then sailing the right combo of steering and main sheet is the way to go fast in big breeze. Oh yes, almost forgot – hike hard!
READ MORE
READ MORE

guides
LET’S TALK SOLO WITH CHARLIE CUMBLEY & TOM GILLARD
LET’S TALK SOLO WITH CHARLIE CUMBLEY & TOM GILLARD
Tuning the Boat for Speed & Upwind Tips
Solo Class Leader Charlie Cumbley and Class Expert Tom Gillard discuss all things Solo with special guest and Solo Class Chairman, Doug Latta. Topics include tips on how to maximize speed on the racecourse, boat setup advice as well as a focus on upwind sailing with Charlie and downwind sailing with Tom.
READ MORE
READ MORE

guides
LET’S TALK MOTH WITH ROB GREENHALGH | SESSION TWO
LET’S TALK MOTH WITH ROB GREENHALGH
Session Two
North Sails Moth Class Leader Rob Greenhalgh is joined by North Sails designer Ruairidh Scott and Chris Dixon from CST Spars for the second live session for the Moth class.
READ MORE
READ MORE

guides
LET'S TALK J/70 | MAINSAIL TRIM
LET’S TALK J/70
Mainsail Trim
In this J/70 Webinar class champions Giulio Desiderato, Zeke Horowitz and Allan Terhune talk in detail about mainsail trim and onboard communication.
Topics covered include:
3:02 How do you do your initial J/70 setup
7:35 J/70 Controls. Which and How to Use?
37:24 J/70 Light Wind
47:15 J/70 Medium Wind
53:39 J/70 Strong Wind
1:03:30 J/70 Downwind
Learn more about North Sails fast J/70 designs.
READ MORE
READ MORE
guides
JOIN NORTH SAILS AND SPECIAL GUEST TOM SLINGSBY TO TALK MOTHS
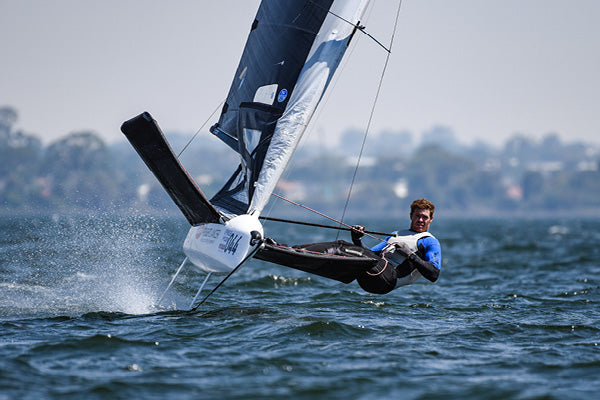
TUNE INTO A LIVE MOTH WEBINAR WITH TOM SLINGSBY AND ROB GREENHALGH
2019 World Champion Joins North Sails for Let’s Talk Moths Webinar Series
Join Moth World Champion Tom Slingsby and North Sails class leader Rob Greenhalgh live on Wednesday, April 8th for the third session of Let’s Talk Moth. These two world-renowned sailors will take us through the in’s and out’s of race day strategy and provide tuning tips for the newly released 9DSX Decksweeper mainsail.
Sign up and register today for the Zoom link.
Register Now
Session 1: Expert Opinions and Introductions to the North Sails Class Leaders
North Sails Moth Class Leader, and National and European titleholder Rob Greenhalgh gives his expert opinion on a variety of topics and introduces key people within the class. Topics include an introduction to the series, a fleet update, and foiling like a pro.
Session 2: Sail Design, Spars and 3Di for the Moth Class
North Sails Moth Class Leader Rob Greenhalgh is joined by North Sails designer Ruairidh Scott and Chris Dixon from CST Spars for the second live session for the Moth class.
READ MORE
READ MORE

guides
LET’S TALK MOTH WITH ROB GREENHALGH | SESSION ONE
LET’S TALK MOTH WITH ROB GREENHALGH
Session One
North Sails Moth Class Leader and National and European titleholder Rob Greenhalgh gives his expert opinion on a variety of topics, and introduces key people within the class in the first of many live sessions for the Moth class. Essential topics include an introduction to the series, a fleet update, and foiling like a pro.
READ MORE
READ MORE

guides
LET'S TALK VX ONE | JIBES & DOWNWIND MODES
LET’S TALK VX ONE
Jibes & Donwind Modes
Tune in with North Sails VX One expert Mike Marshall for an interactive web talk on the different types of jibes and downwind modes.
READ MORE
READ MORE

guides
LET'S TALK 'OFF THE WIND' SAILING WITH AUSTIN POWERS
LET’S TALK OFF THE WIND SAILING WITH AUSTIN POWERS
North Sails expert Austin Powers and Broad Bay Sailing Association discuss modern advancements in off the wind sailing.
READ MORE
READ MORE

guides
LET’S TALK LIGHTNING | CHANGING GEARS
LET’S TALK LIGHTING
Changing Gears
Lightning Class Expert Brian Hayes and special guest Greg Fisher share tips on how the top teams change gears and keep the boat going fast in this interactive live session.
READ MORE
READ MORE
![LET’S TALK OPTIMIST WITH HUGO ROCHA [PORTUGUESE]](http://www.northsails.com/cdn/shop/articles/2020-04-09_72683859-8cf2-442d-bdf3-9cd855b1ad75.jpg?v=1685171256&width=1920)
guides
LET’S TALK OPTIMIST WITH HUGO ROCHA [PORTUGUESE]
LET’S TALK OPTIMIST WITH HUGO ROCHA
Session One
North Sails Optimist expert and winner of several World and European titles, Hugo Rocha, gives his opinion as an expert on various topics alongside guest Olympic sailor Jorge Lima.
READ MORE
READ MORE
guides
CRUISING SAILORS TOOL KIT
We’re All About Your Next Adventure
Our experts have created a variety of articles to help you gain confidence for your next getaway. Topics include battens, weather, safety, durability of cruising sails, and more. Whether you are leaving land behind or simply sharing leisure time with friends and family, our North Sails Cruising Tool Kit will help you prepare for your next trip.
Forecasting For Your Trip
Libby Greenhalgh has navigated around the world twice with the Volvo Ocean Race; she’s a director with the Magenta Project and has an offshore resume that ranks her among the top sailors in the world. Greenhalgh sat down with North Sails to share her steps for planning a trip offshore.
Learn More
Installing and Tensioning Your Battens
Thinking about battens? Preparing for a new season is something that is on everyone’s mind. Whether you’re staging your boat to launch or planning an extended cruise, it’s important to make sure you’ve got your battens installed properly and tensioned correctly.
Learn More
Furling Sails & UV Suncovers
What happens if you furl your sail the wrong way? – with the sun cover on the inside instead of the outside of the furl? Learn more from Expert Hugh Beaton on how to prevent UV exposure and a bad furl.
Learn More
Safety Always Comes First
Hardcore ocean racers and coastal cruisers alike should all make safety at sea a priority. Practices from racing in the World’s toughest conditions of the Southern Ocean can be applicable to sailors of all levels and speeds. North Sails President, Ken Read, shares his tips for all sailors on his best protocols for sailing offshore.
Learn More
Cruising Sailors Demand Durability
Predicting durability is a tough challenge, because sails are subjected to so many different forms of use and conditions. That said, the most common question we hear from cruising sailors is: “How long will my sails last?”
Learn More
Sources Of Power
Cruising sail trim priorities will vary depending on the wind strength. The easiest trimming condition is moderate winds of 8 to 10 knots, because you trim for full power and indicators like telltales are easy to read. Here’s how to set each source of power.
Learn More
Interested in North Sails cruising sails? Contact your local loft today.
READ MORE
READ MORE

guides
KEN READ ON OFFSHORE SAFETY
Hardcore ocean racers and coastal cruisers alike should all make safety at sea a priority.
READ MORE
READ MORE

guides
WHY CHECKING THE FORECAST MATTERS
Libby has delivered and cruised all over the world. Her experience has given her an exceptional eye for weather. Greenhalgh sat down with North Sails to share her steps for planning a trip offshore.
READ MORE
READ MORE

guides
LET'S TALK J/70 | LESSONS LEARNED IN MIAMI
LET’S TALK J/70
Lessons Learned in Miami
Keeping the J/70 conversation going with class champions Tim Healy, Ruairidh Scott, and Allan Terhune. This interactive session includes lessons learned at the 2020 Bacardi Invitational and J/70 Midwinters.
READ MORE
READ MORE

guides
LET’S TALK FLYING SCOTS | CHANGING GEARS
LET’S TALK FLYING SCOTS
Changing Gears
Join Class Champions Zeke Horowitz and Brian Hayes for an informal web talk covering tips on how the top teams change gears and keep the boat going fast!
READ MORE
READ MORE
guides
SAIL CARE & MAINTENANCE TIPS
SAIL CARE & MAINTENANCE TIPS
Ways You Can Protect Your Investment
📸 Cate Brown / Block Island Race Week 2019
There are many ways you can help prolong the life of your sails. Here are some pointers to keep you aligned with our sail care maintenance practices, which can be part of your regular routine while on your own whether you are at home, or on your boat. Preserving the life of your sails is important for performance and you can take these guidelines to help protect your investment.
Avoid prolonged flogging of sails. Flogging and leech flutter can degrade a sail’s performance before its time. Minimize motoring into the wind with flapping sails. After hoisting sails, trim promptly and steer a course so the sails fill rather than flog.
Use your sails in their designed wind ranges. If you don’t know the recommended wind ranges for your sails, contact your North sailmaker.
Adjust your leech line to eliminate leech flutter (tension it just a touch more than necessary to stop the flutter). The tension needed will change as the breeze increases and as the jib sheet is adjusted. Do not over-tension the leech line; if the leech becomes hooked, ease it off. Proper placement of genoa cars will also prevent leech flogging on your genoa.
📸 Michael Egan/ Egan Images
Avoid unnecessary contact between sails and standing rigging. Avoid releasing the genoa sheet late in a tack. Backwinding the leech against the windward spreader tip will distort the leech and can split your sail.
To combat chafe, be sure to cover spreader ends, and check there are no exposed split pins, cotter pins, or other sharp edges around the mast, foredeck, lifelines, and turnbuckles. These can chafe and/or tear your sail.
Make sure your sails have extra reinforcement in areas of high chafe. Spreader patches on overlapping genoas and mainsails, as well as extra chafe protection on headsails where they come in contact with mast mounted radars and stanchions, will extend the useful life of your sail.
📸 Michael Egan/ Egan Images
When leaving the boat, ease the jib halyard, main halyard, and outhaul to prevent permanent luff and foot stretching. Releasing batten tension also reduces distortion at the batten ends
Limit exposure to the sun for extended periods of time. UV rays are one of your sail’s worst enemies. Roller furling genoas should have UV-resistant material covering the leech and foot. If you store your mainsail on the boom, make sure it is always covered when not in use.
Rinse your sails with fresh water and dry thoroughly before storing, to prevent mildew and color bleeding in spinnakers. Rinse fittings in fresh water to help prevent corrosion. Store dry sails in a well-ventilated location. And remember, making sure they are dry is as important as the initial rinse. Wet sails create mold issues.
Avoid folding sails on the same fold lines so that small creases don’t become permanent.
📸 Michael Egan/ Egan Images
Remove mildew stains on polyester, Spectra/Dyneema or Vectran sails promptly. Use a mild household bleach solution with water and a soft cloth, then rinse thoroughly. DO NOT USE BLEACH ON NYLON, ARAMID, OR LAMINATED SAILS.
To remove oil/grease stains, scrub with Simple Green and a soft brush, then rinse. Follow with a mild soap scrub and rinse to remove the Simple Green completely from the sail. Be careful not damage the sail with excessive scrubbing. Depending on the stain, you may not be able to remove it completely.
Removing rust stains is tricky. We recommend that you contact your North Certified Service expert for treatment. We may not be able to completely get rid of it, but we can make sure the area is still in good working order.
Regularly rinse sail bag zippers or lubricate with silicone spray.
Patch minor tears as soon as possible with a pressure sensitive adhesive (PSA). Avoid using duct tape!
Check nylon/polyester downwind sails a few times each season for small tears. Catching small holes early can reduce the chance of them becoming bigger tears later on.
Spray luff tapes on both genoas and mainsails as they slide up the track, using a Mclube-style lubricant. This will help clean the tracks and make hoisting and dousing easier.
📸 Michael Egan/ Egan Images
Check battens for splintering. Splintered battens should be replaced, or at least taped, so the splinters don’t harm the sail.
Check luff slides and other hardware to make sure they are still securely attached to the sail.
Check seam stitching to make sure it is still intact. UV can quickly damage certain threads.
Have your North Sail Certified Service expert inspect your sails at least once a season. Regular inspection will prevent small problems from becoming big ones. You can also ask your local loft to create an onboard sail repair kit for your specific sails.
Keep a sail log. Photographing your sails on a regular basis and logging the hours they are used will help you and your sailmaker evaluate your sail inventory seasonally. Your sail photos can also be digitized and analyzed using North’s SailScan computer program. Contact your North representative for details.
📸 Michael Egan/ Egan Images
READ MORE
READ MORE
guides
ROLLER FURLERS & UV SUNCOVERS: WHAT YOU SHOULD KNOW
ROLLER FURLERS & UV SUNCOVERS: WHAT YOU SHOULD KNOW
Understanding Your Furler and How it Works Will Prevent Disaster
📸 Billy Black
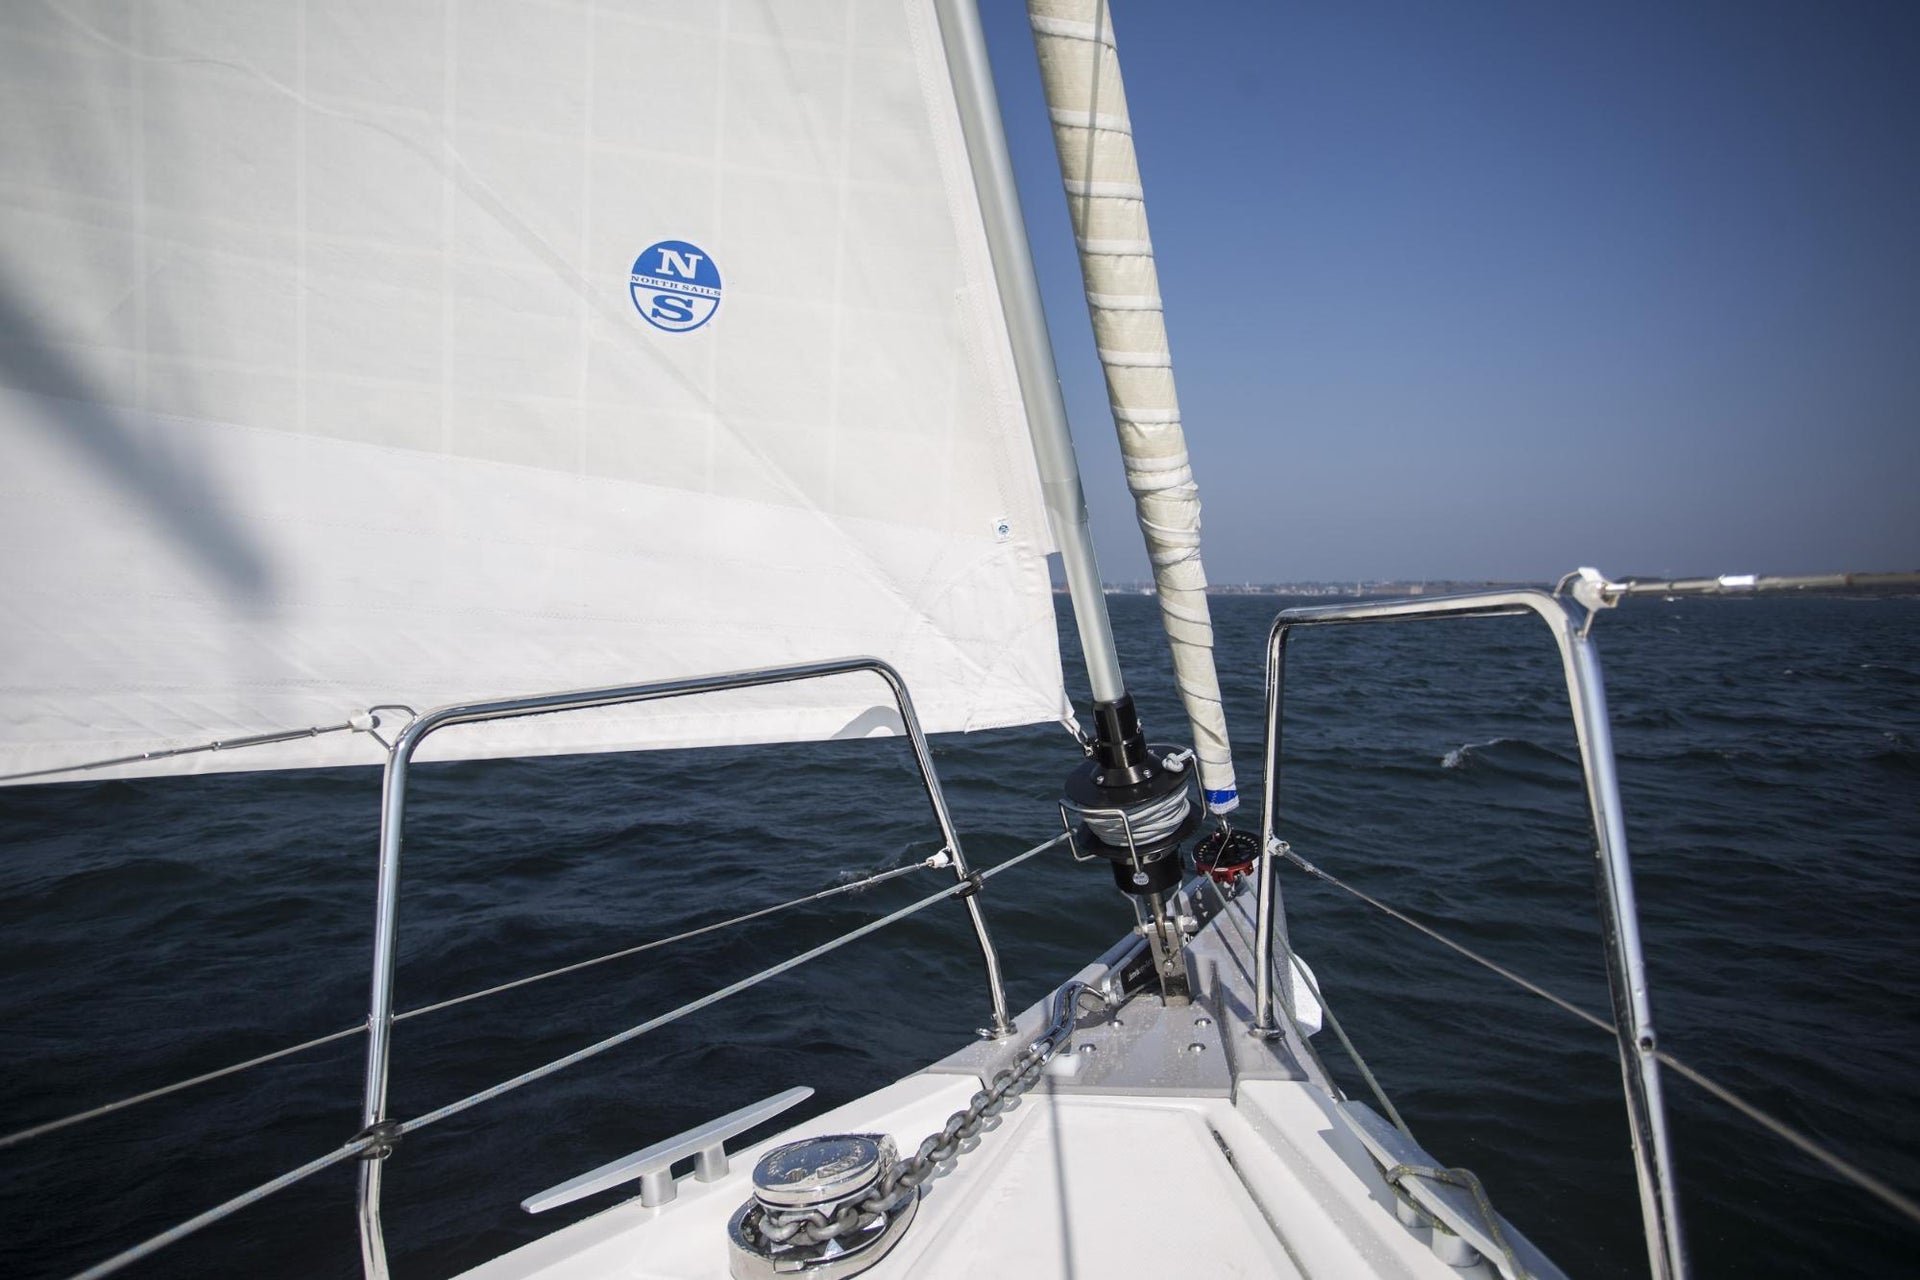
What happens if you furl your sail the wrong way? – with the sun cover on the inside instead of the outside of the furl? Unfortunately, we see the effects of this in our service lofts around the world. The result is UV damage to the sailcloth that has been left exposed to the sun, instead of being protected by the UV leech and foot cover.
Most often, this happens when a sail has a UV cover that is the same colour as the sail material. Such as a white cover on a white sail or a grey cover on a grey sail. When the sail is rolled around the headstay in the wrong direction – with the UV protection on the inside of the roll, it is not always obvious leaving the base sail material exposed.
In some cases, this can happen on a new sail that has been installed incorrectly – with the sail cover that is on the inside of the furl due to the direction the furling drum turns when furling – either clockwise or counter clockwise.
This also can happen seasonally when the boat is unrigged or mast is not stepped (assembled and placed vertical). If the furling line is re-rigged, it must be wound the correct direction around the furler, to be compatible with the sail. Fortunately, North Sails always have a sticker displayed as a visual reminder that the sail is furled the correct way based on what side the UV protection is applied.
📸 Michael Egan/ Egan Images
To avoid this mistake which may result in the need for a sail repair, here is a short checklist to ensure that your sail is installed with the UV protection on the outside:
Determine which side of the sail has the built in UV protection – for coloured UV materials this is easy – but not as much as matching colors. The UV cover is either on the Port or Starboard side of the sail. If there is any question regarding which side of the sail is protected please contact your local North Sails professional for assistance. There are many easy ways to tell which side your UV protection is attached.
Next, you want to check that the furling line has been loaded into the drum so that the sail will roll with the UV on the outside. An easy rule to follow is that the furling line needs to enter/exit the drum on the opposite side than the UV protection. i.e if the UV is on the PORT side of the sail, then the furling line needs to exit the STARBOARD side of the furling drum.
Normally, it is a very easy fix to re-rig your furling line, by unwinding it completely, then re-winding it in the opposite direction.
Once you are certain that your furling direction is in sync with your UV protection, you can be confident in leaving your sail hoisted and furled for extended periods of time. Please note, the type of UV material and your latitude make a substantial difference in the length of time and level of protection you can expect from your UV leech and foot covers.
📸 Michael Egan/ Egan Images
READ MORE
READ MORE

guides
LET’S TALK VX ONE | TUNING FOR SPEED
LET’S TALK VX ONE
Tuning the VX One for Speed
Join North Sails expert Mike Marshall for the first session of the VX ONE informal web talk about sailing even if we can’t physically go and do it.
READ MORE
READ MORE

guides
SPEED READING: HOW TO MAINTAIN FOCUS OFFSHORE
SPEED READING: HOW TO MAINTAIN FOCUS OFFSHORE
Day After Day, Mile After Mile, for Extended Periods of Time
📸 Yann Riou
Day after day, mile after mile, distance racing reminds us of that never-ending feeling of being stuck in one place for extended periods of time. Hear more from Casey Smith (CS) how to cope with those long periods of isolation where you can only do so much. Casey is a two-time Volvo Ocean Race veteran and was a key member onboard during all of Comanche’s record runs and race wins. Casey knows a lot about being stuck out at sea, but still finds humor in the little things and gets his job done, which is most important.
Here are Casey’s tips for maintaining focus while isolated at sea for days on end:
What’s the longest race you’ve done?
CS: For sure, it’s the Volvo Ocean Race. Four hours-on, four hours-off, the whole way around the world. Waking up and coming on deck, “Oh, hi. Fancy seeing all you guys here! And look, that other boat we are racing against is still right there, and it has been for the last week!”
Do you have a sequence of things you think about that help you stay focused?
CS: Sleep. Eat. Four hours on watch. Repeat (10, 20, 30+ days…).
Do the days blend together or do you lose track of time?
CS: You lose track of the days of the week. You never lose track of time because the whole boat revolves around time. The four-hour watch rotation or the weather schedules and boat position schedules are all very closely followed, and everyone wants as much time to rest as possible and also know how you are doing on the fleet.
📸Yann Riou
What are some things you think about while you are sailing for extended periods of time?
CS: You just need to concentrate on the competition aspect of the race; that’s why you are out there in the first place. Compete and try to win. It’s really important to put everything into sailing the boat 100%.
How do you maintain your focus if the weather gets rough and you are on the same tack/jibe for hours on end?
CS: Focus comes from wanting to win. Chances are if it’s windy and downwind are probably going fast. You want to make sure you are the fastest boat and keep the pedal down. If you’re sailing upwind, and conditions are windy and rough, that’s a bit tougher because it’s hard to sleep during the off-watch and your energy is a bit lower. Being on the same tack or jibe for long periods is great as it means you get a break from moving sails and equipment so everything has a silver lining!
What advice can you give to someone who is sailing offshore for their first time in relation to staying focused and not feeling overwhelmed?
CS: It’s all about making the boat go fast. Basically nothing else matters. You have a job to do, it might be helming, trimming, grinding, sail changing and everyone contributes to miles gained or lost. Do your job at 100% and keep the boat moving fast. Also, stay calm and level. There will be times when another boat (or boats) is doing better than you but stay calm and keep sailing your boat 100% as that’s all you can control.
📸James Blake
When you are down below, if you are not sleeping, what do you do to still stay alert and ready for when it’s time for your shift to start?
CS: Eat. Make coffee for the team. Tidy up the living space up. Dry water out of the bilge. Check the steering and other systems. Watch movies.
What are your favorite foods to help stay awake and focused if you are the crew on shift?
CS: We are usually limited on what foods we can have on board, so your mind does wander to what food you love and would love to be eating. The reality is you have never seen faces light up as much as when a fresh bag of jerky comes on deck. Coffee and warm drinks are huge as well, but chewing gum is needed after the jerky and coffee. Brushing your teeth is something that slips a little offshore.
Is there anything you have vowed to do when you’ve been on a long leg? (Did you do it?)
CS: Remember to load some more movies, music or books on the iPod. You can only watch the music video of Umbrella by Rihanna so many times.
Staring at the horizon for so many hours on end, have you hallucinated offshore?
CS: No hallucinations on deck but I’ve had some crazy dreams during the off watch. Also waking up and forgetting where you are and then slowly coming too. Then the realization of “crap, I’m on the boat and only one week into a six-week leg from China to Rio.”
READ MORE
READ MORE

guides
CRUISING SAIL PERFORMANCE
At North Sails, we are passionate about performance. For cruising sailors, this means a lot more than just speed.
READ MORE
READ MORE

guides
CRUISING SAIL DURABILITY
Cruising sailors demand durability. Yet, durability is not an easily quantified element of sail performance. Predicting durability is a tough challenge, because sails are subjected to so many different forms of use and conditions.
READ MORE
READ MORE

guides
DN ICEBOATING: INNOVATING FOR SPEED
DN ICEBOATING: INNOVATING FOR SPEED
What does it take to go even faster than last season?
For Chad Atkins and Oliver Moore, winter means fast apparent wind sailing on their DN iceboats—whenever they can find ice and wind within driving distance of Rhode Island. We recently spoke with them to learn more about a recent speed jump made by North Sails clients. Chad finished third at the 2020 DN North Americans, his first time ever in the top five—and he was just “one bad leeward mark rounding” shy of winning the whole thing. (Tuning partner James “T” Thieler won the regatta.)
Oliver, who owns the Moore Brothers Company and builds iceboat masts, says it’s Chad’s tuning that makes him so fast. Chad, who worked with Mike Marshall to develop the North Sails DN inventory, says it’s those composite masts—and the sails designed to match them—that made his speed jump possible.
But both agree that the most significant speed gains are made long before the regatta starts, which is why iceboaters spend so much time developing and dialing in equipment to suit style, body size, and personal preference. “Most of this stuff is happening before we hit the ice,” Chad says. “Static deflection, bend testing, the development of the mast and the sails and the plank… that’s 75-80% of the speed right there.”
Oliver enjoys that part of the challenge; “It’s the most technical boat I’ve ever sailed, from a setup standpoint.” And he says Chad was the guy who got him into iceboating. “He helped set me up and got me close enough to right that I could be in the conversation. Then you can say, okay, ‘this is the effect I’m trying to achieve.’”
Mast pop
Mast bend characteristics are absolutely critical, and the goal is the same as soft-water sailing: to get powered up as low in the wind range as possible. The ideal look, though, is radically different; the mast is tuned to make it “pop” to leeward. That exerts downward pressure on the iceboat runners, acting (as Oliver puts it) “like a spoiler on a race car,” which makes it possible to push harder without losing control.
“When the breeze builds, the first to get the mast to pop wins,” Oliver says. “So at that point you want a super-soft mast. But as the breeze keeps building, you’re trying to restrain that overbend, because you’re losing power. The way you control that is all in rig geometry: adjusting your shrouds or forestay, and moving your mast.” Once you’re in the ballpark, he says, the entire range is only a couple of turns on the shrouds.
The fuselage (hull) on a DN can vary quite a bit in size and height, but both the length and stiffness of the plank (which runs athwartship and holds the shrouds) are critical. “People are measuring to make sure that when you stand on your plank, it’s bending to the exact millimeter that you think is correct,” Oliver explains. Sails are built to match each mast and plank’s combined bend characteristics, also factoring in other variables like wind strength, ice conditions, and sailor size. “Some people have four or five different sails—I’ve got two.”
Tuning up before Racing
Though the goal is to be in the ballpark speed-wise before showing up to sail, everyone fine-tunes rig tension and mast rake before each race. The mast step can move backward and forward on the fuselage up to six inches, Chad explains. “The farther forward it goes, that’s going to be a narrower triangle , so it’ll bend sooner. The farther back it is, it’ll be a little stiffer.” Though that sounds quite straightforward, Oliver points out that there are other considerations as well. “The farther back you have the rig, the less pressure there’ll be on the front runner. Which can be fast, but you don’t have as much control.”
With so many variables, it’s hard to compare one boat’s tuning to another. “It’s very easy to get completely confused about what’s doing what,” Oliver says, “so I try and simplify as much as I can. If you want more mast bend, ease the shrouds. If you want less, shorten your shrouds.”
Chad says that when he’s going the best, the boat “has some fight to it. I have to work pretty hard to get off the line, get the plank squatting and the mast bending, all the things that need to happen before you can really get going fast.”
If the rig tension is too soft, he says, it affects height. “You might have the same speed, but guys are going to be pointing higher. It’s a pretty noticeable difference.” If the rig’s too stiff, “people are going to be laying down and their leeches start twisting off and they’re just—gone.”
Once the boat is set up the way he wants, Chad gauges mast bend off the forestay, “to know whether to press more (shoulders back on seatback) and keep the boat lit, or ease sheet some and try to get some height upwind—or soak downwind with pressure and angle.”
Between races, sailors often swap out runners or sails to better match the conditions—which can change significantly throughout the day, as rising or falling temperatures affect the ice. “You bring all your stuff out,” Oliver says, “spares and everything, dump your toolbox on the ice. That way you can change things.”
Fast sails
Chad uses the All Purpose Power sail that he helped Mike Marshall design, or the Max Power if the wind is light and the ice soft. Oliver uses the APP as well; “I think the APP works further up the speed range and is more versatile” than older designs, adding that there’s always a tradeoff in DN sailing between versatility and optimization. “Because you can change between races, there is the temptation to have very specialized equipment for each condition—but you still need to figure out which is the right setup. I try to keep it as versatile as possible.”
What’s changed, and what hasn’t
Chad has been iceboating since he was seven. Only a year or two later, “My dad just pushed me off and I went out and didn’t come back.” He laughs. “He’s like, holy crap, I gotta build a second boat.” Since then, Chad has seen the development that used to take place in basements and garages migrate to professional shops like Moore Brothers. Composite masts are more predictable than the spruce or aluminum rigs he grew up with, making DN sailing safer—and a lot more fun. “The technology is really paying off, because you can drive the boat harder and just continue to accelerate another couple of knots.”
Oliver came to iceboating as an adult, and he admits that it’s a pretty crazy sport—especially when you factor in all the driving time that chasing ice requires. But it’s addictive, he says. “The racing at the top-end is insanely amazing—so close, you have one bad mark rounding and you lose the regatta. It’s everything that Laser racing is, but at 40 miles an hour.”
Another thing that keeps both of these guys hooked is the continuous innovation in search of ever faster speeds. “We’ve outgrown some of the smaller ponds that we used to be able to sail on,” Chad says, “because we’re going too fast. But we’re still working to go faster. The aero package part of it’s really starting to come into play, reducing that triangle between the fuselage and the forward top part of the boom… You’re never done, and it’s always fun. That’s what I love about it.” Or, as Oliver puts it: “It’s a radical thing to be going that fast, that low to the ice, crossing ten boats! One good day of sailing every three years—that’s enough to keep you coming back.”
READ MORE
READ MORE
guides
J/70 TIPS: HEAVY AIR
J/70 TIPS: HEAVY AIR
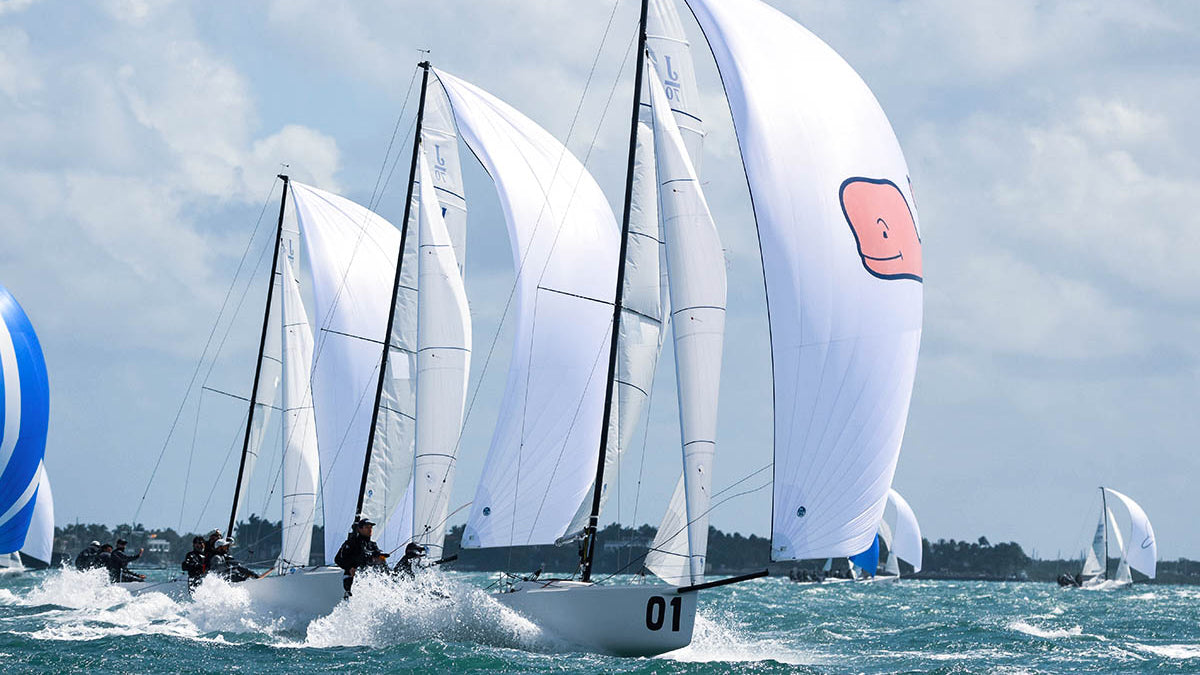
Allan Terhune Explains What Worked for Team Vineyard Vines at the 2020 J/70 Midwinters.
When the breeze increases, a different set of skills are required. We caught up with North Sails expert Allan Terhune, who called tactics on the winning team at the J/70 Midwinters in Miami, for some lessons learned from a windy weekend.
Sailing in Breeze – Upwind
The key to speed upwind is keeping the boat flat and balanced. This is achieved two ways: rig tune and trim.
Rig Tune
We were at the top of our tuning guide most of the weekend to keep our headstay tight. One key factor is the backstay gross tune; make it TIGHT. You need to have enough throw to pull backstay on, in order to flatten out the main. Many teams took the slack out of their gross tune but didn’t make it tight. Also I heard many people did not go to the top of the tuning guide. If this was not the weekend to go there, I don’t know what would be!
Trim
Once the rig is tuned, the goal is to keep the helm balanced, and also to be able to burp the main in the puffs to eliminate heel. The key to this is the jib sheet. If you have the sail max in-hauled like you would in lighter conditions, the main would immediately luff in puffs, forcing the bow to go down. To compensate for this, we sailed with less inhaul, and moved the lead forward one hole. This may seem counter-intuitive, but it keeps the leech correct and makes the foot powerful enough to get through the chop. We made sure the leech was close to the middle band on the spreader at all times.
We then played the in-hauler to get through waves and puffs. Our main luffed very few times, and we talked all the time about keeping the boat balanced.
As for mainsail trim, it was easy to over-tighten the outhaul and not have enough power through waves. We found that having max backstay was always faster and having enough vang on made it easy to play the sheet. We tried to NEVER let the main luff or flog. You have to be using both sails to be balanced and fast.
Sailing in Breeze – Downwind
Wow was that fun or what! Seriously though, it was HARD work!
A few things to remember off the wind in big breeze:
Keep a constant angle of heel. Too much heel and you wipe out, too little and you slow down and bear off too much. You have to keep the apparent wind forward.
Jib trim is crucial. Molly did a great job of always keeping the jib full, but also knew when to blow it if I lost the kite.
Jibing: Speed is your friend. The worst thing you can do is bear off and slow down and load the boat up right before a jibe. That is when you wipe out.
Steer around waves and surf whenever possible. Finding a good rhythm with the trimmer and talking about the angles is the best way to identify the path of least resistance.
Stay in the puff. We all work so hard upwind to go .1 or .2 knots faster, but if you miss a puff downwind you will be 2-5 knots slower. The tacticians who keep their eyes out for the next puff make HUGE gains.
This regatta was a great reminder that the J/70 is truly a team boat. Everyone has a role, and if one person is not carrying their weight, the boat does not succeed. For success in heavy air, you need to develop a different set of skills. And practicing with your team when it’s windy is the only way to get better.
Team Vineyard Vines John and Molly Baxter, Ben Lamb, and Allan Terhune are the 2020 J/70 Midwinter Champs after a relentless eight-race battle in a variety of testing conditions. On the final day, they snagged two bullets using the 2019 J/70 Worlds winning inventory: F-1 Mainsail, J-6 High Clew Jib and AP-1 Asymmetrical kite. | Full story
Awesome job team Vineyard Vines. 📸 Chris Howell
John Brim’s Rimette leading the pack 📸 Chris Howell
READ MORE
READ MORE
guides
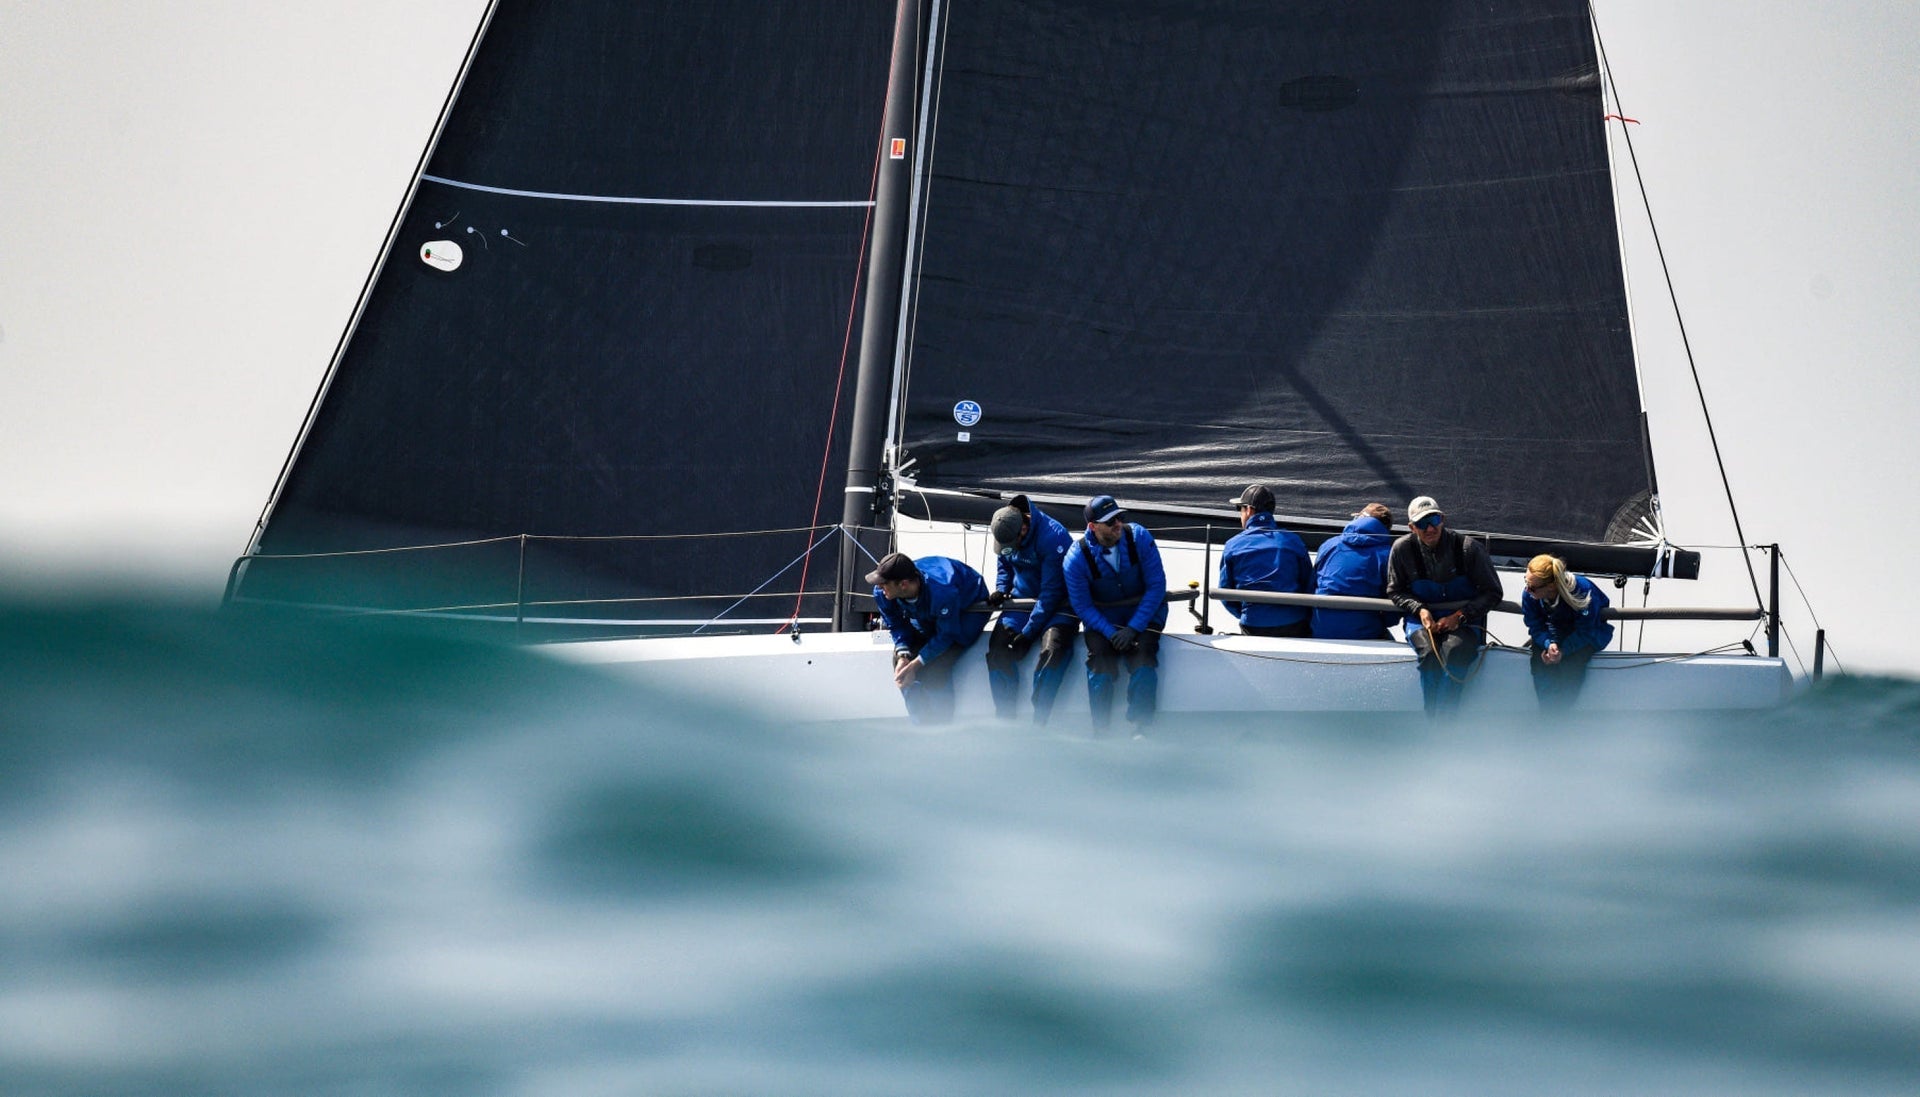
THE DIFFERENCE BETWEEN RACING SAILS AND CRUISING SAILS
People use sailboats in many ways, but we broadly define them as cruising or racing. Here is the North Sails Expert advice on what to look for when it comes to performance, design, and materials
READ MORE
READ MORE
guides
420 MIDWINTERS: COACH NOTES
420 MIDWINTERS: COACH NOTES
Key Tips To Up Your Game
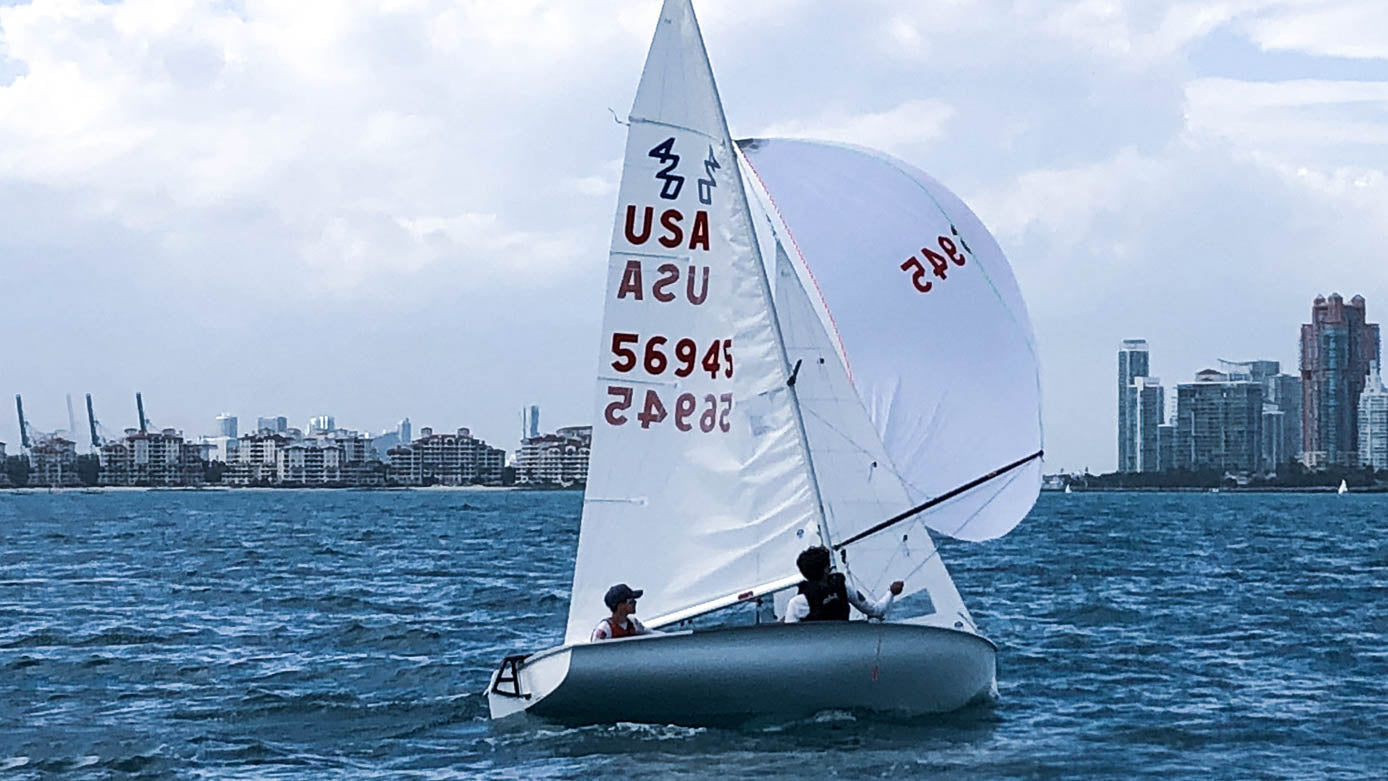
35 teams from around the country gathered at the Miami Yacht Club for the 2020 International 420 Midwinter Championship. Out of the high caliber of talent, Justin & Mitchel Callahan prevailed with outstanding sailing and a convincing win at this event. North Sails powered boats fared very well, showing speed and versatility in a range of conditions, ultimately placing seven of the top ten boats in the overall results.
Here are some coach notes from North expert Tom Sitzmann:
Know your own boat
As much as we’d love to think that our hulls, spars, foils, sails, and individual tuning measurements are exact, the reality is that each boat, and all gear associated with it, is unique. With a tuning partner, experienced coach, or both, make sure you get out on the water before racing to check your rig settings and sail trim – no two boats are exactly alike! Use tuning guides as a starting point, experiment when able, but proof of concept is only validated on the water.
Spinnaker trim on the reach legs
There are LOTS of gains to be made on the “outer” reach and in the final sprint to the finish. Again, it is critical to know the design philosophy of your spinnaker and trim accordingly. Pole height, often set and forgotten about, can be a big difference-maker for an i420 on the wire reach. Experiment and improve!
Learn more about 420 sails.
Re-tuning for the lighter wind prediction on the final day.
Haul to the open-water sailing east of Key Biscayne
READ MORE
READ MORE
guides
THISTLE MIDWINTERS WEST: COACH NOTES
THISTLE MIDWINTERS WEST: COACH NOTES
North Expert Mike Ingham Shares Clinic Tips
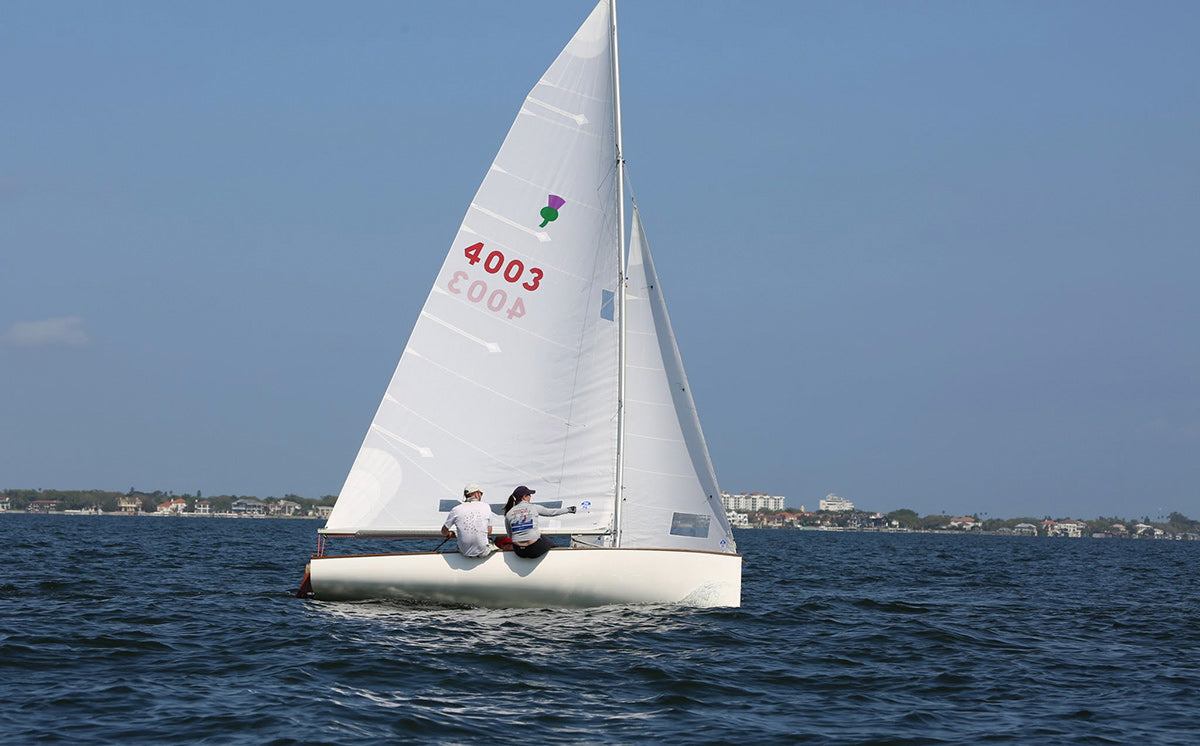
📸 Tina Deptula
North Sails expert Mike Ingham hosted a one-day clinic for over 20 Thistles in preparation for the 2020 Midwinters West in San Diego, CA. Boats were overpowered at first, but later in the day, the wind softened.
“It was nice to see both wind ranges,” Mike says. “Reviewing the on-the-water videos, I found some common threads that were well worth talking about with the group.”
If you couldn’t be there, here’s what Mike saw.
Flat, Flat
The Thistle likes to sail flat, especially in Mission Bay where there are no waves.
Depowering
To keep flat when overpowered, you need to depower. Here are a few thoughts on how to do that in flat water:
Outhaul – Tight the outhaul until the foot looks stretched. That shelf is important.
Cunningham – Make sure your main halyard is up all the way and your cunningham is reasonably snug. Wrinkles are great in lighter wind, but as it builds, pull it on to smooth them out.
Pinch – In flat water when overpowered, it is okay to pinch.
Jib Trim
A great starting point is to trim the jib leech in until it lines up with a zip tie taped to the middle spreader 10 ½” away from the mast. A lot of people did not have that zip tie, and their jib trim was inconsistent.
In Heavy Wind: If you have to ease the main out to keep the boat flat, ease the jib as well until there is just a hint of backwind in the main.
In Lighter Wind: When underpowered, if the jib leech tell tale near the middle spreader is stalled, you are trimmed too tight. If it is flowing, you may be able to trim tighter.
Mainsail Trim
When overpowered:
Vang sheet. Pull hard on the vang, and then let the mainsheet out to keep the boat flat.
If you have the North Proctor mainsail, traveler sheet.
When underpowered:
Keep the vang floppy loose so you can control the leech tension with the mainsheet.
As a starting point, try to keep the top main leech telltale flowing 50% of the time (if it stalls behind the main for a few seconds, then flows straight back for a few seconds, that’s 50%)
In flat water, you can have it flow less, say 30%
In waves or chop you will want it to flow more, say 75%
Mike’s next stop – the Thistle Midwinters East in St. Pete.
Learn more about North Sails Thistle sails.
READ MORE
READ MORE
guides
SPAN SQUARED
SPAN SQUARED
What Does It Mean When Wings Create Lift?
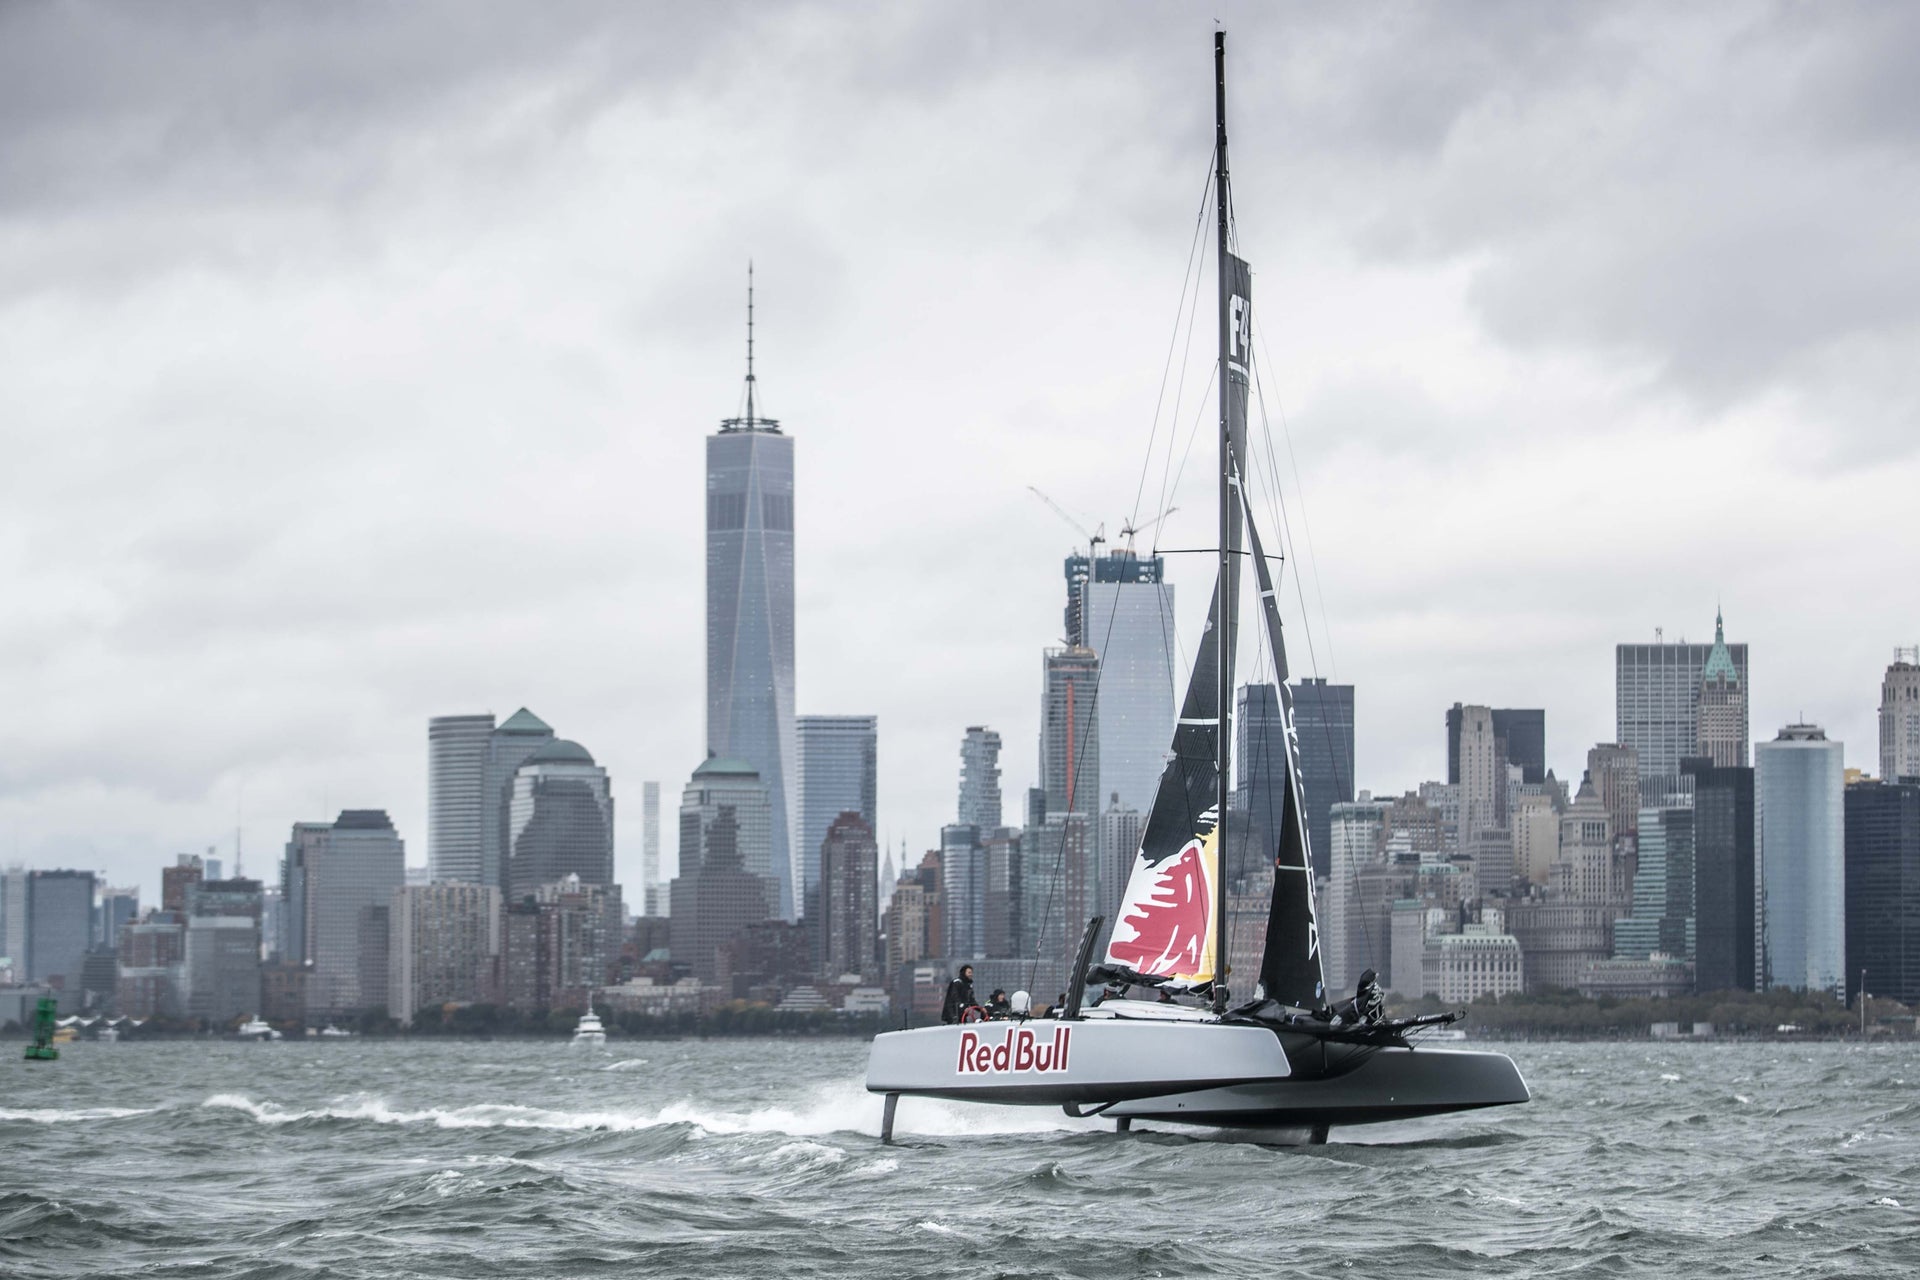
© RedBull G2
When a wing (like a sail or a keel or centerboard) produces lift, an accompanying drag force is generated called induced drag. This is related to pressure that is lost around the wingtip and the formation of vorticity. A wing is considered to be more efficient if it produces lift with less induced drag.
Common understanding is that induced drag is lower for higher aspect ratio wings. This is apparent by reviewing the standard equation used to calculate induced drag which contains the term aspect ratio. The problem with this equation is that it defines the value of the induced drag coefficient using the lift coefficient, which is not necessarily constant depending on how aspect ratio is changed.
The equation is useful in situations where the wing area is the same, such as these two wings. Notice that while they have the same area, they have different spans.
A useful definition is to relate aspect ratio to the span and area rather than to the span and chord. This is particularly handy
for tapered wings.
Lift coefficient and drag coefficient are non-dimensional terms that indicate how hard a wing is working regardless of speed or size. Dynamic pressure, which depends on the velocity squared, and area are divided into the lift and drag forces to define these coefficients. As area changes, the coefficients required to generate the same force will change proportionally.
Since the equation for induced drag coefficient relies on the lift coefficient, it is susceptible to changes in lift coefficient that can occur as the aspect ratio changes. For a fixed amount of lift (force, not coefficient), if the aspect ratio is increased by making the span longer while keeping the chord length the same, which adds area, the lift coefficient will be decreased due to the greater area. If the aspect ratio is increased by keeping the span the same length and decreasing the chord length, then the lift coefficient will be increased due to the smaller area. When aspect ratio and lift coefficient both change, it becomes more complicated to assess what the affect is on induced drag.
There is a simpler way to understand how induced drag is affected. By performing some appropriate substitutions in the induced drag equation and simplifying the terms, we define the induced drag force rather than the induced drag coefficient.
The result is that this equation shows that induced drag is proportional to the lift force (not coefficient) squared divided by the span squared. This means that span, not aspect ratio, is the determining factor for the efficiency of a wing. Area and chord do not appear in the final equation and do not impact induced drag. They do affect the viscous (frictional) drag, though.
Unlike the original induced drag coefficient equation, which implies that induced drag is dependent on aspect ratio (but only when the area is kept constant, meaning that as aspect ratio is changed, chord and span are modified to maintain the same area) this equation demonstrates that the induced drag force is really dependent on the amount of lift squared and the span squared. This reveals that the reduction in induced drag in the previous span comparison example is really due to the increase in span. The power of the squared term is significant because, for example, if span is doubled, the induced drag is decreased by a factor of four. Even a 10% increase in span results in nearly 20% less induced drag.
Understanding that induced drag is inversely proportional to span squared has value to improving sailing performance.
A common misconception is that a centerboard or keel with shorter chord but the same span is more efficient because it has higher aspect ratio. When we recognize that when span is the same, induced drag is therefore the same, we can properly attribute any performance differences experienced to the difference in area. These differences relate to the viscous drag instead, which is the friction of the fluid flowing over the surface and is dependent on the area, and also to changes in angle of attack (leeway and apparent wind) that occur as area is changed.
An example of the affect of span on sails that is common for many one designs is that as speed increases, raking the rig aft has been found to be beneficial to performance. This can be explained through span squared.
After a boat has reached its righting moment limit (crew fully hiked or trapezing, or practical limit of heel for a keelboat) the amount of force that the sails produce cannot be increased any more (without causing excessive and detrimental heeling). In order for the boat to go any faster, the drag needs to be reduced. The longest edge of the sail is the leech, which as the rig is raked aft becomes more vertical and maximizes span. So, with the same lift being produced over a sail with greater span, the induced drag of the rig is reduced and the boat can sail faster. In the most extreme case, comparing an upright luff to an upright leech, the induced drag would be decreased by the ratio of the luff length divided by the leech length, squared.
Another benefit of raking the rig is that the clew becomes closer to the deck, and as the trailing edge approaches being sealed, there is less pressure lost around under the boom and the sail becomes more efficient. Span-wise change in pressure differential is what causes vorticity to be shed from the trailing edge. Increasing the distance between the vorticity shed from either end, or reducing the vorticity shed yield higher effective span, hence lower induced drag.
Since drag also contributes to heeling, a lower heeling force allows the total force on the sail to be increased up to the righting moment limit, further increasing the boat’s speed.
When the rig is raked aft to maximize span by making the leech more vertical, the height of the sail is slightly lowered becoming closer to the water where the wind velocity is lessened by friction with the water surface. While this is not a problem once the boat has reached the righting-moment- limited condition where de-powering (and drag reduction) becomes necessary, it might explain why it is not always advantageous to sail with the rig raked aft in lighter wind conditions when creating more sail force could be the overriding factor.
As the rake of the rig is changed the location of the sail’s force moves with it. This changes the loading required on the rudder in order to make the boat sail straight. While this may limit mast adjustment, the potential benefit creates incentive to discover how to set up the boat to take advantage of the lower induced drag of a more raked rig.
The concept of span squared can also be used to determine the optimum rudder load, either to define the reasonable extent of mast rake or to minimize the drag of the underwater foils for a fixed mast location. The keel (or centerboard) and rudder should both contribute to the boat’s side-force to counteract the sail’s side-force. Determining the appropriate load for each can produce significant performance improvements.
While there are some interactions between the two foils, a simple approach to determine the minimum induced drag is to treat each foil as isolated and sum the drag of each. The result with the least induced drag is that the foils should contribute to side-force proportionally to the ratio of their spans squared.
It is important to consider the span as twice the physical span of the keel or centerboard because it is sealed against the bottom of the hull, which acts as a reflection plane. This is because the pressure differential across the sealed foil is maintained at the hull intersection as if there were a reflected image of the keel protruding upward. A completely immersed rudder that is sealed under the hull can also be considered to have a reflected image that doubles its physical span, but a transom hung rudder that pierces the surface of the water would only be considered to have its physical span without a reflected image. This is because the water surface can deflect due to the pressures imposed on it by the surface piercing foil. As the water surface deflects, the pressure differential at the surface is degraded and the surface piercing rudder loses the benefit of a reflected image.
The difference in effective span between an immersed rudder and a transom-hung rudder indicates that most keelboats (with immersed rudders) should be sailed with more rudder load than most dinghies (with transom-hung rudders).
An additional factor is that as rudder load is increased through deflecting the rudder, the leeway angle of the boat is decreased. Decreased leeway has the additional benefit of a higher apparent wind angle and the opportunity to produce higher sail force. This makes it is very beneficial to deflect the rudder at least to the angle that produces minimum induced drag for the whole boat and gain low induced drag, a higher apparent wind angle and larger sail force, and less leeway, all of which contribute to better pointing. It could even be useful to sail with the rudder deflected somewhat beyond the loading that minimizes induced drag. The small additional increment in induced drag for a modest increase in rudder angle could be offset by further improved pointing ability.
A boat with a gybing centerboard or adjustable flap on the keel already has the capability to reduce leeway and improve the apparent wind angle and may not benefit as much from overloading the rudder as much as a boat with a fixed centerboard or keel.
Since sailing with the appropriate rudder load can have a significant affect, particularly in one-designs where there are limited opportunities for performance improvement, it is valuable to determine what the target rudder angle should be. Assessing the issues for a specific boat requires knowing the dimensions and loads. These can be analyzed to produce specific target settings or designs (if allowed).
Here is an example of how induced drag is minimized through optimizing the load sharing of the keel and rudder.
The total amount of side-force that the keel and rudder produces is kept constant but the amount of side-force that each contributes is varied. By ignoring the affect of each component on the other (a simplification that is more valid as the distance between them is large), the induced drag of the keel and rudder can be calculated separately and added together. In this example the keel span has been chosen to be four and the rudder span to be three. The units do not matter, since we are merely looking at the proportionality of the load. Assuming 100 total units of lift, induced drag is shown for several possible load distributions. Note that minimum induced drag occurs when the load is distributed proportionally to the ratio of the span of the keel and rudder, squared (for example 64/36 = 8/6 squared, and 88/12 is close to 8/3 squared).
The example is shown two ways: with an immersed, sealed rudder that benefits from a reflected image with twice the span, and with a transom-hung, surface piercing rudder that only has an effective span equal to its length. The lower induced drag with the longer effective span rudder is dramatic. But what is important to recognize is that the optimum load sharing distribution is quite different between the rudder styles.
While the longer acting rudder can take 36% of the side-force leaving 64% for the keel, the shorter acting rudder can only take 12% of the side-force leaving 88% for the keel. That causes the lowest possible induced drag value to be 37% higher in order to produce the same 100 units of side-force. Again, the units are artificial, as the constants dynamic pressure and pi have been left out of the equation so we can just look at proportional relationships. A similar amount of drag reduction could be expected for the same style rudder that was replaced with one that had twice the span.
Within the constraints of one-design rules, that type of change is usually not allowed, but there is still the potential to achieve a load sharing that yields the lowest possible induced drag for the configuration. The increases in induced drag as the proportions are varied away from the optimums are shown and give incentive to set the boat up to achieve loads that generate the lowest possible induced drag. Also evident is that being away from the optimum is more severe for the shorter span rudder configuration than for the longer span rudder configuration.
By applying the relationship of span squared, the target loads can be determined for a specific boat. The challenge then is to achieve those loads. This is accomplished through changing the mast position, either by moving the mast step or adjusting rake in order to establish the location of the sails’ force so that the boat will sail straight with the rudder deflected to the desired angle that minimizes the induced drag of the underwater foils. As the mast is shifted aft, the rudder load required to make the boat sail straight increases, and as the mast is shifted forward, the rudder load will decrease. Finding the optimum can have a noticeable affect on performance. The goal is to efficiently use the spans of both foils.
Often, a boat has the mast too upright and hence, is not properly loading the rudder. Raking the mast back can cause the rudder load to increase, which decreases the underwater foils’ induced drag, AND increases the span of the sail by making the longer leech more upright, which causes the sail to have less induced drag also. Appreciating the power of span squared can be useful when making decisions that affect performance.
READ MORE
READ MORE
guides
SAIL PLAN DIMENSIONS
Determine the Correct Rig Dimensions for Your Sails
When it comes to optimizing your boat's performance, one of the key factors is understanding your sail plan and how its dimensions affect the overall handling and efficiency of your vessel. The basic rig dimensions for a yacht are generally understood. However, there are some differences in how sailors describe these dimensions. At North Sails, we want to make sure everyone is on the same page, which is why we've put together this guide on how we define sail plan dimensions and how to measure them accurately. Whether you're a seasoned sailor or just getting started, knowing how to properly measure your sail plan is crucial for making informed decisions about sail choice and tuning. Let’s dive in!
I – Height of Foretriangle
Elevation of Forestay, measured down to elevation of main shrouds at sheer line.
J – Base of Foretriangle
Horizontal distance measured from front face of mast at deck to position of headstay at sheer line.
P – Mainsail Hoist
Elevation of upper mast band or maximum main halyard position, measured down to lower mast band or top of boom.
E- Mainsail Foot
Horizontal distance measured from aft face of mast at top of boom to boom band or maximum outhaul position.
Is – Height of Inner Foretriangle
Elevation of Forestay, measured down to elevation of main shrouds at sheer line.
Js – Base of Inner Foretriangle
Horizontal distance measured from front face of mast at deck to position of inner headstay at sheer line.
Py – Mizzen Mainsail Hoist
Elevation of upper mast band or maximum main halyard position, measured down to lower mast band or top of boom.
Ey – Mizzen Mainsail Foot
Horizontal distance measured from aft face of mizzen mast at top of boom to boom band or maximum outhaul position.
ISP – Elevation of Spinnaker Halyard
Measured down to elevation of main shrouds at sheer line.
SPL – Spinnaker Pole Length
Distance from the forward end of the mast to the point where the spinnaker pole attaches to the sail or to the pole’s furthest extension.
STL – Spinnaker Tack Length
Horizontal distance measured from front face of mast at deck, forward and horizontally to position of spinnaker tack attachment point.
READ MORE
READ MORE

guides
EFFECT OF WINTER SUN ON BOAT SAILS
EFFECTS OF WINTER SUN ON BOAT SAILS
UV Is Not Your Friend
We all know that ultraviolet (UV) light breaks down traditional fabrics, which is why sunshine is bad for your sails. (FYI 3Di is composite technology, not a sail laminate. For info on 3Di sail care, read Sail Maintenance.) Even the lower sun angles of winter can wreak havoc on our sails. Here’s what you need to know about UV damage on traditional fabrics. Fortunately, there’s a way to protect your sails and extend their life expectancy: be diligent about covering them up when they are not in use. Once fabric is rotted from UV exposure, the only remedy is replacement. Read on for other factors that make a difference.
Fiber type
Some fibers have better UV resistance than others. For two fibers of the same type, a smaller diameter fiber will degrade more rapidly than a larger diameter fiber. Woven polyester fabrics are made with warp yarns that are almost always smaller than the fill yarn. So when dacron has been rotted by the sun, it will rip more easily across the warp (parallel to the fill).
The simple test of your sail’s fiber integrity is to lightly scrape the surface of the fabric with a dull metal object, like the edge of a spoon or the thick side of a knife blade. If the fibers are still in good shape, the fabric will become shiny and smoother where you rubbed it. If the fibers are rotted, the filaments on the surface will fuzz up or sluff off of the sail. If the UV damage is very advanced, the fiber might rub away completely—the sign of a sail that is going to fail.
Most UV exposure occurs when the boat is sitting with the sails down. Accordingly, some areas of the sail will get more exposure than others. The mainsail leech lying on top will rot long before the parts of the sail hidden beneath it. The same is true for a roller-furled headsail. The fabric on the inside of the roll will last much longer than the leech, which forms the outside of the roll.
Sometimes the degraded area of a sail can be economically replaced. But more often, when the sail fabric is degraded enough to easily rub the fibers away, or to tear a Dacron fabric along the fill yarns, it is time to replace the sail.
Suncovers
You may be surprised to learn that your sail will degrade right through its sun cover. As the cover ages, it becomes less effective at blocking the rays of the sun. Heavier fabric provides a more effective barrier than lighter fabric, and dark colors provide better protection than light colors. If you spend time in the tropics, consider a multiple layer cover. It will be much more bulky, but your mainsail will last longer.
Last but not least, the deck of your boat is an excellent UV barrier. Keep your sails below decks whenever possible.
A suncover can help protect your sail from UV rays, but step one is making sure your sail is furled correctly so the suncover is on the outside. This image shows how the sun has damaged the sail material because the sail was furled incorrectly.
Stitching
Sewing thread will rot in the sun much sooner than a fiber of the same size woven into sailcloth, because it sits on top of the fabric and is more exposed. If resistance to UV rot were the only criteria for selecting the thread weight, bigger would always be better. But selecting thread too heavy for the application will result in a hopelessly puckered up seam and eventually the fabric will tear along the dotted line. A needle that is too small for the fabric weight can bend and deflect around large fibers, adversely affecting the timing tolerances of the machine. With these considerations in mind, the sailmaker typically chooses the lightest thread and smallest needle that the fabric will allow.
Thumb Test
Anyone with a thumb can test for rotten thread. If you can scrape the thread away with your thumbnail, it’s time to restitch your sail. Check each seam in several locations, especially along the leech tabling or on the sail cover of a roller furling genoa. Some areas will rot sooner because of the way the sail is rolled or flaked.
If you can scrape away any of the thread, circle the area with a pencil and then start looking for more rotten thread. Restitching is an easy, time-consuming job, but less time-consuming if you catch the rotted thread before the seams come apart.
Sun degrades stitching. It’s important to get scheduled sail service to address these types of issues to avoid disaster on the water.
Straps and webbing
When you inspect your sails, take a close look at the outside of any web straps. If you see any broken fibers, start planning to get the sail into a loft to have new straps sewn over the old ones. It is not a good idea to attempt to sew through an old
corner strap with an onboard sewing machine, or any other light duty machine. The corners of the sail get harder as the sail is used, and you will be exploding lots of needles.
Excerpted from The Complete Guide to Sail Care and Repair, by Dan Neri
Webbing damage due to long-term sun exposure.
READ MORE
READ MORE

guides
VX ONE SPEED GUIDE
North American Champion and North Sails Expert Mike Marshall explains how to sail this exciting sportboat well.
Who sails a VX One?
This is the nuts and bolts of VX One sailing. First off, VX sailors are really fun and we all have a blast sailing this boat. Even on a day when we can’t sail, we have a good time. One reason the class is gaining in popularity is that you can sail it with either two or three people, and at a wide variety of weights. Most people sail with three, and the accepted class weight is around 420 pounds. I have been in the top three at major regattas sailing with just one crew, and had great results at weights ranging anywhere from 380-450 pounds.
📸 Tim Olin
What’s involved in crewing?
The boat responds very well to hiking, so it’s important for the entire team to be physically fit. Pulling the spinnaker up and down is the hardest job, so put your strongest teammate in the middle. Sailing with three, jobs are divided up as follows: Upwind: the forward person adjusts the self-tacking jib and the middle crew trims main. Downwind: forward person adjusts weight (both fore and aft and side to side) to keep boat flat and fast, adjusts the jib as needed, and trims the kite during sets and douses. Middle hoists/douses the kite and trims it the rest of the time. Sailing with two, the helm handles the mainsheet and also takes the spinnaker sheet during sets and douses.
Top VX speed tip?
You just can’t get the boat flat enough upwind. Hiking harder will make you flatter, but if you aren’t able to do that ease the main out farther than you think, and then pull the heck out of the vang. Oh yeah, and hike HARD.
What should buyers know when choosing a boat?
There are two builders, McKay and Ovington. Any of the newer boats (above #150) are quite similar. Below that number, the boats are a bit heavier. You are allowed to take weight out of the keel to bring them down to minimum weight, but it’s a little extra work and there is a limit to how much you can take out.
How does a VX get around on land?
For just one boat, the load is light and you can pretty much tow it behind anything. It’s got an aluminum trailer, and the keel goes up and down. So you put the boat on the bunks, put the covers on, put the mast on top, and head off to the next regatta. It’s a similar load to a Lightning. If you are traveling more than an hour, it is a good idea to take your keel out.
How many sails are required?
Three sails, made of polyester cloth. Our goal is to keep costs down. There was a push in the class to go to Aramid, but a brand new polyester sail is going to be better than an older Aramid sail so we think it’s more important to be able to buy new sails more often. That’s also why we only offer three sail options: one main, a jib, and a spinnaker.
VX One Tuning
What are the keys to rig set-up?
The VX has uppers and diagonals, as well as checkstays that attach to the top of the vang, and balancing the tension between them is crucial. Set your rig tension to the tuning guide’s base numbers for the conditions before leaving the dock. Once on the water, fine-tune the uppers so the leeward one just goes slack when you're sailing upwind. That gives you enough prebend, and enough headstay sag or headstay tension for the conditions. Total range is 18 turns from light air to really windy. Once I get my uppers correct, I continue to sail upwind and overtrim the main a few clicks. The overbend wrinkles should go about 50% of the way back. If they're going above the spreaders and more than 50% of the way back, I immediately put a turn or two on the diagonals. If they look okay at the spreaders, but they're going more than 50% of the way back through the window in the main, I put maybe one turn on the checks (the whole range should only be one to two turns, so if you are doing more than that, your base tuning is off). The diagonals will go through about 10 full turns of adjustment up the range. For more detail, read the Tuning Guide. And don’t just count turns; the key is to look at the main while tuning, to dial it in. Then go sailing!
📸 Jeff Westcott
VX One Upwind Sailing
Upwind the front person adjusts the jib sheet and car. It’s self-tacking, but sheet tension and car angle are critical to boat speed. The middle person trims the main, which also controls angle of heel. The driver adjusts vang and cunningham.
Which is better, sailing high or fast?
Sailing fast is much better, but the boat has to be flat. Keep the jib telltales flying 100 percent of time; don’t let the windward one dance until you are overpowered and have to ease the jib out to keep the main from backwinding.
Upwind, where does the crew sit?
Keep crew weight as far forward as possible. If I take three big waves over the bow in a row, everyone moves back a half body width. Otherwise stay as far forward as possible.
📸 Tim Olin
How do you trim the VX mainsail upwind?
Unless we’re overpowered, I trim it in until the top telltale just stalls. Once we get overpowered, mainsail trim doesn’t matter—boat heel does. Ease it out as much as you need to in order to keep the boat flat.
How do you trim the VX jib upwind?
The top of the upper leech should be parallel to centerline with the telltale flying 95% of the time, and the jib car should be sitting at 7-7.5 degrees out from centerline until it’s time to depower. Start depowering by moving the car halfway down the track (10-13 degrees off centerline); I like to keep the sheet on as long as possible. The standard attachment point on the clew is the fourth hole up from the bottom. In breezier conditions, move down a hole or two. Jib halyard tension is key in the VX One and should be played constantly, especially in puffy conditions. When you do have the main eased to keep the boat flat, don't overtrim the jib. If the main starts luffing, it’s backwind from the jib so it is time to ease!
How do you shift gears upwind?
Put the bow down and go faster! Off the starting line, it’s so hard to consistently sail the boat high and slow that you’re better off extending away than trying to pinch someone off. Shifting gears in this boat means figuring out that you’re too high and not fast enough. The faster you go, the more effective the keel and rudder are so the higher you will point.
Who says what when sailing upwind?
On our boat, the forward crew talks about pressure while the middle talks about boat traffic and speed. The skipper has pretty good visibility, and I don’t hike hard enough… so I can look around to decide where to go. When I sail with two, my forward crew talks about pressure and fills in my blind spots.
📸 Jeff Westcott
VX One Downwind Sailing
How fast is the boat downwind?
It feels like you're doing a million miles an hour, but it’s also totally manageable. The boat talks to you; when it does wipe out, just let the kite out, pull the jib in, and get the bow down and the boat flat again. There are two very distinct modes sailing downwind; lower/not hiking, and higher/hiking. The higher mode is better, but harder to maintain because it requires riding the fine line of not sailing too much distance while going fast. The goal is to stay right on the edge of control.
Where does your crew sit when sailing downwind?
The middle crew needs to be able to see the spinnaker, so that means sitting (or hiking) on the weather rail. The forward crew gets as far forward and to leeward if necessary (in light air) to keep the correct angle of heel. It’s easy to move back too soon; wait until you’re planing and hiking or taking waves over the bow. In very light air, the forward crew can sit on the floor in front of the shrouds. Don’t drag the boat’s butt in any condition. If you ever feel like the bow is up in the air, then you're probably too far back.
Under spinnaker, how much heel should be carried?
Just enough to get one half of the hull out of the water, about eight degrees. It’s very similar to upwind.
📸 Chris Turner
What are the keys to trimming the kite?
Biggest key is to ease when a puff hits, even though the kite might curl a little. Trimming heels the boat over, which turns the boat up—the opposite of what you want in a puff. Easing frees the helm and allows the boat to pop onto a plane. In theory, the apparent wind will remain constant downwind, because as you accelerate you turn down. So don’t move the kite sheet too much. In lulls, trim a bit as the driver heads up, but be careful of overdoing it.
How do you shift gears downwind?
There are two modes. Displacement (under 10 knots of breeze) and planing (above 10 knots of breeze). Above 18, it’s easy to find the planing mode. From 10-18 knots, the higher mode is faster but it’s also harder to achieve.
VX One Boathandling
What are your top 3 tips to starting well in a VX?
For the first five seconds after the gun, put the bow down and commit to getting boat speed up. If you do this, you’ll probably be going faster than the boats around you, so you’ll no longer need to sail high to keep your lane. If you don’t commit to the low fast mode, you’ll end up pinching and watching others sail away from you. While in sequence, keep a small part of jib unfurled to make it easier to tack. The jib trimmer needs to be very active. I’d love the jib to come out at 20 seconds, but realistically it’s out at around two minutes to get to the right place on line and control the boatspeed. Never slow down too much. The keel has a very short cord length, so you’ll end up sliding sideways and eating up your hole to leeward.
What are the keys to tacking a VX well?
Keep your crew weight forward. If you drag the stern, you’ll slow down even more. When you come out of the tack, ease both sails to keep the boat flat and powered up until you get back up to speed.
What are the keys to jibing a VX well?
There are two kinds of jibes: the high speed blow through, and the displacement. For the first you turn a lot faster, trying to keep the speed up. Trim the old sheet in before letting the sail blow through to the new side, and then fill it again by trimming the new sheet. It’s fast, but not conservative. For a displacement jibe, the old sheet gets eased early and you trim on the new sheet as you’re turning. You should be about halfway in on the new sheet when the main crosses. This isn’t quite as fast, but it’s a lot less likely to get you into trouble if it’s windy or your crew is not too experienced.
📸 Jeff Westcott
How do you make a fast spinnaker set?
Turn down 15-20 degrees lower than your sailing angle before calling for the hoist, just long enough to depower the sails and get the boat flat. Then turn back up as the kite goes up. If you hoist while the boat’s heeled, the tack will fall in the water and you will shrimp. The middle crew hoists, using legs rather than arms, and it should be fully hoisted with 2-3 pulls. The forward person trims the sheet until it’s handed over to the middle crew. If you have to stay high to maintain a lane, ease the main to get the boat flat before hoisting.
What are the keys to a good spinnaker takedown on the VX?
Pass the sheet to the forward crew so they can keep it filled right up to the douse. The middle crew pulls on the douse line; the first two pulls are easy, but once the bulk of the sail reaches the snuffer (usually on the third pull) it gets a lot harder. Try to adjust your first two pulls so that you’re just beginning the third when it gets hard; that way you can use your legs and have more power. On any takedown where you have to get the sheet around the headstay, I like to grab the weather sheet and pull it back until the clew is just behind the headstay on the windward side. That helps the kite land in the boat, not in the water.
How do you recover from a broach or capsize?
I haven’t done that yet! Fingers crossed! But the boat talks to you… so when you feel the rudder cavitate, ease the main to get it under control. If you don’t catch it in time, luff the kite while trimming the jib until the boat is back under control.
Any recommended boathandling drills?
Setting and dousing are the two hardest boathandling moves. Practice with an older kite, and work on the timing of the pulls as well as the direction that the bow is pointed. Also practice stopping and starting. Getting up to speed quickly can make (or break) your starts. One good check is at what speed on your Velocitek you loose flow on the foils; try to never get below that on the starting line.
The coolest thing about the VXOne class?
The people! The boat is an absolute riot to sail, but it wouldn’t matter if you didn’t have fun people to sail against. No matter where you are in the fleet, you’ll be crossing tacks and jibes with someone who will be sharing their war stories over a beer back on shore. Everyone is just so excited about going sailing and having fun.
📸 Jeff Westcott
READ MORE
READ MORE
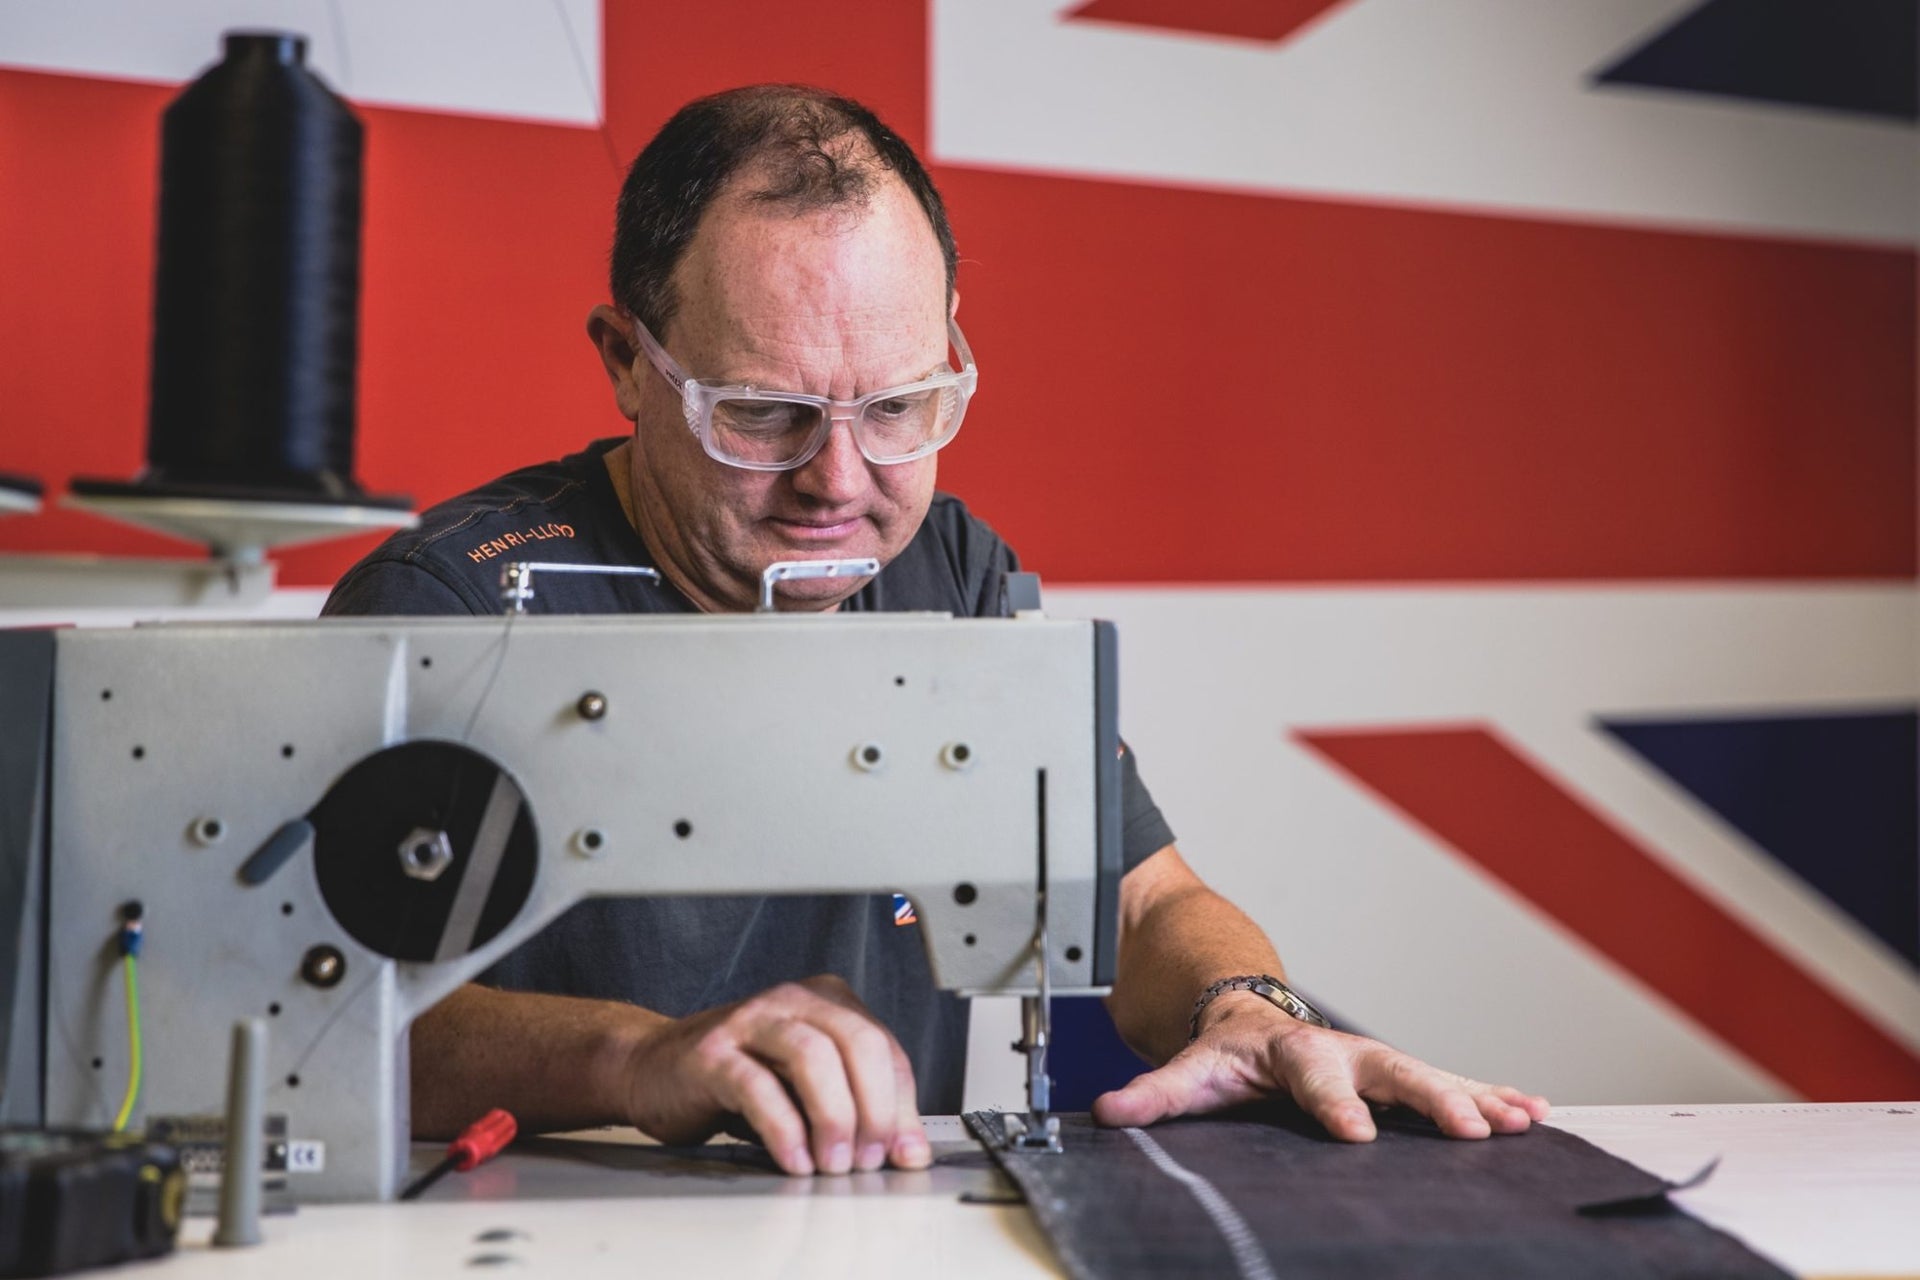
guides
WINGS OUT, SAILS IN
WINGS OUT, SAILS IN
The Return Of Traditional Sailmaking
Sail loft production manager, Ian ‘Shinzy’ Pattison © Harry KH
This article was first published by INEOS TEAM UK, November 2019
Sails have taken a change in direction for the next edition of the America’s Cup and with it comes the return of more traditional sailmaking. OUT are the semi-rigid 23 metre wings that were used on the 50’ ACC catamarans, IN are the new double-skinned mainsails that are now raised and lowered 26m to the top of the mast.
The revolutionary new design brings some of the aerodynamic advantages of the wing into the traditional sailing world. The two ‘sail skins’ that constitute the mainsail are attached to the rig, one to each corner of the back of the D-shaped mast section. It’s a 3Di product from North Sails, made from carbon fibre and equipped with buoyant material or airbags at the top, to provide buoyancy in case of capsize. The rig is one design, developed and produced by Southern Spars.
Prepping the new double skinned mainsail © Harry KH
Each team can produce up to 10 mainsails under the rules. Along with the mainsail you have the jibs and code zeros. There are five jib sizes to accommodate the different conditions and they weigh around 60kg each. Unlike the main, they are a single skin construction. The code zero, used in lighter sailing conditions has replaced the traditional spinnaker on the downwind legs, but could also be used upwind when it’s very light.
The previous wing concept was complex and required a specialist operations team and a crane to attach it to the platform. The new mainsails need support from more traditional sailmakers and allow the team to change sails on the water. The INEOS TEAM UK sailmaking team is three strong, headed up by Sail Loft Production Manager, Ian ‘Shinzy’ Pattison alongside sailmakers Sam Haines and Danny Leech.
INEOS TEAM UK Sailmaker Sam Haines © Dan Wilko
Shinzy has campaigned with numerous Cup teams, whereas for Sam and Danny the AC36 will be their first. Sam has over 20 years of sailmaking knowledge and provides some insight into the new sail concept: “The nice thing about this type of sail, compared to the previous wings, is that it does bring back the more traditional skills and machine work, which I think some people have been missing in the previous editions.
“The mainsail is the biggest sail on the boat; it is the primary device for controlling and powering the boat. It’s the equivalent to having a rudder in the sky! Iain is our trimmer onboard, there’s a lot of controls that primarily attach to the top (head) of the sail, including the twist and camber control.”
INEOS TEAM UK Head Of Rigging, Chris Noble © Lloyd Images
These controls have a big impact on the balance of the boat, and the mainsail trimmer must work very closely with the helmsman to control the boat and keep it going fast.
“The main sail is essentially the same product you see out on a 30-foot sailboat out on the Solent, just some of the engineering is different because of what we are trying to achieve with these AC75s. There’s a lot of components inside the sails so the boat builders are manufacturing these for us, there’s a lot of involvement from the different trades within the team.
“We are still in a development phase and looking at different concepts and set ups. However, a lot of the thinking has come from how the wing sails worked, so we are trying to adapt this concept into the soft sail. We are really going to be pushing the boundaries.”
Sam described a typical sailing day for him and the team. “The mainsail goes on the boat around 15-20 minutes before we are due to leave the dock. Then out on the water there’s one or two of us out there from the sail loft, in case we need to make any quick repairs and to assess if any changes need to be made.
“But our day really starts when the team get back! We bring the mainsail, jib and code zero into the base, check all the internal and external components, check the corners and batten tensions to make sure there’s no wear and tear we have missed. It’s around three hours of checking per sailing session.”
INEOS TEAM UK Sailmaker Sam Haines © Dan Wilko
“It’s a really exciting time to be a sailmaker in the America’s Cup and I think this concept can – and will – eventually trickle down to the wider sailing industry.”
READ MORE
READ MORE
guides
SARASOTA BAY: LOCAL KNOWLEDGE IS KEY
SARASOTA BAY: LOCAL KNOWLEDGE IS KEY
Vipers And VX One Winter Series
Sarasota Bay has to be one of the most beautiful places to sail in the country. Its gorgeous blues and greens reflect off the sandy white bottom and a warm salty splash is always refreshing. Perhaps the only thing more heartwarming than leaving the Sarasota Sailing Squadron is the return back to the dock, where you’re always greeted with a cold beverage, a smile, and story from another sailing enthusiast. It’s no wonder why the Squadron’s racing calendar is constantly booked.
This venue also delivers a challenging race track that keeps every tactician on their toes! The geography and weather patterns can provide just about every type of racing condition imaginable. A three day regatta might have 50 degrees temps and 25 knots from the north one day, a 3-12 knot easterly and 40 degree wind shifts the next day, and finish off with a building 8-15 knot sea breeze from the northwest. Perhaps the only people scratching their heads more than the tacticians are the PROs that have the pleasure of running our races!
I learned to race on the Sarasota Bay when I was 9 years old and I’m very fortunate to get to return to my home waters quite often. I’ve been on both the right and wrong end of the Bay’s challenges, so here are some trends I’ve noticed along the way.
Sea Breeze Day
The sea breeze has a tendency to influence the gradient any time temperatures ashore get over about 80 degrees. If there is no other weather system in the area and the day is supposed to get that warm, you can fairly reliably look for a light easterly (often with a bit of south in it) when you arrive at the Squadron in the morning.
Hopefully our PRO is reading this, because with this scenario there is really only one thing to do: POSTPONE! This morning easterly will pump in and out and shift slowly south as it dies. Keep an eye over the Van Wezel (it’s purple – you can’t miss it!) and look for puffy clouds to will build up until about 12:30pm. By 1:00 – 1:30, the easterly will have given up, and—as fast as you can snap your finger—the WNW sea breeze will make its grand entrance off the shores of Longboat Key. Now we’re in for a beautiful afternoon of racing.
The sea breeze is fairly steady, but as the weather mark gets closer to Longboat Key the land can create 10 degree shifts. Shortly after the sea breeze comes in, look for more velocity on the right side of the race course. Make sure you play shifts to get over there, and then look for opportunities back to the top left closer to land. Later in the day, the pressure tends to even out and you start seeing more gains on the top left. But be careful, because if the course is too close to Longboat Key, the holes get bigger and bigger and you can get hung out to dry if you go too far left. On the downwind legs, try to keep an eye on the puffs settling in off the Key.
Cold Front Day
Any decent weather forecast will typically predict these a long time out. Unlike Miami, Sarasota occasionally gets hit with the big winter cold fronts that sweep across our country. Often these fronts pass through overnight (tie your boats down!) and we are greeted the next morning with a few inches of rain, temperatures in the 40s, and a NNW breeze that might be gusting over 30 knots. If the breeze does settle down enough to go racing, plan on shallower water because the wind will have blown a lot of water out of Big Pass (the Southern exit of the bay, near Siesta Key). This means “lots of sheep” as a popular class member likes to put it… steep chop to the rest of us. Plan on exercising your bailing arm and your hiking muscles as these days can be pretty full on. The wind is generally pretty steady, so it’s usually about starting at the favored end and minimizing tacks. The top priorities are boat speed and boat handling.
Strong Easterly
It’s fairly common in the spring to have an easterly breeze strong enough that it’s not affected by the sea breeze. It will often start out around 15 knots in the morning and die down to around 5 knots by the end of the day. This is the most dynamic condition on Sarasota Bay; the shifts and puffs are quite large and not always predictable. Get on the long tack early, and stay on it as long as you can. Point your boat at the mark, even if you have to sacrifice clean air to stay on the lifted tack. You can’t afford to sail away from the big shifts. Many times, it seems there is a left shift near the bottom of the course, a right shift in the middle, and a big left shift again at the top. But nothing can be counted as rock solid in this condition!
Before the start, look up the course and try to start where you think the most pressure will be. From there, get on the lifted tack ASAP. Coming into the weather mark, decide what the shift is and get on the correct jibe right away as well. There’s a lot to be gained and lost there.
Southerly
It’s rare, but every now and then we get strong south breeze. In fact, last year’s final day of racing at the Midwinters was blown out by a building southerly. More often, when the breeze comes from the south it is lighter and more variable, often with big shifts and pressure from course right as the sea breeze endeavors to have its way. In a southerly less than 12 knots, my money’s on the right side of the course because it generally marches over to the right in a typical “clocking” fashion (with smaller “backs” to the left throughout the process). Early in the day it’s common to see huge right shifts with velocity, but as the direction works right the breeze settles in from the SW and the big shifts become less dramatic. The right seems more reliable, but it’s still possible to play the shifts on the left for a nice gain. Keep reading the water for velocity, and play the compass numbers above all else.
There are some good rules of thumb that may help out when racing on Sarasota Bay, but this venue has stumped me plenty of times—even when I think I have a good idea of what’s going on! That is why the racing is so fun here—everyone has to be ready for anything!
READ MORE
READ MORE
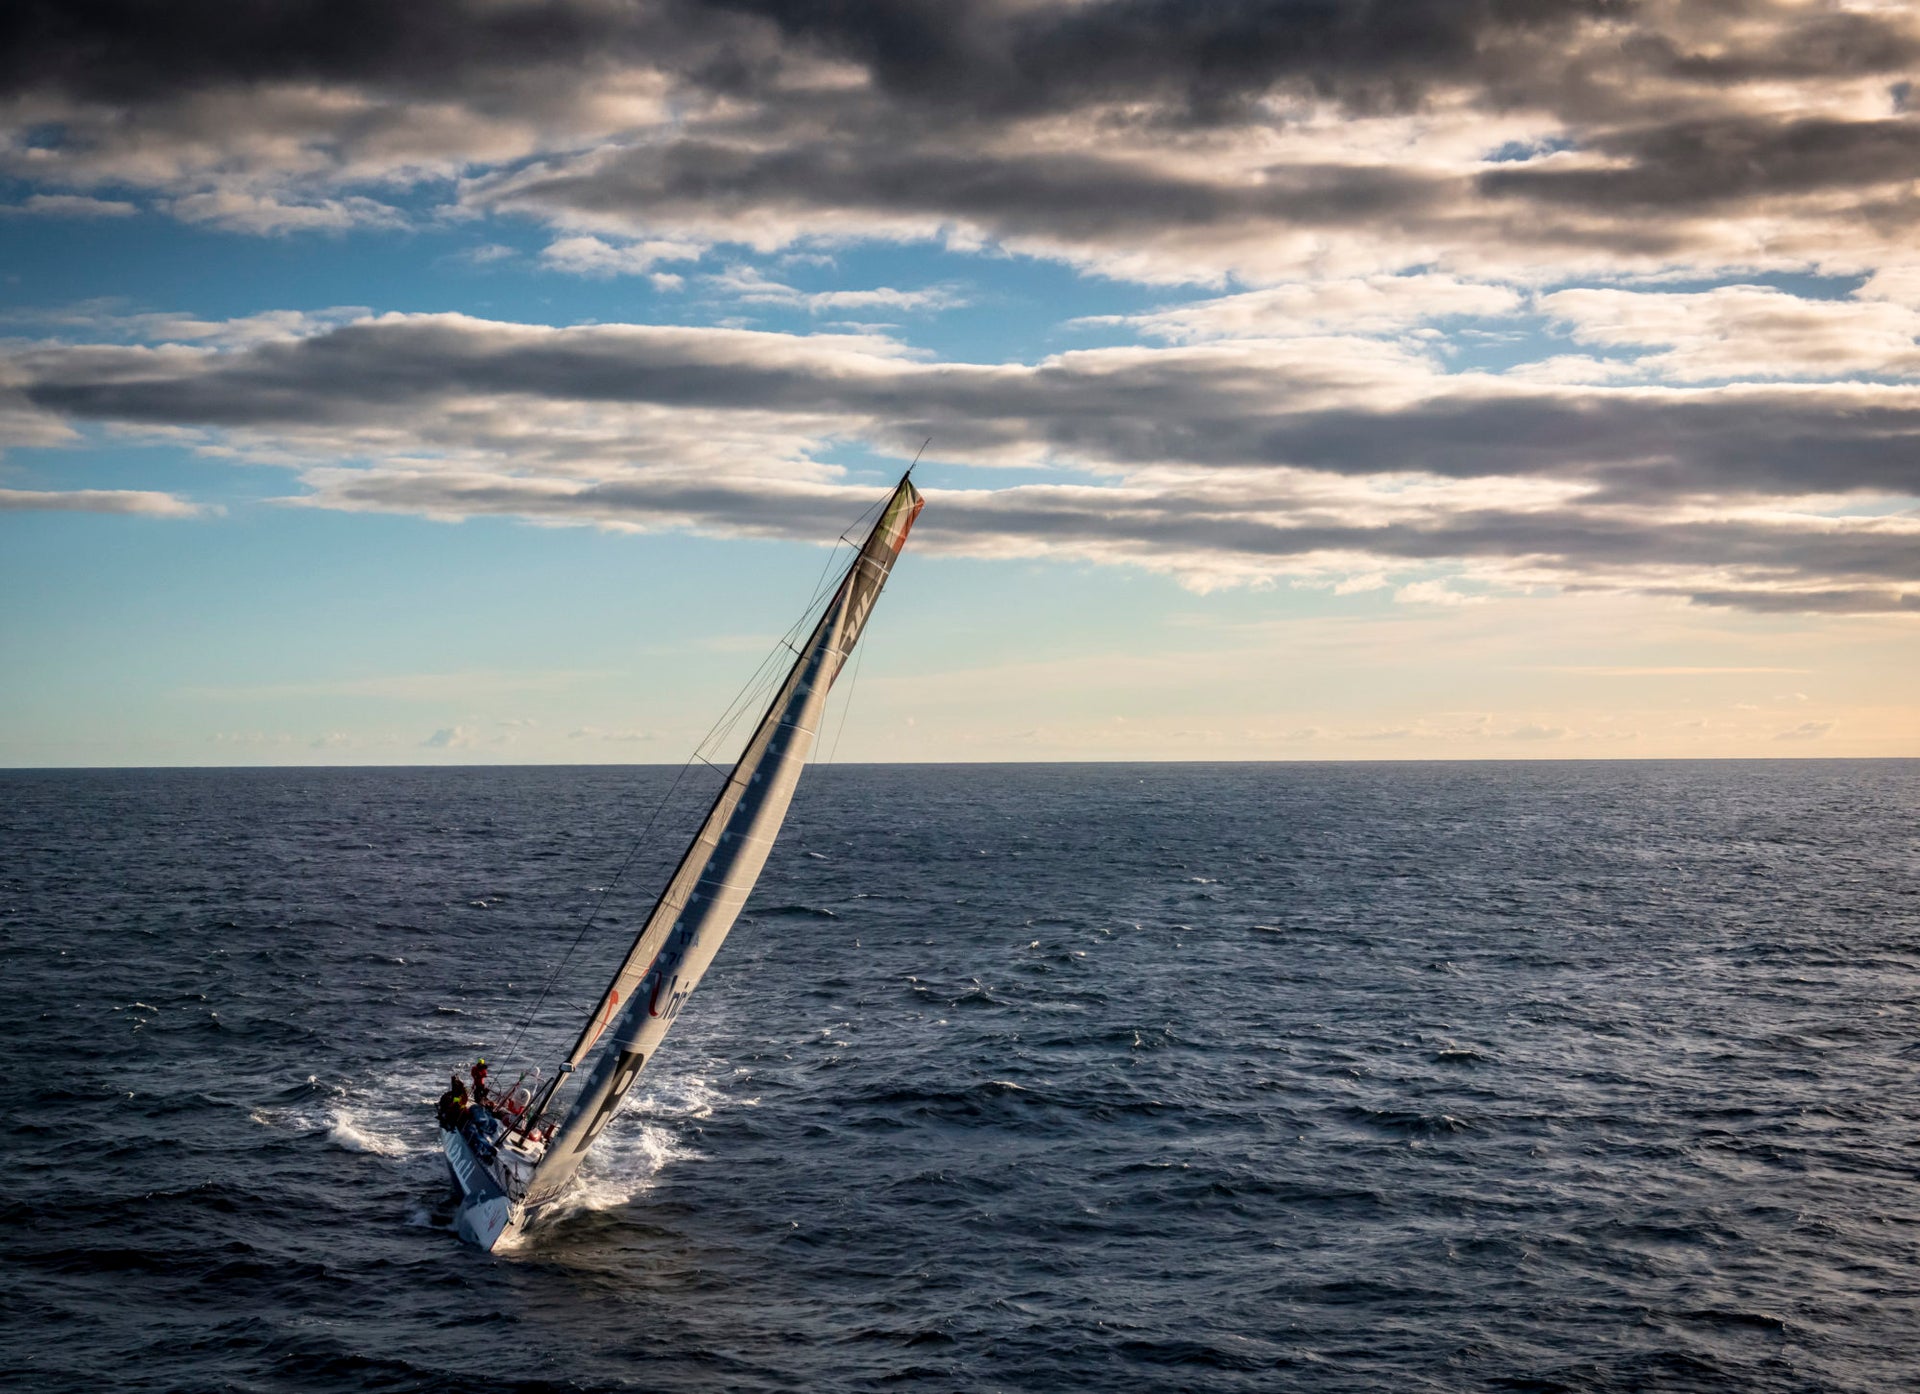
guides
OFFSHORE SAILING: WINNING THE DELIVERY HOME
Preparing successfully to compete in the biggest offshore races requires putting your attention to every detail. When sailing the Transpac, Sydney to Hobart (or a similar race that heads well offshore such as the Newport Bermuda Race), you’ll need to win a different sort of race after crossing the finish line—the delivery back to your home port.
READ MORE
READ MORE
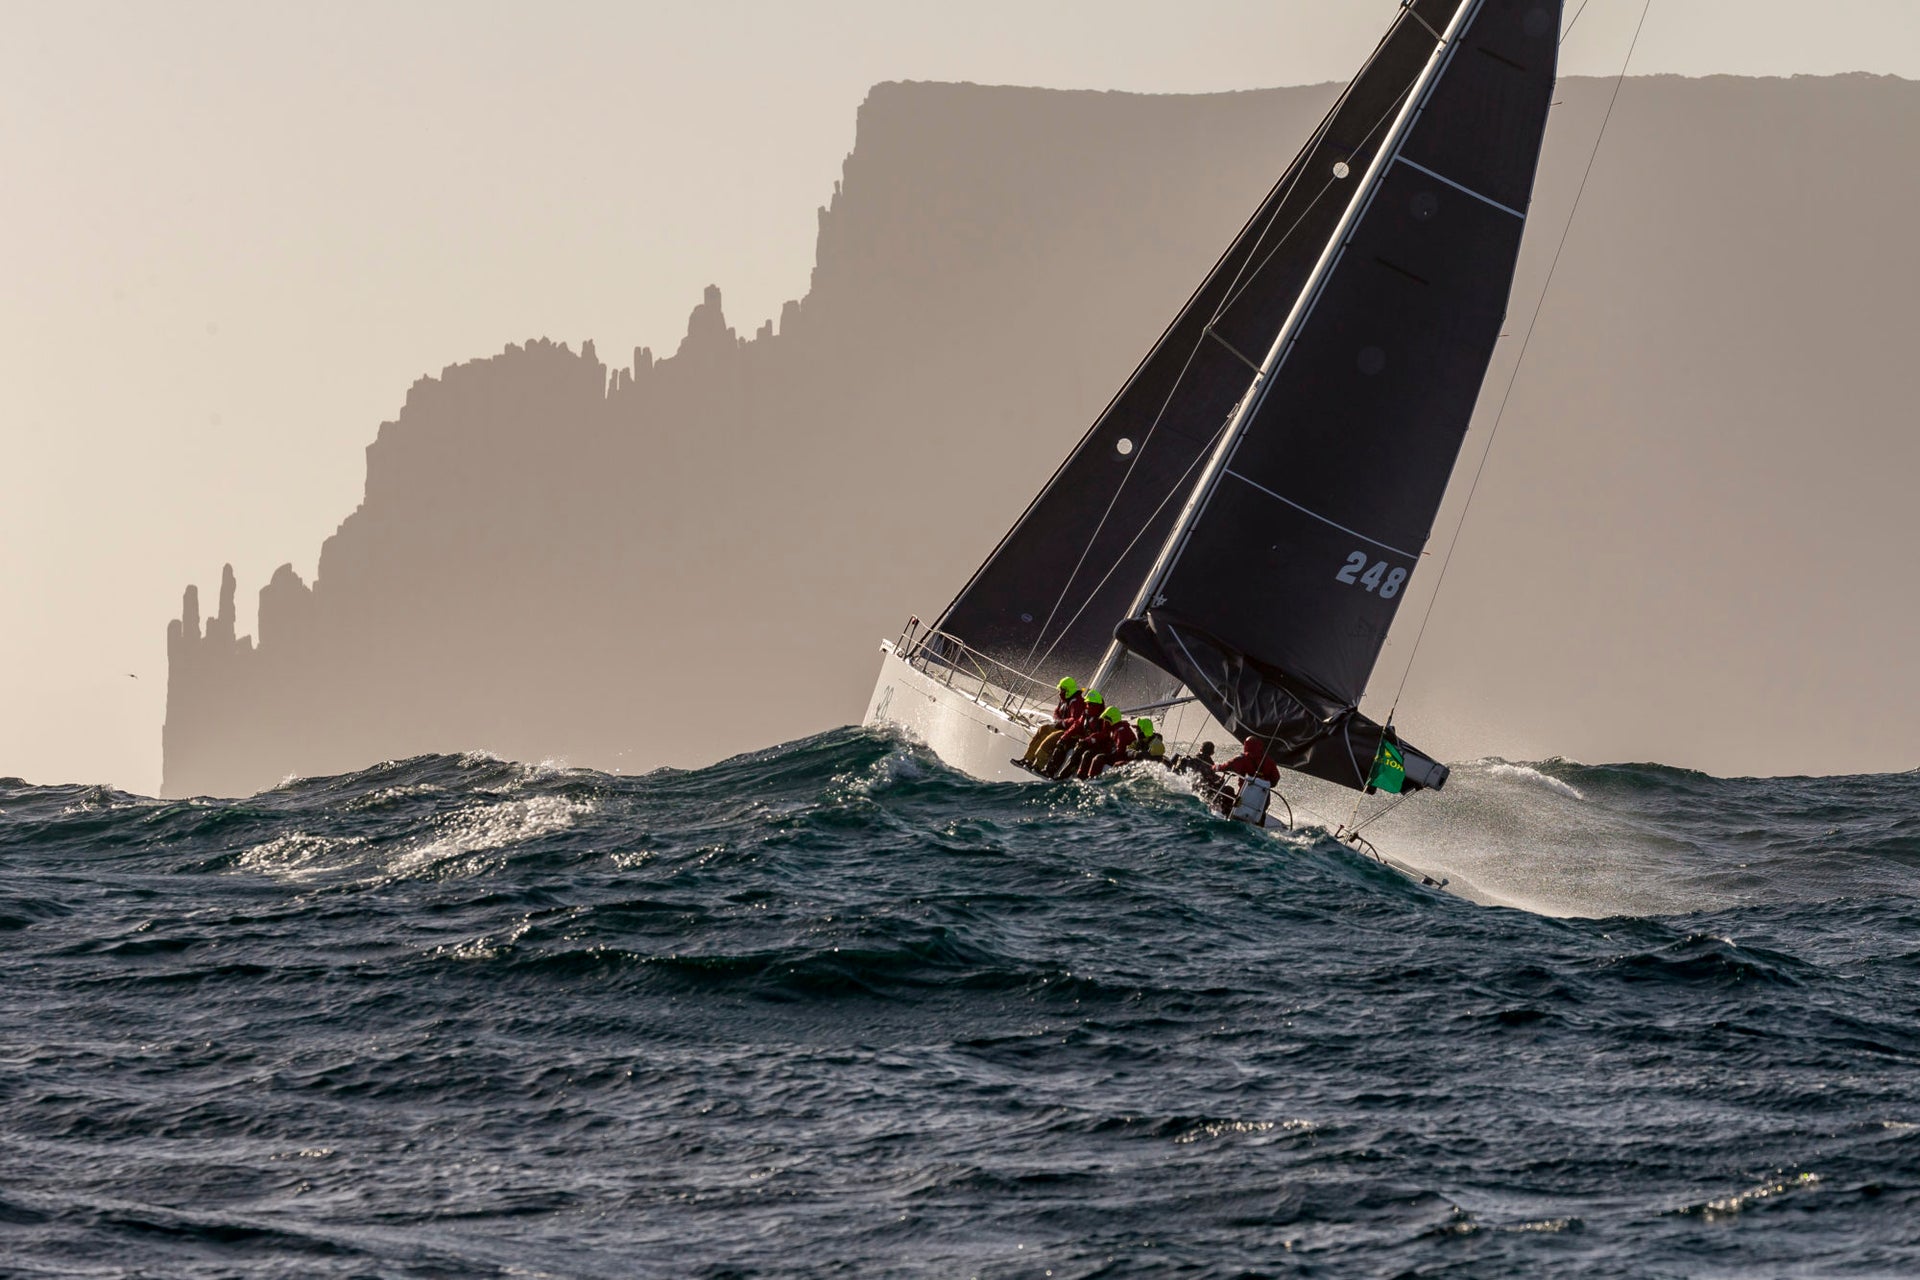
guides
SLAB REEFING SYSTEMS & TIPS FOR REEFING
In the lead up to your next offshore race, here’s a look at a typical mainsail reefing system and some tips for looking after the mainsail when reefing.
READ MORE
READ MORE
guides
WATCH SYSTEMS & CREW MANAGEMENT
For the majority of boats racing offshore distance, the crew size will be between 8-16. To get the best out of everyone while racing the boat hard around the clock, the skipper or sailing master needs a clear view of each crew member’s skill sets: their strengths and weaknesses, and where they will work best within the team.
READ MORE
READ MORE
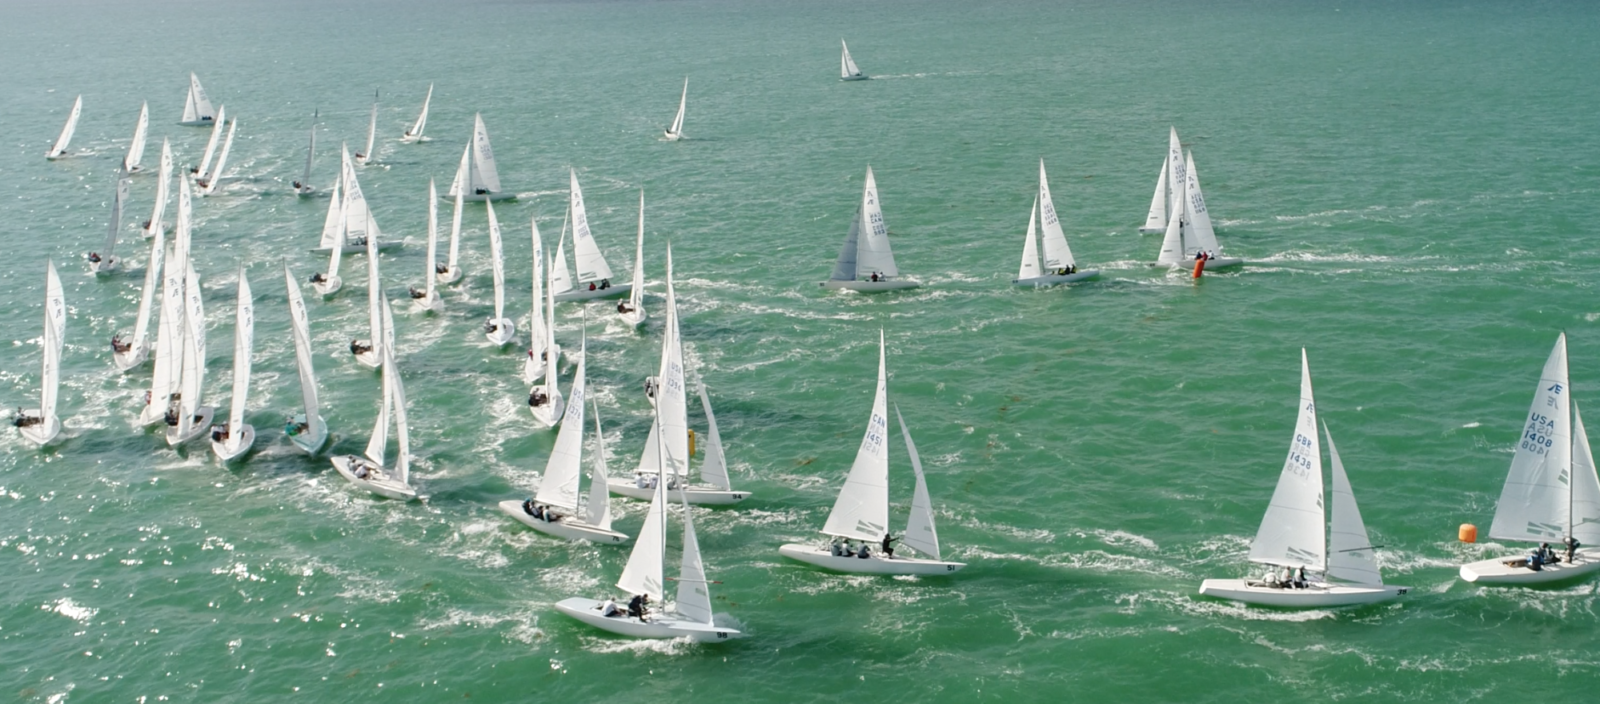
guides
BISCAYNE BAY LOCAL KNOWLEDGE
BISCAYNE BAY LOCAL KNOWLEDGE
Get To Know Your Racing Area
© Andrew Palfrey, Etchells Winter series Miami, FL
To help you prepare for the 2019 Winter Racing Circuits, we asked the local Star and Snipe World Champion Augie Diaz to explain about his home waters of Biscayne Bay in Miami, FL.
Biscayne Bay is I think pretty straightforward. The weather is driven by cold fronts approaching, and we don’t get as much breeze as we used to because the city’s grown so big. But generally, any breeze from the northeast around through the southwest is great sailing. From this direction, the breeze is usually under fifteen knots, with relatively flat water (chop but no swell). Spring and fall are the best seasons, because we don’t get many fronts.
Dominant wind direction: easterlies
The old rule of thumb is still the case: if the wind’s to the left of the south end of Key Biscayne, you go left. Near the Key, from 120-160 degrees, there is a little more pressure closer to the end of the Key, and also a geographical shift off the land. How favored is somewhat current-dependent; from 70 degrees to 160 degrees with an outgoing current, then left is really good, what we call the “Old Man Expressway”. At the top of the beat on the J/24 Worlds course, the Old Man Expressway could be important.
On what I call the Cuba Course, where the Etchells sail, way down south of Matheson Hammock, there’s less left down there than there is closer to the point of Key Biscayne. So you have to keep in mind where you are on the Bay.
Current
Understanding the current is very important. People think the current comes in and out of the Bay from the east, but it actually runs in and out from Bear Cut. If you get close to what we call the Valves, which are the channels through the shallow areas that on the chart are labeled Biscayne Flats, there is a component of current going in and out of there. But you have to be very close to the Valves for that to be the net effect. Otherwise, the current basically ebbs from the southwest to the northeast, and goes the opposite way when it floods.
As for the timing relative to high and low tide, I’ve seen it as much as an hour off, so I just use tide change as a gauge and then keep checking the buoys, all the time. Sometimes seaweed will show lines of current, but I’ve never really seen a change in the color of the water.
Other wind directions
Once the wind gets to about 170-180, it’s pretty important to protect the right. That’s true all the way to 220 degrees. Anything right of 220-230, it’s going to march quickly to the northwest because that’s a frontal-driven direction, which doesn’t doesn’t have the ability to stick.
If the wind’s right of 230 degrees, I like coming in from the top left because you get some really nice puffs off the left shore. It depends where you are on the Bay; on the J/24 course, close to the west shoreline, you’ll definitely want to come in from the top left.
Northwesters are like you’re on a lake: very shifty, very up and down. But in late October, it’s actually less frontal, so that’s less likely.
Secret to success
Focus on what the current’s doing, and in the easterly understand how important it is to go left.
READ MORE
READ MORE

guides
HARBOR 20 TUNING GUIDE
Thank you for choosing North Sails for your Harbor 20. We hope using this tuning guide will help you get the most from your new North Sails. Our goal is to give you a rig set up that is fast in all conditions and easy to adjust. Some relatively minor modifications are necessary to the standard Harbor 20 layout in order to get the most from your boat and sails.
General
Shroud Adjusters
It is important to have the proper shroud set up for effective rig tuning. Notice the picture above, the keeper allows you to make adjustments with the shroud locking mechanism so you can make adjustments to the rig based off the conditions.
The keeper and third hands will also prevent the shrouds from spinning off while sailing. These can be purchased in a variety of different rig shops.
Adjustable Backstay
In order to properly control the shape of the jib and mainsail it is a big help to have a easily adjustable and fairly powerful backstay. Making sure your backstay is running smoothly will allow you to de-power your sail in moderate wind conditions.
Mast Tuning
Before Sailing
First loosen shrouds until they are making 5” circles. From there tension the upper shrouds until they read 20 on the loose gage. From there fill your bucket half full of water and untie your stern from the dock so your boat is head to wind. Attach the bucket to the main halyard and let your boom sit on the cushions in the cockpit. Hang the bucket over the starboard side of the boat, and cleat the main halyard so the bucket handle sits flush with the bottom of the cap shroud. Then, without uncleating the main halyard, take the bucket and hang it over the port side of the boat. If the bucket handle is hitting the same part of the cap shroud on both sides, this means your mast is in the middle of the boat. If the handle is above the mark on the port side that means your mast is to starboard. If it is below the mark then the mast is leaning to port. Adjust the shroud to get the mast in the middle of the boat.
**Note: it is important that the boat is faced into the wind. Likewise it is important that just one person is in the boat during this exercise, and that person sits in the same spot on both the port and starboard side. Do the exercise multiple times before making adjustments.**
After getting the mast in the middle of the boat, tension the lower shrouds to 10 on the loose gage. Sight the mast to make sure it is straight.
Now you should be ready to race! You should also sight the mast on both starboard and port to ensure the mast is symmetric side to side while under sail.
Sail Trim
Light Air (0-8 knots)
MAIN
Outhaul should be tensioned so their is about 3.5” between the boom and the foot of the sail.
Traveler should be centered. Never let your traveler go to leeward in any situations. There are folks in the fleet who actually screw their traveler to the deck so there is zero chance of it moving.
JIB
Tension jib halyard so that there is a hint of wrinkles in the luff. Be careful not to over tension. Adjust jib lead dependent on the jib. If top telltales luff first, move the lead up on the clew board. If bottom telltales luff first, move the lead down on the clew board.
Backstay should be adjusted so you have about 1.5” of forestay sag at base setting.
Moderate Air
MAIN
Pull on the outhaul until there is 1.5” between the foot and the boom. Tension mainsheet so top telltale flies 70% of time; top batten will be parallel to the boom. This helps to generate power. Tension main halyard/ cunningham to just remove horizontal wrinkles in luff. Use the main sheet to tension the headstay along with shroud adjustments. If you are easing main sheet, you are loosing headstay tension. Pull on backstay to help with headstay tension and to flatten the sails.
JIB
Trim sheet so sail is 2-3” from end of spreader. Tension backstay to medium setting. This will straighten headstay and slightly flatten sail Ideally you want zero sag in the headstay.
Heavy Air
MAIN
Outhaul out to band – max tight. Tension halyard or cunningham hard to keep draft forward. Tension lower shrouds to keep mast from bending too much. Backstay on very tight. Top batten should be outside of parallel. Tension the vang tight enough so that the boom does not go up when the mainsheet is eased. This will allows you to “vang sheet” to keep boat on its feet. Remember, flat is fast. Play the mainsheet aggressively in the puffs to keep the boat flat.
JIB
Tighten halyard quite tight to keep draft forward. Trim sail so it is 3-4” off end of spreader. Tighten backstay very tight to make headstay as straight as possible and flatten sail.
*Please note that the above trim settings should be taken as starting points only. These are meant to show the range of settings from light to heavy air. We have found it useful to keep a logbook every time we go sailing to note fast settings or ideas.
Harbor 20 Quick Tuning Chart – California
UPPERS
LOWERS
WIND SPEEDKnots
UPPERS(PT1)
LOWERS(PT1)
Steps
Turns from base*
Steps
Turns from base*
VANG
OUTHAUL
JIB LEAD
< 6
-4
-2
– 2
-4
– 2
-2
0
3”
Lower
6-8
-2
-1
– 2
-2
– 1
-1
0
2.5”
Lower
8-10
20
10
BASE
BASE
BASE
BASE
Snug
2”
Neutral
10-13
2
1
2
2
1
1
Snug
2”
Neutral
13-16
4
3
2
4
2
3
Tight
1”
Neutral
16 – 19
5
4
1
5
1
4
Tight
Max
Upper
19-22
6
5
1
6
1
5
Tight
Max
Upper
22+
6
6
1
6
1
6
Tight
Max
Upper
* The number of turns is an estimate and could be different from boat to boat. It is important to check your settings, and the number of turns between the settings, before going out on the water.
Harbor 20 Quick Tuning Chart – Chesapeake Bay
UPPERS
LOWERS
WIND SPEEDKnots
UPPERS(PT1)
LOWERS(PT1)
Steps
Turns from base*
Steps
Turns from base*
VANG
OUTHAUL
JIB LEAD
< 6
-2
-1
– 1
-2
– 1
-1
0
3”
Lower
6-8
14
10
BASE
BASE
BASE
BASE
Snug
2.5”+
Lower
8-10
2
1
2
2
1
BASE
Snug
2”
Neutral
10-13
4
2
3
4
2
2
Snug
2”
Neutral
13-16
6
4
3
5
3
4
Tight
1”
Neutral
16 – 19
7
5
2
6
2
5
Tight
Max
Upper
19-22
8
6
2
7
2
6
Tight
Max
Upper
22+
8
7
2
7
2
7
Tight
Max
Upper
* The number of turns is an estimate and could be different from boat to boat. It is important to check your settings, and the number of turns between the settings, before going out on the water.
READ MORE
READ MORE
guides
LARK TUNING GUIDE
Mast: C section
Mast Foot: 2700mm (From aft transom to aft face of the mast foot)Spreader Length: 395mm (From the outside of the shroud perpendicular to the bearing surface of the mast track)Spreader Deflection: 155mm (From the centre of the straight line drawn from tips of the spreaders to mast)
Mast: Kappa section
Mast Foot: 2700mm (From aft transom to aft face of the mast foot)Spreader Length: 380mm (From the outside of the shroud perpendicular to the bearing surface of the mast track)Spreader Deflection: 145mm (From the centre of the straight line drawn from tips of the spreaders to mast)
Wind Speed
Light 1-8 knots
Moderate 9-15 knots
16+ Knots
Sea State
Flat
Choppy
Flat
Choppy
Flat
Choppy
Mast Rake (Ft/Inches)
21″ 11″
21′ 9″
21′ 7″
Rig tension (lbs)
330
297
264
Mast Ram
Pull forward to flatten the main
Pull back to keep the mast straight as kicker is applied
Pull back to ease over bending
Cunningham
None
Take out minor creases
Lower the cunningham block further by 30mm
Outhaul
Hard
Ease 20mm
Ease 20mm
Hard
Kicker
Take up slack
Keep top tell-tale flying 90%
Hard
Centreboard
Leading edge vertically down
Raise 1-2’’
Raise 3-4’’
Jib Fairleads
The position of the fairleads affects the foot and leech tensions; pulling the fairleads forward is the same as pulling the barber haulers on. Moving them back in the boat increases the foot tension and allows the top half of the jib to twist open (see the top tell-tale break before the lower ones). Moving them forward has theopposite effects of opening the foot slightly, and closes the leech.
Light Winds (1-8 knots)
The pulley for jib sheeting should be set so if you follow the line of the jib sheet it bisects the clew at roughly 45 degrees. The general rule for light air sailing is to keep the flow of air moving through slot (leech of the jib to the luff of the main). Aim to have the higher tell-tales lifting before the lower ones as this shows the direction of flow is more biased to the top of the leech (twist)
Moderate winds (9-15 knots)
As the breeze starts to build you should be aiming for max power. Here you will be able to move the fairlead forward to close the slot to help stop losing power at the head of the jib. Again, sheet the jib aiming to get the higher tell-tales lifting before the lower ones.
Heavy winds (16 knots+)
The jib sheeting should be moved forward again to help close the leech. If the luff of the main starts to turn inside out the slot is being stalled, you may need to ease the sheet and move the fairleads back to help open and keep the flow of air exiting the sails as quick as possible.
Spinnaker Trim
The spinnaker should be flying so the two clews (two bottom corners) are level, then ease the leeward sheet so the luff (sail edge nearest the wind) just starts to flicker back on itself. A handy tip is the tie the halyard to the head of the kite so there is 2 inch gap from the knot to the edge of the sail, this helps the kite fly freely.
This is purely a tuning guide and has been prepared to help you get the most out of your North Sails as quickly as possible. Some of these numbers will differ from boat to boat. Feel free to modify and experiment in small steps to find what suits you best. If you find settings that really work well, mark these clearly and please keep us informed.
READ MORE
READ MORE

guides
HELIX LUFF CORD: RELIABLE TOP-DOWN FURLING
TOP-DOWN FURLING IS BACK
The Helix Luff Cord Changes Everything
North Sails and Future Fibres co-engineered the Helix Luff Cord, the latest advancement in Load Sharing Technology. This exciting new product was designed and manufactured by North Sails partner Future Fibres, who took their vast experience and technical expertise in torsion cable and furler integration to the next level on this shared R&D project.
Designed to work exclusively with North Helix sails, this innovative product brings top-down furling back to self-supporting Code sails. The Future Fibres Helix Luff Cord is a very light, thin, and pliable engineering solution that brings the benefits of top-down furling to Load Sharing sails. The cords are built to the precise tensile stiffness which allows for optimal Load Sharing between the cable and the sail. As the sail trim changes the cord to sail load ratio remains the same. The onboard benefit is a safe and reliable top-down furl while reaping the benefits of a free-flying, forward projecting Helix sail.
North Sails Head of Engineering and Design JB Braun and Future Fibres Project Manager Seth Cooley employed Future Fibre design tools in combination with the North Design Suite, validating the Helix Luff Cord Concept, and then understand the details aeroelastic coupling through a range of sailing conditions. Membrain, the North exclusive load analysis software, helped the team understand the loads on the boat, mast and sails, right down to the specific Load Sharing ratios between cord and sail. The designs were then run through Flow, which analyzed wind pressures across the sail as cord and sail load up together.
“As the Helix concept has grown exponentially over the past year and a half, it became clear that bottom-up furling of 75% mid-girth sails was unreliable at best,” says North Sails President Ken Read. “It would have been easy to simply retrofit standard torsion cables back into Helix, but that isn’t our style. We needed to develop a system that incorporated lightweight and ease of handling along with clear sail shape and performance advantages. A tall task. Fortunately, JB, Seth and our teams came up with a product that is a true revolution.”
The Helix Luff Cord allows for “top-down” furling at a fraction of the size, weight, and stiffness of past luff cables. This, in turn, allows the Load Sharing and shape of the Helix sail structure to fly unencumbered by the stiffness, weight, and diameter of a conventional cable.
The Helix Luff Cord (right) delivers reliable top-down furling at a fraction of the size, weight, and stiffness of traditional anti-torsion cables (left).
“This is the next step in the evolution of Load Sharing Technology,” JB Braun explains. “The Helix Luff Cord and sail work together, as opposed to a heavy anti-torsion cable which is designed to hold the rig up. And the same sail/cord load ratio is maintained through changes in sail trim. This allows the sails to change shape through tack line adjustment while maintaining optimum luff tension.”
Since its introduction, Helix has become the choice for cruisers, racers, and Grand Prix sailing because it offers superior flying shapes with less overall loading. Code Sails, laminate A-Sails, reaching headsails, and staysails have all benefited from the North exclusive Helix designs, and the Helix Luff Cord adds easier and more dependable Code sail-handling to the many other benefits of Load Sharing Technology.
“Anyone can furl, unfurl, hoist and drop our Helix Code Zero now, at any apparent wind angle,” says Sam Richmond, sales manager for North Sails UK. “We have been developing and testing luff cords on Jethou throughout the past five months, mainly on our Helix Code Zeros. The Helix Luff Cord allows us to reap the benefits of the Helix design with its forward-flying luff and a radical reduction in loads on the bowsprit and mast, all while adding the safety and reliability of top-down furling. We no longer have to worry about losing boat lengths during a furl or unfurl, or the danger of handling big sails with bottom-up furling.”
To find out more about Helix and the new Future Fibres Helix Luff Cord contact a North Sails representative near you. The Helix Luff Cord is exclusive to North Sails, part of our mission to make sailing better for all types of sailors.
Read more about the Helix Luff Cord here.
READ MORE
READ MORE
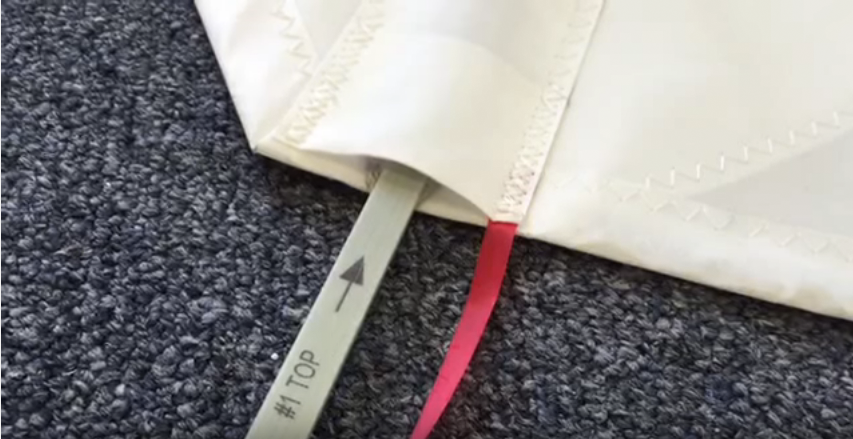
guides
VELCRO STUFF BATTEN POCKET INSTALLATION GUIDE
VELCRO STUFF BATTEN POCKET
Installation Guide
North Sails Velcro Stuff batten pockets are simple to use yet require proper installation in order to ensure maximum sail performance.
Step 1: Lay out the sail and identify the battens
Lay out the sail with the batten pockets facing up. Check the label on the batten to determine the order in which they go into each pocket; #1 is the bottom batten. Note the arrow showing which end should go toward the luff. If there is no arrow label, insert the tapered end first.
Step 2: Insert the batten into the pocket
With the Velcro tensioner lying flat, insert the batten into the pocket making sure that the arrow on the label is pointing in the correct direction (tapered end goes in first). The batten should be placed between the Velcro tensioning strap and the Velcro top piece (sewn inside the pocket). Insert the batten as far as it will go without forcing it. When properly inserted, the batten should stick out of the sail a little bit.
Note: On new sails, the batten pocket reinforcement at the inboard end my be creased, preventing the batten from being fully inserted. Should this occur, smooth out the reinforcement and re-insert the batten until it slides all the way in.
Step 3: Insert the tensioner
Insert the end of the batten loader (the small “batten” included with your sail) into the capped end of the tensioner, with the removal cord positioned off to the side of the Velcro. Insert the tensioner into the pocket end above the batten. Apply the desired amount of batten tension.
Note: When inserting the tensioner, make sure that the batten removal cord (attached to the tensioner) is not lying on top of the Velcro strip.
Step 4: Secure the pocket
When the batten has been loaded and the desired tension applied, remove the batten loader from the pocket and secure the pocket Velcro by rubbing firmly on the top of the pocket.
Important: When removing the batten, first slide the batten loader into the pocket to split the Velcro bond. Pull the removal cord and loader back simultaneously, allowing the Velcro tensioner to come out of the pocket with ease. Always try to align the removal cord over the middle of the pocket before you pull on it.
READ MORE
READ MORE
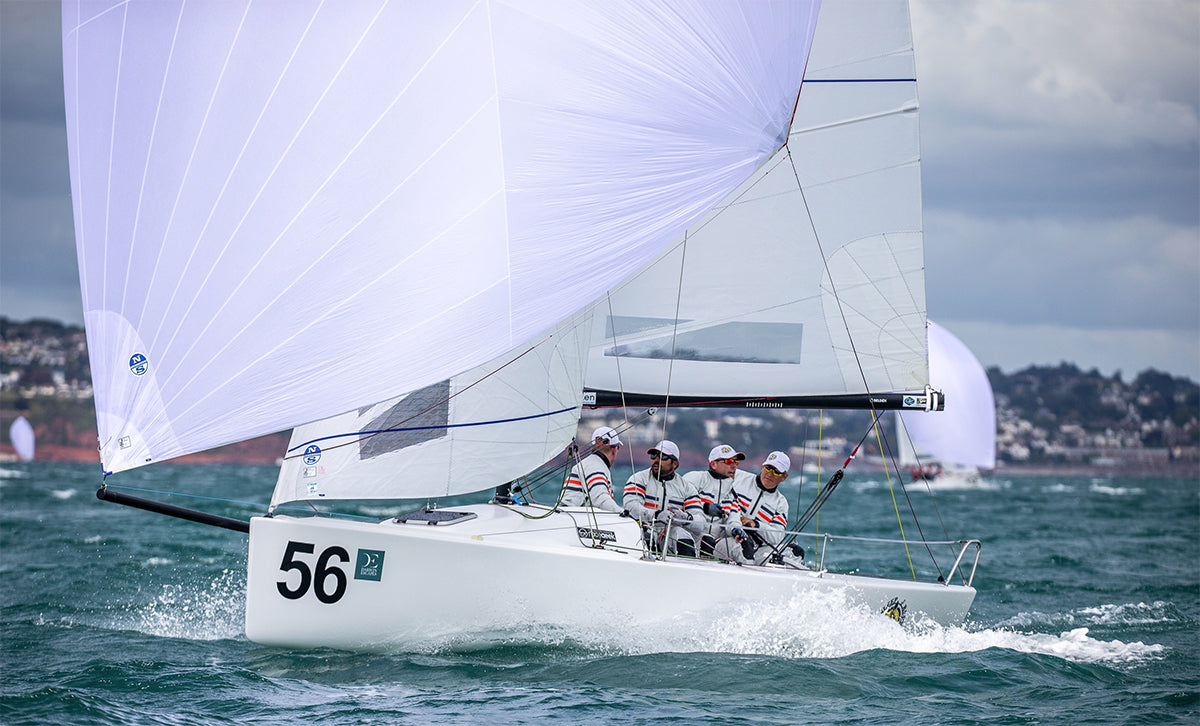
guides
HOW TO CHOOSE THE BEST J/70 JIB
HOW TO CHOOSE YOUR J/70 JIB
North Experts Explain The Advantages of the J-2 and J-6
2019 J/70 World Champions powered by the J-6 jib, F-1 mainsail and AP-1 spinnaker. 📸 Sportographytv
One of the common questions we get at North Sails is “Which jib is better, the J-2 or the J-6?” The answer is: Both jibs are great, but they fill different roles. We sail in different venues, have different sailing styles, and have different teams and equipment. So, after a lot of development and testing, we have two amazing jibs in our inventory. Understanding how the sails perform will help you make the right choice on your next order.
First, let’s start with what the sails have in common. Both are made out of our exclusive NPC Radian fabric. North NPC Radian makes possible a more sophisticated radial panel construction and offers superior shape holding over all other materials. Both the J-2 and the J-6 have been designed to take advantage of NPC Radian’s benefits.
Both jibs are constructed with a high clew, to allow for in-hauling and proper jib trim.
The other commonality is the results they produce. These jibs are fast and deliver top performance on the race course. In 2019, the J-2 won the Europeans, while the J-6 was used to win the Worlds and the North Americans. At the NA’s we saw both jibs finishing in the top four and winning races.
2019 European Champions powered by the J-2 jib, XCS-2 mainsail and AP-1 spinnaker. 📸 Zerogradinord
Here’s What Makes Each Jib Special:
We repeat: Both jibs are great, but they fill different roles. Which will be right for you depends on where you sail, your team, and your style. We can confidently recommend either, because no matter which jib you choose, the top guys are translating all that development and testing into success on the race course.
Read also: Which mainsail is best for your J/70 team?
For more info on the world’s fastest J/70 sails, visit the J/70 Inventory page.
2019 J/70 World Corinthian Champions powered by the J-2 jib, XCS-2 mainsail and AP-1 spinnaker. 📸 Sportographytv
Oivind Lorentzen’s Team Nine, 2019 North American Champions powered by the J-6 jib, XCS-2 mainsail and AP-1 spinnaker. 📸 Chris Howell /J/70 Class Association
READ MORE
READ MORE
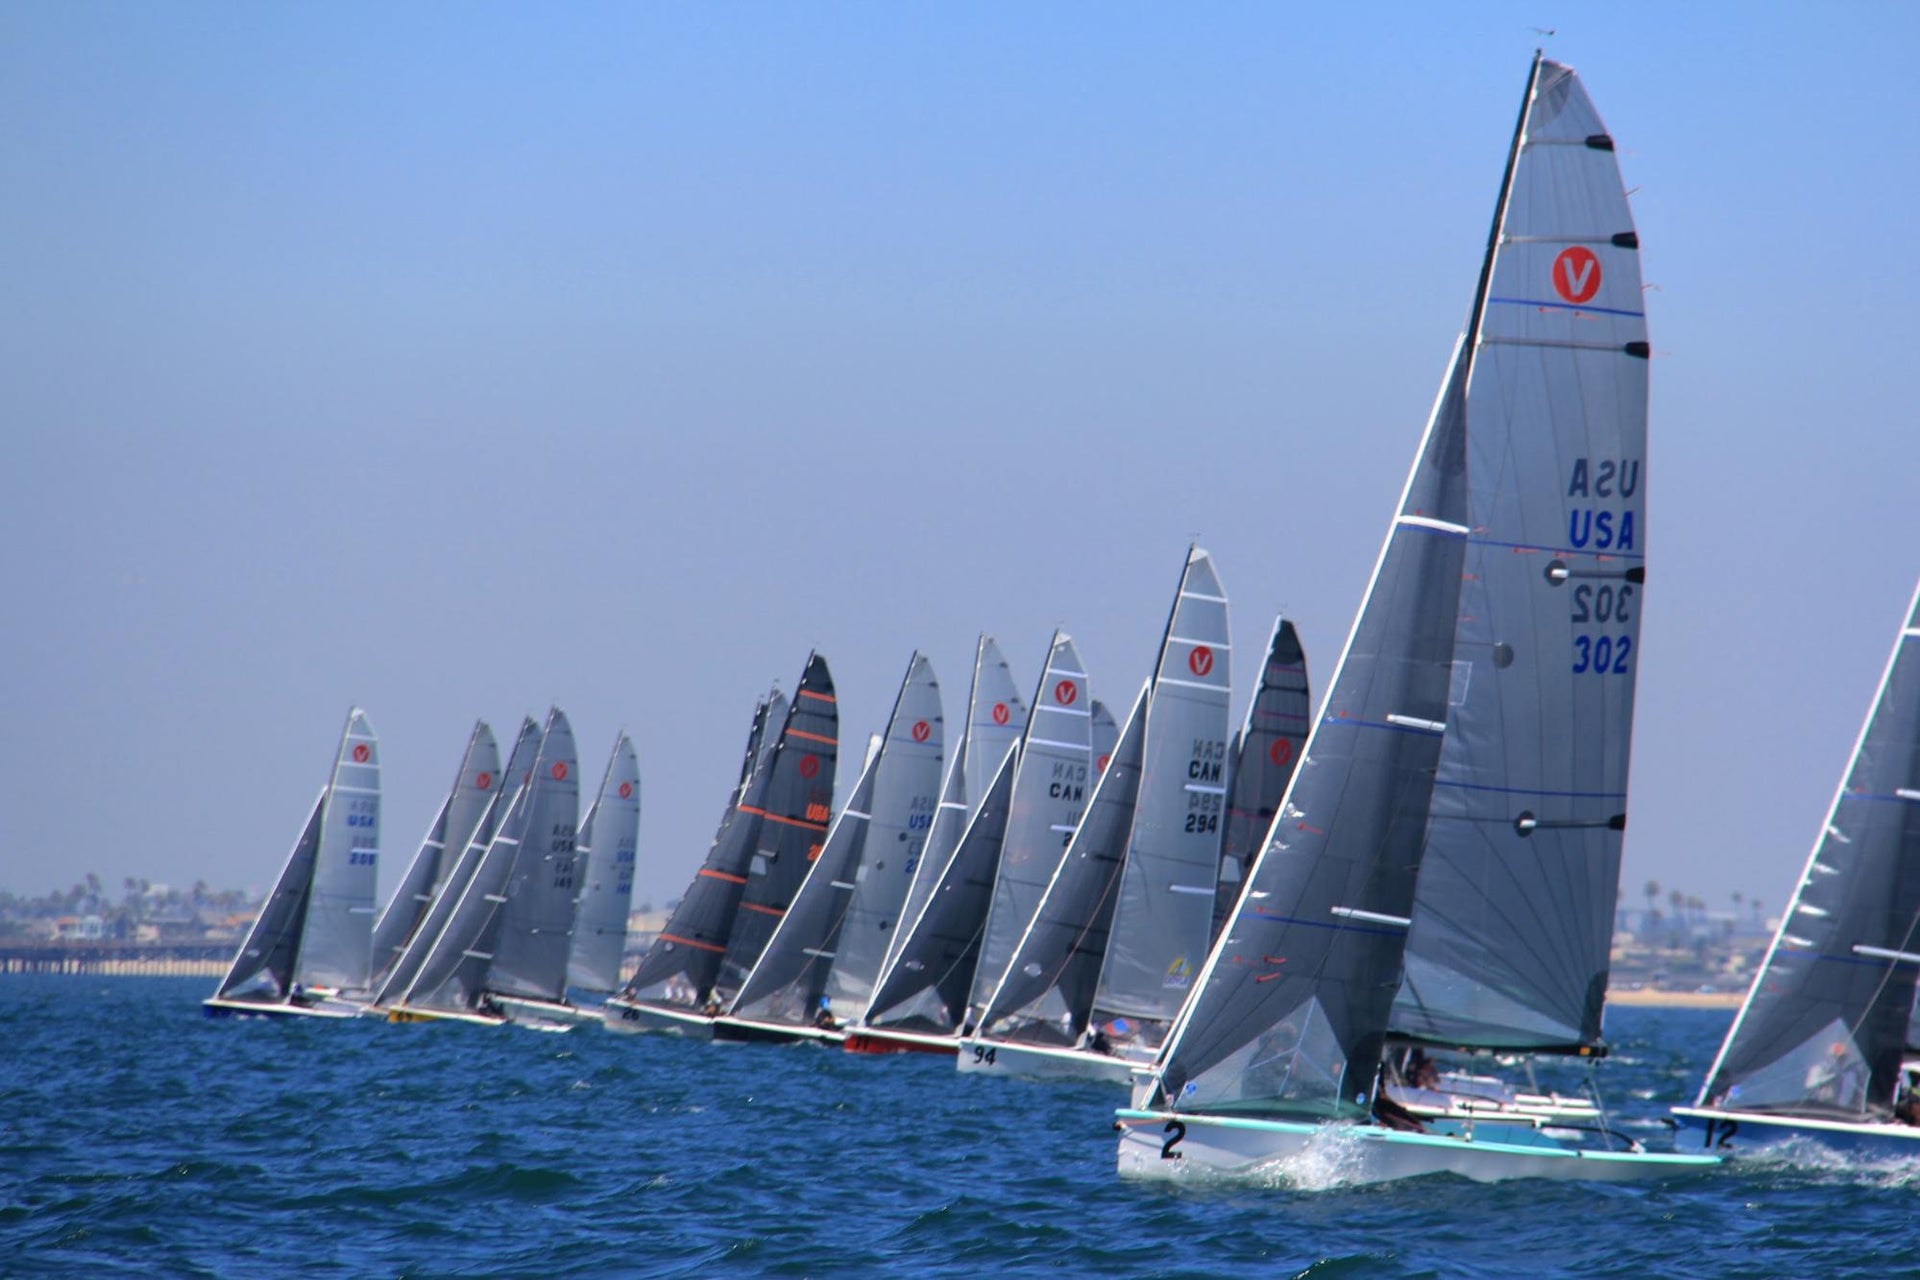
guides
KEYS TO FINDING YOUR UPWIND GROOVE
KEYS TO FINDING YOUR UPWIND GROOVE
What To Look For
How wide is your groove? Sounds like a question from the ‘60s, doesn’t it? In this story, North expert Skip Dieball explains the upwind groove and tells us what to look for.
Earlier this year, as part of a story called Achieving Balance in Your Sailplan, we discussed refining your boat’s upwind angle of attack. That’s another term we use to describe your upwind groove—the point of sail in which you sail against the wind most efficiently, at a consistent angle of heel. In practice, the groove covers a range of a few degrees angle to the wind in which you are able to steer consistently at a steady speed.
How your rig and sails are set will change the width of your steering groove at the start and upwind.
Depending on your set-up, the groove on your boat may be narrow, with a tolerance of only a couple degrees, or wide, in which you can head up or down several degrees. If the groove is wide, you can handle gusty winds and steer around waves better, but you won’t point as close to the wind. If it’s narrow, you must maintain a precise course, which can be a challenge in variable winds but can be very fast in flat water.
Sometimes I call finding the groove finding the “happy spot,” because that’s where, for a given condition, our blend of forward speed and pointing are as good or better than boats around us. The term also applies to how you’re feeling if your groove is too wide or too tight. Visual cues are also useful: if your telltales react too fast on both sides of the sail, the entry angle is super narrow; if the sail will actually luff before the telltales react, the entry angle is too wide.
Adjust the forestay length
If you think your groove is too wide or narrow, try changing the length of your forestay. Here’s why:
All sails are cut for a certain amount of curvature, known as luff curve. The more material in the front of the sail, the deeper it will be. Your forestay needs to be long enough to match this depth, and the way to tell is by studying how your telltales react from top to bottom when you’re sailing upwind. If they react in unison—all luffing at the same time as you head up—your forestay length (and halyard tension) is about right. But if the tell-tales in the mid-section of the sail are reacting differently from those at the top and bottom, then the forestay is not set up for the way your sail is cut.
The shorter your headstay relative to your luff curve, the flatter the luff or entry angle will be in the middle of the sail and the quicker the middle telltales will react on both windward and leeward sides. If the headstay is too long relative to your luff round, the telltales in the middle will tend to be slower to react than those at top and bottom.
In most one-design classes, you need to set the headstay length before the race and leave it.
On some boats with deck-stepped masts, you will tension up the rig at the dock, such as the Thistle, Highlander or Interlake. On these boats, the sailmaker will cut sails for a static headstay sag and you’ll need to adjust the groove by means of halyard tension. This tension is spelled out in the sailmaker’s Tuning Guide. (For more on this topic, read “Why is Headstay Sag Fast Upwind in Light Air?”)
On boats like the J/70 and Tartan Ten, with swept spreaders and a wide shroud base, you’ll set the headstay and then use shroud tension and backstay to tighten the forestay underway.
On boats with keel-stepped masts, you can chock the mast forward at the deck to create more headstay sag and add power to the sailplan. If your mast butt is movable (like the Etchells), then you can move it aft to induce more sag or forward to tighten the forestay. Keep in mind, however, when you adjust the mast butt, you are affecting the mast pre-bend too. You can also tighten the forestay with the permanent backstay and through rig tune. The Lightning, Etchells and Star fall in this category.
Change headstay tension
I think of the forestay length as the gross tune for the groove and the halyard tension on each sail as the fine tune. Once you find a nice spot for the forestay, then you can fine-tune with halyard tension. Simply put, the more tension you add with the halyard, the rounder the shape forward and the wider the groove will be. Loosen up the halyard for a softer, finer entry and the groove will get narrower.
Again, on different boats, the dynamics are a bit different. Jib-halyard tension is actually a key component on boats with deck-stepped masts and some boats like the J/70 have a fine tune on the jib halyard for this purpose. When I want a finer entry, I ease the halyard until I have wrinkles at the snaps along the luff of the jib.
When sails are newer with a harder finish or a more true shape, it’s easier to set them up. I find the range of halyard adjustment on a new sail may be only an inch or two (depending on purchase system), while it’s five inches on an older sail. Either way, it’s good to have marks on your halyards for quick reference; we color code them too—red for tighter and more forgiving, black for less tension and a finer entry.
Leech adjustment on the main
Mainsail trim changes the width of your groove, too. If you sail with an open, twisted leech, the groove will be wider and more forgiving to sail in at speed. However, you’re not likely to point as high. If you sail with a straighter, firmer leech, the groove will be narrower. You’ll be able to point higher but both helmsman and main trimmer will need to be able to react quickly to changes or you may be slow at times.
Depending on the style of boat, use of the backstay or vang-sheeting can contribute to the shape of your leech as well. Tightening the permanent backstay, if you have one, will open the leech; easing will add “hook” to it. With a deck-stepped mast or on any boat that can induce mast bend through use of the boom vang, vang-sheeting can be a powerful tool to help create a more open leech.
Taken together, the forestay length, halyard tension, and mainsail leech shape can have a large impact on the width of your groove when sailing upwind. If you’re sailing upwind and feeling grumpy, try making some adjustments until you find a happier spot. All these need to work in harmony to find the ideal upwind groove.
Connect with North Expert Skip Dieball for more information.
READ MORE
READ MORE
guides
PLANNING YOUR BEST PERFORMANCE
PLANNING YOUR BEST PERFORMANCE
North Sails Hosts Two Seminars To Prep for 2020 Newport Bermuda Race
120 sailors attended a two-day Performance Seminar ahead of the 2020 Newport to Bermuda Race, which starts next June. Hosted by North Sails, with special guests Peter Isler and Chris Bedford, topics included weather, sail selection, and setting up your team for both safety and success. The presentations helped sailors make a plan, set realistic goals, and start thinking about preparations for boat, sails, and crew.
Two locations
The seminar began in Rhode Island with our Portsmouth loft team on Friday evening and continued Saturday morning in Milford, Connecticut. Peter Isler served as master of ceremonies, sharing his own vast offshore experience and fielded questions to the North Sails experts about how to optimize a sail inventory for the 635-mile blue water classic.
Historical weather
Weather guru Chris Bedford ran polars for five different boats, based on eight years of weather data and 248 race simulations, for the two weeks before and after the start date (June 19). Understanding the weather helps determine what sails to take on the race, but because different boats have different polars, optimizing your boat requires a unique sail combination.
Sail selection
While the sail allowance for the Bermuda race is generous, optimizing performance by taking only the sails that you know you’lll need is an important aspect of the race. Historical weather and a thorough review of your current inventory will help you identify the best fit for the 2020 race, and also look at what additions you’d want to make with plenty of advance time.
Besides understanding the special sail requirements for the race, the big takeaway for sailors was that a Tweener can definitely help performance because a Tweener is a more efficient sail compared to a 75% mid girth sail.
What’s a Tweener? Also known as a large roach headsail, a tweener is an off the wind sail that has a mid-girth of less than 75% and fits in between a jib and a traditional 75% mid girth Code sail. Tweeners do impact ratings, though generally lightly in ORR. The latest advancement to this multi-purpose sail is the North Helix Luff structure, which relies on Load Sharing Technology and eliminates the need for a heavy anti-torsion cable. For more details, talk to your North Sails expert to learn how to optimize your boat and team.
Team preparation
A 635-mile race requires several overnights, and with half the crew off-watch it’s important to optimize human performance. That means making a solid plan with a watch system, as well as food and clothing. Navigation is also very important because crossing the Gulf Stream complicates the race track.
What you can do right now
Seven months before the start, you should already be making preparations. For sails, make sure to have them serviced before they go into storage for the winter, and also check your inventory for any possible holes. It’s also a great time to put together your sail repair kit; ask your local North Sails expert what should be included.
Thanks to this Performance Seminar, over a hundred sailors are now better prepared for a race that starts next June. Let us know how we can help you get your boat, sails, and crew ready for next year’s bluewater classic.
Download Presentation
Download Presentation
Download Button Interstitial
First Name
*
Last Name
*
Email
*
By entering your email address, you agree to receive emails from North Sails as well as promotional offers and announcements from North Sails. Collected information will not be shared with any third party.
Privacy Policy Opt-In
*
I have read and understand North Sails privacy policy
Age Consent Opt-In
*
I am 16 years or older
Continue
READ MORE
READ MORE
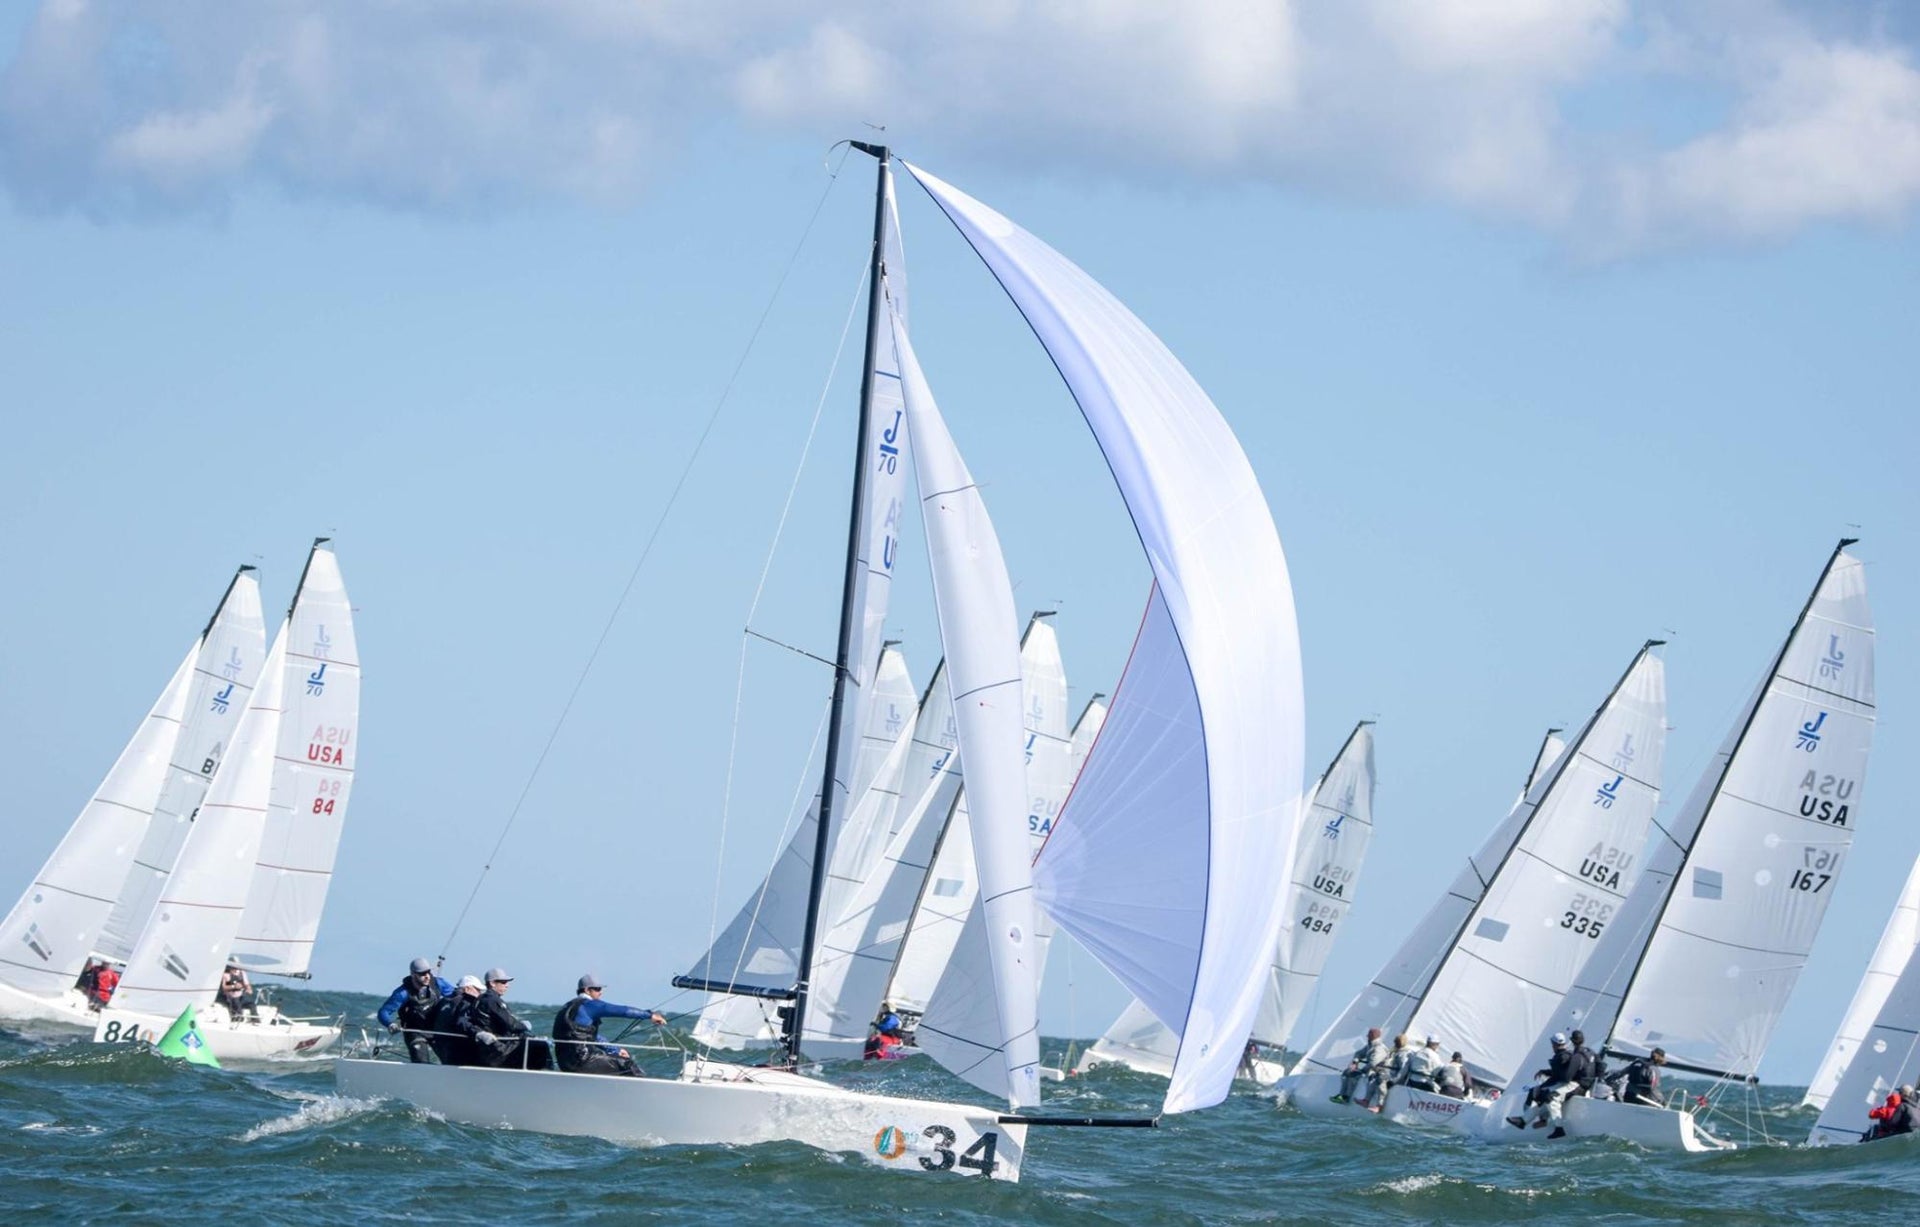
guides
WHICH MAINSAIL IS BEST FOR YOUR J/70 TEAM?
WHICH MAINSAIL IS BEST FOR YOUR J/70 TEAM?
A Complete Guide Considering Rig Tendencies and Batten Choices
Team Rimette at the North Americans powered by North F-1 mainsail. 📸 Chris Howell/J70 Class Association
Trying to stay up to date with all the latest testing and sail development in a highly competitive class like the J/70 can be quite daunting. How do I pick the right sails? Does crew weight matter? Does the venue matter? What about my mast? How do I know how much pre-bend I have? What do I do with all these battens?! There is a lot to think about for sure, but in this article I will try to simplify some of these elements to help you make the right choice for you and your boat.
Choosing the right mainsail for your team is imperative. One of the major factors in designing a mainsail is the bend characteristics of the mast. With over 1,500 J/70s built, there is bound to be a bit of variance in bend characteristics – especially now that there are two different brands of spar out there – the Southern and the Selden. Not only are there inherent differences in stiffness, but where you carry your rake (more rake = more bend) and how swept your spreaders are will also greatly impact the bend tendencies. North Sails offers two brilliantly designed maisails, both of which are garnering tremendous results around the globe. By getting to know your mast, and learning how to use your battens and rig tune, you will be able to have success with either sail. But you may find that one sail will fit your rig better than the other.
Let’s keep it simple to start out – there are two choices – the XCS-2 and F-1. The XCS-2 is fuller than the F-1 and was therefore designed to fit perfectly with masts that tend to carry more bend. A bendier mast requires a fuller sail shape so that it won’t invert too quickly when the breeze comes up and the mast starts bending. The F-1 is a flatter overall sail designed to accommodate stiffer masts. If the mast doesn’t bend very much, you need a flatter sail to avoid extra drag – especially in light air when there is not enough pressure to bend the rig and it’s too light to use backstay.
How Can You Tell Which Sail is Best For Your Mast?
The first thing you’d want to check is your pre-bend at “base”. You will need the mast up with the upper shrouds set to a tension of 16 on the PT2 Loos gauge. For the lower shrouds, set them so they have a tension of 10 on the gauge with the mast looking straight, and then take another 2 turns off each lower shroud so they are loose. You’ll want to find a pre-bend checker which is essentially a ruler that can be hoisted up the mast track (see photo below). Hoist the bend checker up the sail track on the spinnaker halyard (don’t forget to tie a line to the bottom of the checker so you can pull it back down!). You want to get it just above the spreaders where the max bend is. Now you will pull the main halyard up against the gooseneck (pinch it right into the bottom of the sail track). As you look up the mast, you’ll see the main halyard coming in contact with the bend checker. Read the bend checker to determine how much pre-bend you have at “base.” We’ve found that the range can be anywhere from 1.25” to just over 2”. Quite a range!! If your mast shows less than 1.75” of pre-bend, it’s likely that the F1 will fit your rig better and if you’re over 1.75”, then it’s more likely a good fit for the XCS-2.
What if your mast is right at 1.75”?? Perfect! Try both! (Kidding but probably not a bad idea!). Another test you can do to learn about your mast stiffness is to wind the rig all the way up to the our tightest recommended rig tune setting which would have both your upper shrouds and lower shrouds reading 29 on the gauge. The number of turns it takes for you to get to this setting will tell you a lot about your mast. Again, we have found quite a bit of variance here from rig to rig. If it only takes you about 7 turns on the uppers and 5 turns on the lowers to achieve these tensions, that is a sign that your mast is quite stiff and probably better suited for the F-1. If it takes you closer to 11 turns on the uppers and 8 on the lowers, that is a sign that your mast is bendy and probably better suited for the XCS-2. Nine turns on the uppers and 7 on the lowers would be somewhere in the middle. One more telltale sign you can use to determine your mast stiffness is by observing the overbend wrinkles on the main while sailing upwind. There needs to be enough wind so that you’re using 70-100% of your backstay. So your rig tune should be tight. While sailing, play through your range of backstay and observe where your main is showing the biggest overbend wrinkles. They should be all below the window in the luff of the main (to see the jib leech) until you’re at the point of full inversion. If you see a very large “hinge” in the main that goes from the forward end of the bottom batten, up to a point above that luff window – that is a sign that your mast is on the bendy side and probably better suited for the XCS-2. If you never get to the point of the full “hinge” and all of the overbend wrinkles stay below the luff window, that is a sign that your mast is on the stiff side and probably a better fit with the F-1.
No matter which mainsail, you end up choosing, you have a lot of range depending on which battens you put in. Using stiffer battens will give you a flatter sail shape while softer battens let the sail become fuller. This is extremely useful when trying to make your sail shape fit the mast in a given condition. If you decide to use the F-1 main but are sailing in a venue where you know you will want a little bit of extra power (say it’s overly lumpy compared to wind strength), you can error on using the softer battens in the Main to help give the sail extra depth for more power. Conversely, if you have the XCS-2 main but want the option to keep it flatter (say it’s blowing 14 knots but dead flat water) you can go to heavier battens to get rid of some depth in the main.
The key takeaway here is that is very important to learn your rig tendencies so you can make the best decision possible for your team whether you’re looking for your all purpose sail, or for a venue specific sail choice. Combining this knowledge with the correct batten choice will give you peace of mind in knowing that you can achieve the perfect sail shape for any condition. As always, consult your favorite North Sails J/70 expert for more information or any questions about your sail choice!
READ MORE
READ MORE
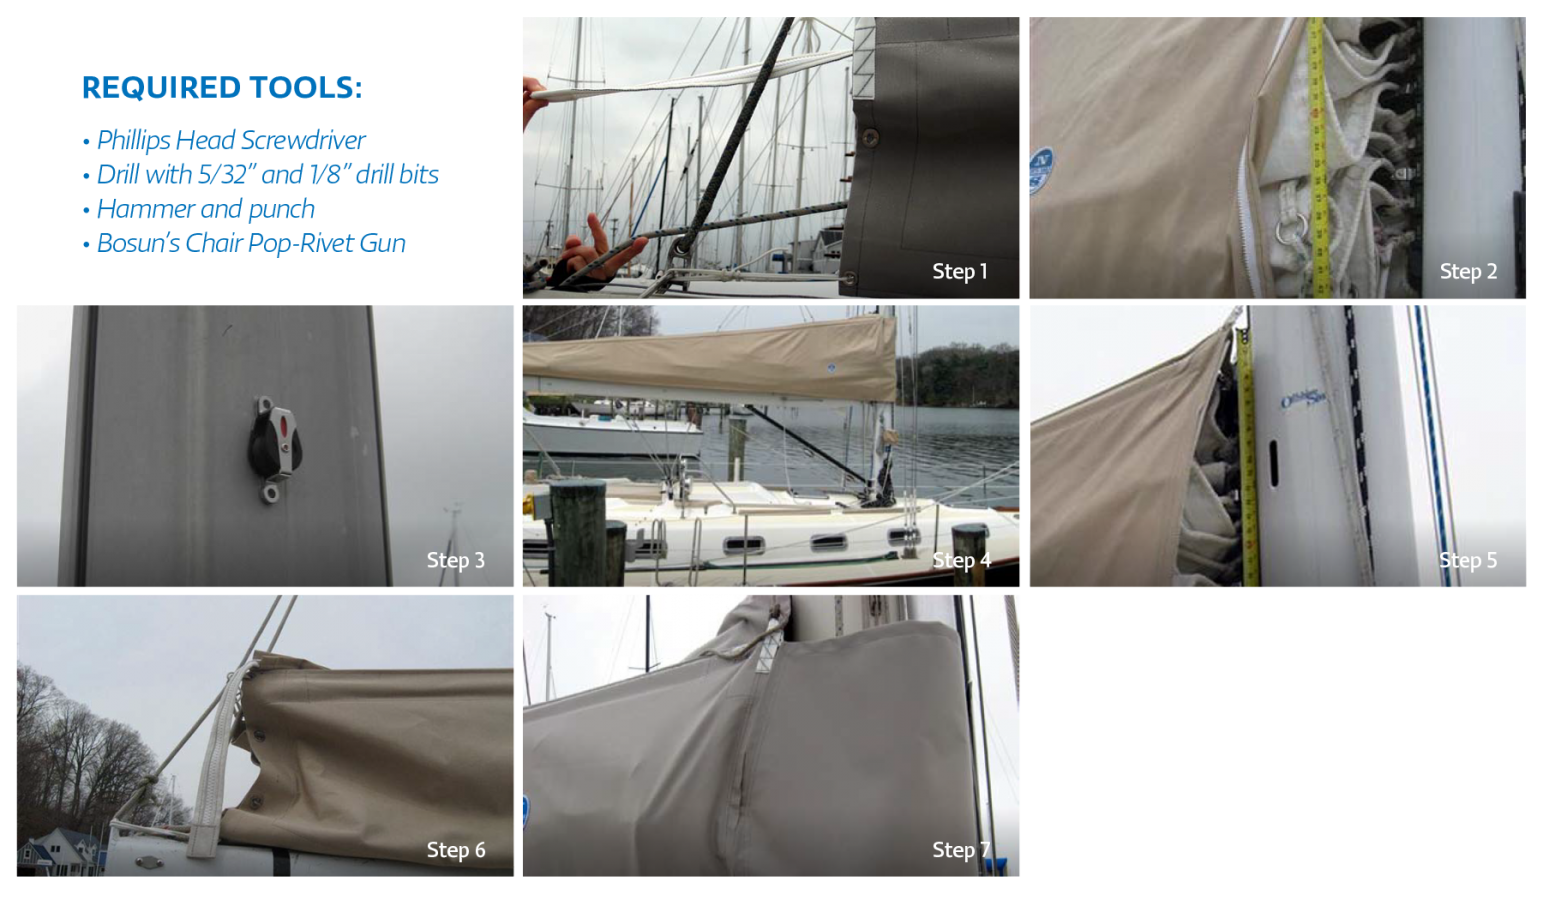
guides
QUICKCOVER INSTALLATION GUIDE
QUICKCOVER INSTALLATION GUIDE
North Sails QuickCover makes storing and protecting your mainsail a simple and easy process, eliminating the need for a cumbersome sail cover. Following these steps will ensure that your QuickCover is properly installed and will be easy to handle.
Step 1- Attach Clew and Foot
Slide the sail’s clew slug into the boom, followed by the bolt rope on the foot of the cover. The sail and cover should slide all the way to the end of the boom and attach to the outhaul. If the sail has reef slots in the foot, run the reefing lines inside the cover.
NOTE: If your boom has a clew car then there is no need to worry about bending on the main and cover at the same time. Simply install the cover and flake it out on either side of the boom.
Step 2 -Attach the Tack and Luff Slides
Once foot and clew are in place, attach the tack and install the luff cars/slugs into the mast. After the tack and luff are secured, install the battens into the pockets on the inside of the QuickCover. Zip the cover from the clew to the mast and you are now ready to install the Lazy-Jacks.
Step 3- Install Cheek Blocks on the Mast
Installing the cheek blocks will require sending someone approximately 65% of the way up the mast, which is where the cheek blocks (supplied) will be installed. You will need a center punch, a drill fitted with a 5/32 bit, a few 5/32 pop rivets (supplied), and a pop rivet gun. Mark the location of the cheek block on the side of the mast, slightly more than halfway aft. Use the center punch to pre-locate the holes, drill, and install with supplied pop rivets.
The Lazy-Jack lines lead through the cheek blocks from aft to forward. When you come down the mast, the Lazy-Jacks should be led down the backside of the mast. Make sure they are aft of the spreaders.
Step 4- Adjust Lazy Jacks and Install Padeyes
Pull the Quickcover up into place where it will sit when the main is dropped, and tension both sides of the Lazy-Jacks evenly. Install the supplied padeyes at the forward upper end of the cover and at a 45-degree angle, about the same distance aft as the cheek blocks. Tie the line attached through the webbing into the padeyes.
Step 5- Install the Lazy Jacks Cleat
Once the foot and clew are in place, attach the tack and install the luff cars/slugs into the mast. After the tack and luff are secured, install the battens into the pockets on the inside of the QuickCover™. Zip the cover from the clew to the mast and you are now ready to install the Lazy-Jacks.
Step 6- Lazy-Jack Fine Tune
Lace the line at the tack through the gooseneck fitting. The forward edge of the QuickCover should be even with the backside of the mast.
Once the tack is tied securely, tension the cover from the clew by running the line on the bottom of the cover through the back of the boom. Usually there is a hole or shackle that can be used for this. If you have a topping lift, tie the line on the top aft corner around the topping lift to keep the top of the cover tight. If you don’t have a topping lift, the cover will still work fine; the aft lift for the Lazy Jack provides ample support. Don’t forget to rig reef lines and run them through the slots along the foot.
Step 7- Install The Front Cover
This separate piece is removed for sailing.
NOTES
To reduce flutter in the QuickCover while sailing, zip together the two sides.
Lazy Jacks will work best when you hoist or drop the main with the bow pointed directly into the wind.
READ MORE
READ MORE
guides
2019 J/24 WORLDS TOOL KIT
Get The Most From Your J/24
The 2019 Worlds are just around the corner. Is your team ready? Our J/24 Tool Kit will help.
Scroll down for tips about boat speed, tuning, shifting gears, jibing in breeze, and much more. Created just for J/24 sailors, by our team of experts.
Get To Know Biscayne Bay
To help you prepare for the 2019 Worlds, we asked the local Star and Snipe World Champion Augie Diaz to explain about his home waters of Biscayne Bay in Miami, FL.
How The 2018 Worlds Were Won
It may not be Lake Garda, but Miami could serve up some similar conditions where tuning and sail selection comes into play. We can expect a little bit of everything at the 2019 Worlds, and you may see some recurring themes from Garda that find their way to Biscayne Bay.
Shifting Gears
Two-time North American Champion and North Sails expert Mike Ingham explains how to shift gears when pressure is unpredictable.
Fine Tune With North
Find your groove. Get your numbers. After countless hours of sailing, sail testing, and competing in the J/24, our World Championship winning sails will get you up to speed quickly with our newly updated tuning guide and matrix.
Jibing With Authority
The key to perfect jibes is practice, practice, practice. Get the play-by-play on how to execute a jibe with success.
#NSVictoryList
There is no better performance test of a one design sail than the results it produces. In 2019 alone, North Sails J/24 inventories have powered many teams to the number one spot all over the globe.
Let us help you achieve your end goal.
Building Your Confidence In Breeze
Windy day ahead? Here are 10 tips to help you conquer those days at the top end of the genoa’s range.
Videos: Get Your Team Up To Speed
World-level preparation works for smaller regattas too. Before your next regatta, watch our video tips from Tim Healy and Will Welles.
Preparing For A Big Event
Will Welles talks us through boat prep, tuning, how to put together a winning team, and regatta logistics.
Define Your Speed
Pulling all the pieces together can be challenging. Our J/24 Speed Guide will help you leverage our expertise to make the most of your sailing.
Common Questions, Answered
We respond to 13 of the most frequently asked questions about racing a J/24 well.
Trust In Our Expertise
We’ve been winning in the J/24 since the class started, and we can help you win too. Contact your local expert, check out our inventory, and join us at the front of the pack.
READ MORE
READ MORE
guides
MELGES 24 WORLDS TOOL KIT
Fine Tune With North
Find your groove. Get your numbers. Be confident in all wind conditions. After countless hours sailing, testing, and competing in the Melges 24 our tuning guide will help you achieve race-winning speed.
Raise The Bar With 3Di
Lucky Dog confirms new 3Di sails make a difference in the race course at the Melges 24 North Americans.
What To Expect In Villasimius
Fresh from winning the Pre-Worlds, North Sails Expert Giulio Desiderato provides his intel on what competitors should expect at the upcoming Melges 24 World Championship.
Get Up To Speed
Pulling all the pieces together can be challenging. The North Sails Melges 24 Speed Guide leverages our expertise to help you improve your team’s performance.
World Champions Tips
What worked for Team Altea in the past Worlds? Take a look at the tips from the winning team and get inspired to sail fast.
Our Experts Make It Happen
Have questions? Contact your local Melges 24 expert today for more information on choosing the right sails for your Melges 24.
READ MORE
READ MORE
