


NORTH SAILS BLOG
Alle
News
Events
Guides
Sustainability
Tech & Innovation
People
Travel & Adventure

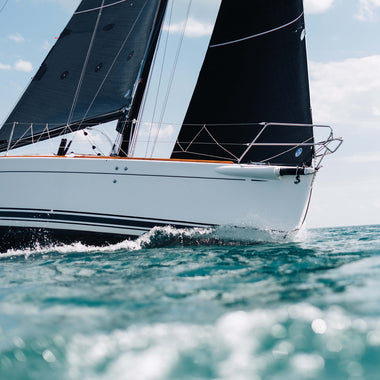
05 July
MERLIN ROCKET TUNING GUIDE
Introduction
These are the current settings for the North Sail range of Merlin Rocket sails. This information will give the ability to pre-bend the mast when required and control the rig over the full range of conditions. With the ability of the modern Merlin to be able to make almost infinite adjustment whilst afloat this tuning guide will walk through setting up the standing rigging and then the control of the rig whilst sailing.
Spreader settings
The settings shown below for the Jackson/Chipstow mast are also a good starting point for all other masts. The focus being around 38mm of pre-bend, see below.
MERLIN ROCKET JACKSON/CHIPSTOW MAST
• Mast track to shroud wire – 365mm
• Tip of track to straight edge between shrouds – 140mm
• Shroud to shroud – 677mm
MERLIN ROCKET SELDEN SKINNY MAST
• Mast track to shroud wire – 365mm
• Tip of track to straight edge between shrouds – 137mm
• Shroud to shroud – 685mm
Standing Rigging Assumptions
The ‘jib hook’ position is crucial to maximize your mast rake.
• Jib halyard hook at ‘most upright’ setting – Shrouds and lowers loose, just able to get jib halyard onto hook (this is another crucial element, the shrouds should be adjusted so that there is only just enough slack to place the jib halyard on the hook)
.• Set the bow of the boat to perpendicular.
• The mast should now be perpendicular. Adjust the jib strop/halyard until this is achieved and this should be done before proceeding further.
Base Settings
Apply some rig tension 200kg (28-29 on Loose gauge PT-1) which equates to helm and crew sitting on the side deck and snugging up the leeward shroud plus a little bit.With the lowers fully released this should give you about 38mm of pre-bend at the spreaders. To measure this, the main halyard should be tied to the gooseneck and touching the mast at that point.
Note: Be careful that you don’t pull it so tight as to bend the mast further!Once this has been achieved pull on the lowers until the mast just starts to invert. The lowers need to have sufficient range to go from this base setting to totally free.Make a careful note of jib, shroud and lower settings. These are essential to enable easy replication when on the water.Apply more rig tension and possibly lowers as the wind increases to keep the leeward shroud snugged up. Rake when the top batten starts to invert or when the boom is off the centre line more than 50% of the time.
Fig. 1: shows the rig without lowers. You can see the little gauge at the spreaders which is used to measure the pre-bend, the thicker cloth ends 25mm from the mast track therefore 38mm pre-bend.
Fig 2: shows the slight inversion in the lower section (deck to spreaders) and the pre-bend reduces to 15 mm.
Basic principles
Why do we want all of this adjustment? The fundamental is to match the luff round to the mast bend and optimise the two. It also means that we can adjust the shape of the rig to maximize performance for the given conditions, flat mainsail in calm and windy, full in mid range to power up.
Good luck on the water!
READ MORE
READ MORE

21 June
NORDIC FOLKBOAT TUNING GUIDE FOR ALUMINIUM MASTS
INTRODUCTION
The purpose of this tuning guide is to provide our clients with standardized guidelines on how to get the most out of their new North Sails Folkboat sails. This guide was written by Soren Kæstel, Per Jørgensen and Theis Palm.
Follow these instructions as closely as possible. However, it is always a good idea to experiment. Your boat, the weight of the crew, the boat’s balance as well as local conditions will also affect the optimal trim.
MAST TRIM
The mast on a Folkboat is probably the most critical component of the boat’s trim, especially with the introduction of the class-legal aluminum mast. The aluminum mast has the proper stiffness. Therefore, it is important that these trim instructions are followed carefully in terms of how much pressure the mast applies to the aft edge of the mast hole.
1 Verify that the mast is vertical. This is best done by moving each shroud along the mast and make a mark on the shroud that matches the top of the gooseneck mark. Reattach the shrouds to the chainplates and measure from the mark to where the turnbuckles enter the deck – the distance should be the same on both sides.
2 Set the mast rake. Detach the forestay from the deck and place it along the mast. Stretch the wire as much as possible and make a mark that matches the top of the gooseneck mark. Reattach the forestay. The mark should be 1.31 m from the deck along the forestay.
3 Position the foot of the mast. Move the foot of the mast aft until the mast just touches the aft edge of the mast hole. In light winds (0-8 knots) the mast should be relatively hard on the aft edge and pressed 22 mm aft along the mast foot rail for the mast to bend smoothly. In the wind 9-14 knots of wind, press the foot of the mast 16 mm astern and in strong winds 10 mm astern.
4 Adjust the jumpers. Pull-on the backstay. Look up the sail track and make sure that the mast is straight and the jumpers are equally tight. If not, adjust the jumpers until the mast is straight. Jumpers are set relatively loose in light winds and strong winds. In medium winds, tighten the common turnbuckle 2-3 turns. The maximum draft in the top of the mainsail should be 47% aft along the chord. The most important thing is that the mast curve is even from deck to top. If the jumpers are too tight, the mast will curve too much in the bottom and be too straight in the top. If the jumpers are too loose, the bottom will be straight and the top will curve if the jumpers are set to loose. A consistent curvature gives the leech a nice, even twist.
5 Set the forestay tension. Initially, the mast hole helps to push the mast forward and thus get the forestay loose. In light wind the forestay should sag about 8 cm. Tighten the shrouds while sailing until the 8 cm sag is obtained. In medium wind, tighten the shroud turnbuckles 1½ turns and a further 1½ turns in strong wind, thus tightening the forestay under increased wind pressure.
MAINSAIL TRIM
The mainsheet is critical in setting the shape of the sail and small adjustments can have a big effect on speed and pointing. If the mainsheet is sheeted tight, the leech will close and put more pressure on the rudder – on the other hand pointing ability is improved. This can be used in medium winds and flat water, where the boat can be kept flat by hiking.
In light winds the mainsheet is eased so that the top tell-tale flies straight. In heavy winds, sheet tight and pull the backstay until the rudder feels light again (but without losing pointing). In large waves, let the leech twist a little more to have a wider steering angle. This increases speed, and therefore pointing, at the same time. As a thumb rule the top batten is trimmed parallel to the boom in almost all wind strengths.
1 Outhaul. The outhaul is also an important factor when trimming as it controls the draft in the bottom of the sail. In very light winds (0-5 knots) the sail should be 3 cm from the mark. In medium winds (5-12 knots) about 1.5 cm from the mark andin more wind than this pull the sail all the way to the mark.
2 Cunningham. Do not set the cunningham in light winds. In medium winds set the cunningham so that the wrinkles in the luff disappear. When the wind exceeds 15 knots it is pulled hard to open the leech and keep the draft forward in the sail.
3 Traveller. It is a good idea to have two cars on your traveller. They are then connected by two wires of about 40 cm leading to a mainsheet block. This facilitates sailing in light and medium winds. In light winds (0-6 knots) pull the traveller cars 15-20cm to windward. In medium winds (6-14 knots) set them in the middle. In higher wind the cars are eased to leeward to decrease heel and thus rudder pressure.
4 Backstay. The backstay has two functions: To control draft in the mainsail and to control forestay sag. When the backstay is tightened, the mainsail flattens, the leech opens, and there is less forestay sag and, therefore, a jib with less draft. It is agood idea to put marks on the backstay, e.g., every 20 cm, to facilitate finding the right trim after mark roundings, etc.
5 Kickingstrap / Boom Vang. The kickingstrap is used when sailing upwind in strong wind and also downwind. Upwind, the kickingstrap pulls on the mast and opens the leech in the bottom part of the mainsail and keeps the boom down when easing in the gusts. Never use the kickingstrap upwind in less than 18 knots and use caution. Remember always to ease the kickingstrap for downwind sailing when bearing off, otherwise the boom might break. Downwind the kickingstrap is trimmed so that the top batten is parallel to the boom – on all sailing angles and in all conditions.
JIB TRIM
North Sails jibs are made for sheeting points both on deck and cabin top. However, we recommend sheeting from the cabin top to make the jib-leech twist more freely and thus allowing the gap between main and jib to be as wide as possible. Furthermore, the control of the jib is improved (particularly in heavy winds) because of the shorter distance from clew to block. The jib-lead track is placed with its centre 58 cm from the boat’s centreline. When sheeting from the cabin top, we recommend using a swivel block on the deck, so that the jib sheet does not create an overwrap on the winch.
1 Sheeting Point. The position of the jib lead is crucial for the jib trim. As a reference point measure 2.65 m from the pin in the forestay to the centre of the block (if the lead is on the cabin top). The jib shall luff evenly, i.e. tell-tales must fly at the same time intop and bottom.
2 Jib Sheet. As a general rule sheet the jib so that the middle batten is parallel to the centreline in most conditions, but in light winds (0-5 knots) leave 2-3 degrees of twist. If the sea is lumpy, move the jib lead two to three “holes” forward to getmore draft and power in the jib (the middle batten shall still be parallel to the boat’s centreline). In heavy winds move the lead on to two “holes” back without letting the foot of the sail become loose and flutter.
3 Halyard Tension. Never pull the halyard too tight. This will cause the draft of the jib to move too far forward. Pull it until the wrinkles in the luff disappear. In light wind the best shape is obtained when leaving small wrinkles in the luff.
Please get in touch with Theis Palm for any more information.
READ MORE
READ MORE
21 June
KESTREL TUNING GUIDE
This Kestrel tuning guide is meant to be a starting point from which you can experiment and find the setting that work best for your boat crew weight and sailing technique. If you have any specific questions please contact Tim Rush – tim.rush@northsails.com.
Mast Rake
23′ 6″ Tip of mast to top of transom
23′ 6″ Light to Moderate
23′ 0″ – 23′ 3″ Heavy
Rig Tension
250 – 300 lbs on forestay
Spreaders and Pre-bend
LIGHT CREWS
Spreaders 425mm long
Sweepback 200mm
Pre-bend 45mm
HEAVY CREWS
Spreaders 435mm long
Sweepback 190mm
Pre-bend 40mm
Jib Sheet
Extension of jib sheet to intersect luff 2110mm above the tack
Transom to front of mast 3175mm
Transom to Centreboard bolt 2550mm
READ MORE
READ MORE

21 June
INTERNATIONAL FOLKBOAT TUNING GUIDE
Introduction
North Sails tuning guide is written to help you get the best performance from your International Folkboat sails. The measurements and settings included in this guide are the ones that we have found to be the fastest settings for the IF-Boat. Since crew, wind and sailing conditions vary, you may find slightly different settings are better for you. However, by following these instructions, you can be confident that you are well set up to win at any level. We believe this guide will make your sailing experience simpler, more successful and most of all more fun.
The tuning guide was written by Björn Österberg at North Sails One Design.
Preparation
This chapter explains rig tuning and the trim control systems required to be able to get full potential from your North Sails. Always consult the Class Rules while working with your boat and equipment.
MAST RAKE
The IF-Boat has relatively little helm and is, unlike most boats, even more neutral when heeled. To get enough helm for good pointing ability upwind the mast is raked aft. The length of the headstay determines the amount of rake. We recommend a total headstay length of 8400mm. You will most likely need to add one or two toggles to the original headstay to bring it up to this length. A popular alternative is to get a new headstay without turnbuckle made to the total length of 8400mm.
While measuring the rig you can also check other measurements including J-measurement an spinnaker pole length to make sure they are on maximum and according to the class rule.
RIG TENSION
IF-boats are typically 20 –30 years old and therefore checking points that effects rig tension can be worth while. The cabin top underneath the mast step and the hull around the chainplates are the most critical areas. A ”knee”, which strengthens the hull and deck at the chainplates, is allowed. This procedure is described in the class rules.
The settings for rig tension and prebend should me taken with no load on the backstay. Using a tension gauge helps finding and repeating a desired rig trim. We use the Loos Tension Gauge mod. B rig. The base setting is 22 (220kg) headstay tension. To achieve that the values for the upper and lower shrouds are 37 and 20. In certain conditions, when the boat needs a lot of power, a looser rig set-up with a headstay tension of 18, can be worth trying. A looser headstay adds power to the genoa, making it easier to build and maintain botspped.
PREBEND
The tension of the lowers affects two things. Adding tension to the lowers increases tension in the forstay. It also affects the amount of prebend in the mast. The amount of prebend determines the amount of camber in the mainsail. Your North manisail is designed to a prebend of 20 mm. Setting your rig with a greater prebend will flatten your mainsail. Setting the mast with less prebend, a straight mast, will add more power to the mainsail.
SPREADER SWEEP
According to the class rule the spreaders has to be able to move for and aft in the spreader brackets. Reducing the aft movement of the spreaders creates a better support for the mast. Using a string, tie the shrouds to pull the spreaders back as far as they will go. Then measure 280 mm from the string to the aft face of the mast to get the recommended sweep.
TRIM DECALS
Your sail is delivered with 4 small and 6 large trim decals. The small decals can be used for outhaul and other small range adjustments. We use the large decals for genoa halyard, genoa cunningham, genoa- and main tracks. Cutting the decals into “loose” numbers allows you to match the numbers to positions on genoa track.
MAINSHEET TRAVELER
The main traveler has to be easy adjustable. A low friction traveler car with a 2:1 purchase will ensure that adjustments can be made even in heavy conditions.
OUTHAUL
With eased outhaul the elliptical foot panel gives the mainsail a deep and smooth shape. When tensioned for upwind sailing the lower half of the mainsail is flattened. The purchase of the outhaul should be at least 6:1. The tailing end can either stop underneath the boom (as shown) or be lead to the cabin top.
CUNNINGHAM
Cunningham adjustment affects draft position. With loose cunningham the draft will be further aft. When the cunningham is tensioned the draft will move forward and open the leech of the mainsail. A 3:1 purchase lead back to a cleat on the cabin top ensures easy adjustment.
VANG
We use the vang mainly to adjust mainsail twist on downwind legs. The vang can also be used to help the mast bend in the lower sections on a heavy air beat. Using a tight vang while manoeuvring in the pre-start will make the boat accelerate faster. An 8:1 purchase with an easy to reach cleat is recommended.
BACKSTAY
The backstay is the key to balance and speed in medium and heavy air. It has to be easy adjustable even when the crew is hiking from the windward side of the cockpit. The backstay can either be lead to both sides of the cockpit or to a center cleat with the line lead underneath the hatch (as shown). We recommend minimum 16:1 purchase.
INNER GENOA TRACKS
The genoa has a flat leech section that allows us to sheet the genoa on an inner track in all conditions. The position of the track is 100 to 150 mm inboard of the standard track. The aft end of the track is 600 mm forward of the cut-out in the gunwale. The track is 500 mm long. Because of the low clew of the genoa it is important to have the spacing of the trim positions tight enough. Drilling an extra hole between factory holes, bringing the spacing down to about 50 mm will do the job.
GENOA SHEET WINCHES
Sheeting the genoa from winches on the cabin top gives the trimmer a better position. Further forward and facing in to the slot between genoa and main it is easier to get the right genoa trim. With low handle winches, such as Andersen, the handle can be left in the winch while tacking.
GENOA HALYARD
Put a mark on the genoa halyard in front of the cleat. A “North Sails Trim Decal” underneath the mark helps keeping track of the hoist. Adjusting luff tension can be done with either halyard tension or a genoa cunningham.
The cunningham alternative has the advantage of not affecting the head of the sail and therefore leaving the sheeting position unaffected. It is easy to underestimate the force in the cunningham and use a too stretchy rope. We use a 6mm spectra core with a 6:1 purchase arrangement on the aft starbord side of the cabin. Since the tack of the genoa is about 200 mm above deck it is important to keep the sail forward towards the forstay. If this is not done properly the sheet tension will pull the tack of the genoa aft, causing a wrinkle from the firs luff hank. If you use a rigging screw at the lower end of the forstay, just tie a 4mm spectra loop twice around the rigging screw and the trough the tack ring. If you are using a cunningham you might want to put a thin aluminium pipe around the rigging screw to reduce friction. Having a full-length forstay use the extra luff hank right close to the tack ring.
TWEEKERS
Tweekers (twing lines) serve many purposes: they keep the after guy out of the way of the crew on reaches. They reduce the need a forguy and keep the spinnaker more stable in manoeuvres making it easier for the bowman. We put the tweeker blocks at the forward end of the standard genoa tracks where the boat is at maximum width.Sailtrim
The IF sails well unreefed even in heavy air. Using the jib in winds above 18 knots will make both manoeuvres and keeping boatspeed easier. Because the centre of effort moves forward with the jib, pointing is the critical thing with the jib. The confident crew will therefore use the genoa in all windstrenghs because of the importance of good pointing, especially in bigger fleets. We recommend using the inner genoa track in all conditions.
A good way to move quickly up the learning curve is to mark all trim control lines and positions. This will enable you to copy a trim you have found fast in the past, giving you confidence in boatspeed and allowing you to concentrate more fully on tactics.
MAINSAIL
In very light air the mainsail should be trimmed with an open leech to allow the wind flow to follow the sail. The traveler is kept about 300 mm to windward of the centerline with the sheet tensioned to position the boom about 200 mm to leeward of the centerling. Check that the top telltales flow to make sure the leech has enough twist.
Keeping the crew weight to leeward in these conditiond helps opening the leeches of the sails. The outhaul is set at #3 on the small trim decal on the boom. When the breeze builds to about 6 knots the sail can take more sheeting while still maintaing good windflow. The traveler is dropped to about 100 mm to windward and the sheet is pulled to centre the boom. In light air when the mast is straight the cunningham should be slack and small horisontal “sped wrinkles” should bee seen in the luff of the sail.
LIGHT AIR
In the 6 to 12 knots wind range the mainsail can be sheeted tight, letting the top telltale stall at about 50% of the time. A closed leech puts priority on pointing whereas a more open leech gives extra speed. In choppy conditions it pays to ease a few inches in the sheet after tacking to help acceleration. When the boat is up to speed the sheet is pulled tight and the focus is back on pointing. At 10 knots you can start flattening the main by pulling the slack out of the backstay and tightening the outhaul.
MEDIUM AIR
In about 14 knots of wind the boat will start to heel with the trim described above. The solution is to tighten the backstay. This will depower the main and twist its upper part. The boom can still be held on the centreline to match the overlap of the genoa. To keep the draft position in the middle when bending the mast you need to pull the cunningham. A new sail needs only little cunningham tension whereas an older sail requires relatively more luff tension.
HEAVY AIR
In winds above 16 knots the mainsail is depowerd and used mainly for controlling helm. Controlling the power with backstay works well in steady wind conditions. In gusty conditions this method is too slow and we have to work the traveler instead. Make sure the boat is well-balanced in heavy seas. With the right trim the boat should flow naturally through the waves. If the boat feels “sluggish” it can be a sign that the main is giving too much power. With the right, open-leech, trim the boat will be easy to steer and accelerate quickly after big waves.
GENOA
To get the right clew height you need to set the tack about 150 to 200 mm above deck. Regardless if you use cunningham or not, it is important to make sure the tack does not move aft with increased sheet tension. If you use a rigging screw at the lower end of the forstay, tie a 4mm spectra loop twice around the rigging screw and the trough the tack ring. With a full-length forstay use the extra luff hank right close to the tack ring. The best reference for genoa trim is the distance between the leech and the spreader tip. The following measurements refer to spreaders with reduced sweep (as described earlier). For standard sweept spreaders add 50 mm to the measurements below.
LIGHT AND MEDIUM AIR
The right genoa lead for light and medium wind is set when the luff of the genoa breaks evenly from top to bottom. If the top luff breaks earlier the lead is too far aft. In light air the luff should be tensioned so that a few wrinkles remain. Under 6 knots the distance between the leech and spreader tip is 100 mm. When the breeze builds to 8 knots the luff is tightened to remove wrinkles and the genoa is sheeted to 20-30 mm from the spreader tip. In flat water the sail can be sheeted all the way in to the spreader. With tighter sheeting the car has to be moved aft about 50 mm to ensure an even break in the luff.
HEAVY AIR
As with the mainsail the genoa should be flattened and twisted in heavy air. The luff is tensioned and the lead is moved another 50 – 100 mm aft. The upper part of the luff will now break earlier than the bottom part. The foot of the sail is sheeted tight around the chainplates and the leech is further away from the spreader. In 14 knots the distance is 100 mm. With winds above 20 knots the lead is moved further aft and the distance from leech to spreader is 250 mm. This allows the mainsail traveler to be dropped without closing the slot too much. The harmony between main and genoa is important. An adjustment in the genoa is normally followed by a matching adjustment in the main. In stronger winds the amount of backwind in the main will give a hint about the relative trim of the sails. Compared to other boats the IF can be sailed very close to the wind (with a considerable break in the genoa luff) in strong breeze and flat water.
DOWNWIND TRIM
Because we no longer sail reaching legs this part only describes downwind (VMG) sailing. The rule-of-thumb for spinnaker trim is to keep both clews on the same height and the spinnaker boom in right angle to the apparent wind. In light winds this will mean a lower boom and for heavy air the boom can be carried higher. If the spinnaker boom is on an adjustable track on the mast, keep the boom horizontal to get maximum effect. The afterguy (brace) should be set with a tight tweeker. The exception is when the boat is sailed on very deep angles where the tweeker should be eased 500 mm to avoid a sharp bend at the tweeker block.
The spinnaker sheet is eased just to get a slight curl in the luff of the spinnaker. In light airs sailing higher angles even on downwind legs can use the effect of the apparent wind. The angle determines by the spinnaker sheet pressure. Communication between spinnaker trimmer and helmsman is the key. When the pressure builds the trimmer tells the helmsman to bear off and when pressure drops the trimmer tells the helmsman to luff up.
In winds above 10 knots the main is eased all the way to the shrouds. In lighter winds when steering higher angles she main is sheeted tighter to provide a slot between spinnaker and main. To give the mainsail powerful and even camber, make sure the outhaul is eased to #5 and the cunningham and backstay is slack. The vang should be tensioned just enough to keep the top batten parallel with the boom.
Spinnaker sailing is easier if you get rid of the genoa. Roll the genoa parallel to the headstay. Start with the clew and roll the sail vertical behind the headstay. Have a 500 mm rope and tie it around the sail and headstay. When the genoa is not furled make sure the genoa sheet is loose. An overtrimmed genoa will create turbulent air for the spinnaker, making it unstable and hard to trim.Crew WorkThe IF is normally raced with 3 persons. It is not possible to describe the “perfect” crew organisation for all boats. The knowledge, experience and the ambitions of the crew should determine who does what. The idea with the following chart is to present a proposal and an inspiration to make your own chart for your boat. By making a chart you have to think and talk trough the crew work. By assigning a job description to each position, a new crew member can be easily integrated into your boat handling team.
In organising the crew of your boat your goals should be to:· Involve all crew members in each manoeuvre· Avoid having crew members cross paths with each other· Talk about and decide tactical matters to involve the whole crew
SPINNAKER HANDLING
We hoist and retrieve the spinnaker trough the fordeck hatch. We like this method because the spinnaker has a shorter distance to get from stored to set, especially at gybe sets. With the traditional way of hoisting from the cabin hatch the spinnaker has to be led past the boom, vang and shrouds before getting in position. Another advantage is to have the bowman work from a position around the mast. This will make the cockpit less crowded and keep the crew weight well forward.A short description:
To allow the spinnaker to be hoisted from the mast, exit the spinnaker halyard 2000 mm above deck on starboard side. Mount a cleat 400 mm underneath the exit. The forward closing fittings of the fordeck hatch can be removed while racing. The hatch is heavy enough to keep the water out even in rough conditions.
Store the spinnaker in the fordeck hatch. Have the head and clews sticking out a few inches. The halyard is led forward to the forstay to keep it out of the way of the genoa. Use the gunwhale fairlead or a hook mounted close to the headstay.
READ MORE
READ MORE

19 June
A CLASS CATAMARAN TUNING GUIDE
The settings below are recommended for Fiberfoam 14 / DNA masts and 80 kg skipper. Download PDF
MAST
UPWIND
DOWNWIND
WIND SPEED
Knots
SPREADER RAKE
PREBEND
CUNNIGHAM
BATTENS (Top 4 battens)
MAST ROTATION
CUNNIGHAM
MAST ROTATION
TRAVELER
(off the center line if foling)
5-8
42 mm
20 mm
OFF
Light
45-50 degrees
OFF
80 degree if foiling
180 mm
8 - 12
56 mm
27 mm
15 - 40%
Light Medium
(10+ kts)
35-45 degrees
10 - 25%
70 degrees
220 mm
12 - 16
60 mm
32 mm
100%
Medium
25 - 30 degrees
60 - 75%
65 degrees
300 - 400 mm
16 - 20
75 mm
38 mm
100%
Medium
Heavy
(18+ kts)
20 - 25 degrees
80%
80 degrees
500 mm
20 - 24
90 mm
42 mm
100%
Heavy
20 - 25 degrees
80%
80 degrees
500 mm (Hang on!)
Lighter skipper will slide settings up the range one and heavier skipper will stay down range one setting for best performance. (70kg is light. 90kg is heavy) Mainsheet should be tensioned enough to have an even twist profile from top to bottom and all tell tails should fly evenly.
READ MORE
READ MORE

16 June
FLYING FIFTEEN TUNING GUIDE
FLYING FIFTEEN TUNING GUIDE FR-3/FR-5 MAINSAIL & NXG-3 JIB
WIND SPEED (knots)
0 - 4
5 - 8
9 - 12
13 - 16
17 - 22+
Sea State
Flat <---> Choppy
Flat <---> Choppy
All Sea States
All Sea States
All Sea States
Mast Rake
24'11 (7595mm)
24'10 (7570mm)
24'10 (7570mm)
24'9 (7545mm)
24'8 (7520mm)
Rig Tension
180 kg <---> 160 kg
160 kg <---> 140 kg
160 kg
160 kg
180 kg
Kicker Tension
Slack (set for downwind)
Just snug
Tension until 2nd tell tail on the leech stalls 10% of the time
Increase tension bit by bit as the wind increases
30-50%
Ram
Pull fwd 30mm <---> Pull fwd 20mm
Pull fwd 15mm <---> Pull fwd 10mm
Neutral position
Neutral position
Ease fwd 5mm
Outhaul
Ease 10mm from max <---> Ease 20mm from max
Ease 20mm from max
Ease 10mm from max
Max outhaul
Max outhaul
Cunningham
None (see notes)
None (see notes)
None (see notes)
Removing all wrinkles on the luff
Increasing to max tension
Jib Inhauling
None (see notes)
50% <---> 25%
25-50%
None
None
Jib Luff Tension
Soft, slight wrinkles on luff
Soft, slight wrinkles on luff
Just removing wrinkles
No wrinkles
Firm
Notes:
Spreader Length:
420mm-430mm based on overall crew weight, heavy teams should use 430mm, lighter teams 420mm, (if under 23stone then reduce to 410mm)
Spreader Angle:
FR-3 mainsail use 175mm, for FR-5 mainsail use 185mm
Ram:
The Neutral position is set on the dock using 24'10 rake and 350lbs of rig tension, this should produce around 20-25mm of pre bend, Mark this position at deck, this is the zero point or Neutral. Move the ram from this position the amount in the guide.
Cunningham:
Our mainsails use a rubber luff rope which is slightly elasticated which helps to release tension when the cunningham is eased, it does mean it can create larger wrinkles off the luff so its best to lightly snug the cunningham in the lighter winds to remove the larger of these wrinkles without affecting sail shape.
Jib Inhauling:
With the newer higher aspect jibs there is the option to sheet the sail closer to the centreline, there are too many different sheeting setups to give a measurement figure but if you try using the max you think you could inhaul for a short spell, 30 seconds off a start line for example, this is 100% inhaul, use the % guide figure as a ball park to how much you can use in regular sailing in the longer term. I.e 8 kts in flat water would be the likely most effective inhauling condition using 50% of max. You need to ensure the boom is on or even slightly over the centreline to make this work as effectively as possible.
READ MORE
READ MORE


16 June
FARR 3.7 TUNING GUIDE
Mast Rake
Use Bruce Farr’s mast rake diagram as a starting point. Most top boats have recently had the centre of their mast set 60 -80mm (2 or so inches) aft of the intersection point of the tapes. When your boat is going well, use a stick to measure your forestay lashing so that you can set it at the same place every time, or experiment knowing what your rake actually is. 4mm on a forestay changes the rake quite a bit (check it out and see). Use a measuring stick - don’t try to experiment by the power of your biceps when setting up the mast. The writer’s experience is that even though in principle everything should be equal, the forestay sets mast rake, while the tightness of sidestays affects rig tension before it seriously affects mast rake. Sailing upwind, it is definitely the forestay that remains tight, and upwind is where the rake matters most. Don’t be afraid to vary your mast rake according to wind conditions, fresh or salt water. (Forward on fresh water, unless it is choppy). Raking your mast too far aft, or forward, will lose you upwind pointing ability. If your rake is too far aft in strong breeze you will capsize a lot. Some skippers believe that as soon as you are in big waves or chop, having your mast raked forward will make your boat bunt into the waves and go slow upwind. If you rake it correctly aft, the bow will lift nicely through the waves without you having to move back in the boat while trapezing.
Rudder
Class Restrictions give you total freedom for your rudder design. Some believe that when you are planing at high speed off wind, the distance between the centreboard and rudder determines how sharply you will turn with whatever minor movement you make on the tiller. If you want to survive more easily in 20 knots plus, (downwind, of course) hang your rudder blade at least 6 inches aft of the transom and have both your rudder gudgeons and your rudder blade raked at the same angle as your centreboard. A thick, rounded leading edge should help reduce your rudder’s tendency to cavitate (suck air right down, make spray, and stop steering.) At high speed, you will not have very good control of your boat if there is a lot of play in your rudder gudgeons. At high speed (ie, off-wind in a blow) the boat is controllable only through ultra-quick use of the tiller and very quick shifting of body-weight - and both controls must be precise. Don’t be afraid of some swims in the learning stages. You’ll know you’ve made it when you’re with the guys who don’t swim. (If you aren’t willing to enjoy the odd massive wipe-out, maybe you should stick to sailing Optimists!) Unless something major is wrong with your board or rudder blade, 90% of your boat speed will stem from your rig (mast rake, mast bend, and sail shape), assuming your hull and body are down to weight.
READ MORE
READ MORE

16 June
EUROPE TUNING GUIDE
Introduction
First we would like to congratulate you for choosing North Sails Europe Class sails. Here we will present the basic set up and some guidelines on how to get the most out of your North Sail.
Follow the guidelines, but always experiment and try finding your own trim. The weight of the crew, the balance of the boat, the stiffness of the mast together with specific local wind and sea conditions will all influence the fastest and final trim.
Upwind Trim
Even though the Europe is not as physical as the Laser or Finn you will still need to hike to get the maximum performance out of your sail when sailing upwind. If your sails are trimmed perfectly and you are just sitting on the side enjoying the scenery, you will be slow. So remember to take care with your self-preparations. It is always a good idea to use trim scales on your boat so that it is easier to get a reference point.
One of the most important trim functions on the Europe is the mast rake. We have found that 5440cm is a good base position to start from.
0-5 KNOTS
In less than 5 knots, when hiking is not required, concentration and setup are crucial. In light wind conditions we find that raking back the mast approx. 2cm from base position gives the boat more feel and will help you control the leech easier. Play the mainsheet so that the top tell tail stalls 20% of the time. To keep the leech loose in light conditions is very important. The traveller should be adjusted so that the end of the boom is at mid tank. In light air the outhaul should be 6cm forward of the black band and the inhaul should be loose, 3cm back from the aft edge of the mast. The cunningham is kept loose.
5-10 KNOTS
As wind velocity increases, your primary concern is leech tension and traveller position. At around 5 knots of wind the mast can still be raked back 2cm from base position to help you control the leech. As wind velocity increases, from 6 knots of wind, the mast should be raked forward to base position. As you slowly tighten your leech by pulling the mainsheet you should at the same time work with the traveller. The end of the boom should be around mid tank to transom corner depending on the conditions. The top tell tail should stall 30% of the time. From around 9 knots of wind the end of the boom will hit the deck and the top tell tail will probably fly all the time. When the boom hits the deck you can no longer control the leech tension with the mainsheet. Rake forward the mast 1-2cm from base position to help you get the proper leech tension. The outhaul trim depends a lot on the sea state. In flat water conditions the outhaul should be approx. 6cm from the black band and in choppy conditions approx 10cm from the band. With the inhaul trim it is the opposite way. In flat water it is kept loose, 3cm from the mast, and in choppy conditions it will be tightened. The cunningham is kept loose.
10-15 KNOTS
In 10 knots of wind the Europe is fully powered. Mast rake will be from base position to 1-2cm forward. The boom should be touching the deck at all times. The traveller position should be so that the end of the boom is from 3cm from the inside corner to the transom corner. Remember to play the traveller in puffs to help you balance the boat. The outhaul trim follows the same ground rule as in 5-10 knots but should be kept tighter, 4-9cm from the band. The inhaul should be tightened. As wind velocity increases to around 14 knots you will also start to need to use the cunningham. A good starting point is to start smoothing out the wrinkles along the mast. From around 14 knots of wind you can also lift the centreboard, approx. 10cm, to help balance the boat.
15-20 KNOTS
At this stage it is really time to start de-powering the Europe. To keep the boat well balanced is the main focus. At around 15 knots of wind the mast rake will still be from base position to 1-2 cm forward. As wind velocity increases, to around 20 knots, use base position. The mainsheet should be kept tight with the boom touching the deck at all times. The traveller position should be so that the end of the boom is from the transom corner to some cm outside corner. The outhaul should now be from approx. 4cm from the band to maximum tension. The inhaul should be tightened even more to maximum tension. The cunningham should also be tightened, smoothing out all the wrinkles along the mast. The centreboard can be lifted approx. 20cm.
20-25 KNOTS
As we have said before a well balanced boat is the key to success on the race course. It’s all about de-powering. Mast rake should be in the base position to 1-3cm back. The mainsheet should be kept tight but can be played in the puffs. The traveller position should be so that the end of the boom is outside the transom corner at all times. The outhaul and inhaul should be at maximum tension. The cunningham should be kept tight to maximum tension. The centreboard can be lifted even higher, almost to deck level as the wind velocity increases.
Downwind Sailing
Downwind sailing is an art in itself. Many sailors like to compare it to, for example dancing and they are in many ways right. It takes many hours on the water to really master the art of downwind sailing so be prepared to do some hard work out there. Here we will present some guidelines for helping you to reach that medal winning downwind speed.
When approaching the weather mark try to adjust all the sail controls before you reach the mark so that you can concentrate on surfing that first wave instead of messing with your lines. Release the cunningham and inhaul. How much you release the outhaul depends on the wind velocity, you still have to get around that mark in one piece. In higher wind speeds you can also preset the vang. The vang should be set so that the top batten is 2-3° open relative to the boom.
Play the mainsheet directly from the boom (1:1) until it feels like you are going to be pulled out of the boat, from that point it is not longer effective. Remember that steering always comes first, before pumping and rocking the boat. With too much power in your arm you can no longer concentrate on finding the right way through the waves but are instead just wrestling with your mainsheet which is not fast. At this point switch to 2:1, it then becomes more manageable and safer. As the wind velocity increases even more, pull the mainsheet directly from the ratchet. When surfing, always concentrate on finding your way through the waves. Don’t be greedy and stay too long on each wave. Instead you should use the top speed gained on each wave to try catching the next one. You should always aim to surf from one wave to the next continuously.
Good luck on the water!
READ MORE
READ MORE

09 June
ENTERPRISE TUNING GUIDE
This tuning guide has been prepared to help you get the most out of your North Sails as quickly as possible. It is meant as a starting point only, as we cannot cover all options and techniques. Feel free to modify and experiment in small steps to find what suits you best. If you find a settings that really work well, please keep us informed.
Mast Preparation
Ensure all sheaves are free running and the rigging is clean prior to stepping the mast.
SPREADERS
Spreader Angle: Measure from spreader tip to tip.
Super Spar M2 Sleaved – 780 mmProctor D+ – 760 mm
Spreader Length: Measure from spreader tip to wall of mast.
Super Spar M2 Sleaved – 410mm
Proctor D+ – 410mm
Rig Tension / Mast Rake
Rig tension is measured on the shrouds with a 3mm wire gauge. Mast rake is measured from top of mast to the centre of the transom. For sailing in all conditions the rig should be set up with Jib hoisted and tension fully on:
Rig Tension: 400lbsMast Rake: 6470mm
This should make the mast straight with no Mainsail hoisted.
Mainsail
Ensure the Mainsail is fully hoisted – halyards do stretch.
Battens
Battens should be left in the sail at all times and whilst not afloat, the sail should be rolled down the leech, parallel to the battens.
Cunningham
This is used to position draft in the sail. Do not use any Cunningham until you become overpowered in heavy airs, then pull Cunningham on progressively harder as the breeze increases. This will move the draft of the sail forward in the top and de-power the upper leech.
Outhaul
Beating: In light and heavy airs the foot of the sail should be pulled tight. In medium airs, ease approximately 12mm.
Running: Keep the foot tight in all conditions.
Reaching: Ease fully in medium conditions, in light airs ease 25mm and in heavy airs pull out tight.
Jib
To find Jib lead position, follow the sheeting angle through the Jib clew. This should divide the Jib luff approximately in half. When sailing upwind in a Force 3, all the tell tales should break together. In medium/heavy airs, the Jib should be sheeted hard to maximise pointing ability.
In lighter conditions the Jib sheet needs to be eased approximately 12mm to keep the top of the leech open. Once a fairlead position has been found, use it in all conditions with very heavy airs, then move back 25mm. This will flatten the base of the Jib and open the leech, keeping the boat driving and on her feet.
Good luck on the water!
READ MORE
READ MORE

09 June
CONTENDER TUNING GUIDE
Basic Setup
Rake – 21ft 2inSpreader length – 430mmSpreader Angle – 100 -110mm (track to line straight between wires at tip)Prebend – 20 – 25mm (with the lowers slack)Lowers Tension until the mast is straightShroud Tension 26-28 on a Loos gauge
Centreboard Position Upwind
GUIDE SETTINGS
0 – 8 knots – Vertical9 – 12 knots – Up 5-8cm (from vertical)13 -18 knots – Up 10-15cm19 -25 knots – Up 20-25cm
It is almost impossible to change your mast rake on the water but because the top mast is long and the lower mast is controlled by the lowers, as you pull on the kicker the mast tip moves back in much the same way as it does when you increase mast rake. This creates weather helm so to balance the helm the centreboard angle should be adjusted. This becomes the key to speed through the wind range. The exact positions will vary depending on your weight and height as well as the stiffness of your mast and the seastate, but the principle is that as the wind increases raise the board enough to keep the helm balanced and the boat driving forward as opposed to luffing and stalling in the gusts. If you raise the board too far the boat will feel easy to sail but you will be unable to point. There is always some tolerance when searching for the optimum board angle, so if you want to point high and you are prepared to sacrifice a little speed lower the board a little, if you want to go low and fast raise it.
Good luck on the water!
READ MORE
READ MORE

08 June
B14 TUNING GUIDE
This Tuning Guide has been prepared to help you get the best out of your North Sails. This is meant as a starting point, feel free to modify and experiment in small steps to find what suits you best. If you find a Setting or Settings that really works, please keep us informed.
Mast Position
The aim of the B14 settings is to keep the lower ¼ of the mast as straight as possible. To achieve this you will need to move the mast foot as far forward as is possible, and use a small chock in front of the mast at the mast gate. The size of the chock will vary and you will need to set this by looking up the mast when it is tensioned and checking it is straight.
On The Water Tuning
Because the rig is very simple, there are not a lot of changes you can make while you are on the water. There are your normal sail controls, the jib tack height and the centre board.
CUNNINGHAM
As you start to become overpowered start to pull on the cunningham a little, as the breeze increases progressively pull on more.
JIB TACK HEIGHT
The jib tack height is the only control for the sheeting angle of the sail. Lowering the tack will increase the twist of the sail. If the conditions change you can alter the tack height between races, lowering the sail if the breeze increases and raising it if the breeze drops.
CENTRE BOARD
As with the jib, the centre board can only really be adjusted between races. If you feel the boat ‘tripping up’ over the board in breezy conditions raise it up.As a guide:15-20kts: 150mm (6”)20kts+: 300mm (12”)
Notes
Tensions are found with Loos PT1-m rig tension gauge.The spreaders are measured from a straight line between the shrouds to the back of the mast track, without rig tension. The holes are a bit of a course adjustment so you might not be able to exactly match these figures. If in doubt go slightly further forward on the lowers and slightly further back on the uppers, if possible try to keep the 2 sets of spreaders in line or the upper set slightly aft.
Good luck on the water!
READ MORE
READ MORE