QUICKCOVER INSTALLATION GUIDE
QUICKCOVER INSTALLATION GUIDE
North Sails QuickCover makes storing and protecting your mainsail a simple and easy process, eliminating the need for a cumbersome sail cover. Following these steps will ensure that your QuickCover is properly installed and will be easy to handle.
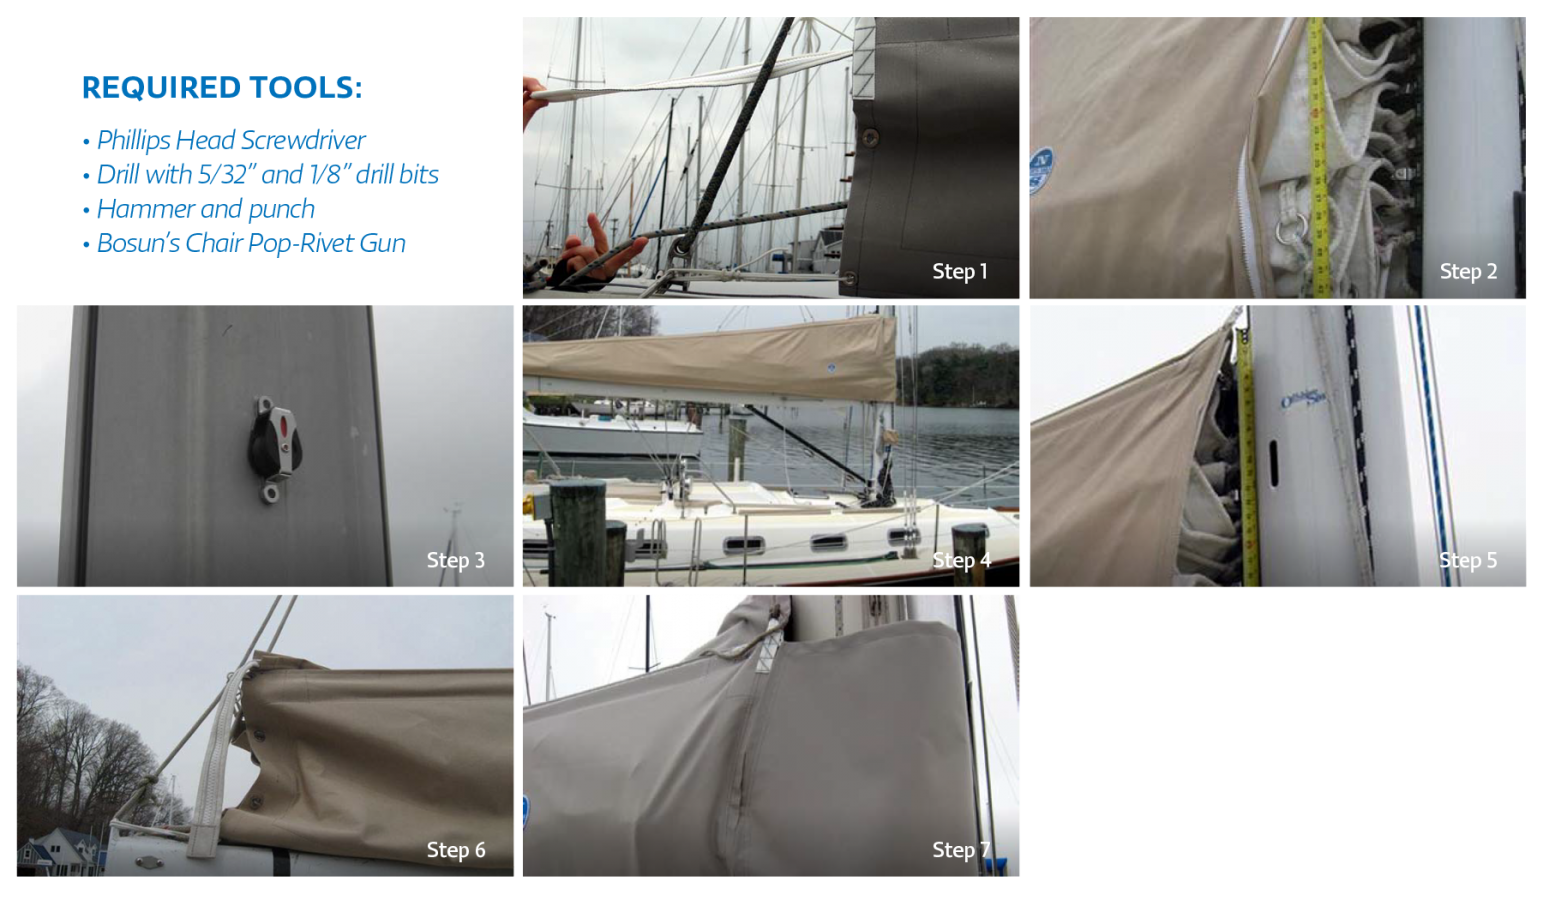
Step 1- Attach Clew and Foot
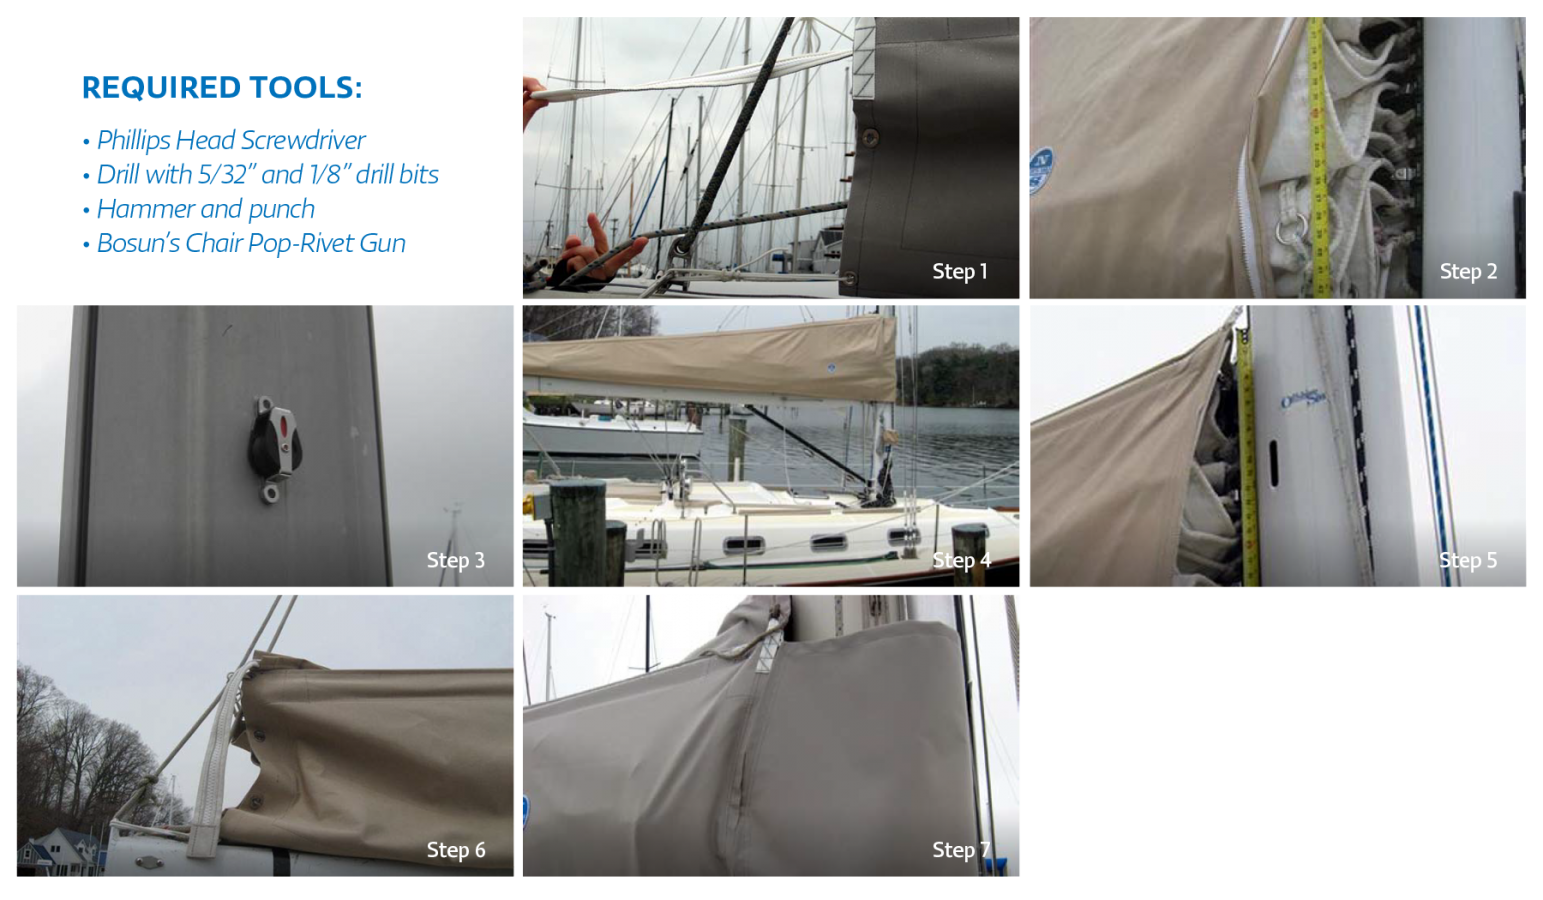
Slide the sail’s clew slug into the boom, followed by the bolt rope on the foot of the cover. The sail and cover should slide all the way to the end of the boom and attach to the outhaul. If the sail has reef slots in the foot, run the reefing lines inside the cover.
NOTE: If your boom has a clew car then there is no need to worry about bending on the main and cover at the same time. Simply install the cover and flake it out on either side of the boom.
Step 2 -Attach the Tack and Luff Slides
Once foot and clew are in place, attach the tack and install the luff cars/slugs into the mast. After the tack and luff are secured, install the battens into the pockets on the inside of the QuickCover. Zip the cover from the clew to the mast and you are now ready to install the Lazy-Jacks.
Step 3- Install Cheek Blocks on the Mast
Installing the cheek blocks will require sending someone approximately 65% of the way up the mast, which is where the cheek blocks (supplied) will be installed. You will need a center punch, a drill fitted with a 5/32 bit, a few 5/32 pop rivets (supplied), and a pop rivet gun. Mark the location of the cheek block on the side of the mast, slightly more than halfway aft. Use the center punch to pre-locate the holes, drill, and install with supplied pop rivets.
The Lazy-Jack lines lead through the cheek blocks from aft to forward. When you come down the mast, the Lazy-Jacks should be led down the backside of the mast. Make sure they are aft of the spreaders.
Step 4- Adjust Lazy Jacks and Install Padeyes
Pull the Quickcover up into place where it will sit when the main is dropped, and tension both sides of the Lazy-Jacks evenly. Install the supplied padeyes at the forward upper end of the cover and at a 45-degree angle, about the same distance aft as the cheek blocks. Tie the line attached through the webbing into the padeyes.
Step 5- Install the Lazy Jacks Cleat
Once the foot and clew are in place, attach the tack and install the luff cars/slugs into the mast. After the tack and luff are secured, install the battens into the pockets on the inside of the QuickCover™. Zip the cover from the clew to the mast and you are now ready to install the Lazy-Jacks.
Step 6- Lazy-Jack Fine Tune
Lace the line at the tack through the gooseneck fitting. The forward edge of the QuickCover should be even with the backside of the mast.
Once the tack is tied securely, tension the cover from the clew by running the line on the bottom of the cover through the back of the boom. Usually there is a hole or shackle that can be used for this. If you have a topping lift, tie the line on the top aft corner around the topping lift to keep the top of the cover tight. If you don’t have a topping lift, the cover will still work fine; the aft lift for the Lazy Jack provides ample support. Don’t forget to rig reef lines and run them through the slots along the foot.
Step 7- Install The Front Cover
This separate piece is removed for sailing.
NOTES
- To reduce flutter in the QuickCover while sailing, zip together the two sides.
- Lazy Jacks will work best when you hoist or drop the main with the bow pointed directly into the wind.
