NORTH SAILS BLOG
All
Events
Guides
News
People
Podcast
Sustainability
Tech & Innovation
Travel & Adventure

NORTH SAILS RELEASE NEW JIBS TO MEET J/105 LATEST CLASS WEIGHT RULES
NORTH SAILS RELEASE NEW JIBS TO MEET J/105 LATEST CLASS WEIGHT RULES
New Lighter Sails Retain Market-leading Durability, Shape Holding And Performance
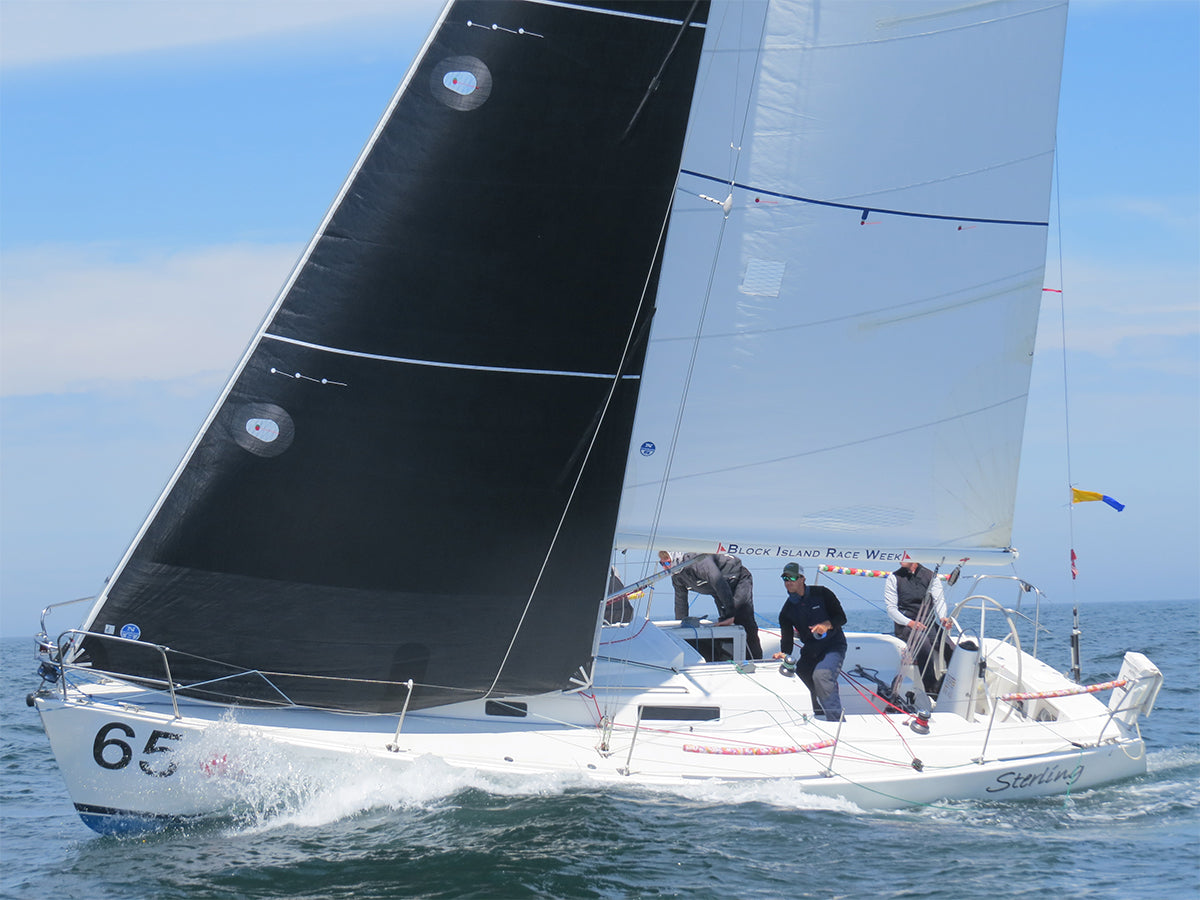
North Sails have released new 3Di jibs for the J/105, updating the popular Mi-4 to the Mi-5 and the Li-5 to the Li-6 to meet the new weight rules set by the class. The new designs continue to offer unparalleled durability, speed and range as a result of North’s unique 3Di technology.
Allan Terhune, the J/105 Class Expert with North Sails in Annapolis MD, added, “The new Mi-5 and Li-6 jibs are now really right in the wheelhouse of peak performance, as we were arguably previously over-building them before to meet the weight requirements. But with the new minimum weight, these sails are really coming into their own.”
Sail designer Rich Bowen added, “The designs remain the current standard and the previous sails had some parasitic features to boost weight to achieve the old class minimum, so updating the finishing and tape layouts has been key to the new sail. The new J/105 jibs are now all 760 RAW, which immediately saved some weight. We were then able to reduce sail structure and still have the strength required to achieve the same flying shape. “Non-standard” edge reinforcements were removed, and we applied appropriate-sized corner rings and webs on the new models.”
J/105 boats racing with North Sails have long benefited from 3Di technology, with no delamination and uncompromised shape retention. North J/105 clients are able to see sustained performance over multiple racing seasons without replacing sails, netting a bigger return on investment and value-for-money.
The J/105 events in 2020 include the popular NOOD Regattas in the Spring in Annapolis MD, San Diego CA and Marblehead MA, as well as the North American Championships in October. In 2019 North Sails clients dominated the North Americans, Midwinter Series, East Coast and NOOD regattas, in one of the strongest results for North powered boats on record. North Sails supports the Class across all key events, with representatives on the ground at regattas offering instructional seminars and helping clients get the most out of their sails.
As the leader in One Design sailmaking, North Sails is offering special pricing for all orders placed by December 31st, 2019.
Contact your local North expert today.
READ MORE
READ MORE

J/105 NORTH AMERICANS TOOL KIT
Get The Most From Your J/105
The 2019 J/105 British Virgin Islands North Americans in Marblehead is just around the corner. Is your team ready? Our J/105 Tool Kit will help. Created just for J/105 sailors, by our expert team.
#NSVictoryList
There is no better performance test of a one design sail than the results it produces. In 2018 alone, North Sails J/105 inventories helped teams win regattas all over the US.
Tips From The Champ
Champion Terry McLaughlin shares some tips that helped team Mandate win the 2018 North Americans.
Downwind Tips & Tricks
How to sail as deep as possible while still keeping your speed up. Before your next regatta, read this downwind manual from expert Will Keyworth.
Define Your Speed
Pulling all the pieces together can be challenging. Our J/105 Speed Guide will help you leverage our expertise to make the most of your sailing.
Fine Tune With North
Find your groove. Get your numbers. Be confident in all wind conditions. After countless hours of sailing, sail testing, and competing in the J/105, our championship winning sails will get you up to speed quickly.
Working With The Best
Our J/105 sails deliver the best results for our clients. Contact your local expert and join us at the front of the pack.
READ MORE
READ MORE
J/105 JIB WEIGHT RULE CHANGE: WHAT IT MEANS FOR YOU
J/105 JIB WEIGHT RULE CHANGE
What It Means For You
How does the J/105, a boat that was introduced in 1991, remain one of the strongest one design classes 28 years later? There are two answers: the sailing qualities of the boat itself, and the Class Association Rules.
The boat is simple to sail but complex enough to attract top sailors and crews. For a 34 ft boat, the J/105 is pretty affordable, especially when it is both an acceptable weekend cruiser and capable offshore platform. So it maintains a high resale value.
But the real success of the J/105 Class is a direct result of the conservative management of class rules, which includes a careful consideration of updates. We all balk at change, especially if we don’t know what the outcome of that change will be, but it is both natural and inevitable.
So, you ask, “How is this jib bag weight change going to affect me?” J/105 North specialist Will Keyworth one-word answer is….“positively!” This is a great rules update for all J/105 owners who actively race their boats, and class leaders drafted it only after requesting input from all the class sailmakers. “My view is that the result will be sails that are better, not just lighter.”
The result will be sails that are better, not just lighter. You don’t have to buy a new sail to comply with the rule, but the next sail you buy will be a better one.
You’ve probably already had discussions with other J/105 owners that start off with any of the following questions: Will a lighter sail last as long? How does this specifically affect the Light, Medium, and Heavy jibs? Do I have to buy a new sail now that the rule has changed? Will it cost more? All great questions, so let’s discuss them.
First, a bit of class history to explain how we got here. Since this rule was introduced in the mid 90s, class-legal jib materials have gotten much stronger: from woven Dacron, to Mylar film/Darcon laminates, to Kevlar laminate, and finally to Carbon laminates. Meanwhile, the Class minimum weight stayed the same. When Kevlar (and later carbon) became the material of choice, sailmakers had to add extra weight to the sails just to comply with the class bag weight. This weight was typically added by applying extra corner patching, especially in the tack; that bulk made it difficult to furl the sail tightly. So to answer “Will a lighter sail last as long?”, consider this: None of that “parasitic” weight did anything to improve durability or performance, and it actually made handling the sail harder.
How Does This Specifically Affect The Light, Medium, and Heavy Jibs?
The rule change from 23lb to 19.8lb represents a 14% reduction in bag weight, but even so an AP or Medium jib will have to be slightly over-built (with more load-bearing fibers than it needs) to comply. A Light jib will have to be significantly over-built, while the Heavy jib will end up at the correct weight without adding any extra fiber.
The new bag weight will enhance performance by reducing parasitic weight and improve handling, all without reducing durability.
Do I have To Buy a New Sail Now That The Rule Has Changed?
You don’t have to buy a new sail to comply with the rule, but the next sail you buy will be a better one.
Last But Not Least: Will It Cost More?
Since no expensive material (Carbon or Aramid) will be removed, my guess is that there will be no significant price change.
The bottom line is this: the new bag weight will enhance performance by reducing parasitic weight and improve handling, all without reducing durability. Better performing sails that are easier to handle and equally durable? That sounds like an improvement that will help keep the J/105 going strong, for at least another 28 years.
Is North Working on New Designs? When Can I Order the New Jibs?
Our designers are working on new jibs shapes for the J/105. A sail testing is planned for late summer. Sails can only be purchased with 2020 sail tags and are not legal until Jan 1, 2020. Advance purchase orders can be placed starting in November of 2019 for 2020 delivery.
READ MORE
READ MORE

J/105 TOOL KIT
Get The Most From Your J/105
Your next regatta is just around the corner. Is your team ready? Our J/105 Tool Kit will help. Created just for J/105 sailors, by our expert team.
#NSVictoryList
There is no better performance test of a one design sail than the results it produces. In 2018 alone, North Sails J/105 inventories helped teams win regattas all over the US.
Tips From The Champ
Champion Terry McLaughlin shares some tips that helped team Mandate win the 2018 North Americans.
Downwind Tips & Tricks
How to sail as deep as possible while still keeping your speed up. Before your next regatta, read this downwind manual from expert Will Keyworth.
Define Your Speed
Pulling all the pieces together can be challenging. Our J/105 Speed Guide will help you leverage our expertise to make the most of your sailing.
Fine Tune With North
Find your groove. Get your numbers. Be confident in all wind conditions. After countless hours of sailing, sail testing, and competing in the J/105, our championship winning sails will get you up to speed quickly.
Working With The Best
Our J/105 sails deliver the best results for our clients. Contact your local expert and join us at the front of the pack.
READ MORE
READ MORE
INTERVIEW WITH J/105 NORTH AMERICAN CHAMPION
INTERVIEW WITH J/105 NORTH AMERICAN CHAMPION
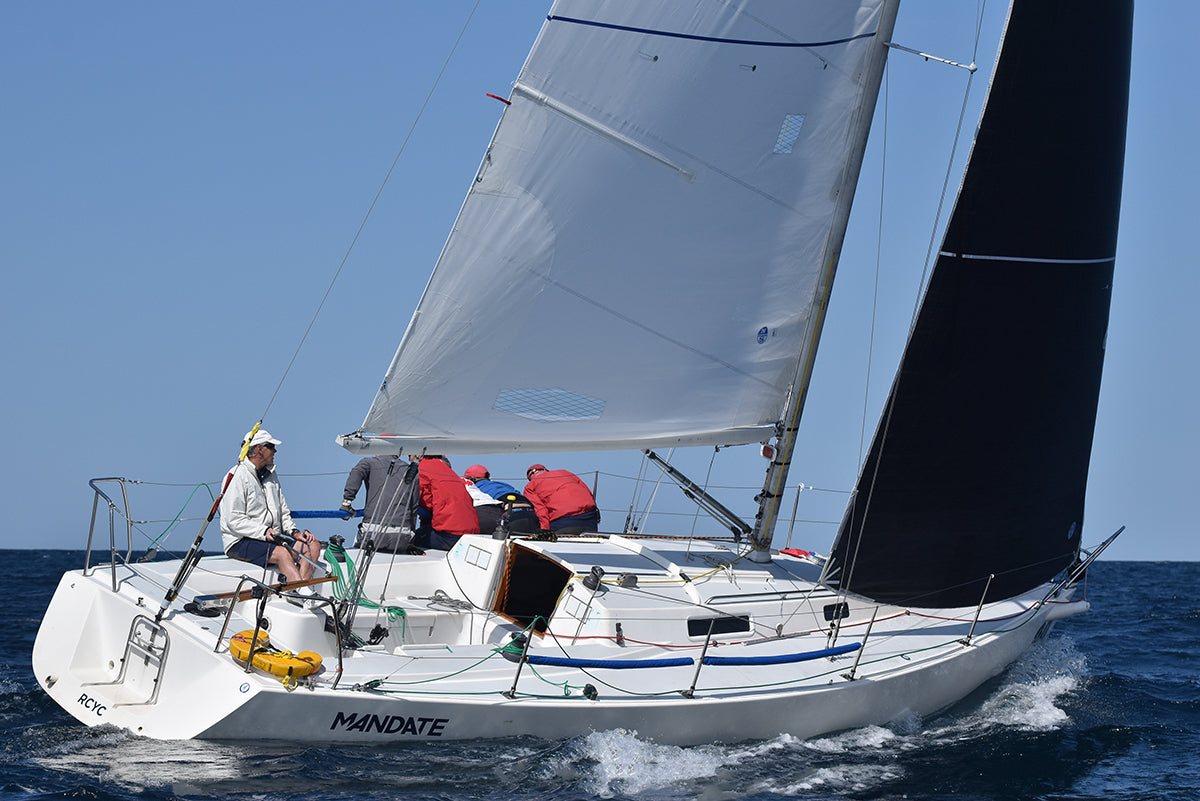
North Powers Mandate to Another North American Title
© Chris Howell
This is the third North American title for Terry McLaughlin’s Mandate. Terry bought the J/105 in late 2012 with friend Rod Wilmer. They race during the week on Tuesday evenings in Toronto and do weekend local regattas in preparation for larger events. Terry really enjoys sailing his J/105, commenting that it is “incredibly comfortable to race both on deck and down below”. Terry also enjoys the competition within the class explaining, “no matter where you race them there are always good sailors on the race course.”
Prior to the start, they made sure they had the correct shroud tuning and best jib for current conditions. In variable conditions they found it was better to be a bit loose on the rig tension, so they weren’t too tight in the lulls. Like most good sailors, Terry typically planned to win the favored end of the starting line.
“At the NA’s the lines were usually quite square so it was more important to decide what side of the course you favored. In the windier races, we didn’t push the line too hard knowing that we had good speed in those conditions.“
© Chris Howell
“There were some teams that were also fast downwind so we had to be at our best. As the wind comes up, there is a point that you have to put the bow up to get it to plane. The vang is sensitive on the J/105, so we focused on sailing with less vang while soaking in our low-mode, which is something we wouldn’t have previously done. Our crew weight is always at max weight. It doesn’t take much to be overpowered. The rudder is quite large, so I try to keep the rudder movements small, but if its too small the bow has tendencies to go down. Having my crew understand when they need to lean in and out to hike when the pressure comes is important.”
Terry said that his team improved mostly on vang tension downwind. They were much more sensitive to it this time around, and he noticed a difference in boat speed and how they could sail lower angles much faster.
© Chris Howell
Mandate’s worst race was a third in race seven. “We went for the RC boat-end of the line, which we thought was slightly favored, despite the fact that we liked the left side of the course. We were never able to get left enough after that and had to fight back all race to salvage a third.”
We asked Terry what the hardest part of the event was for his team. He mentioned;
“Bruce Stone’s Gryphon was good right from the start of the regatta. Bruce and Nicole are both very experienced J/105 sailors and know how to make the boat go well in just about anything. Bill Zartler’s Deja Voodoo got stronger every day .”
© Chris Howell
For the most part, Terry’s team sailed clean and stayed out of trouble. They’ve spent a lot of time together racing the J/105, and they can feel when the boat needs something to improve speed.
“My crew is very willing to hike hard, which is key to speed,” Terry said.
Mandate was powered by a new main, Li-5 3Di light air and Mi-4 All Purpose Jib, and runner kite.
“The two 3Di Jibs looked really good. Both had nice, straight exits.”
Terry’s Tips:
Sail with a consistent crew. Form a group of seven or eight crew members that you can count on to be available most of the time.
Have your tuning numbers on hand. Putting together a tuning guide for the shrouds that is very extensive is key. Get to know what the right “look” is for the forestay sag, leeward mast sag, and leeward shroud tension.
Have Fun & Ask Questions. Ask questions to those who are out front. We all have things to share. Everyone is willing to help out.
Interested in North Sails J/105 products? Call your local expert today.
Full Results
© Chris Howell
© Chris Howell
READ MORE
READ MORE
J/105 DOWNWIND TIPS AND TRICKS
J/105 DOWNWIND TIPS AND TRICKS
How to sail as deep as possible while still keeping your speed up
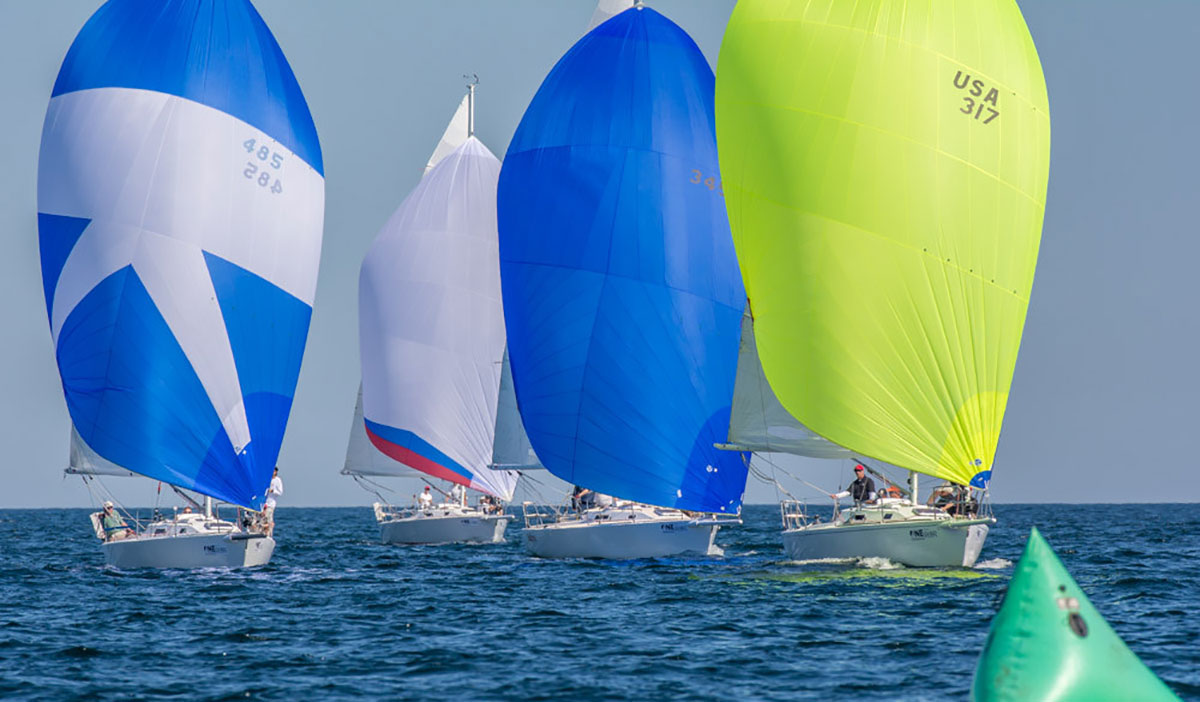
We often see teams get a little too relaxed when sailing downwind, even though this is where you will make the largest gains (and losses) when racing your J/105. You are trying to get to the bottom mark as fast as possible, so you need to sail as deep as possible while still keeping your speed up. Since the J/105 is primarily a displacement boat and doesn’t plane easily, the key is to coordinate several critical elements as you sail through velocity changes.
Puffs and lulls
Sailing with the wind, you will only see about half as many puffs as you did sailing upwind, so it is critical to designate one crew to call the breeze. A constant stream of verbal puff and lull communication will help keep your team in sync and anticipate the next change in velocity.
Helming
The goal for the helm is to minimize rudder movements while steering the boat downwind, using crew movement and sail trim to steer the boat. Make sure you are in a comfortable position with good visibility. We often see the helm trying to sit too far forward, which makes it difficult to steer accurately. As a driver, you are going to be working hard all race, so get comfortable!
Kite Trimming
The spinnaker trimmer and helm should maintain a continuous dialogue, discussing the pressure on the spinnaker and the correct angle to sail. “Up in the lulls and down in the puffs”…right? Yes, but make sure the angle changes are slow and smooth. As the breeze starts to drop, begin to “heat” up slowly—before the boat speed crashes—until you reach the angle that will keep your speed up in less breeze. When the puff returns, bear away and gradually build speed until you reach the new lower target angle.
In non-planing boats like the J/105, the goal is to get the spinnaker to rotate to weather, which increases its projected area and gets the sail out of the disturbed air behind the mainsail. To accomplish this we use both heel angle and tack line ease. In all but very light wind, keep the boat flat (or even slightly heeled to weather). This will also help the boat sail deeper in the puffs with less helm movement. Generally speaking, you can ease the tack line of the spinnaker as long as it goes straight up or to weather; if it goes to leeward when eased, keep it tight.
Weight placement
The J/105 is very responsive to weight placement, and moving crew weight to help turn the boat will minimize the amount of rudder needed.To head up, the crew leans to leeward; to head down, the crew hikes/leans to windward. In light air, we like to keep only the helm and main trimmer behind the cabin top winches; put the rest of the crew at the shrouds. As the breeze picks up, we move weight back just enough to keep the bow from digging in.
At least once a season, we like to completely empty the boat of EVERYTHING. This is a great way to see how much excess weight is on board, as well as an opportunity to pare back to the bare necessities.
Stabilize the rig
Keeping the rig from bouncing around in puffs and waves will mean the sails are pulling the boat forward and not just moving the mast. Apply enough backstay tension to make it “just snug”, and tension the jib sheets after furling to take the “slop” out of the headstay.
Four Modes of Downwind Sailing
Light air VMG
In VMG mode, the apparent wind will be around 90 degrees. Make sure the trimmers are easing sails in the puffs so the driver can work lower. The crew will be sitting forward and to leeward in the light spots, moving to the centerline and even up to weather in the puffs to help steer the boat down. Constant communication between the trimmers and helm is critical!
Moderate air running
The crew sits just behind the shrouds, heeling the boat to weather to help rotate the spinnaker out from behind the main. Ease the tack line as much as possible while keeping the spinnaker stable; don’t let the tack fall to leeward.
Heavy air running
The crew slides aft to help grind in the spinnaker and to keep the bow from digging in. If you are having a hard time steering straight, there is too much weight forward.
Wing on Wing
Sailing wing and wing can be very beneficial, especially for tactical reasons. Our recommendation is to sail conventionally, unless the water is very flat or you need to dig low for tactical reasons. A winged-out spinnaker is not as stable, and recovering from a collapse is very slow.
When all of these variables work in harmony, huge gains can be made by continuously sailing lower and faster and smoother than the boats around you. By working on these elements in practice and then applying what you learn on the race course, you can definitely “up your game.”
10 knots of wind. Crew forward and to weather to help the spinnaker rotate to weather. The tack line is eased to increase luff windward projection. Two people looking aft to ensure that we get into and stay in the puffs.
Crew forward and to weather with good spinnaker rotation.
Wing on wing in FLAT water. Crew forward and to weather with spinnaker trimmer holding sheet out to ensure that it is not affecting trim. Crew looking aft to help find puffs.
READ MORE
READ MORE

J105 SPEED GUIDE
North Sails class leaders Will Keyworth and Seadon Wijsen answer your J105 speed and boathandling questions, including the coolest thing about the class.
Who sails a J105?
As the first keelboat with a retractable bowsprit, the J105 was a breakthrough when Rod Johnstone designed it for J/Boats in 1991, and nearly 700 boats were built. Because it has relatively small jibs and spinnakers and a displacement hull, the boat is easy to sail, yet it still delivers excitement in a breeze. Teams frequently include more women and youth sailors than other classes, and we find that it’s a great platform for a sailor with modest experience who wants to compete, but doesn’t have a super crew pool to start.
If you climb aboard with three sails and an enthusiastic crew, you can quickly learn to jibe the chute. It takes a while to learn to get the most out of the boat when it’s underpowered, under 10 knots of wind, but that may be why the best sailors in this class tend to be the most persistent, gradually becoming more competitive. The class has restrictions on pros participating, which has combined with the boat’s simplicity, all-around performance, and large fleet to give it staying power as a class.
The J105 combines simplicity with all-around performance and large fleets.
What’s involved in crewing?
Most teams sail with five or six sailors, and they include many husband-wife teams. There is no limitation on the number of sailors aboard; the total crew weight allowed is 474 kilograms or 1,045 pounds. In windy venues, such as San Francisco Bay, most teams sail at maximum weight, and those with less weight and less strength make up for it by adding the sixth person.
We recommend recruiting a strong bow person to work the spinnaker around in jibes and pull it down at the leeward mark, and if they’re a little heavier than the typical bow person, it doesn’t seem to slow the boat down. On the other hand, the winches are adequately sized and the mainsail has enough purchase, so trimming isn’t overly physical, which means for those farther aft, quickness and the agility to move around is often more important than strength.
Top three J105 speed tips?
Spend time in the boat with a committed core crew.
Learn appropriate sail trim and rig tune, especially when windy.
Prep the hull and rig, clean the bottom, and save your best sails for big events.
What should buyers know when choosing a J105?
J/Boats isn’t building new boats currently due to low demand. Used boat prices range from $45,000-$90,000, and most are between $60,000 and $70,000. On older boats, you’ll commonly replace winches, the boom, and maybe the sprit.
We see that top competitors in the class often seek an older boat built before production shifted to the SCRIMP (resin-infusion) method, because the boats are considered a little stiffer, with less weight in the hull and deck. By rule, the first 400 pounds of corrector weights on light boats can be added down low, although not in the keel sump. J/Boats points out that this “class wisdom” may be overstated because much of the SCRIMP boats’ weight is in a substantially heavier keel grid. They also point out that the hulls have more laminate stiffness and are less susceptible to water penetration in the core, particularly in the deck—a problem that needs to be addressed in many older boats.
One of the other big decisions is whether to buy a boat with a wheel or tiller. Many like using tiller steering due to its lighter weight and feel, but in a heavy-air locale, almost everyone chooses wheel steering for better control. Both configurations win regattas, so our recommendation is that you choose whatever you are most comfortable using.
Finally, it’s worth noting that J/Boats built a number of shoal-draft J105s over the years; you’ll want to buy one with a deep-draft keel to go racing.
How do you move a J105 around to regattas?
Double-axle J105 trailers are prolific in many regions as owners commonly trailer boats to events. If needed, you can often borrow a trailer. It’s not unusual for boats from both New England and California to meet at a regatta in the middle of the country. That doesn’t mean that rigging a boat is super quick. It takes most boat crews a day to get a boat ready to travel and another day to go back in the water.
How many sails are required?
The J105 class allows you to sail with two jibs, two spinnakers and one main, but the spinnakers are identical, so the second is typically an older kite kept as a spare. Sails can be changed between races, so a boat with a light and medium jib will switch sails as the breeze builds. In broad terms, a light-air jib is used in 0 to 10 knots, the medium covers 8 to 16, and the heavy can be used in 14 and above.
If the water is relatively flat, the medium jib will provide good speed in most winds strong enough to start a race. Because boats often come with a large inventory of used sails, many new owners find they can buy a new main, spinnaker and medium jib and be competitive, with older sails used for low-key races or daysailing.
The class sail-purchase limits are reasonably liberal. You can buy three sails in one year and then two sails, the next. The mains must be made of woven Dacron and may be made of heavier cloth for windy venues like San Francisco where they are subject to a fair amount of flogging. Laminated jibs are permitted, which includes recent approval for North’s more durable 3Di sails—both medium and light-air jibs. (See North’s J105 sail products)
Leading the jib sheet to the windward winch keeps weight on the high side and allows the mainsheet trimmer to adjust the trim.
J105 Tuning
What are the keys to rig set-up?
When tuning up the J105 to race, we pay the most attention to 1) mast-butt position, 2) headstay sag, and 3) shroud tension on the D1 (lower), D2 (intermediate), cap (upper).
There is only one correct butt position, so you only need to set that once, as per the North Sails Tuning Guide. The guide also explains how to adjust each set of shrouds for different wind strengths. We stress learning about this because shroud tension affects headstay tension and how much the headstay sags under different loads.
Getting headstay sag right is also a little finicky, because the mast sits at different heights from boat to boat, varying by as much as 25mm due to the way the interior pan goes into the hull. To determine your headstay sag, we recommend sighting up the headstay with the backstay off —no more than 4 inches when it’s breezy and closer to 6 inches in light air. If you’re flying a medium jib in light air, you may need more sag, yet not so much that the headstay begins to bounce around in chop. Having enough sag in light air gives power to your jib, but if you have too much and you control it by tensioning the backstay as the wind comes up, you’ll end up over-flattening your main.
Shroud tension also affects mid-mast sag. In lighter airs, you want less tension on the D1 and D2 shrouds so you can see 25 mm of leeward sag in the middle of the mast. In 12 knots and up, you’ll want no sag at all.
What other control systems are important on the J105?
Setting up to cross-sheet the jib (and then practicing your tacks) is critical in windy conditions, as is having good leverage on the vang. You are not allowed to in-haul the jib with the windward sheet, so that simplifies things somewhat. Mainsheets have fine tunes and you’ll find some variation. For example, some are led outboard so the helmsman can play the fine tune. Our view is that this is an area of personal preference and probably not a high priority for you if you’re a new J105 helmsperson. Let the mainsail trimmer handle the job while you focus on steering.
For more tuning tips, read the J105 Tuning Guide
Headstay sag on the J105 is adjusted by means of shroud tension; the sag should be about 6 inches in light air and no more than 4 inches when breezy.
J105 Upwind Sailing
How much heel is fast on a J105?
In general, you should sail the boats pretty flat. A skilled driver will keep it flatter, but most important is to maintain a constant heel angle and consistent speed. If you need more heel to maintain consistency, that’s OK.
Where does the crew sit?
The boats are a bit stern heavy, so we always work to keep people forward and out of the cockpit. This is especially true with wheel boats, which have extra weight aft. If sailing with six, locate one person forward of shrouds; everyone else should be forward of the back edge of the cabinhouse; if sailing with five, sit the forward-most three close together, just behind the shrouds, followed by the mainsheet trimmer when he or she is able to get on the rail.
When the wind lightens, there’s no fore-and-aft position change, just lateral movement, with the jib trimmer moving to leeward first. When possible, we move everyone a half a body width farther forward, with the mainsail trimmer scooting to the front of the cockpit. In heavier air, bring the forward-most person behind the shrouds to keep weight at max beam.
How do you trim the J105 jib?
The key move we make with the jib is to keep halyard tension soft, especially with new jibs. Be sure to put trim stripes on the spreaders as per the North Tuning Guide. The jib likes to be kept twisted, with the leech opened up slightly even as the sheet is trimmed pretty hard. Above 10 knots, you will sheet hard enough that you may begin to get a wrinkle between the tack and the clew. Watching for that is a good way to judge sheet tension. Many people move the lead too far forward because the foot looks abnormally tight, but it’s fast this way. Keep in mind that both jib and main will need to be twisted.
In breeze, the J105 jib is sheeted hard with the lead far enough aft to keep the leech open.
How do you trim the J105 main?
Again, we focus on halyard tension on the mainsail—it’s critical. Until it gets breezy, don’t over-tension the halyard; you should have diagonal wrinkles from the slides on the luff. Also, your outhaul should be tight.
Many people think they should always be streaming their top mainsail telltale, but because the top batten is full length, in reality it’s hard to stall the top. The sails are designed with a lot of twist in them so you can sheet hard as it gets windier. We recommend even in 8 knots that the top telltale should be stalled 60 percent of the time. The extra leech tension has the added benefit of pulling the headstay tighter, too, minimizing headstay sag.
The J105 doesn’t like much heel. From 11 knots up, our team is fully hiked, and at 15 knots, we’re pulling on the permanent backstay and tightening the cunningham. The backstay flattens the main well and begins to twist open the sail again, minimizing heel and weather helm. That’s the real trick on this boat. Set the rig tune so your trim and your backstay work for both sails at the same time. If the headstay gets too saggy and the main gets too flat, you probably don’t have enough cap and D2 tension.
The vang becomes critical in a breeze. In 8 to 10 knots, pull the vang snug. As the boat begins to get overpowered, pull it on firm. When using a lot of twist, it’s time for a two-hand pull, with feet against the cabinhouse. For the sake of your boom and mainsail, remember to ease the vang at the weather mark and let the cunningham off.
How do you shift gears upwind?
Besides hiking when the wind increases, shifting gears begins with adjusting the jib leads—moving the lead aft increases twist in the leech, which makes a big difference. The factory tracks have wide spacing between holes, so drill extra holes, one per inch.
You should quickly move to maximize outhaul on the mainsail, apply backstay as needed, and begin easing your traveler down in the puffs. Don’t hesitate to add a lot of vang tension so you can ease mainsheet instead of traveler; as a rule, the traveler car rarely moves lower or higher than the bench seats on either side of the cockpit.
Who says what when sailing upwind?
We like to have a crew on the rail calling the puffs consistently, so the main trimmer can be proactive in keeping the boat upright. Likewise, calling the waves allows for better steering and easing of sheets in lighter air. Dialogue between the helm and main trimmer is critical—and even more so when using a wheel because the driver is less likely to feel the pressure on the rudder.
The conversation when it’s windy is usually about having more or less twist in the sails. Is there too much helm and we’re going too slow? Twist the leeches. Not enough height? Reduce twist. The best sailor on many J105s is often the main trimmer because she is dialed in to both sail trim and boatspeed.
Keep weight forward and low when sailing a J105 downwind, with two crew forward of the shrouds in lighter conditions.
J105 Downwind Sailing
Where are J105 crew located?
Keep weight forward, out of cockpit. People also tend to stand a lot, but it’s faster to get down, keeping weight lower. On most boats, the main trimmer is at the companionway and the chute trimmer is at or ahead of the forward edge of the cockpit. All others move forward: in 0-8 knots, put two crew forward of the shrouds; in 9-16 knots, they can move just aft of the mast.
The boat likes to be sailed fairly flat and, ideally, the helm goes neutral. If it’s light enough that you’re sailing VMG angles, you’ll have some crew to leeward for a slight leeward heel. In running conditions of 10-plus knots, all crew will move to weather and sail the boat flat. Over 12, you sail with a little weather heel, and when control becomes an issue at 16-plus, the crew slides aft. In 20-plus, a couple guys are sitting in the cockpit.
How do you trim the spinnaker?
On a J105 downwind, the basic moves are to ease the chute as far as possible and rotate it in front of the boat as much as you can. The main should be all the way out and the vang kept soft.
The all-purpose and heavy-air spinnakers are the same size—the latter has bigger corner patches and a slightly different design to maximize projection. On both, the class-legal maximum luff is two feet short of ideal, so we generally sail with the tack line eased. This helps rotate the chute to windward—a good guide is not to ease it more than the height of the pulpit. As the breeze builds, you may trim down the tack line to within a foot of the pole.
The key to speed is the conversation and coordination between helm and trimmer. In light air, we look for an angle where the boat feels good, with slight heel to leeward. The mistake that people often make is to heat up the boat too much in lulls and soak it too low in puffs. You need to smooth that out. Yes, you do scallop your way down the course, but do it gently. The good guys gain a lot this way, and for everyone else, this is one of the best areas to practice and improve.
How do you shift gears downwind?
The key transition downwind is in 9 to 11 knots, learning when you can sail deep and when to keep the boat sailing higher and faster. The tack line on the spinnaker is a good focal point for this: If the tack moves to leeward of vertical, pull the tack line toward the pole; if to weather, ease it out, with a total range of two or three feet.
Another way to think of this is that in light air, when sailing VMG angles, the tack line is pulled towards the sprit and the main is trimmed for the angle. In medium air, when sailing deeper, the tack line is eased the most. Then, when control is an issue, tighten the tack line, which keeps the chute from oscillating.
Another downwind tip is to “fraculate”—taking slack out of the headstay by trimming in the sheets on the rolled-up jib. This firms up the backstay and transfers the energy in the sails more directly to the hull.
Near a leeward mark or at a finish line, you can also sail wing and wing, with the spinnaker on the opposite side from the mainsail. This takes practice and should be reserved for tactical situations, say the last five or six boatlengths to the mark. You can sail lower and just as fast, but don’t try it for extended periods; you risk collapsing the chute and losing more distance overall.
In 12 knots of breeze, most J105 crew stay out of the cockpit and at or just aft of the mast. To "fraculate" or keep the rig steady with backstay eased, tension the jib sheets to remove headstay slack.
J105 Boathandling
What are your top tips to starting well in a J105?
The J105 has a big keel and rudder, so you can sail pretty slowly before the start and not slide sideways much when you accelerate. However, the boat takes time to get up to speed. Practice accelerating from half speed to full speed before each race to learn how long it will take. Never let the boat stop or get too far from the line.
You’ll see many J105 teams wait to unfurl their jib in the last minute before starting, because visibility is better and, without a luffing jib, it’s easier to hold position on the line. When doing so, keep your bow at a fast angle to the wind so you can unroll the jib and accelerate quickly. The one time we never keep our jib rolled is when the wind is really light—if you get totally parked, the rest of the fleet may be long gone by the time you get moving.
What are the keys to tacking a J105 well?
Tacking the jib is pretty easy because it’s not a big sail, so you only need two trimmers in the cockpit. The other crew members go over the coach roof and keep their weight forward. This also gives the helmsperson more visibility.
How the trimmers work depends on whether your jib sheet 1) leads to a footblock and a leeward winch, 2) to a footblock and a windward winch, or 3) directly to a cabintop winch.
In light air, the cabin top winch set-up can be handled by the jib trimmer and the next person forward, and this has the advantage of keeping weight forward. However, those winches aren’t set up for breezy conditions.
We prefer sheeting to the primaries and having the main trimmer handle the jib-sheet release. The jib trimmer is the next person off the rail and trims the new sheet. This is also where cross-sheeting really pays as the jib trimmer is immediately moving to windward, not grinding away down to leeward. The main trimmer can then help out by dropping in the winch handle and doing the final trim after the jib trimmer starts hiking.
Most boats have self-tacking traveler cars. When tacking, the main trimmer can ease the mainsheet fine tune a little, release the jib, pull up the traveler, and then drop the handle in for the jib trimmer (if cross sheeting).
So the boat can accelerate, don’t bring the jib in too hard right away. Put multiple marks on the jib sheets to line up with the base of windward winch (if cross-sheeting), and after trimming to the first mark, the jib trimmer can hit the rail and the final five inches of jib sheet can be ground in by the main trimmer.
What are the keys to jibing a J105 well?
A good J105 jibe is a dance between the rates at which the driver turns the boat and the trimmer eases the spinnaker. As the boat bears away and the sheet is eased, the driver needs to watch the clew of the chute; when it gets to the headstay, the boat can be turned more quickly as the new sheet is taken up quickly. If you turn too fast without easing the sheet enough, or if you turn too slow, the chute ends up on the windward side of the headstay when the turn is complete.
On many boats, especially in lighter-wind areas, one trimmer will handle both spinnaker sheets. On other boats and in more breeze, it’s common to have two sheet trimmers for more consistency in ease and take-up. Either way, the foredeck person and sometimes others drag the new sheet around the headstay and aft. It’s important to pull the chute through the jibe this way to avoid a twist, then get to the high side quickly to help the boat accelerate. Keeping crew weight on the high side before the jibe will also help the boat turn.
In light-air jibes, don’t turn the boat too fast or pull the main across too soon. Jibe the spinnaker first. Then the mainsail trimmer should grab all parts of mainsheet and “pop” the main through to keep the upper leech from hanging up on the backstay. In heavy air, on the other hand, don’t take too long to get main across. Get it across while the boat is at full speed. Otherwise you may have to turn the boat too far to get the main over, and then you may round up when you finish the jibe. One helpful trick is to ease the vang a little bit.
How do you make a fast spinnaker set?
There are two rules to remember on J105 spinnaker sets: First, the bow must be at the windward mark before the bow person pulls the pole out to extend the sprit. Second, to set the spinnaker successfully, keep it out of the water by not pulling the tack line out too soon.
The bow person begins the set by freeing the chute from the forward hatch. Wait to start the hoist until the boat makes its turn. When it’s windy, as the mast person hoists, both the bow person and jib trimmer pull the tack line out to its mark. Next, the bow person can roll up the jib.
If a jibe-set is needed, there are two approaches you can take: one is to re-rig the chute on the correct side of the boat and hoist as the boat jibes. The other option is for the bow person to walk the clew around the headstay during the hoist, or even before you hoist.
Sailing wing and wing with the spinnaker can be a useful tactical move; keeping weight forward in light air is always faster.
What are the keys to a good spinnaker takedown on the J105?
Most people douse the spinnaker to windward. Leeward drops are harder, in part because the chutes are wide and easy to shrimp (drop in the water). Either way, if you make sure to have room to turn the boat downwind, any takedown will become easier.
On a normal windward takedown, after the jib is unrolled, the helmsman bears off and the trimmer eases the spinnaker sheet. The bow person pulls (aka “tractors”) the clew around to the windward side of the jib as the halyard starts to come down. One crewmember stands below and pulls the chute through the forward hatch. If it’s windy, don’t blow the tack line too soon to keep the chute clear of the water—make sure the spinnaker is collapsing and that two crewmembers have a good grip on the material.
On a leeward takedown: the bow person grabs the lazy sheet and with the crewmember below pulls the chute under the jib and down the hatch. On these drops, don’t release the tack line until the sail decompresses and you’re able to pull the spinnaker straight down.
What are the most common takedown mistakes?
The most frequent error we see is simple—the spinnaker sheet isn’t eased enough so the bow person can’t pull the chute around the jib. The other one is also simple—if you do shrimp your kite, you must completely stop the boat before you can pull it back aboard.
How do you recover from a broach?
Most broaches don’t last long; once you ease the spinnaker sheet, the boat will pop back up. Remember to ease the main and the boomvang as you start to broach, and your recovery may be immediate.
What J105 best practices do you recommend?
Set daily objectives. Evaluate after sailing so you can step forward next time.
Identify crew responsibilities.
Mark everything so you can duplicate settings, especially jib leads and sheets.
Practice tacking and jibing; choreograph movements so you repeat them every time.
Document rig tune and settings.
What’s the coolest thing about the J105 class?
The J105 class is very friendly and well-organized. You’ll find some really good technical sailors who know about rig tune and are willing to share knowledge. We recommend new people in the class find a more experienced buddy and ask if you can sail together at events. Watch, observe, ask questions, and you’ll improve steadily.
READ MORE
READ MORE

J/105 TUNING GUIDE
Download the North Sails J/105 Tuning Chart
Part 1: Rigging Preparation
The following recommendations are small changes that should be made to the stock J/105 to allow you to get the most from your North Sails and make the boat easier to sail and set up.
Head swivel shackle
The North Sails jibs come with a webbing loop at the head. It is critical to have a 90-degree “twist” shackle to attach the sail to the swivel. A standard shackle will cause a hard spot at the top of the jib as the sail is torqued.
Remove backstay toggle
Many J/105s come with a toggle that rotates the hydraulic cylinder 90-degrees so that the handle faces forward. While it is nice to have the handle forward, this toggle reduces the throw of the backstay adjuster too much so that you are not able to get enough tension in heavy air. Some of the older boats actually need to have the backstay rod shortened to get enough backstay throw.
Change to 4:1 or 6:1 Cunningham
The standard Cunningham is 2:1 and led aft to a cabin house halyard stopper.This system should be replaced with the lower purchase with integral cleating shackled to the ring on the top of the Quik Vang. This allows for easier and more precise Cunningham control by a forward crewmember. Many boats then rig the asymmetrical tack line through the free stopper.
Mark the tack line at the cleat
Put marks on the tack line at the proper range of settings. As you approach the windward mark you can then pre-set the tack line so that when you extend the pole and set the spinnaker the tack will be set properly. The tack line is much easier to work with in this placement than on the side of the cabin house.
Move mainsheet swivel base forward of the traveler
This allows for easier trim of the gross tune by the main trimmer, especially when tacking.
Tapered Spectra spinnaker sheets
These sheets have a light uncovered portion that attaches to the sail, with a covered portion that goes on the winch. The sheets should be 3/8” Spectra cored line with the cover removed at the sail end of the sheet. These lightweight sheets are used in all conditions and help downwind performance in light air. Heavy sheets pull down on the leech of the spinnaker in light air, closing the leech too much.
Bypass the jib sheet turning block
The standard set-up for the jib sheet is to run the sheet from the clew of the jib, through the lead block, through the turning block near the rail, and then to the winch. This set-up makes the lead block lean over to leeward, increasing sheeting angle. In light and moderate air, the jib will sheet tighter to the centerline if you lead the sheet straight to the winch from the jib lead block. In heavy air, it can be faster to use the turning block to sheet the jib outboard slightly.
Part 2: Rig Set-Up and Preparation
Tools and items required: Loos RT 10M Rod Tension Gauge, 2 crescent wrenches, spray lubricant, bosun’s chair and 50’ metric tape measure.
Part of the success of growth of the J/105 Class is the tight class rules and limited sail inventory. With the J/105s limited sail inventory of only one headsail, aggressive rig tuning is essential for performance throughout the full range of wind conditions. By definition, the North Sails “AP” inventory is optimized for 9 to 12 knots. This is actually the easiest condition to sail in, so the racing tends to be at its tightest. Having really fast sails in this condition is key to gain a slight speed edge and the AP inventory is designed to give you just that. The heavy air “HA” inventory is optimized for 13-20 knots. In the extreme conditions of light and heavy air the rig must be manipulated to enhance the sail shapes for those conditions. The result of proper rig tuning is the correct relationship between mast bend and headstay tension to get fast shapes. The North inventory has been designed to make these transitions easily with the correct tuning to be fast in all conditions.
Step One: Check Mast Butt Position
The measurement from the front of the forward bulkhead to the aft face of the mast should be 24.46cm (9 5/8”). This is very close to the center of the step. For the HA sails, the mast butt should be 26.00cm (10 1/4”) from the bulkhead.
Step Two: Check J Measurement
The J measurement is the distance from the headstay intersection to the deck to the forward face of the mast. This should be a minimum of 4.11m (13’6”). Use mast chocks or SparTite to achieve this position.lean over to leeward, increasing sheeting angle. In light and moderate air, the jib will sheet tighter to the centerline if you lead the sheet straight to the winch from the jib lead block. In heavy air, it can be faster to use the turning block to sheet the jib outboard slightly.
Step Three: Set Mast Rake
Rake is controlled by headstay length. The headstay should be set at the class legal maximum rake, 13.035m (42’ 9.125”). Hoist a crewmember up the mast and have them hold the butt of the tape measure at the center of the pin that secures the forestay to the mast. Measure to the to of the furler drum (measurement A), then measure from the top of the furler drum to the bottom of the furler drum (measurement B), then from the underside of the furler drum to the intersection of the stem and sheer line of the boat (measurement C). The overall headstay measurement is then the sum of A+B+C.
Step Four: Centering the Spar
Put a mark on the rail of the boat on one side even with the chainplates. Measure this distance from the headstay attachment on the bow. Put a corresponding mark on the other side, the same distance from the headstay. At this point the Upper Shrouds (Caps) should be hand tight and the Intermediates (D2s) and the Lowers (D1s) should be loose. Hoist the tape measure to the top on the centerline jib halyard. Measure to the marks on either side and adjust the Caps until they are equal.
Step Five: Tensioning the Shrouds
Tighten the D2s and D1s to hand tight. Add 8 full turns to the Caps. Then tighten the D2s 6 turns. This should be done incrementally (2-3 turns at a time per side) sighting the mast to be sure that the mast is in column. Add turns to one side and remove turns from the other to bring the mast in column. This added tension that you have applied has probably made the D1s slack, so double check to make sure that they are hand tight.
Step Six: Check Shroud Tensions with Loos Gauge
Put marks on the shrouds 2m (6’ 6 3/4”) up from the deck. Put the top post of the gauge on this mark when measuring tension. Be sure to have the backstay released when measuring tension with the Loos Gauge. For the base setting for 10-14 knots TWS the shrouds should read the following:
All Purpose Sails Caps: 35D2s: 10D1s: 0 (10 cm play)
Heavy Air SailsCaps: 55D2s: 25D1s:10 (hand tight)
You should double check to be sure that the mast is still in column at the dock when the rig is at full tension. At the base setting, the mast should sit with virtually no pre-bend up to the hounds.
You are now at the “base” setting and ready to go racing. From here follow the Quick Tuning Guide to optimize your J/105’s performance for various wind conditions.
Advanced Tuning – Beyond the Numbers
The North Sails J/105 Tuning Guide is very refined, and has been used to the letter to win many events. However, understanding the fundamental concepts of how tuning affects the rig and sails is important to be able to check that the settings are right for your boat, as well as customizing your own tuning numbers for your sailing style. Keeping good records is the key. Keep a Wet Notes pad on your boat and record your rig settings, wind speed, sea state, and your speed and pointing relative to other boats. This will help you to see what is working best for you and fine tune your own numbers.
Changes to shroud tension affect the rig in two ways: 1) headstay tension & 2) mast bend. Tighter Cap shrouds generate more headstay tension by pulling back against the headstay. A good guide for Cap (upper) shroud tension is that the leeward Cap shroud should just go slack in all but the heaviest of wind conditions. Tighter D1 (lower) and D2 (intermediate) shrouds generate more headstay tension by reducing mast bend and compression. The important factor of the D1 anD2 adjustment is the relationship to the amount of backstay used in each wind condition, which affects mainsail shape. Tight D1s and D2s will make the mast too straight (main too full and draft forward) when no backstay is used, and conversely loose D1s and D2s will allow the mast to bend too much (main too flat or even inverted) when a lot of backstay is used. The final D1 and D2 rig tension will be dictated by mainsail shape.
The light air performance of the J/105 can be dramatically improved with leeward mast sag in under 12 knots. This is side-to-side sag from the partners to the hounds. This can only be seen under sail and will not happen at the dock. The settings from the Quick Tuning Guide should generate this sag, but all masts are a little different, so you may need to adjust your intermediates and lowers to achieve it. Loosen the intermediates and lowers so that there is 2.5cm (1”) of leeward sag halfway to the hounds in under 9 knots and Zero in 9-12 knots. In general the intermediates will need to be eased twice as many turns as the lowers to achieve even sag.
Part 3: Mainsail Trim
The J/105 relies on much of it’s power from the mainsail with the class inventory. The mainsail is very easily adjusted because there are many shape controls including mainsheet, traveler, backstay, cunningham, vang and outhaul. Proper mainsail trim is achieved by balancing the speed and pointing with its twist, angle of attack and overall power. Proper communication with the helmsman for the feel of the boat and performance vs. the boats around you are the key to establishing the correct balance of those three elements.
Mainsail Angle of Attack — The Traveler
The traveler controls the boom angle to the centerline of the boat, which is described as angle of attack to the wind. Much like the sheet, a narrow angle of attack (traveler high) is used for pointing and powering up the boat and a wide angle of attack (low traveler) is used for acceleration and depowering the boat. Carry the traveler as high as possible without making the boat heel too much.
In light to moderate conditions the boom should be on centerline or slightly above. In very light air, when the main is twisted, setting the boom actually above centerline will put the lower third of the main parallel to the centerline of the boat. A good gauge for this is to look where the bottom batten is pointing. The bottom batten should point at the backstay in very light air. If it is pointing to windward of the backstay, the traveler is too high.
As the breeze builds, the traveler should be played aggressively to control heel and keep the boat on its feet. If the boat heels too much, the boat will get too much helm and the helmsman will have to use much rudder angle to keep the boat going straight. The optimum rudder angle to create the most lift is around 4 degrees. There are times when more angle than that is unavoidable, but 5 degrees of rudder angle should be the most that you try to use. Rudder angle can be monitored by putting a tape mark on the top of the wheel when it is perfectly straight. The main trimmer can notice when the helmsman is using too much helm (or not enough) and adjust the traveler appropriately.
Mainsheet vs. Traveler for Various Sea States
One of the more difficult things to determine is how to depower the main in moderate to heavy conditions. As we have learned, you can depower the main by either twisting the main by easing the sheet or letting the traveler down. The technique used should be determined by sea state, which will affect how the helmsman has to steer the boat. In flat water, the helmsman should be able to use very subtle steering changes. Hours of on-the-water testing has shown us that depowering by lowering the traveler and keeping a tight, untwisted leech produces the best VMG. You can point reasonably high in flat water without slowing down and the tight leech will help with pointing. We have found that twisting the main in flat water in moderate air only makes you lose height. With this style the traveler is played to maintain the proper angle of heel.However in waves and chop, the opposite has proven to be faster. In waves and chop the helmsman has to be more aggressive with the helm. With the wider range of steering keeping the traveler higher (with the car near centerline) with a more twisted main allows the helmsman to steer through wider angles and accelerate as needed in the waves. With this style the mainsheet fine tune is played to maintain the correct trim and angle of heel as the helmsman steers through the waves.
Overall Power – The Backstay
The backstay is the most important sail control for setting the overall power of the sail plan. The backstay is the universal control to modify the shape of the main primarily, but also the jib. The North Class Inventory has been carefully designed so that backstay adjustment changes the shape of the main and jib in unison. As backstay is applied the mast bends, flattening the main. It also pulls aft against the headstay, reducing headstay sag, which flattens the jib. By flattening the sails the boat’s power is reduced as the boat becomes overpowered and heels too much. Flatter sails can be trimmed harder than full sails so when it is windy it is better to set the sails up flatter and sail with less twist. This will allow you to point higher.
As stated in the tuning section of this guide, having the rig set up properly for the wind conditions will allow you to get the most benefit of adjusting the main and jib together with the backstay, but itis also the control that allows you to set up the sails as best you can when the wind changes and you are no longer tuned correctly.
With a loose rig the main will flatten out faster than the jib. This is because the loose D1s and D2s will allow the mast to bend, which will flatten the main. However, since the mast is bending, the main will get to a point where it over bends before you can bottom out the backstay. By not being able to bottom out the backstay, the jib will still be a bit fuller than is ideal at this point since 1) you can’t pull on the full range of backstay and 2) the mast will compress more so the backstay tension will not transfer as well to the headstay.
Conversely, with a tight rig, the main will stay fuller when the backstay is eased, while the overall rig tension will keep the headstay tighter and thus keep the jib a bit flatter. It is important to understand this relationship between how the backstay and rig tuning affects sail shape when you may not be tuned correctly. If your rig is too loose, use more backstay to set the main up flatter, knowing that your jib will be fuller than ideal. If your rig is too tight, use less backstay to set the main up fuller, knowing that your jib will be flatter than ideal. In general, it is better to be set up with a flat main and a full jib so it is better to err on the loose side of the rig tuning matrix if you expect the wind to change. It’s much easier to depower the J/105 than it is to power it up so always tune for the lulls!
As the mast bends it has an immediate effect on the luff and leech tension, so other controls must be adjusted in conjunction with the backstay. When you pull the backstay on, the mainsail will twist more so more sheet will have to pulled on to reset the twist. More backstay will also loosen the luff, so more cunningham will be needed. Don’t forget to ease the sheet and the cunningham after you ease the backstay.
Other Mainsail Controls
Cunninghamhe cunningham controls the luff tension of the mainsail. Luff tension controls the draft position of the mainsail. As backstay tension is applied, the mast compresses and the main appears to fall down a little and the draft will move aft. Pull on the cunningham to move the draft forward to the desired position. As well as moving the draft, luff tension will also make the main somewhat flatter. In light air, you should see slight wrinkles coming from the sail slides. In moderate air the luff should be smooth. In heavy air, the luff should be tensioned past being smooth to set the draft position and flatten the sail.
VangWith the non-overlapping jib, in order for the mainsail to generate enough power in light air, a certain amount of depth has been designed into the lower portion. In over 12 knots begin to pull on the vang to induce low mast bend to flatten the lower third of the main. When it is really windy pull on the vang quite hard to help bend the mast. be sure to ease the vang at the weather mark! Before you ease the main, ease the vang to allow the main to twist as you bear off. If the vang stays on too hard, you may not be able to bear away, or worse you could break the boom.
OuthaulThe outhaul also controls the sail shape in the lower third of the mainsail. Easing the outhall makes the lower third of the mainsail fuller and tightening flattens the lower third. In light air the outhaul should be slightly eased and pull it progressively harder as the wind increases, to the point where you should pull it as hard as you can in over 15 knots.
Part 4: Jib Trim
The J/105 Class Jib has a very tough job. It has to be fast in all wind conditions, where other 35’ offshore one-designs allow three headsails! The single jib inventory presents a tough challenge for sail designers to create a sail that is versatile enough to cover the entire wind range, while being constructed so that it can be light enough to perform well in light air, yet being strong enough to handle heavy air. The 3DL jib is the ultimate solution to handle this daunting task. The latest design has been refined to be responsive to the few controls that can change the shape. The 3DL process is the only way to create a sail that is minimum weight, yet is strong enough for heavy air.
While the North 3DL jib is refined to a level that makes it very easy to enhance the light shape in light air and a heavy shape in heavy air, it is important for the trimmer to be able to manipulate the sail appropriately. The primary controls that we have to affect the sail shape are the halyard, sheet, jib lead placement and headstay tension.
Jib Halyard
The halyard is the most important sail control for shaping the jib and it has a much greater affect on sail shape than the cunningham on the main. However, just like the cunningham on the mainsail, the halyard controls the entry angle, draft position, and overall depth in the sail. A tighter halyard will produce a more draft forward, rounded entry shape, with less overall depth. A loose halyard will produce a more draft aft, finer entry shape with more overall depth. As a general rule, the halyard should be tensioned to just barely remove the wrinkles in the luff. In lighter air wrinkles can just be visible, in moderate air the luff should be smooth, and in heavy air the halyard should be pulled 2.54-7.62cm (1-3”) past removing the wrinkles.
In flat water, a looser halyard can improve pointing with a finer entry angle. In waves and chop, a tighter halyard will produce a more rounded entry and more open leech, which will have a wider steering groove and be better for acceleration. If you try the loose halyard and your helmsman seems to be struggling to find the groove, try a slightly tighter halyard.
As sails age, the entry tends to get finer and the draft starts to move aft. An older sail will require more halyard tension to achieve the same shape as a brand new sail with a looser halyard.
Jib Sheet
The sheet is the most important control for adjusting the jib once the draft is set. The general rule is to trim the jib as hard as possible without slowing the boat down too much. The jib needs to be played in conjunction with the main and the helmsman’s steering. The sheet tension will change with each change in the wind speed. When a puff hits, the leech will become more open. Be careful not to trim the jib too soon. Allow the leech to stay open to take advantage of the puff to accelerate the boat and them trim in once you have accelerated to increase pointing.
The Class mainsails are fitted with a spreader window so that you can see the jib leech on the lower spreader. Put tape marks on the spreader at 7.62cm (3”), 15.24cm (6”) and 22.860cm (9”) in from the spreader tip. In general you should trim the jib so that it is at the spreader tip in very light air, 7.62cm (3”) inside the tip in light air, 15.24cm (6”) to 22.860cm (9”) inside the tip in moderate air, then back out to 7.62cm (3”) in heavy air. These guidelines are subject to change based on sea state. The jib can be sheeted harder in flat water than in waves and chop. Be careful to only make small sheet adjustments. Due to the high aspect nature of the jib, small changes make abig difference.
Jib Lead
The jib lead should be used to control the top and bottom shape of the jib. The middle of the jib is not as affected by lead position as much as it is with sheet. Once the sail is trimmed to the appropriate spot on the lower spreader, adjust the lead to make the top and bottom look right. Moving the lead forward will make the upper leech more closed and the foot rounder. Moving the lead aft will make the upper leech more open and the foot flatter.
The median jib lead position is slightly aft of the middle of the jib track, which is about 9” aft of the chainplate. This position is also just forward of the window on the side of the cabin house.
Headstay Tension
Headstay tension has the most dramatic affect on the overall camber of the jib. Headstay tension affects headstay sag. This is a difficult thing to visualize, but it works much the same as mast bend affects mainsail shape. As the headstay sags, it pushes the luff towards the leech, which increases camber. Conversely as the headstay gets tight, it pulls the luff away from the leech, decreasing camber.
Clearly this is very important, but has been listed last here because it is very dependent upon rig tuning. Headstay tension is achieved by a combination of a tighter rig and a tight backstay. As we have learned in the rig tuning and main trim sections, rig tuning and backstay tension has a great affect on mainsail camber as well. The Class main and jib designs and the tuning guide shroud tensions have been carefully developed to have the backstay control main and jib camber in unison. If you are tuned properly, when the main sets up correctly, the headstay tension will be correct as well. Your headstay tension should be almost self-tending.
During a race, the only way to adjust your headstay tension is with the backstay. Because of this it is important to know how you are tuned and whether you are actually sailing in the right wind speed for your tuning. The backstay will be the key to get the most of the set up that you have when you are not tuned perfectly. Simply, if there is less wind than you are tuned for, use less backstay tension to power up the sails as best you can. If there is more wind than you are tuned for, use more backstay tension.
A good technique is to tape a batten with marks every 2.54cm (1”) on it to the backstay cylinder. This will help you to be able to record your settings and duplicate them later.
Part 5: Crew Weight Placement
With the new “float line” rule, this discussion has become much easier now that we know that all boats should float the same. The goals of weight placement are to 1) control helm and 2) reduce wetted surface in light air.
Light Air
In light air the crew should be well forward and to leeward both upwind and down. Two crewmembers should be forward of the shrouds to leeward. Remaining crew should be up near the shrouds. There should only be one person in the cockpit other than the helmsman. In really light air the main is not trimmed that often and the helmsman can make small adjustments. Being to leeward helps heel the boat increasing helm giving a better feel and allows for the best pointing and rudder lift. Being forward allows the bow to dig in which also helps pointing as well as reduces wetted surface by getting the transom out of the water.
Moderate Air
In moderate air the crew can begin to slide back as they begin to move to weather. Once anyone goes to weather they should be stacked just behind the shrouds. At this point if you have a dedicated main trimmer, he can slide back to his station upwind. Downwind as soon as there is constant adequate pressure on the sheet and you begin to try to sail low the crew should move to weather to help rotate the spinnaker to windward out from behind the main. This happens at about 10 knots. There is plenty more coming on downwind sailing in Part 6, starting on page 21.
Heavy Air
In heavy air the crew should continue to move aft, especially in waves. If you notice that your helmsman has to steer a lot to keep the boat going straight (dialing for dollars), move aft and as the bow lifts the boat will track straighter. Since crew weight is limited the guys who are on the rail need to hike hard. Remember, sailing is a sport and it’s a boat not a couch!
Part 6: Downwind Sailing
Sailing the J/105 downwind can be one of the more difficult things to do well. Paying small attention to the minor details can make a huge difference. The key to fast sailing downwind is good communication between the trimmer and the helmsman. The trimmer should constantly be telling the helmsman how much pressure he has in the sheet. This will allow the helmsman to know if he can bear off a little more, but more importantly when he needs to head up a little bit to build pressure.
The J/105 has an asymmetric spinnaker set on a centerline sprit. The goal in downwind sailing is to maximize downwind VMG. This is achieved by sailing a wind angle tight enough to keep speed, but sailing lower towards the mark whenever possible. The North Sails asymmetric has been designed as a running spinnaker for optimum downwind performance at the apparent wind angles that produce the best VMG for the J/105. The sail has been designed to rotate out to windward to project the maximum sail area out from behind the mainsail. Always hoist the sail all the way to the top. Due to the luff length restriction in the rules, the tack of the sail is never set all the way down to the pole. Raising the tack helps the sail to rotate to windward.
Light Air Sailing (0-9 knots TWS)
In light air, you must sail tighter angles for best VMG. The tack is set 0.3m-0.6m (1-2’) off the sprit. The crew should be forward and to leeward. Keep the crew weight as low as possible. Steer down in the puffs until the pressure sheet starts to get light and then head up slightly. Communication between the trimmer and the helmsman is key. Try to find the lowest angle you can sail before the speed drops. Don’t forget about the main! Proper mainsail trim is essential to good speed. The vang should be set so that the top batten is open by 5 degrees. A good trick to help acceleration out of the jibes is for the main trimmer to hold the sail in a bit after coming out of the jibe. When the asymmetric is jibed, it needs to
be overtrimmed to make it “pop” through. When the spinnaker is overtrimmed, it blows air back into the mainsail relieving pressure from it. By keeping the main in, it will keep the main pressurized as well as opening the slot between it and the spinnaker to get the air flowing over it faster. The main trimmer can easily feel if the main is pressurized by the pull on the sheet. Ease the main out slowly as the pressure on the sheet builds as the spinnaker is eased.
Moderate Air Sailing (9-12 knots TWS)
In moderate air, there is a wide range where you can sail. Lower is best as long as you can maintain your speed. The tack line is eased 0.6-0.9 (2-3’) off the sprit. The same principles apply to steering as in light air. Once the boat feels well pressured, the crew should move to the windward side to help rotate the spinnaker. In this range the crew should be very active moving to weather when you head down in the puffs and back to leeward when you head up in the lulls.
Heavy Air Sailing (12+ knots TWS)
In over 12 knots, the boat is well pressured up going downwind. At this point you want to sail as low as possible most of the time. There will almost always be good pressure on the sheet but when you sail too low, the sail will become blanketed behind the main and collapse. The sheet is well eased to get as much of the sail out from behind the main as possible. The crew should be to windward at all times. Heel the boat to windward by as much as 10 degrees. The vang should be set so the top batten is parallel to the boom.
DOWNWIND NOTESGood coordination between the trimmer and helmsman will result in very subtle changes in the sheet. A properly coordinated team will only adjust the sheet by a couple of feet. If you find yourself constantly trimming and easing more than 3 feet of sheet than your coordination should be improved. Be careful not to try to sail too low and collapse the spinnaker. A collapse will result in around a three-boat length loss!
Rev 0218
READ MORE
READ MORE
